
Trends make Japanese work look like it must be a full sleeve to land right. In practice the motifs that hold up are about spacing, contrast, and where you put them on the body. I focused on practical panels, scaled-down options, and sleeve-ready pieces that read clearly at six months and five years. Below you will find motif ideas, what to tell your artist in plain terms, and wardrobe tips to wear the tattoo while it heals.
1. Koi Transformation Forearm Panel
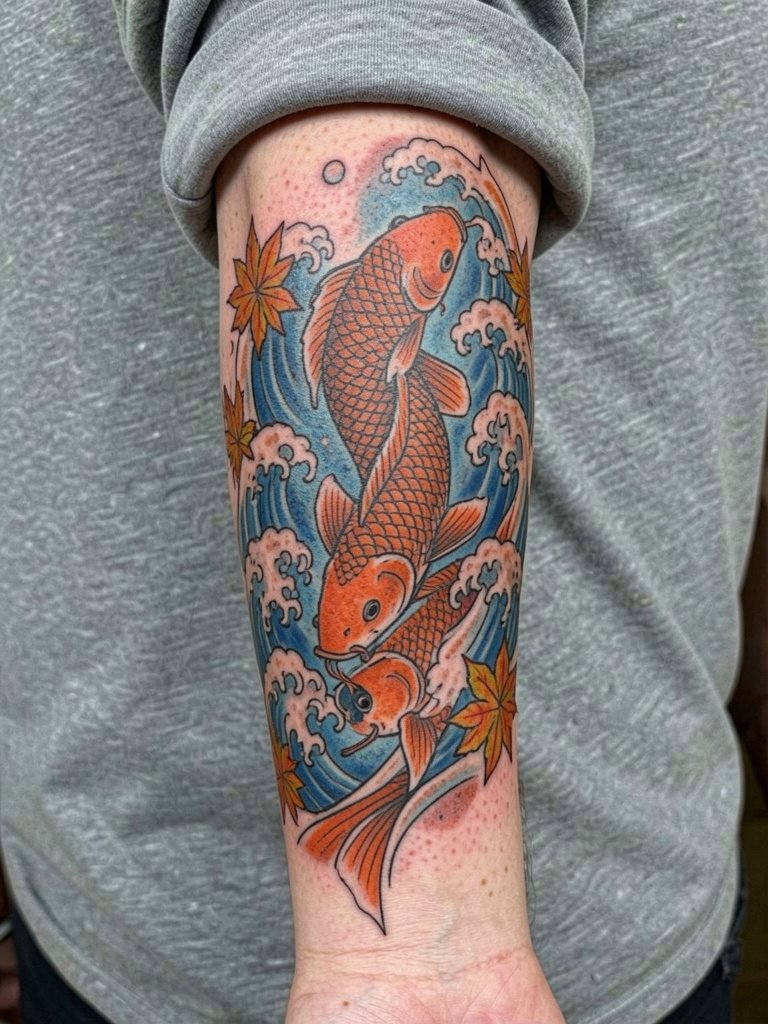
A vertical koi on the inner forearm is a great starter piece if you like Japanese narrative without committing to a sleeve. I recommend slightly heavier linework than the Pinterest single-needle examples because the palm-up surface tends to soften thin lines by year two. Bring a reference that shows spacing at three and five inches so the artist can scale the scales and wave bars correctly. The common mistake is asking for too much tiny detail in a narrow panel. For the session wear a fitted plain tee with the sleeve rolled up, like a fitted plain tee, so the artist can work without shifting fabric.
2. Dragon Back Panel with Cloud Framing
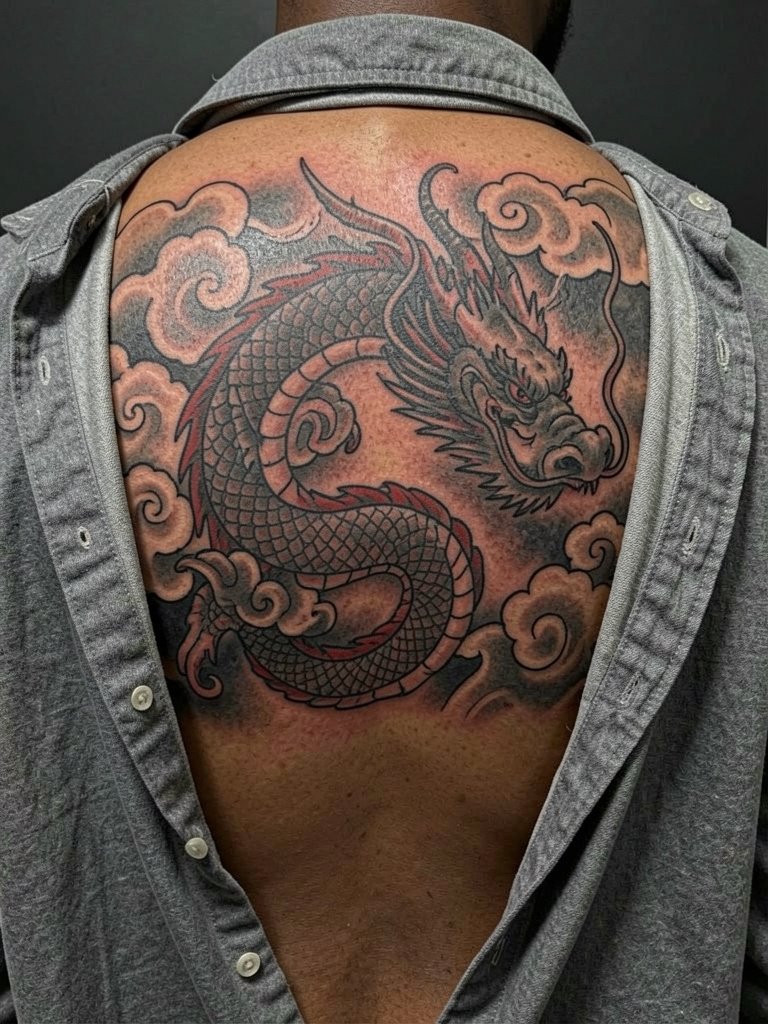
A back piece gives the dragon room to breathe and show motion. For narrative flow, ask the artist how the spine will be used as a central axis and whether a continuous scale texture will wrap to the sides. Expect sessions of several hours each and a multi-visit plan. The touch-up timeline for large back work is usually a touch-up at six months, another at 12 months, and then as-needed after that. When you want to show the piece off, open-back tanks or a loose button-down make the framing obvious. For session day wear pick a loose button-down you can remove without tugging the ink.
3. Oni Mask Chest Panel
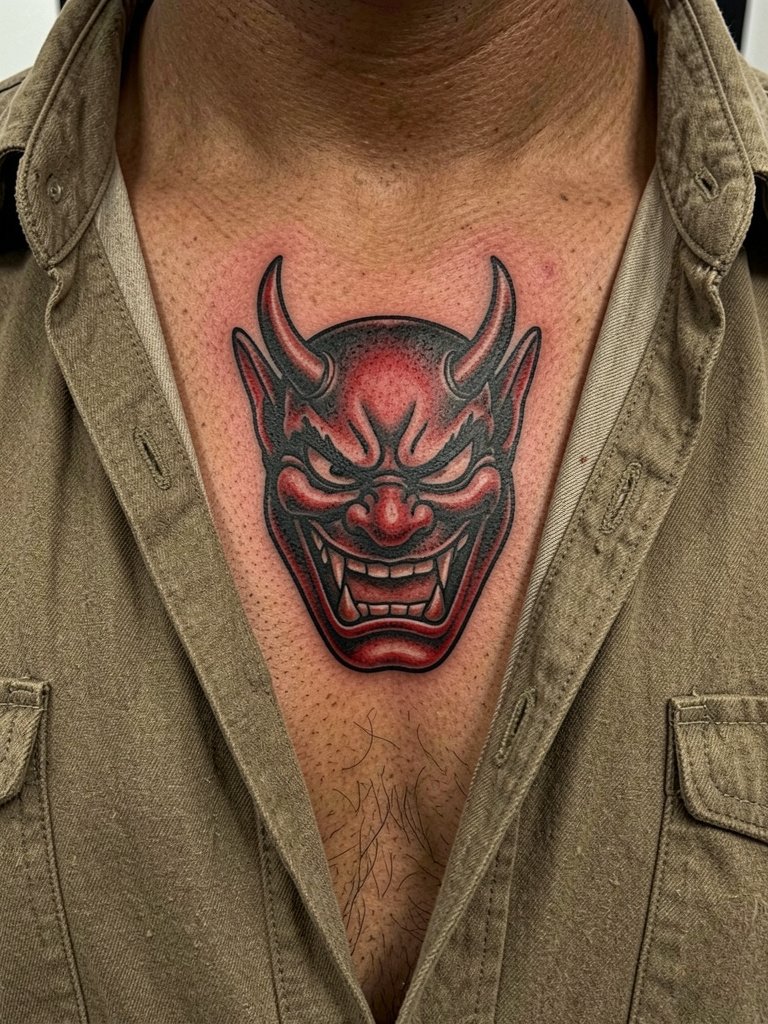
An oni mask reads like protective armor across the chest when scaled to the pectoral anatomy. Be specific in consultation about how much negative space you want between the mask and chest musculature so the design does not fall into the sternum crease over time. A frequent mistake is crowding tiny facial features into a small chest patch. Expect sternum sessions to be more sensitive. For show-off styling, a camp collar shirt with the top buttons undone frames the upper chest without exposing too much. Note: sternum and chest panels often need an artist experienced in bold Japanese shading.
4. Samurai Helmet (Kabuto) Upper Arm Panel
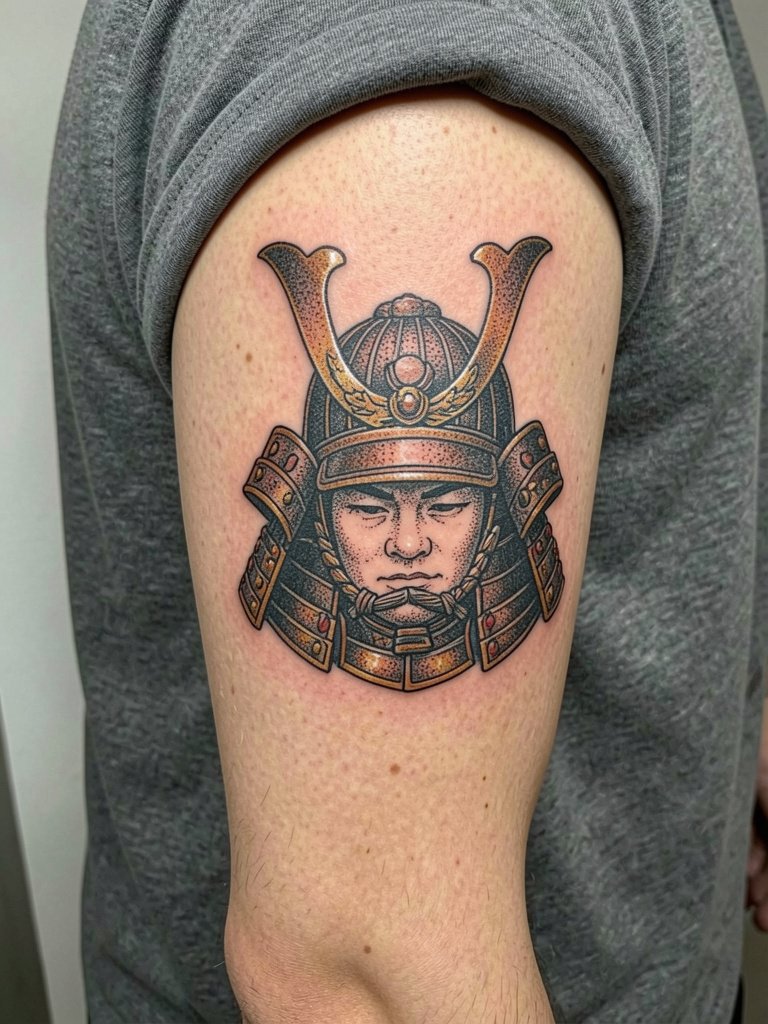
A kabuto panel is a strong single-image placement that can anchor a future sleeve. I suggest asking for the crest to be slightly oversized relative to the armor details so the face and silhouette stay readable at a distance. The mistake I see is shrinking the helmet into a tiny upper arm badge. Session time is typically two to four hours depending on shading. For casual show-off, short sleeve black tees or an overshirt with cuff rolled up lets the upper arm read clearly. This placement is a good compromise if you want a bold focal point without starting a sleeve right away.
5. Tiger Side-Facing Forearm Panel
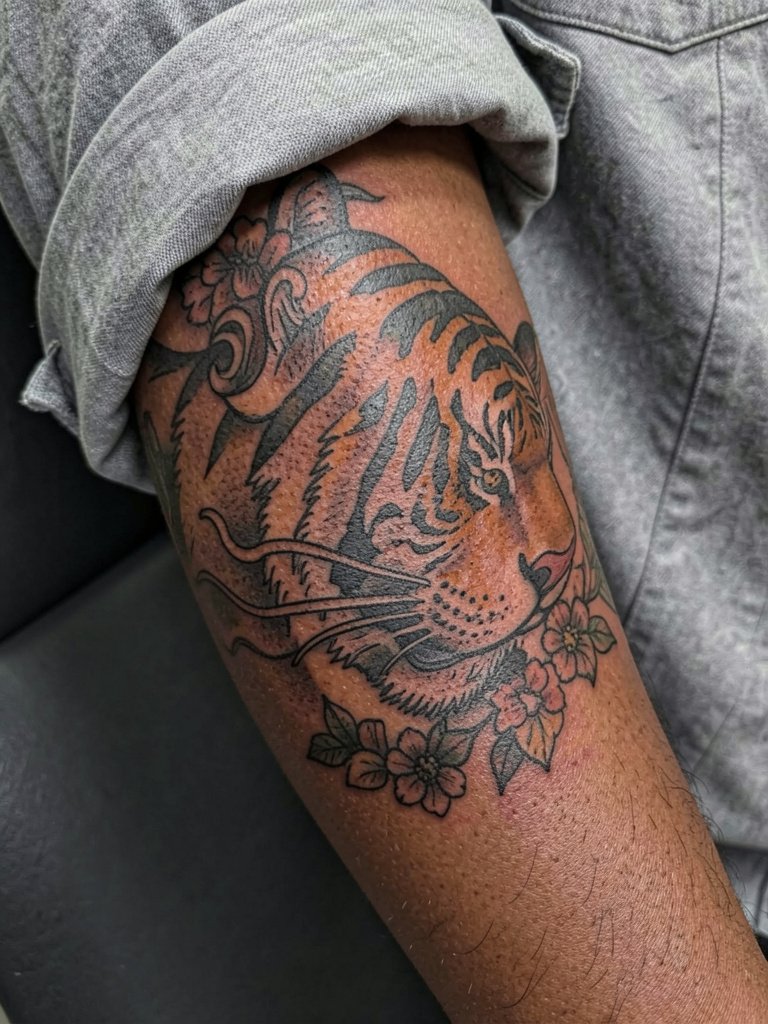
A side-facing tiger is a masculine focal panel that holds up because of bold contours. Tell your artist you want the stripes to stop short of the most detailed areas so the tiger reads at arm distance. A common aging problem is over-dense stripe detail that blurs into a grey patch by year three. Plan for a touch-up around the one-year mark to revive saturation if you pick color. For session comfort wear a shirt you can roll above the elbow easily, like a rolled sleeve shirt, so the artist has consistent access.
6. Fine-Line Sakura Branch on Inner Forearm
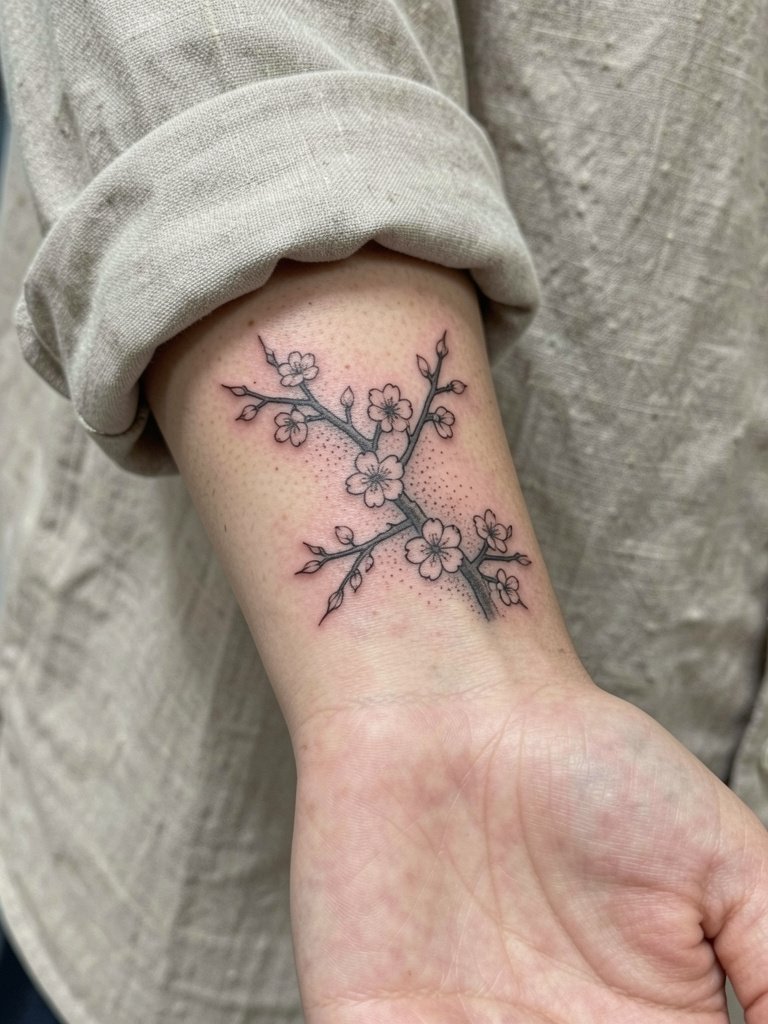
Sakura branches make excellent starter tattoos because they scale down and keep the Japanese aesthetic without heavy saturation. My tip is to request slightly heavier line anchors on the main stems so the smaller blossoms are supported and the piece does not fade into a soft blur. The inner forearm sees moderate sun exposure, so expect touch-ups faster than a covered area. For the session wear a linen shirt with cuffs you can roll easily, such as linen shirt. The inner forearm is low in blowout risk if the artist spaces the petals correctly.
Pack Smart
The forearm and chest pieces above have different session needs, so a few targeted items will smooth the appointment and the first week.
- Stencil transfer pads. Useful for previewing exact placement on curved forearms and chests before linework starts.
- Topical numbing cream. Apply 30 to 45 minutes before a sensitive chest or rib session for extra comfort.
- Thin protective film roll. Keeps fresh forearm work clean during showers and minor friction from sleeves.
- Fragrance-free gentle body wash. Mild cleansing protects delicate linework as scabs form and heal.
- Aquaphor healing ointment. A thin layer for the first two days maintains moisture without suffocating the tattoo.
7. Neo-Japanese Full Sleeve Panel
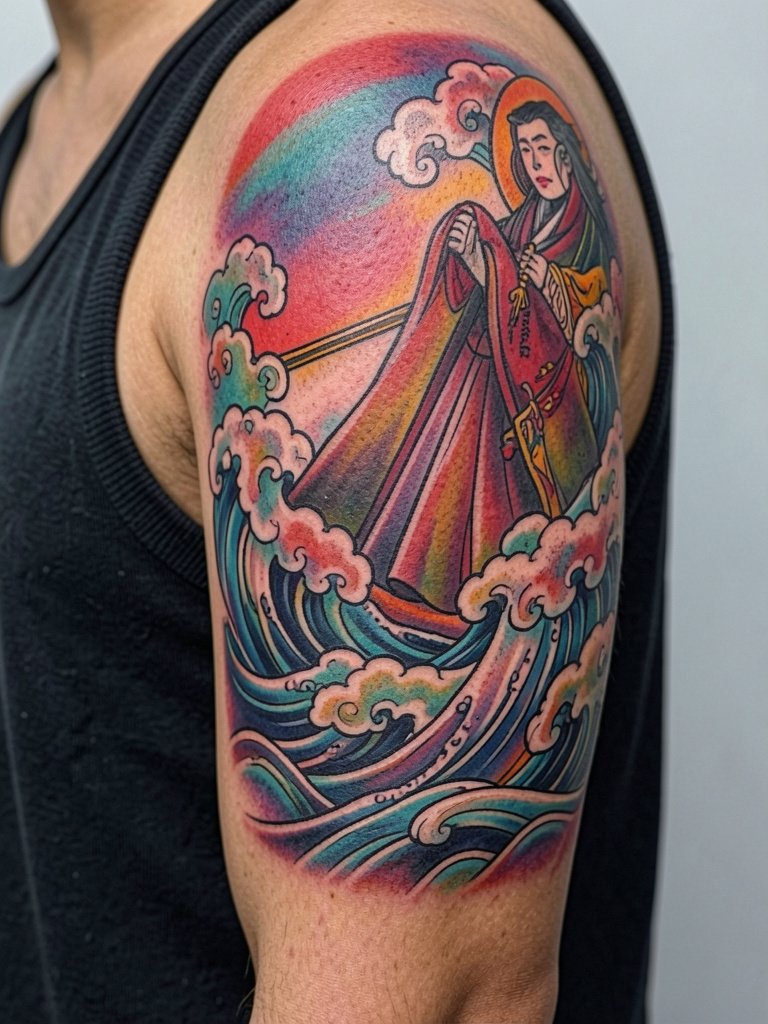
Neo-Japanese leans hard on color and contrast, and one camp praises it for the visual pop color brings to dragons and koi. The other camp prefers black-and-grey because it costs less and often ages more predictably. If you pick neo-Japanese, budget for the extra sessions and specify vibrant midtones rather than tiny gradients so the color retains intensity. For session wear choose a sleeveless tank so the artist can spin the arm freely. Also plan for color-specific touch-ups at one year to keep the palette lively.
8. Mount Fuji Landscape Panel on Calf
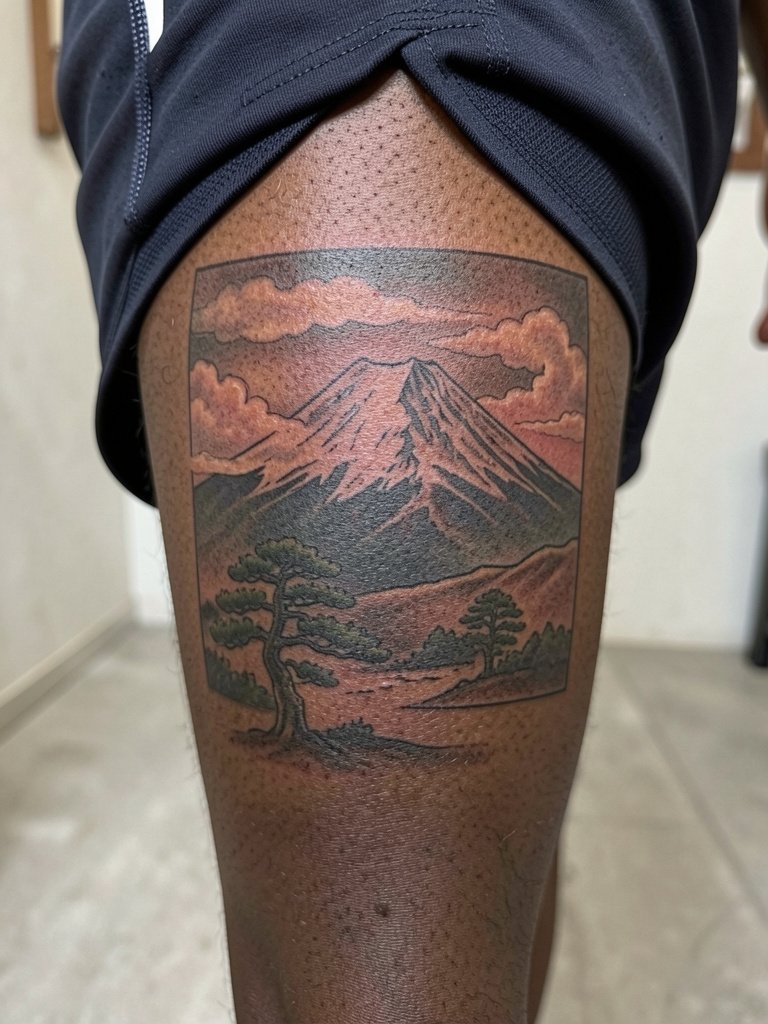
A Mount Fuji panel on the calf reads like a compact scene that can stay moderately small and still feel complete. Ask the artist to simplify cloud bands and keep the peak silhouette bold so the design reads from three feet away. Calf work tolerates heavier saturation, but watch for tight compositions that age poorly when the leg sits for long periods. For show-off looks pick shorts with a clean hem or cropped pants so the landscape sits in a visible window. Session wear should be shorts that allow the artist to roll the leg up without pressure.
9. Minimal Torii Gate Wrist Tattoo
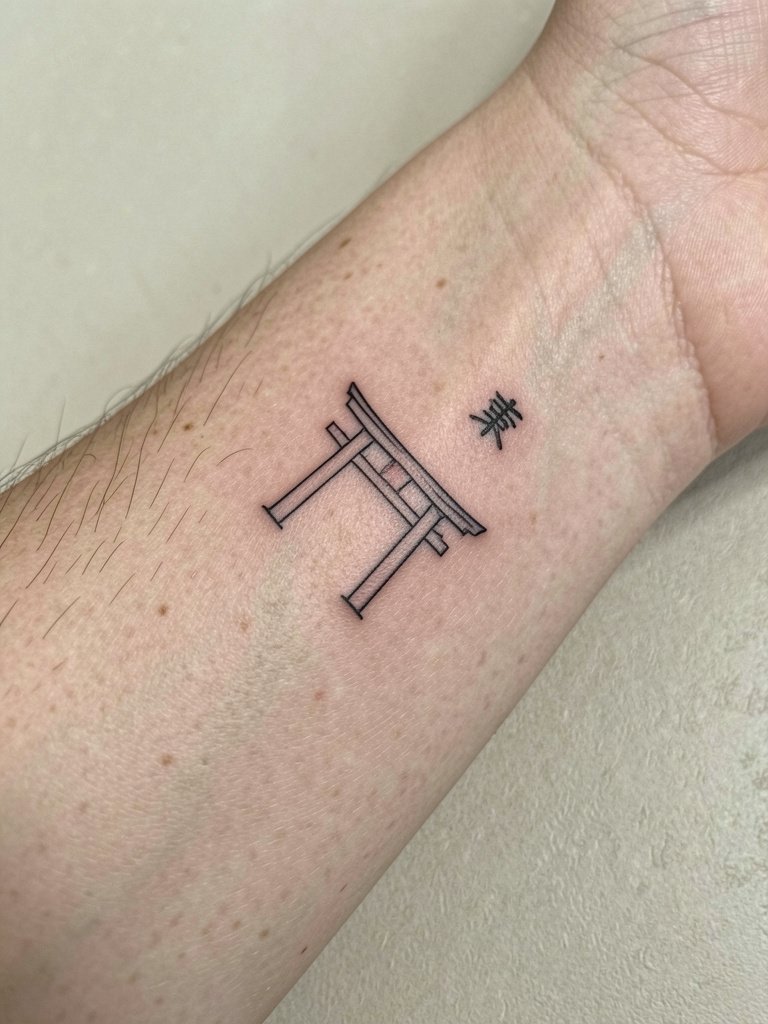
A tiny torii gate on the wrist is symbolic without being complex. For this placement specify slightly thicker line anchors at key corners so the gate does not blur into a single dark mark over time. The wrist experiences friction from watches and cuffs, so plan to avoid a watch during the initial healing week. For showing it off, a slim bracelet on the opposite wrist creates balance, or keep shirts with short sleeves and a neat cuff. During the appointment wear short sleeves or a fitted tee that does not rub against the wrist.
10. Crane in Flight Shoulder Cap
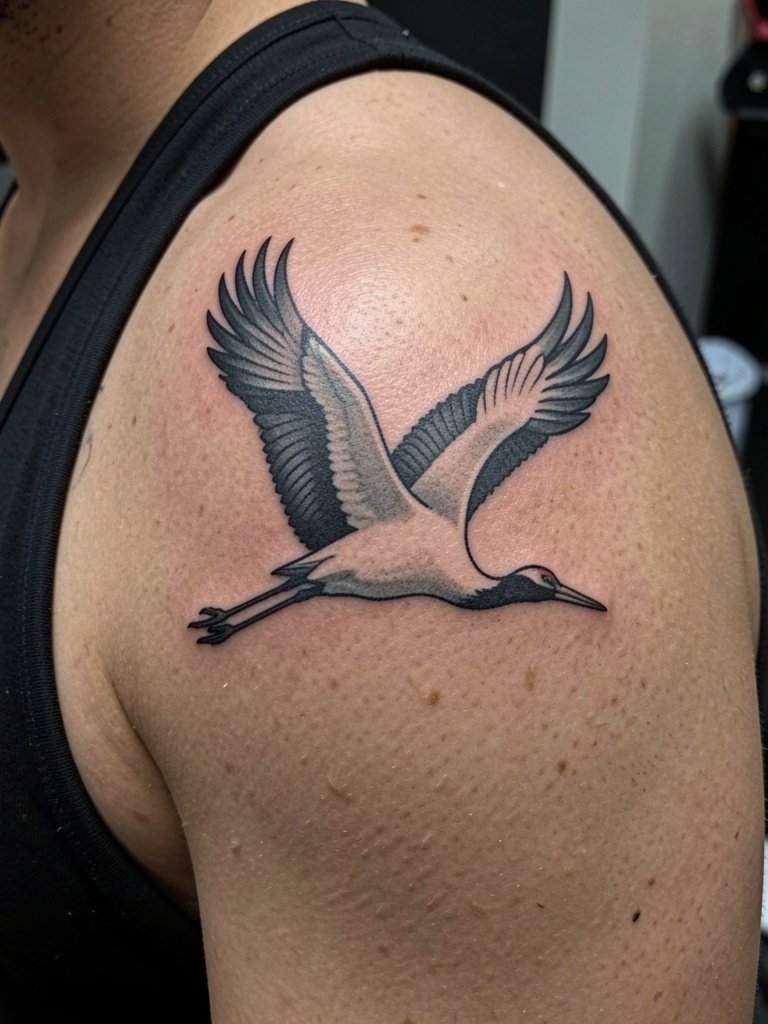
A crane works well on the shoulder cap because the rounded surface lets wings wrap slightly and still read. Tell the artist you want the wing tips to taper with open space between feathers so the negative space holds as the skin settles. Shoulder skin is forgiving, but if you choose single-needle feather details ask for slightly bolder anchors. For sessions wear a sleeveless tank so the shoulder sits free. For show-off pairing pick a sleeveless gym tank or cuffed overshirt to let the bird silhouette read.
11. Kitsune Mask with Lantern Thigh Panel
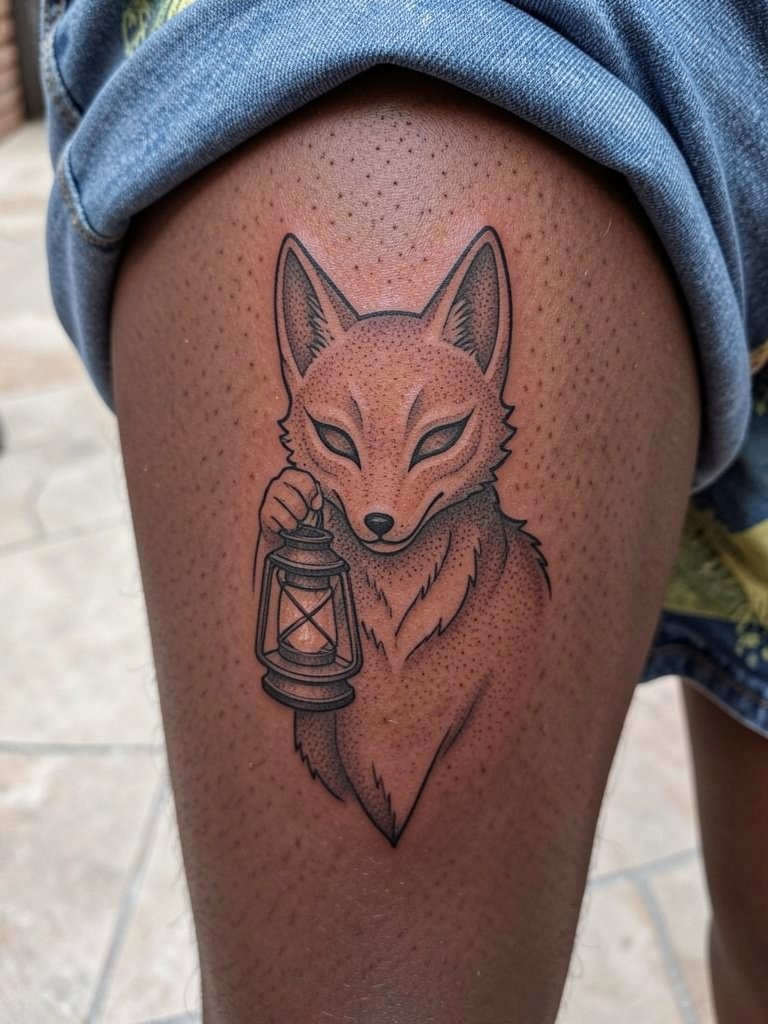
A kitsune mask on the thigh gives you a narrative panel that is easy to hide or reveal. For consultation be explicit about lantern scale and where you want shadow fall to land on the thigh curve. The inner thigh can be sensitive so plan session length accordingly and consider multiple shorter visits. For showing off in casual settings choose relaxed shorts or wide-leg pants that slide up comfortably. Note: intimate placements like inner thigh call for an artist who is comfortable with proximity and client comfort procedures.
12. Peony Accent for Sleeve Fill
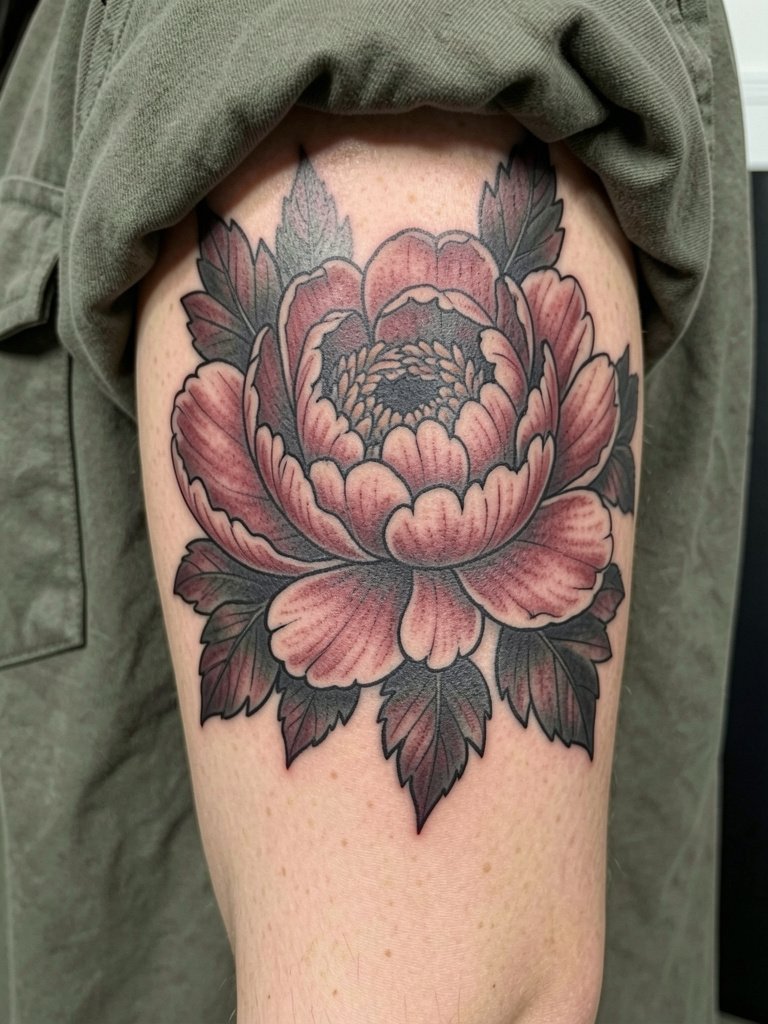
Peonies are classic fillers in Japanese sleeves because their forms break up negative space and anchor larger figures. Tell the artist to use overlapping petals with varied edge thickness so the flowers do not flatten into one mass as the sleeve settles. A common mistake is repeating the same petal size, which makes the filler read like wallpaper. Peonies are forgiving in touch-ups, and they help guide the eye around larger motifs. For outfit pairing a cuffed overshirt in a neutral tone keeps the sleeve readable.
13. Hannya Mask Half-Sleeve Panel
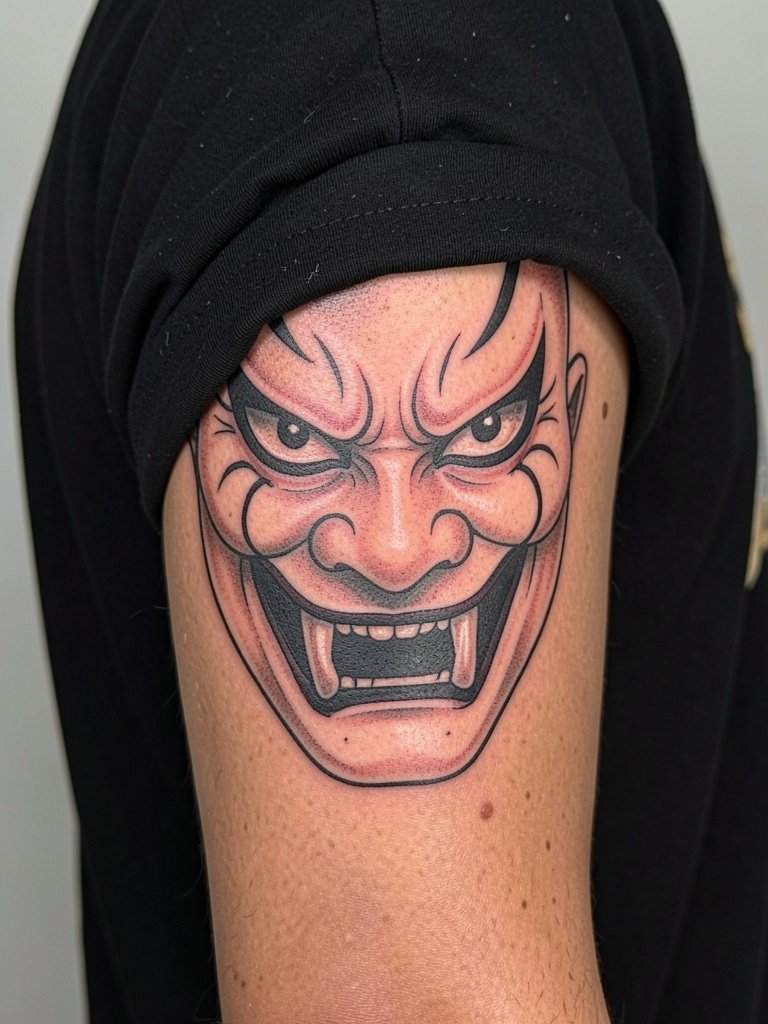
A Hannya mask demands strong contrast and clear negative space inside the eye sockets to avoid filling in over time. Request bold black anchors and deliberate white highlights so the expression keeps its bite five years down the line. The most frequent error is packing too much facial micro-detail into the cheek area. For sessions plan on mid-length appointments and wear a short sleeve black tee or an overshirt you can remove without tugging. This piece is a powerful half-sleeve focal point that can later link into a full sleeve.
14. Dragon and Koi Paired Narrative Sleeve Panel
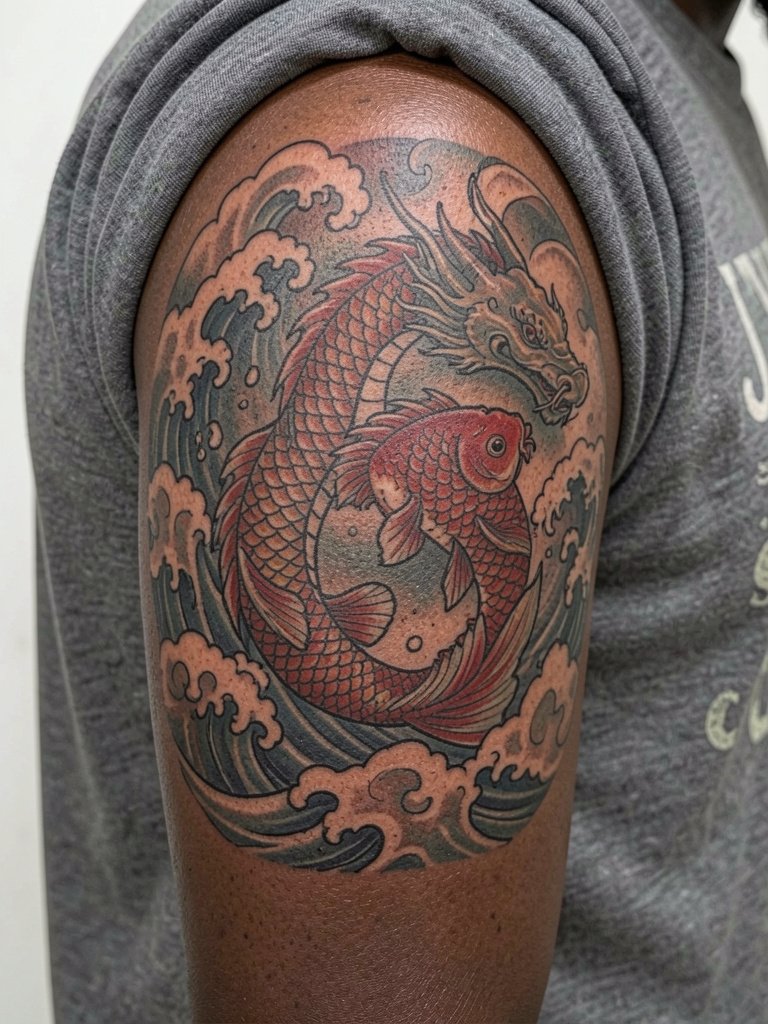
Pairing dragon and koi builds a clear transformation narrative. One camp says color enhances the contrast and makes the duo sing. The other camp argues black-and-grey keeps the composition readable and is easier to maintain long term. If you want both motifs in one panel, ask for distinct value separation between the two characters so they do not blend into one mass. Sleeve panels that combine both need careful spacing and may require staged sessions to let earlier ink settle before adding the second motif.
15. Black-and-Grey Wave Panel on Lower Leg
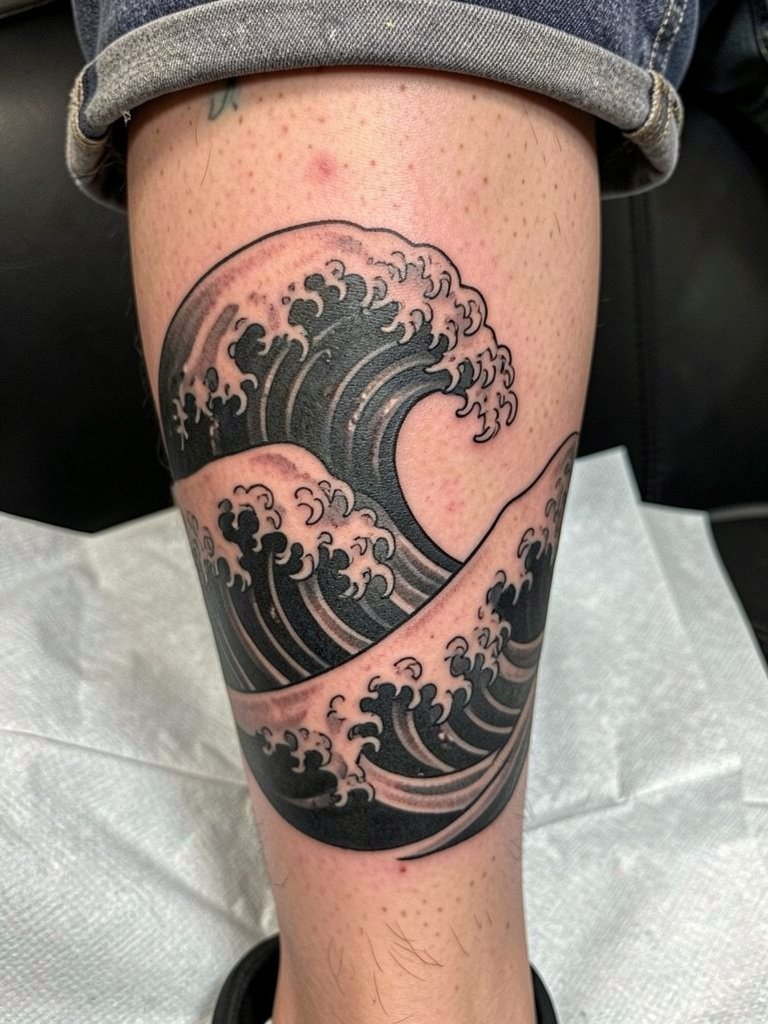
Black-and-grey wave panels are a strong alternative to color sleeves because they preserve contrast and often age with fewer surprises. Tell the artist you want broad tonal planes rather than micro-grain gradations so the waves stay dynamic as the skin changes. A common mistake is over-detailing small crest lines that blur into texture later. For showing off, shorts with a clean hem or low athletic socks keep the wave visible. Ask about touch-up timing for large shaded areas, since these often benefit from a saturation pass after initial healing.
16. Geometric Carp Scale Dot Work Panel
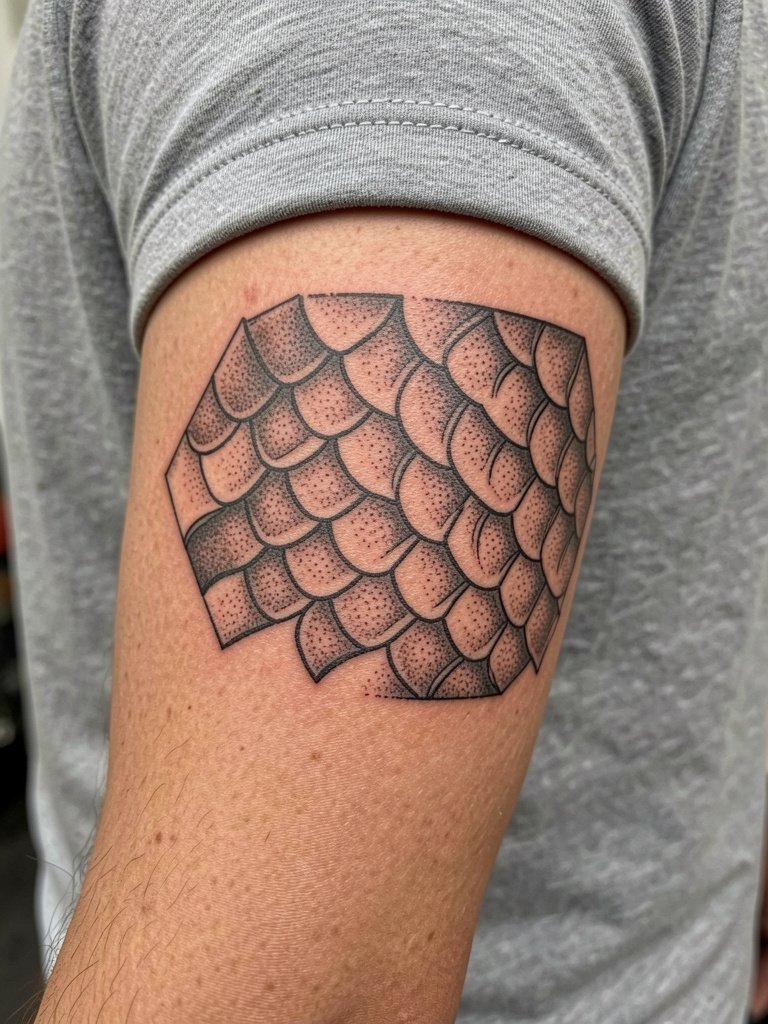
A geometric carp scale panel blends traditional texture with modern dot techniques. Specify dot density and maximum scale size so your artist can plan the stippling rhythm. The forearm tolerates dot work well if the dots have room to breathe. A mistake is asking for extremely tight stippling in a small area, which tends to merge into a grey block. For the session wear a fitted tee that exposes the forearm. Dot work touch-ups are usually subtle and planned at the one-year mark if contrast softens.
17. Minimal Kanji Wrist Stamp
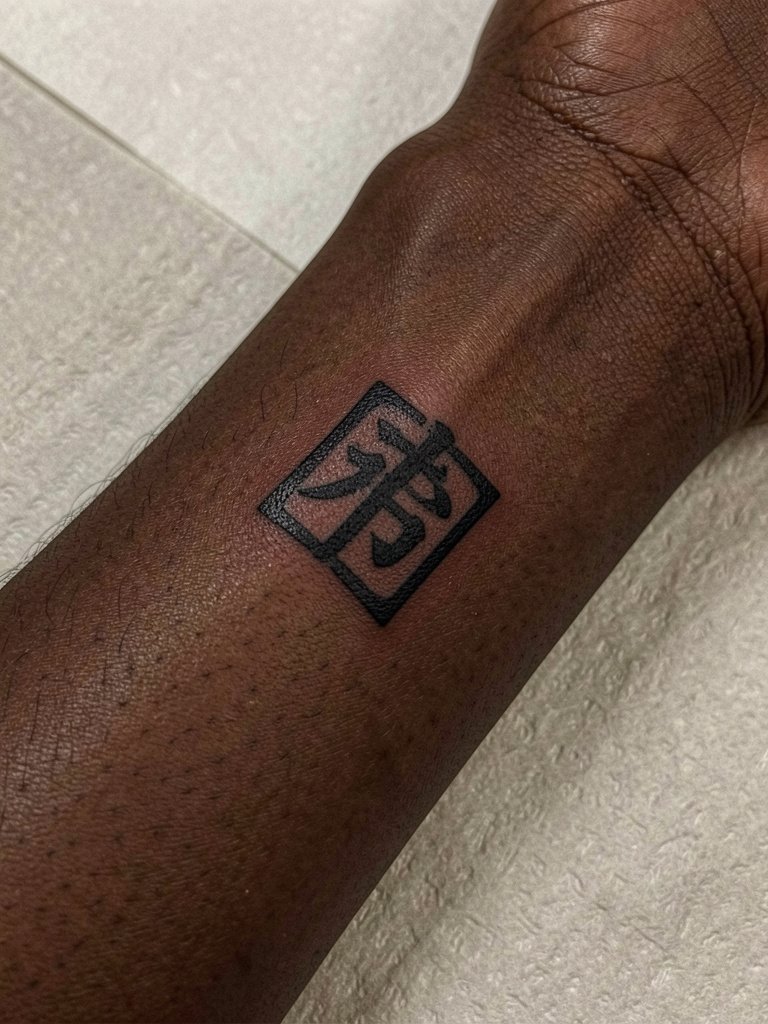
Single kanji designs are compact and meaningful if you pick the exact glyph and spacing. Provide the artist the exact character in a clear font and ask for a letterform test in stencil on the wrist before lining. The worst error is using an incorrect or stylistically mismatched character. Wrist tattoos face high wear, so expect a touch-up window earlier than on the chest. For session comfort wear short sleeves and avoid watches the week after. Be specific about exact text rather than saying "ask your artist" in vague terms.
18. Phoenix Rising Chest-to-Shoulder Panel
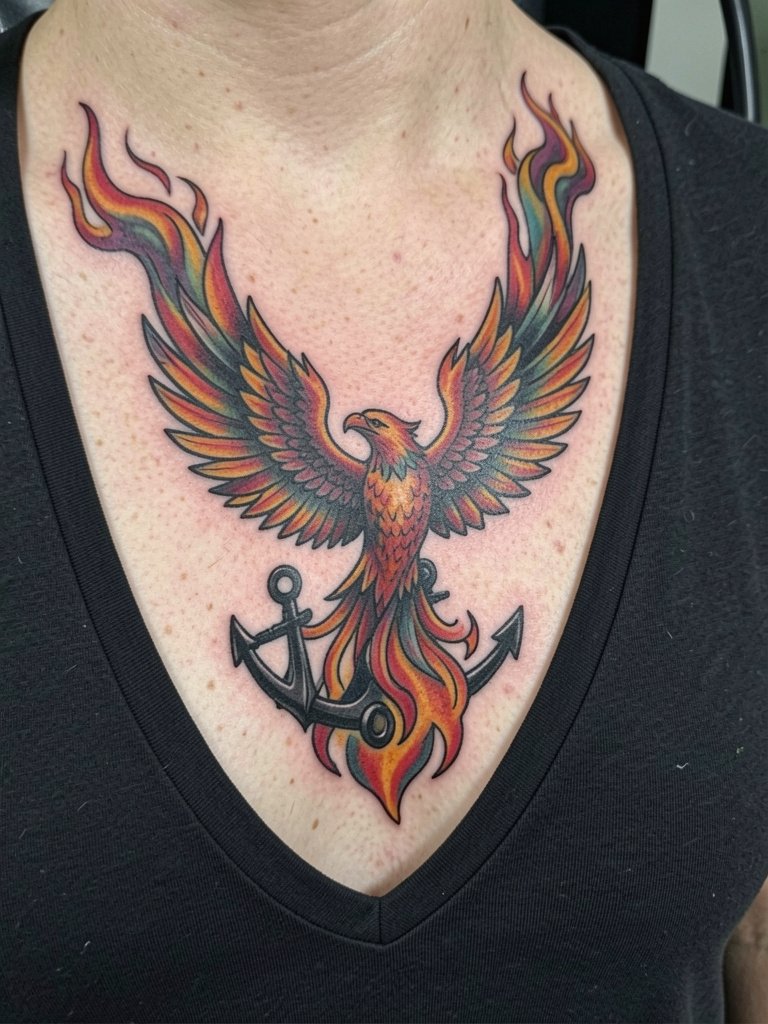
A phoenix across chest and shoulder needs clear flight direction. Ask the artist to map feather flow along the pectoral curvature so the bird appears to rise naturally. The chest can be sensitive and prone to slight swelling, so plan for shorter sessions if your pain tolerance is low. For showing the piece choose open-collar shirts or deep V-neck tees to frame the bird. The chest-to-shoulder junction is forgiving for color, but request bold anchors to protect the edges from feather blurring over time.
19. Wind Bars and Wave Cuff Forearm Band
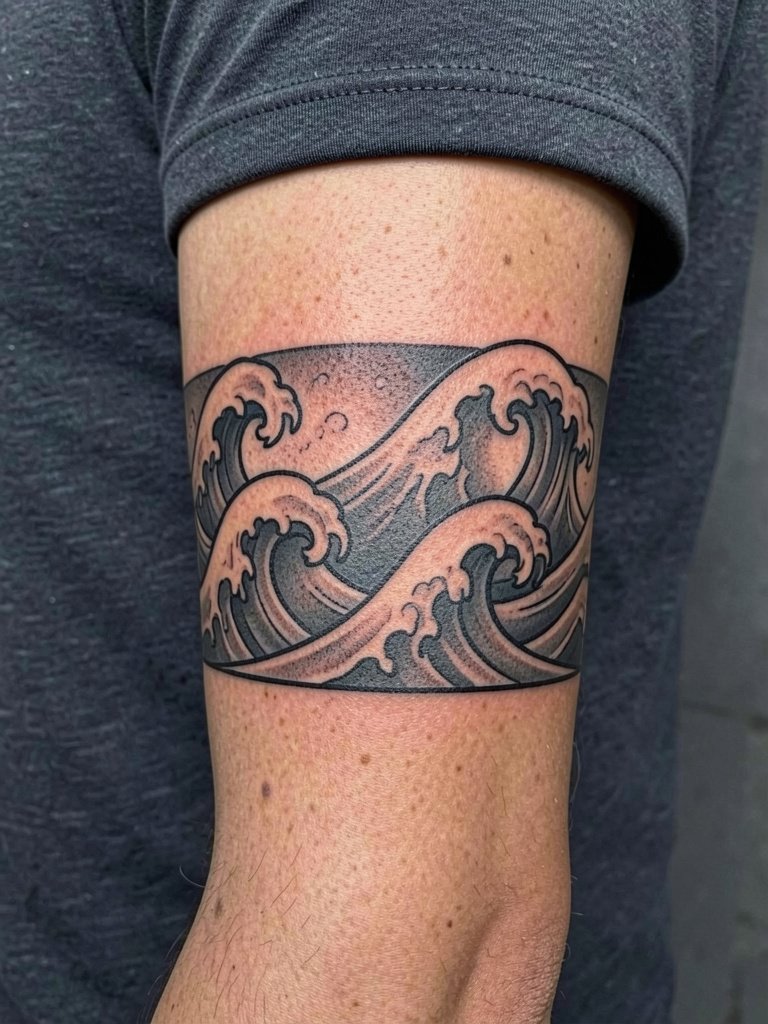
A cuff of wind bars and waves reads like a traditional bracelet and is a tidy way to add Japanese flow without a full sleeve. Ask for spacing between wind bars large enough to remain legible after healing. The error I see is compressing too many bars into a small circumference that then turns into a dark band. For session wear a short sleeve shirt that you can roll without friction. This band can work as a linking element later if you decide to expand into a sleeve.
20. Small Geisha Portrait Calf Panel
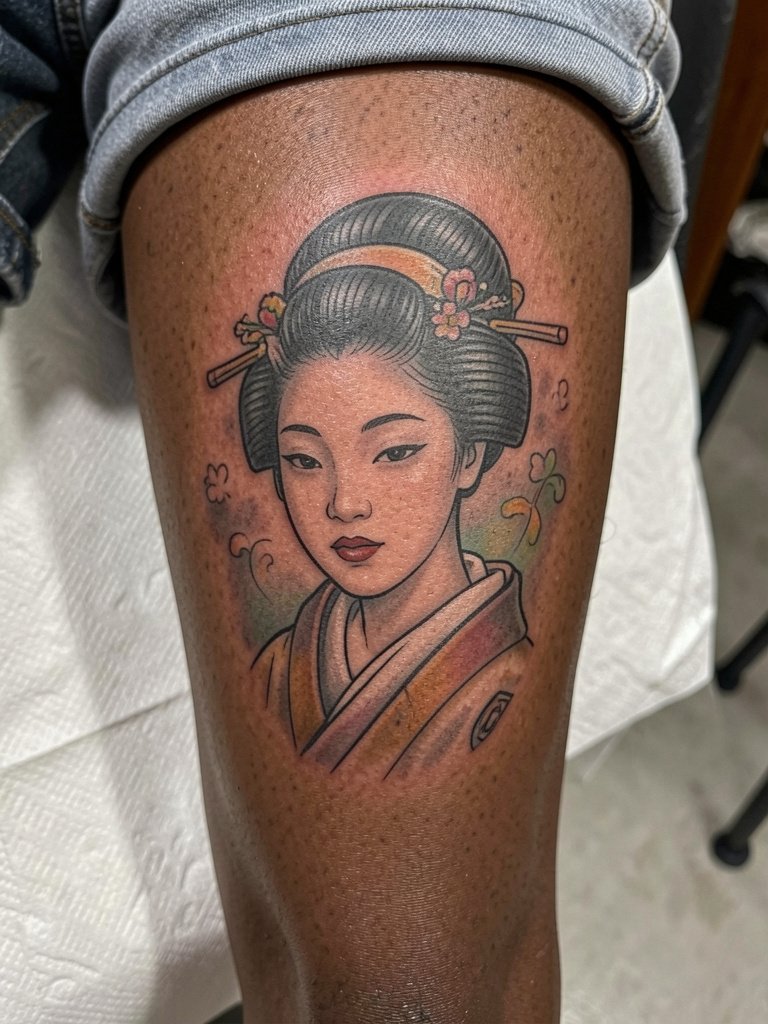
A calf portrait of a geisha can be a refined panel if you avoid heavy facial micro-detail. Tell the artist you want emphasis on silhouette, hair ornament shapes, and a simplified face so the portrait does not lose its definition. The calf is a forgiving canvas for portraits but avoid tiny eye or lip detail. For casual reveal choose shorts with a clean hem. Note: cultural designs like geisha carry context; be respectful about composition and symbolism when briefing the artist.
21. Armor Plate Chest Framing Panel
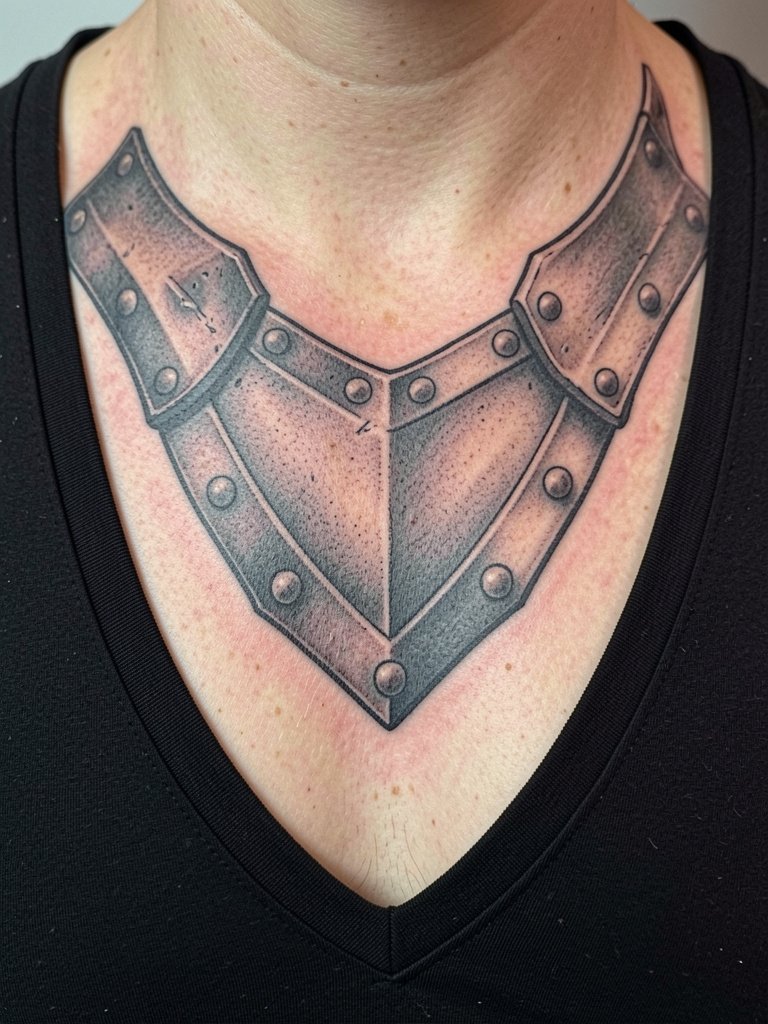
Chest armor plates make the torso feel visually structured. Request the artist to map the plate edges to your clavicle and pectoral curve so the piece sits like a frame rather than an isolated patch. A common mistake is forcing symmetrical plates onto an asymmetrical chest. For sessions wear a button-up you can open or a loose tee you can lift, and for show-off looks use an open-collar shirt. This placement pairs well with chest-centered motifs like oni masks or samurai faces.
22. Subtle Stippled Wave Behind Ear Accent
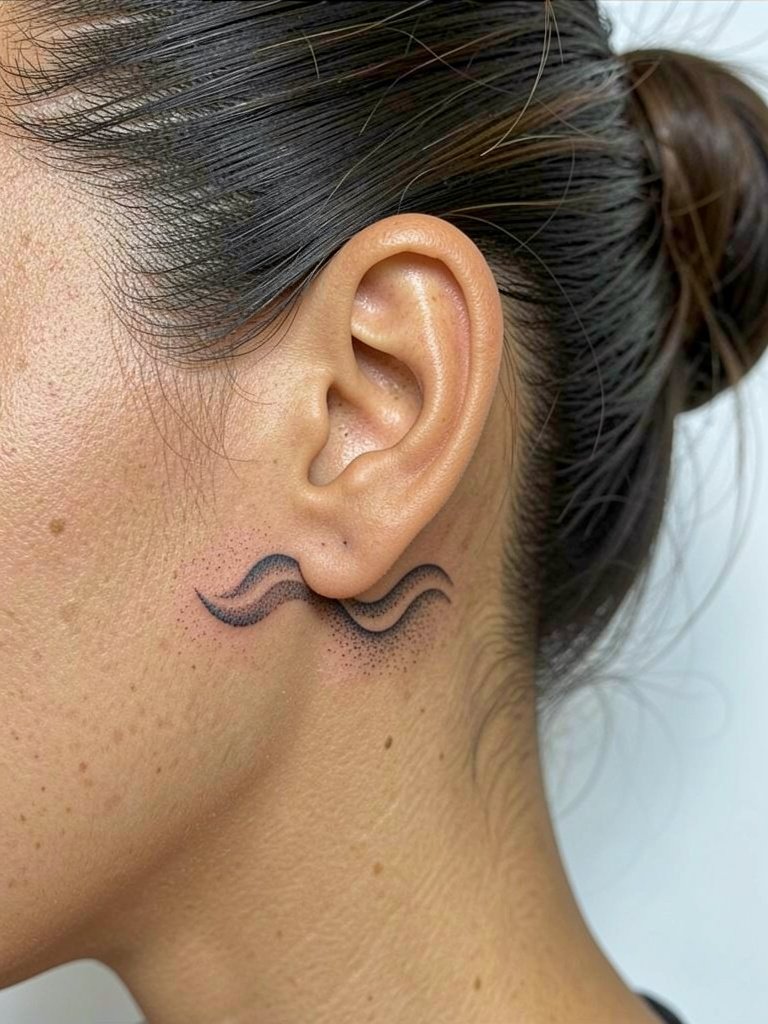
Behind-the-ear accents are micro and require precise stencil placement. Ask for a small stipple test to confirm how dot density prints on your mastoid skin. The one-sentence consideration here is that delicate dots can migrate if placed too close to hairline or cartilage. For the session tie your hair back so the artist can see the area and so the stencil sits flat. Behind-ear work often needs an artist experienced with micro placements.
23. Samurai Portrait Full Chest Panel
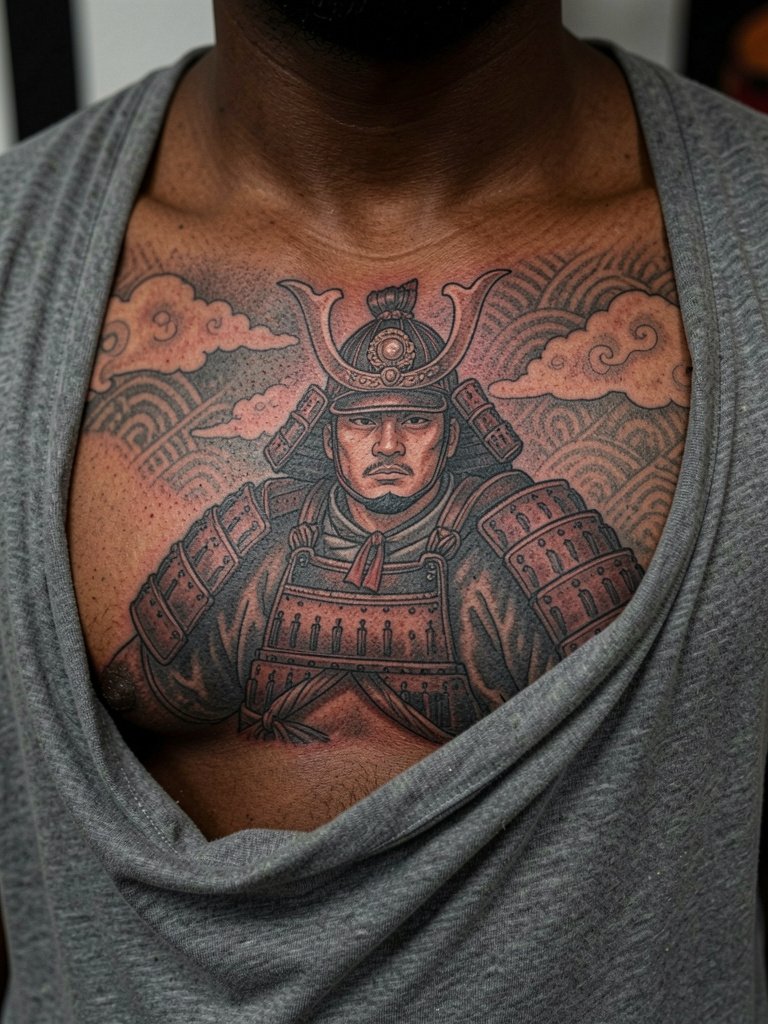
A full chest samurai needs careful composition so the helmet and face do not sit in the sternum crease. Ask the artist to map the face slightly off-center if your chest shape favors one side. Many clients request dense armor detail and later regret the visual crowding. For sessions choose loose tops that lift easily or a button-up. Chest portraits often need staged shading passes to let earlier layers settle before moving to micro-texture.
24. Crane and Pine Landscape Sleeve Panel
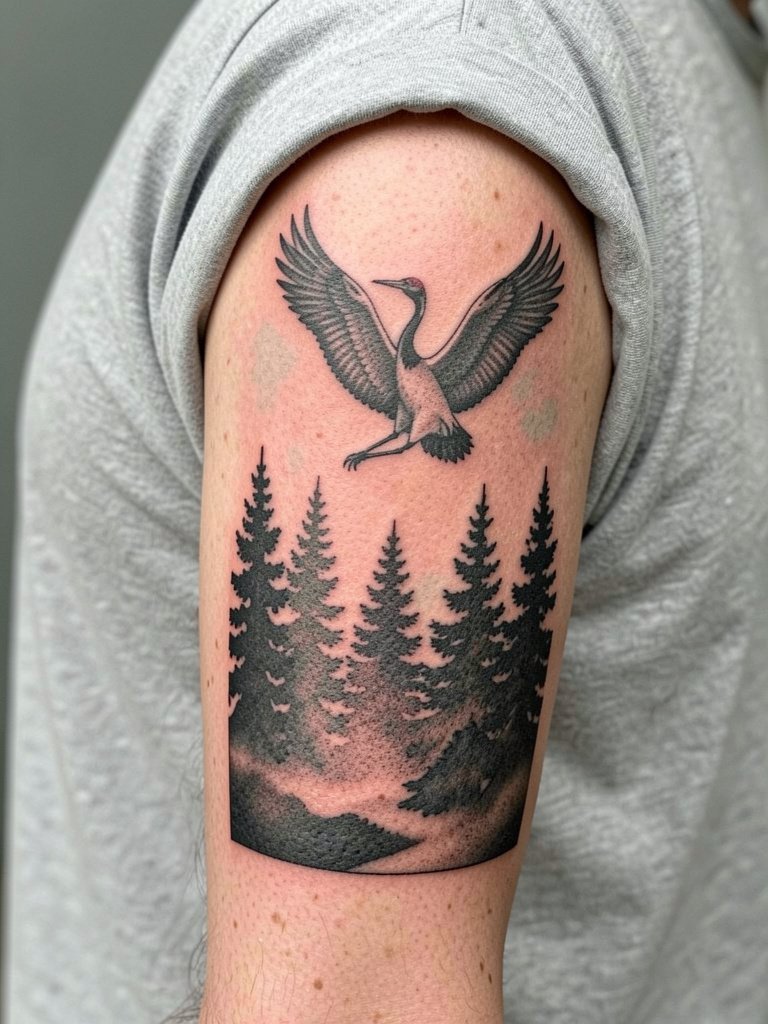
Combining crane and pine produces a classical Japanese landscape that scales well across the arm. Specify the visual hierarchy so the crane reads as the focal point while the pines act as soft background. A mistake is giving the trees as much contrast as the bird, which flattens the composition. For showing off, a cuffed overshirt or rolled sleeve ensures the vertical scene remains legible. Sleeve landscapes benefit from staged sessions that let darker planes settle before adding midtones.
25. Lotus Knee Cap Panel
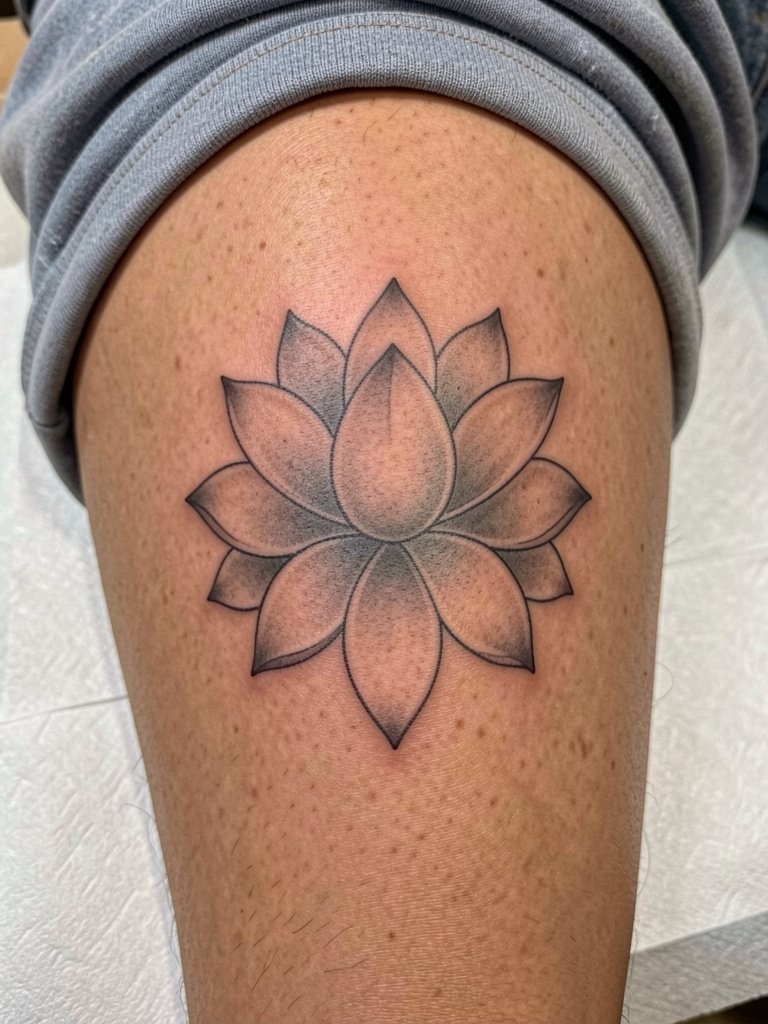
A lotus over the kneecap reads like a mandala that moves with the leg. Ask the artist to test the symmetry while your leg is both bent and straight so the petals do not distort awkwardly. The trick is compensating for skin stretch during kneeling. For session wear loose shorts that let the artist position your leg in the natural pose. Knee tattoos require an artist who understands curved anatomy because an otherwise perfect circle can warp if not planned.
26. Small Wave Ankle Motif
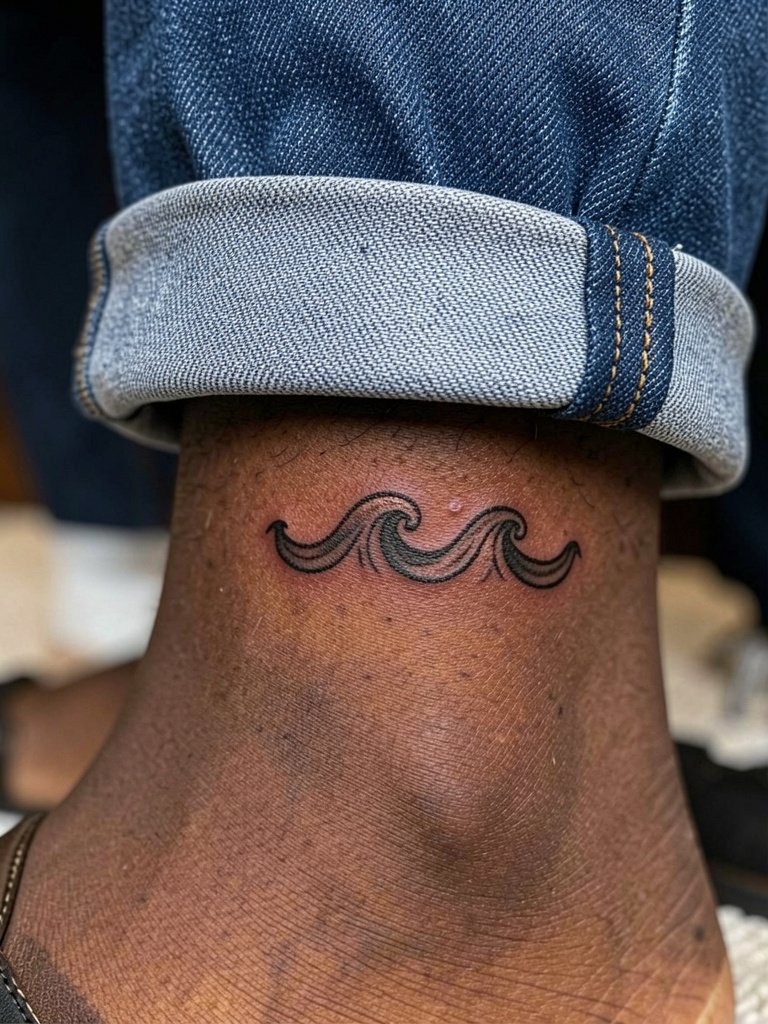
Ankle motifs are low-commitment and age well if kept bold. Specify a clear margin between the wave crest and ankle bone so the motion reads without merging with skin folds. The common error is making the design too small and delicate, which invites early blurring. For show-off pairing choose shorts with a clean hem or roll your jeans to reveal the ankle naturally. Session wear should be pants you can easily roll up without tugging.
27. Minimal Torii or Single-Character Collarbone Accent
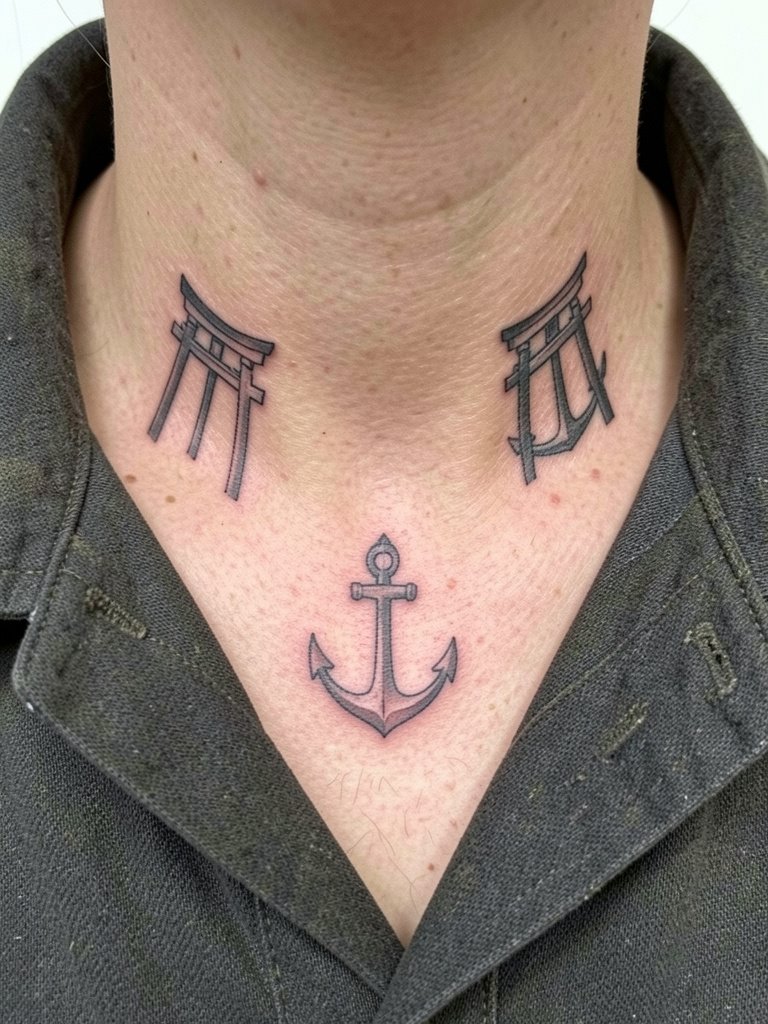
A collarbone accent reads best when the line weight is deliberate and not ghost-thin. Ask for anchored corners so the piece keeps its form against the clavicle's subtle movement. The mistake people make is picking a single-needle stroke that fades quickly on this high-motion site. For session wear choose a camp collar shirt or deep V so the collarbone is exposed without fabric tugging. Collarbone placements can frame chest panels if you later expand into a larger composition.
Frequently Asked Questions
Q: How do I find local artists who specialize in Japanese-style work without naming specific artists?
A: Search social platforms for tags like #japanesetattoo, #irezumi, #japanesesleeve, and #neojapanesetattoo with your city name appended. Look specifically for healed photos in portfolios rather than only fresh work. Filter studios by portfolios that show multiple completed Japanese pieces across different clients so you can assess flow and healed saturation.
Q: Will color or black-and-grey hold up better over time for dragons and koi?
A: One camp prefers color because it boosts contrast and makes mythic scenes pop, and they accept the extra cost and touch-ups. The other camp favors black-and-grey for its predictability and lower long-term refresh needs. In practice choose color only if you budget for staged saturation passes, and ask the artist to plan value separation so the forms do not merge as pigments soften.
Q: How should I dress on session day for different placements?
A: For sleeves and forearms wear short sleeves or sleeveless tanks so the artist can rotate the limb easily. For chest or sternum choose a button-up or an open-collar shirt you can remove without tugging. For thigh or calf pick loose shorts or gym shorts so the artist can roll fabric without pressure. Bring something comfortable to change into after longer sessions.
Q: How long before a Japanese-style piece needs a touch-up?
A: Small single-needle pieces often need a touch-up within 6 to 12 months. Medium panels like forearm koi or calf portraits typically benefit from a one-year saturation pass. Large sleeves or back panels may need a touch-up at six months and then another at one year. Exact timing depends on skin type, sun exposure, and aftercare.
Q: Are there special considerations for culturally significant motifs like geisha, torii, or Buddhist imagery?
A: These designs carry cultural context, so be clear about intent and composition. Use respectful imagery and avoid mixing sacred symbols with unrelated icons. If you are unsure, describe the visual elements you want rather than naming a specific cultural symbol and ask the artist to advise on respectful treatment.
Q: Can I preview how a Japanese sleeve will flow before booking?
A: Yes. Use portfolio comparisons and request a placement mockup from the artist showing the design at life-size on your arm or back. Look for healed examples to judge how linework and shading settle. If you want hashtags and discovery tips, use the search tags above with your city filter on Instagram and TikTok, then cross-check studio websites for healed galleries.
