
A lot of people expect tiny floral wrist tattoos to behave like stickers. They do not. A single-bloom rose or a minute daffodil on the wrist needs room, slightly bolder linework, and the right placement to still read after a few years. This list focuses on birth flowers sized for the wrist, specific tweaks that make each bloom age better, and practical styling notes you can take into a consultation.
1. Fine Line Single-Bloom Rose, Radial Wrist
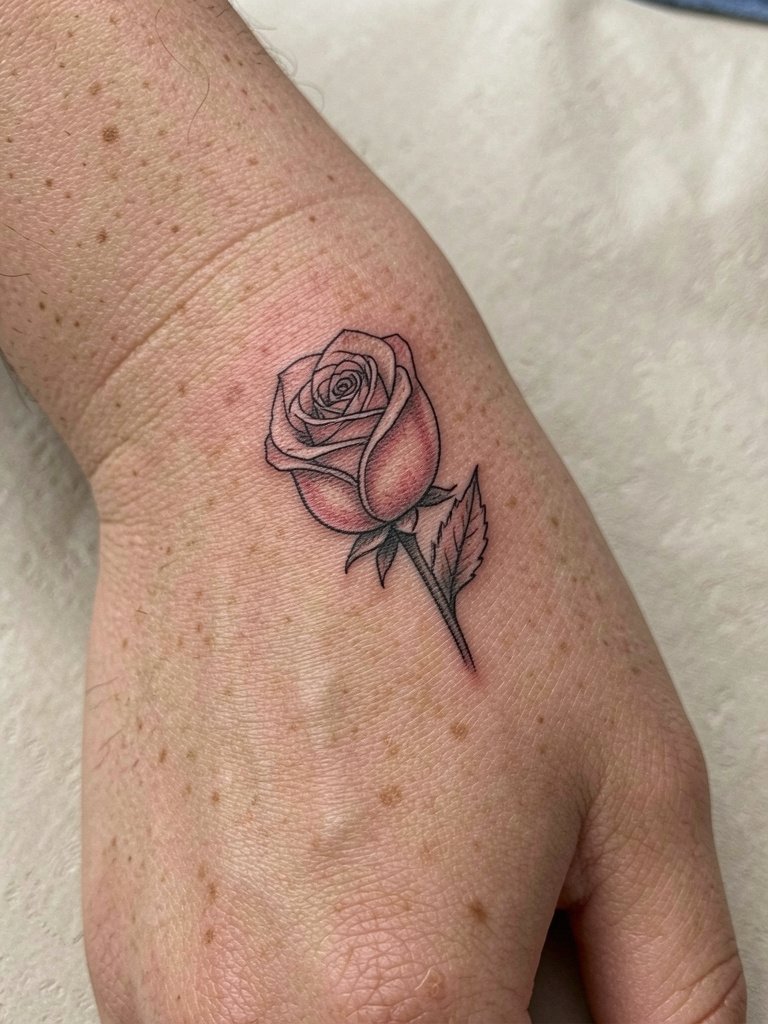
A rose on the radial wrist reads best with slightly heavier linework than the image you saved. Artists divide on fine line here. One camp says ultra-thin single-needle lines blur within one to two years because wrist skin is thin and faces constant friction from sleeves and watches. The other camp argues that fine line holds when the artist uses correct needle depth and slightly wider spacing, and they show healed three-year photos to prove it. Practical move. Ask for clear spacing between petals and a hair heavier outline than your reference so the bloom keeps its shape. For show-off styling pair it with a minimalist watch on the opposite wrist.
2. Minimalist Carnation, Inner Wrist
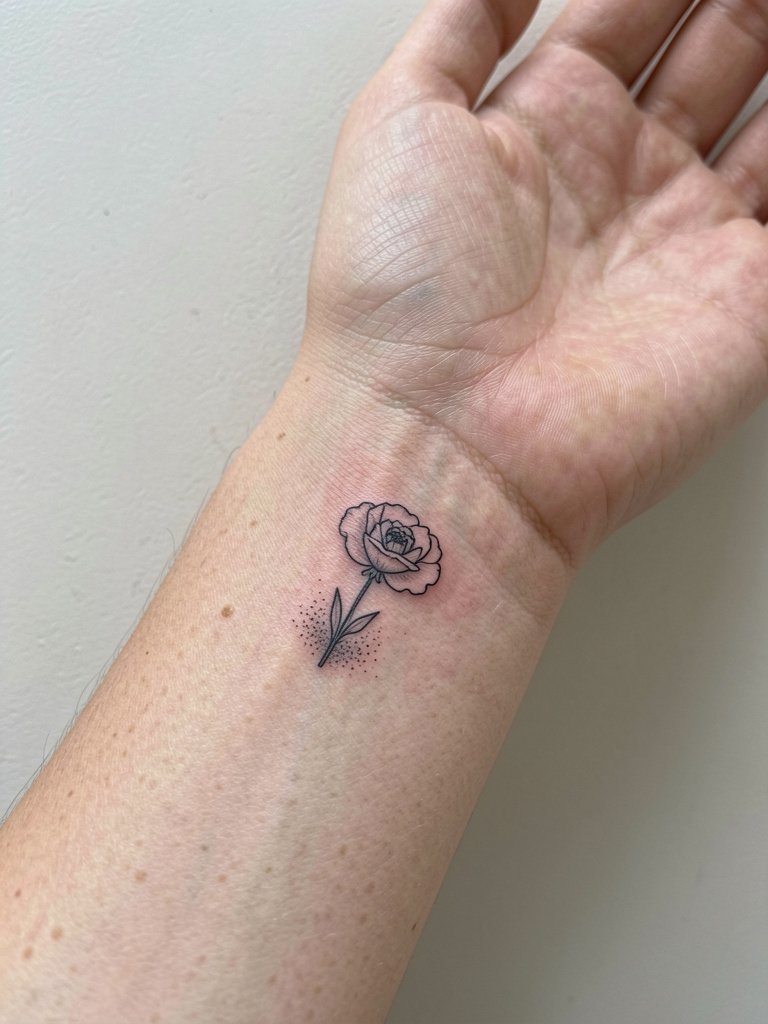
Carnations scale down well because of their distinctive ruffled edge. I recommend a compact outline with tiny stipple for texture so the petal edges don't melt into one another over time. Common mistake is asking for the thinnest possible single-needle outline and ending up with a faint, cloudy shape. During the consultation bring a reference showing petal spacing and ask the artist to show a mockup at 1cm and 2cm so you can see legibility. For session wear, roll up a linen sleeve and consider pairing the healed piece with a dainty gold stacked bracelet set on the opposite wrist to balance attention.
3. Dainty Daffodil, Lateral Wrist Near Thumb
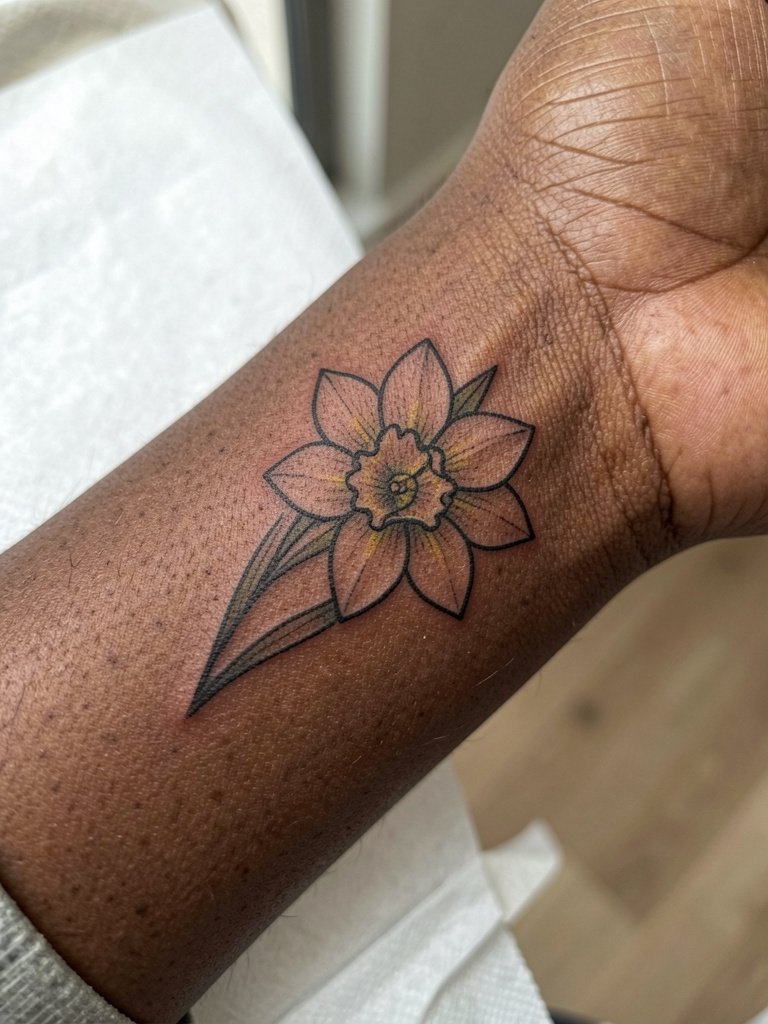
Daffodils read clearly at small scale because of the trumpet silhouette. A mistake I see is flattening the trumpet into the petals which blurs when healed. Request separate negative-space between the trumpet and petals so the shape keeps contrast as it softens. On a bony wrist ask the artist to show the stencil on your hand while seated so you can test visual balance. For showing it off, keep bracelets minimal or go bare on the tattoo wrist and wear a thin leather cord bracelet on the opposite wrist.
4. Single-Needle Lily, Inner Forearm Transition
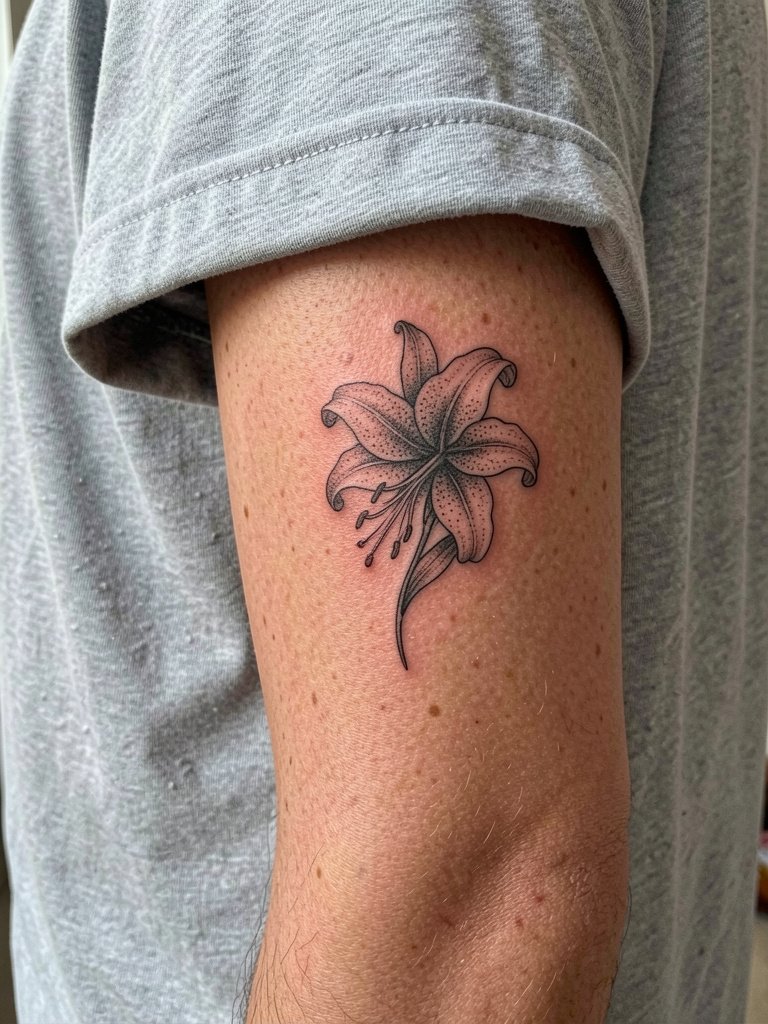
Single-needle lilies look delicate but need a little structure at the petal edges to survive daily wear. A practical tweak is a faint hairline shadow at the petal base rather than continuous single-needle throughout. That helps at year two without losing the delicate look at year zero. A common session comment is that the inner forearm transition area feels more sensitive than the forearm itself. Plan for a session under an hour with a short break. For after-session outfits wear a loose short-sleeve top so the artist can access the wrist easily.
5. Neo-Traditional Rose with Leaf Accent, Outer Dorsal Wrist
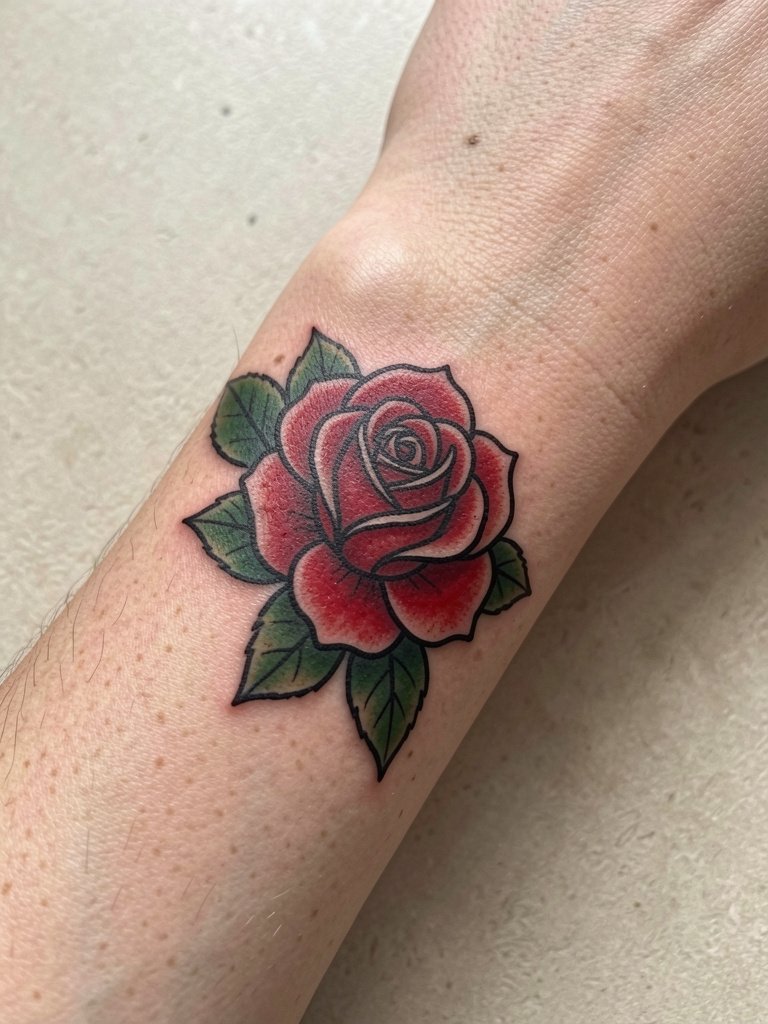
Collectors pick neo-traditional here when they want color that still reads at a distance. The trick is to keep negative space inside the petals so saturation does not compact. A common mistake is over-detailing inside a 2cm bloom which turns muddy. If you want color, request bold outlines with flat fills and one contrasting leaf or dot to keep the silhouette legible. During the session avoid watches. For outfits that frame the wrist try a bold cuff bracelet on the opposite hand to match the design weight.
6. Fine Line Marigold / Caléndula, Inner Wrist
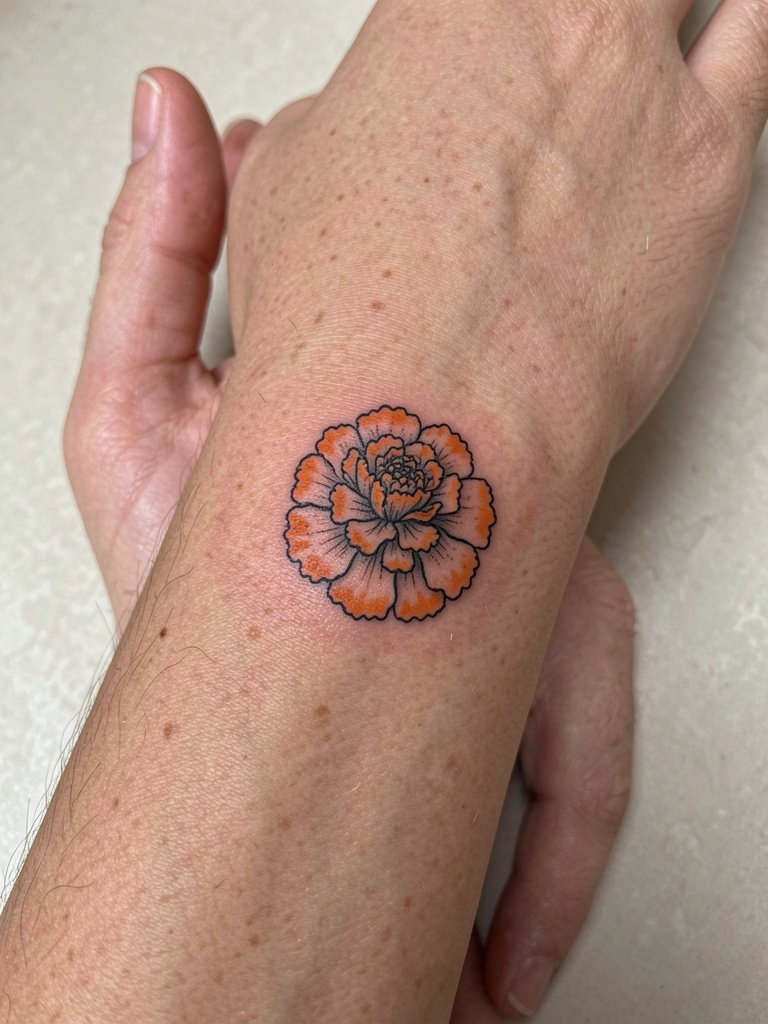
Marigolds need petal separation to avoid a smudged look later. Ask for tiny gaps between layers and a hint of stipple at the center so texture survives touch-ups. On thin-skinned wrists avoid ultra-thin whiskers that can disappear. For the appointment wear a loose button-down so the artist can roll the sleeve without pressure on the wrist. A neutral rolled sleeve also photographs well with a dainty wrist bracelet stack.
Before You Book
The small wrist pieces above behave differently from larger forearm tattoos, so a handful of items smooth the session and the first week.
-
Japanese aftercare balm (HadaBoho style). A thinner balm option favored by people with sensitive skin after the first few days, helpful if heavy ointments caused irritation in past heals.
-
Australian tattoo lotion (Ink Joy style). Lightweight daily lotion for the days after initial healing when heavy ointments feel greasy on wrist skin.
-
Matte-finish photography filter tool. Helps reduce shine in photos for darker skin tones so crisp blackwork reads better in social shots.
-
Gold stencil tape. Useful for marking placement on bony wrists to prevent stencil distortion during setup.
-
Hustle Butter Deluxe. A popular thinner balm artists recommend switching to after the initial ointment phase to avoid clogged pores on thin wrists.
7. Ornamental Chrysanthemum with Geometric Border, Radial Wrist
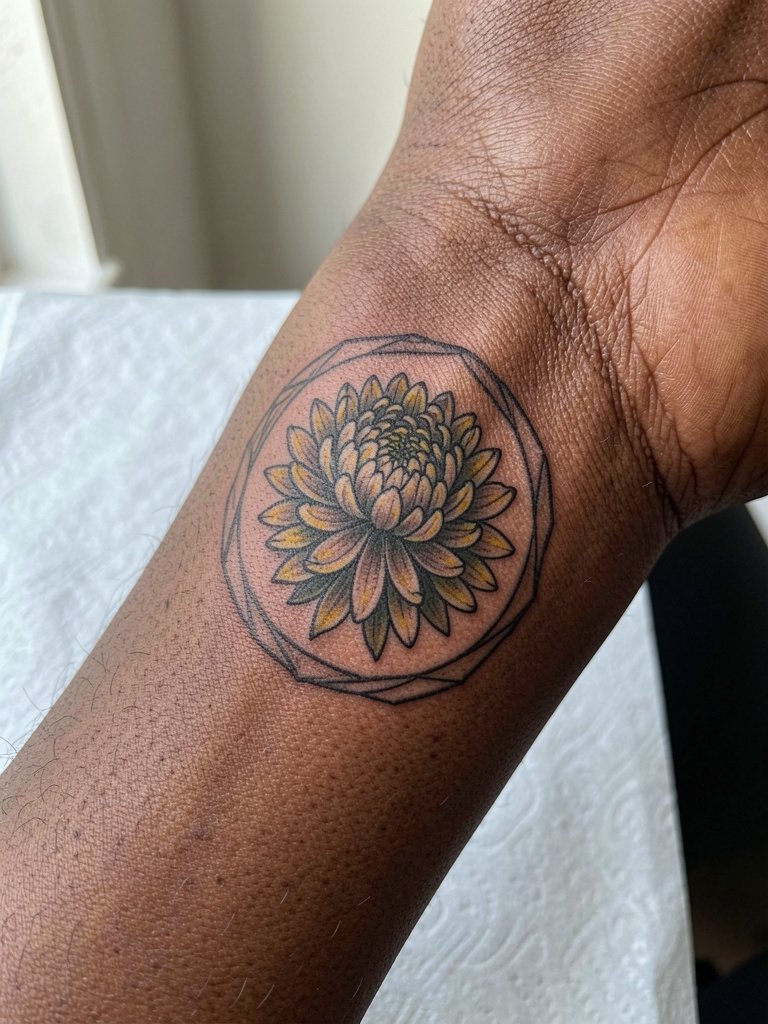
Chrysanthemums perform well when the petals get breathing room from a border. A common aging problem is packing too many inner petal lines which fuse into a grey block. Instead pick a simple ornamental border to hold shape and reserve inner detail for stippling. If you have darker skin request a silhouette version or add a tiny gold accent dot so contrast lifts in photos. For session wear choose short sleeves. The piece looks formal with a simple bracelet on the opposite wrist.
8. Micro-Realism Peony, Inner Wrist
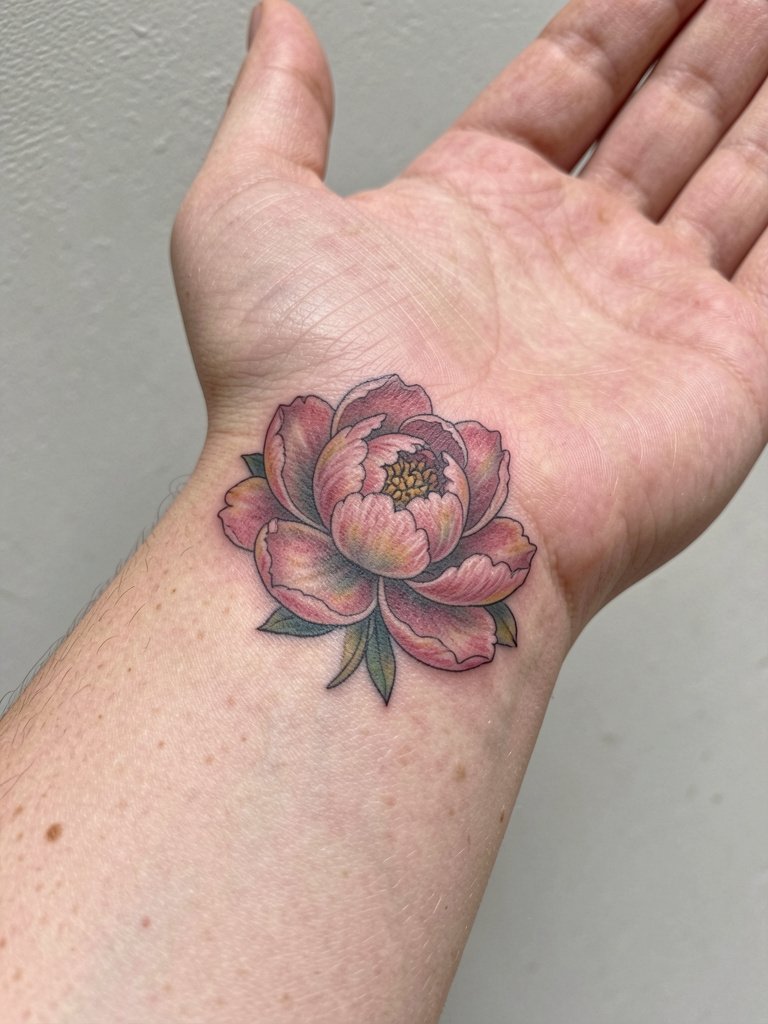
Peonies demand size to show petal depth, so they work best at the upper end of wrist scale. The mistake is shrinking micro-realism down below two centimeters where detail collapses. Expect a longer session and realistic touch-up expectations as color settles. For an outfit pairing, an open-back midi dress brings attention to a wrist bloom when you rest your arm on a table, though this styling is optional. During the appointment wear sleeveless to give the artist unobstructed access.
9. Ignorant Style Daisy, Lateral Wrist
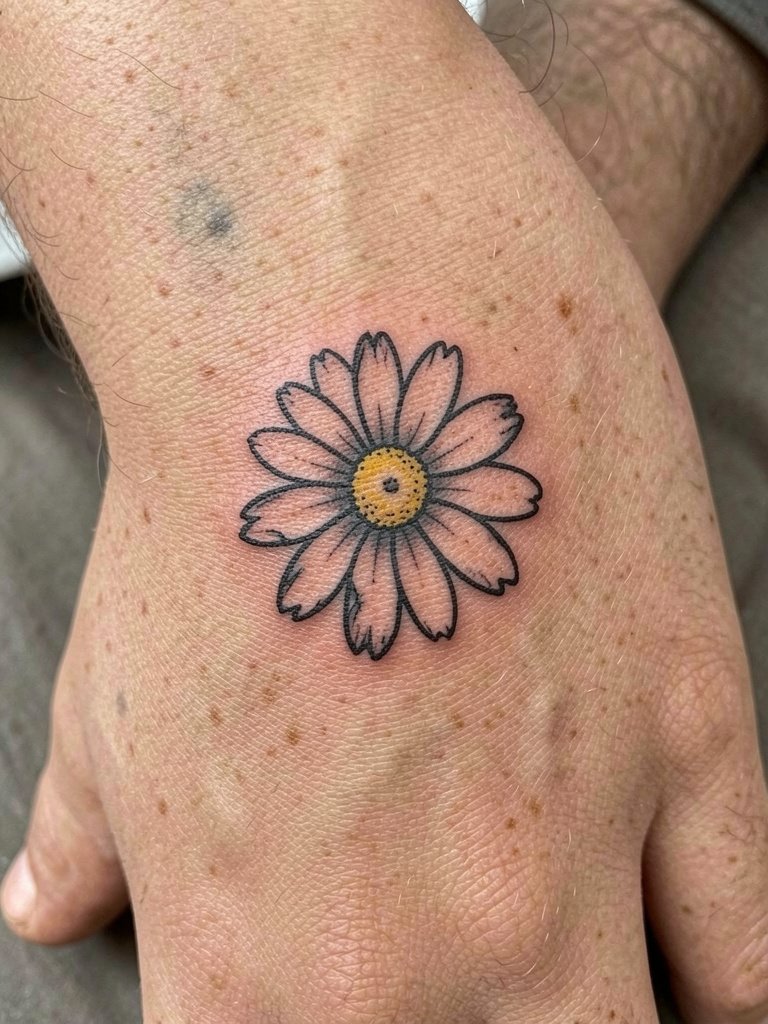
Ignorant style intentionally looks hand-sketched, which helps it age into character rather than smudge. The main mistake people make is over-trying to make it too symmetrical; the charm is in the wobble. Stippling or a tiny filled center keeps the daisy readable at four years. For a casual vibe pair the healed wrist with a thin chain bracelet set on the opposite wrist.
10. Watercolor Rose Fade, Outer Dorsal Wrist
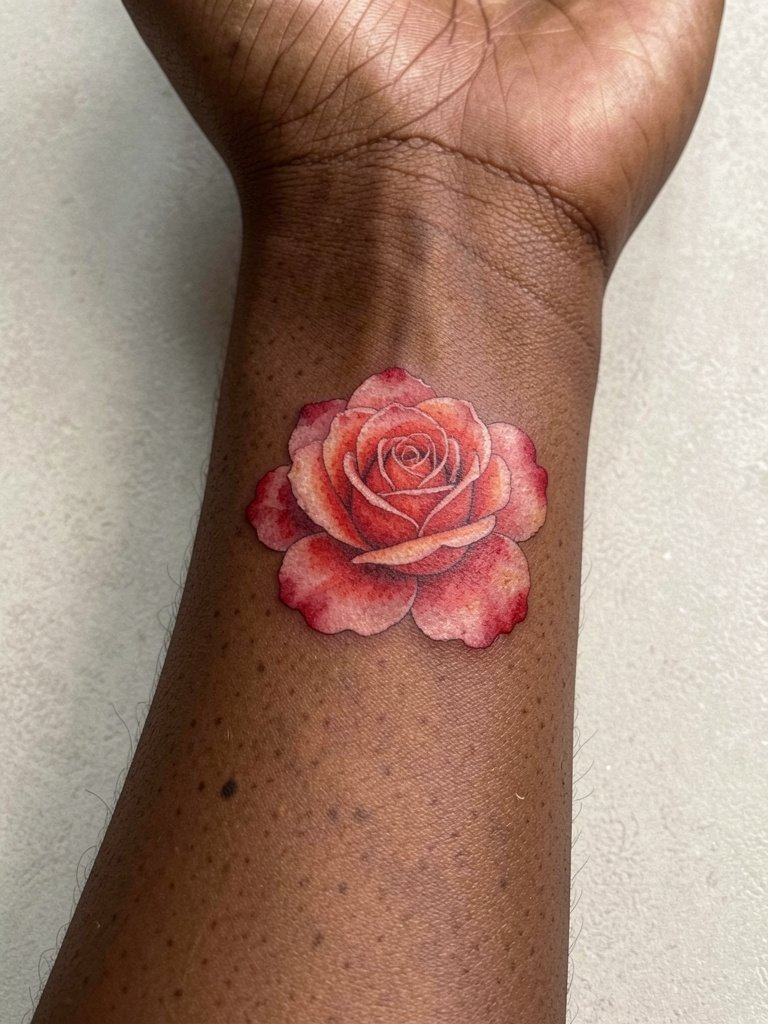
Watercolor looks striking at first but can fade unevenly on the wrist. A common aging issue is color wash-out into a grey haze. If you must have watercolor, ask the artist to anchor the washes with a thin contour line so the silhouette survives. Also plan on a color refresh at year two or three. For clothing, short sleeves or strap tops keep the wrist visible and let color reads pop.
11. Blackwork Chrysanthemum Silhouette, Inner Wrist
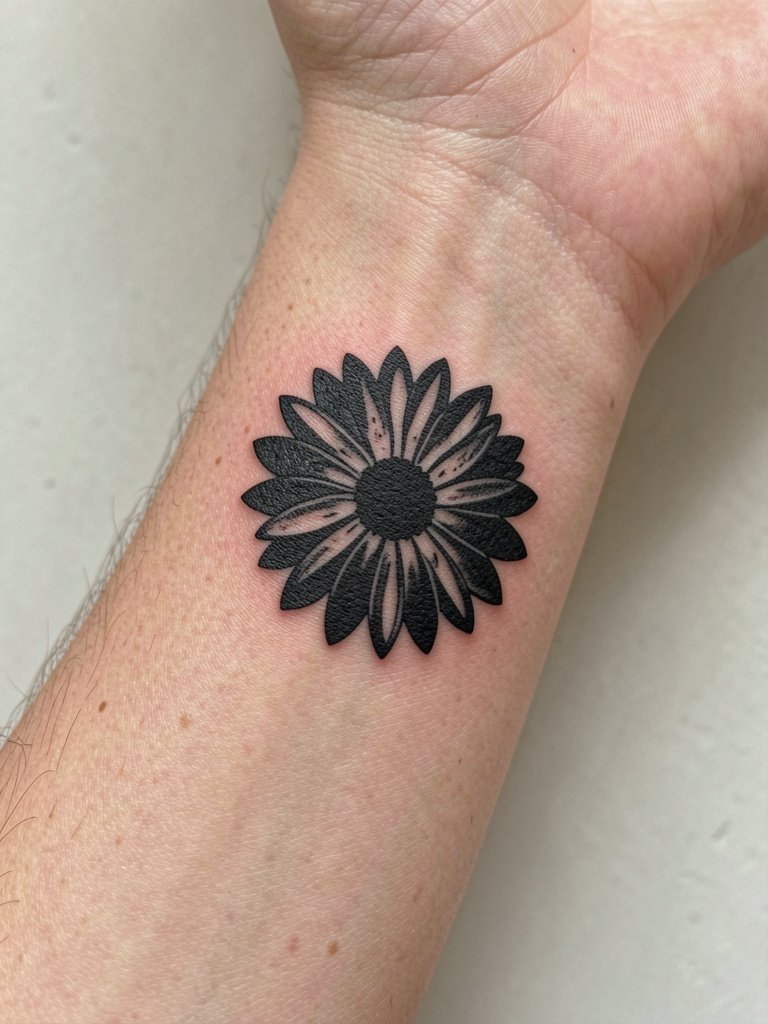
Blackwork gives high contrast that holds up especially well on darker skin tones. The risk is packing the flower too tightly without negative space which reads as a blob. Request clear petal gaps and ask to preview the stencil from a few angles to confirm silhouette. For show-off styling a matte-finish photograph filter can help your photos, though that is a photography tip rather than part of the session. During the appointment keep the wrist elevated and relaxed.
12. Patchwork Monthly Bouquet, Wrist Band or Stacked Vertically
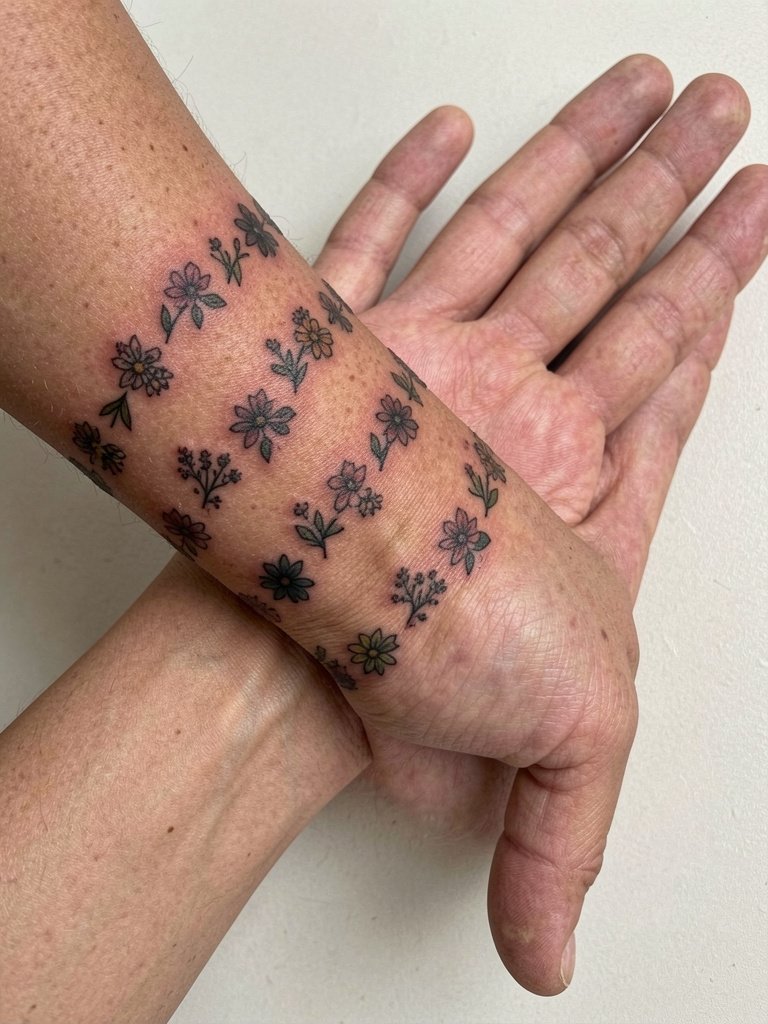
Collectors love one bloom per month as a patchwork band or vertical stack. The essential planning detail is spacing. One camp argues tiny monthly icons end up crowding the wrist and blur. The opposite camp says careful spacing across two or three sessions creates a readable band that ages into a cohesive bouquet. My practical tip is to map the full layout on paper and ask for a mockup wrapped around your wrist so you can see overlap before any ink touches skin. For session-day wear choose short sleeves so the artist can wrap the stencil smoothly.
13. Fine Line Script Plus Bloom Combo, Inner Wrist
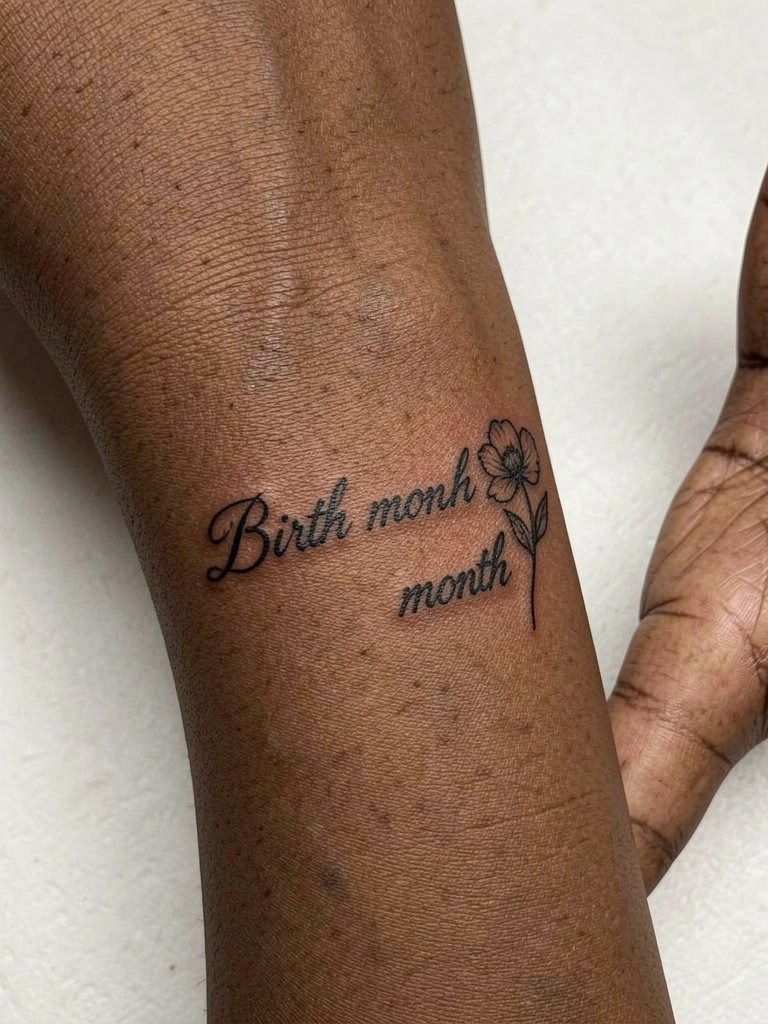
Script plus bloom is a classic pairing but beware scale. Tiny script below a bloom often loses letter spacing. Ask the artist to show the script at actual size on your wrist and to increase letter spacing slightly so the word remains legible as the skin softens. A useful depth signal is touch-up timeline. Fine script often needs a touch-up within 12–24 months. For showing it off choose neutral rolled cuffs and a linen button down shirt to keep attention on the wrist.
14. Stippled Dahlia, Lateral Wrist
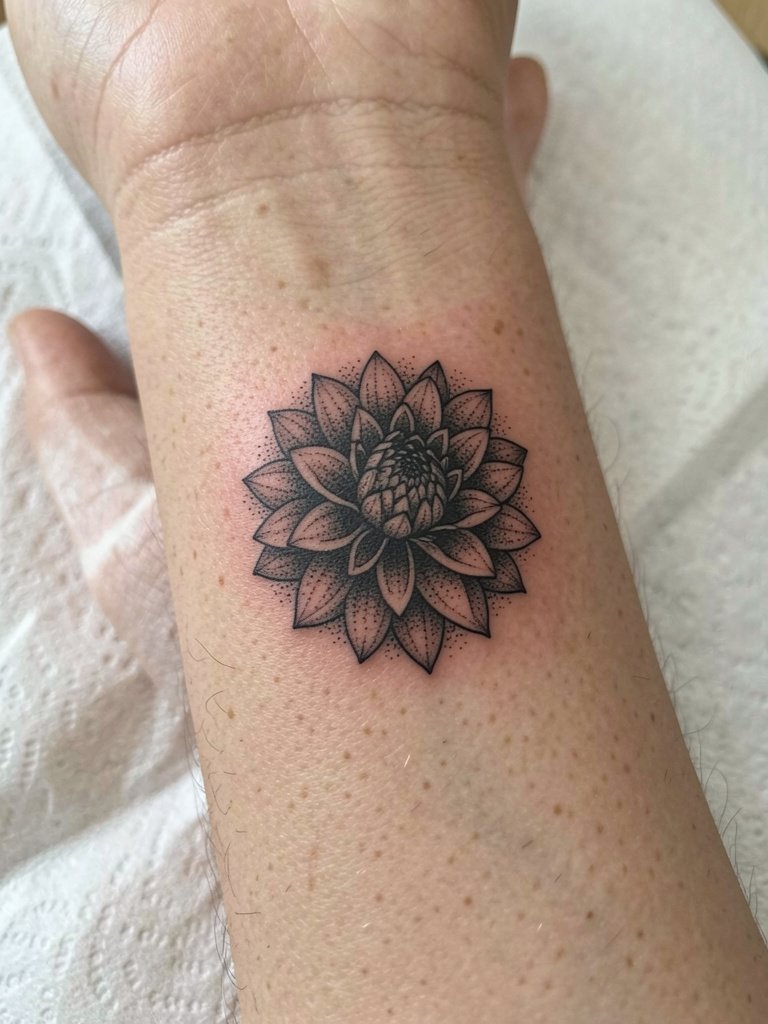
Stipple shading adds texture without relying on thin continuous lines, which makes it a strong option on wrists that see daily movement. The mistake is over-dense stipple that becomes a grey mass after a year. Pick medium-density dots and reserve heavier stippling for shadowed areas only. Stippled work can feel like a sustained buzzy session but usually stays under two hours for a 1.5cm piece. For outfits the piece pairs cleanly with sleeveless tops and a simple stacked thin chain bracelet on the opposite wrist.
15. Ornamental Mandala Rose, Outer Dorsal Wrist
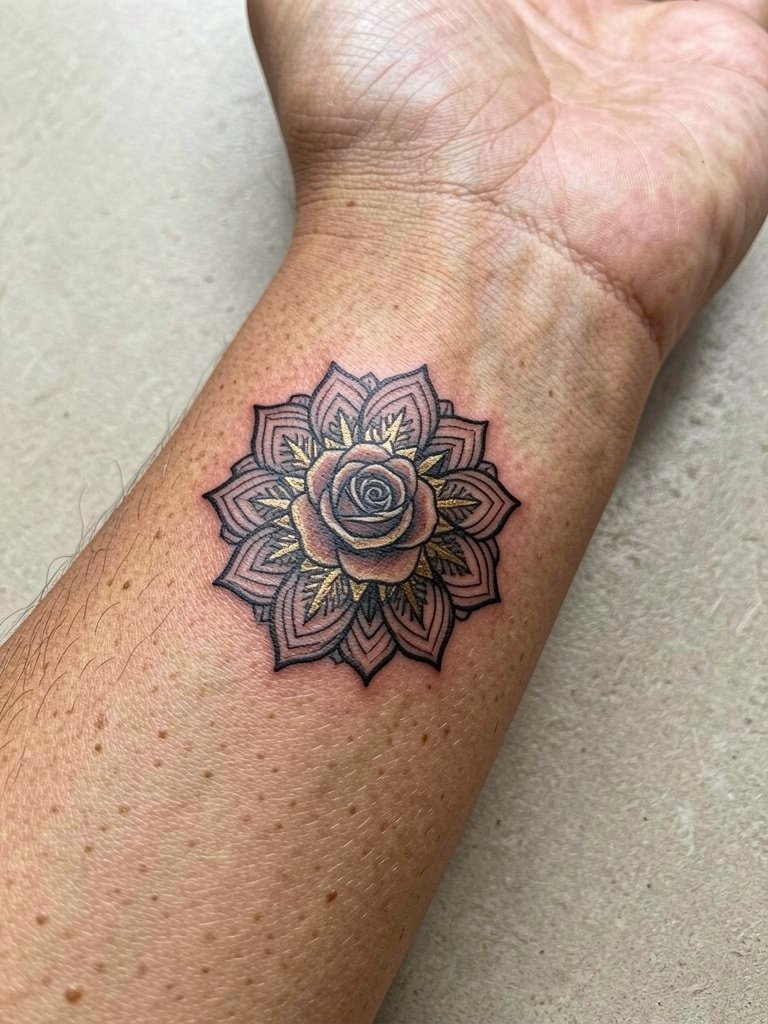
Mandala borders help distribute movement across the design so no single line is under too much stress. The common error is squeezing a mandala into too small a circle, which makes the pattern collapse. Insist on a size that allows at least 1.5mm between key lines. If you want a gold accent ask for a tiny dot rather than broad fills to keep contrast. For dressing, a scoop-neck top with sleeves rolled reads nicely with this style.
16. Miniature Sunflower, Radial Wrist
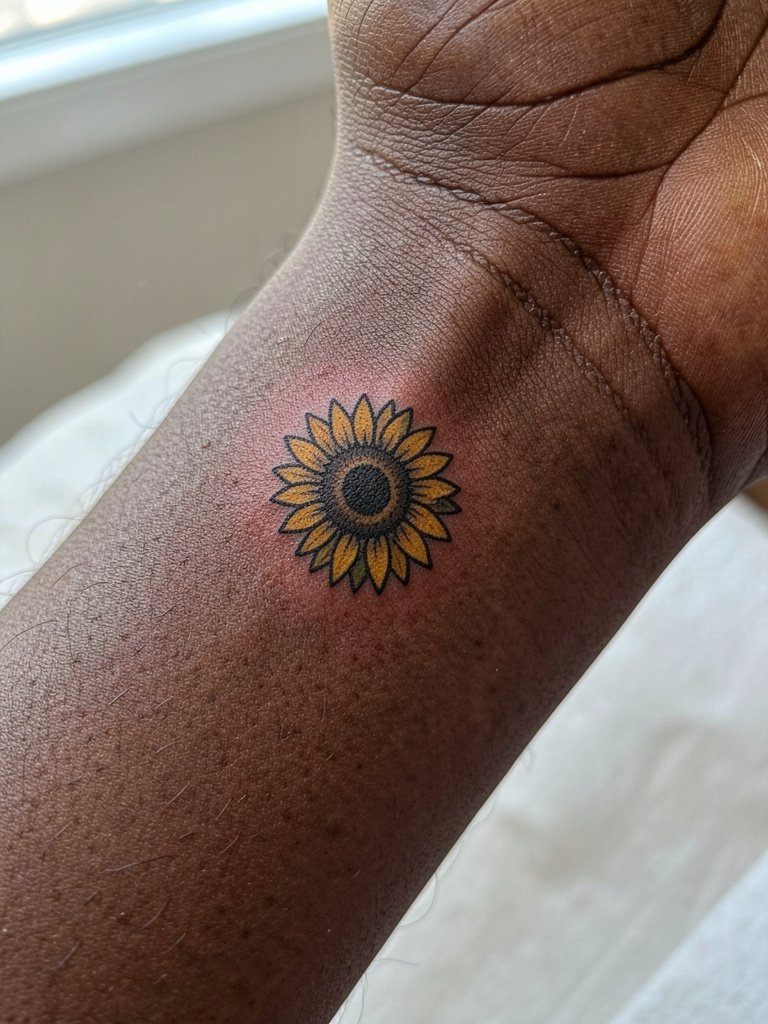
Sunflowers read well if the center is dense and the outer petals are simple. A tiny filled center keeps contrast on darker skin tones. The typical session length is short, but ask for the stencil to be viewable in natural light before ink. For daytime looks pair with casual short sleeves so the wrist sits exposed and the bloom reads against neutral fabrics.
17. Petite Iris, Inner Wrist
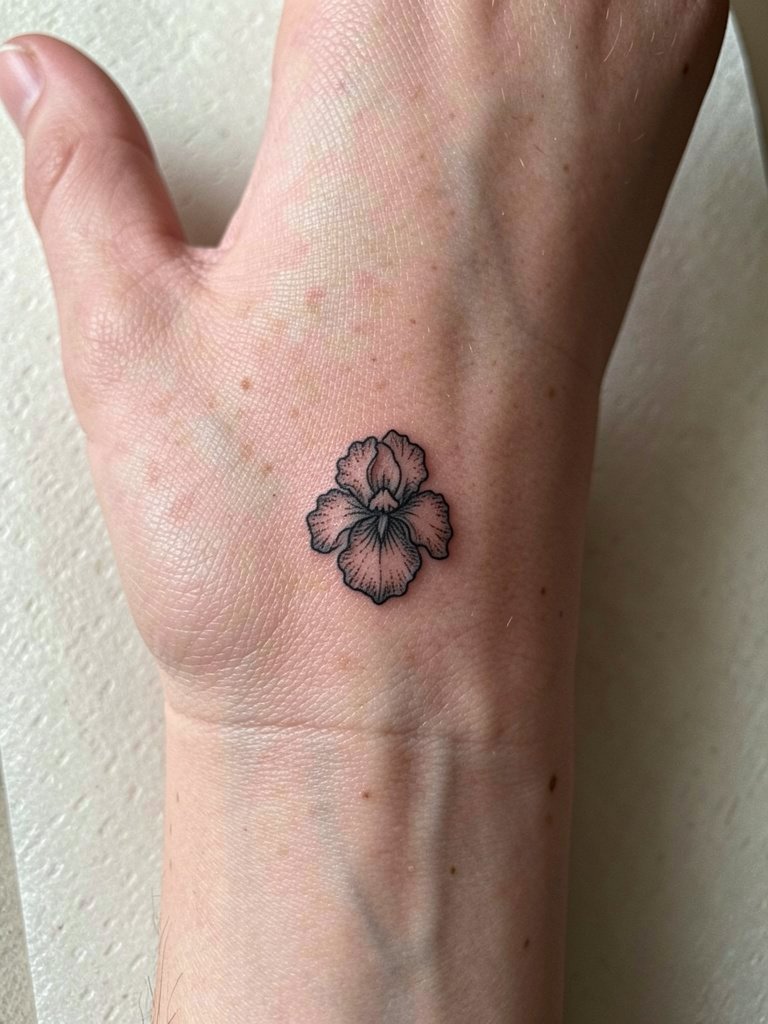
Irises are delicate but read when the ruffled petal is allowed a little negative space. A common mistake is trying to compress too much petal detail into a tiny mark. Ask to see the design printed at the exact size on paper and then taped to the wrist so you can confirm legibility. In sessions bring a loose button shirt to roll up easily.
18. Micro-Blackwork Poppy, Lateral Wrist
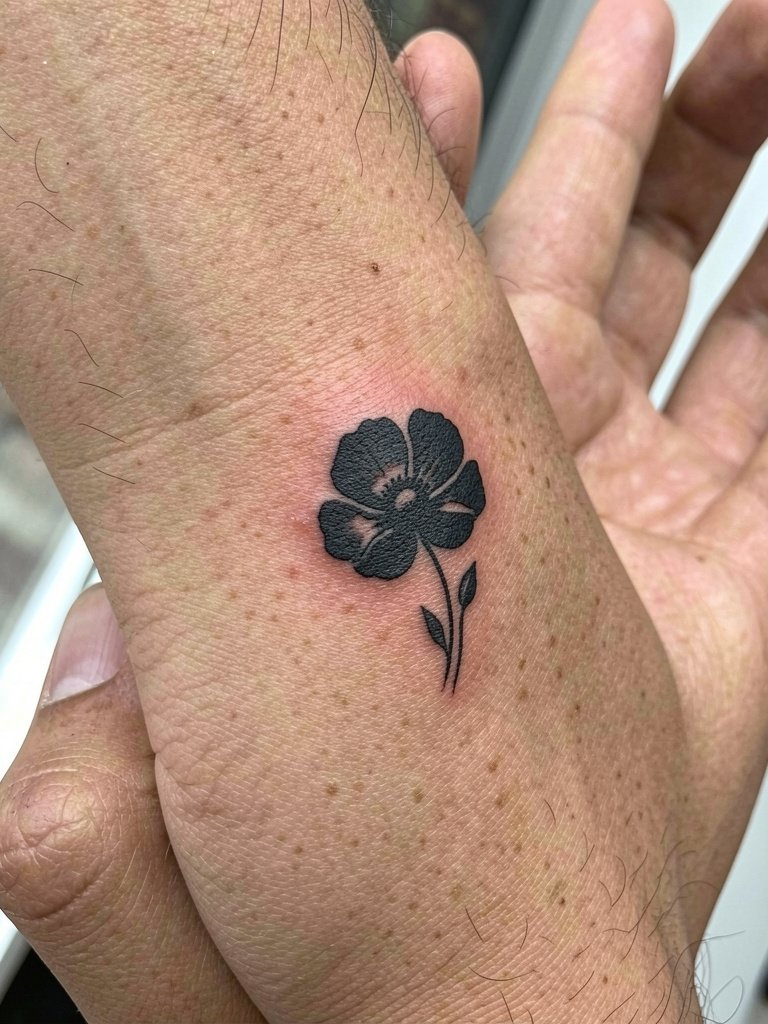
Poppies in pure black make a bold tiny statement and age predictably. The main mistake is over-complicating petal folds which disappear in small scale. Keep one or two internal cuts for visual interest and prioritize solid saturation. For outfits the silhouette works with both casual and formal looks. Consider pairing the healed piece with a minimalist watch on the opposite wrist for visual balance.
19. Tiny Lavender Sprig, Inner Wrist
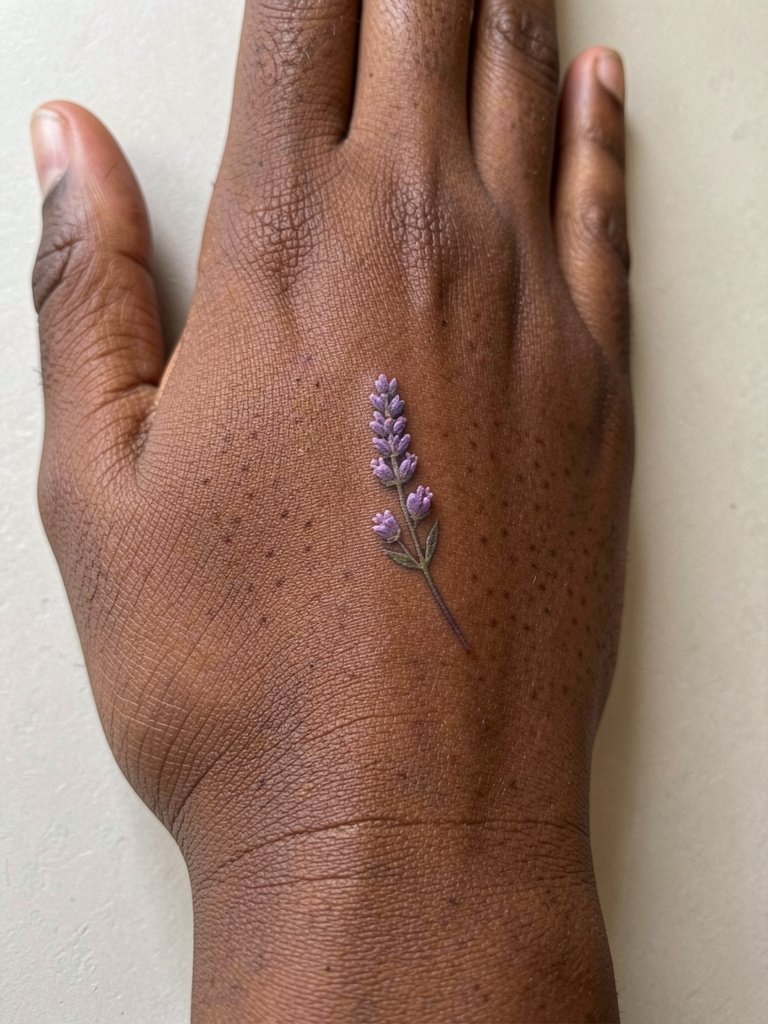
Lavender reads as a vertical sprig and adapts well to narrow wrist real estate. A common error is making the buds too small which turns them into a fuzzy line. Ask the artist to enlarge the bud groupings slightly and to show a mockup with your wrist in relaxed position. For session clothing choose a sleeveless or short-sleeve top so the area is easy to access.
20. Minimalistic Bluebell, Lateral Wrist
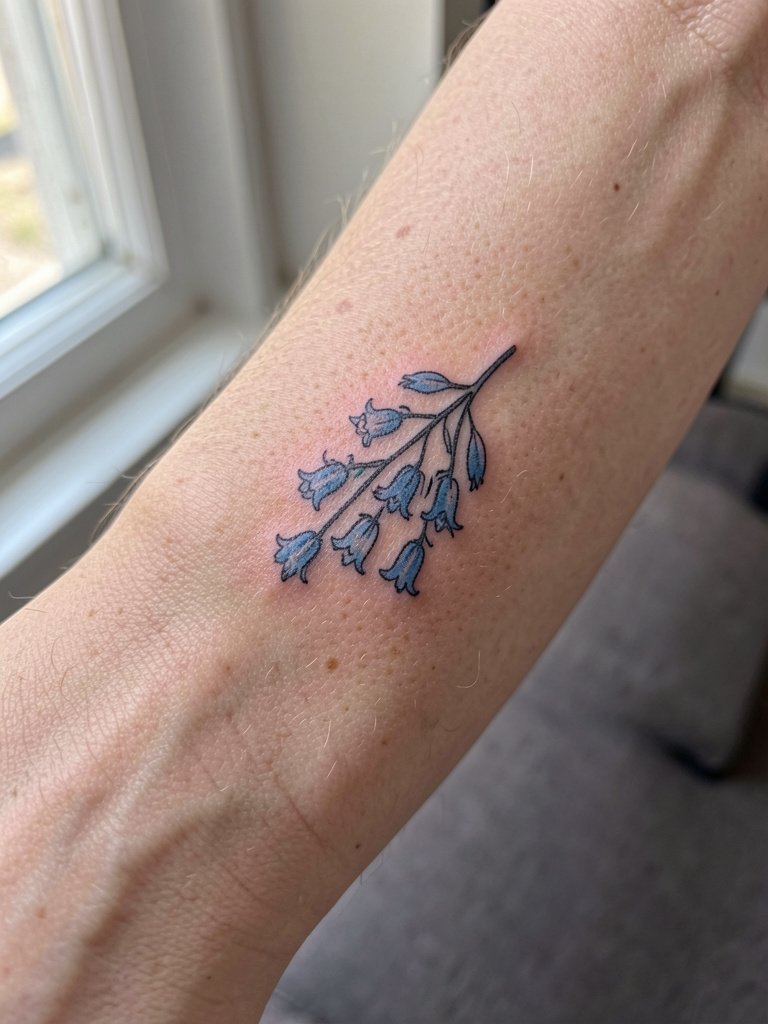
Bluebells look elegant when drawn as a tight cluster rather than scattered dots. Avoid tiny dangling petals that can soften into indistinct marks. Ask the artist for a slightly bolder stem so the cluster keeps orientation as the wrist shifts. For outfit pairing a cropped sleeve or rolled cuff keeps the wrist exposed and frames the bell cluster.
21. Tiny Violet Cluster, Inner Wrist
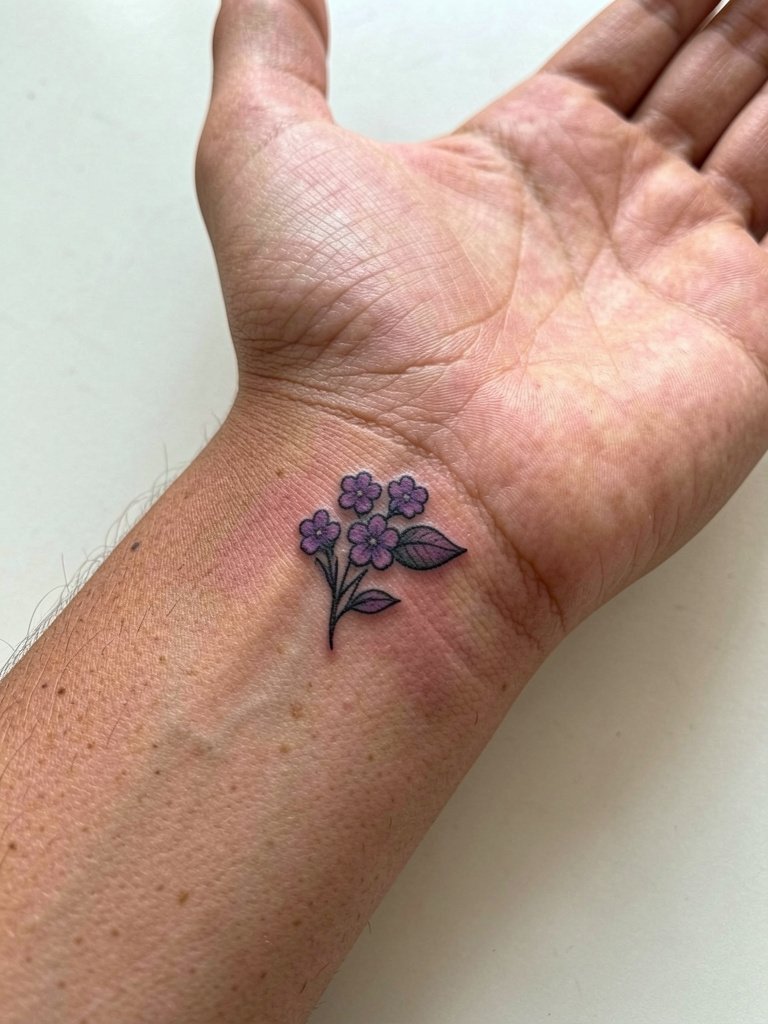
Violets are low-profile and suit a discreet inner wrist placement. The mistake is trying to cram color into each tiny petal. Instead pick a slightly larger central petal and use negative space around it. This style usually needs one touch-up within the first two years to refresh tiny color fills. For evening wear the cluster peeks out from rolled cuffs with a delicate bracelet on the opposite wrist.
22. Miniature Camellia, Radial Wrist
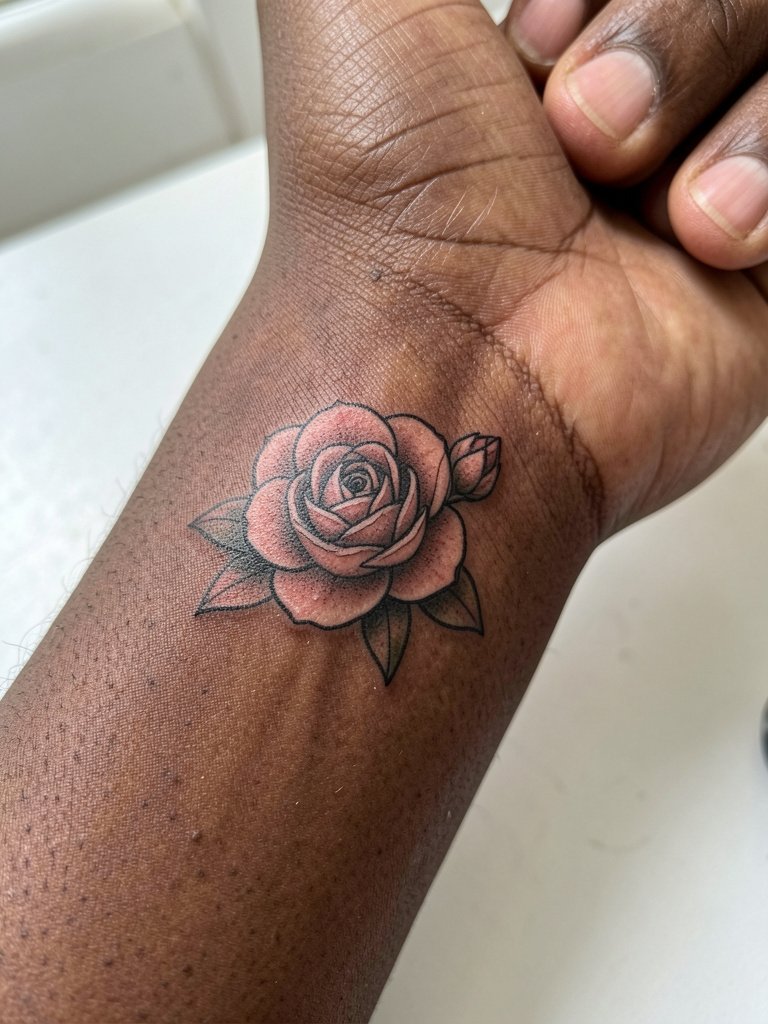
Camellias look dense so keep petal borders simple to prevent blurring. A common error is pressure-filling too much color into a small area. Plan for subtle washes only and expect a minor touch-up after the first year. Session time is typically short. For daytime outfits pair with rolled linen sleeves or a simple bracelet on the opposite wrist.
23. Petite Tulip, Inner Wrist
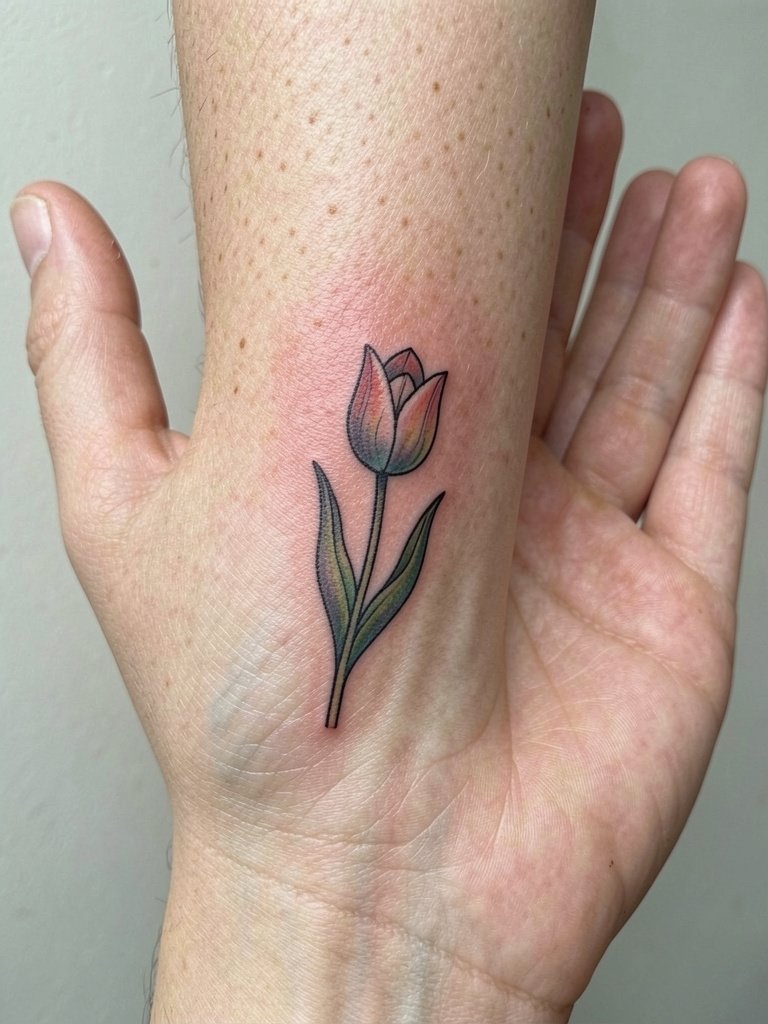
Tulips are graphic and translate well to the wrist if kept simple. The frequent mistake is adding too many leaves which creates visual clutter. Keep a single stem and one or two leaves and ask for the stencil to be checked at rest and with a light fist to see how the bloom reads when you move. For styling the tulip looks modern with a dainty wrist bracelet stack on the opposite hand.
24. Micro-Realism Lily of the Valley, Inner Wrist
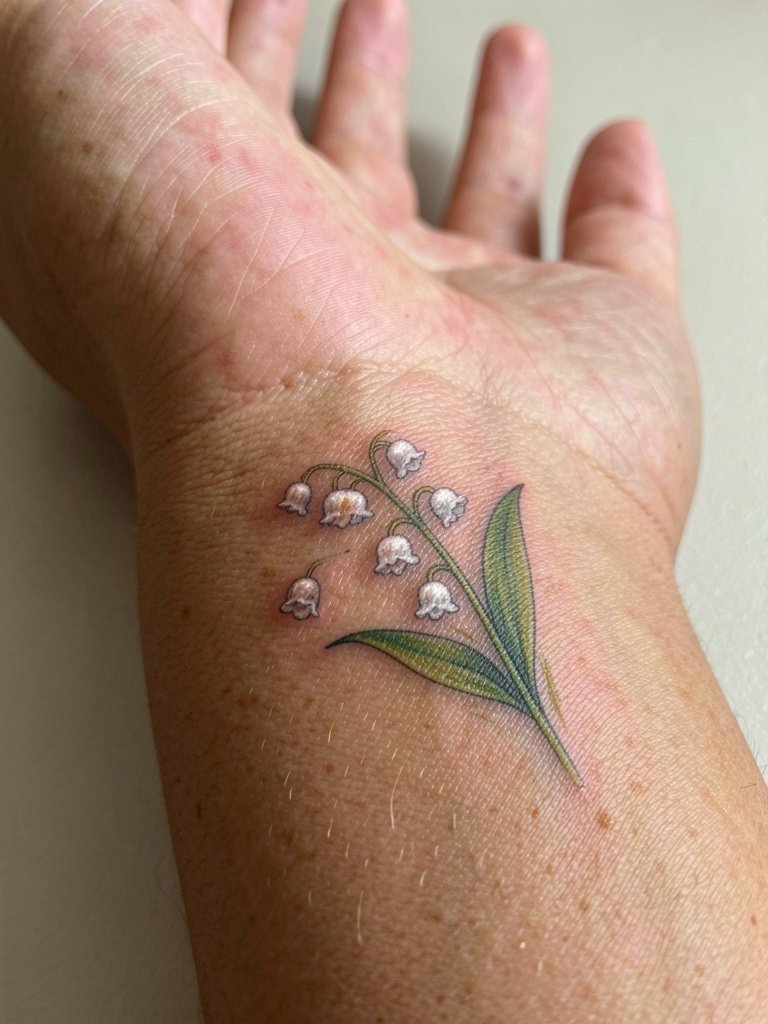
Lily of the valley survives when each bell has a little breathing space. The trap is over-detailing each bell which becomes indecipherable at tiny scale. If you want realism, accept a slightly larger size or reduce the number of bells. For the session wear a loose button-down so sleeves can be rolled without tugging.
25. Miniature Zinnia, Outer Wrist
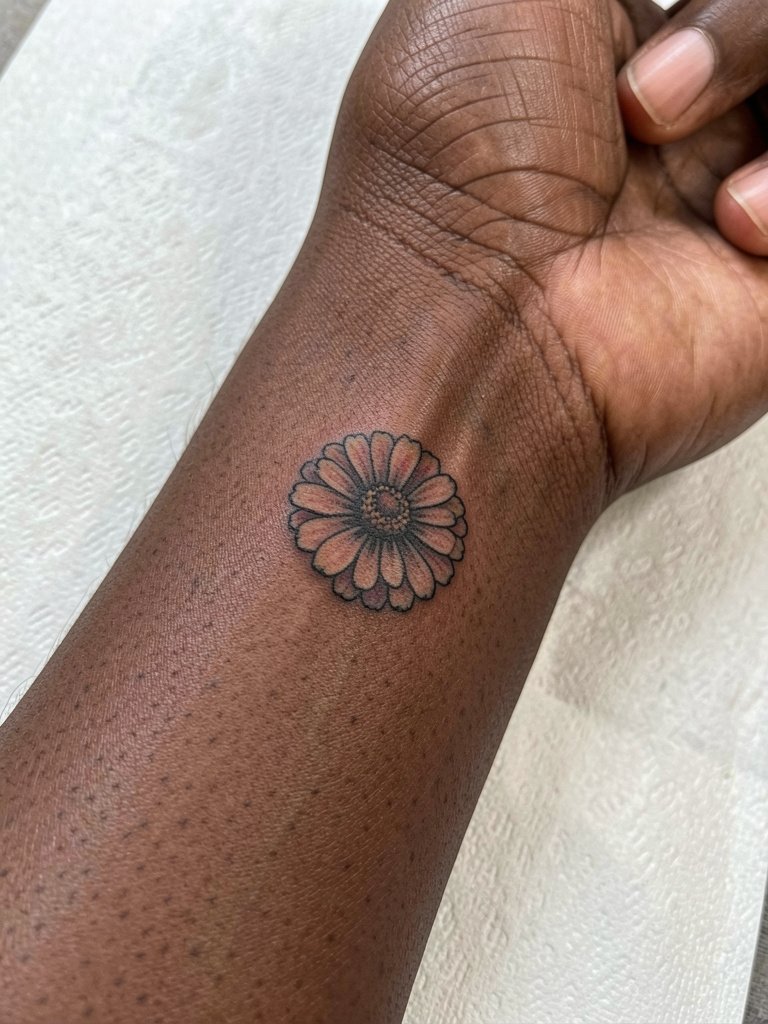
Zinnias work as compact display pieces if the center has contrast. The common oversight is flattening the center which loses the flower’s focal point. Ask the artist to keep the disk slightly darker and reserve petal detail for the outer ring. For outfits try a short-sleeve top so the outer wrist reads against the sleeve hem.
26. Tiny Forget-Me-Not, Inner Wrist
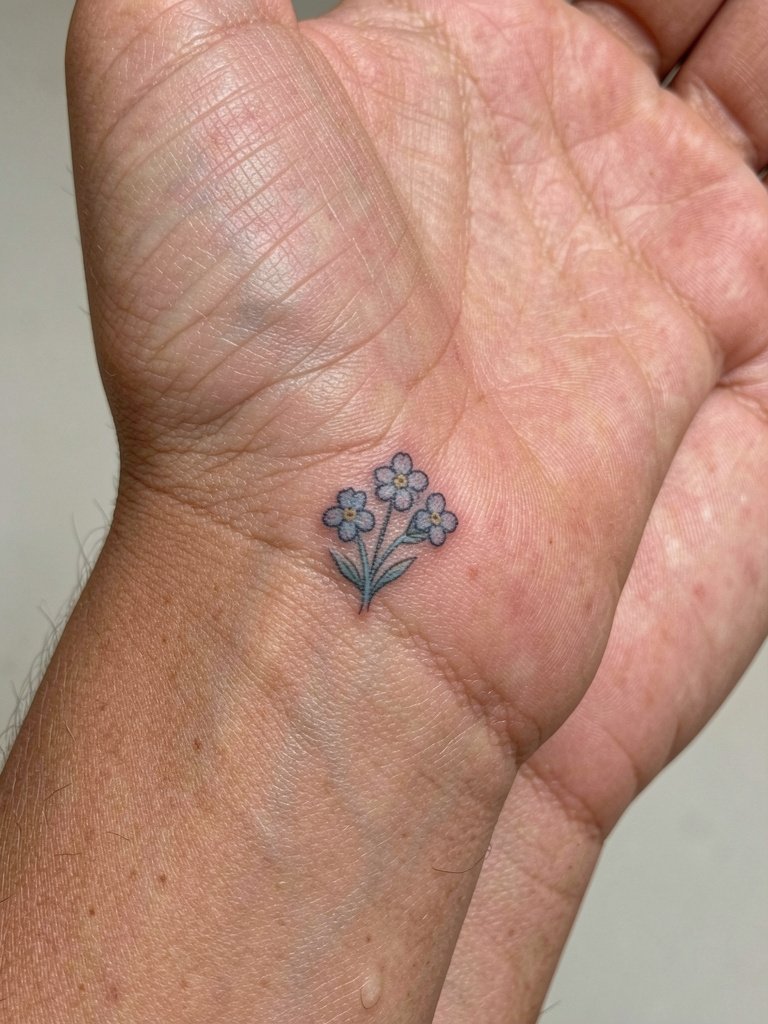
Forget-me-nots read best as small clusters, not scattered dots. The mistake is making lone, minute flowers that are hard to place visually. Ask for a tight arrangement of two or three and confirm how it looks when your wrist is flexed. For photographs a neutral short sleeve keeps the wrist visible and delicate.
27. Micro-Realism Periwinkle, Lateral Wrist
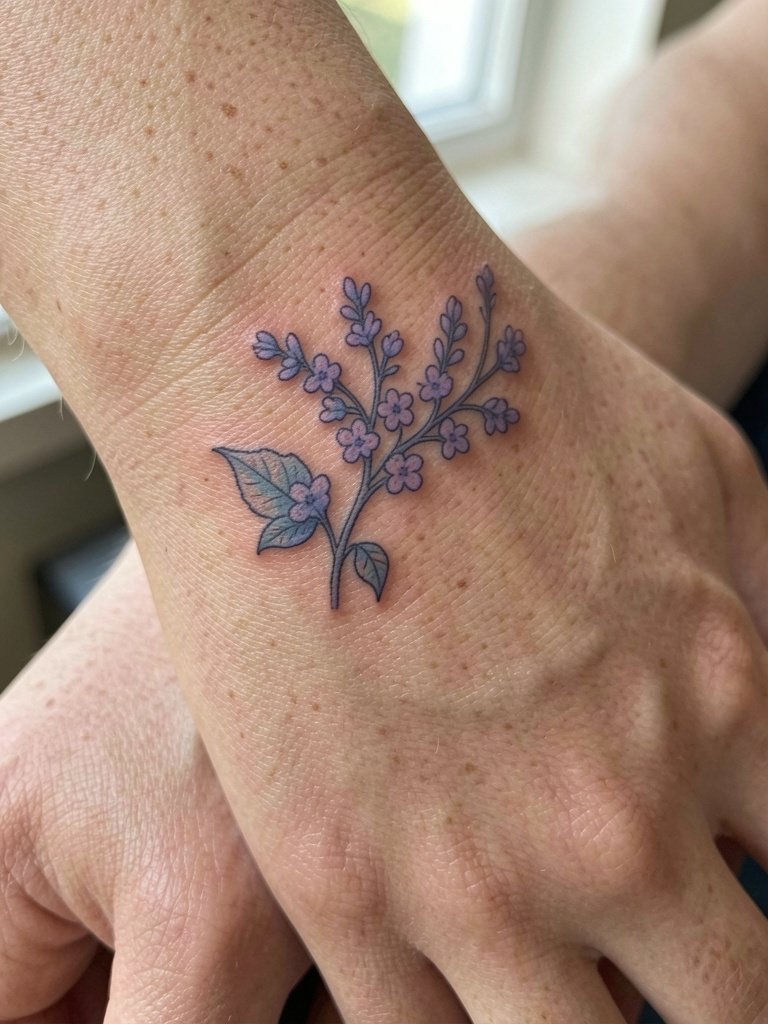
Periwinkles are delicate and suit the lateral wrist if drawn with simplified petals. Avoid excessive shading which can turn into an indistinct patch. Expect a quick session and plan to wear a loose sleeve for access. The design pairs well with minimalist jewelry on the opposite hand.
28. Minimal Seeded Echinacea, Radial Wrist
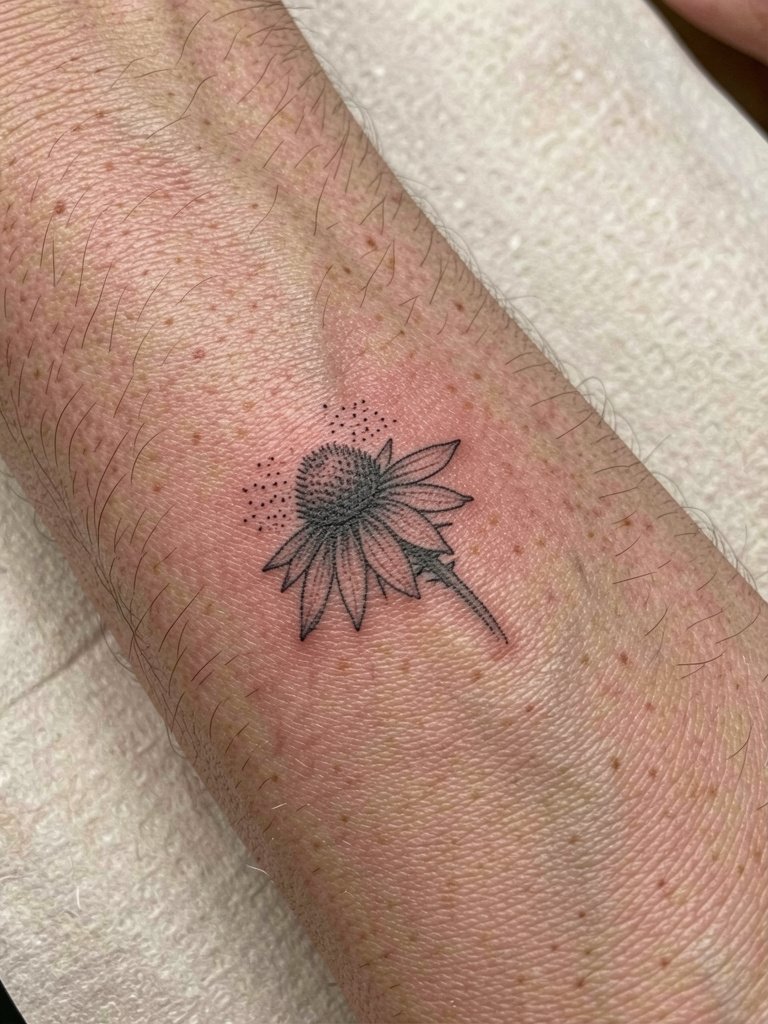
Echinacea handles stipple nicely because the center gains texture and the petals stay clean. The most common error is heavy center filling that becomes a blob. Keep the center stippled and the petals airy. For a casual daytime look pair the wrist with a thin chain bracelet set on the other wrist.
29. Petite Magnolia, Inner Wrist
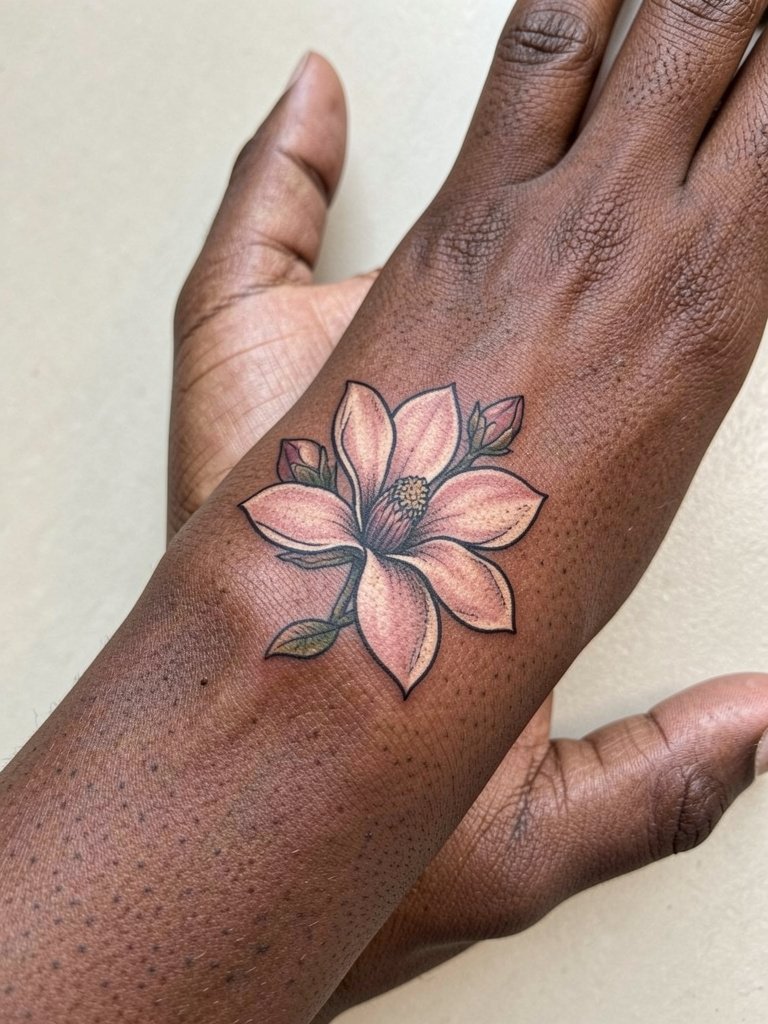
Magnolias read best with fewer petal splits and slightly wider petal borders to prevent softening. The mistake is excessive inner petal detail which disappears by year two. Ask for a mockup that shows how the petals overlap at actual wrist scale. For session comfort wear a sleeveless top so the artist can reach the inner wrist without fabric pressure.
Frequently Asked Questions
Q: How much should I expect to pay for a small wrist birth flower tattoo and how much is tipping?
A: For a small wrist bloom most artists quote a range rather than a flat fee. In practice expect a typical small wrist piece to fall in the range of $150 to $350. Tipping norms vary. A common approach is 15 to 25 percent, with people who want to reward extra care sometimes leaning toward the higher end.
Q: Will a fine-line birth flower on my wrist blur quickly?
A: Artists disagree. One side says wrist skin and constant friction will blur ultra-thin lines in one to two years. The other side points to healed three-year examples and says fine line can hold if the artist uses correct depth and slightly wider spacing. My practical advice is to ask for a hair thicker outline than your reference and for visible spacing between petals so the design keeps definition over time.
Q: What aftercare products actually help wrist tattoos without clogging pores?
A: Some people find thick ointments cause itching on thin wrist skin while others report fine results when they use them sparingly. One camp prefers lighter, thinner specialty balms and lotions after the initial days. The other camp reports the traditional ointment barrier works if applied in a very thin layer before switching to lotion. If you have sensitive skin test a small amount on intact skin before using it on a fresh tattoo.
Q: Where can I find artists and healed examples without following named accounts?
A: Search hashtags like #birthflowertattoo, #finelinetattoo, and #minimalistfloral on Instagram and TikTok and use the location filters to find artists near you. Tattoodo and Booksy let you filter by keywords like "fine line rose wrist" and show portfolio photos. Reddit threads on r/tattoos and r/tattooadvice surface peer recommendations and healed examples across skin tones.
Q: How should I dress on session day for a wrist tattoo?
A: Wear clothing that gives easy access and does not press on the fresh ink. Short sleeves or sleeveless tops work best. If you plan to roll a sleeve, pick a soft fabric you can roll without tight elastic so the cuff does not press on the area immediately after the session. Bring a loose shirt to change into for the ride home if needed.
