A tiny wave at the ankle can feel like a private token you wear only in sandals, but small does not always mean low maintenance. Fine single-needle curls that sit too close together can blur fast on a bony ankle. If you choose slightly stronger linework and plan for a one-year touch-up, the design will keep its shape and charm through seasons of shoes and sun.
1. Minimal Fine-Line Ankle Wave
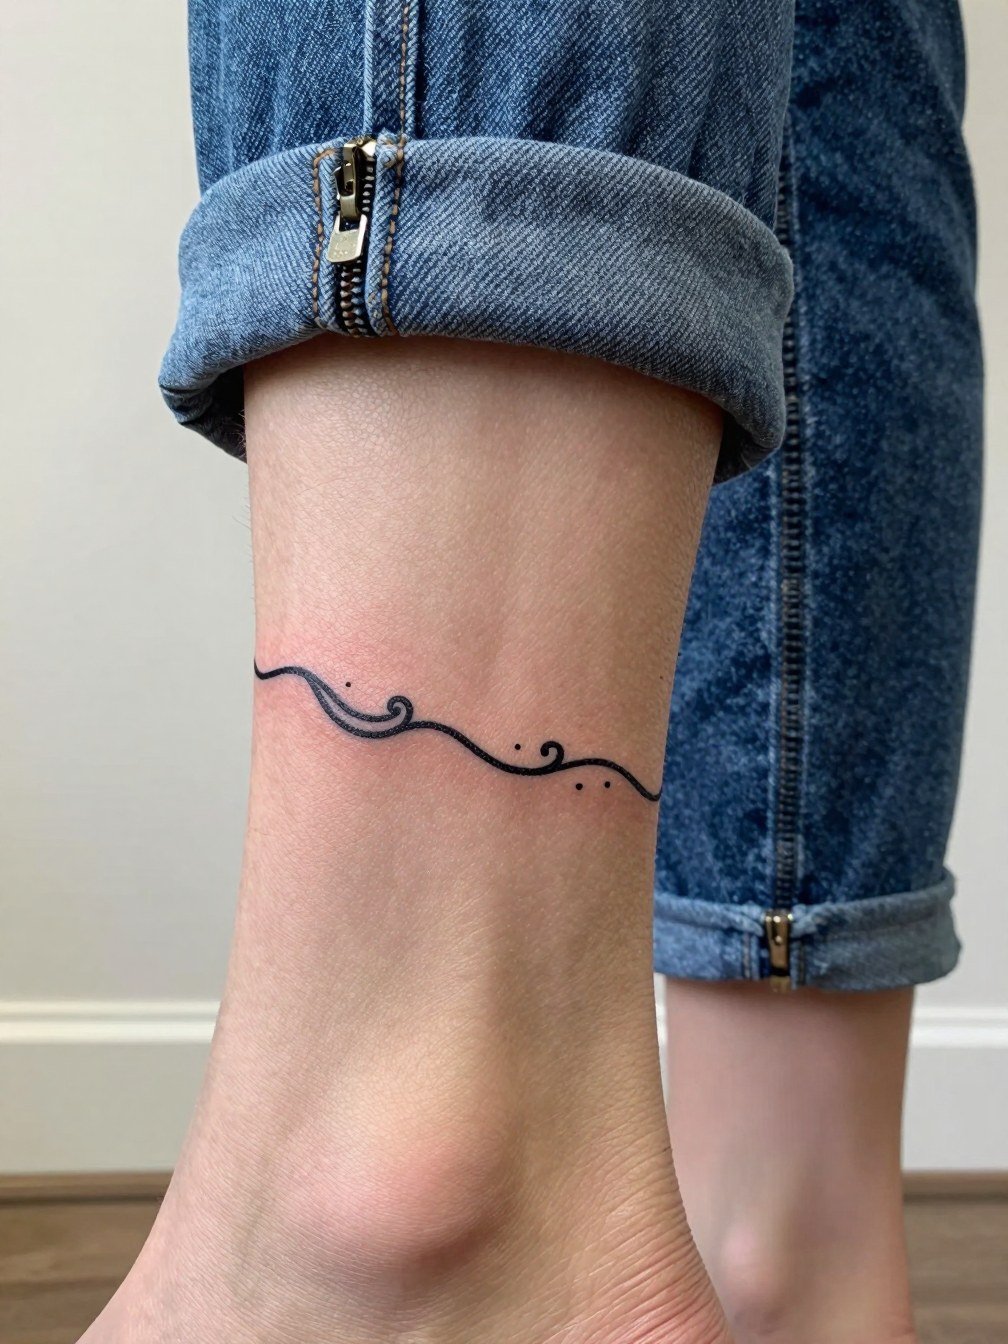
A true minimalist wave works when the line weight is planned to survive ankle motion. One camp argues ultra-thin single-needle work on the ankle blurs within a couple of years because the area is bony and moves against socks and shoes. The other camp says a slightly heavier single-needle approach with clear spacing will settle and still read as delicate. For the session request a single reference showing line weight at three inches so the artist can scale spacing. Pain sits low to moderate. Expect a 20 to 40 minute session and a likely touch-up at year one.
2. Anklet-Style Wave Band
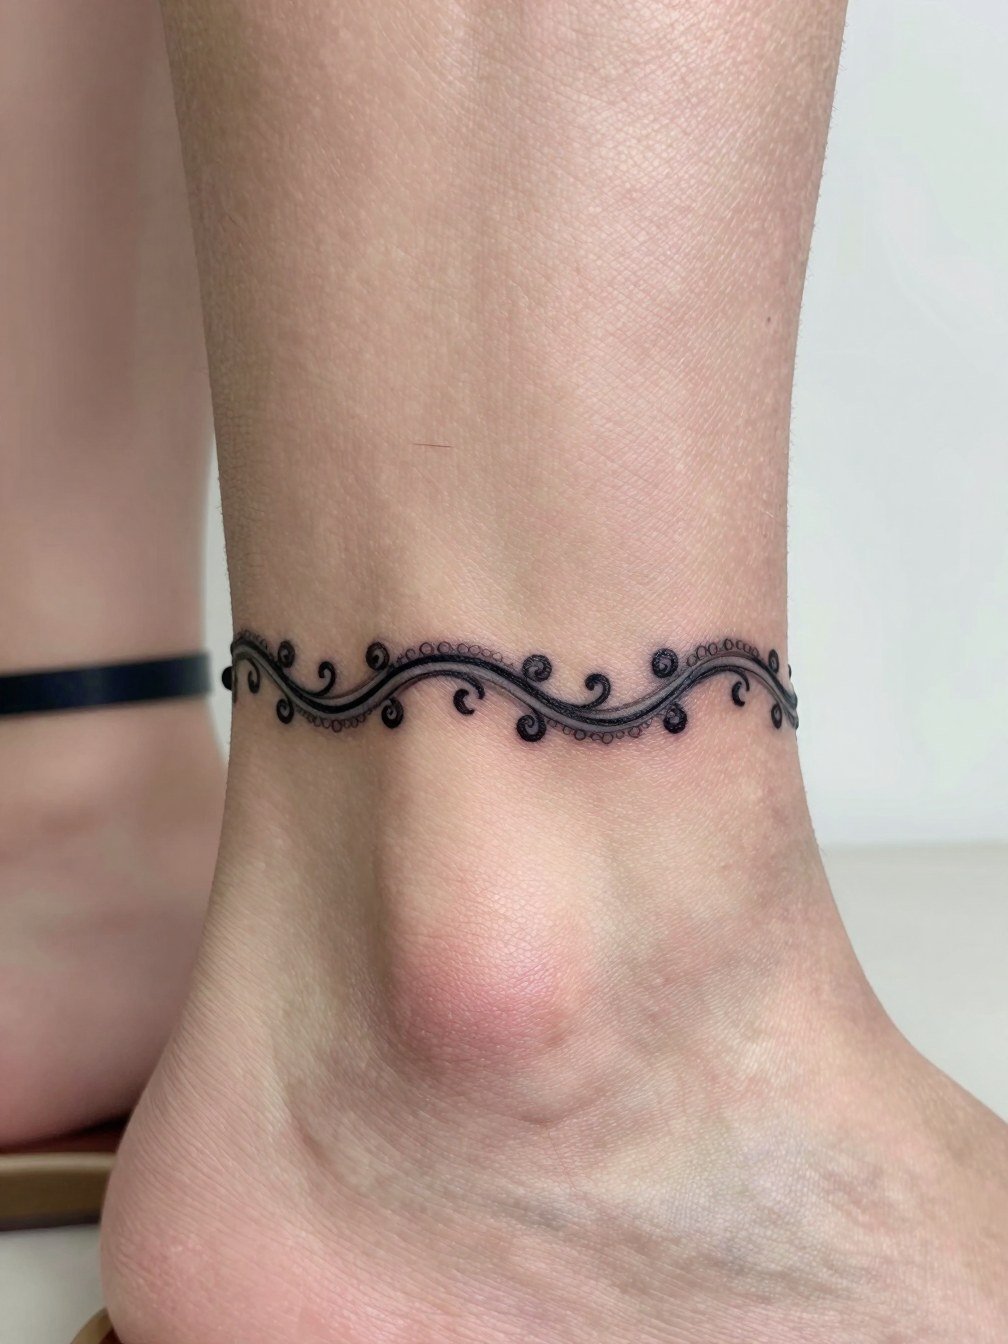
This anklet illusion plays to the ankle curve and reads like permanent jewelry when positioned just above the bone. Ask for slightly bolder contour strokes than a wrist bracelet so the band stays legible over time. A common mistake is packing too many tiny ornaments into the wrap, which muddies after healing. For a summer look wear ankle strap sandals that echo the band. Session time is short, usually under 30 minutes, and sensitivity is low.
3. Delicate Wrapped Wave That Follows the Bone
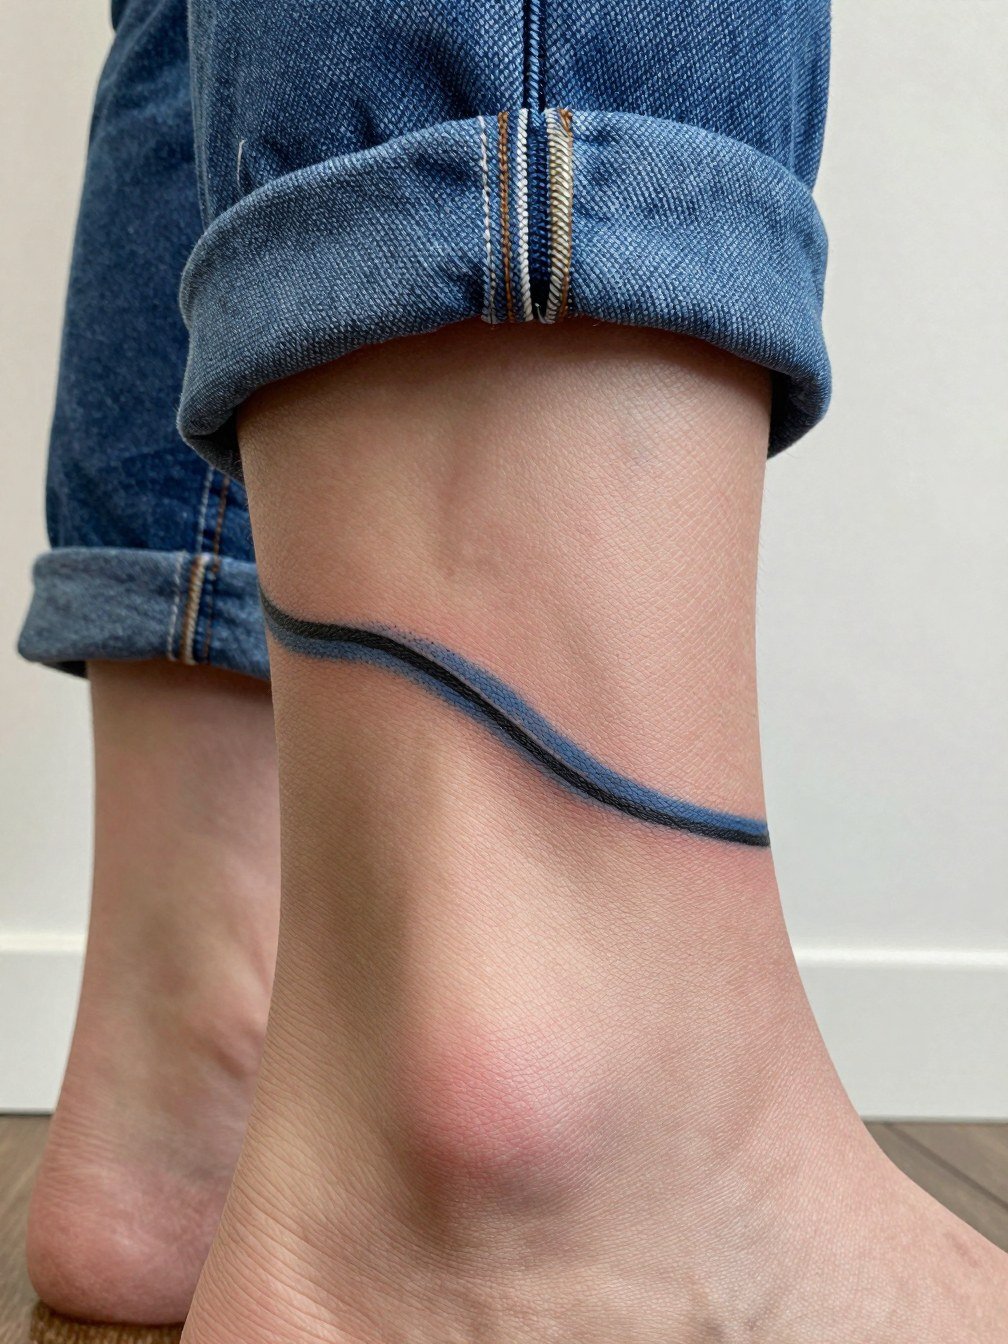
When the line follows the bone it becomes part of the silhouette rather than a pasted-on decal. Recommend that the artist map the design with the ankle flexed and relaxed so the final placement sits comfortably with shoes on. A mistake is centering the wave over a bony prominence without enough negative space. Expect low to moderate pain and a session under 45 minutes. This wears well if the line spacing is deliberate. For showing it off choose cropped straight leg jeans with a low cuff.
4. Color Wave with Blue, Green, and Orange Accents
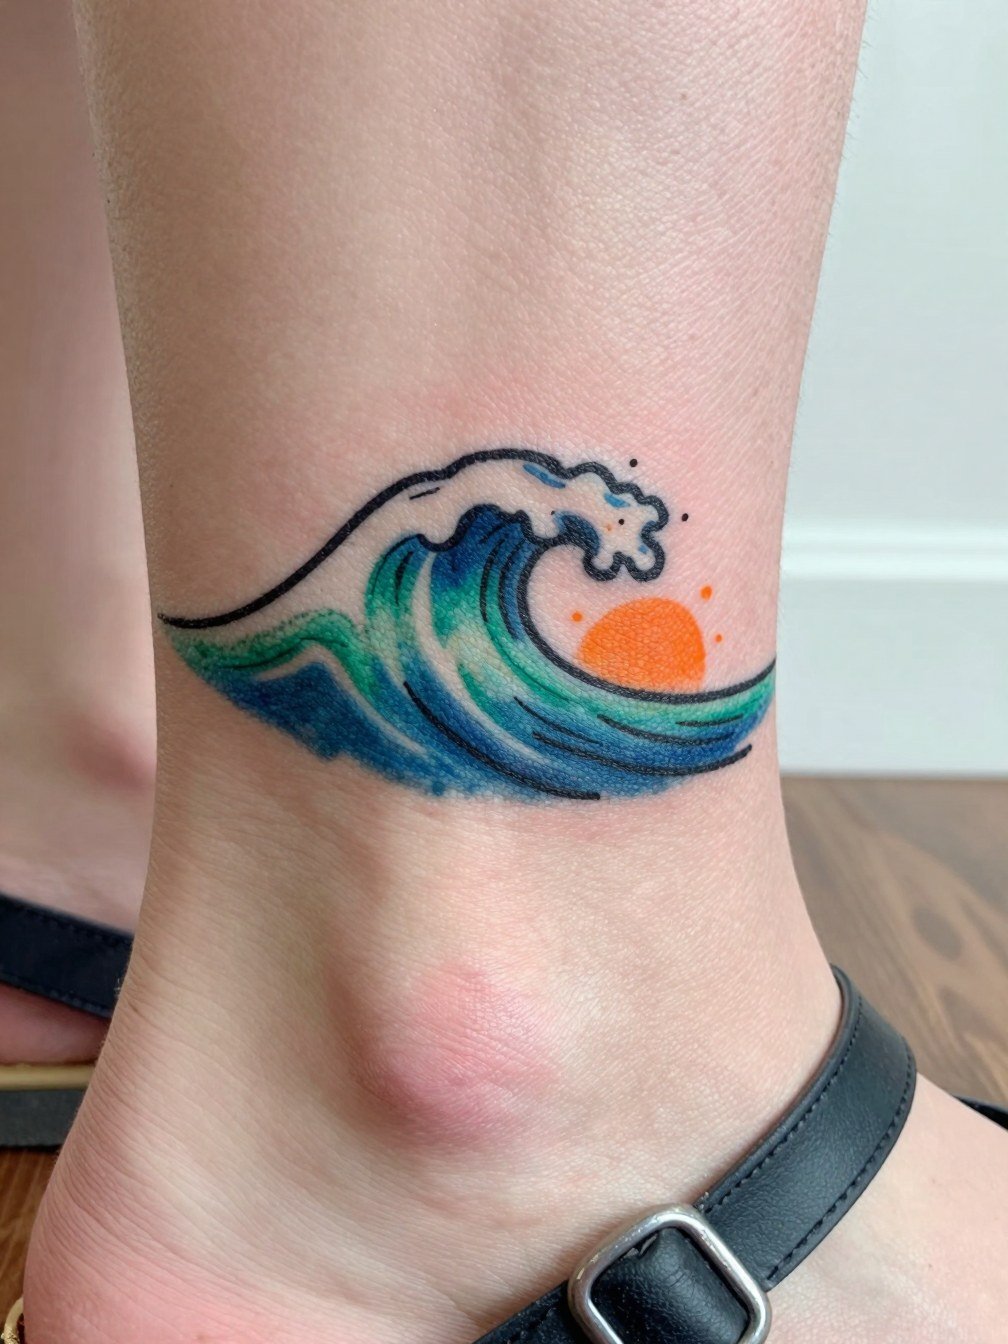
Color splits opinion. One camp says black ink keeps small ankle tattoos legible longer because color fades and loses contrast on textured skin. The other camp says color gives a lively painterly feel and is worth the seasonal maintenance. If you pick color, ask the artist how they layer blue and orange so the pigments sit at slightly different depths for longevity. Realistic fading happens by year two to three unless you protect the area from sun. Session time is usually 45 minutes to an hour. Pair this design with strappy flat sandals to let the palette read.
5. Wave with Tiny Sun Motif
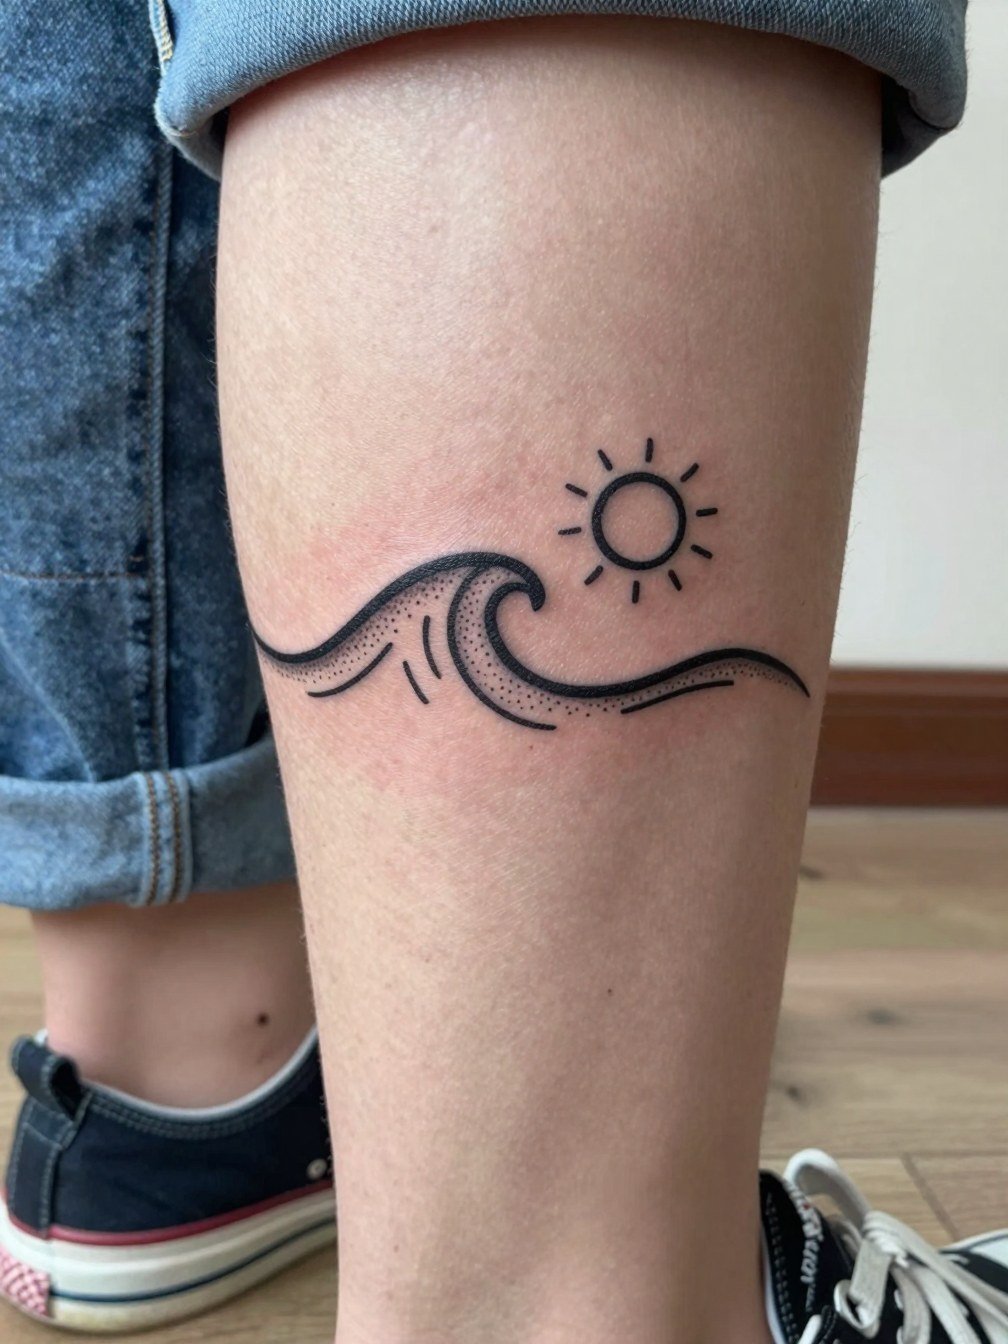
Combining a sun with a wave scales well at ankle size because it anchors the composition. During consultation bring a sun reference that matches the wave's line weight so the two elements age together. A frequent error is tiny rays that blur into the sun disk, so ask for fewer, thicker rays. Pain is low. Expect a 30 to 50 minute appointment. For after-session comfort wear roomy ankle socks to avoid friction while commuting.
6. Dolphin and Wave Tiny Scene
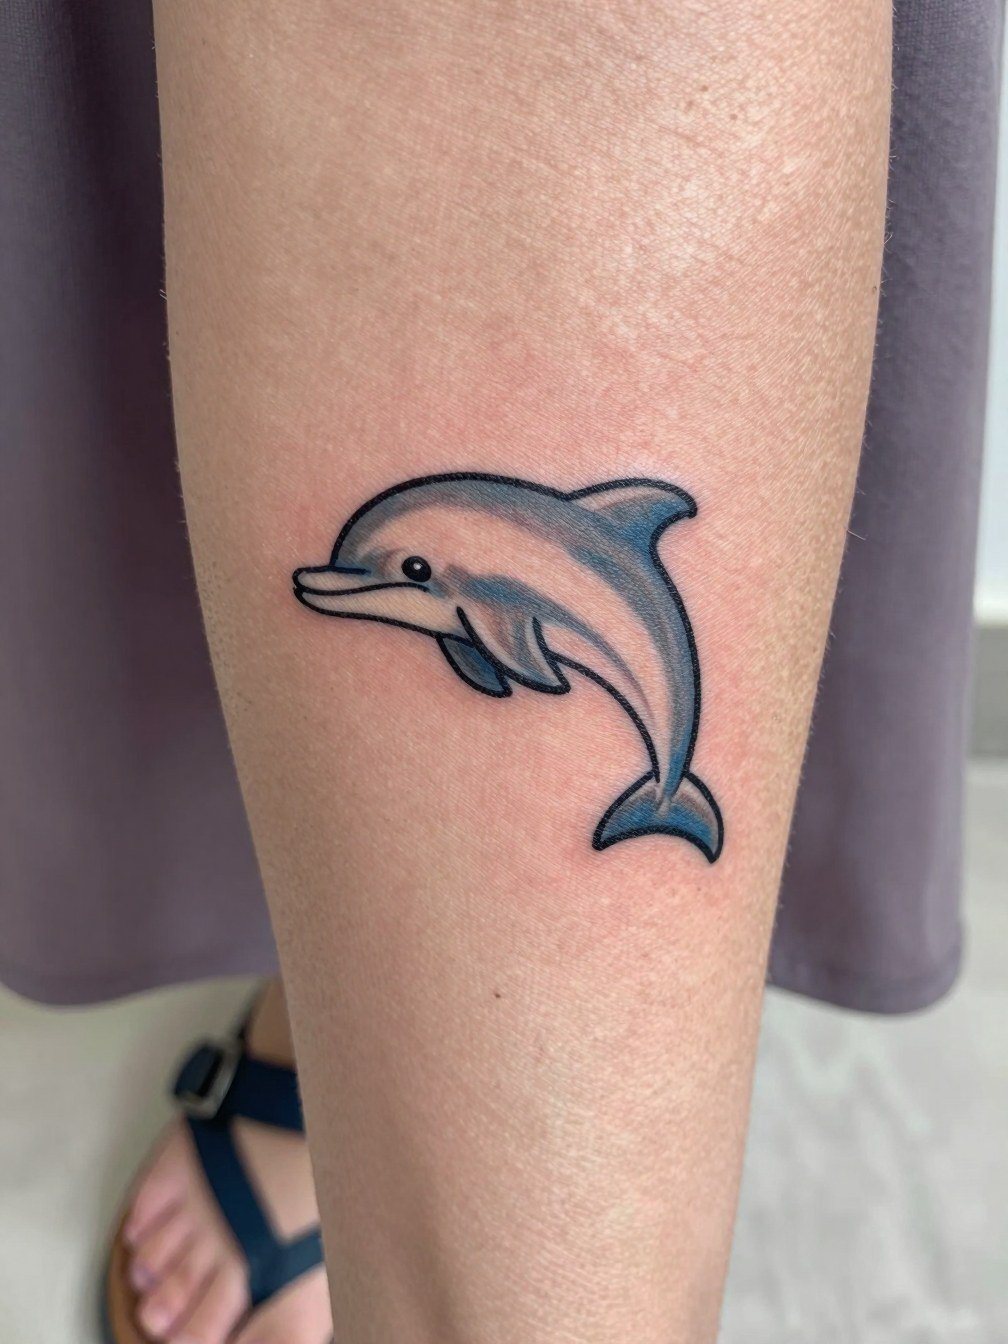
A tiny animal paired with a wave adds narrative without crowding the ankle. For this small scene bring two scale references so the artist knows how big the dolphin should be relative to the wave. The common mistake is making the animal too detailed for the canvas and then losing clarity after healing. This session is low pain and typically under an hour. If you want the ankle to read as part of your summer wardrobe, try strappy sandals that leave the scene visible.
Before You Book
These ankle ideas share a few practical needs, especially for single-session small pieces and designs that wrap or sit on the bone.
-
Stencil transfer paper kit. Lets you preview how the wave lines flow with the ankle curve before the needle touches skin, which helps avoid placement surprises for wrap and band styles.
-
Topical numbing cream. Applied before short ankle sessions eases sensitivity for people who tense up, and it is useful when the design crosses bone.
-
Thin protective film roll. Keeps the ankle clean from shoe and sock friction in the first 48 hours when the skin is most vulnerable.
-
Fragrance-free gentle body wash. Mild cleansing avoids irritating new linework while letting you shower normally.
-
Healing ointment. A thin layer for the first few days helps seal fine-line work without smothering the needle channels.
7. Small Wave with Realistic Shading
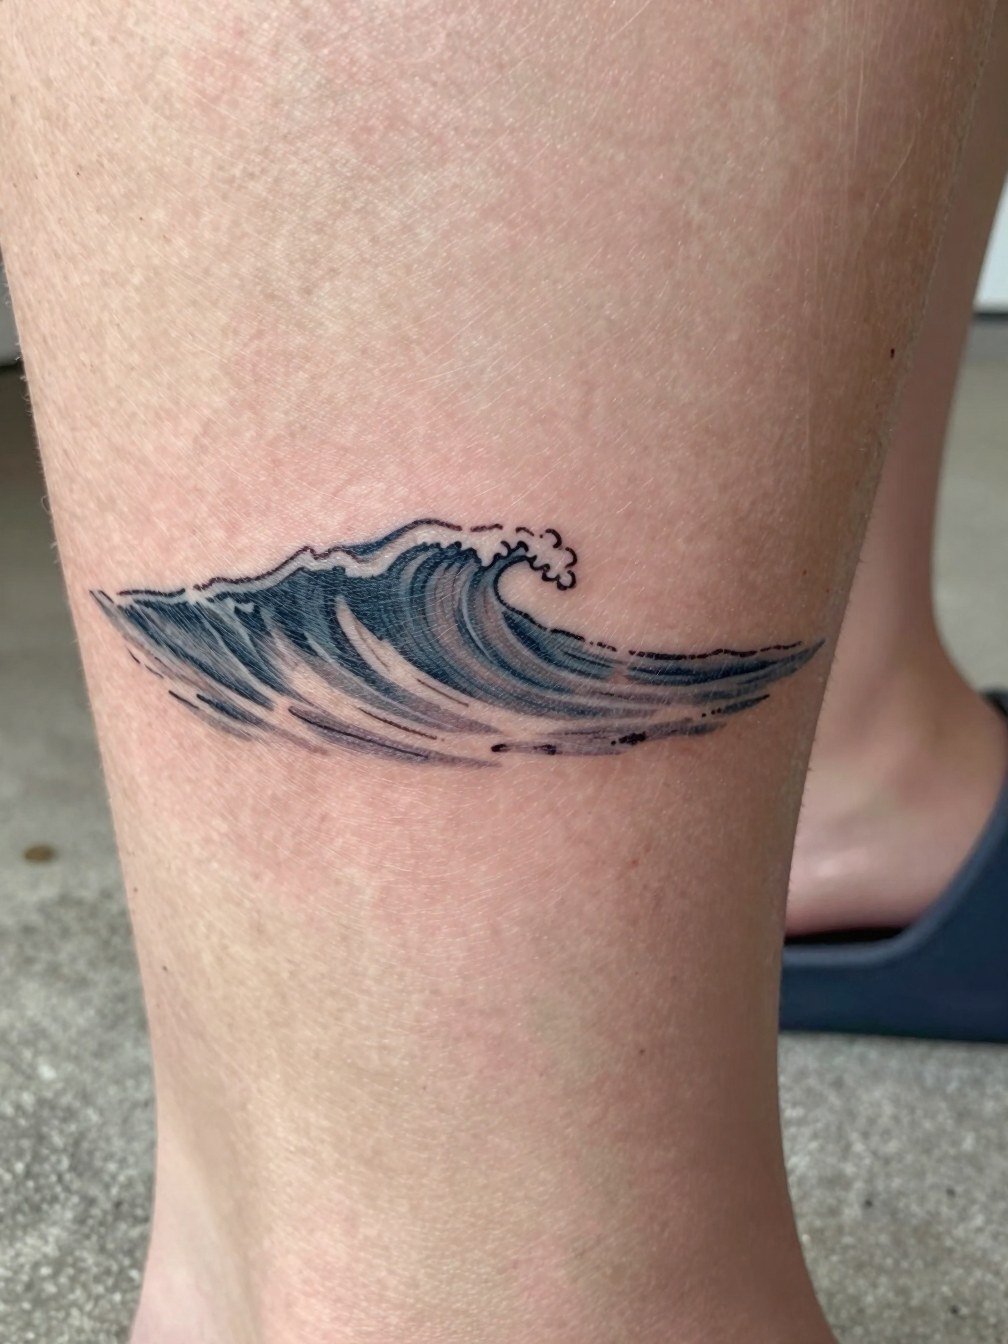
Micro-realism on the ankle reads dramatic when kept small and contrasted. Specify that you want soft tonal layers rather than dense black fills because dense work can feel heavy on a tiny canvas. A common mistake is asking for photoreal detail at too small a scale, which turns into smudged shading after healing. This style may need slightly longer session time, often 60 to 90 minutes, and a probable touch-up. For evenings out the piece looks great with slide sandals that let the texture show.
8. Japanese-Inspired Mini Wave
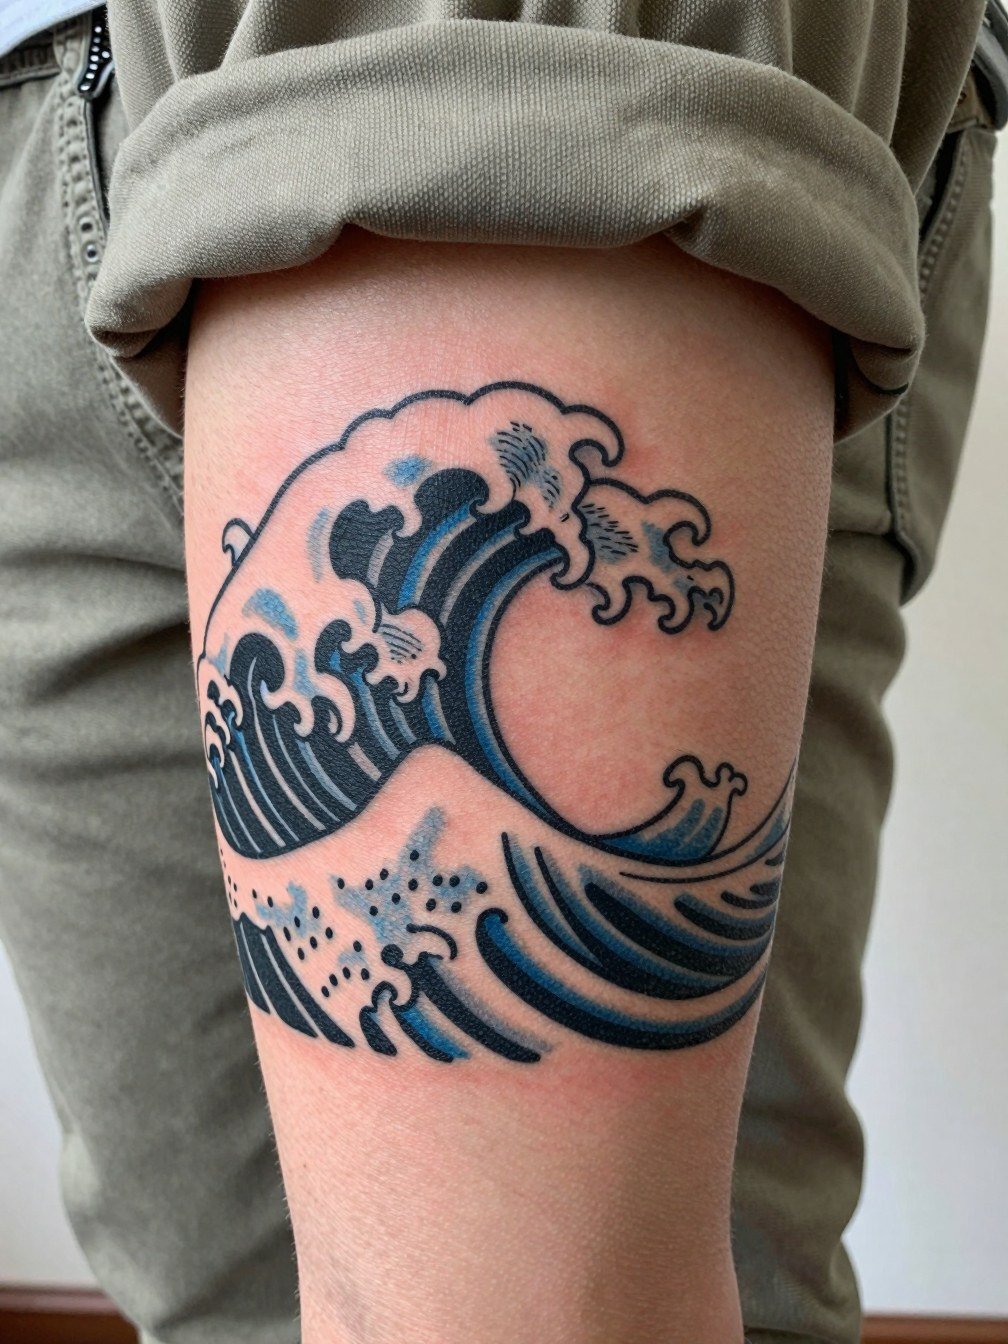
A Japanese-inspired wave brings motion with fewer lines, which helps small work retain clarity. Tell the artist you want bold black outlines and compact negative-space foam so the piece reads at a glance. A mistake is shrinking a full-scale ukiyo-e wave into a postage stamp without adjusting the line hierarchy. Expect moderate session time and low to moderate pain near the bone. The stronger contrast pairs well with thin anklet bracelets that echo the motif.
9. Bold Wave at the Foot-Ankle Line
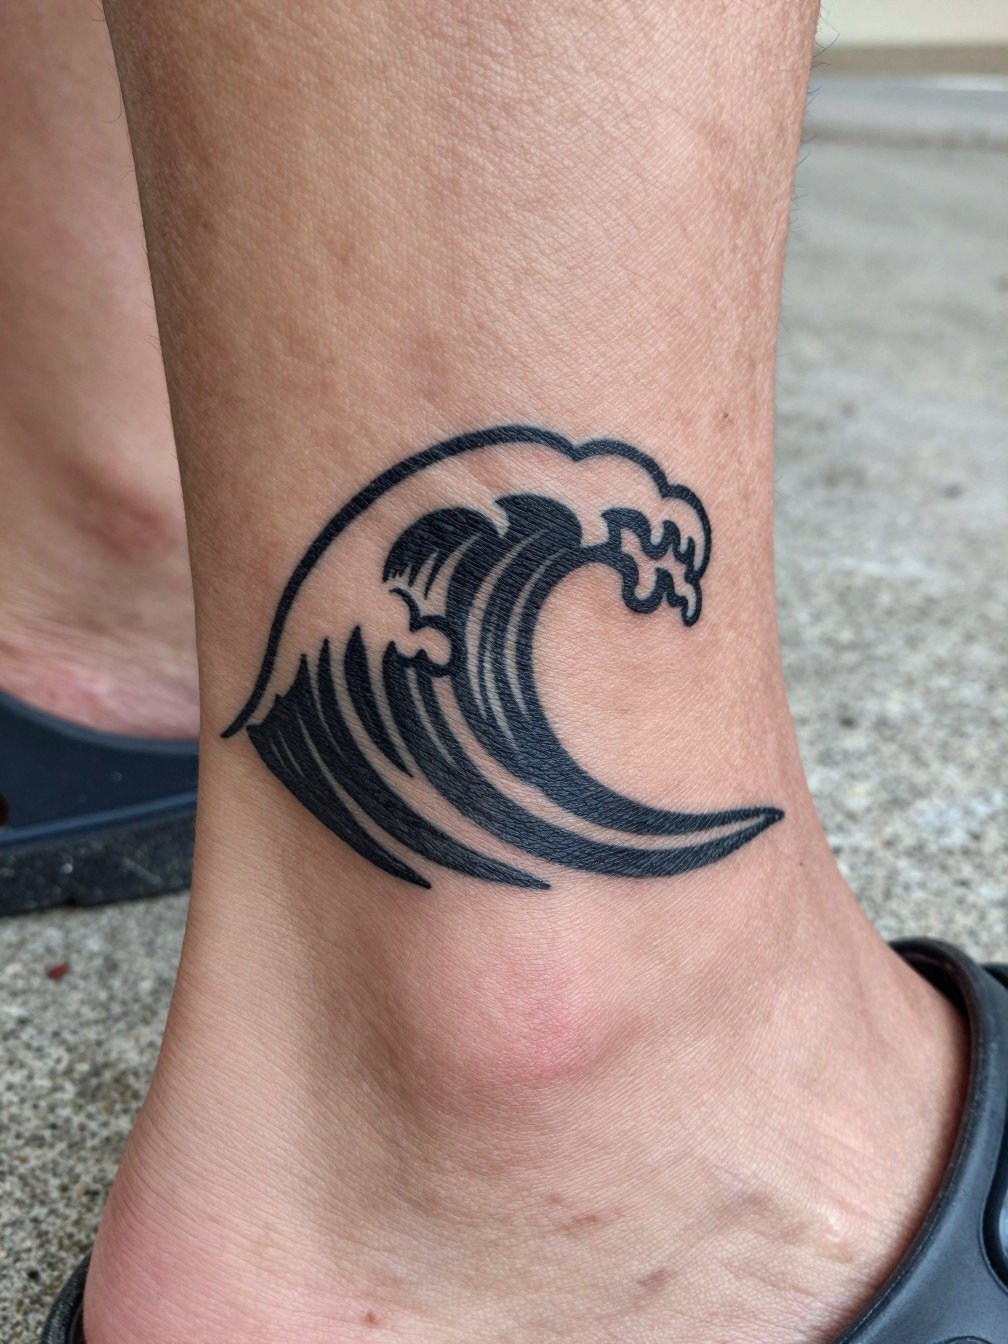
Placing bold lines near the ankle-to-foot junction reduces blowout risk by using strong contrast. One common error is using single-needle detail right on the foot where skin is thin and moves a lot. Ask for thicker contour lines and simpler interior texture so the design stays crisp. Foot placement can be more painful and may cause longer healing because of shoe contact. For the session wear easy-off shoes and bring socks for the trip home.
10. Stipple-Shaded Mini Wave
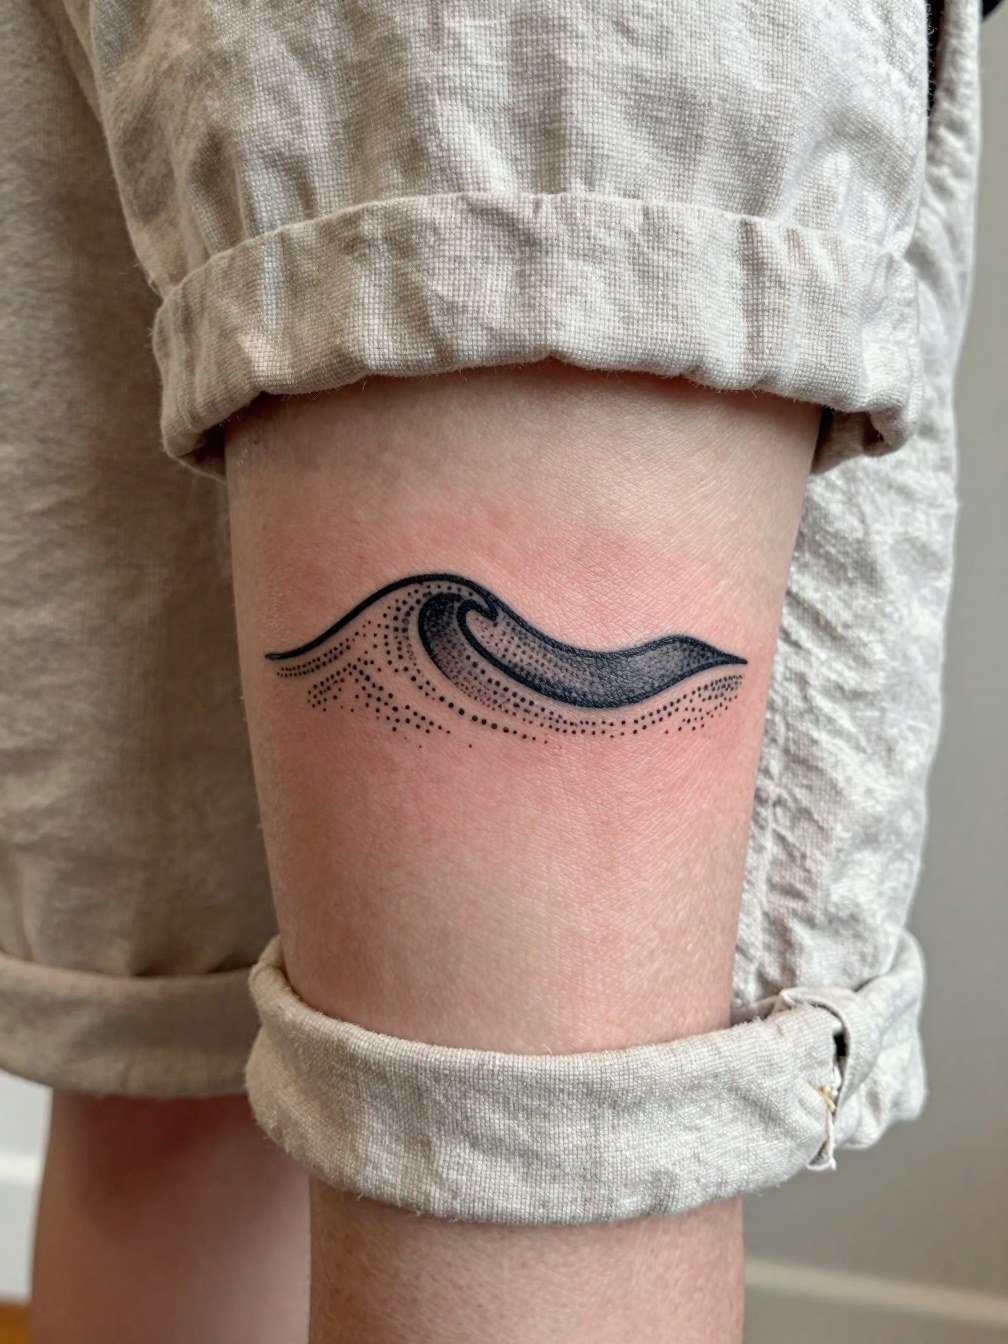
Stipple shading gives a textured water feel without heavy fills, which can age nicely if dots are spaced correctly. A mistake is packing dots too tightly for a tiny area and losing the grain after healing. During consult ask for a sample patch of stippling at the same scale to see how it reads on your skin. Expect a 45 minute session and touch-up options if dots soften. For a casual look wear thin anklet bracelets that complement the dotted texture.
11. Wave with Small Script Accent
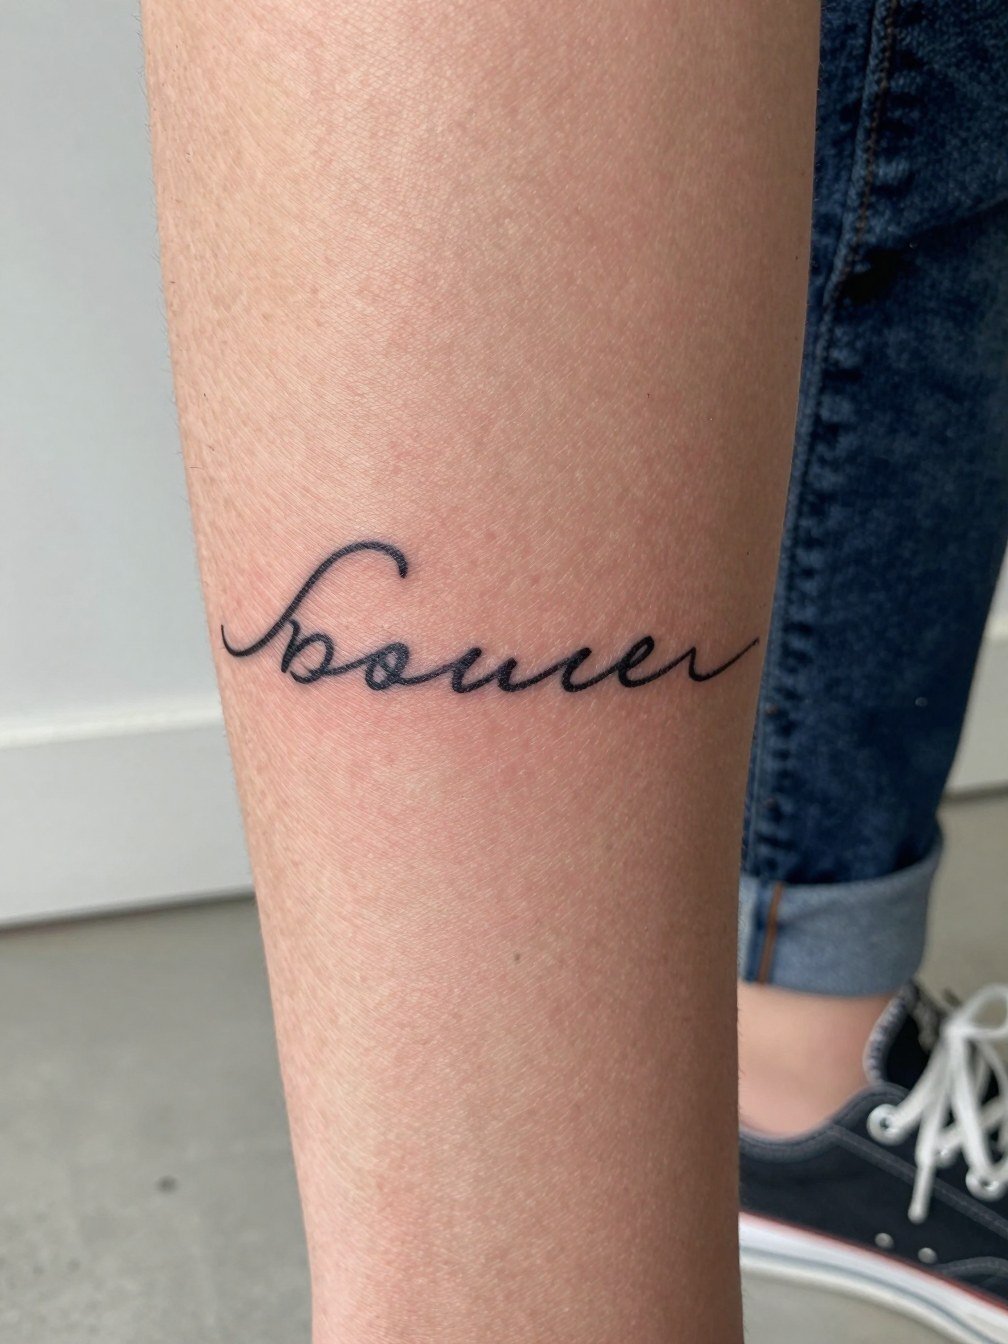
Adding a tiny script anchors the wave thematically but needs exact text sizing. Provide the exact word and font reference so the artist can scale the letters to avoid blurring. The common mistake is selecting an ornate script that loses counters when shrunk. This piece is low pain and quick to do. Pair with ankle strap sandals when you want the word visible.
12. Negative-Space Wave Outline
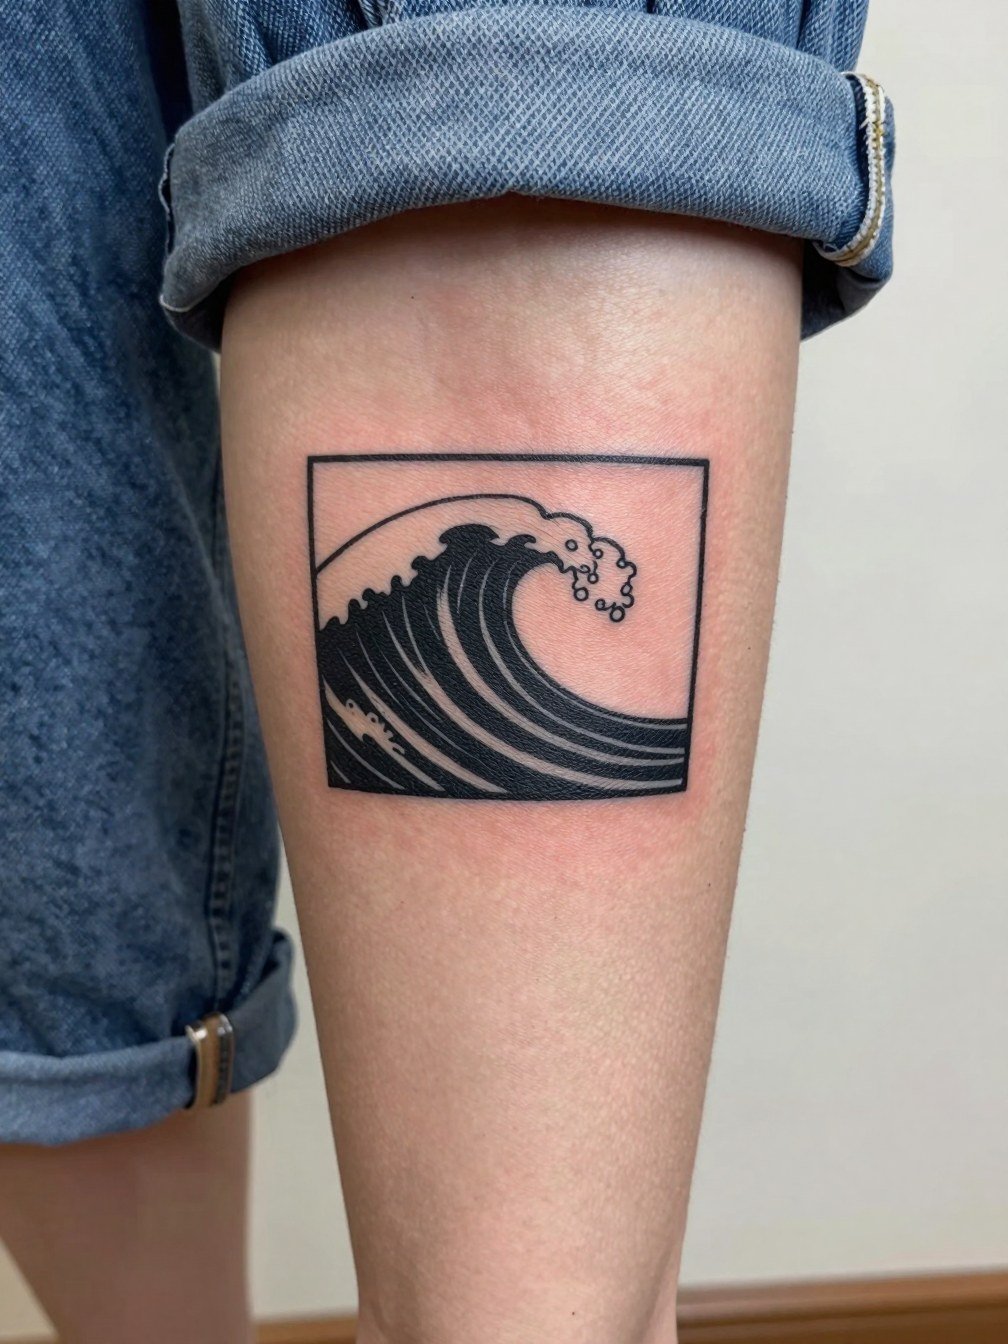
Negative space gives the illusion of detail while preserving longevity because there is less saturated ink. Tell the artist which part you want to remain skin tone so they can plan surrounding line weight. Mistakes happen when outlines are too thin to hold the negative silhouette. Expect a short session. This approach works especially well with simple summer footwear.
13. Wave with Geometric Accent
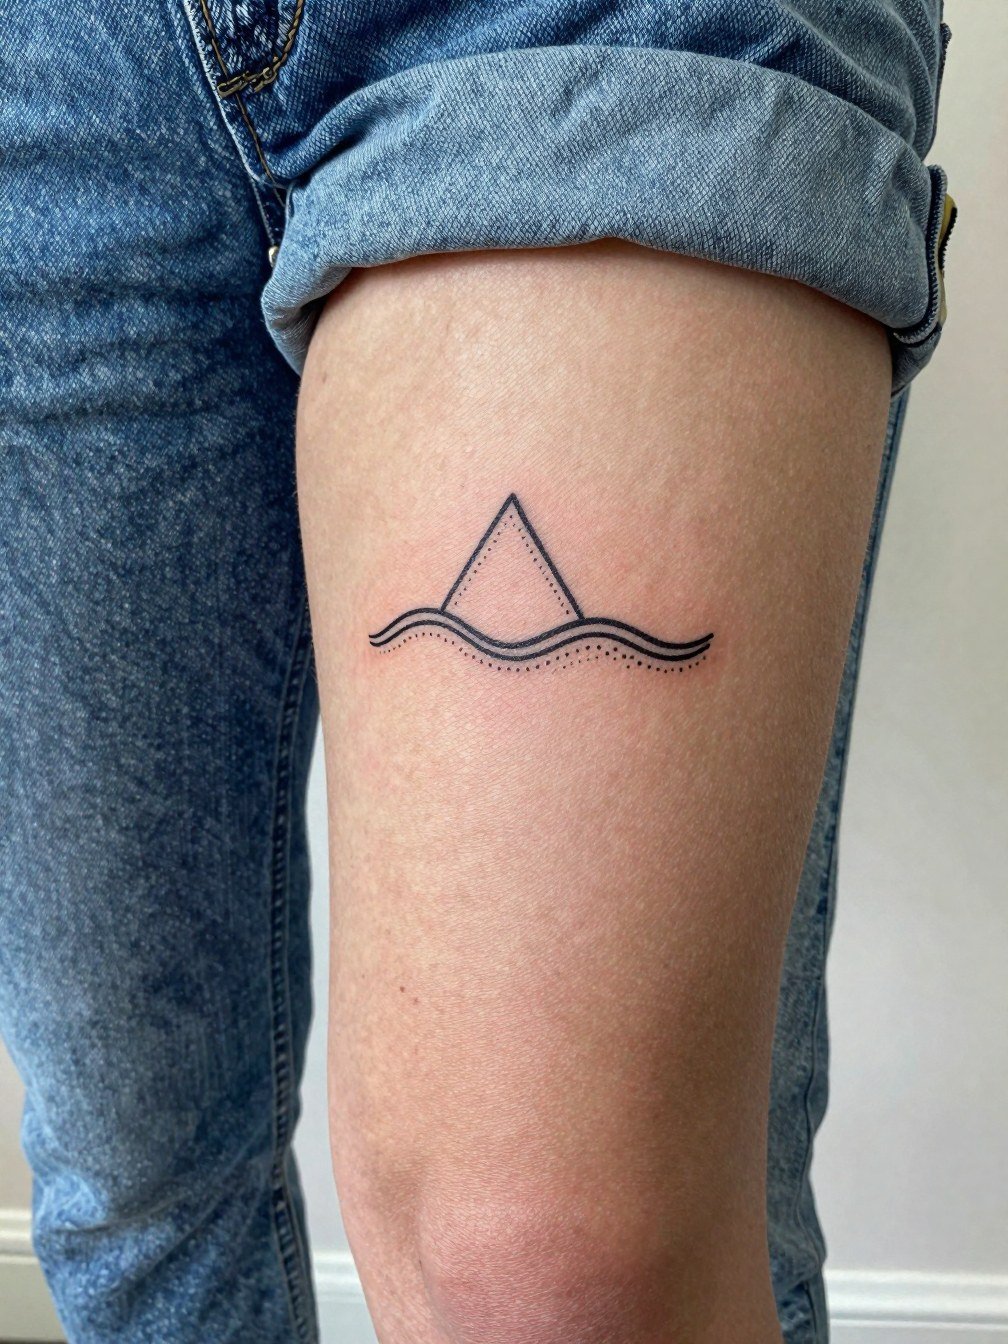
A geometric shape gives structure and helps the wave read from a distance. During consultation show a clear size comparison between the wave and the triangle so neither dominates unexpectedly. A common error is crowding the wave against the shape edge which creates visual noise after healing. Pain is low. For outfits that show off the structure try cropped straight leg jeans and low cuffs.
14. Watercolor Splash Mini Wave
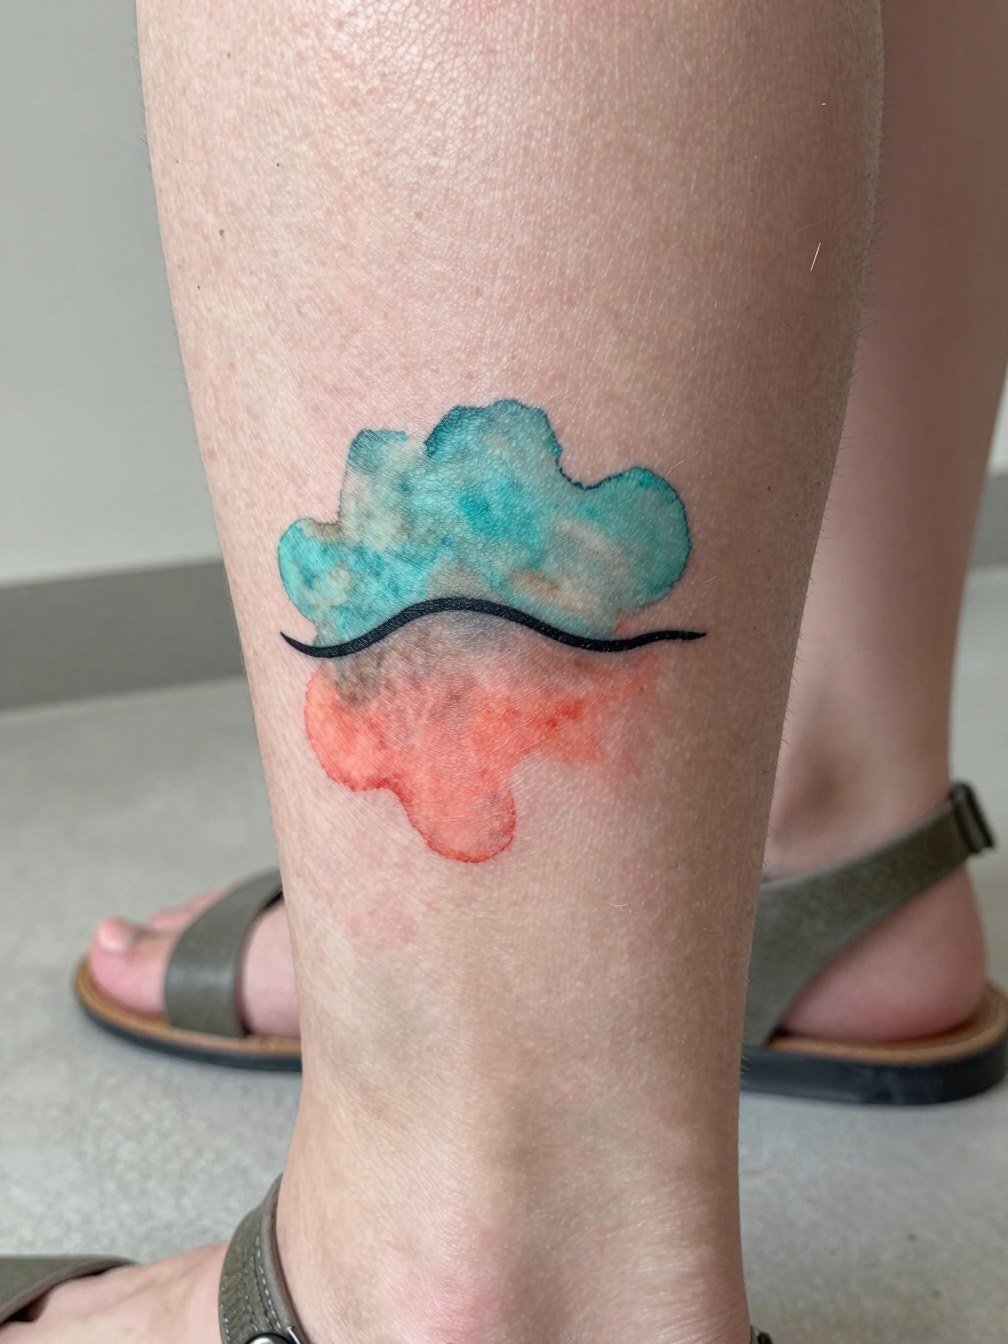
Watercolor accents add a painterly note but require honest expectations about fading. Request the artist use solid black outlines to keep the design readable as the color softens. The frequent mistake is relying solely on color to define the form. Healing may blur soft edges slightly, so plan for a color refresh after year one or two. Session time is moderate. Sandals help the palette show in photos.
15. Tiny Wave with Arrow Accent
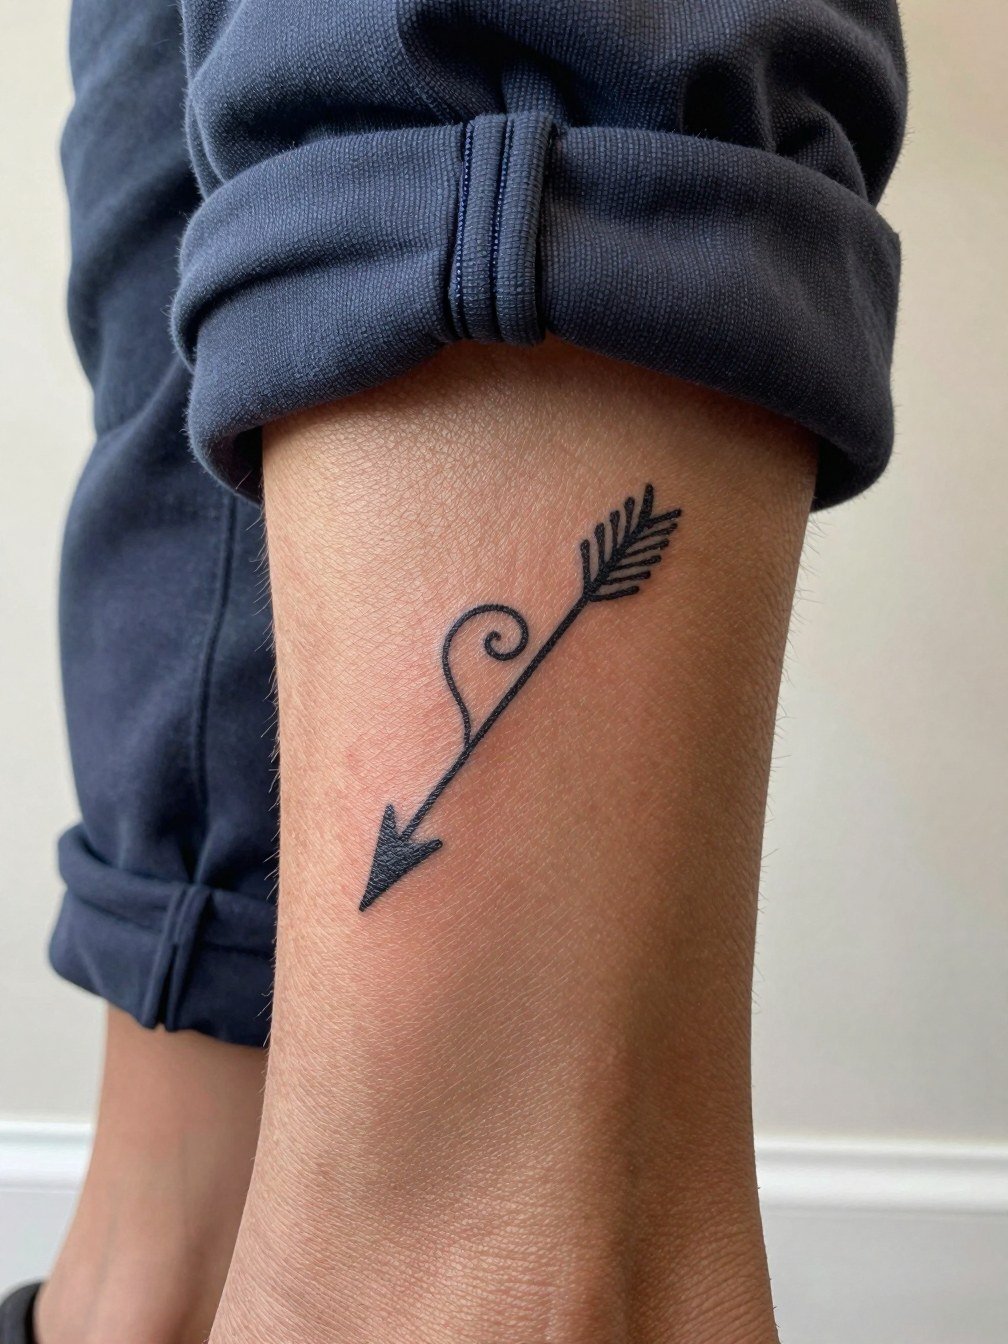
An arrow adds direction and can make the wave feel personal without words. If you want an arrow, specify shaft thickness so it does not disappear with time. A common mistake is requesting an ultra-fine arrow on bony skin. Expect low pain and a 30 to 45 minute session. For a coordinated look consider thin anklet bracelets that mirror the arrow's line.
16. Mini Wave with Moon Phase
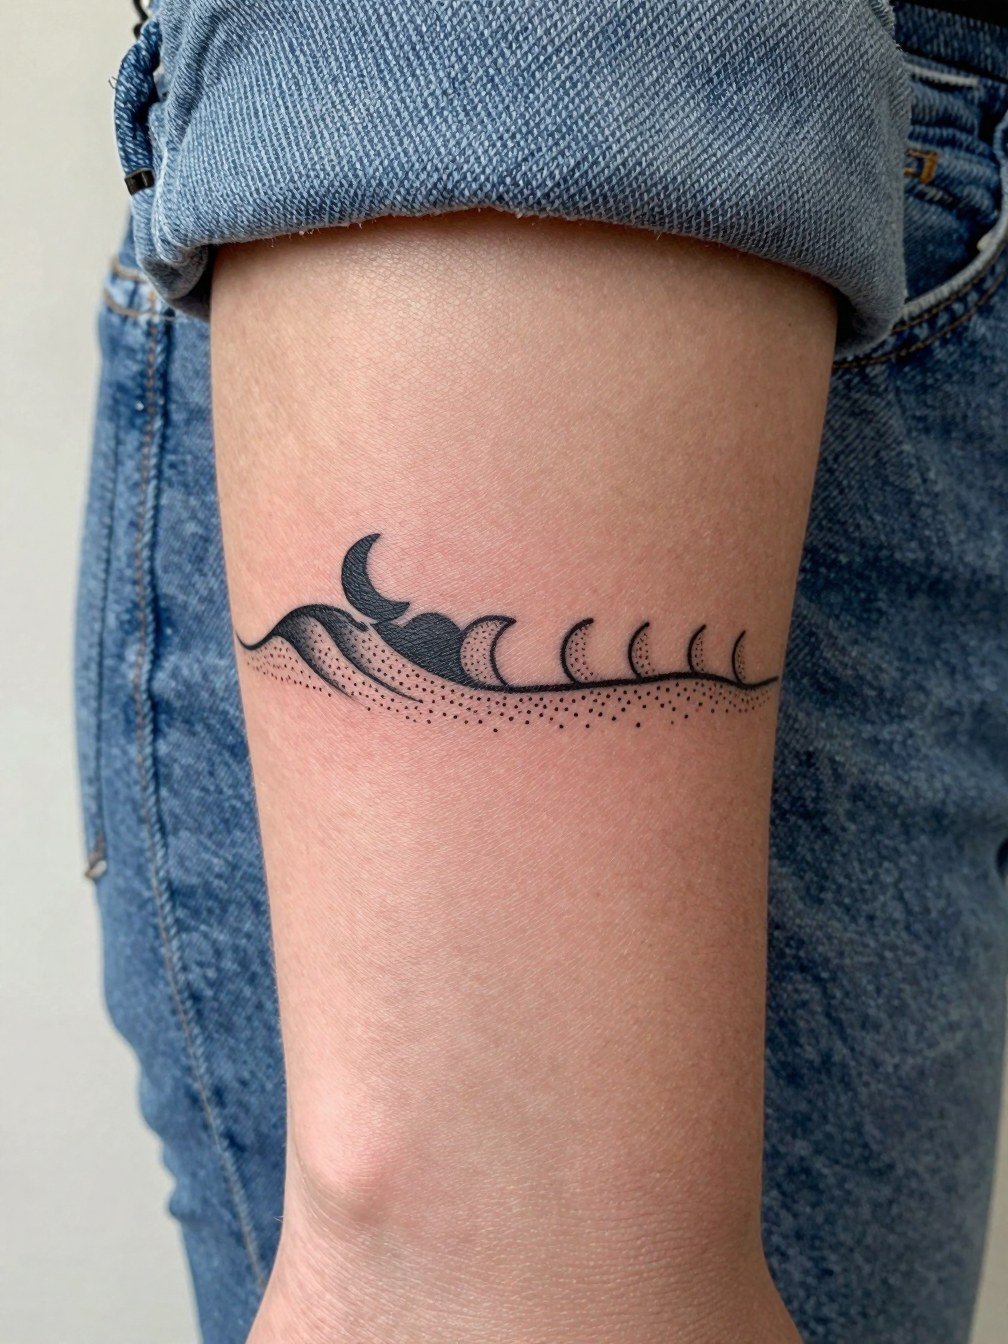
Pairing celestial icons with a wave creates a compact motif that photographs well. Ask for clear spacing between each moon to prevent the phases from merging after settling. The usual error is squeezing too many phases into a tiny band. Session time is short and pain low. Wear ankle strap sandals to display the motif.
17. Double Wave Stack
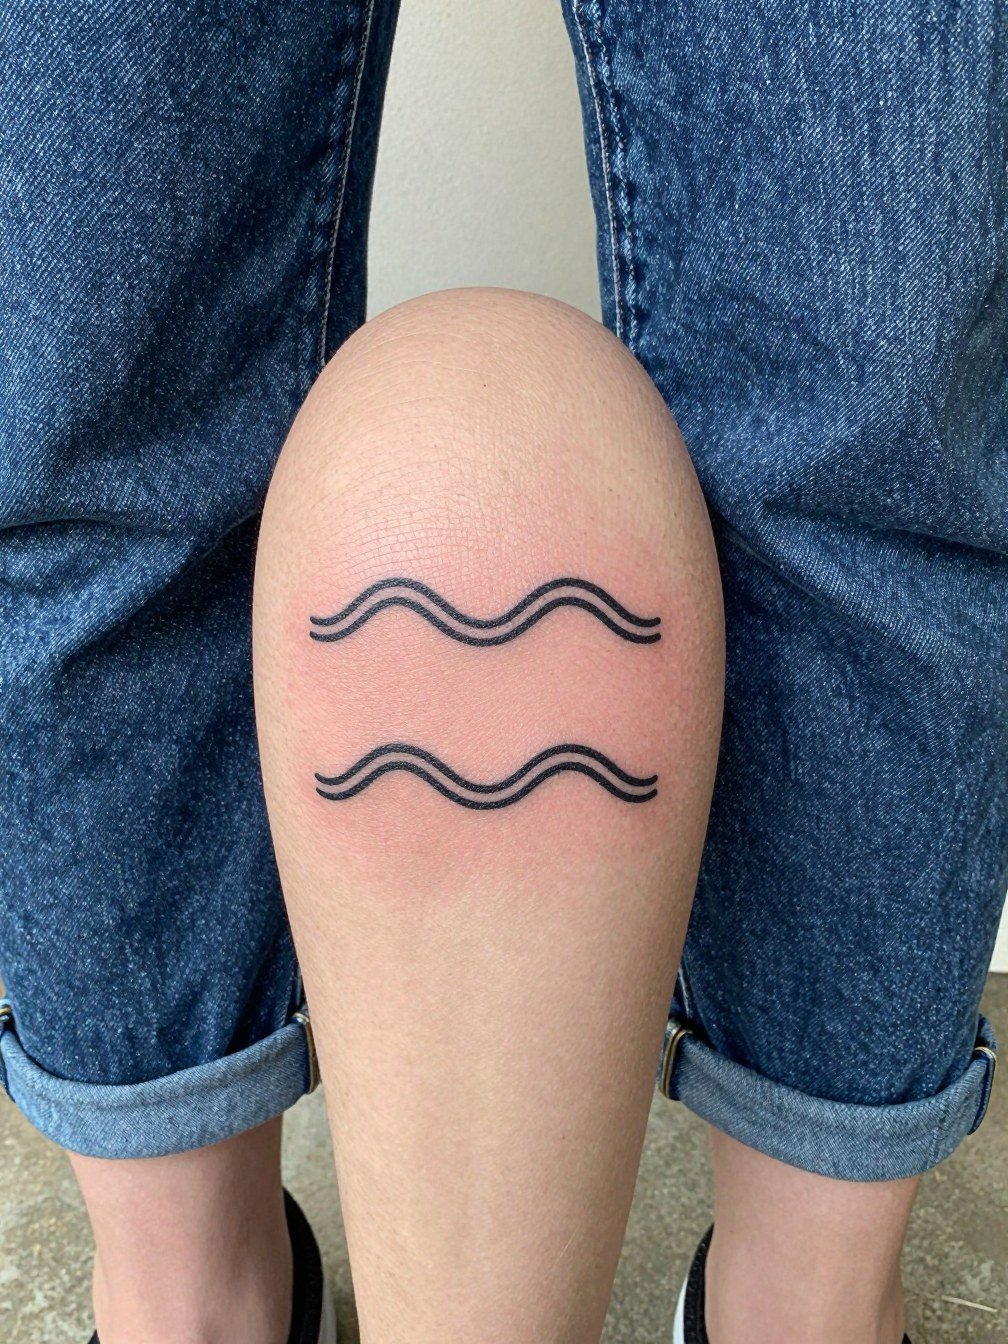
A stacked pair reads as a design system rather than a single icon, which helps when one line softens a little. Tell the artist you want consistent spacing so the pair ages uniformly. People often request stacked waves without considering how shoes will rub the lower line. Expect a short appointment and low pain. For showing the rhythm try cropped straight leg jeans with low cuffs.
18. Minimal Wave with Tiny Anchor
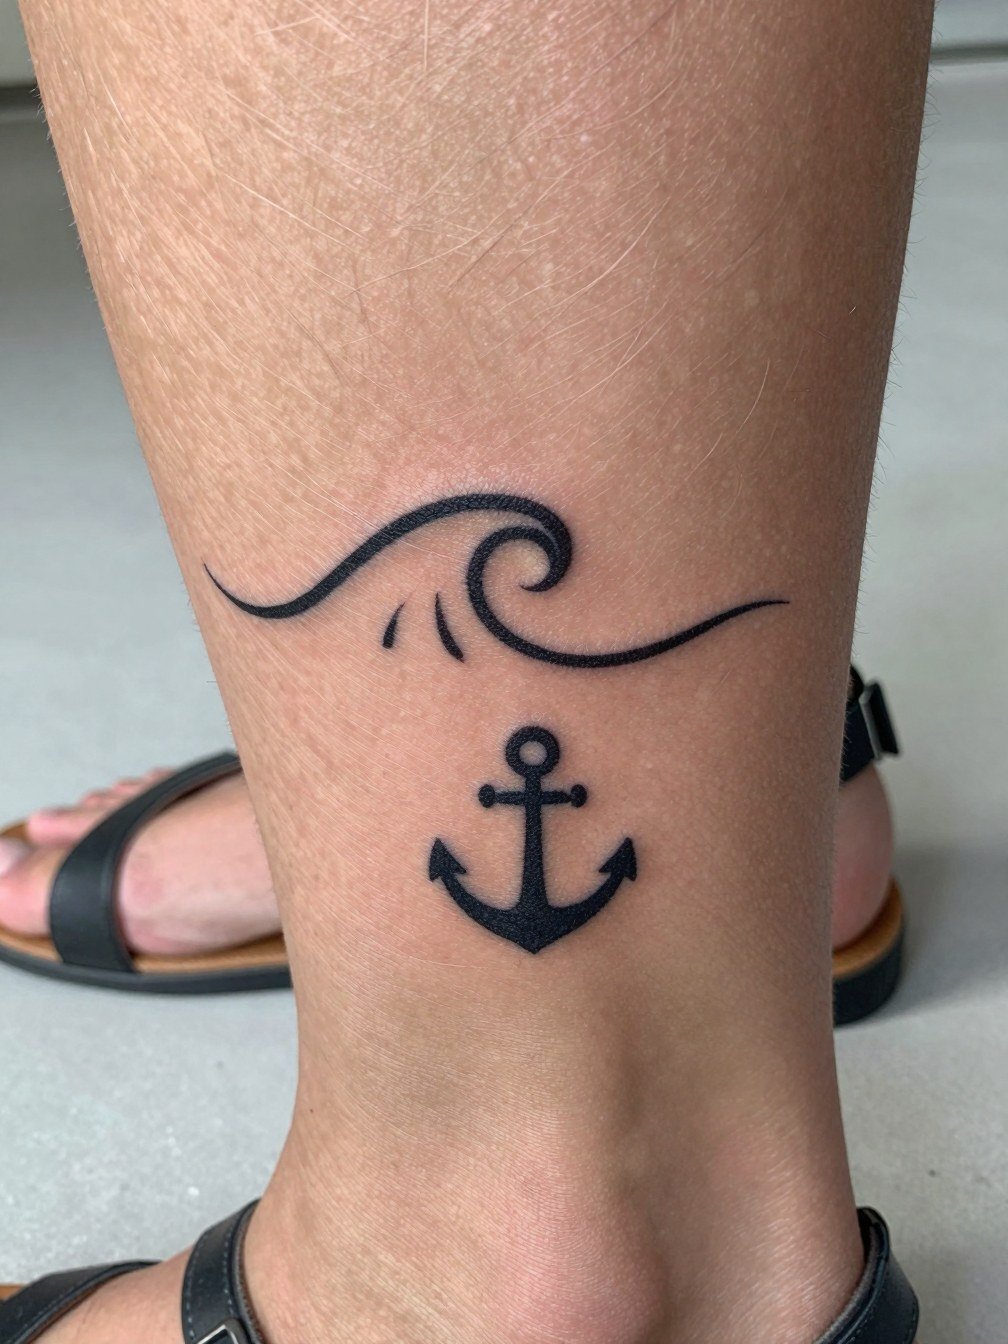
Anchors pair well with waves but need scale discipline. Ask the artist to draw the anchor at a size where the shank and flukes remain distinct after healing. A mistake is using ornate anchor details that smudge into a blob. This design is low pain and quick. For outings choose strappy flat sandals that let the small emblem show.
19. Halftone Wave Band
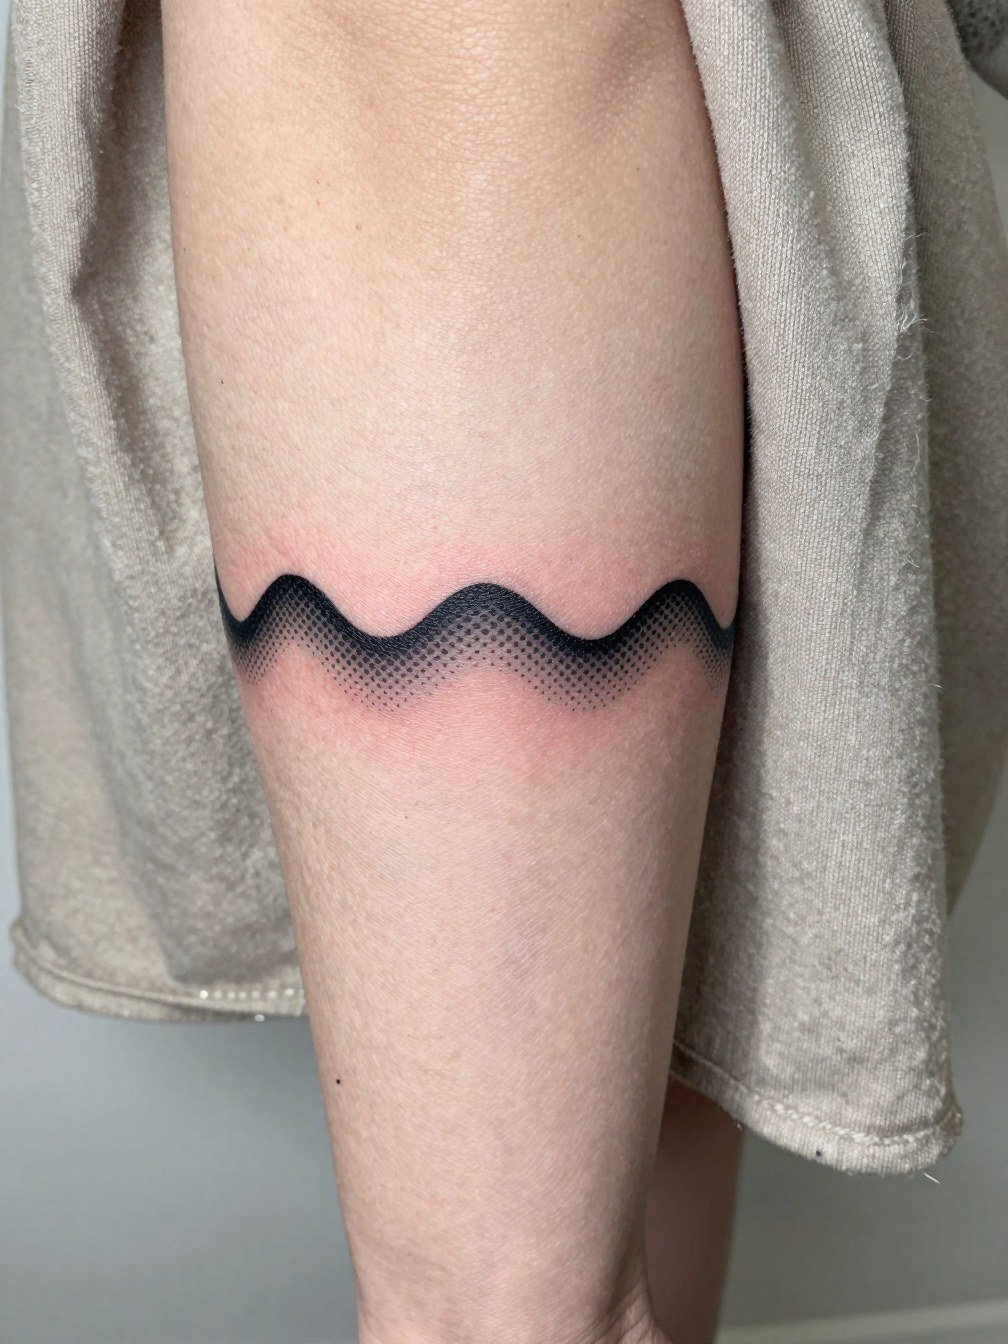
Halftone bands give a modern texture that reads as a subtle cuff. Specify dot size and spacing so the artist avoids overly tight gradients that soften. A common mistake is expecting high-resolution gradients at ankle scale. Session time is moderate. For outfits that highlight the band wear skirts or dresses that reveal the ankle.
20. Thin Black Wave with Metallic Accent Look
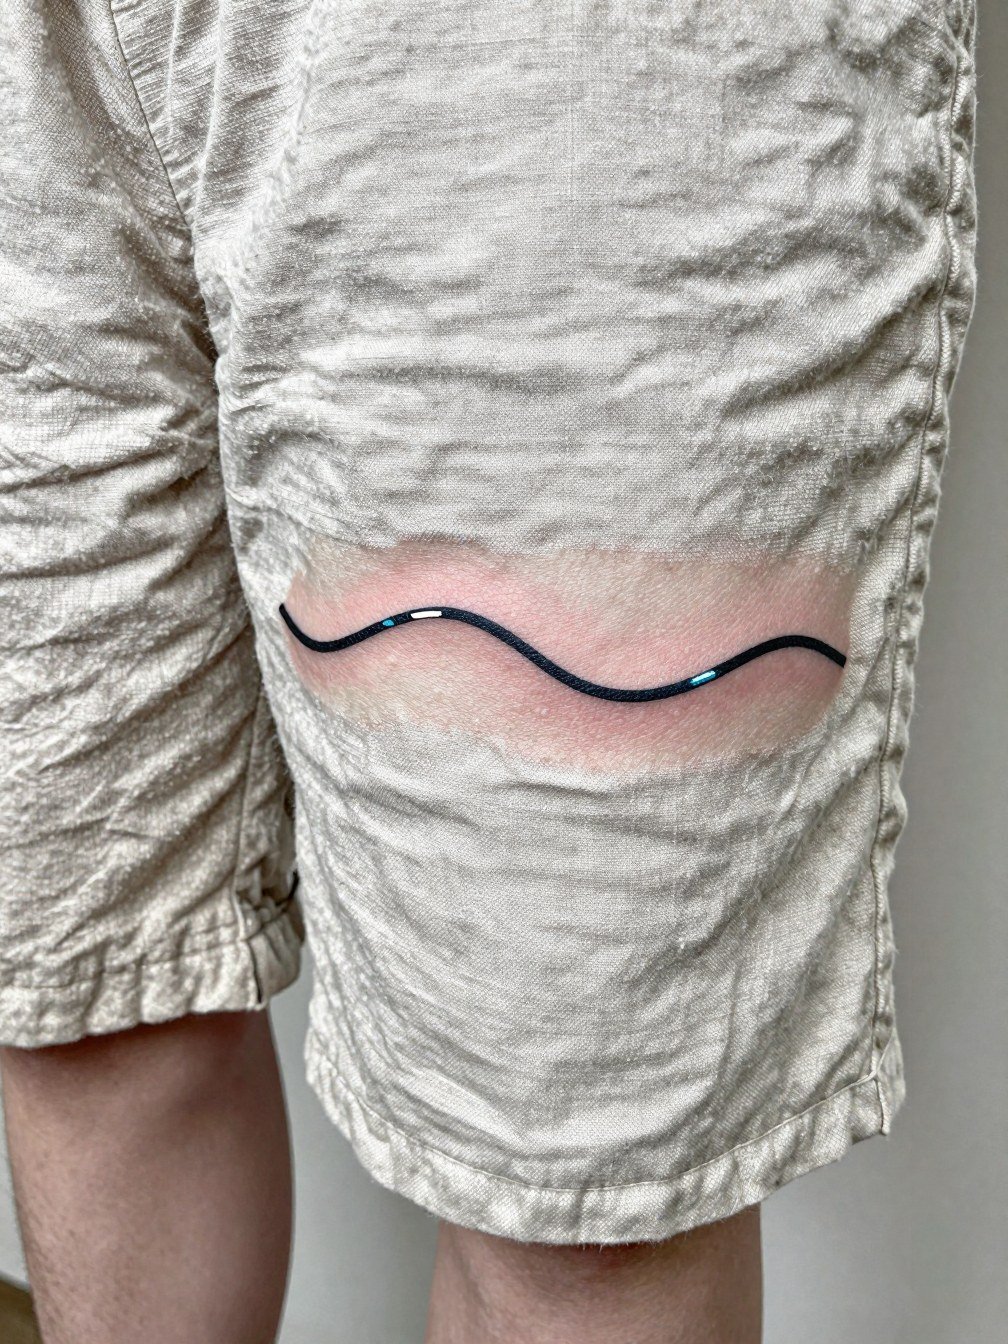
White highlights can suggest metallic shimmer but white pigment behaves differently across skin tones. One camp prefers adding white for a pop that photographs well. Another camp warns that white often fades faster and may appear slightly yellow over time. Request a small test area or a sample healed photo from the artist on similar skin tones. Expect a touch-up sooner with white, likely within a year. For showing the sheen wear ankle strap sandals.
21. Single-Contour Wave with Space for Future Add-Ons
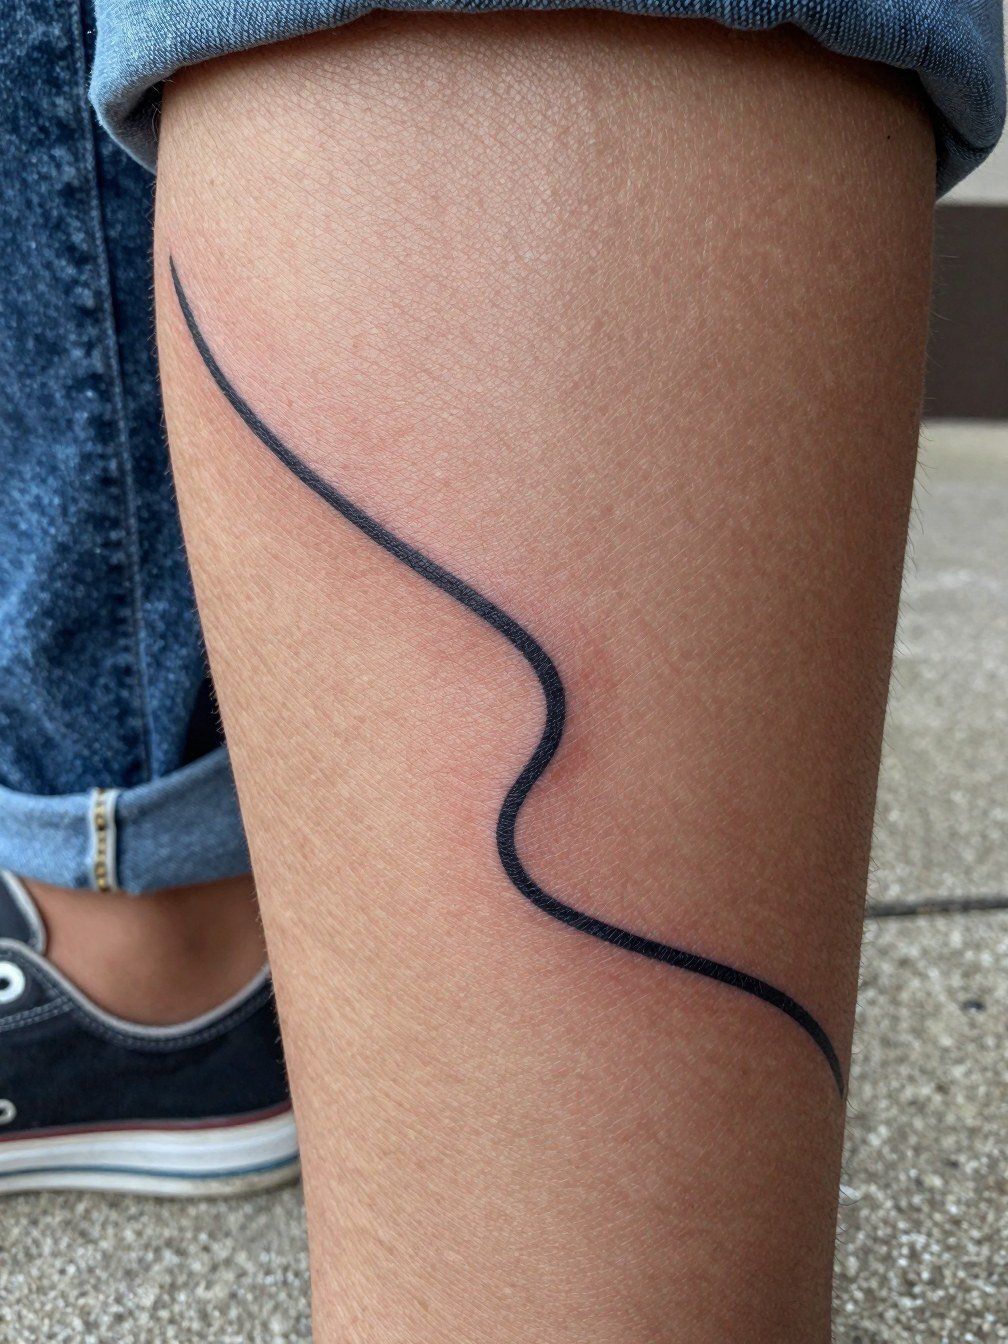
Leaving room around a tiny ankle wave is a smart choice if you want to add elements later. Tell the artist you plan for one or two future accents so they can orient line direction and spacing now. The mistake is squeezing everything into a tiny initial piece and losing options. Session time is short and pain low. For day-of comfort wear roomy ankle socks and loose pants to the shop.
Frequently Asked Questions
Q: How much does a wave tattoo on the ankle usually cost?
A: Expect studio minimums to matter more than the design size. Many shops have a minimum fee that covers supplies and chair time, so a very small ankle wave might still land in the fifty to eighty dollar range at minimum. More complex or colored pieces are priced by the hour, and realistic shading or color layering can increase session time.
Q: Will a tiny ankle wave blur or need touch-ups?
A: Small ankle tattoos can blur faster on bony, high-motion spots if the linework is too thin or too close together. One group of artists recommends keeping line weight a hair heavier and spacing elements out. Another group believes careful single-needle work with correct depth will settle fine. Plan for a touch-up around the one-year mark for tiny pieces, and request healed photos from the artist that show similar scale.
Q: Should I pick black ink or color for an ankle wave?
A: Black holds contrast and tends to be easier to keep sharp at a small scale. Color can make the wave feel lively and photo-ready, but it usually needs more maintenance and careful sun protection. If you want color, ask the artist about pigment layering and how they balance contrast so the form remains clear as the color softens.
Q: Where can I find portfolios and healed examples for wave tattoos on the ankle?
A: Search hashtags like #wavetattoo and #ankletattoo on Instagram and TikTok and use location filters to find nearby artists. Look for portfolio posts that include "healed" in the caption or show multiple stages of healing. Tattoo forums and Reddit threads are useful for finding real-healed photos and first-hand accounts of how ankle pieces aged on different skin tones.
Q: What should I wear to my appointment for an ankle tattoo?
A: Wear loose pants that roll above the ankle or shorts so the artist has clear access, and bring easy-off shoes for the trip home. For example, cropped straight-leg jeans or loose joggers let you roll the hem without pressure on the fresh tattoo. Comfortable clothing reduces the chance of rubbing the area immediately after the session.