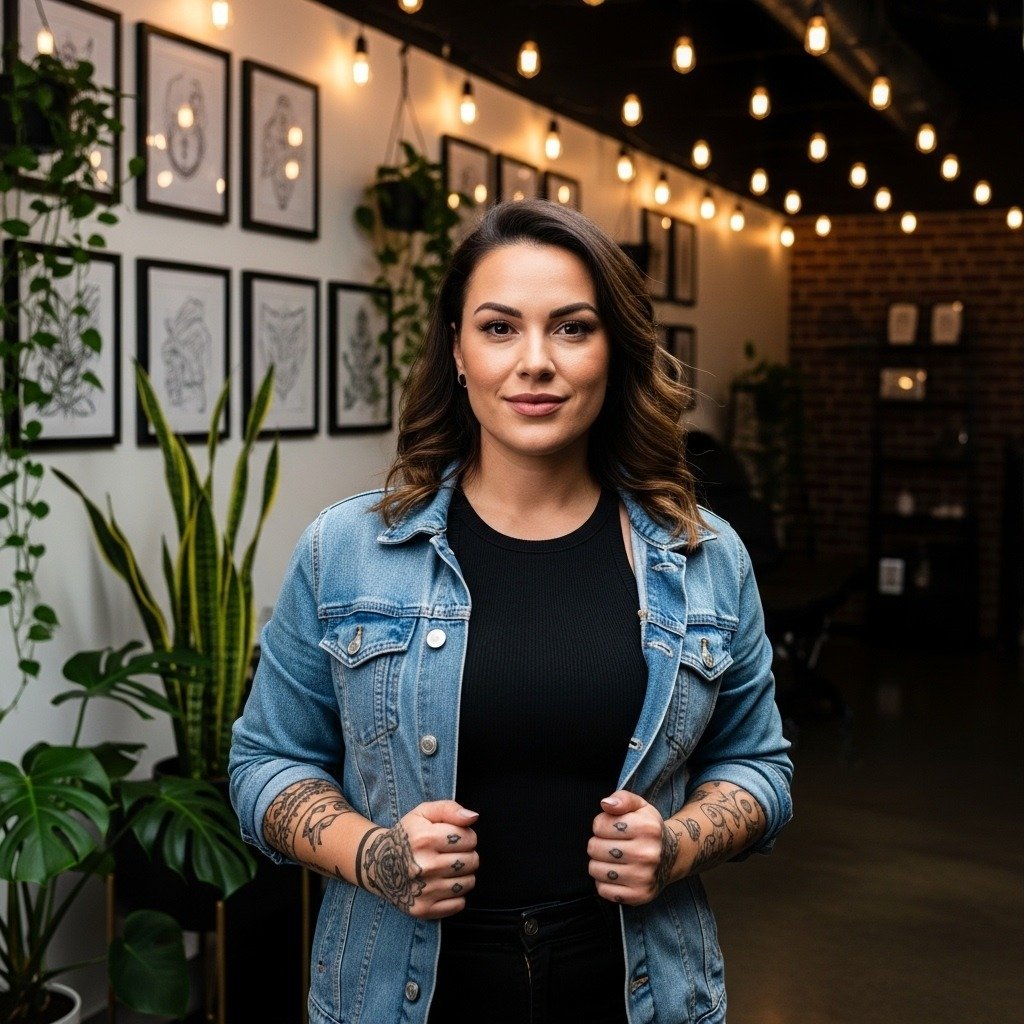
The smallest sun-and-wave pieces that still read crisp at year five are not always the wispy single-needle stencils people pin. One camp argues that bold, saturated suns and defined wave linework age into readable pieces that still read across a room. The other camp says fine single-needle work can last when artists use slightly heavier line weight and leave room for the lines to breathe, and the ideas below lean into both approaches depending on placement.
1. Minimalist Rising Sun on Inner Wrist
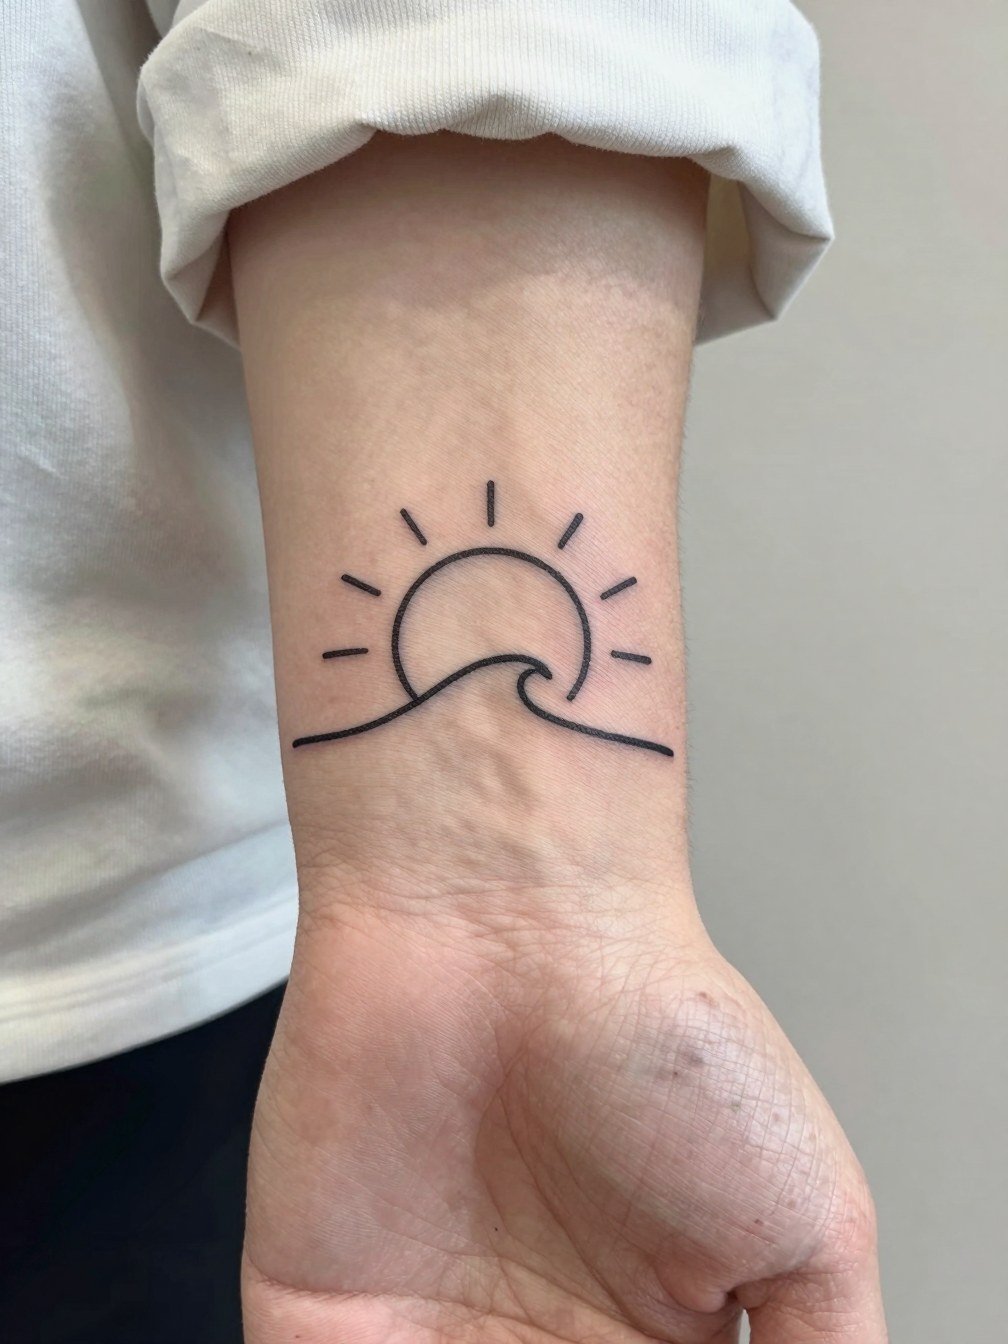
A tiny sun-and-wave on the inner wrist reads as a personal symbol and wears well if you plan for touch-ups. Choose slightly heavier single-needle line weight than your Pinterest reference so the rays keep definition after the first year. Common mistake is asking for hairline rays that vanish into surrounding texture, especially on fair but thin-skinned wrists. Expect a 30 to 60 minute session. The wrist sees constant hand washing and friction, so plan a touch-up at 12 to 18 months for single-needle work. For the appointment, wear a loose button-down or a long-sleeve shirt you can roll up so the area is fully accessible without stretching.
2. Tiny Yellow Sun and Blue Wave on Ankle
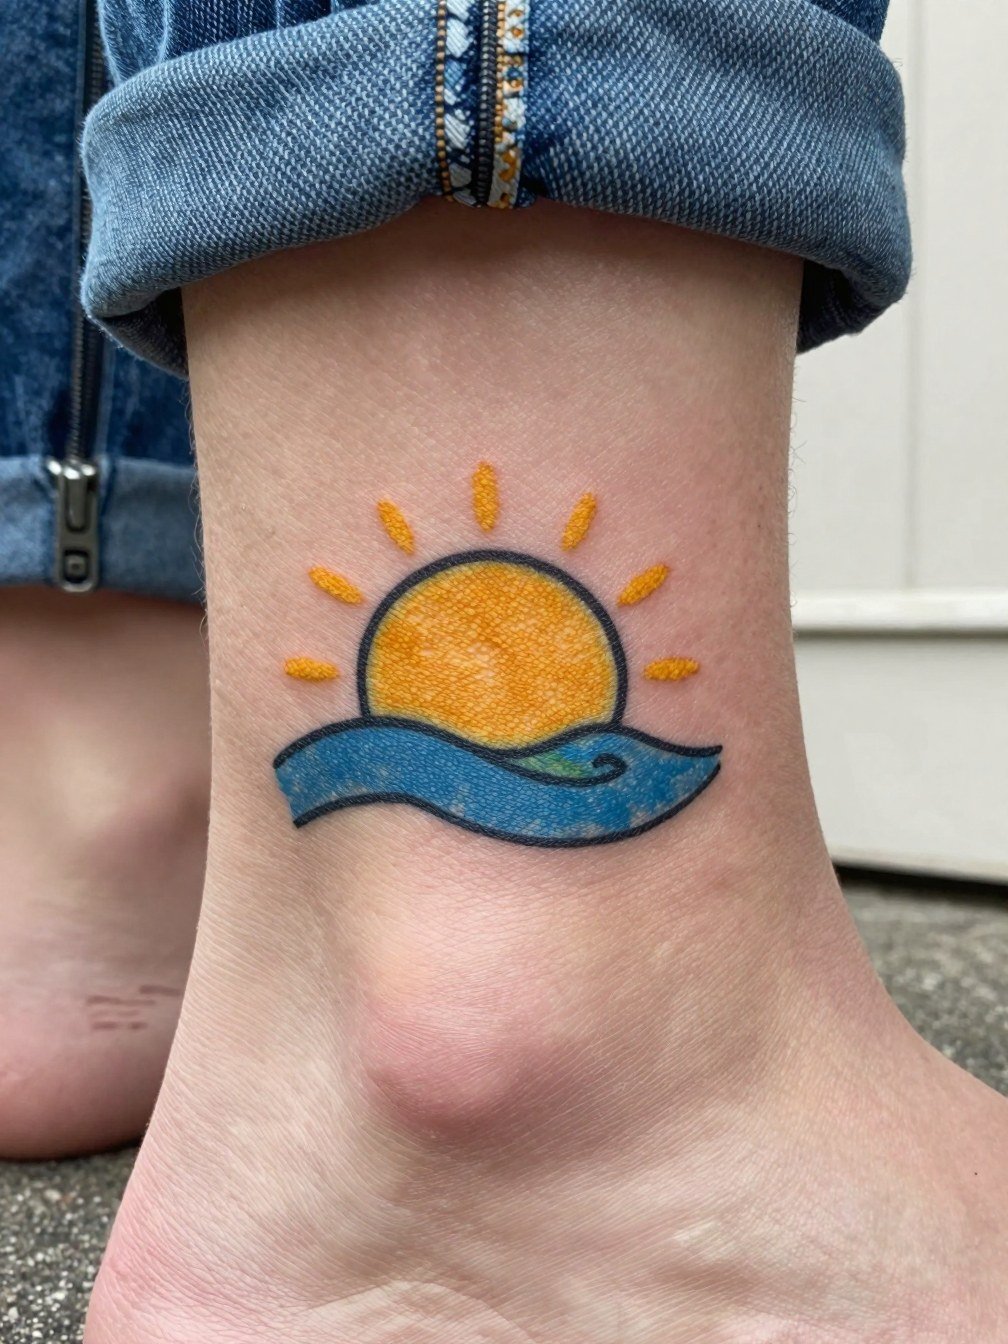
An ankle placement suits a sunny, summery color combo that can peek out over sandals. This small scale benefits from a slightly bolder outline than you might expect to prevent early fading from shoe friction and socks. The common aging issue is color fallout near the edge where shoes rub, so ask for dense but thin color packing rather than scattered wash. Session time is often under an hour. For showing it off, pair with low-rise cuffed jeans or strappy sandals. If you plan heavy winter boots, expect more frequent touch-ups.
3. Neo-Traditional Sun Over Crest on Shoulder Blade
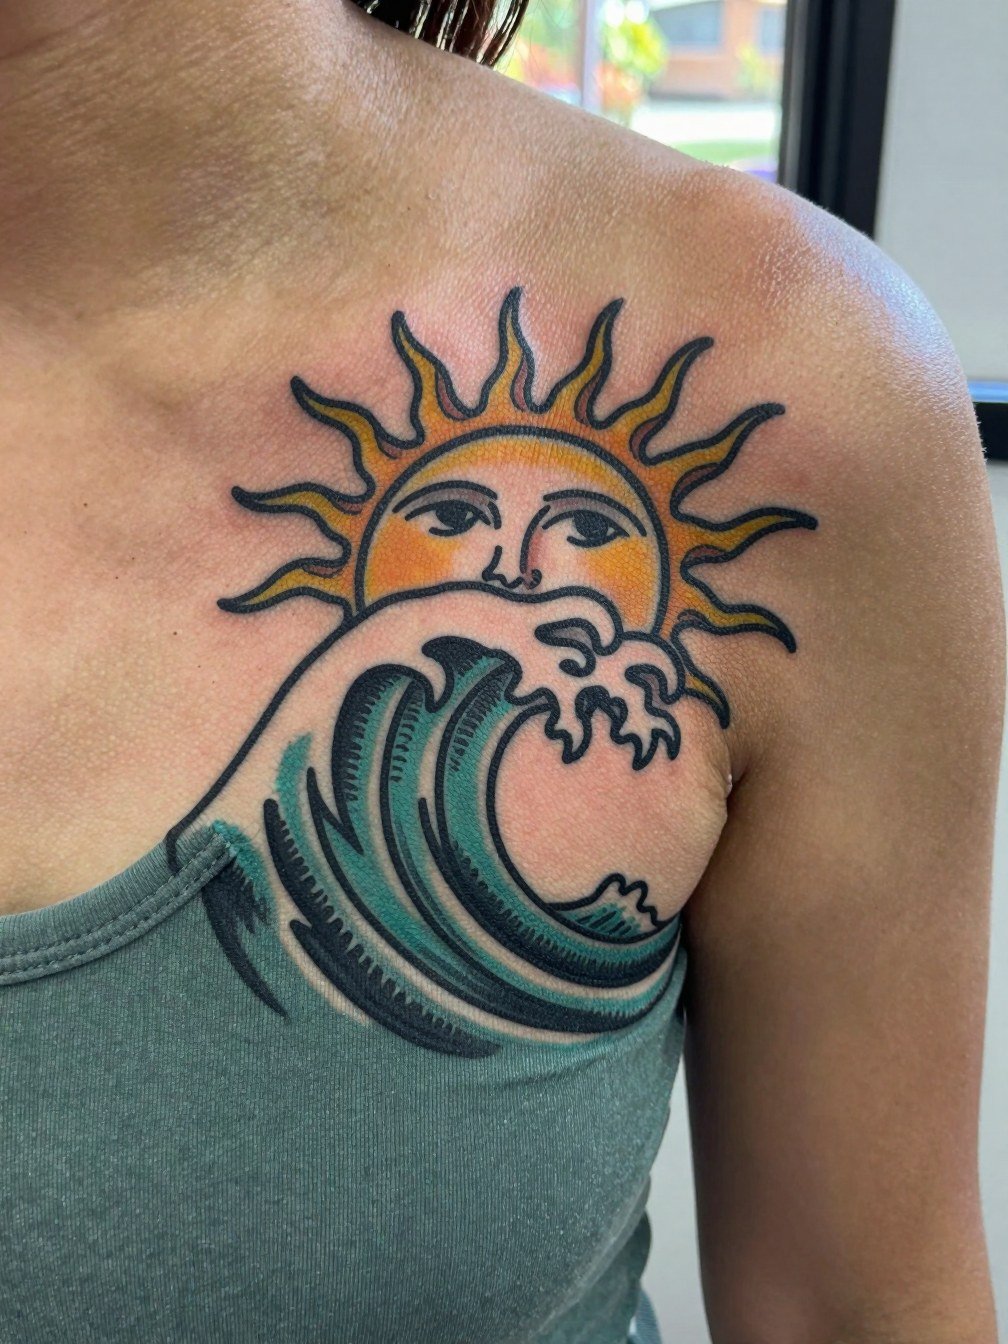
Large neo-traditional pieces on the shoulder blade make the sun and wave motif read like a statement. This is a good choice if you want strong saturation and bold linework that will maintain contrast as skin ages. Discuss with the artist where highlights will sit so the sun’s face keeps its character rather than looking flat after a few years. A two- to three-hour session is common. Shoulder blades move with the scapula so plan shading that follows the curve to avoid patchy healed tone. For evenings out, this placement pairs well with open-back tops that frame the piece.
4. Fine Line Sun and Wave on Ribcage
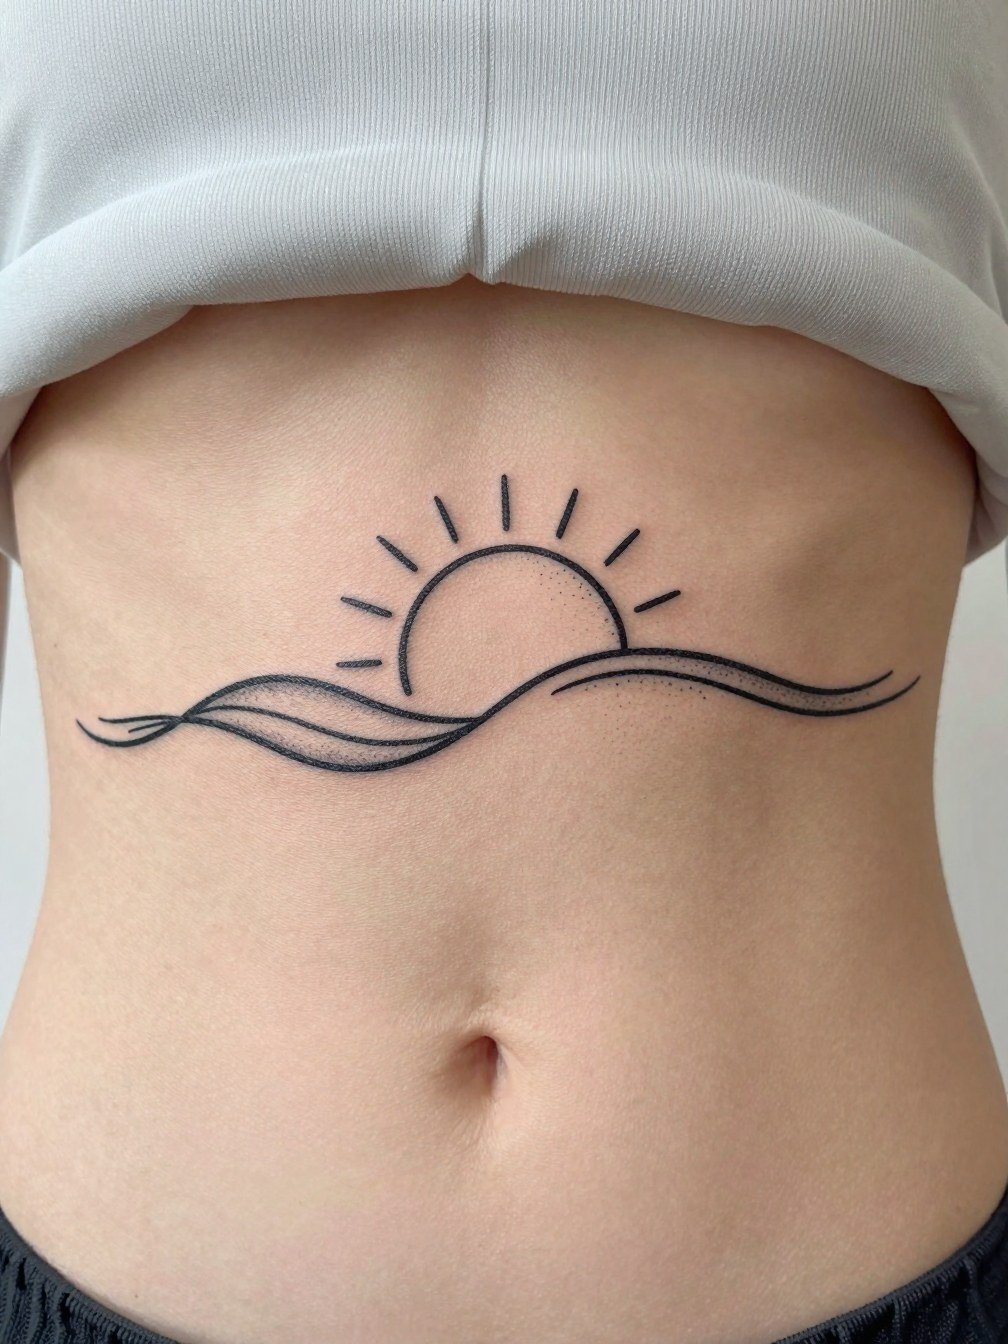
Fine-line ribs are a classic choice for intimate sun-and-wave pieces, but artists are divided on whether this holds up. One camp argues ribs stretch and blur fine single-needle lines within two years, especially under movement. The other camp says with slightly heavier depth and wider spacing the lines can stay crisp, and they will show healed references to back up that claim. If you prefer delicate work, plan for a longer session and budget a touch-up around year two. Rib sessions are sensitive and often need breaks, so wear a comfortable sports bra that gives full access without shifting.
5. Watercolor Sunburst and Soft Wave on Thigh
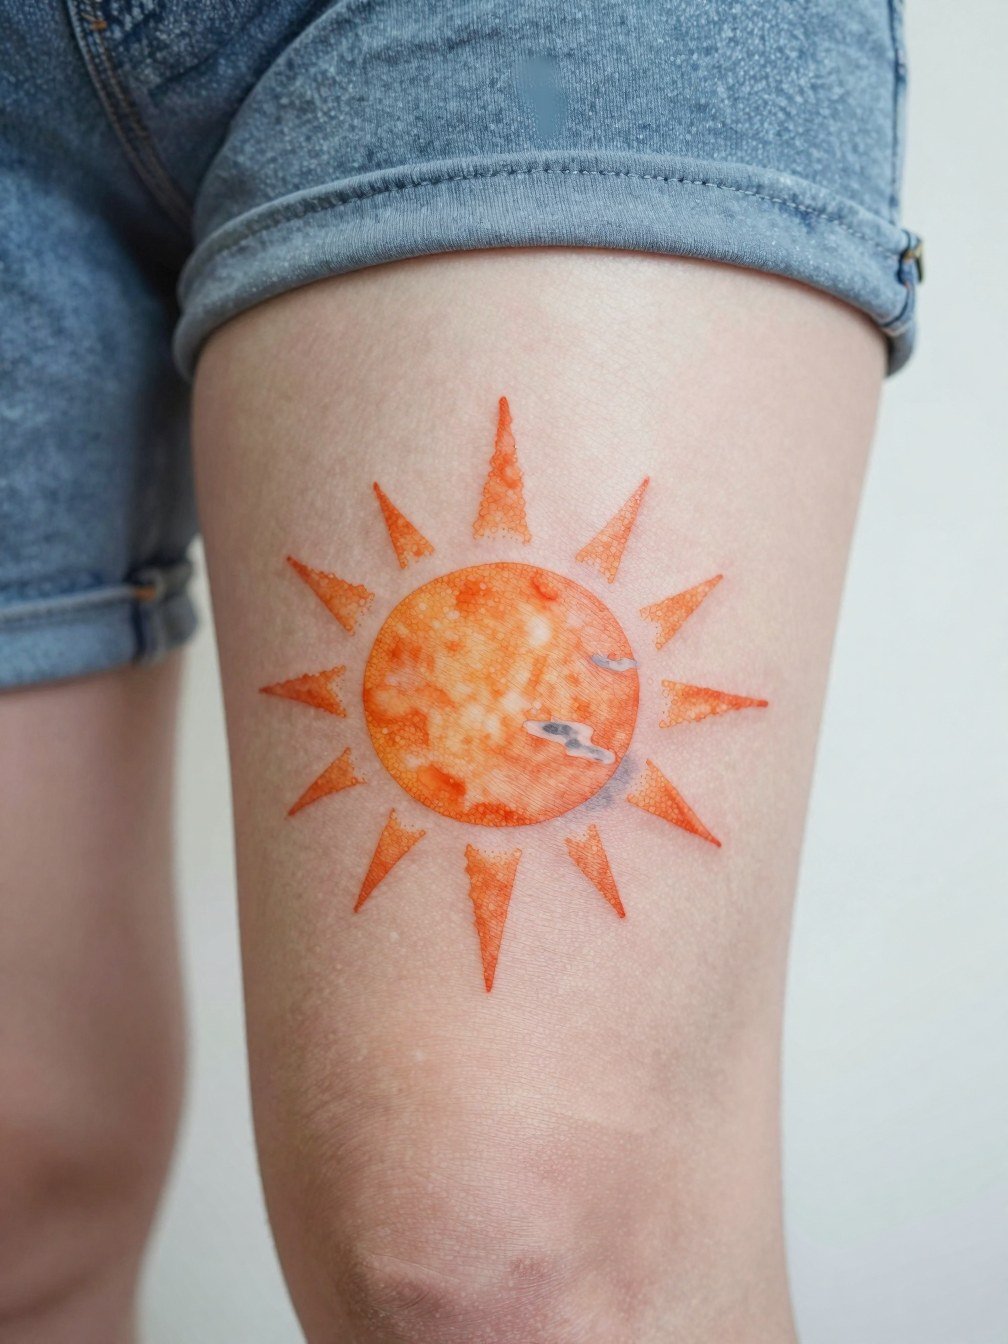
Thigh pieces let watercolor techniques breathe, creating a sun that feels like spill and waves that feel like motion. Watercolor ages differently from solid fills, often softening into gentle halos rather than clean lines. The mistake people make is asking for extreme bleed at small sizes, which can look muddy after healing. Expect a 90 to 180 minute session depending on color layers. For the appointment, wear bike shorts or loose shorts so the artist can work without fabric pressure. Touch-ups may be needed sooner for watercolor than for bold color fills.
6. Tiny Black Sun and Wave Behind the Ear
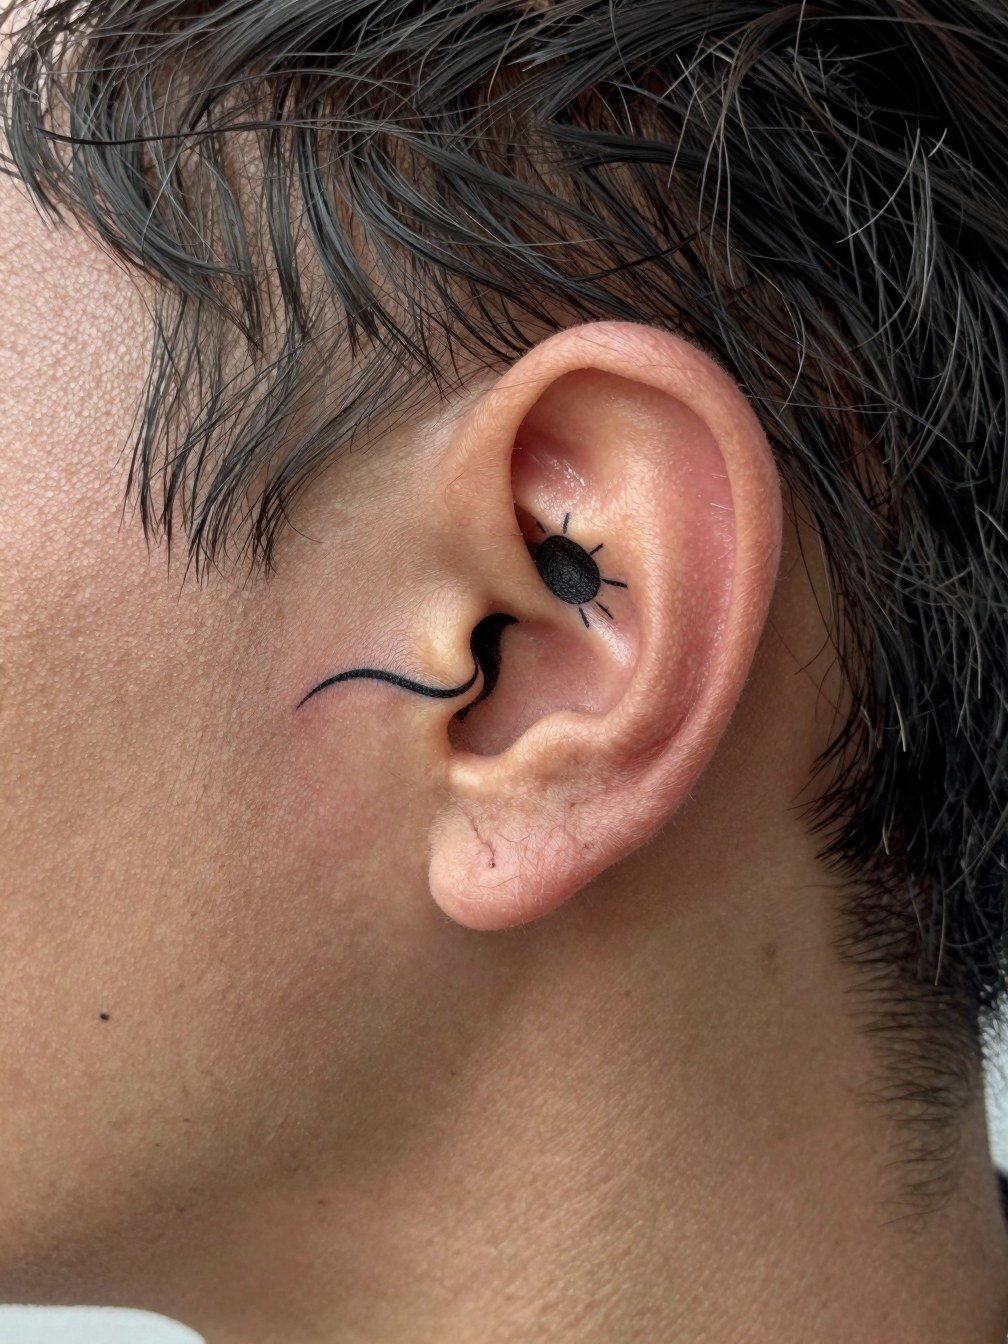
Behind-ear placements read like secret accents that peek from hair. The skin is thin so the sensation is sharper but sessions are short, often under 30 minutes. Common errors include requesting intricate detail that cannot be maintained at micro scale. For longevity, pick simple, bold silhouettes and expect occasional softening where the skin is very thin. Because of visibility when hair is up, think about how the design pairs with earrings. If you wear delicate hoops, the area frames the tiny sun well and offers a subtle contrast.
Studio Day Picks
These first six small and mid-size placements behave differently in the chair and during the first week, so a few targeted items make the session and the early healing smoother.
-
Stencil transfer paper kit. Lets you preview exact placement on skin before you commit, which is especially useful for the wrist and ankle pieces above.
-
Topical numbing cream. Applied 30 to 45 minutes before reduces initial sting on sensitive zones like ribs and the inner thigh without interfering with ink uptake.
-
Thin protective film roll. Works well for ankle and finger locations that face constant friction in the first few days.
-
Fragrance-free gentle body wash. A soap without added scents helps the healing area stay clean without irritation when showering.
-
Healing ointment. A well-known mainstream balm recommended for the very first days to keep delicate fine-line pieces hydrated without clogging.
7. Japanese Wave with Sun on Full Back
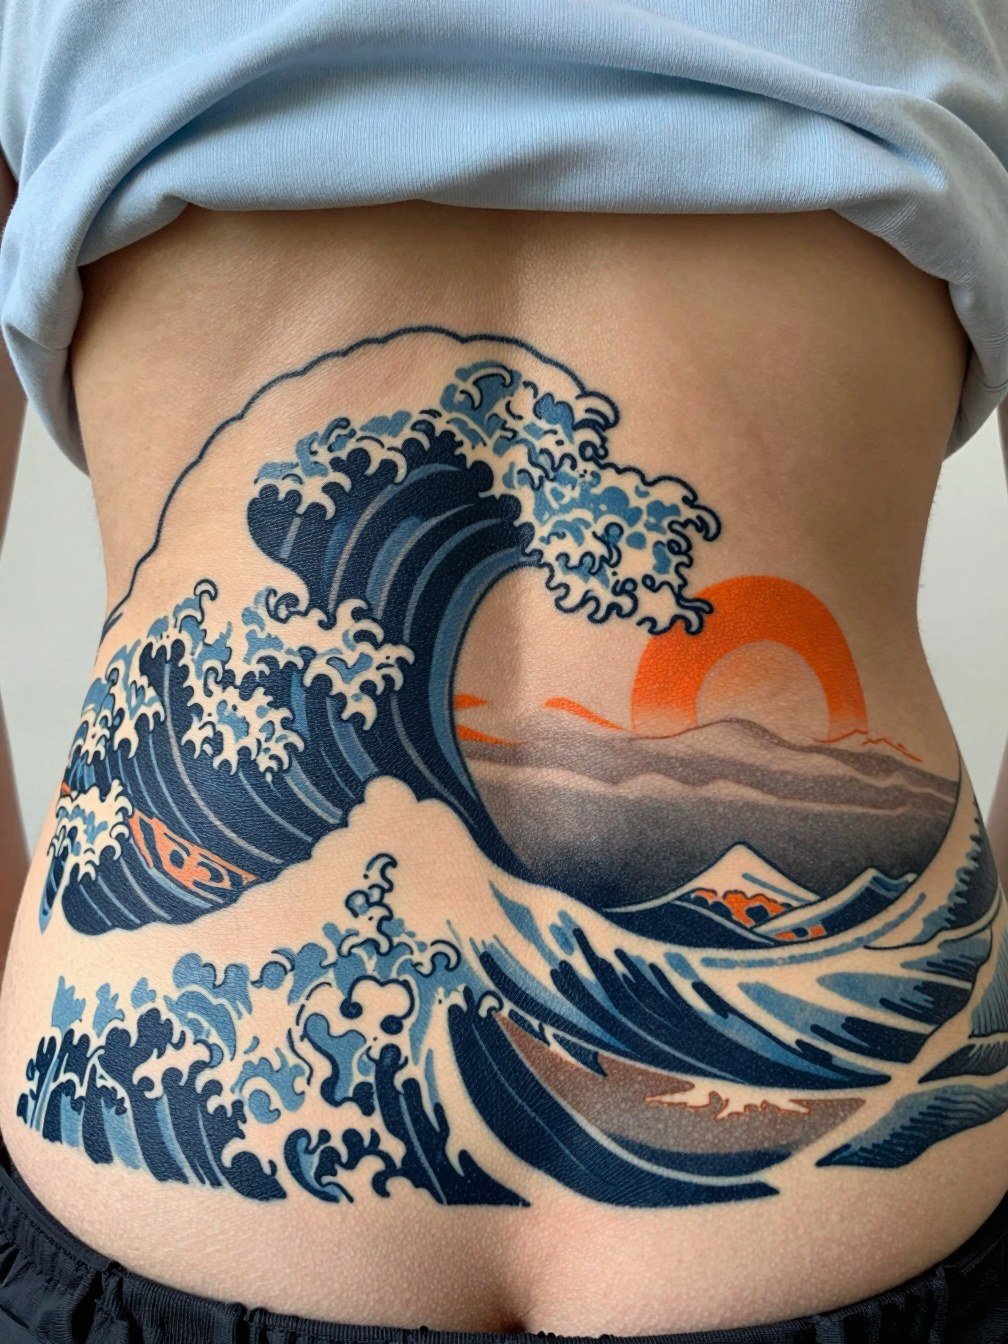
A full-back sun-and-wave is a commitment that benefits from custom composition. This scale favors traditional Japanese linework and saturation, which age into a cohesive piece rather than fragmenting. Discuss flow across the spine and how the wave crest will interact with muscle movement to avoid patchy healed tone. Sessions are multiple long sittings, so plan for breaks and wear comfortable, loose clothing to and from the studio. For reveal outfits, pick open-back dresses that let the composition be the focal point. Ask about long-term touch-up plans for saturated blues.
8. Fine Dot Work Sun Over Geometric Wave on Forearm
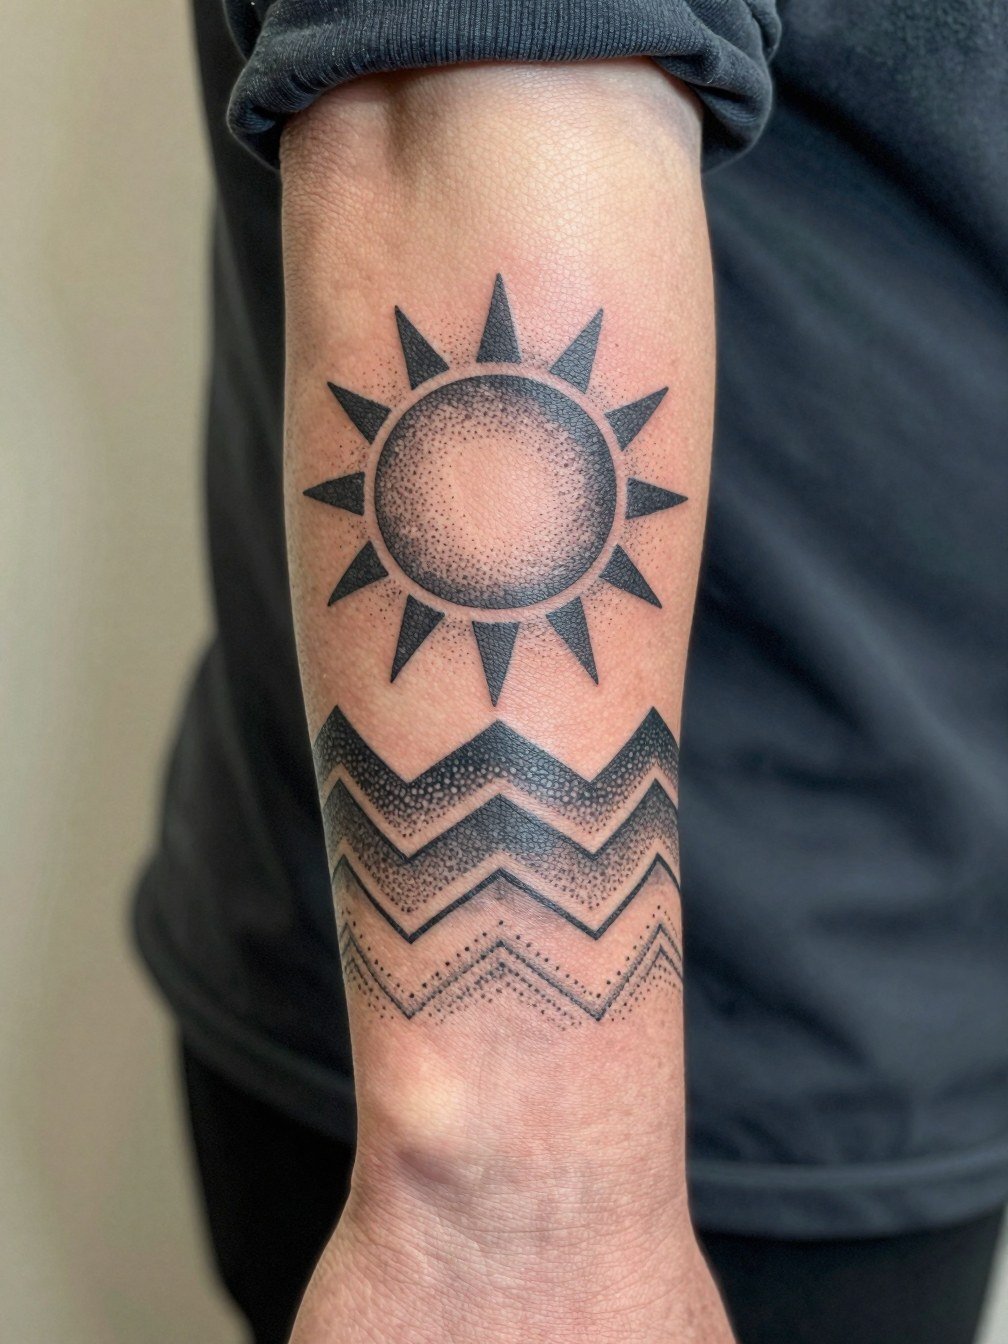
Dot work and geometric waves create a meditative, graphic look on the forearm. This style can hold detail well when spaced correctly, but tiny dots packed too close will blur over time. Ask for reference scales so the artist can show how the gradient reads at four inches versus six. Forearm pieces are visible and experience sun exposure, so expect gradual fading and plan for sunscreen when not healing. Sessions usually run one to two hours. Show-off pairing works with rolled sleeves and cuffed shirts, and a lightweight linen shirt keeps the arm visible without overheating.
9. Bold Blackwork Sun with Wave Silhouette on Calf
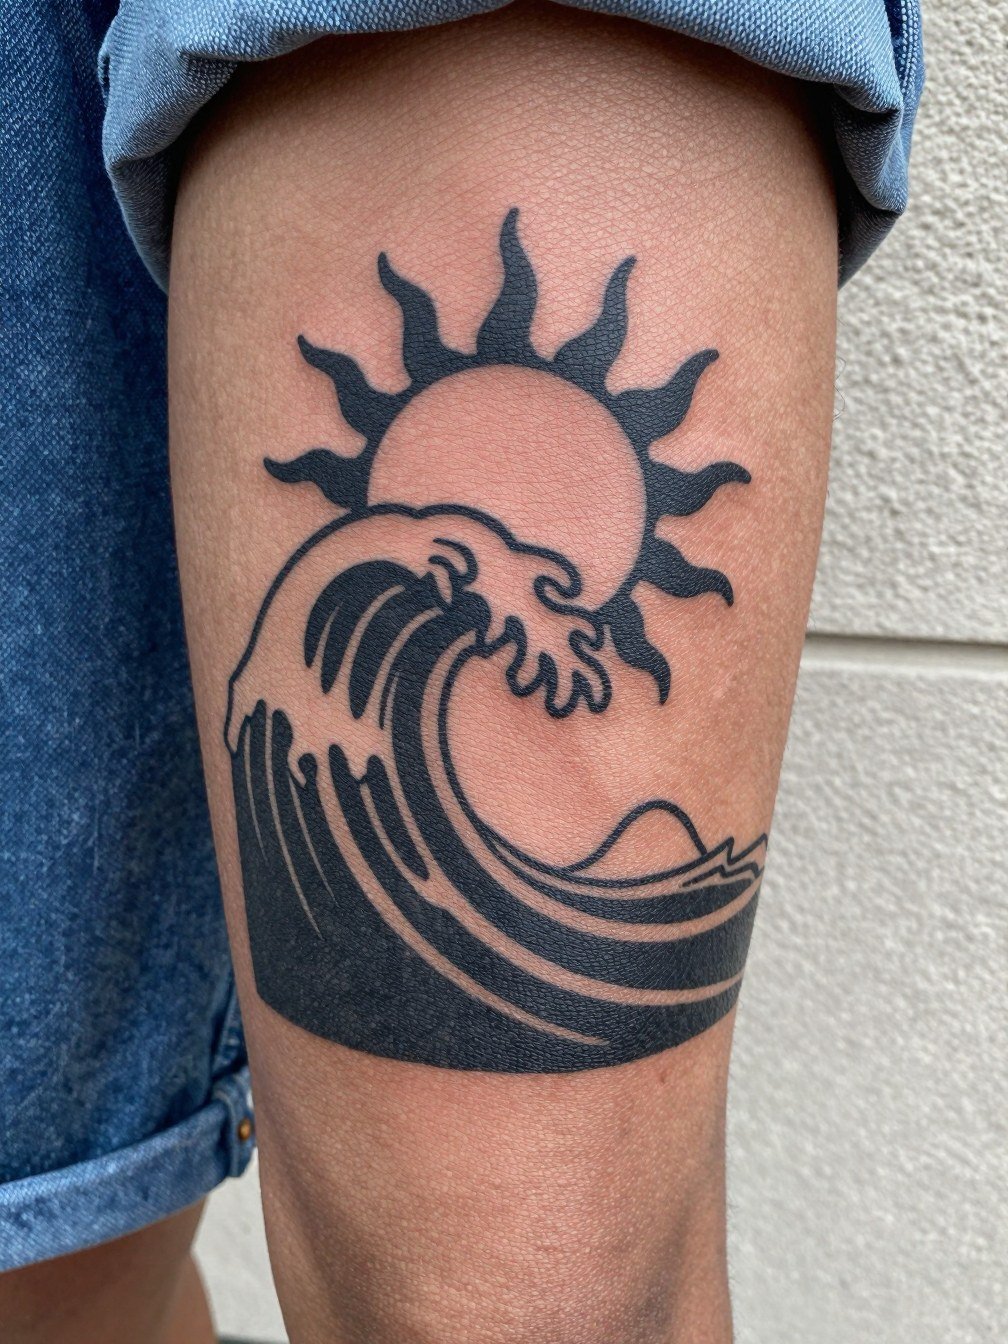
Blackwork is the low-maintenance sibling to color work because heavy saturation keeps contrast as the piece ages. Calf placements are resilient and tolerate bolder compositions without much distortion. A common error is asking for too many tiny internal details inside the black mass that vanish in healing. Touch-ups are rare but useful at year three if you want to re-saturate. Sessions can be comfortable as the calf is fleshy, and you can plan for a single long session. Pair this with cropped trousers or midi skirts that let the dark silhouette read.
10. Sun and Wave Finger Pairing
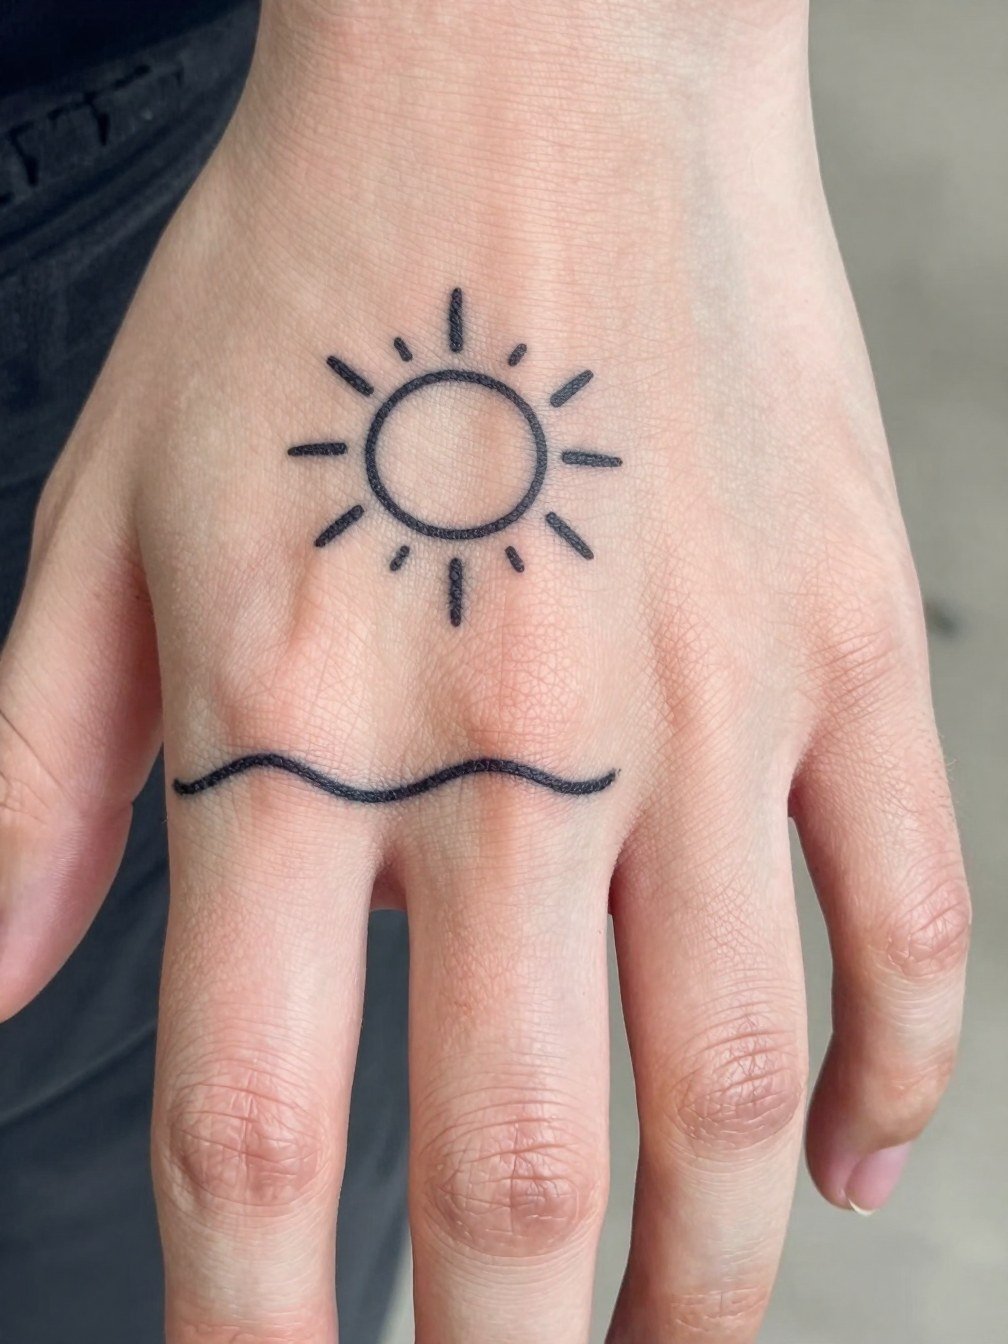
Finger tattoos are highly exposed and have a higher blowout and fading risk than forearm or calf work. Small sun-and-wave icons can work if you accept more frequent touch-ups. The mistake is asking for micro detail across knuckles where the skin shifts and lines soften. For durability, pick simple silhouettes and agree on slightly thicker linework. Sessions are short but can sting due to thin skin and bone proximity. Wear a coat or sleeve that does not rub the fresh ink during the first week. If you want rings to match, bring a photo so the artist can align placement with your preferred finger jewelry.
11. Collared Sun and Wave on Collarbone
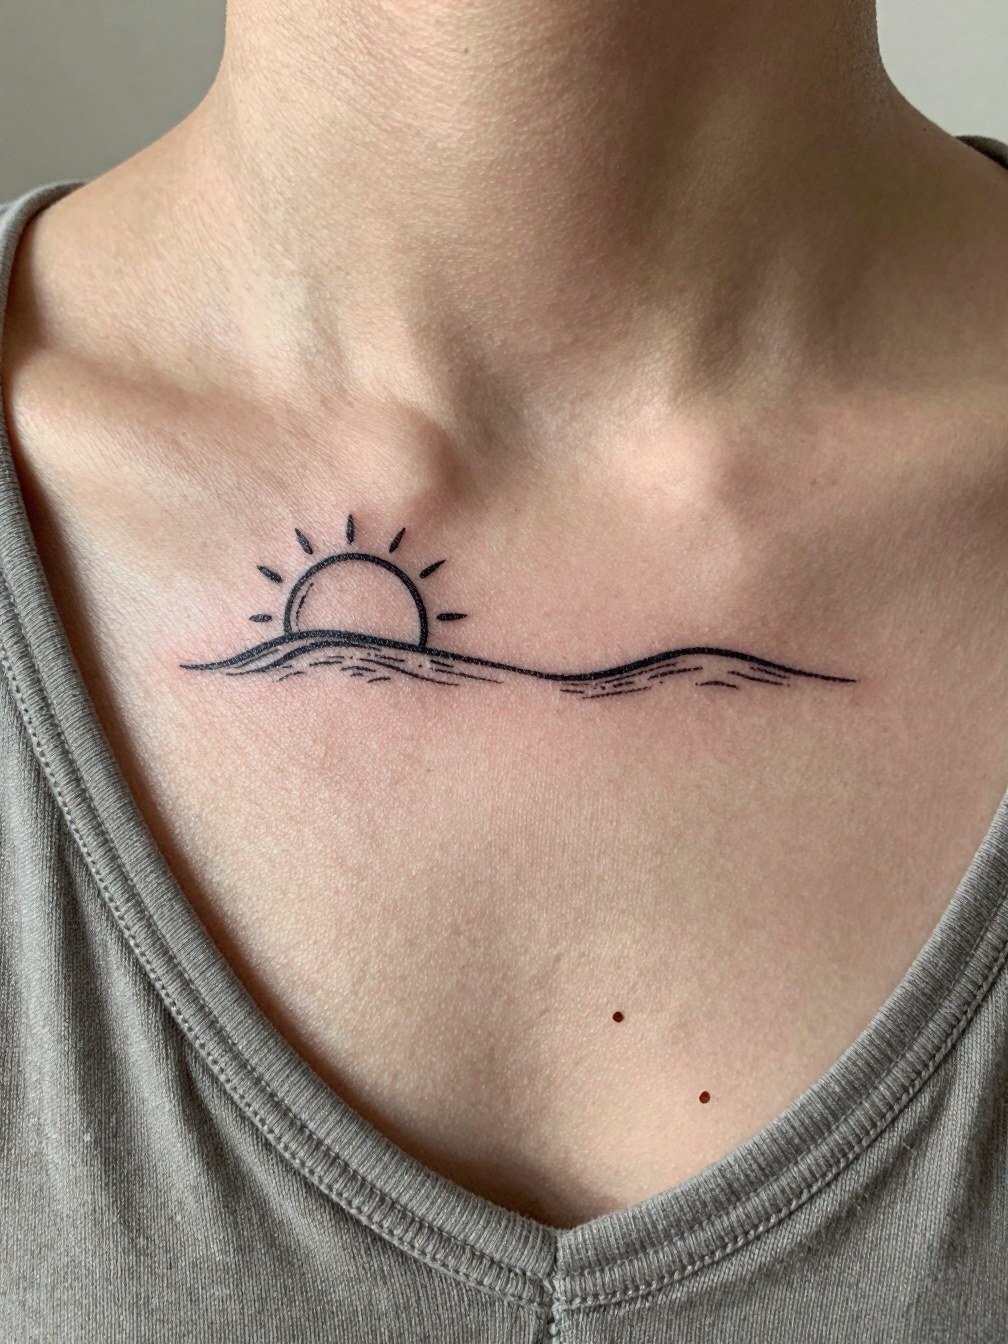
Collarbone pieces read elegantly with simple horizontal compositions that follow bone structure. The skin is thin so line softness is a risk, and the common mistake is choosing hairline strokes that fade into blur. Ask the artist to map line weight to bone contour so rays do not smudge into the clavicle shadow. Sessions usually last 45 to 90 minutes. For reveals, wear wide V-neck tops or scoop necks that frame the piece without tugging at the fresh skin. Plan for one possible touch-up at year two if edges look soft.
12. Sun, Wave, and Crescent Moon on Upper Arm
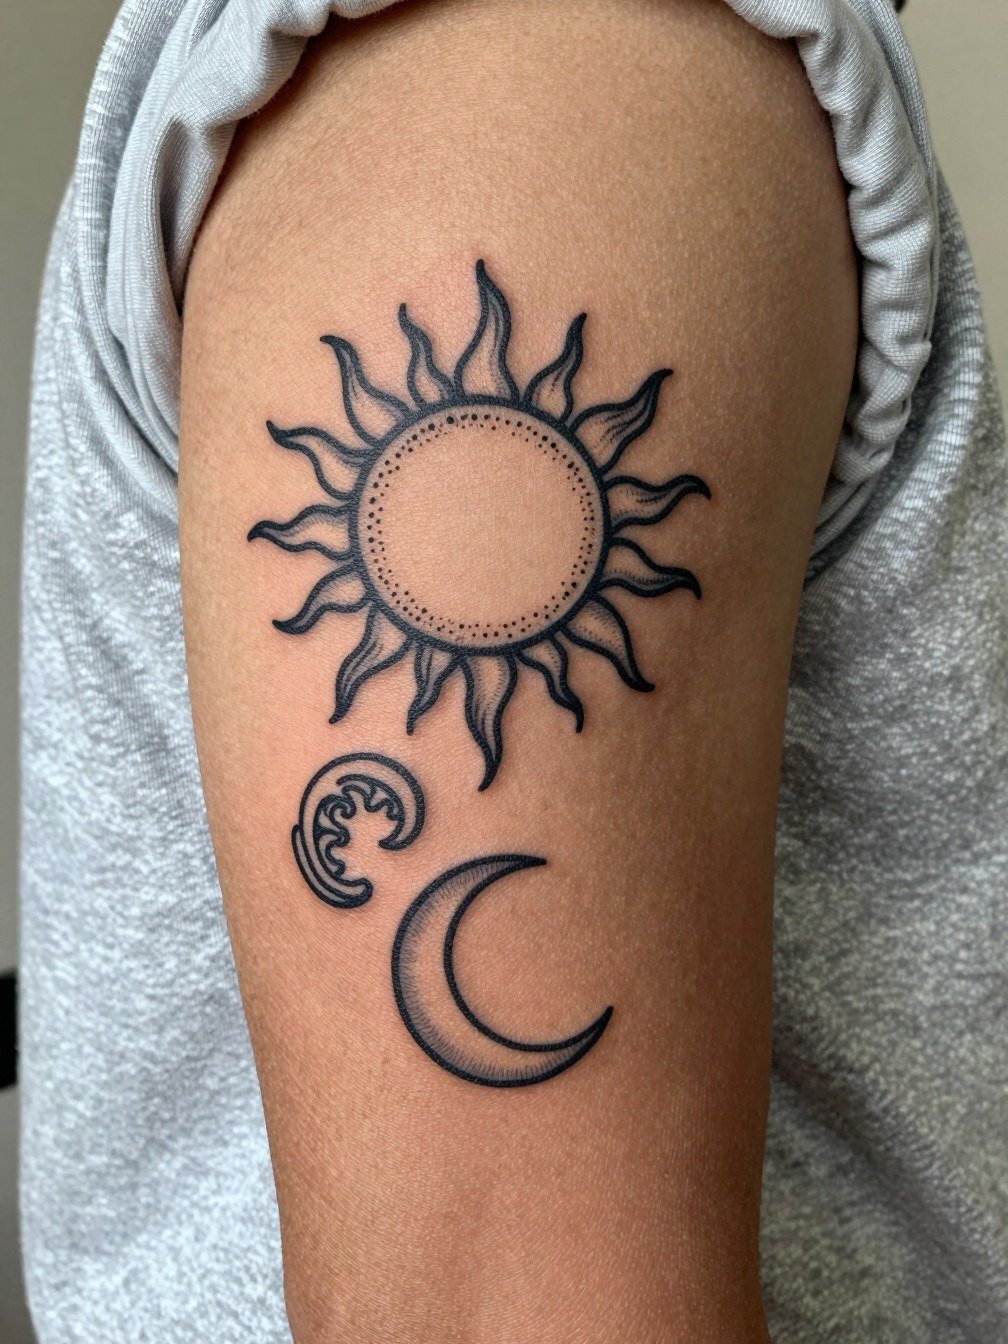
Adding a moon creates celestial balance and lets the composition tell a small story without increasing scale. Upper arm flesh supports medium detail and holds pigment well over time. A typical error is stacking symbols too tightly so the negative spaces collapse in healing. During consultation, bring scaled references so the artist can space elements for long-term legibility. Sessions are comfortable and often under two hours. For display, short-sleeve shirts and rolled sleeves work well and a lightweight cotton tee keeps the area visible without chafing.
13. Stippled Sunrise with Wave on Sternum
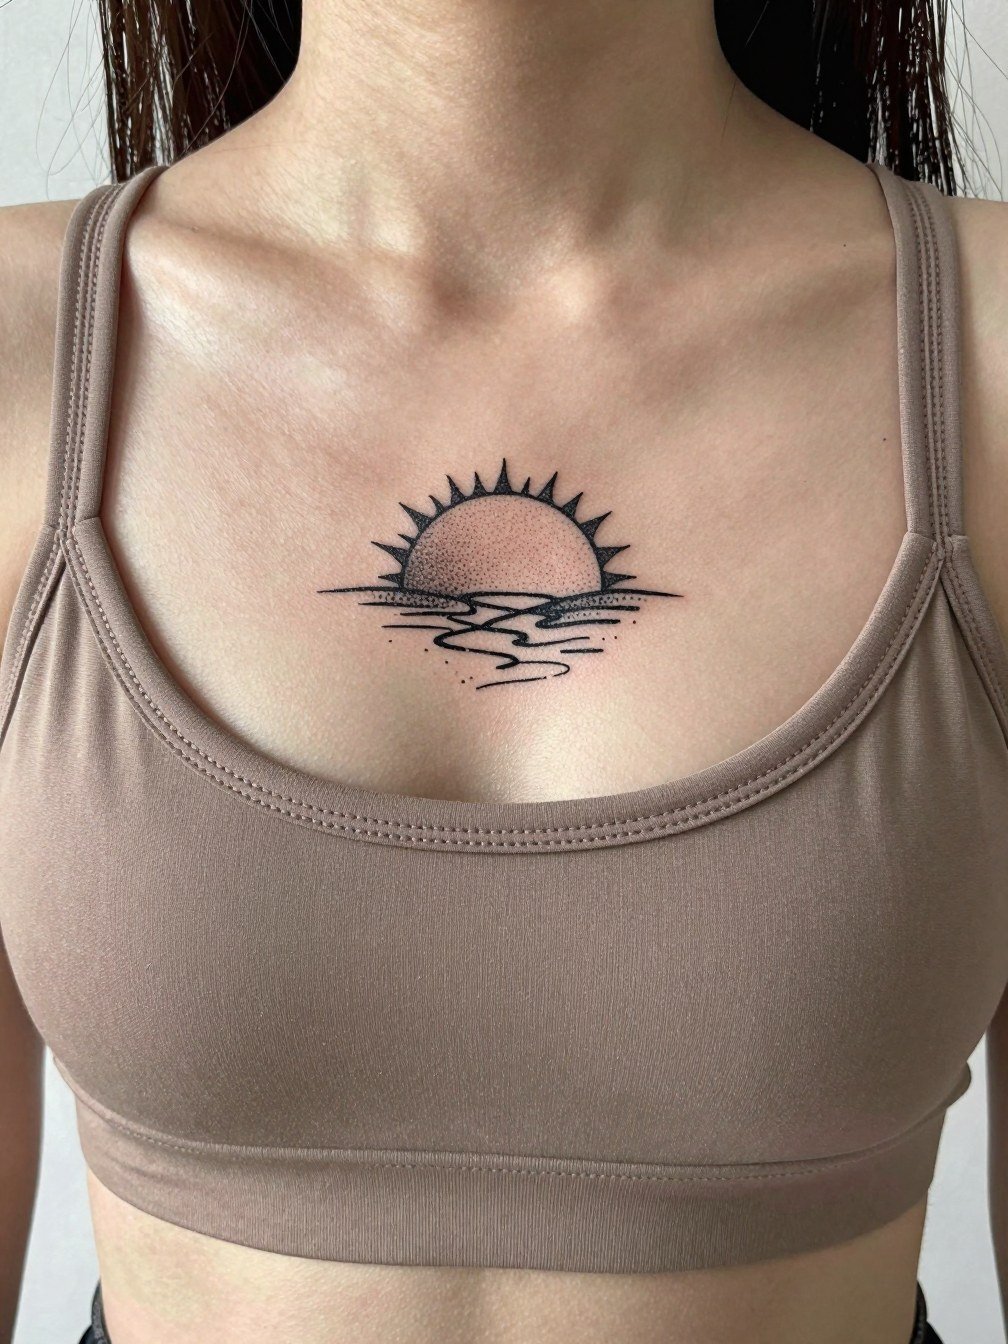
Sternum placements are intimate and demand an experienced hand because of curvature and breast movement. Dot work looks delicate there but can require touch-ups where skin stretches. The common mistake is choosing extreme fineness without considering the sternum’s motion. Sessions are more sensitive and may take breaks. Discuss how shading will age under the breast crease and whether you want the piece to be primarily visible or tucked under clothing. For the session, wear a fitted sports bra to give the artist stable access without exposing more than necessary.
14. Solar Disk with Wave Band Around Wrist
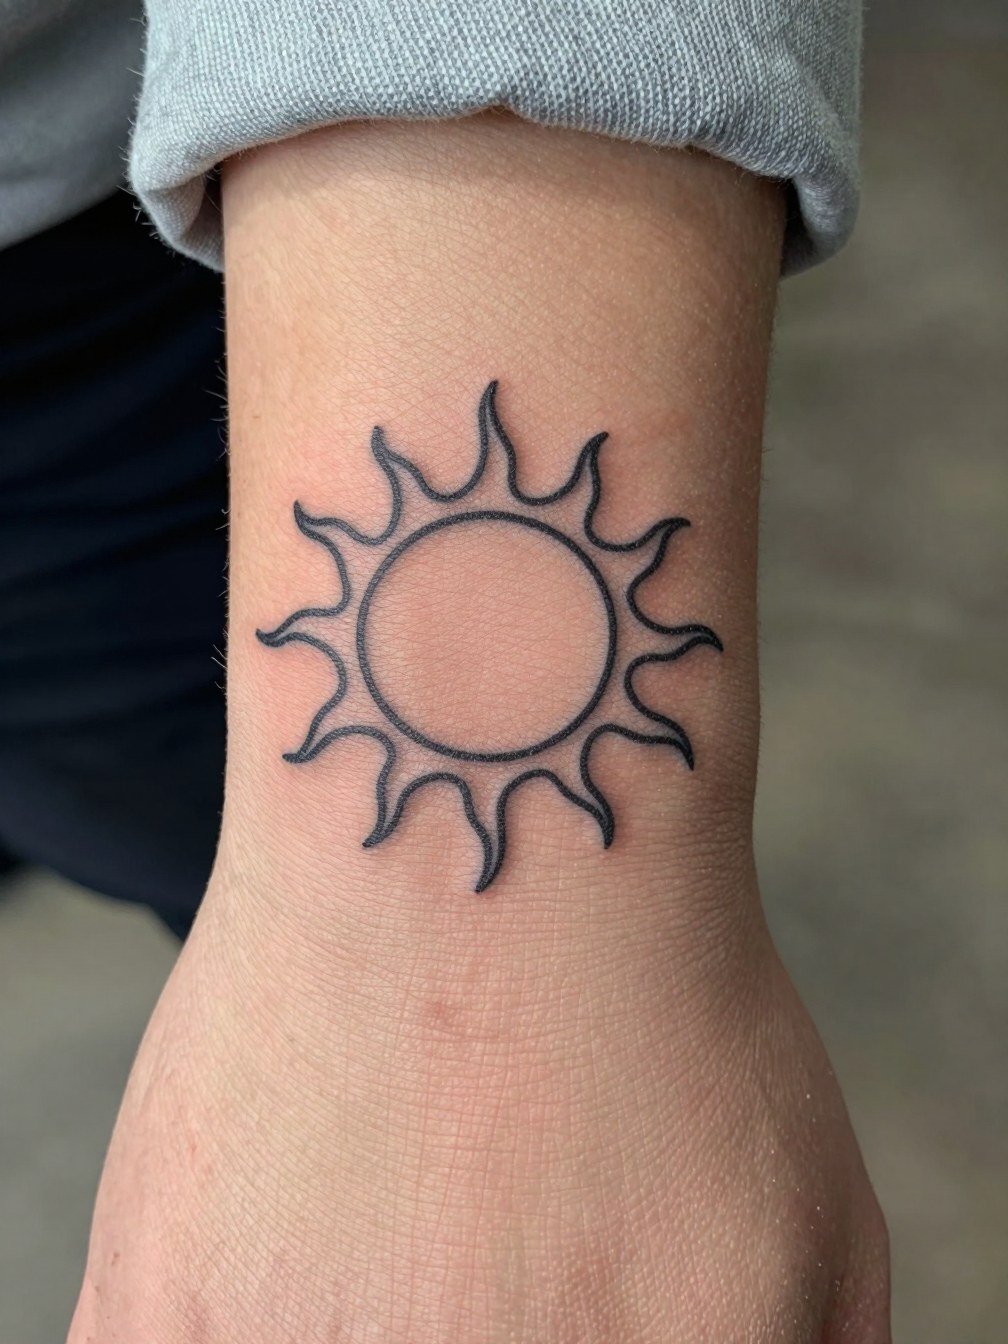
A wrist banded sun balances visibility and wearability, but repeated hand use will gradually soften tiny details. Ask the artist to thicken the outer band slightly and keep inner rays simplified so the composition holds over time. Sessions are quick but can sting on the radial bone. Expect a possible touch-up in 12 to 18 months. For jewelry pairing, bracelets and slim watches frame the disk nicely. A good go-to is a simple leather or metal cuff that does not rub directly on fresh ink during the first two weeks.
15. Traditional Sailor Sun with Rolling Wave on Upper Chest
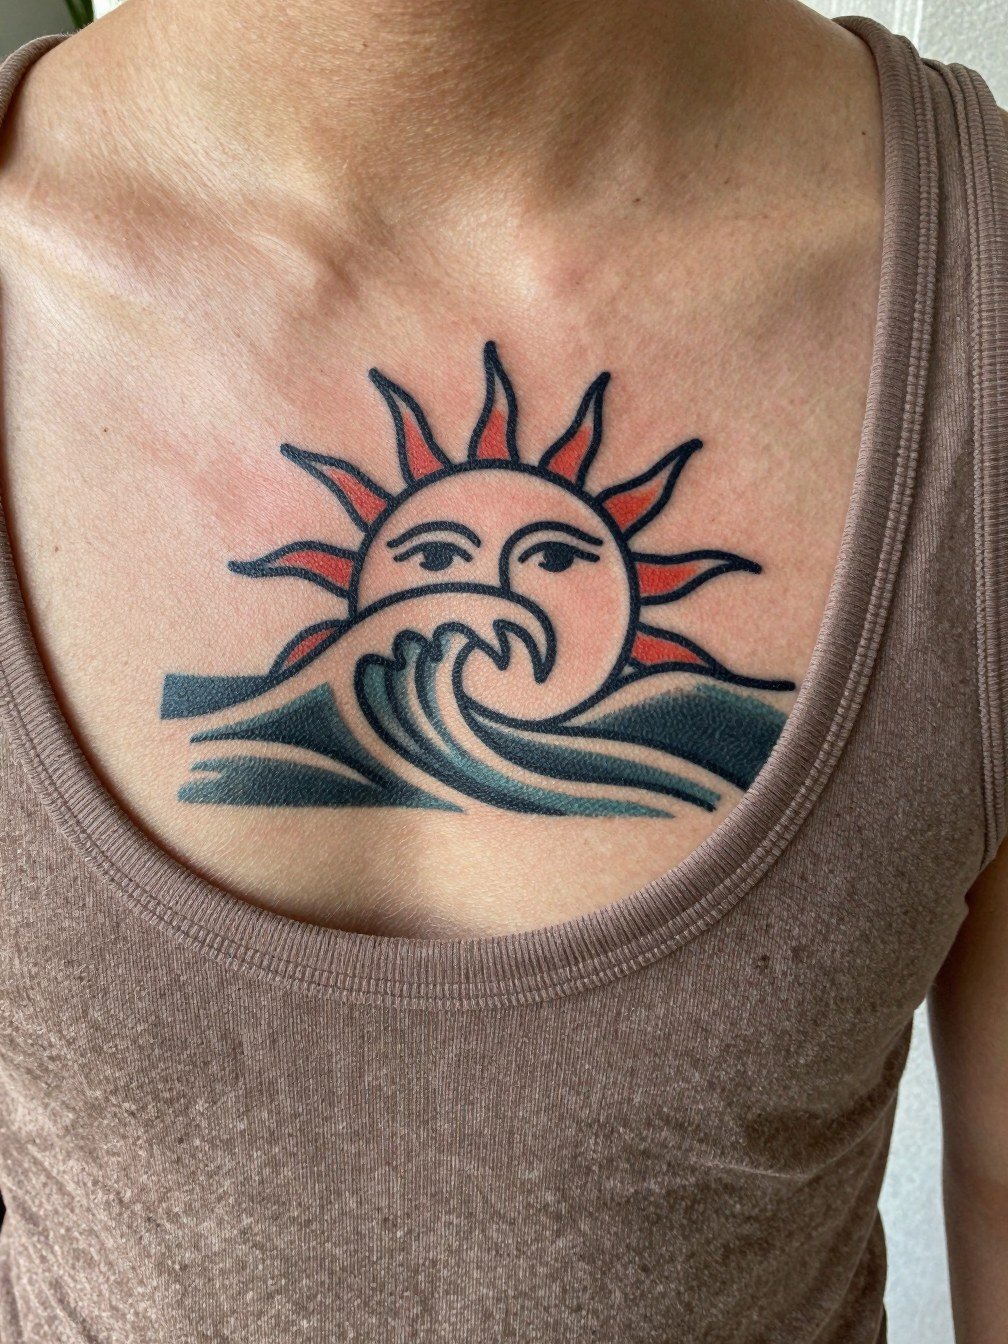
Traditional sailor motifs bring longevity thanks to strong black outlines and solid color blocks. Upper chest skin moves with breathing so plan shading to sit with natural flex. A usual mistake is crowding too many small elements near the clavicle where the skin is thin. Sessions are moderate in length and can be done in one block. For wardrobe, open-neck tops show the piece without tugging at new ink. Consider seasonal sun exposure when healed because chest skin can fade if frequently exposed without protection.
16. Minimal Wave Band with Tiny Sun on Finger Side
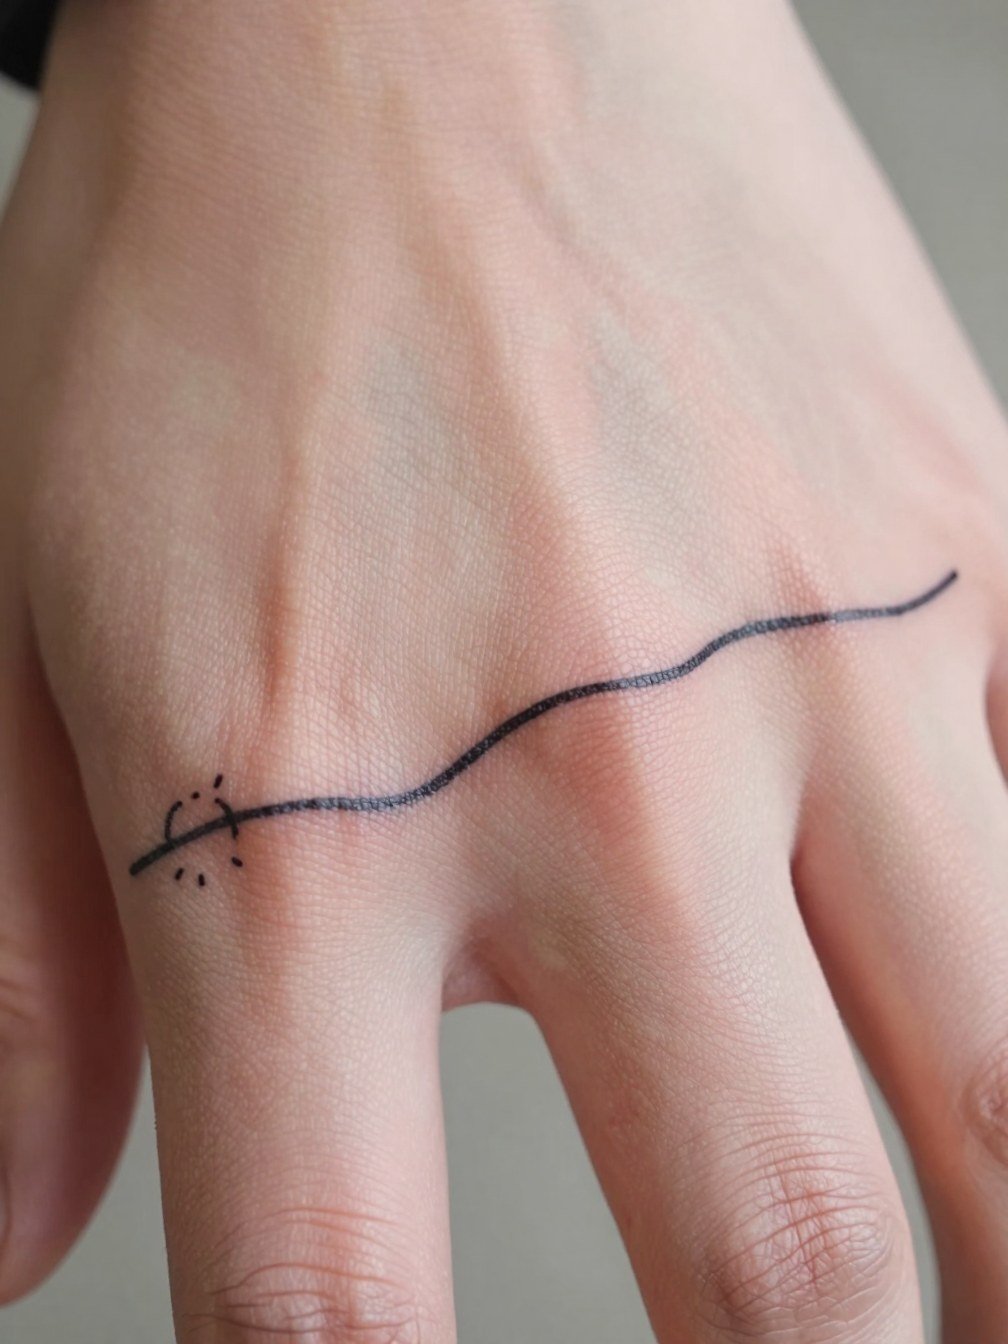
Side-of-finger bands are subtle and look great with simple shapes, but they face the same durability constraints as other finger work. The key is slightly heavier line weight so the curve reads after healing. Plan for touch-ups because the friction from daily use speeds fade. The session is short but sharp. For styling, thin stacking rings complement the band without covering it. Pick rings that slide on and off easily so you avoid rubbing the fresh area during the first week.
17. Black and Grey Sun Behind the Ear to Nape Transition
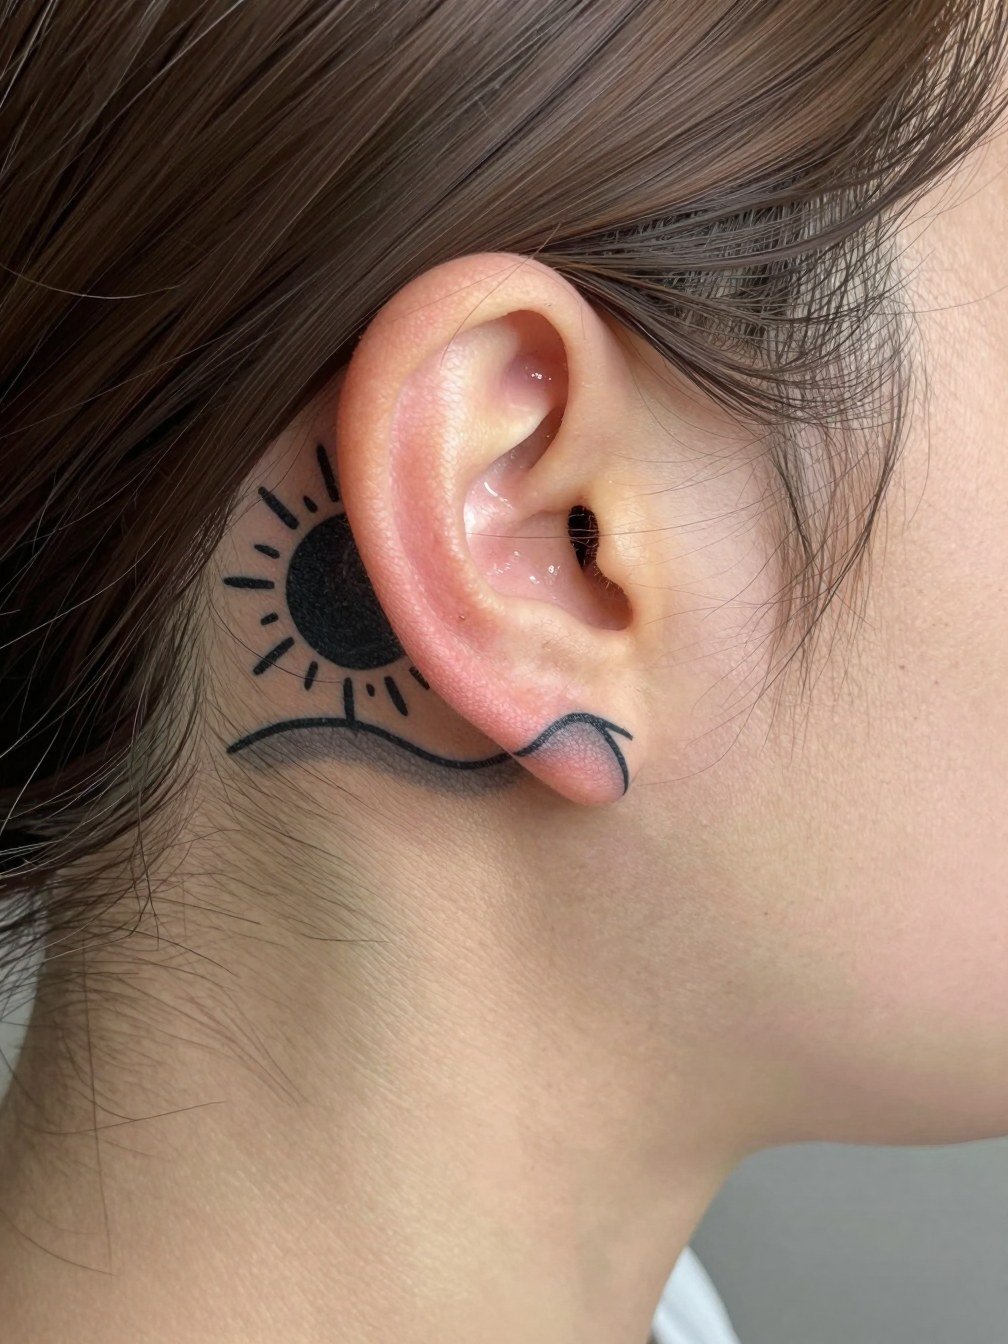
Neck transitions let a tiny sun peek from behind hair and flow down to the nape as a discreet statement. Thin skin means detail must be planned conservatively. The common mistake is overcomplicating the nape area where the skin creases and moves. Sessions are short but can be sensitive. If you wear your hair up often, think about how the piece shows with earrings and collars. Mention hair styling on the appointment day so the artist can see how visibility will work after healing.
18. Color Gradient Sunset with Wave Silhouette on Thigh Outer
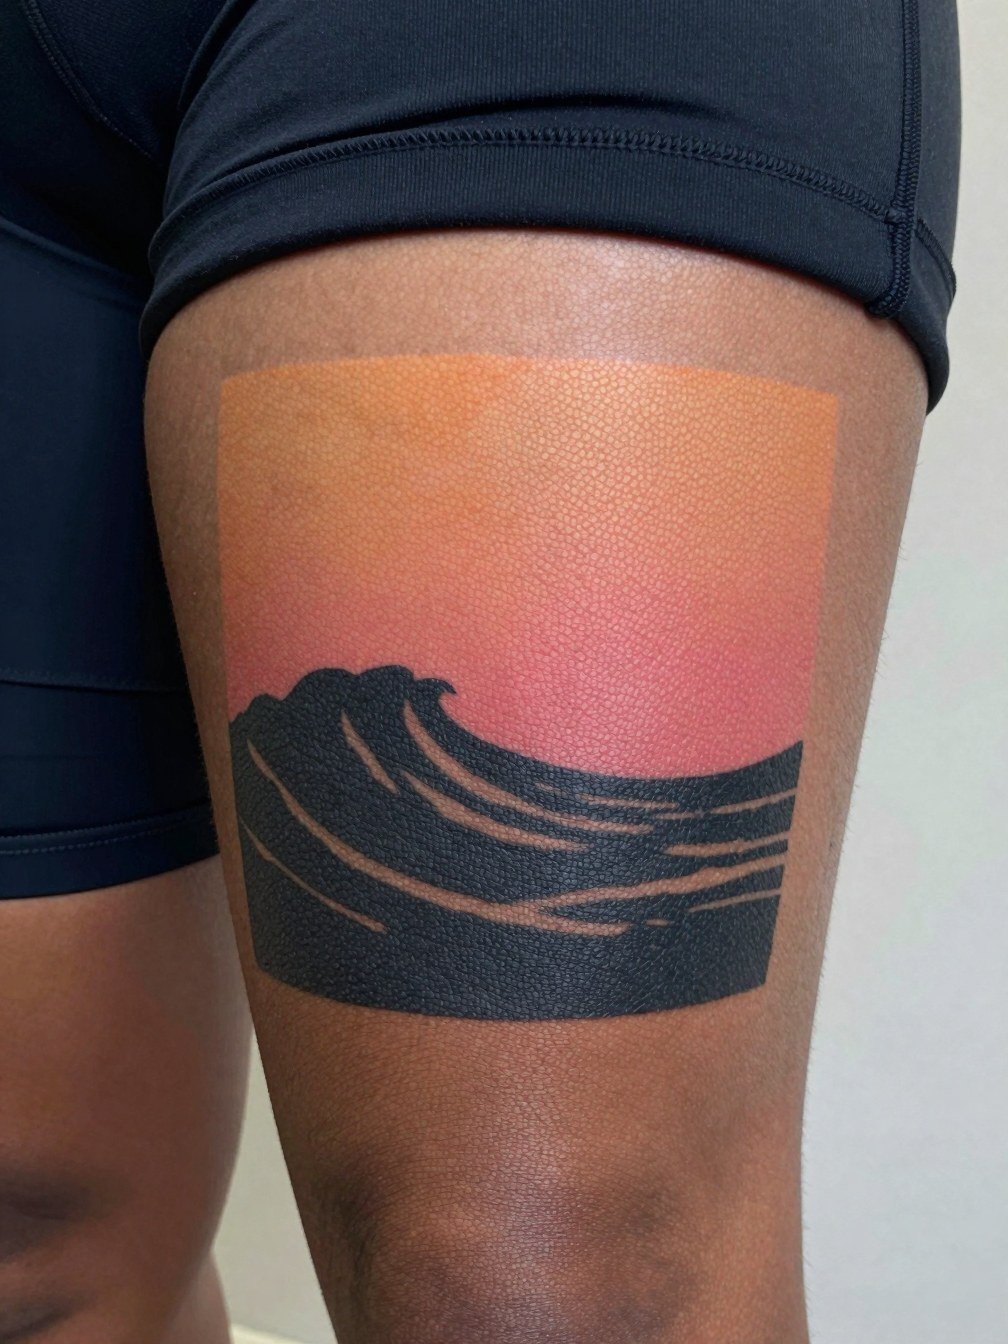
Outer-thigh color gradients look painterly and allow larger washes that age into soft sunsets rather than hard edges. The mistake is compressing too many colors into a tiny area. For long-term clarity, go for broad bands of gradient rather than micro shading. Sessions can be lengthy if multiple color passes are needed. Choose comfortable session wear like loose shorts or bike shorts so the artist can access the area without fabric tugging. Plan a color boost touch-up at year two if you want the gradient to stay vivid.
19. Tiny Wave Ankle Band with Micro Sun Accent
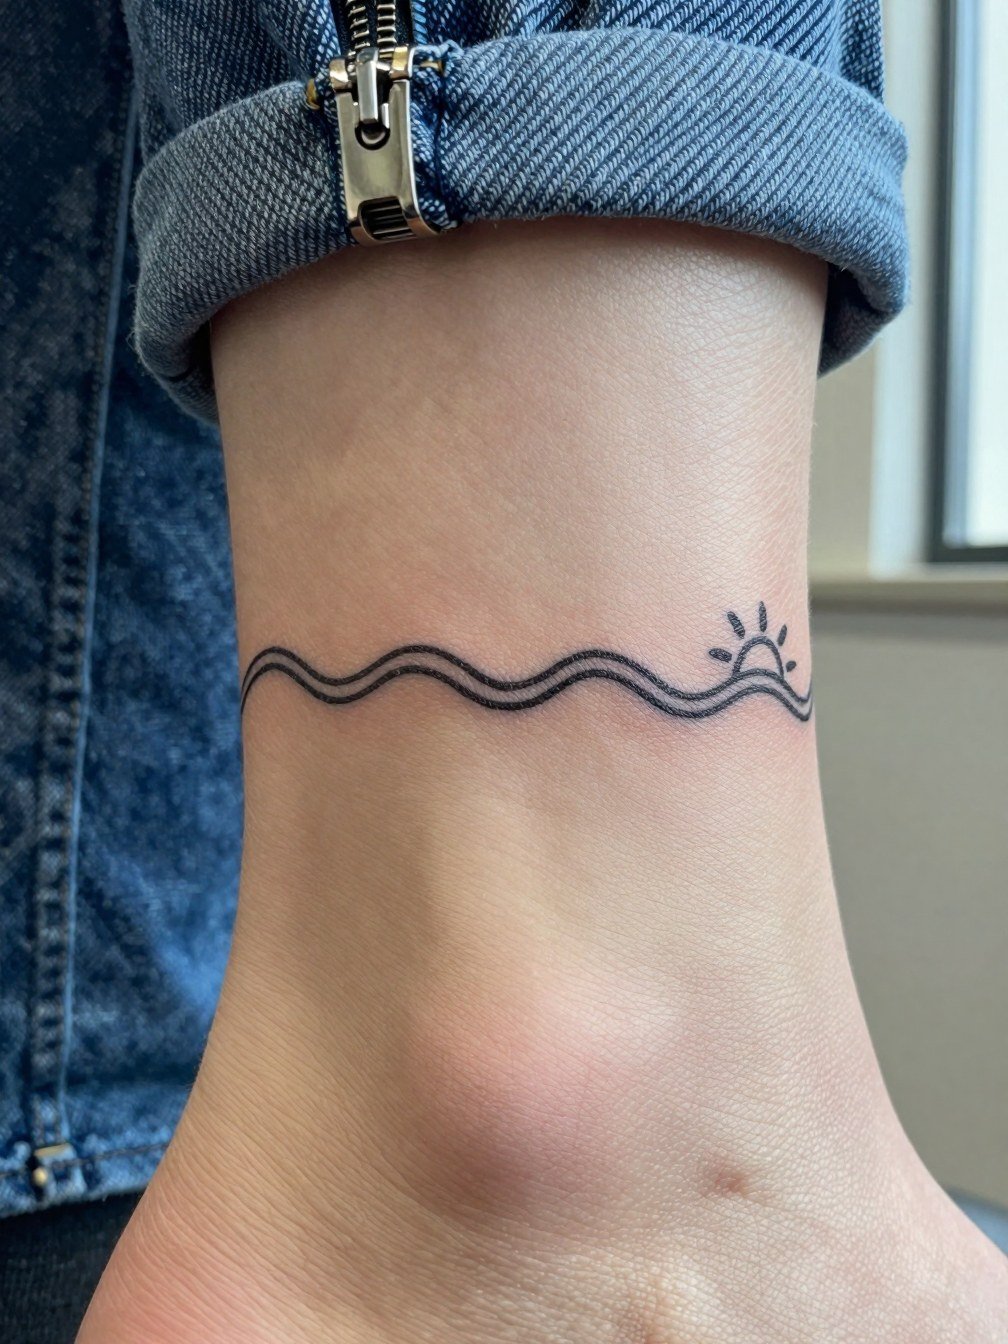
An ankle band is a wearable ring that sits well with small sun details as accents. Friction from boots and socks speeds fading, so thicker outlines around the band help maintain shape. The mistake is expecting a hairline band to remain intact without a touch-up. Sessions are brief and tolerable. For showing it off, ankle straps or sandals frame a band without rubbing. A good session-day choice is a pair of loose slip-on shoes to avoid pressure on the fresh ankle.
20. Half-Sleeve Wave Wrap with Tiny Sun Motif
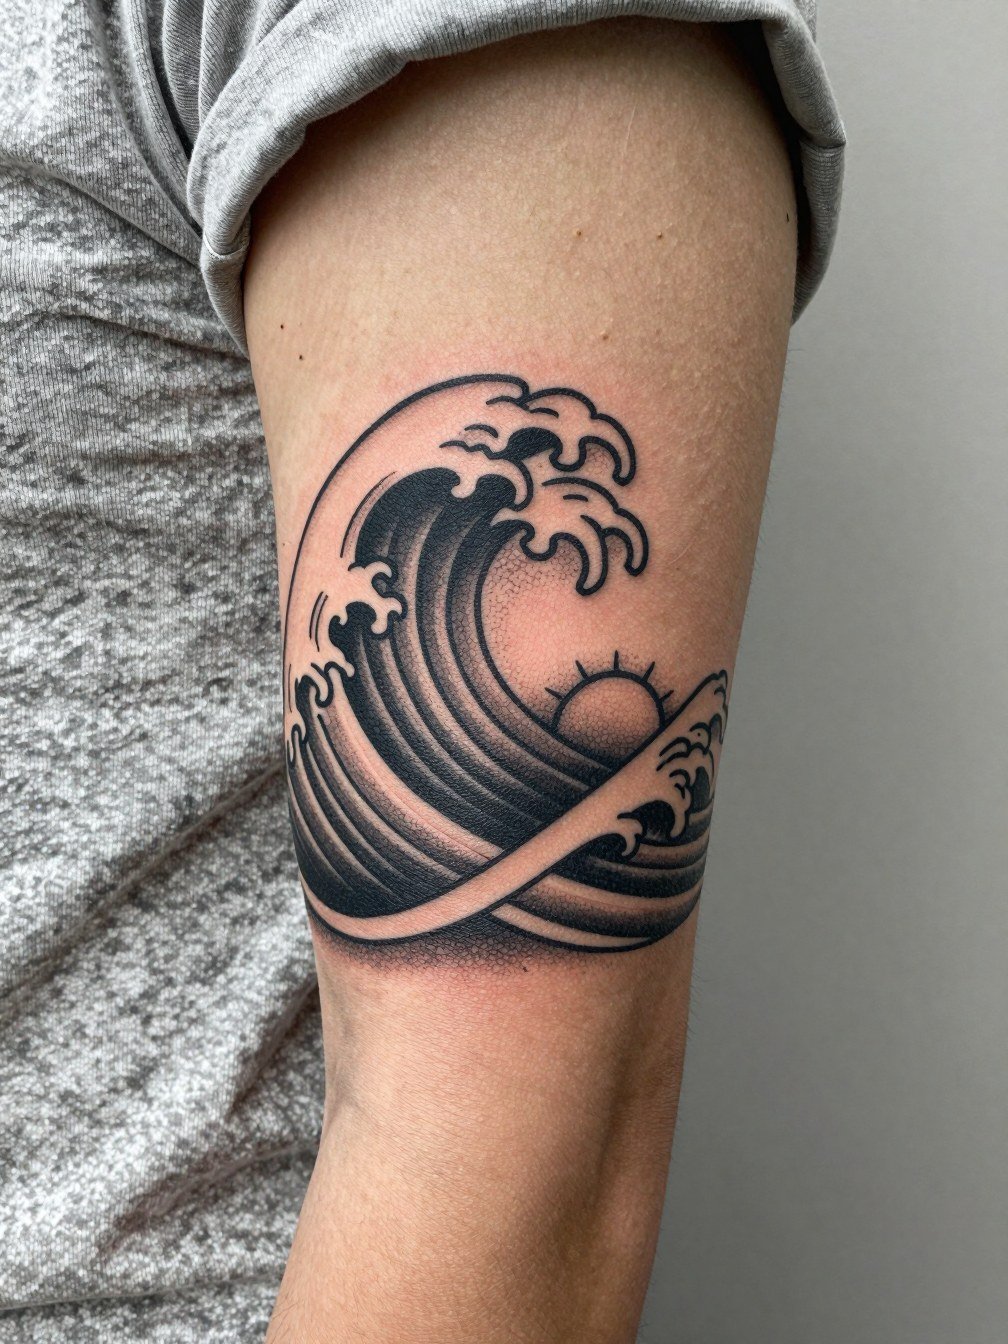
Half-sleeves give space to make waves feel like movement and tuck a small sun into the composition without crowding. For longevity, use varied line weights so the primary shapes read even if fine details soften over time. The session typically spans multiple sittings. Consider how the wrap will look in different clothing, and pick shirts with sleeves that hit where you want the reveal to begin. For everyday pairings, rolled sleeves and short-sleeve shirts show off the wrap without exposing the entire arm.
21. Micro Realism Sun with Wave Horizon on Hip
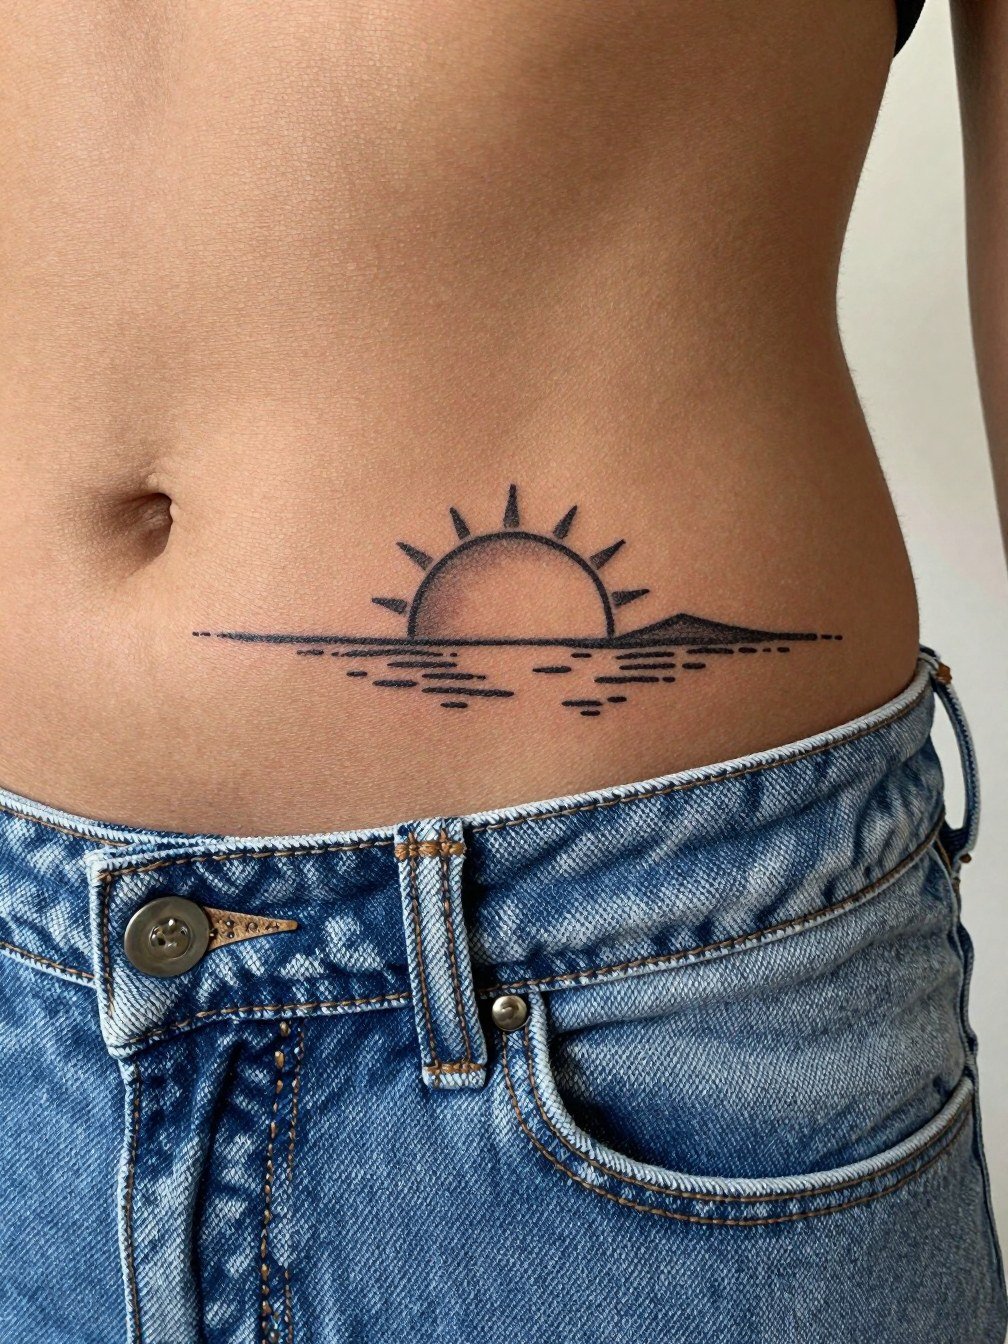
Hip micro realism needs tight planning because the area is subject to clothing friction and seasonal waistband pressure. The most frequent mistake is placing ultra-fine shading where jeans will rub daily. During consultation, request placement stencils while wearing the jeans you normally use so the artist can avoid waistband lines. Sessions are short but may require a touch-up if the area sees constant abrasion. For revealing the piece, low-rise bottoms that sit naturally below the tattoo make it a flirty peek without stress on the healed skin.
Frequently Asked Questions
Q: How do I choose between a fine-line and a bold sun-and-wave for my first tattoo?
A: Think about how often the area is exposed and the look you want in five years. Fine-line works when the placement has less friction and you accept likely touch-ups. Bold saturated linework keeps contrast longer on high-friction sites like ankles and hands. Bring two scaled references so the artist can show how each option reads at your chosen size.
Q: Where can I find healed examples and portfolios without naming specific artists?
A: Use search phrases like "minimalist sun wave healed," "Japanese wave sun healed," and "watercolor sunset wave healed" on Instagram and TikTok with location filters. Browse subreddit galleries that let users post healed photos and include skin-tone tags. That way you can see realistic outcomes across different styles and placements.
Q: Will a sun-and-wave tattoo on the ribs or sternum hurt more than the forearm?
A: Yes, rib and sternum zones are typically more sensitive because the skin is thin and sits over bone. Forearms and calves are fleshier and generally less painful. Plan for breaks on chest or rib work and consider applying topical numbing as advised by the artist before a longer session.
Q: How often should I expect touch-ups for micro sun-and-wave pieces like fingers or wrists?
A: Micro placements on hands and wrists usually need a touch-up within 12 to 24 months, depending on sun exposure and day-to-day wear. Keep those spots protected with SPF after healed to slow fading. If you want guidance on aftercare products, your artist can recommend a routine that matches their technique.
Q: What should I wear to the studio for a thigh or back sun-and-wave session?
A: Wear loose, comfortable clothing that provides easy access to the area without shifting the skin. For thigh and hip sessions, fitted bike shorts are ideal. For back work, a loose tank that you can remove and put on without stretching fresh skin is best. A travel bag with slip-on shoes is helpful if you want minimal rubbing while walking out.