
Someone I know spent months scrolling tattoo pages only to realize the real problem was not finding pretty pictures. It was picking a UV-reactive idea that fits their life, shows under blacklight, and still looks intentional after healing. Below are 25 UV tattoo ideas that balance nightlife pop with long-term wear, plus what to ask your artist and how each design ages so you book the right session.
1. Neon Moon and Stars Constellation on Inner Forearm

Someone I know first pointed at a friend's inner forearm and said they wanted that same quiet reveal at clubs. Ask your artist for faint UV neon outlines rather than heavy daytime saturation so the piece reads as delicate in daylight and lights up under a blacklight. The ribcage and collarbone versions need wider spacing between stars to avoid blur as lines settle. Expect a one to two hour session for a small 2 to 4 inch layout and a touch-up within a couple years if you wear sun exposure. A common mistake is asking for fully invisible ink and then being disappointed when healed scarring still shows.
2. Psychedelic Lightning Bolt on Wrist

Fair warning: the wrist is a busy spot for washing and sun, so the bolt will fade faster than an upper-arm piece. For a durable flash, tell your artist to keep strong linework with a thin neon halo so the bolt reads by day and pops under blacklight. This minimalist take usually fits a single session and hurts like a typical wrist tattoo. Blowout risk is higher if the needle goes too deep given thin skin, so ask about spacing and line weight. Expect brighter glow the first six months and more subtle fluorescence by year two without touch-ups.
3. Witch Silhouette with Jack-o-Lantern on Shoulder Blade

When you sit down with your artist for this one, bring reference photos that show exact silhouette scale. The shoulder blade gives room for a 4 to 6 inch composition and tolerates stipple shading well. Artists are split on pigments for purple UV ink. One camp says certified sterile UV pigments are fine when protocols are strict. The other camp warns of irritation with some fluorescent blends. Ask the artist which pigments they use and whether they test a small patch. The piece will read as a dark silhouette in daylight and reveal purple accents under a blacklight.
4. Dandelion Puff Exploding into Stars on Ribcage

Most people avoid ribs because pain there is real and healing is slow. That said, a fine line dandelion looks ethereal when done with proper depth and spacing. The main aging issue is line blur over time when the design is too tight. Ask your artist for slightly bolder seeds and a faint UV wash rather than ultra-fine floating points. Expect one session but plan for a touch-up around year two if you get heavy sun. The ribcage reads softer at six months, and tiny stars may require refreshes later to keep fluorescence bright.
5. Script Quote in Invisible Curve on Side of Finger

Finger placements are convenient for secret messages but they take abuse. I tell people to pick very short quotes and accept faster fading. For this invisible curve, ask for simple lettering with spaced strokes so the letters do not bleed into one another as the skin moves. Expect the fastest wear here compared with forearm or chest. If you need daytime readability, request a faint neon outline. A common mistake is asking for long cursive on a finger. Keep it short and budget for touch-ups every year or so.
6. Tropical Fish Silhouette on Calf

There is an underwater vibe to UV fish that works well on the calf where the canvas can be slightly larger. The calf handles saturation and multi-color UV pigments better than thin spots like the ankle. Tell your artist you want the fins to have stipple shading and a soft neon rim so movement shows under blacklight. Expect one to two sessions depending on size. Over five years, dense neon pigments may need refreshes more often than standard inks. A frequent mistake is cramming overly detailed scales into too small a patch. Give the design room to breathe.
7. Vintage Halloween Skull on Upper Arm

There is a nostalgic pull to a Halloween skull that glows in club settings. The upper arm is forgiving, so artists can combine neo-gothic linework with UV white fluorescence for teeth and eye sockets. Tell your artist to balance saturation so the skull looks classic in daylight and luminous under blacklight. Expect two sessions if you want shaded depth. The main long-term issue is yellowing of white fluorescents over time if exposed to sunlight. Plan for touch-ups and avoid long days in direct sun to preserve the hue.
8. Mandala with Glowing Petals on Upper Back

There is real value in spacing for mandalas. The biggest mistake is making the pattern too tight for the skin area. The upper back lets the geometry breathe and survive aging. Tell your artist to map out centering with a transfer and to use stipple shading in petal centers for smoother healed transitions. Expect two to three sessions depending on diameter. Some people use this design for spiritual reasons and adapt motifs respectfully. If the pattern references traditional symbols, note the origin and make small variations rather than copying sacred pieces exactly.
9. Invisible Geometric Patterns on Neck

Neck tattoos have professional implications and heal differently than limbs. Hand and neck placements still affect hiring in some industries, so think about career path before committing. Artists split on fully invisible UV ink. One group says true invisible pigments can work and remain discreet by day. The other group points out healed scarring and faint ghosting that can be visible even when pigment fades. Ask your artist how they handle depth and whether they expect any daytime trace. Expect a single session for a small piece but plan for touch-ups sooner than chest or back.
10. Raver Butterfly Wings on Shoulder

There is a specific crowd for butterfly wings at events because the piece reads like body art when activated. For shoulders, ask for watercolor wash blended into a stronger UV outline so the wings stay readable under movement. The shoulder tolerates softer edges better than hands or feet. Plan on two sessions and know that watercolor-style fades can look uneven without careful saturation. A common mistake is asking for full watercolor with ultra-thin layers. Request a mix of saturated anchors and feathery washes to balance daytime and UV visibility.
11. Micro-Realism Planet on Collarbone
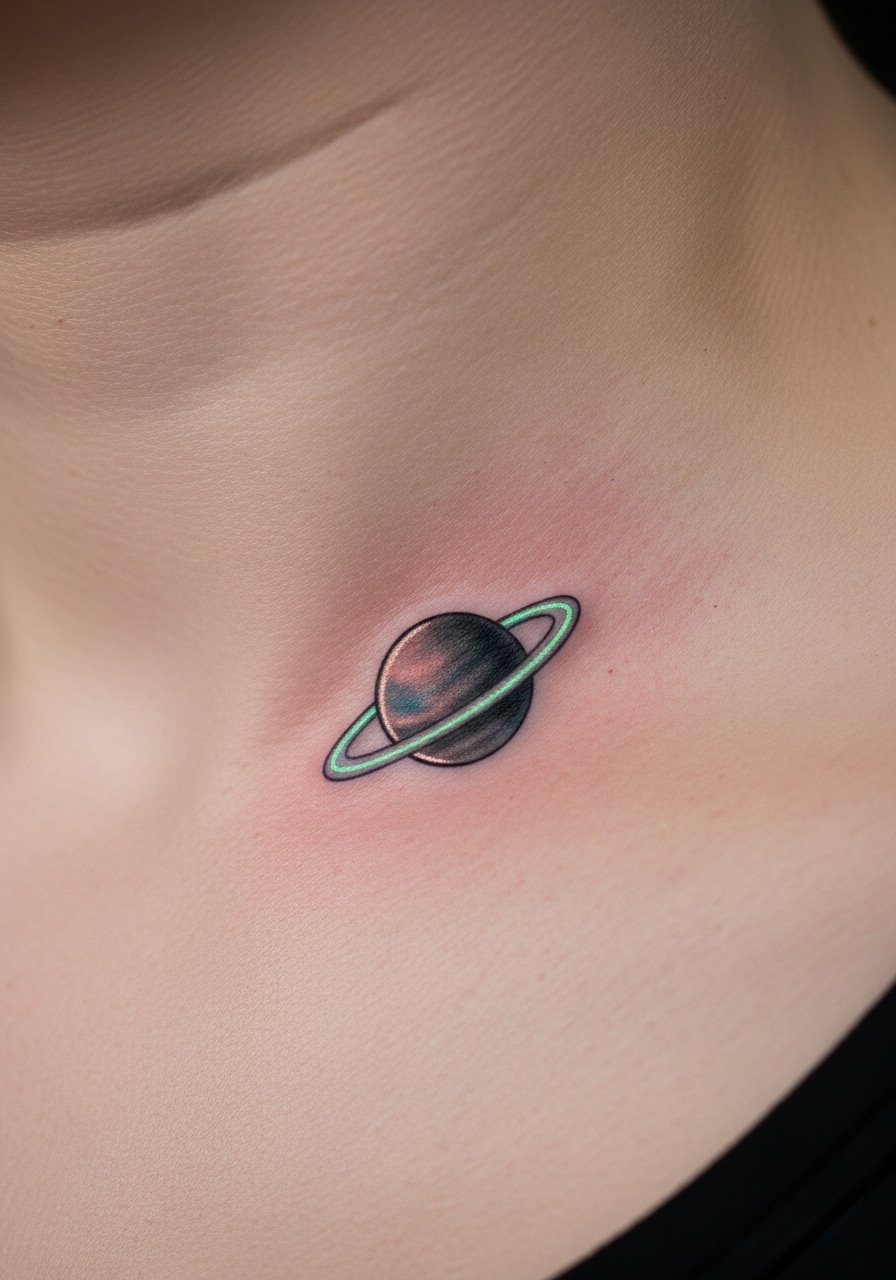
The collarbone has thin skin and higher sensitivity. Pain is higher here but the result can be very personal. When you book, ask for compact composition and controlled saturation so the planet keeps its roundness as it heals. Expect a short session under an hour for a fingertip-sized planet. Over time, highlights may fade faster than core shading. A common mistake is overpacking tiny details into a collarbone piece. Keep orbit lines bold enough to survive two years before a likely touch-up.
12. Abstract Line Wave on Ankle
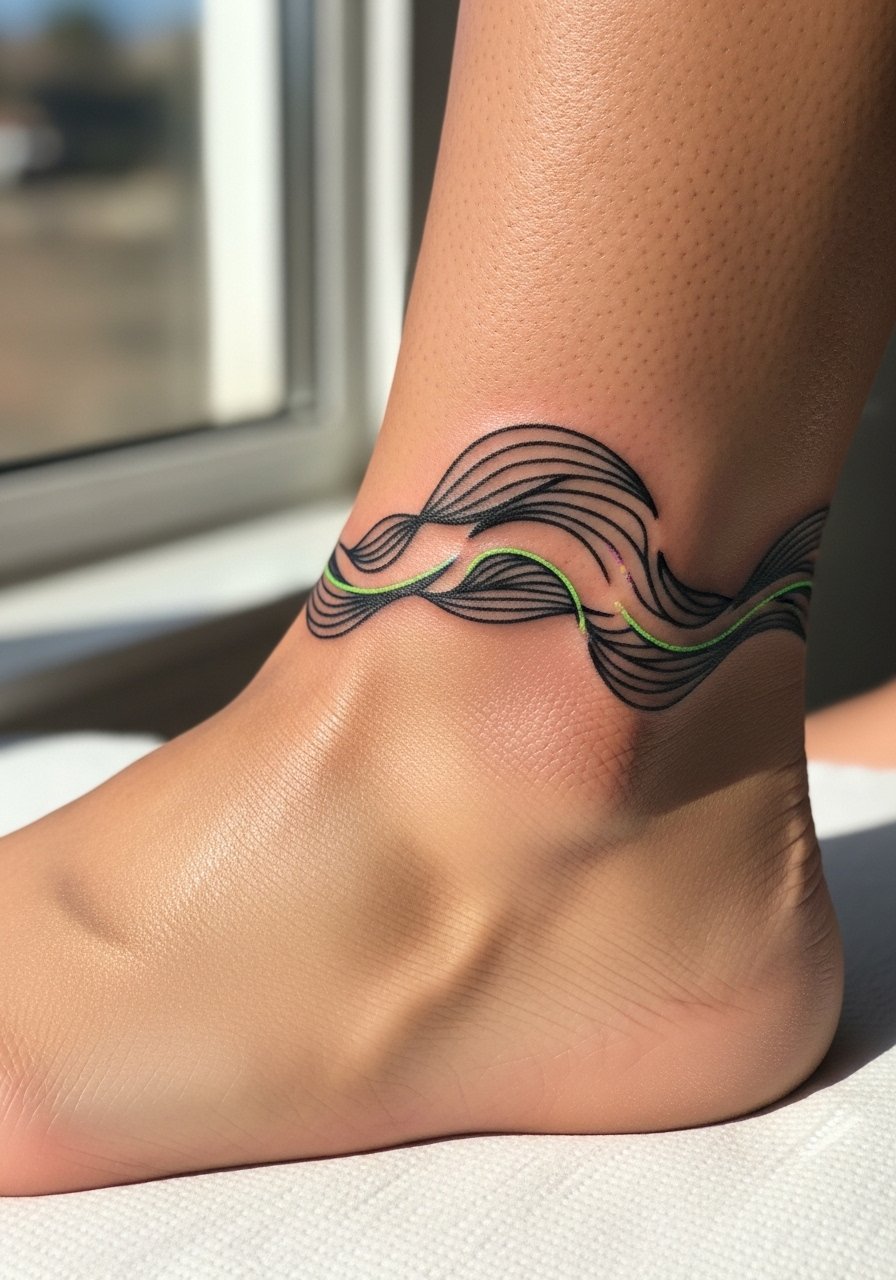
Ankle tattoos are comfortable for minimalist waves but they rub against socks and shoes during healing. I tell people to schedule a session when they can avoid tight footwear for a week. Ask your artist to use slightly thicker linework at the turns so the wave does not blur as the ankle shifts. Expect single session work that may need touch-ups sooner than thigh or back. The main mistake is choosing ultra-fine continuous lines around a joint. Add small breaks or dots to preserve negative space long term.
13. Celestial Sleeve Accent with UV Stars

There is a different cadence to sleeve work when you add UV elements. For forearm accents, tell your artist where you want the UV to sit relative to standard color so it complements rather than competes. Sessions add up, so plan a staged approach. Over years, UV areas will generally need more frequent touch-ups than the non-UV portions. A common mistake is overloading a sleeve with too many small fluorescents that all fade at different rates. Space UV features and reserve larger areas for the most visible glow.
14. Minimalist Mountain Range on Inner Arm

When you ask for a minimalist range, the biggest error is going too small. Inner arm skin moves and subtle lines can blur. Request slightly bolder contour lines and UV ridge accents as a separate pass so the peaks hold. Expect short session time and mild pain. At six months the piece should read clean, but by two to five years you may want a touch-up if you get heavy sun. This placement suits someone who wants a low-profile daytime look and a secret reveal at shows.
15. Floral Ankle Band with Hidden UV Petals
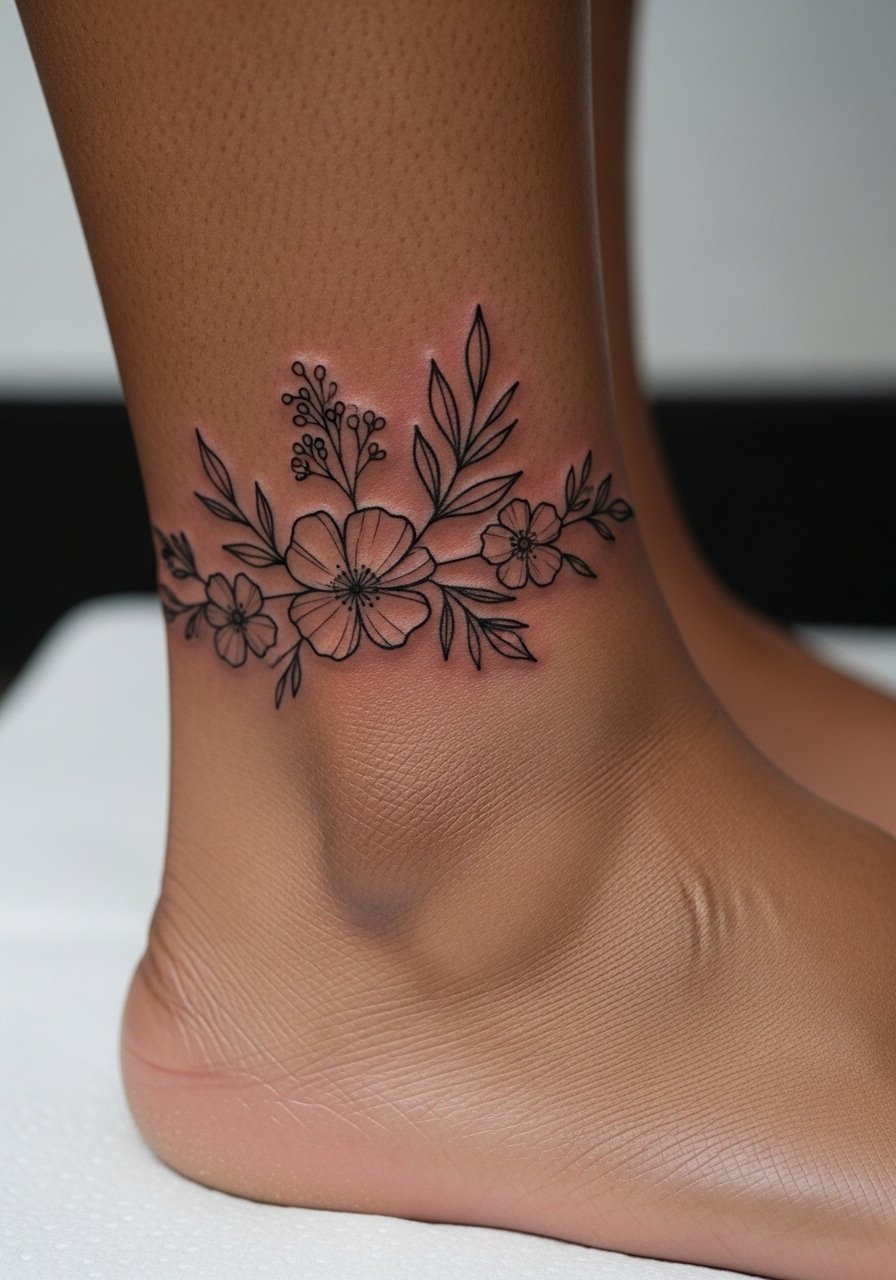
The ankle band is a cute, discreet choice but it suffers the same abrasion as other foot-area work. Ask for slightly stronger lineweight on petal outlines and UV accents concentrated on petal centers. If you plan to wear sandals often, expect faster fading. A common mistake is requesting continuous filigree too close to the bone. The piece will look delicate at first and then require touch-ups to maintain the UV pop after a year or two.
16. Tiny Constellation Behind Ear

Behind-the-ear placements are tiny and intended to be surprises. Tell your artist you want spaced dots and small connecting lines rather than a dense cluster. The area heals quickly but can lose photons fast due to sun and washing. Expect a 20 to 40 minute session and plan on a touch-up in one to three years. Artists often recommend testing ink on a small patch if you have sensitive skin. Keep the design simple to lower blowout risk in that thin area.
17. Barcode-Style Medical Marker on Inner Wrist
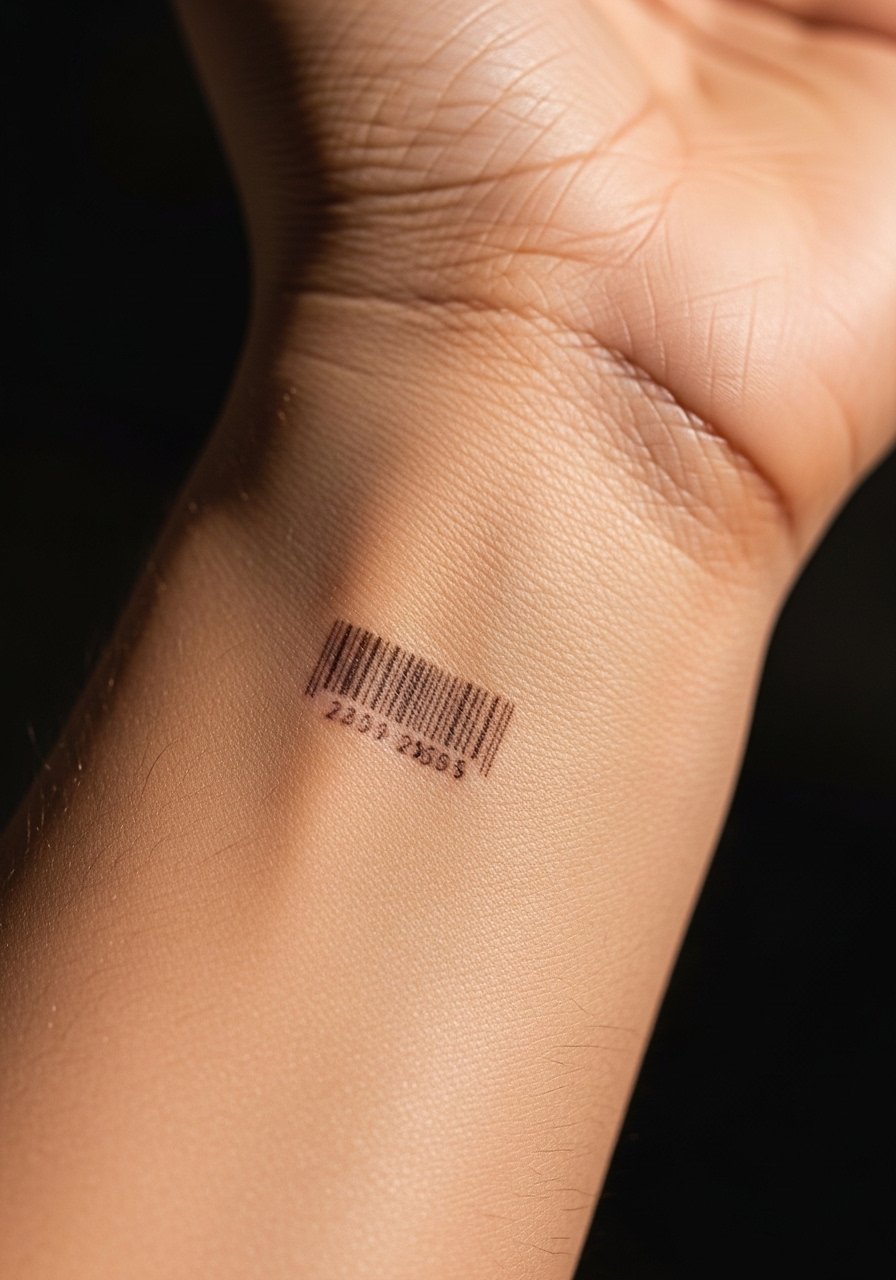
This is one of the under-covered practical uses of UV tattoos. For people who want a discreet identifier, an inner wrist barcode in invisible UV ink can be a privacy-friendly option. Some clinics and individuals have tested similar approaches. One realistic note is that invisible UV ink can still leave a faint impression, so discuss that in consults. Keep the bars wider rather than razor-thin to avoid blurring. Expect single session work and plan to carry a small UV keychain if you want to reveal the marker at will.
18. Bioluminescent Jellyfish on Thigh
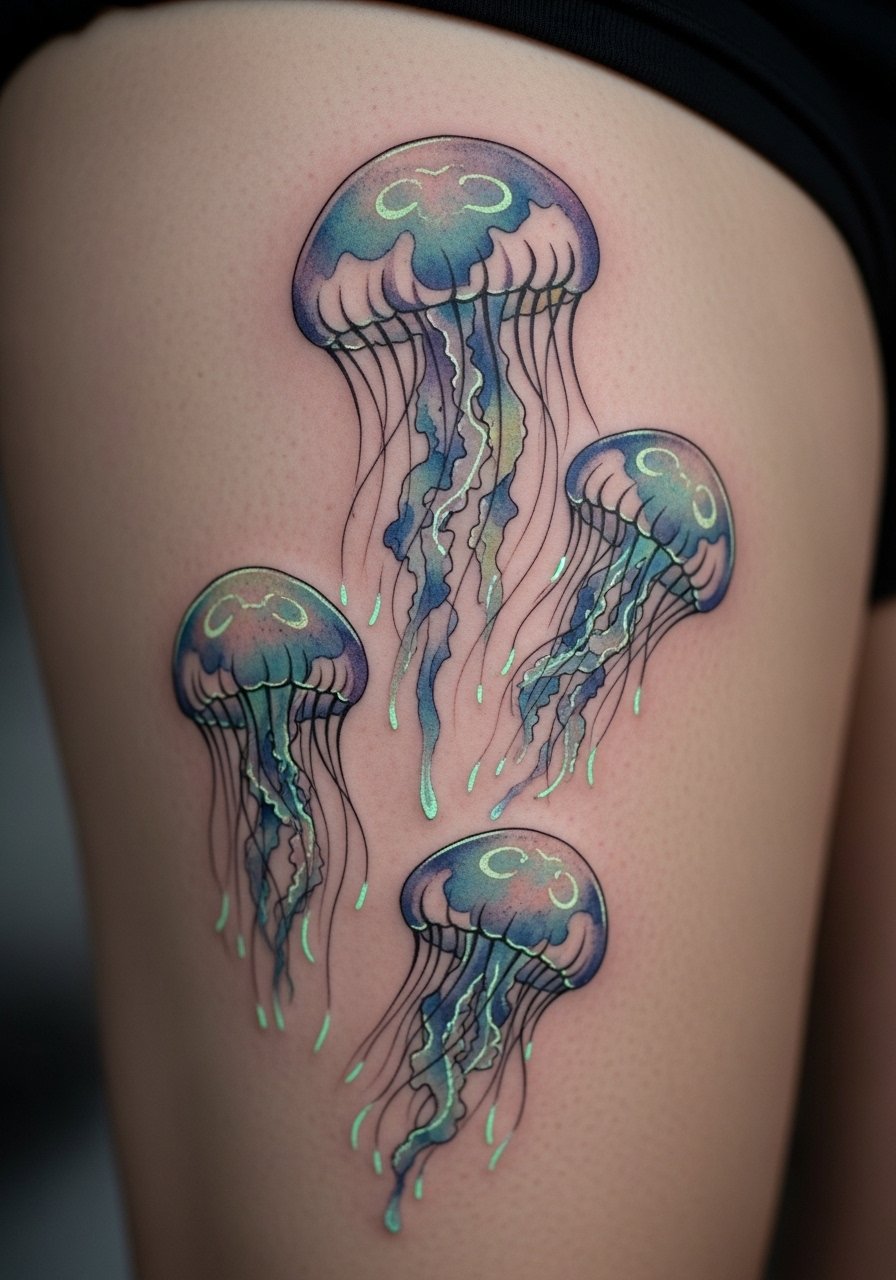
The thigh is forgiving for watercolor and multi-layered UV pigments. Ask your artist to anchor color with stronger saturation at the bell and use stipple shading down the tentacles for a softer healed look. Sessions may run longer because of blending. Over time, watercolor edges can feather, so request denser anchors in key areas. A common mistake is choosing a narrow placement that distorts as you sit. The thigh gives room so the composition ages more predictably.
19. Geometric Arrow Cluster on Forearm

There is a practical reason many choose the forearm for geometry. The skin is stable and the lines hold well. Tell your artist to balance arrow spacing and to use whip shading or stipple where arrows intersect to avoid a dense knot. The forearm usually heals cleanly and has lower blowout risk than hands. For those worried about long-term wear, expect a touch-up around the two to five year mark for the UV points. Avoid squashing too many arrows into a small area or the composition will age poorly.
20. Tiny Scorpion with UV Tail on Ankle
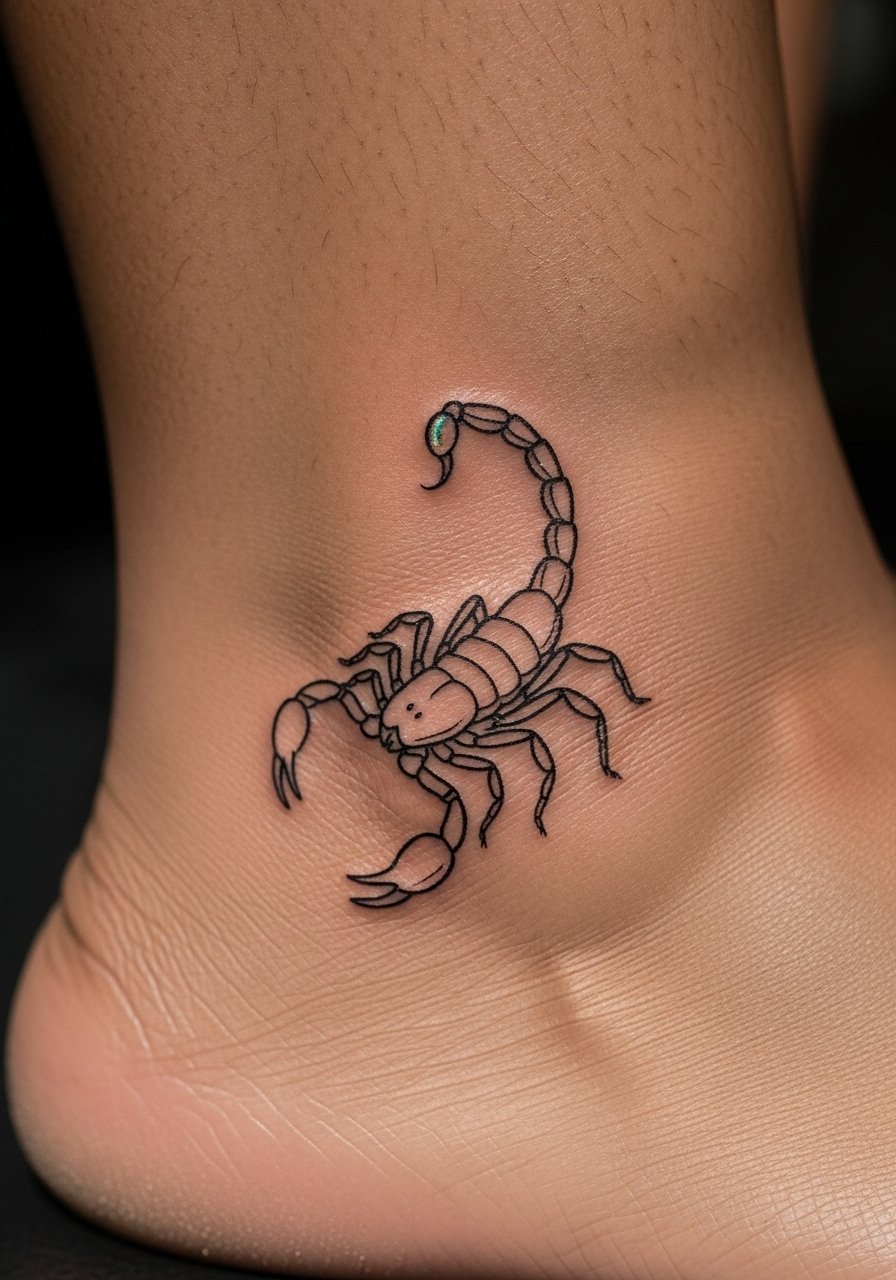
The ankle is a small but bold canvas for a scorpion motif. If you want the tail to light up, ask for the stinger to be slightly larger than you think. Thin tails can disappear as lines settle. The ankle has higher abrasion so the UV may dim sooner than on the upper arm. Expect a short session and mild to moderate healing sensitivity. A common mistake is asking for minute claw details. Keep the silhouette clean so the UV tail reads clearly when activated.
21. Neon Heartbeat Line Across Sternum

Sensitive placements like the sternum require a careful chat about pain and healing. If you want a heartbeat accent that lights under blacklight, ask for a slightly thicker primary line and a separate pass for UV color. The sternum can retain more scar if tattooed aggressively, so request moderate depth. Expect two sessions if you want symmetry and additional shading. Long-term, the UV will likely need refreshes sooner due to chest sun exposure during outdoor activities. Consider your pain tolerance before booking.
22. Locked Key with UV Teeth on Inner Bicep

When you plan a symbolic piece like a key, the inner bicep is private and good for detail. The inside of the arm can be tender during the session but heals well when you keep it rested. Tell your artist the exact word or date you want nearby if you include text so proportions stay right. A typical mistake is placing too much tiny text near moving skin. Expect a single session with a likely touch-up around year two to preserve the UV teeth brightness.
23. Solar Eclipse Band Around Wrist
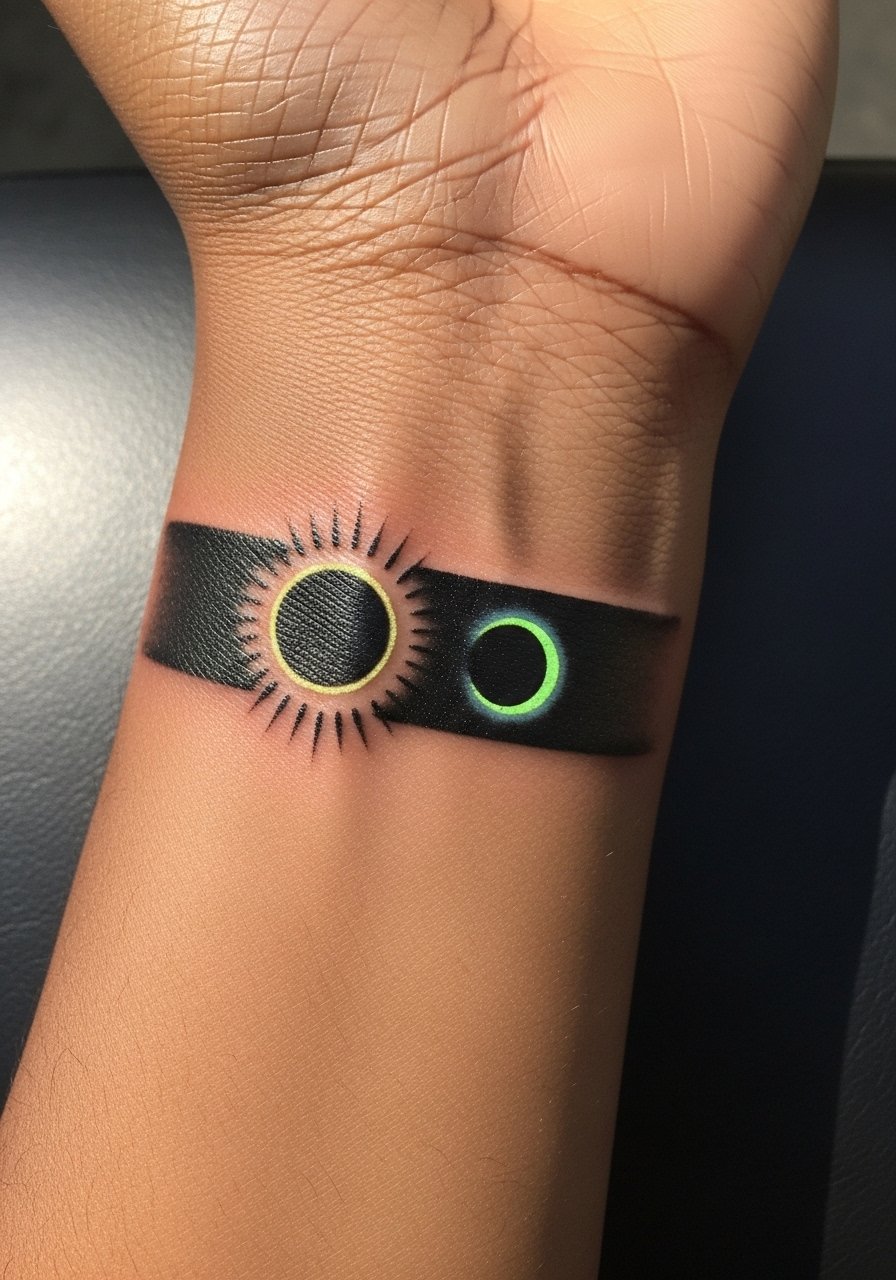
Wrist bands read as jewelry and reveal a secret under blacklight. Ask for slight negative space between elements so the band does not blur as it ages. The wrist is exposed often so you will need to protect it from sunlight to keep fluorescence lively. Expect a short session and plan to rework the UV crescent if the hue dulls. A common mistake is creating a continuous thin band that later fades into a ghost line. Break the band with tiny dots or gaps for longevity.
24. Stippling Compass Rose on Calf

Dot work and stipple shading can complement UV highlights well because dots age predictably. The calf accepts stippling without much blowout risk. Tell your artist to scale the compass so cardinal points have larger UV anchors. A mistake I hear often is asking for ultra-dense stippling that heals muddied. Expect a longer session for detailed dot work and a touch-up later to renew the UV anchors after a couple years. The design stays crisp longer on the calf than on flexible joints.
25. Invisible Script Nape Piece

Designs at the nape are discreet and can be shown when you pull your hair up. If you choose invisible UV script, specify the exact phrase you want so the artist can set spacing correctly. Artists differ on invisible pigments. One camp recommends UV-reactive pigments that are faint in daylight but visible under blacklight. The other camp warns that true invisible pigments may cause uneven healing and slight scarring. Ask which approach your artist uses and whether they have healed photos to share. Expect a short session and budget for touch-ups if you plan to reveal it often.
Tattoo Prep and Aftercare Essentials

Healing UV-reactive ink follows the same basic principles as standard ink with some caveats. Avoid long sun exposure while the piece settles. Test any aftercare balm on a small patch if you have sensitive skin. Keep the area clean with gentle soap and a non-irritating moisturizer. I have spent time in several shops across Brooklyn and the consistent advice is to protect the UV pigments from sunlight and to expect touch-ups for fluorescence sooner than with standard colors.
Shopping list
Fragrance-free lightweight healing balm, tub style. Use for the first week once scabs start to form. It keeps the skin supple without heavy residue and helps color settle.
Gauze-free sterile non-adherent pads, small pack. Ideal for initial dressing to avoid fabric sticking and to reduce irritation during the first 48 hours.
Medical-grade second skin bandage, 6-inch roll. Use immediately after the session if your artist recommends an occlusive dressing. It protects from bacteria while you sleep and shields the piece from rubbing.
Fragrance-free gentle foaming cleanser. Clean twice daily with lukewarm water for the first week. Avoid scrubbing and strong fragrances that can sting fresh ink.
Portable UV keychain light, compact size. Carry this to demo blacklight-reactive pieces at events and to check healed fluorescence at home.
Soft cotton bandage sleeves for limb protection. Useful during workouts to keep sweat and friction away from a healing tattoo.
Broad-spectrum SPF 50 mineral sunscreen lotion. Use on healed tattoos anytime you will be in direct sun to slow pigment degradation.
Silicone scar sheet strips, small pack. For areas that scar easily, these help flatten raised healing and keep healed texture smoother, which can preserve how invisible or faint UV inks read.
Aquaphor Healing Ointment, small jar. This is the one mainstream option I mention because many artists use it during the early healing stage. Use sparingly and rub it in thin layers to avoid trapping moisture.
Every tattoo is different. Always follow your artist's specific aftercare instructions. Consult a dermatologist if you have skin concerns or unusual healing issues.
Frequently Asked Questions
Q: Do UV-reactive inks cause more irritation than standard pigments, and how should I test for sensitivity?
A: From what I've gathered, some people notice more sensitivity with certain fluorescent blends. The safest path is to request a small test spot during your consult or to ask the artist if they perform patch testing. If you have a history of dermatitis, consult a dermatologist first.
Q: How does a fine line UV piece on ribs age compared with one on the forearm?
A: Fine line on ribs tends to blur faster because the skin stretches and moves more when you breathe. On a forearm, lines sit more stably. If you want ribs, ask for slightly bolder line weight and wider spacing so the work holds for two to five years before likely touch-ups.
Q: Can I still get a discreet medical marker in invisible UV ink for privacy, and will it show in daylight?
A: Yes, discreet medical markers in UV-reactive ink are a practical option. They are usually faint in daylight but can leave slight ghosting depending on skin and depth. Discuss expectations with your artist and consider carrying a small UV keychain if you need to reveal it on demand.
Q: How often do UV highlights need touch-ups compared with normal color tattoos?
A: In my experience, UV highlights often need refreshes sooner. Many people expect a noticeable drop in fluorescence by year two to three when exposed to sunlight regularly. Plan touch-ups on a case-by-case basis depending on placement and how much sun exposure the area gets.
Q: Are there discovery methods to find artists who work with UV ink without following specific Instagram handles?
A: Yes. Search style-specific hashtags, look for studios listing UV or blacklight options in local directories, and check tattoo platforms that filter by ink type. Reddit threads and booking apps that include ink tags are useful ways to find artists who regularly do UV work.
