
Small wave motifs look effortless online, but they hide two technical choices that decide how they age. A single-needle tiny crest photographed day one might read delicate, and at year three it can blur into a gray smudge. A slightly thicker line, mindful spacing, and a placement with less friction keeps the silhouette crisp while still feeling understated. Expect practical notes on placement, session feel, and wardrobe that actually helps you show the work.
1. Minimal Single Wave on Inner Wrist

A tiny single-wave on the inner wrist reads calm and private. The inner wrist eats the thinnest detail over time so plan lineweight a hair heavier than your reference, and bring a scaled reference so the artist can show how the design looks at three inches and at two inches. Expect the session to be quick, usually under thirty minutes, with low to moderate pain. At six months the curve will still read sharp, at two years the thinnest parts may soften, and at five years touch-up is common for crisp definition. Wear a rolled-up long sleeve during the session for seat comfort and bring a loose cotton tank top so the artist has unobstructed access.
2. Tiny Wave Anklet Band
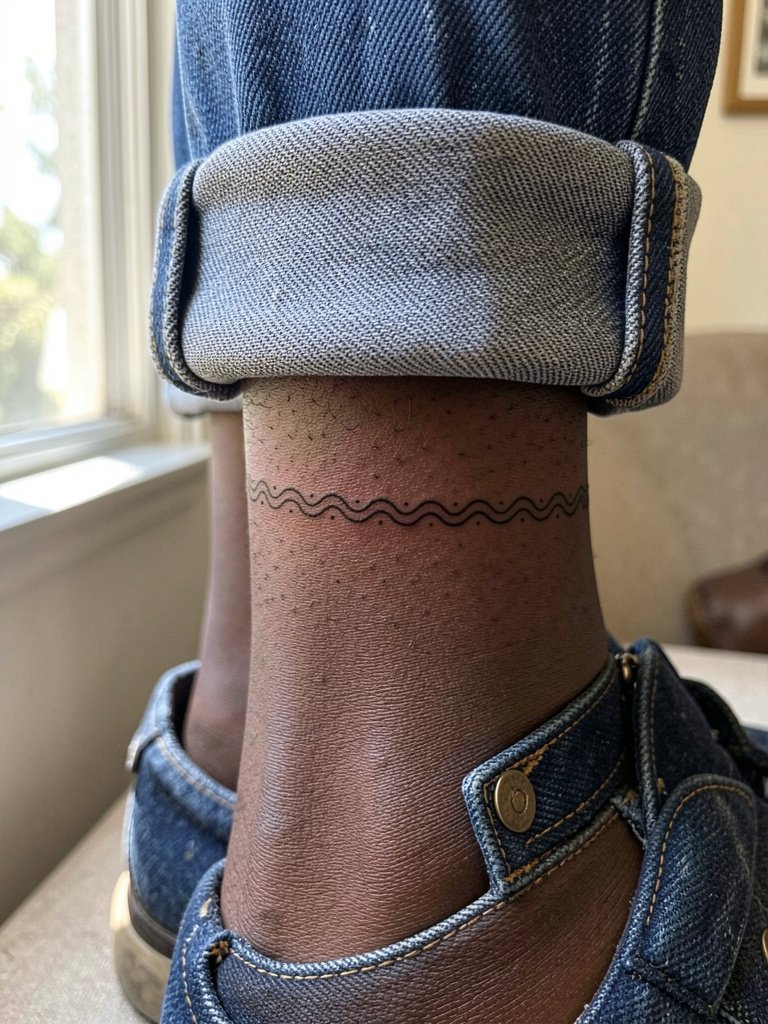
An anklet band of small waves suits people who like a tiny visible accent. The top-of-ankle placement sees constant brushing against socks and shoe collars, so opt for slightly bolder line weight and spacing between repeats. Expect a 30 to 45 minute session and a higher chance of touch-up at the six to twelve month mark because of friction. A common mistake is making each wave too tight and identical, which can blur into one ribbon after a few years. Show-off pairing works well with low-top sandals and linen ankle-length trousers that keep the band visible.
3. Stacked Micro Waves on Inner Forearm

Stacking micro waves gives a quiet rhythm without dominating the forearm. I recommend this if you want more presence than a single line but still want low-key work. The inner forearm tolerates fine detail better than the wrist, but avoid placing the stack too close to the crease where movement can distort lines. Session time is around forty-five minutes to an hour. At six months the parallel lines stay distinct, at two years the narrowest may soften, and at five years a touch-up refreshes the thinner lines. For showing it off, roll sleeves and try a button-up linen shirt with sleeves pushed for a casual reveal.
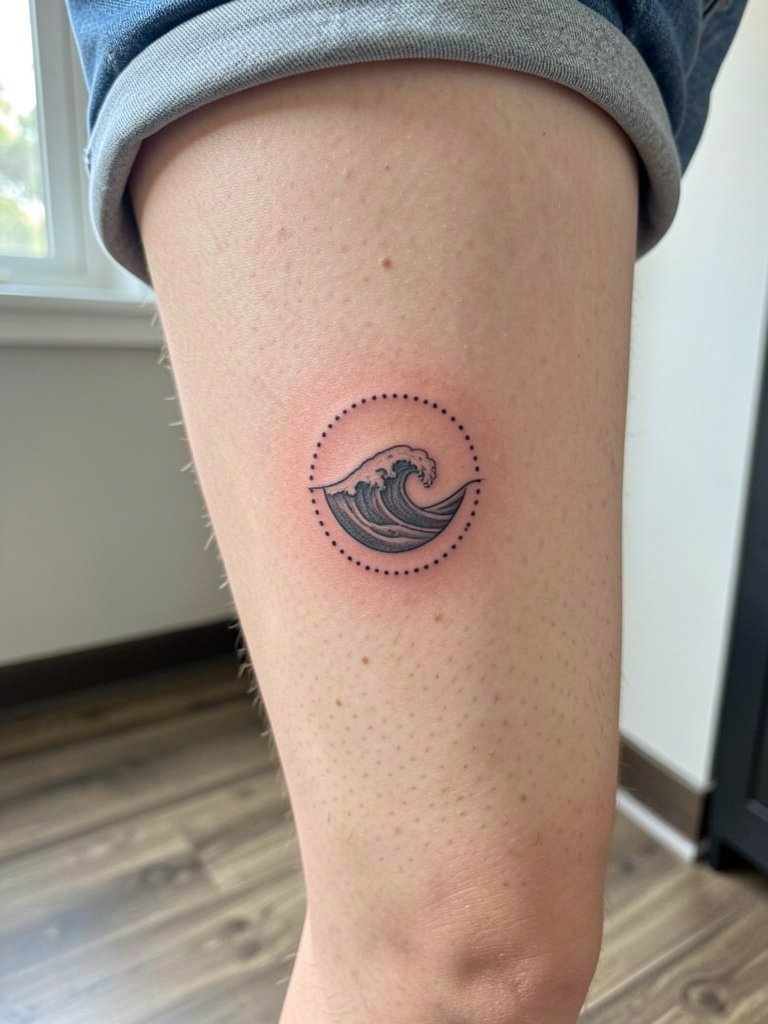
4. Geometric Wave Circle on Collarbone

A compact wave inside a circle sits nicely under the collarbone for an elegant look. The collarbone sees frequent sun exposure so plan for UV protection in your regular skin care routine. Discuss spacing so the circle reads at arm's length, and ask the artist to stencil the exact distance from the bone to ensure symmetry. The session is short and moderately sensitive because of the bone close to skin. Over time the thin circular border can soften, so request a slightly firmer outline. Pair with open-neck shirts and consider an open-back midi dress for evenings when you want the collarbone to frame the piece.
5. Tiny Wave + Minimal Sun on Shoulder Blade

Placing a wave with a minimal sun on the shoulder blade works well for someone who wants a piece that is mostly private but visible in summer clothing. The shoulder blade area has a firm surface with little stretch so fine details hold up well. For the consultation, bring posture photos so the artist places the wave where it does not sit on a muscle crease. Session time is typically under an hour and pain is low to moderate. Six months in the tiny rays will still read crisp and at five years a touch-up may be needed mainly on the smallest dots. Show it with a racerback top and a strappy bralette when you want to display the piece.
6. Micro Japanese Wave Crest on Outer Calf
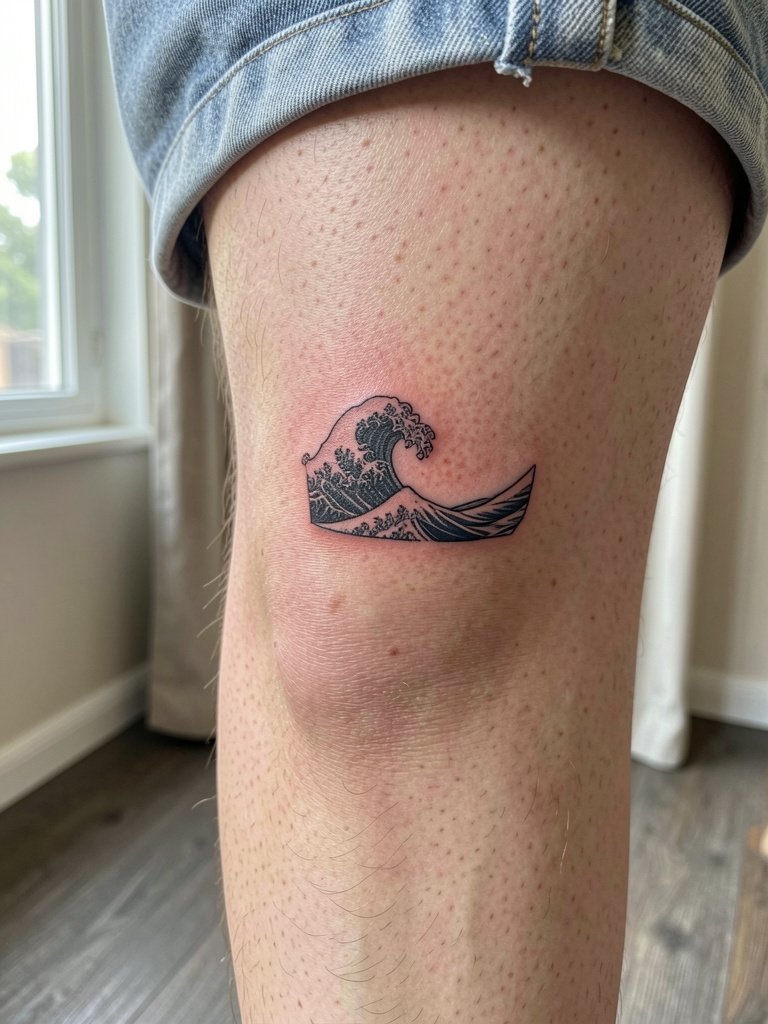
A compact Japanese-inspired crest brings tradition into a small scale. Cultural origins matter for Japanese wave imagery, so approach the design with respect and avoid borrowing sacred motifs without context. The outer calf takes saturation well so this version keeps strong contrast that ages gracefully. Plan for a 45 to 90 minute session depending on shading. A common mistake is shrinking a complex crest too small, which loses the identifying shapes over time. For warm-weather shows, sandals and high socks conceal or reveal as you choose, and an athletic short keeps the view casual.
Session Day Picks
The wrist, ankle, and forearm pieces above have different access needs, so these items smooth the actual appointment and first week.
-
Heat-activated stencil transfer paper kit. Useful when previewing the curvature of wave repeats on wrists and ankles, letting you see how the pattern wraps before the needle.
-
Topical numbing cream 5% lidocaine. Applied per directions about 45 minutes before a sensitive calf or collarbone session can reduce discomfort without affecting line clarity.
-
Thin protective hydrofilm roll. Keeps small ankle and finger pieces protected from friction during the first days of healing.
-
Fragrance-free gentle body wash. Mild cleansing helps preserve fine line contrast for chest and forearm placements.
-
Aquaphor healing ointment. A widely used ointment for the initial thin-layer coverage recommended by many shops during the first two to three days.
7. Wave Outline Behind Ear

A behind-the-ear wave is one of the smallest visible placements and stays intimate. The area is thin and sensitive so expect a quick but sharp session lasting under twenty minutes. The main risk is the skin texture and frequent hair contact which can snag scabs, so wear hair up on the day and in the first week. Small single-needle lines can blur if placed too shallowly, so request slightly firmer depth and a clear stencil. For styling, a neat bun or silk hair scarf shows the area while protecting healing hair.
8. Wave and Tiny Script on Side Rib
Rib placements can be painful and they test fine-line durability. Artists are split on fine line ribs. One camp says the skin there stretches and moves too much so the lines blur within two years. The other camp argues that with proper needle depth and slightly wider spacing the lines settle fine and they show healed photos in support. If you pick a rib wave, plan for a slightly bolder script and accept that touch-up might be needed at the one to three year mark. Wear a loose top the day of the session and consider a soft sports bra for access comfort.
9. Continuous Wave Band for Finger

Finger bands are highly visible and high maintenance. The finger skin regenerates quickly and wears ink with repeated handwashing and friction, so choose a slightly simplified repeat pattern and accept that major touch-ups are likely within one to three years. Session time is short but the pain can be intense for this small area. A frequent mistake is requesting ultra-fine repeats that collapse into a single blurred band. For showing off a finger wave, consider stackable thin rings and a silver midi ring set to frame the tattoo without covering it.
10. Wave with Tiny Moon on Nape
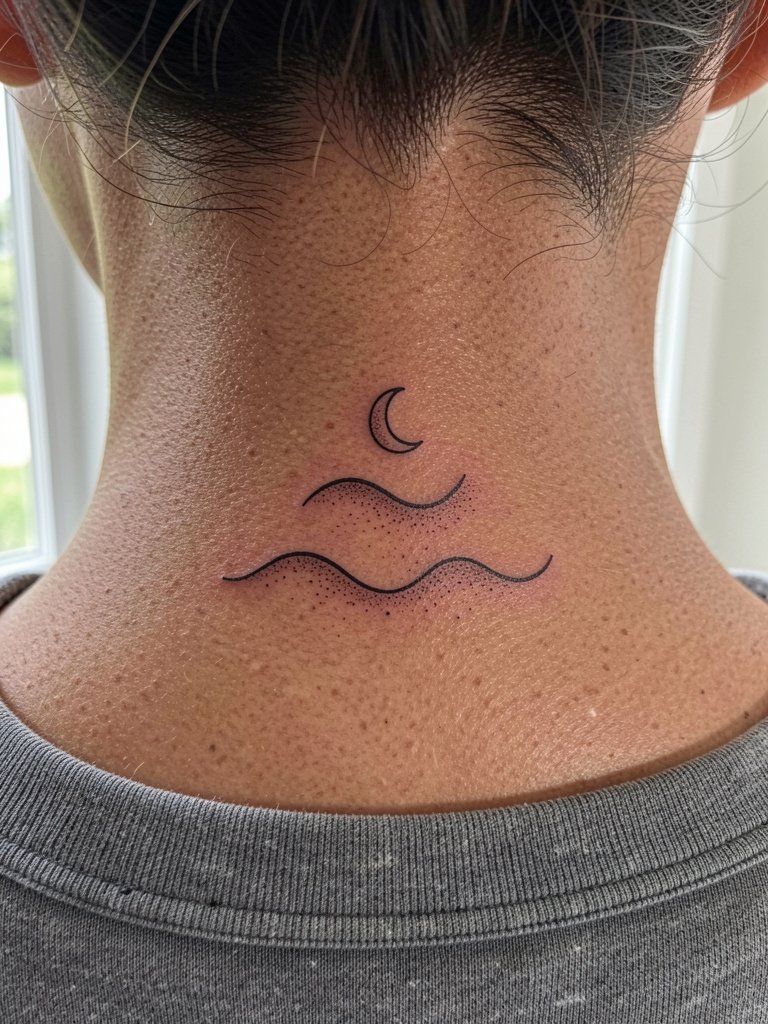
A nape wave is a discreet spot that looks intentional when hair is up. The skin there is stable and holds detail well, so fine lines read longer than on wrists or fingers. Discuss exact vertical placement with your artist so the wave does not sit under where your hairline moves. Sessions are quick and pain moderate. In two years the thin dots may soften so request slightly stronger stipple for longevity. Pair with hairstyles that show the area and try a lightweight hair claw clip for effortless display.
11. Tiny Crest on the Outer Hand Edge

Edge-of-hand pieces are high-visibility and high-risk for fading. The skin there rubs against surfaces constantly so plan for a simplified shape and expect frequent touch-ups. A practical tip is to request the darkest parts of the design be placed away from the most rubbed edges, giving core contrast a chance to stay. Sessions are short but can sting. If you want to show it, open-finger gloves or cropped sleeves help the hand stand out with a neutral knit glove during colder months.
12. Wave Crest with Tiny Floral Accent on Upper Thigh

The inner thigh gives room for a tiny scene and the skin there tends to keep crisp detail if not placed too close to the groin. Expect moderate pain and a session that could run up to an hour depending on shading. A mistake is letting complex botanical elements creep too small near the crease where friction causes early softening. At two years the core shapes remain if spaced correctly, and a small touch-up refreshes any lost dot shading. Show-off pairing for evenings includes a midi slip dress that reveals the thigh elegantly.
13. Bold Micro Wave on Upper Arm

A slightly bolder micro wave on the upper arm trades fragile detail for long-term readability. The upper arm is forgiving with low blowout risk and accepts saturation well, so this option is ideal for someone who wants a tidy graphic that still reads a decade later. Session time is brief and pain is low. A common misstep is overfilling with heavy shading that steals the crisp silhouette, so ask for clean negative space. For casual days, roll sleeves or wear a breathable linen shirt with the sleeve cuff hitched to display the motif.
14. Minimal Wave Inside a Tiny Triangle on Wrist
Framing a small wave inside a micro geometric shape gives the illusion of intent and helps protect the main line from blurring. The wrist placement is sensitive and the skin moves a lot so the trick is keeping the frame strong enough to preserve the internal curve. Ask the artist to show a stencil at full size to check proportions. Expect around thirty to forty-five minutes and occasional twinges during the session. At two years a thin triangle border may show slight softening, so discuss a touch-up window. Match this with rolled cuffs and a minimalist leather bracelet to balance the geometry.
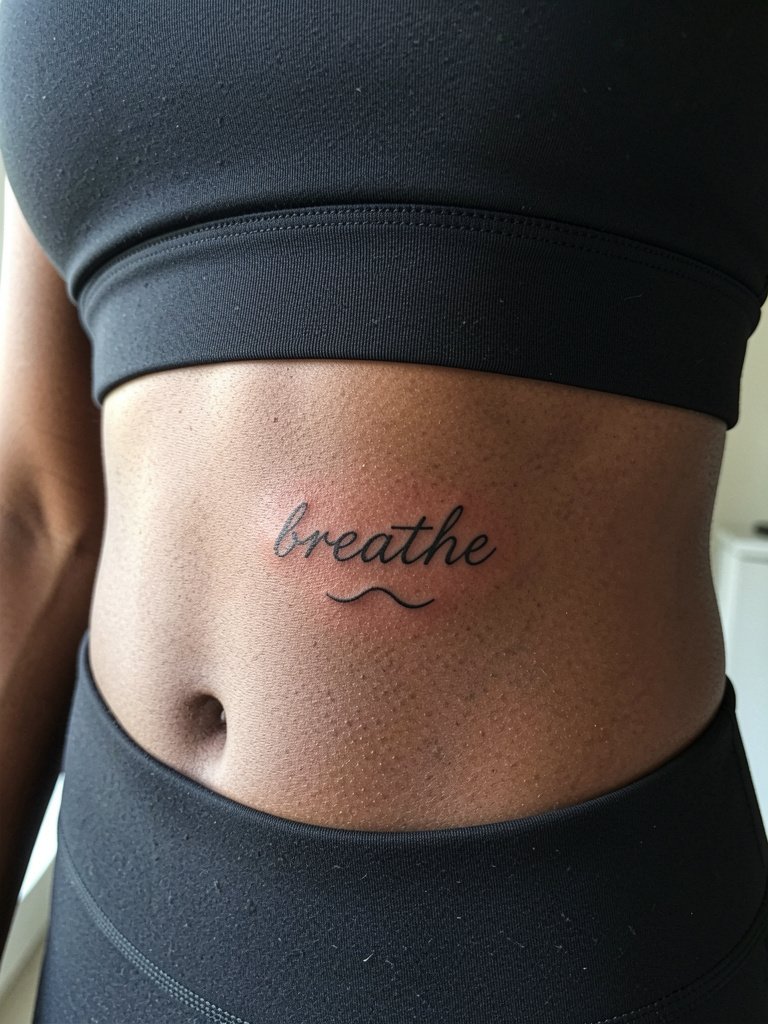
15. Low Hip Wave Slice

The lateral hip is a great spot for a piece that stays private with most clothing yet shows with low-rise or cropped items. Sessions are low to moderate in pain depending on padding and take about thirty minutes. A common mistake is placing the design too far over the hip curve where movement and waistband friction cause early wear. For the session, wear low-rise jeans that you can lower slightly without removing them so the artist has access and your modesty stays intact. For outfits, pair with low-rise denim and a cropped top like a high-waisted fitted jean combo that frames the slice.
16. Mirror Twin Waves on Back of Wrist

Mirrored waves on the back of the wrist have a balanced, jewelry-like effect. The dorsal wrist sees more sun and friction, so thicker outlines help the shapes remain distinct. Discuss symmetry precisely during the consult and have the artist ink a clear full-size stencil to check alignment with veins and tendons. Session time is relatively short but can sting. Over time the thinnest inner points can blur, so schedule a touch-up window around the one to three year mark. Wear bracelets carefully during healing and consider a soft wrist wrap band afterward if you want subtle framing.
17. Tiny Wave with Dot Work on Calf
Dot work gives a small wave some air and texture without adding heavy color. The outer calf accepts stipple well and the skin surface is steady, so the dots keep their structure longer than on high-friction areas. Expect a session of forty-five minutes and mild to moderate discomfort. A mistake to avoid is placing too many tiny dots close to the linework which can cause visual muddiness over time. For warm-season style, pair with mid-length shorts and an everyday sockless sneaker to let the calf show naturally.
18. Crescent Wave on Sternum

Sternum pieces are intimate and can be high on pain for many. The area also moves with breathing and underbust pressure so fine-line work here needs slightly more spacing. One common mistake is asking for ultra-fine single-needle filigree which can blur under movement. Sessions are longer and may require breaks. Plan for touch-ups at one to three years for thin details. Because this is a specialized spot, work with a shop experienced in chest placements and follow up about session pacing and numbing options.
19. Tiny Wave Wrap Behind the Knee

Behind-knee tattoos face the challenge of constant bending which can distort thin lines. For that reason, go for simplified wave repeats spaced slightly apart so they read even when the joint flexes. Expect a somewhat uncomfortable session and a longer healing window because movement impacts scab formation. The biggest error is packing in too many tiny motifs that collapse into a blur. For casual display, short hems and sandals work, and you can pair with a flowy summer skirt that lets movement show the art.
20. Micro Wave within a Heart on Inner Ankle
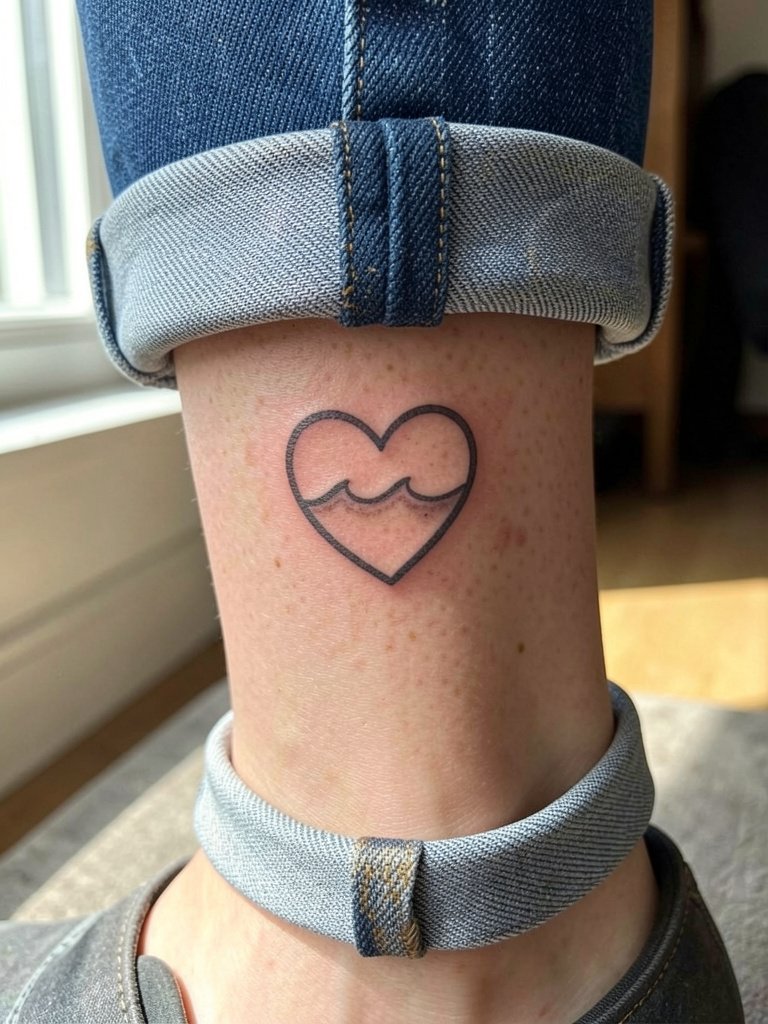
Combining a tiny wave with a heart gives emotional shorthand without becoming literal. The inner ankle is a high-friction area so a reinforced outer shape preserves the inner curve longer. Plan for a short session and expect moderate aftercare attention because of shoe contact and socks. A common mistake is making the heart too thin which lets shoe rubbing erase detail. For showing the area, try rolled denim or ankle boots and consider a delicate anklet to frame the piece.
21. Small Wave Behind the Ear With Tiny Star

Behind-ear tiny combos are discreet and ideal for a first visible mark. The area is sharp to tattoo because the skin is thin and the needle feels more pronounced. Keep the star and wave simple to avoid blurring and plan for a brief session of under twenty minutes. A typical mistake is adding too many small stars that age into speckles. To show the piece, wear hair up with clips and use a compact barrette set that highlights the nape.
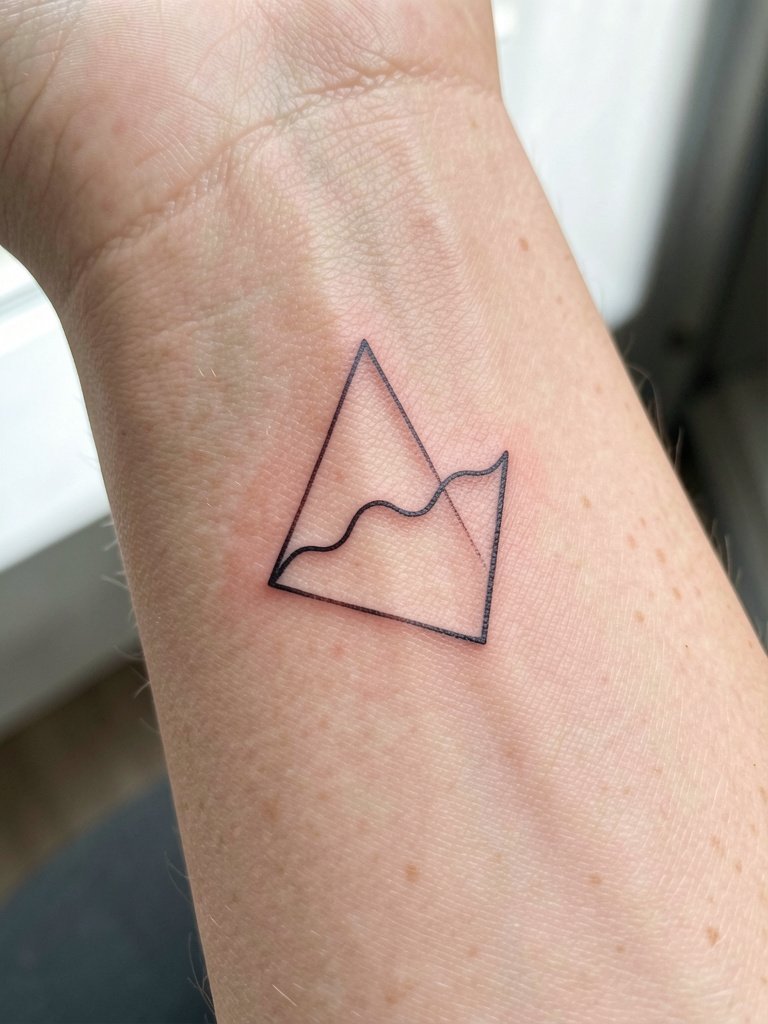
22. Small Wave and Mountain Mini Scene on Outer Thigh

Combining wave and mountain creates a small landscape for people who like symbolic pairings. The outer thigh offers a smooth canvas so fine elements stay readable longer than on high-friction zones. During consultation, show the artist scale references for both the mountain peaks and the crest so neither overwhelms. Expect moderate session time and low to moderate pain. Over the years the tiny peaks keep shape if the linework is given room to breathe. For evenings out, a wrap skirt frames the placement nicely.
23. Continuous Tiny Wave Band for Ear-to-Ear Behind Hairline

An ear-to-ear nape band reads like hidden jewelry and works for someone who likes an occasional reveal. The nape surface is firm and holds repetition well, but hair contact and styling can tug while healing, so plan to keep hair up for the first few days. A frequent mistake is choosing motifs that are too tight and repeating them without spacing, which leads to visual merging after a year or two. Sessions may take an hour depending on length of the band. For showing off, pair with low ponytails and a silk scrunchie to keep the area clean.
Frequently Asked Questions
Q: How do small wave tattoos hold up across different skin tones?
A: In my experience wave silhouettes read well across tones when the artist balances lineweight and contrast. Darker skin tones benefit from slightly bolder outlines for legibility, while lighter tones can carry thinner single-needle work longer. Ask to see healed examples on the skin tone closest to yours during the consult.
Q: Where can I find healed examples and portfolios without naming artists directly?
A: Search platform tags and keywords like #smallwavetattoo, #microwaveink, and "small wave healed" on image-forward social platforms and use location filters to find local shop portfolios. Reddit threads and community boards often include multiple healed shots and notes on touch-up frequency. This single place of discovery helps you compare similar placements across skin tones.
Q: Are there wave designs I should avoid if I want low maintenance?
A: Avoid ultra-fine single-needle repeats on high-friction spots like fingers, palms, and the top of the hand if you want minimal upkeep. Choose slightly thicker single lines or simplified shapes for those areas and plan on a touch-up window at one to three years for most visible spots.
Q: How should I prepare clothing-wise for session comfort for the placements covered here?
A: Wear easy-access clothing that exposes the placement without active disrobing, for example a loose tank for shoulder or upper arm work, or low-rise jeans for hip placement. If you want a dress-up option after the session, an open-back midi dress or a loose button-up shirt works well for collarbone and sternum areas so healing stays private while you get dressed.
Q: Do small wave tattoos age differently if done in color versus black?
A: Color can add vibrancy but it often needs more frequent touch-ups on thin motifs, especially past the one to three year mark. Saturated black keeps silhouette clarity longer and is usually a lower-maintenance choice for minimalist wave work. Color accents are best used sparingly if long-term crispness is the priority.
