
Bold blackwork and classic Japanese sleeves keep their edges for years, while the wispiest single-needle scripts often soften into a smudge. If you want a sleeve that still reads at five years, think about how line weight, placement, and contrast behave on moving skin. Below are 29 sleeve directions that solve those aging problems, work with different skin tones, and pair with wardrobe choices so your ink looks intentional on and off the chair.
1. Japanese Dragon Full Sleeve
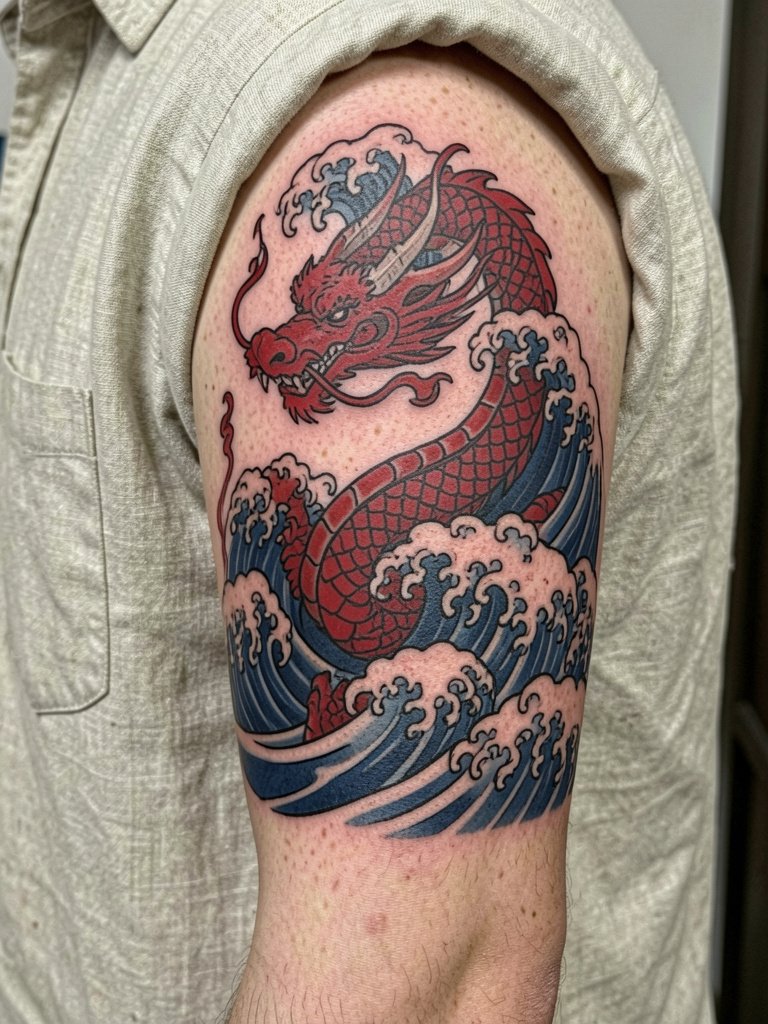
A full Irezumi approach uses bold outlines and large color blocks so each element reads from every angle. Expect multi-session work with long sits on the shoulder cap and bicep. If you plan to bulk muscle, place big motifs on the outer arm where shape change distorts less. For showing it off, short-sleeve linen shirts in cream or olive complement the palette and keep focus on the linework. Bring a loose button-down to the session so the artist has clear shoulder access.
2. Blackwork Geometric Mandala Sleeve

This style relies on heavy saturation and negative space to create contrast. The main mistake is shrinking the geometry too small. The lines need breathing room to avoid blurring at year three. On darker skin tones, pure blackwork keeps the pattern readable where subtle color would wash out. For casual show-off outfits, pair with a charcoal or black tee that lets the shapes pop. During the appointment wear a loose sleeveless top so the artist can access the whole circumference.
3. Hyper-Realistic Black & Grey Sleeve
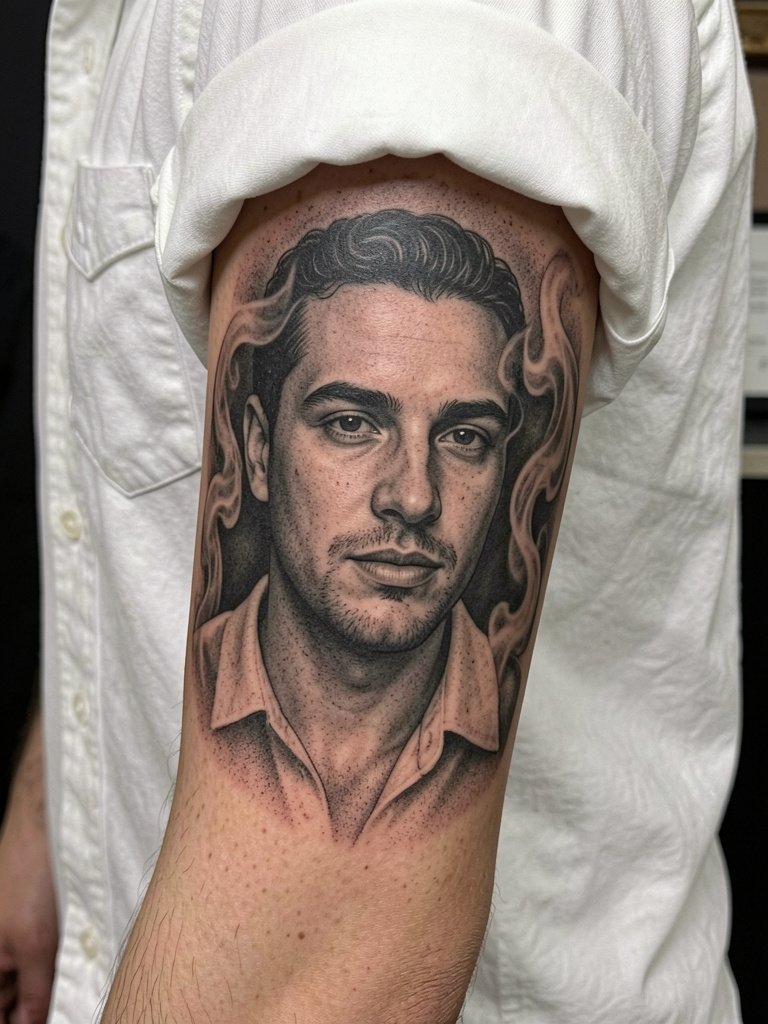
Realism demands long sessions and impeccable shading control. Expect many hours to build depth and then touch-ups later as contrast softens. The big error is trying to cram a portrait into the inner wrist. Keep faces on flatter forearm planes or the outer bicep so proportion reads naturally over time. For editorial looks, wear neutral-toned button-downs that create a clean backdrop for the grayscale tones. On session day, roll sleeves up and bring a comfy cushion for long sitting.
4. Neo-Traditional Color Sleeve
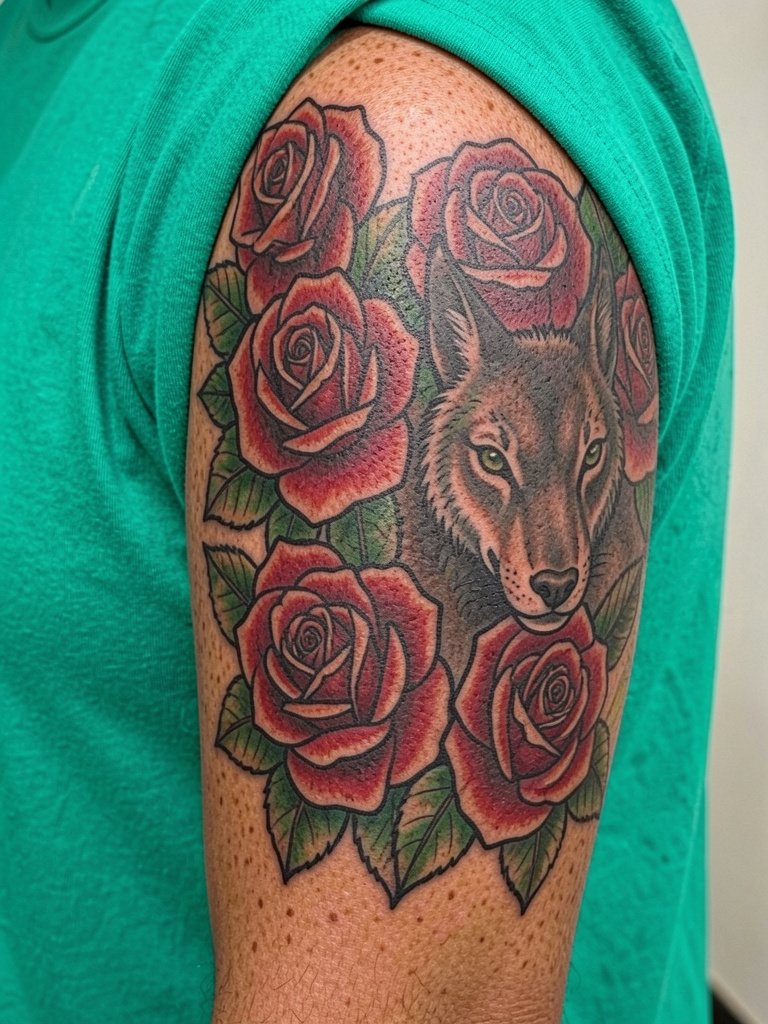
Neo-traditional blends strong linework with richer color fills while keeping composition readable at distance. The common misstep is using trendy pastels that fade quickly. Ask the artist for saturated fills and a slightly heavier outline to protect color edges. Pair vibrant shirts that pick up a tint from the palette when you want the tattoo to harmonize with your outfit. For the session wear a loose short-sleeve so the bicep remains accessible.
5. Patchwork Sleeve Built Over Time
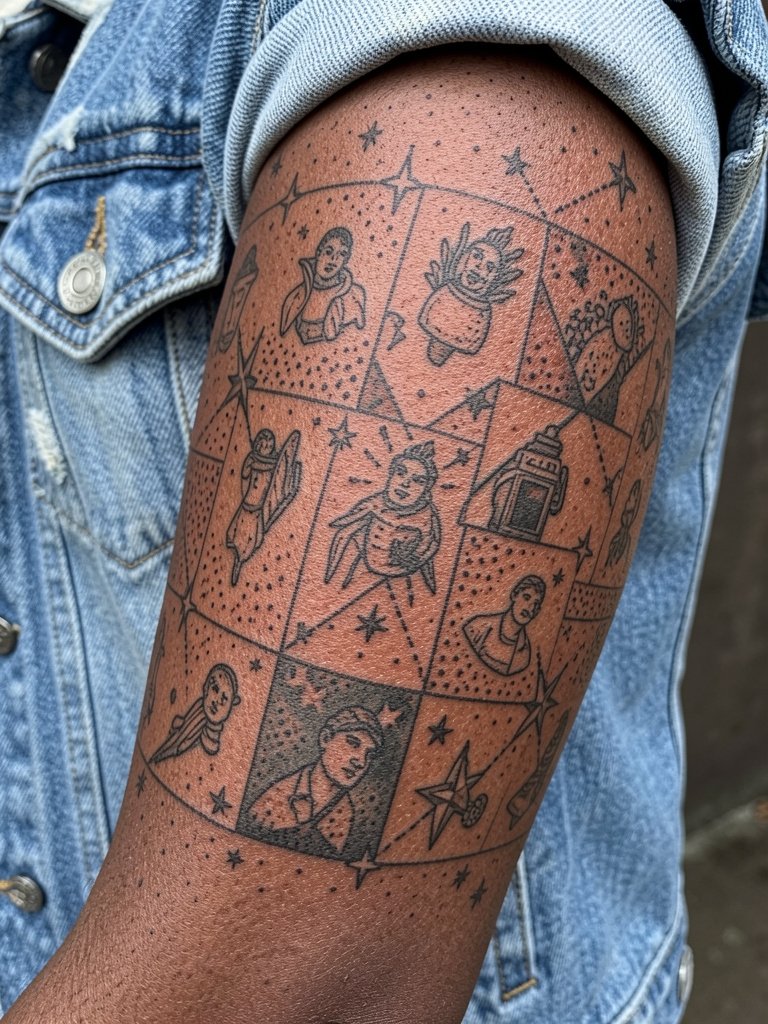
A patchwork sleeve is assembled piece by piece and needs a plan for filler. A practical filler set includes dots, tiny mandalas, and negative-space bands to knit disparate pieces into one flow. Avoid random placement with no thought for arm rotation. Bring two reference images scaled differently so the artist can map how each new piece sits at three inches versus five. For everyday wear, layered looks like a denim jacket over a tee frame an evolving sleeve without competing.
6. Biomechanical 3D Illusion Sleeve
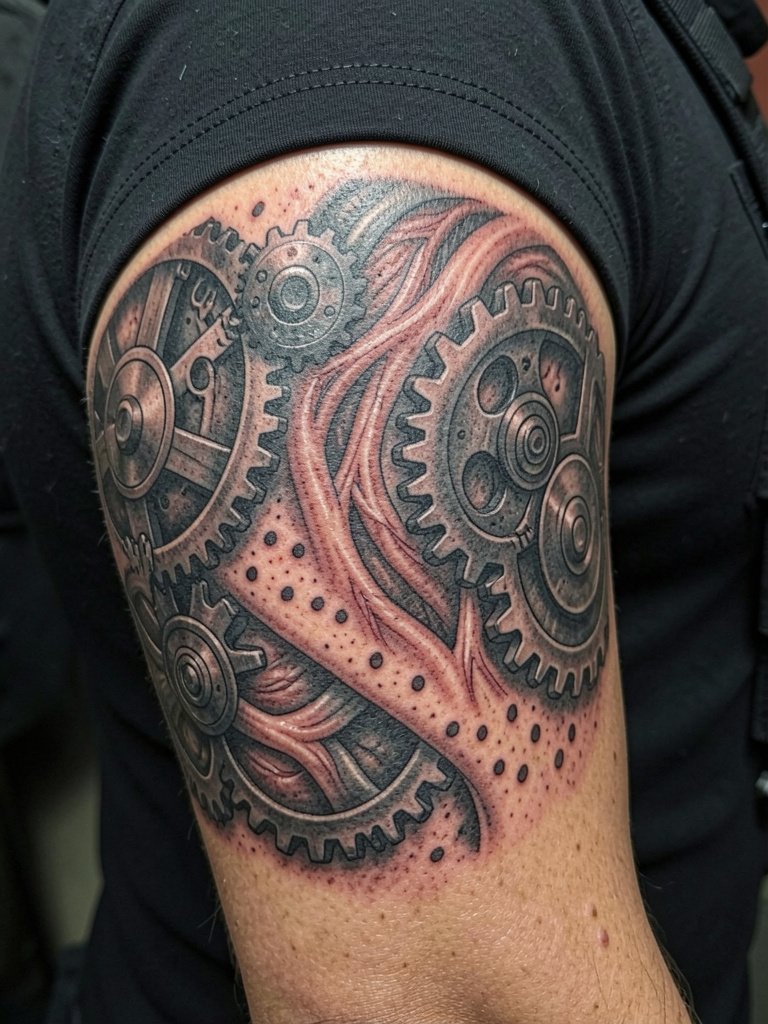
This style uses shading to sit visually beneath skin folds so placement matters. The arm's natural curvature creates depth, which is why artists map the bicep and forearm carefully. A common mistake is flattening perspective by ignoring muscle flow. For a tech-forward outfit pair dark tactical pants and mesh tees to emphasize the cyberpunk look. On session day wear a loose short-sleeve so the artist can rotate the arm for consistent perspective.
Pre-Session Essentials
The larger sleeves above often require long sessions and careful first-week care. These picks smooth the chair day and the first few days at home.
-
Dragon Balm tattoo aftercare. A thinner alternative to heavy ointments for sensitive skin that some users prefer after the first three days.
-
Mad Rabbit tattoo balm. A lighter balm with calming botanicals used by some clients during the mid-healing phase.
-
Tattoo Snug compression sleeve. Helps reduce swelling after long multi-hour sessions and protects fresh work on travel days.
-
Lanolin-free gentle tattoo soap. Mild cleansers avoid pore-clogging ingredients on the first wash.
-
Aquaphor healing ointment. A commonly used initial barrier for the earliest healing phase when skin needs heavy moisture control.
7. Modern Tribal Pattern Sleeve
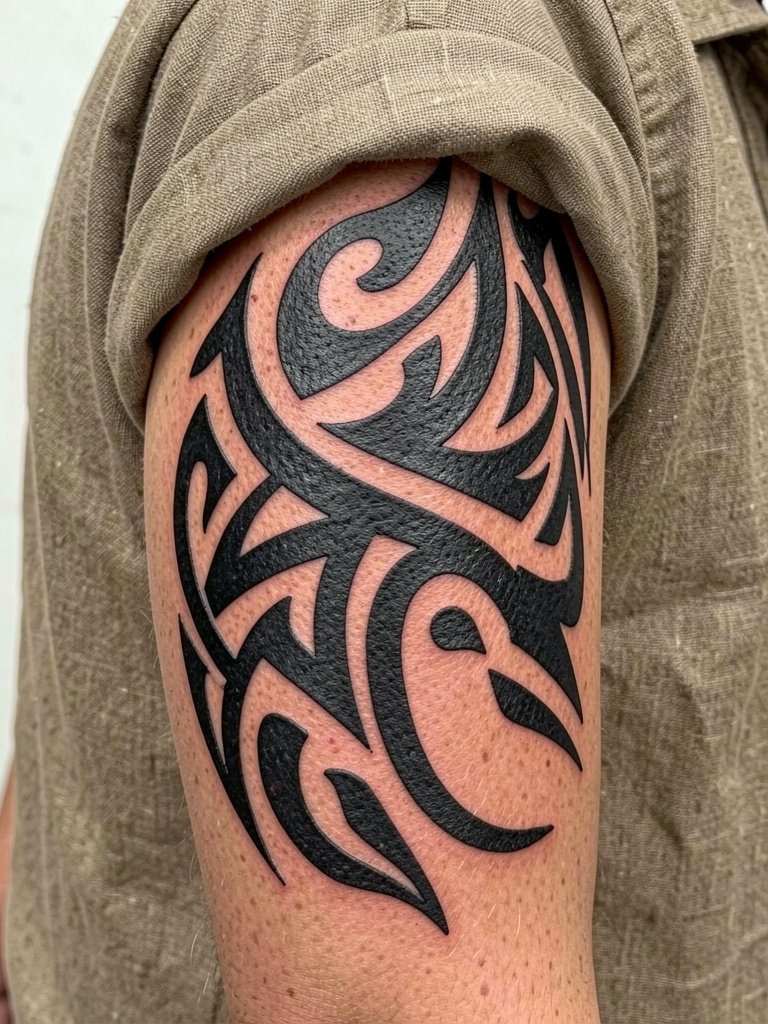
Modern tribal uses broad black glyphs and careful repetition. Respect origins by discussing cultural context with the artist and avoiding sacred motifs used without permission. The main aging issue is keeping edges crisp, so plan for larger shapes rather than thin bands. Earth-toned linen shirts and shorts let the geometry sit visually with natural palettes. For the appointment, wear a loose short-sleeve that allows shoulder-to-bicep access.
8. Nature Scene Sleeve with Mountains and Trees
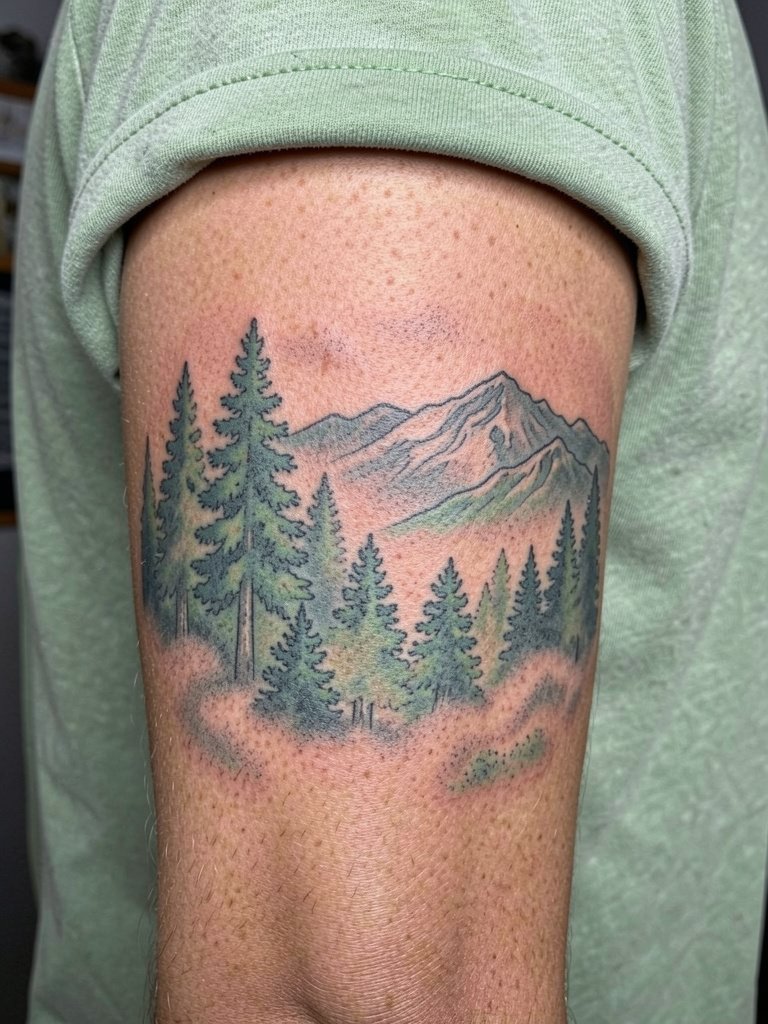
Landscape sleeves read well when composed in bands that wrap the arm and carry horizon lines. The mistake is putting too many small landscape elements on one plane. Use layered depth and mid-tone contrast to avoid a flat collage. Soft, muted shirts in sage or cream reinforce the organic feel when you're showing off. Session wear is a loose short-sleeve so the artist can angle the forearm comfortably.
9. Skull and Mortality Dark Illustrative Sleeve
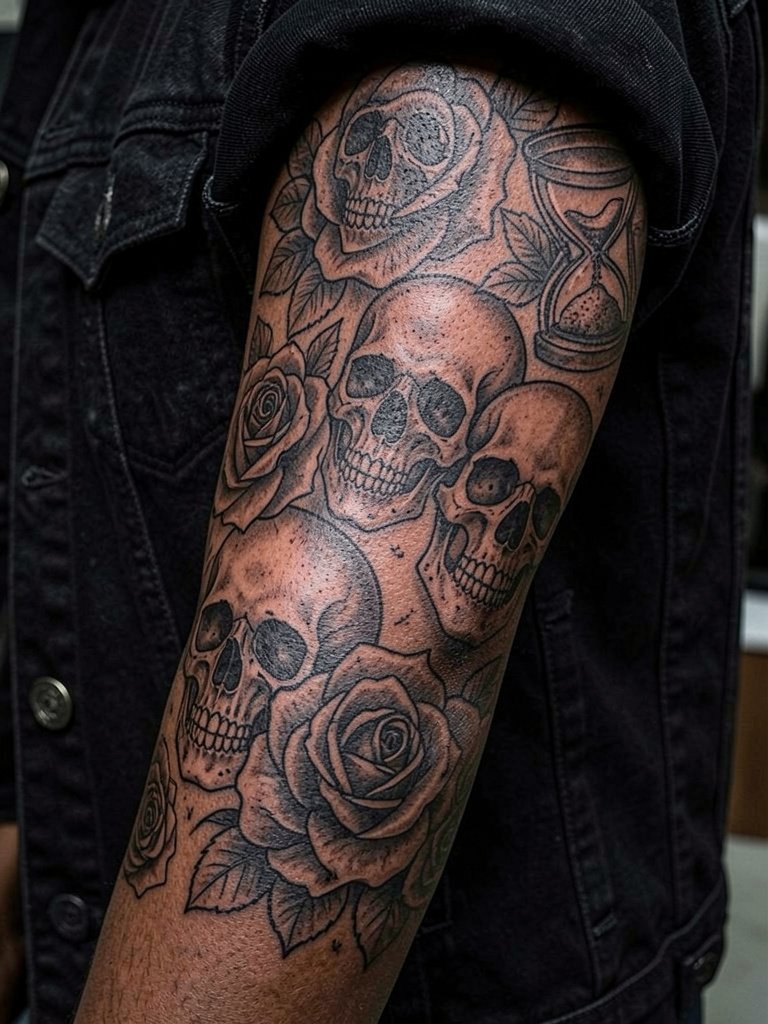
Skull motifs benefit from high contrast so bone structure reads after years of wear. Overworking tiny teeth and micro-details on wrists causes early blur. For a rock-grunge look pair with black denim and leather accents that match the tattoo mood. Expect sessions with heavy shading that can feel warm as the artist layers value. Plan for touch-up at two to three years if you want to retain crisp highlights.
10. Space and Celestial Sleeve
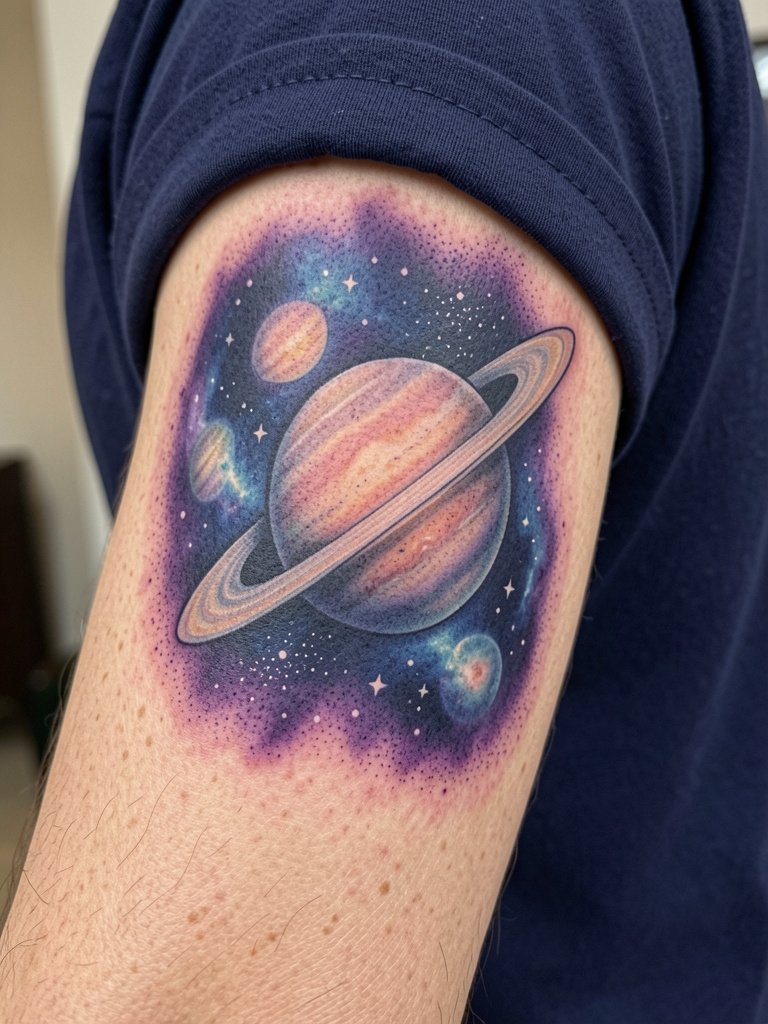
Cosmic sleeves use color blending and negative space to create distance. The aging risk is over-blending tiny stars that then disappear on darker skin tones. Ask for small clusters of white-negative space stars rather than painted single-pixel stars. For night-out looks wear deep navy or black shirts that echo the palette. Session day, choose a loose sleeve you can roll without pressing the fresh ink.
11. Warrior and Animal Motif Sleeve
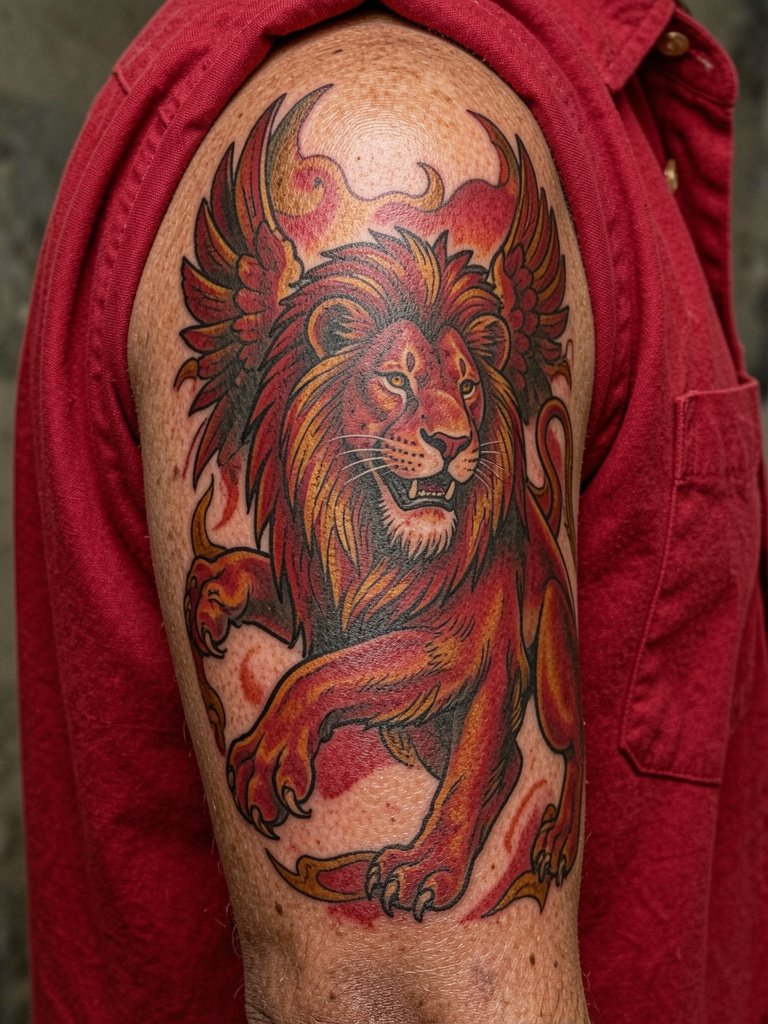
Animal portraits read as symbols of strength when executed at scale with strong anchors for eyes and mane or feathers. The common error is shrinking the animal to fit a narrow spot so expressive detail is lost. Match it to bold solid shirts in red, gold, or black when you want the motif to sing with your outfit. During sessions plan shorter, focused sittings for the portrait areas so saturation stays consistent across sessions.
12. Religious Iconography Sleeve with Ornament

Religious sleeves should honor source imagery and avoid casual appropriation. For longevity use bold outlines and reserved color highlights. Artists recommend positioning strong symbols on broader planes so contouring does not distort icon details when the arm moves. For evenings out select neutral shirts that keep the emphasis on the ornamental panels. Plan sessions around the chest and shoulder transition if the design moves there.
13. Abstract Line Art Sleeve
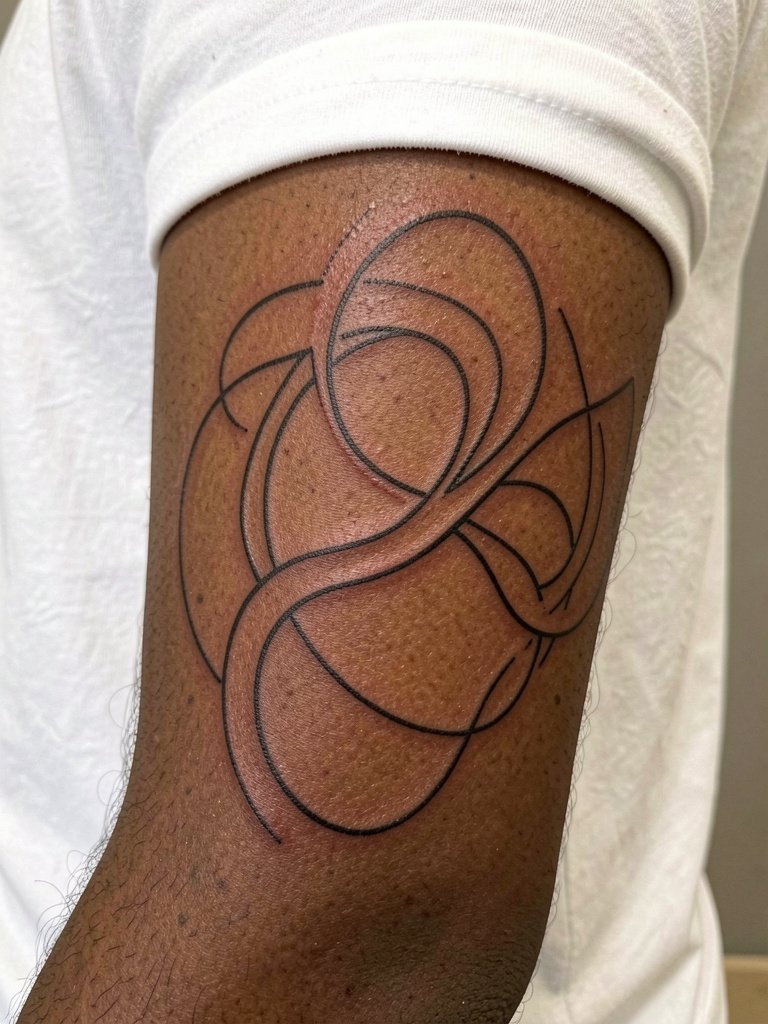
Fine-line abstraction looks modern but splits artists on longevity. One camp argues fine line blurs within two to three years on moving skin and thin lines lose clarity. The other camp says fine line holds if the artist uses correct needle depth and slightly wider spacing and they will point to healed three-year photos to show it. If you favor fine line here, ask for slightly heavier single-needle weight and extra spacing between primary strokes. For minimal looks, pair with white or gray minimalist tees.
14. Koi Fish and Dragon Dual Japanese Sleeve
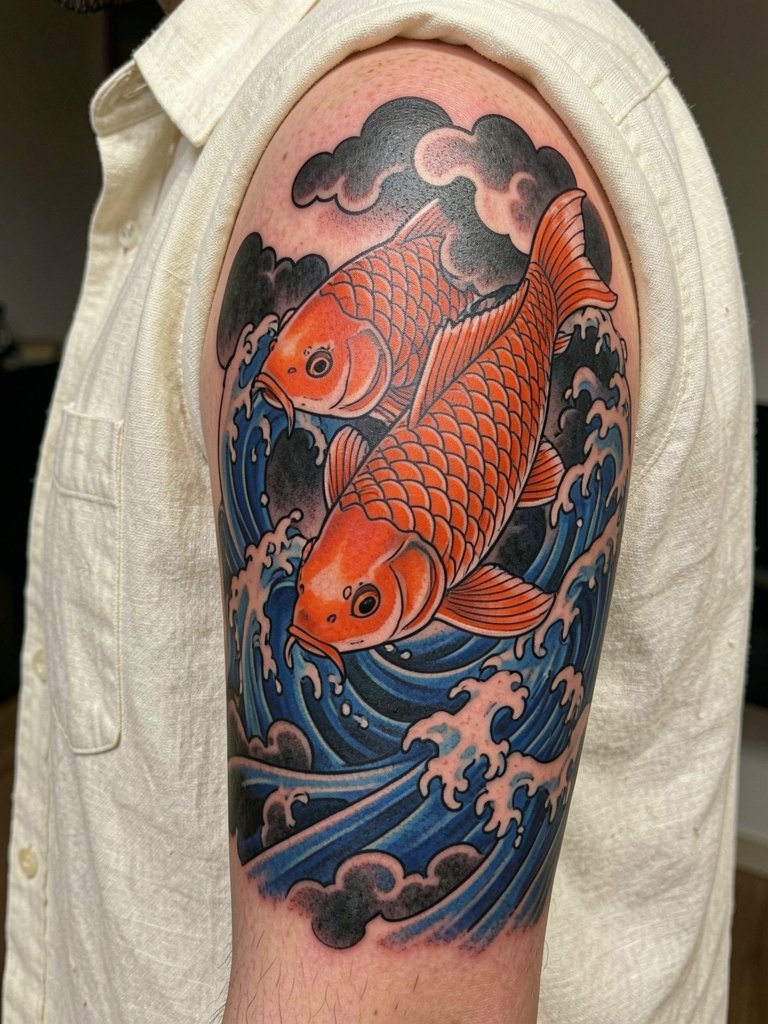
A paired koi and dragon composition uses opposing movement to balance the arm visually. The risk is cramming too many small scales near joints which can blur. Ask the artist to enlarge key elements like the dragon's head and koi eyes so the centerpieces remain readable at distance. Short-sleeve linen shirts in neutral tones keep the palette cohesive when showing off the piece. Session planning should prioritize the shoulder cap early since it anchors the whole flow.
15. Cherry Blossom and Tiger Sleeve
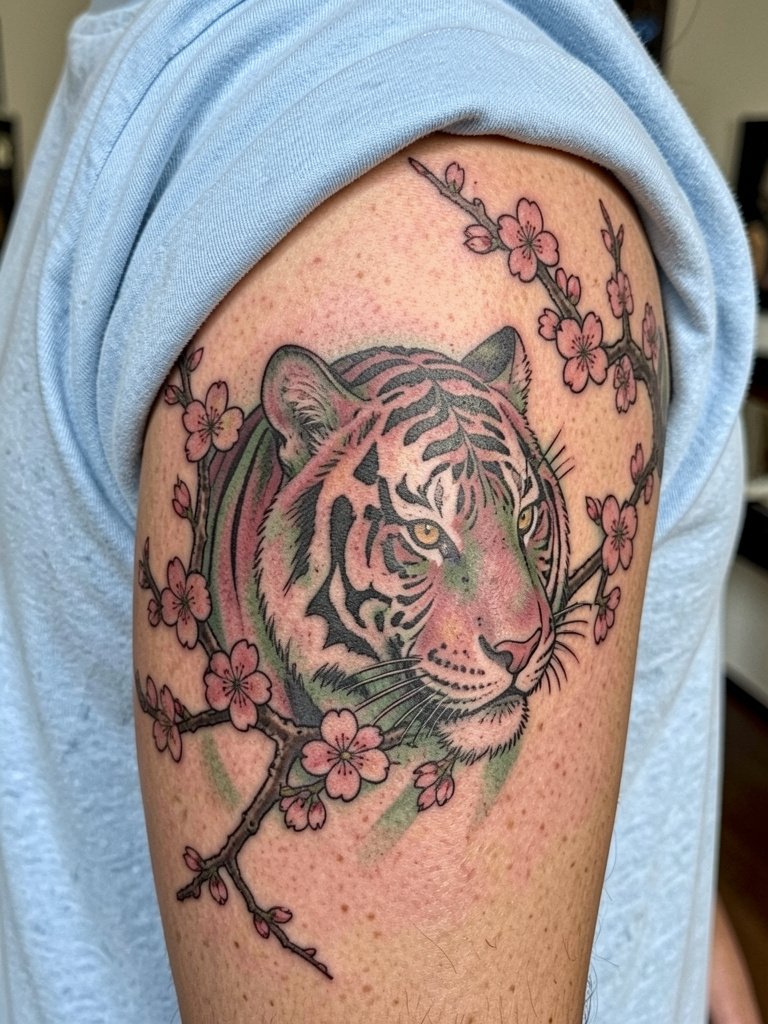
Combining a tiger with blossoms balances ferocity and elegance. Blossoms that are too small on moving forearms tend to fade into texture. Use larger petals and spaced clusters to retain shape over time. Wear soft muted colors like sage or light blue to complement the organic palette. For the session choose a loose short-sleeve and expect multiple sessions across bicep and forearm.
16. Minimal Negative-Space Sleeve
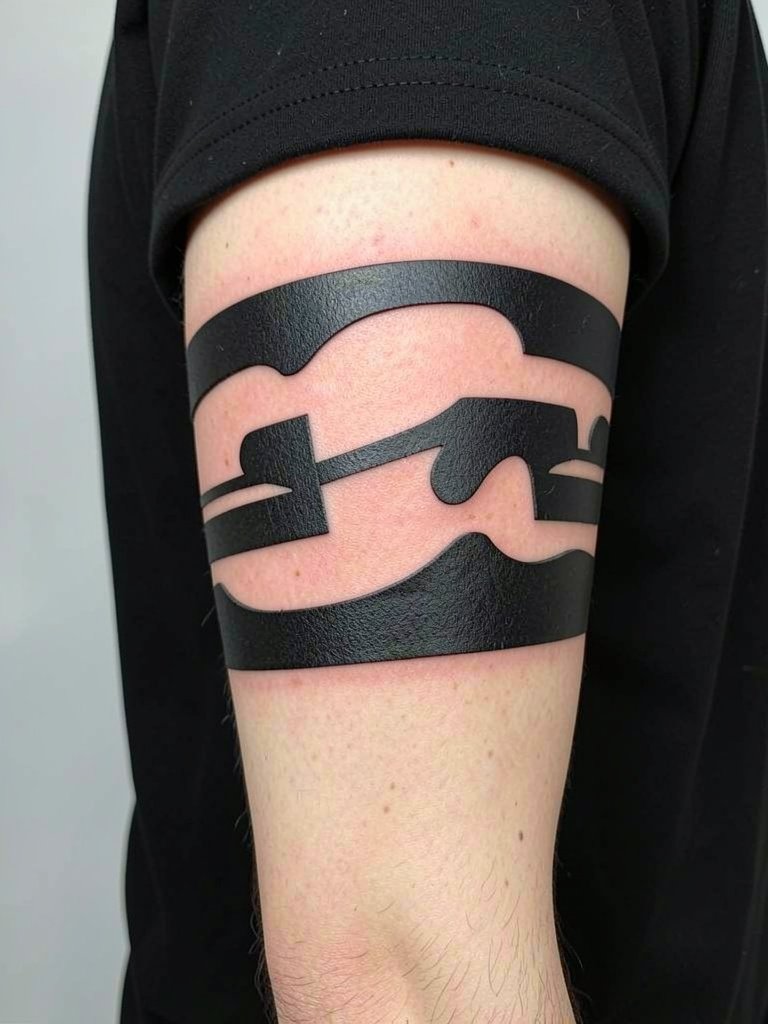
Negative-space sleeves work by carving the arm into readable blocks. The typical mistake is too-thin black fills that show skin texture and break up in a year. Ask for dense saturation and slightly wider bands so negative space stays crisp. Dark neutral tees enhance the stark geometry when you want the sleeve to pop. Session-wise expect solid blackout areas that can feel warm during layering.
17. Celtic Knotwork Wrist-to-Shoulder Sleeve
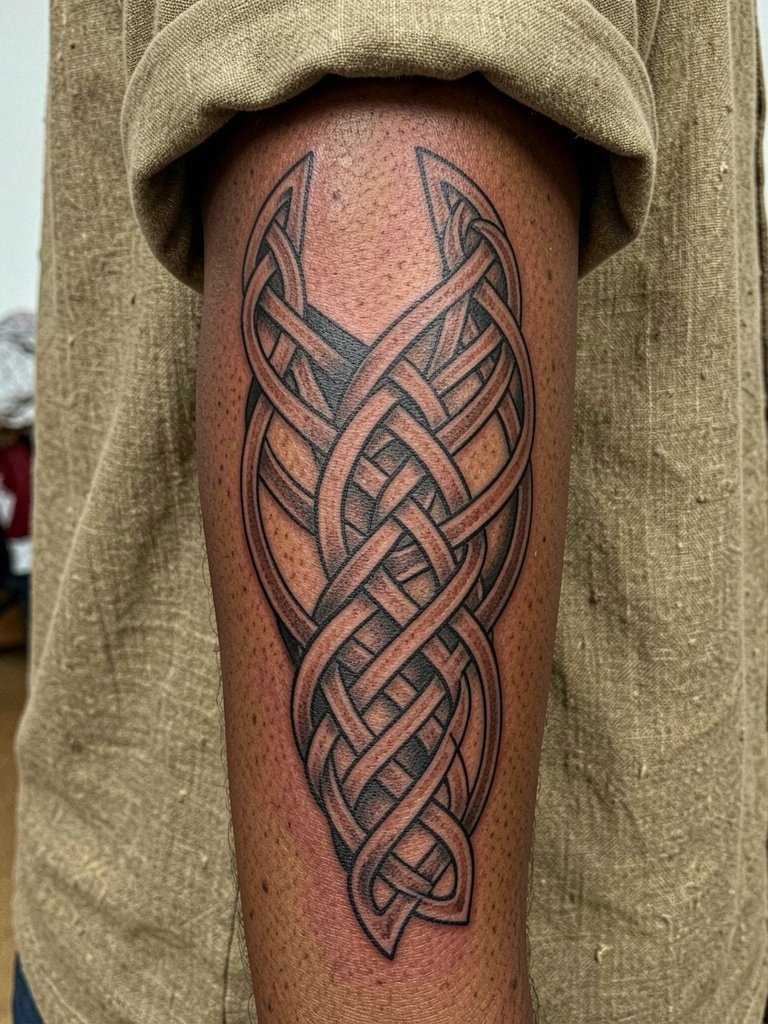
Knotwork needs consistent spacing and symmetry to read as intended. Common mistakes include mismatched loop sizes that make patterns look lopsided after healing. Ask the artist to map the knots across the arm with a temporary stencil to check continuity. Earth-toned shirts pair with the organic geometry for a grounded look. For sessions choose a rolled-sleeve button-down to maintain access.
18. Nautical Old-School Sleeve
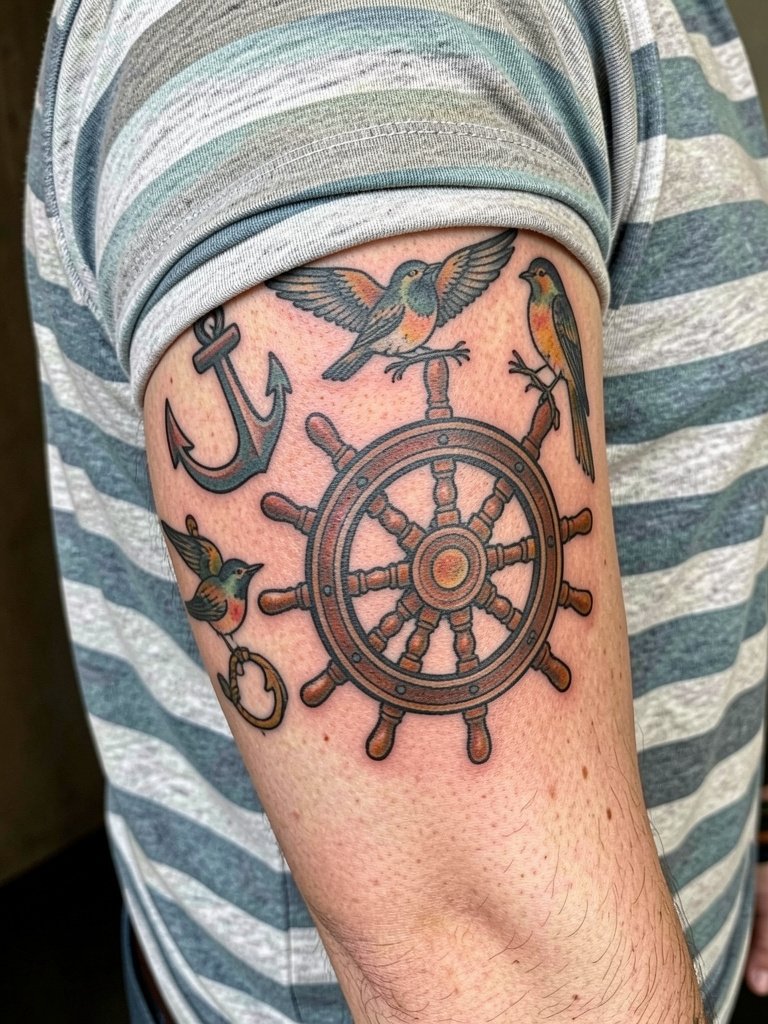
Classic sailor motifs rely on bold lines and saturated color that age well. The mistake is over-detailing small patches like rope twists that become grainy. Prioritize clear anchors and sparrows with bold outlines. Striped tees and vintage cuts reinforce the throwback aesthetic when showing it off. Sessions are straightforward and modular, allowing you to build the sleeve in several visits.
19. Optical Illusion and Op Art Sleeve

Op art sleeves depend on extremely precise linework. Even slight wobble in repeat units becomes obvious after healing. The common error is scaling the pattern too small. Ask the artist to pitch the repeat size so the optical effect reads at arm length. Minimalist, neutral clothing underscores the graphic nature. Expect sessions focused on crisp, steady linework that can be tiring for both client and artist.
20. Portrait Memorial Sleeve
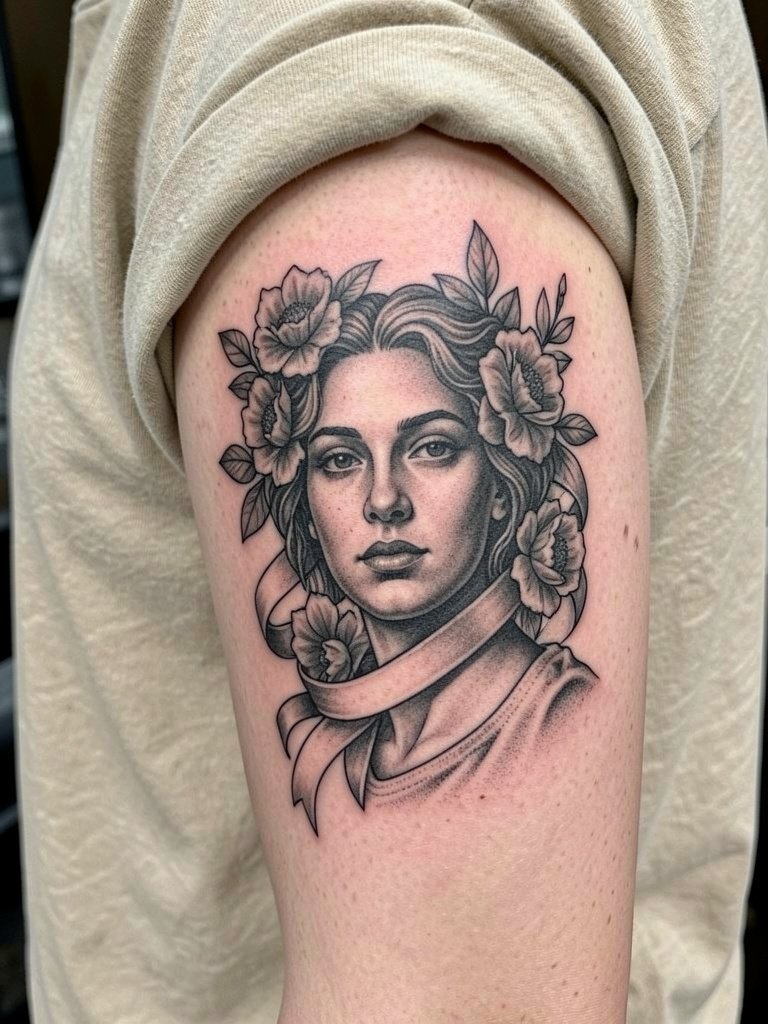
Portraits require large, relatively flat real estate so facial proportions remain intact over time. The mistake is placing a detailed portrait on the inner wrist or hand where distortion happens. Reserve the outer forearm or upper arm for faces and plan for extensive reference and centering checks during the stencil stage. Neutral button-downs provide a clean frame when you want the piece to be the focal point. Plan touch-ups in two to three years to reassert contrast.
21. Script and Lettering Sleeve Bands
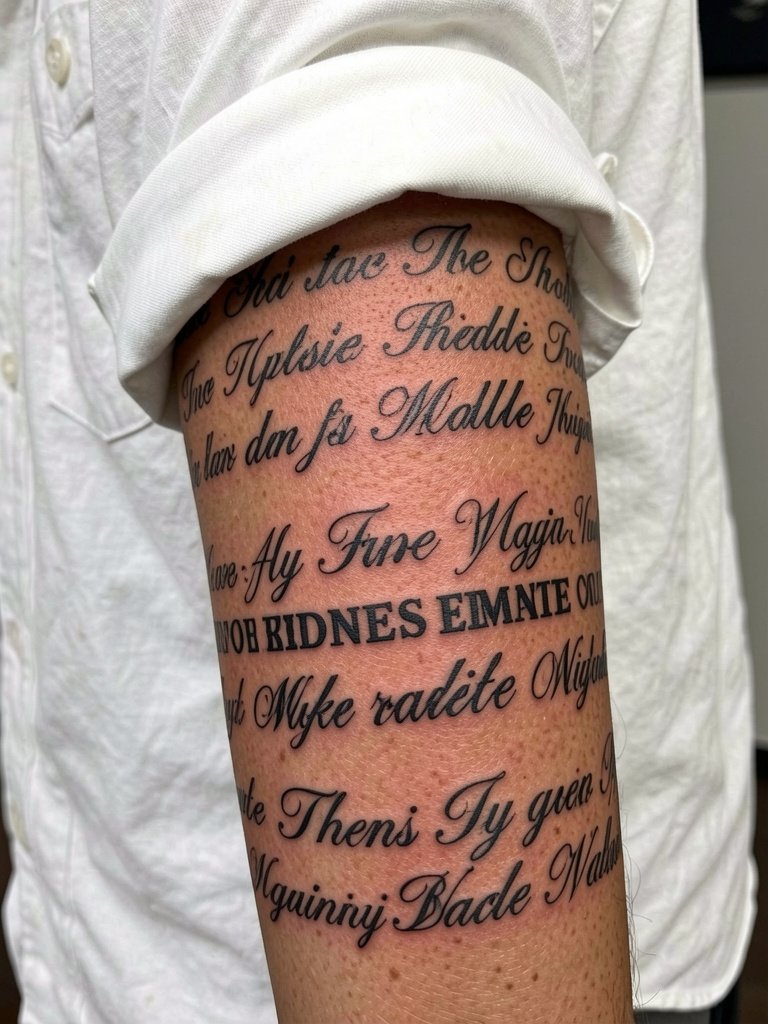
Lettering reads best when scaled to the viewing distance you expect. Tiny single-needle scripts on high-motion areas fade quicker. When planning text, provide exact word choices and compare how they read at three and five inches on your arm. White or neutral button-downs help present lettering in editorial photos. On session day bring legible typed references so the artist can set the font and spacing exactly.
22. Botanical Sleeve with Herbs and Vines
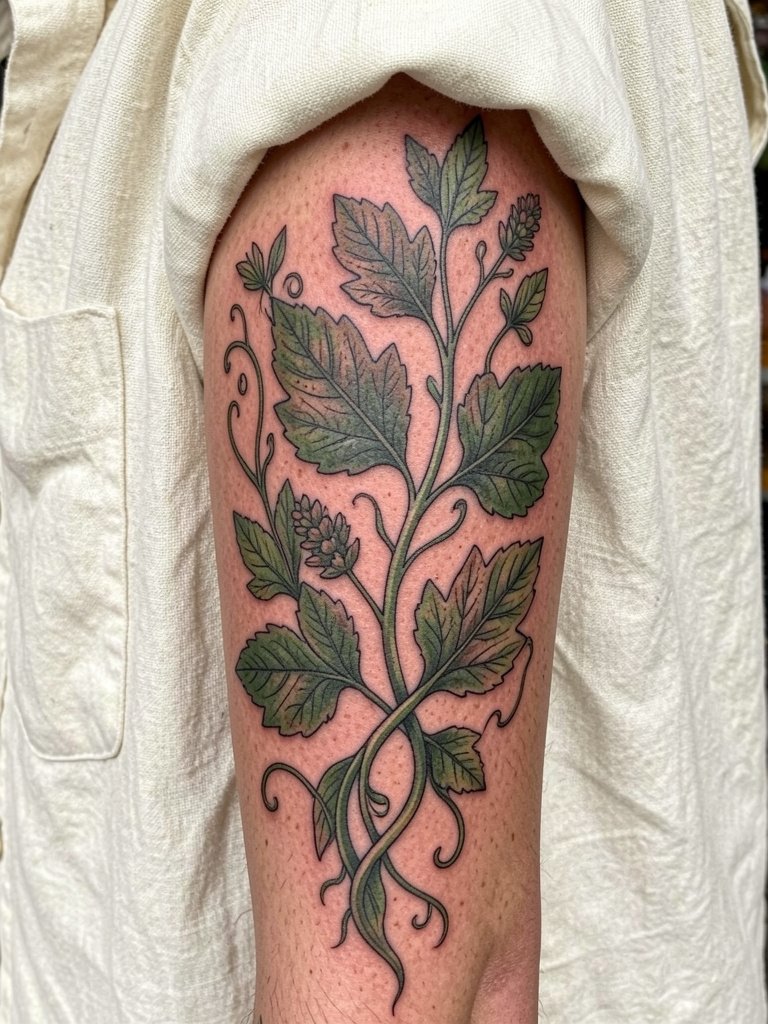
Botanical sleeves gain depth with varied leaf sizes and occasional negative-space breaks. The common error is nonstop tiny leaves that become muddled over time. Use larger anchor plants and spaced filler leaves to retain clarity. Soft, muted shirts like sage or cream pair well when you want the tattoo to read as part of a nature edit. Plan sessions to alternate shading days with linework days to control swelling.
23. Steampunk Mechanical Sleeve
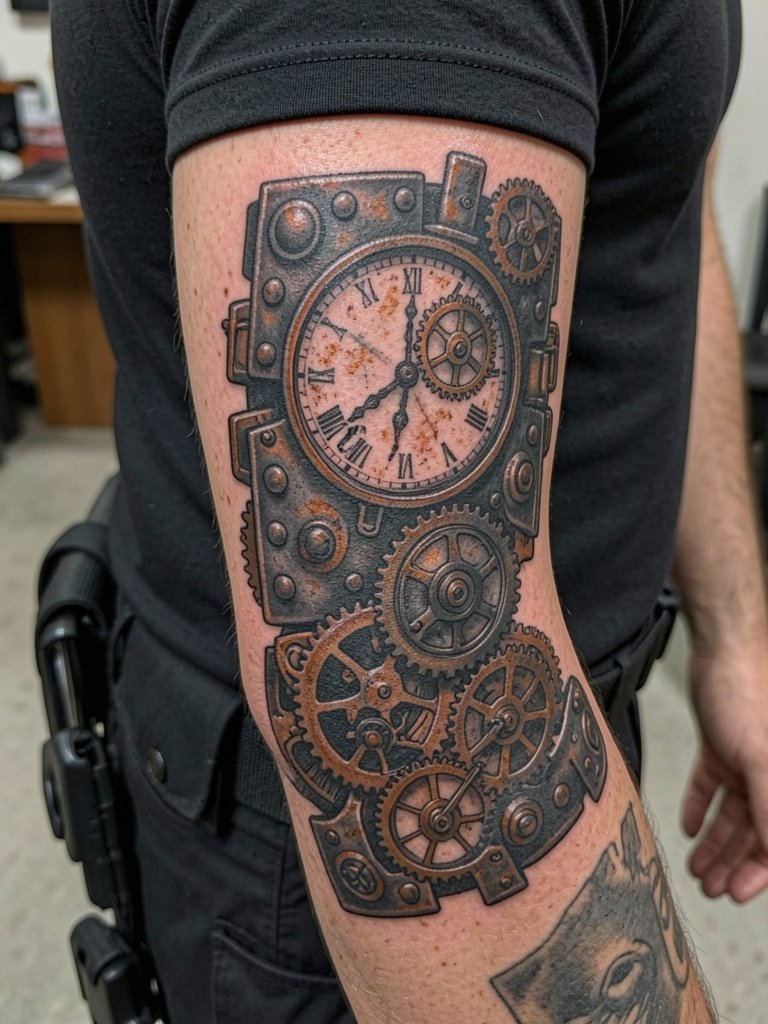
Steampunk sleeves depend on consistent metallic textures and strong depth cues. Avoid tiny stamped details that lose their edge. Instead prioritize larger gears and layered planes that keep the illusion intact. Dark tactical clothing accentuates the industrial feel when you show it off. Sessions require attention to depth so schedule focused shading blocks.
24. Mosaic Tile or Tiled Pattern Sleeve
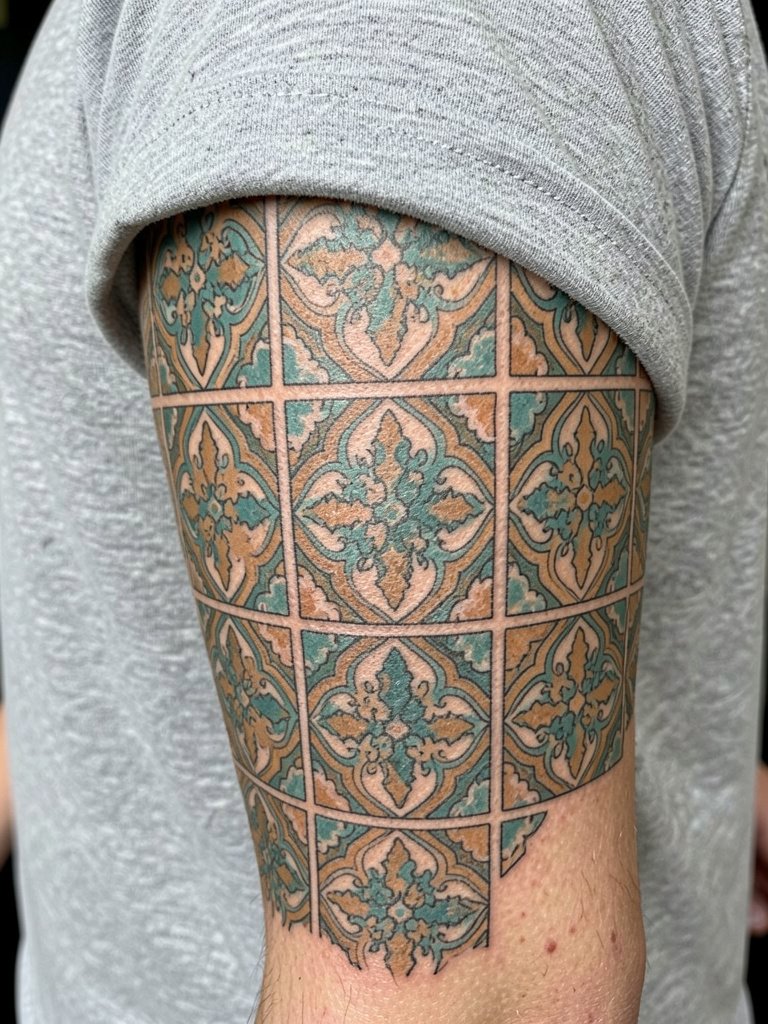
Tiled patterns need consistent repeating units and careful planning to avoid seams at joints. The biggest mistake is mismatched grout spacing that becomes obvious with arm rotation. Ask for mockups mapped to your arm so the repeat flows across the elbow and bicep. Neutral tees keep attention on the pattern. Expect several sessions to complete consistent tile runs.
25. Micro-Realism Insect and Small Creature Sleeve
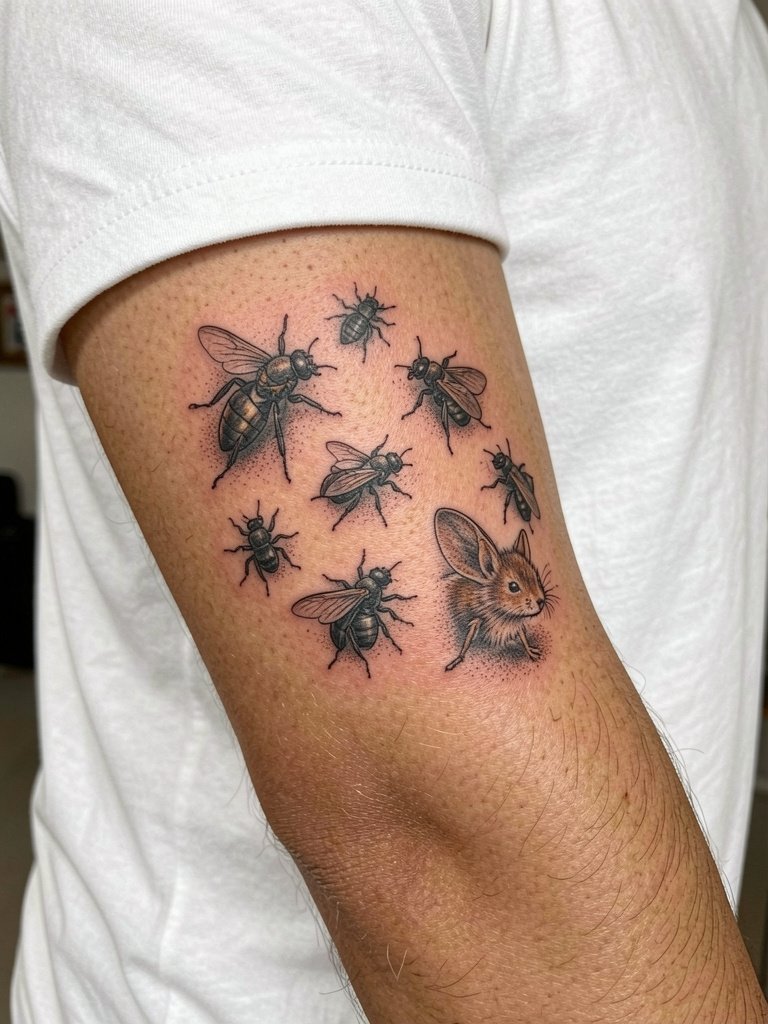
Micro-realism shines at medium scale but fails when shrunken to thumbnail sizes on textured skin. Group several mid-sized specimens rather than many tiny ones so each retains detail. For a clean editorial look choose minimalist neutral shirts that do not compete with fine detail. Sessions involve lots of close-focus shading and may require short breaks to maintain steady needle control.
26. Map and Cartography Sleeve
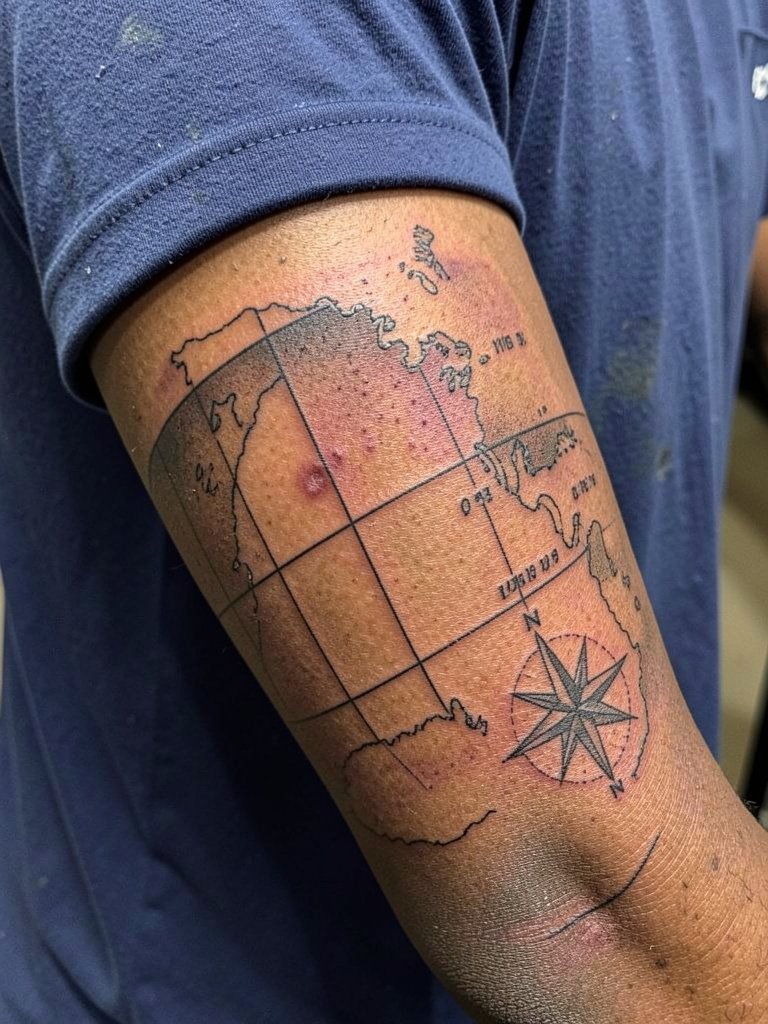
Maps read well as bands that run with the arm's length. The frequent error is putting extremely fine latitude lines too close together where healing obscures them. Opt for bolder coastlines and simplified detail to hold at two to five years. Deep navy clothing amplifies the nautical feel when you want to show the sleeve. For session day, wear a shirt you can roll without pressing the area.
27. Gothic Ornamental Sleeve
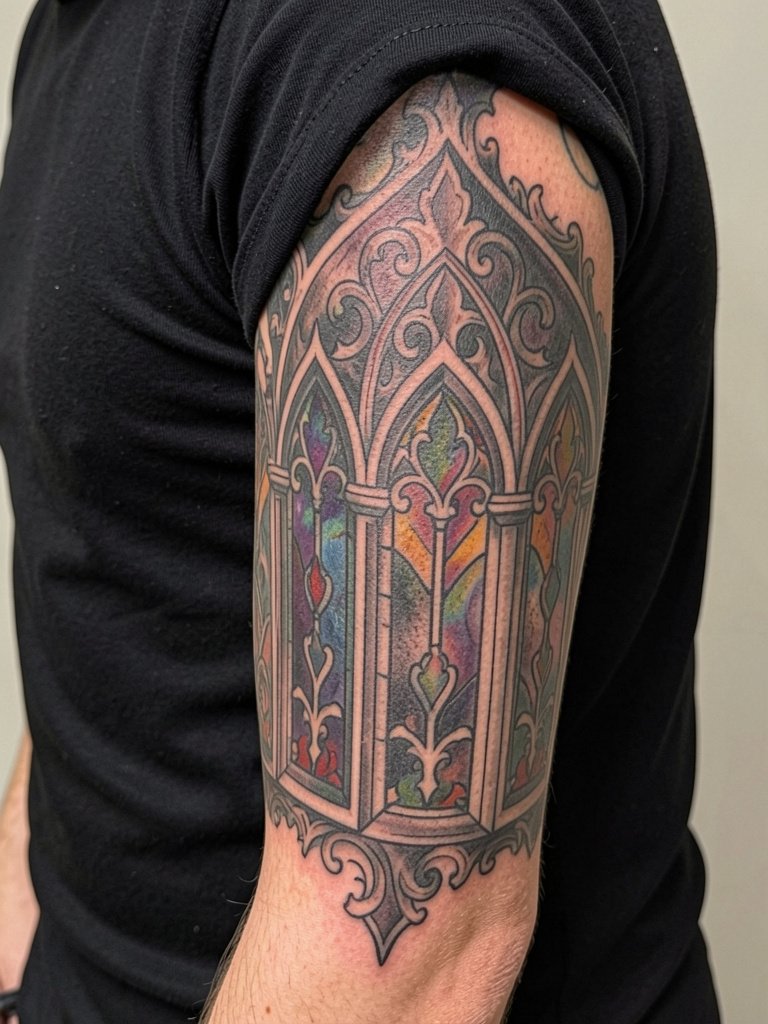
Gothic ornament benefits from high-contrast black and reserved color passages. The error is over-detailing tiny window panes which can muddy. Use larger architectural anchors and stylized negative space to retain a cathedral-like read. Pair with dark slim shirts or jackets for an editorial pairing. Sessions are shading-heavy and can take place across multiple days.
28. Mosaic Portrait Collage Sleeve
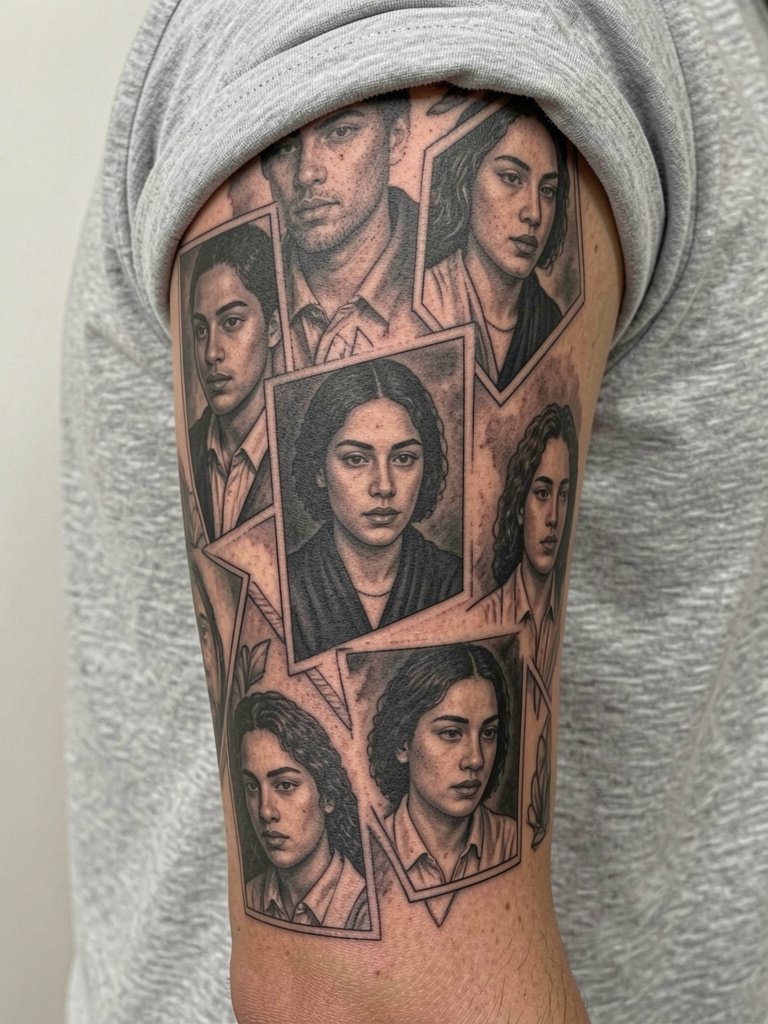
Collage sleeves mix portrait and abstract pieces so composition is key. A frequent mistake is squeezing too many focal points into one band which competes for attention. Create one dominant focal portrait and use smaller fragments as bridges. Neutral minimalist shirts keep the collage readable in photos. Sessions should be scheduled to anchor the dominant portrait early.
29. Abstract Black Band Sleeve

A final option is a high-contrast abstract band approach that uses heavy black to create rhythm. Overly narrow bands are the main aging issue. Ask the artist to set proportions so each band keeps presence at one, three, and five years. Dark basics like black tees accent the sculptural quality. Expect saturation sessions that require recovery days between sittings.
Frequently Asked Questions
Q: How much does a full sleeve typically cost and how should I budget?
A: Expect a wide range depending on style and artist skill. As a practical bracket, many full sleeves fall between $3,000 to $10,000 for custom work. Break the math into hourly sessions to make it manageable, for example $300 per hour times 12 hours equals roughly $3,600. Ask the shop how many hours they expect for your chosen style so you can plan deposits and tip amounts.
Q: Which sleeve styles hold up best on darker skin tones?
A: High-contrast blackwork and traditional bold outlines tend to retain clear read on darker skin. Subtle pastel color and very fine gradients can become muted. If you have darker skin, favor solid saturation, larger shapes, and heavier outlines rather than tiny pastel details. A photographer using a ring light and macro framing helps capture the nuance in healed shots.
Q: Where should I look to find artists who specialize in the styles shown without naming individuals?
A: Search hashtags like #sleeveTattooMen, #blackworkSleeve, and #japaneseTraditional on Instagram and TikTok, then filter by location. Use Tattoodo and the Inked App to search by keyword phrases like "biomechanical sleeve" and "realism sleeve" and to view healed portfolio examples. Reddit communities such as r/tattoos and r/tattooadvice surface peer recommendations and healed photos across skin tones.
Q: Are numbing creams safe for long sleeve sessions and do artists allow them?
A: Artists are divided on numbing cream use. One camp says numbing cream is a legitimate aid that helps clients sit through multi-hour sleeve sessions without shaking. The other camp argues it alters skin texture and can affect needle depth, which may lead to ink issues. If you consider numbing, discuss exact timing and amounts with the artist and follow their protocol so the work is not compromised.
Q: How soon will my sleeve need a touch-up?
A: Touch-up timing depends on style and placement. Heavy blackwork and Irezumi-style pieces often keep contrast longer and may need minor work after three to five years. Fine-line or color-heavy areas can lose crispness sooner and frequently benefit from a touch-up around two to three years. Plan your budget and calendar for at least one follow-up pass when discussing the timeline.
Q: What should I wear to sessions for different placements and how do I show the work off afterward?
A: Wear loose, easy-to-remove clothing that gives the artist unobstructed access to the placement, for example a loose short-sleeve or roll-up button-down for arm work. For showing off a fresh sleeve, styling depends on the aesthetic: a cream linen short-sleeve works well with Japanese traditional pieces, charcoal or black tees complement blackwork, and neutral button-downs frame realistic black and grey work. For shopping, try a search like white button down shirt men to find durable session and show-off options.
