
The bold geometry of traditional Polynesian patterns reads clearly from a distance and keeps its identity in healed skin, more so than tiny single-needle flourishes that often blur. If you want a statement that still reads in five years pick motifs with thick separators and deliberate negative space. Below are ideas that favor longevity, placement, and ways to wear your new work so the shapes stay legible and the silhouette reads strong.
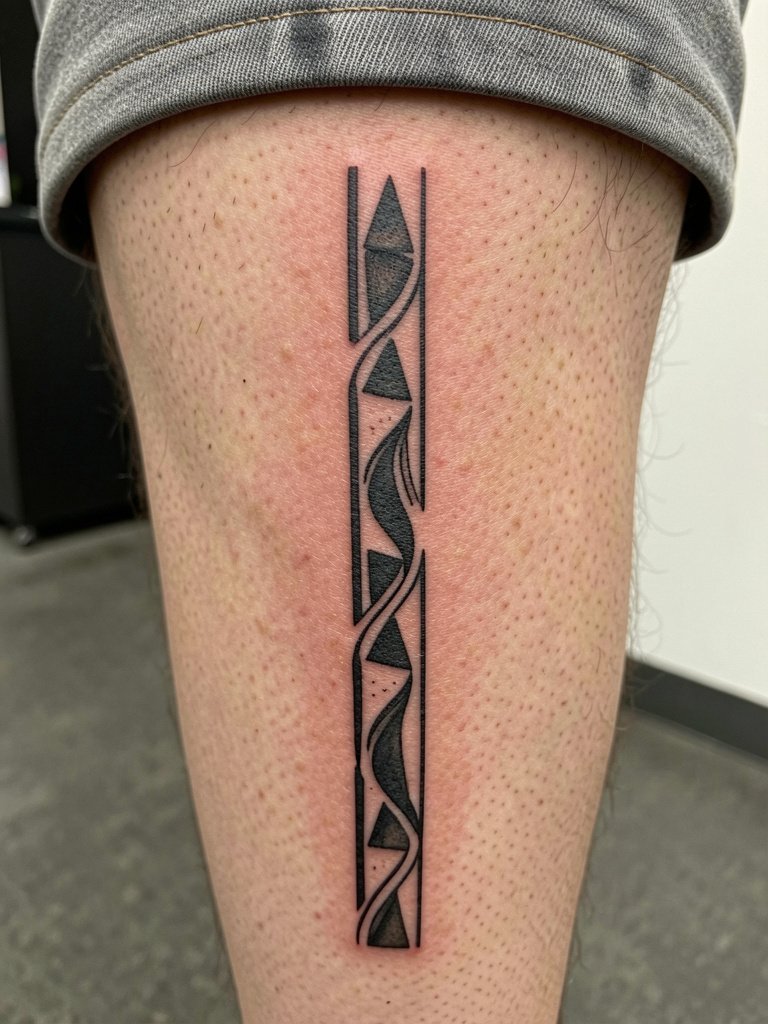
1. Bold Forearm Band with Repeat Motifs

This forearm band works when you want a bold, readable motif that still moves with the arm. I recommend a slightly heavier line weight than you might pick for tiny decorative bands, because the inner forearm softens detail over time. During the consult bring a scaled reference so the artist can show you how the pattern reads at three inches versus five inches. Common mistake is asking for hairline triangles, which collapse into blur by year three. Expect a one to two hour session for a mid-width band, moderate discomfort along the inner curve, and a possible touch-up at 12 to 18 months. For evenings out pair it with rolled linen sleeves that reveal the band without competing with prints.
2. Inner Forearm Koru-Inspired Panel
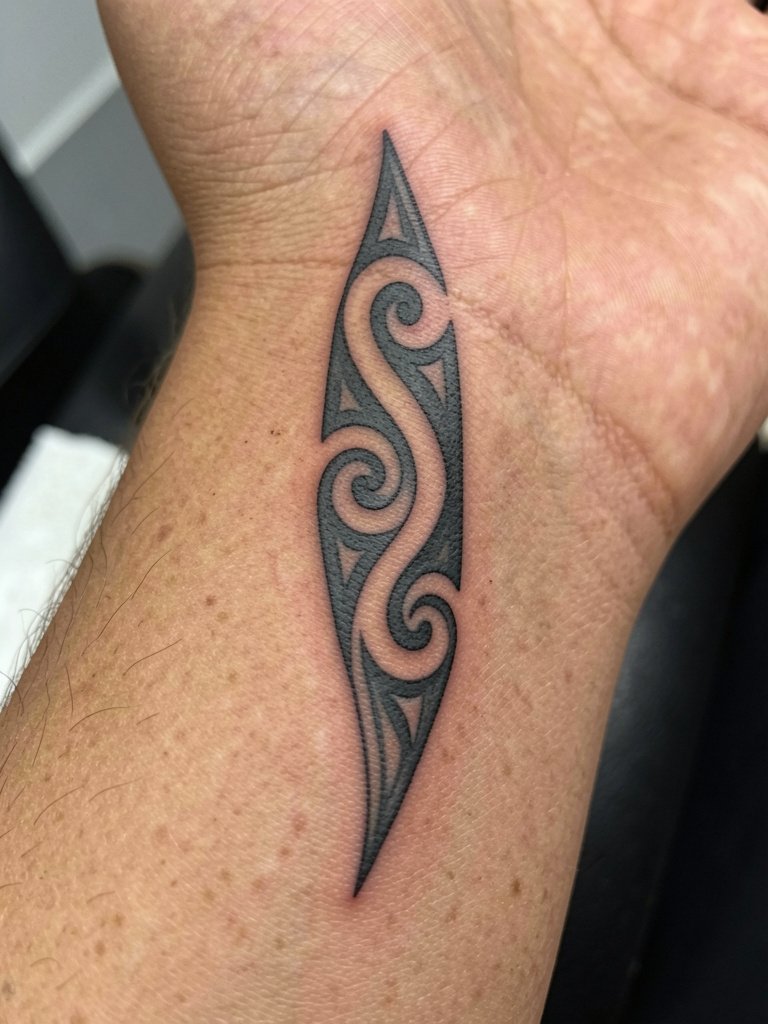
A vertical koru-inspired panel reads elegantly on the inner forearm and keeps strong because of the bold separators built into Polynesian motifs. If you favor visible contrast ask for more negative space between spirals so the shapes do not fuse. The typical error is packing too many micro-details into a narrow panel, which becomes muddied after healing. Session time is often two hours for a wrist-to-elbow strip and the soreness is noticeable when rolling the wrist. Wear a loose tank top to the appointment so the artist has clear access. For styling try open cuff linen shirts that let the panel show without tight cuffs hiding it.
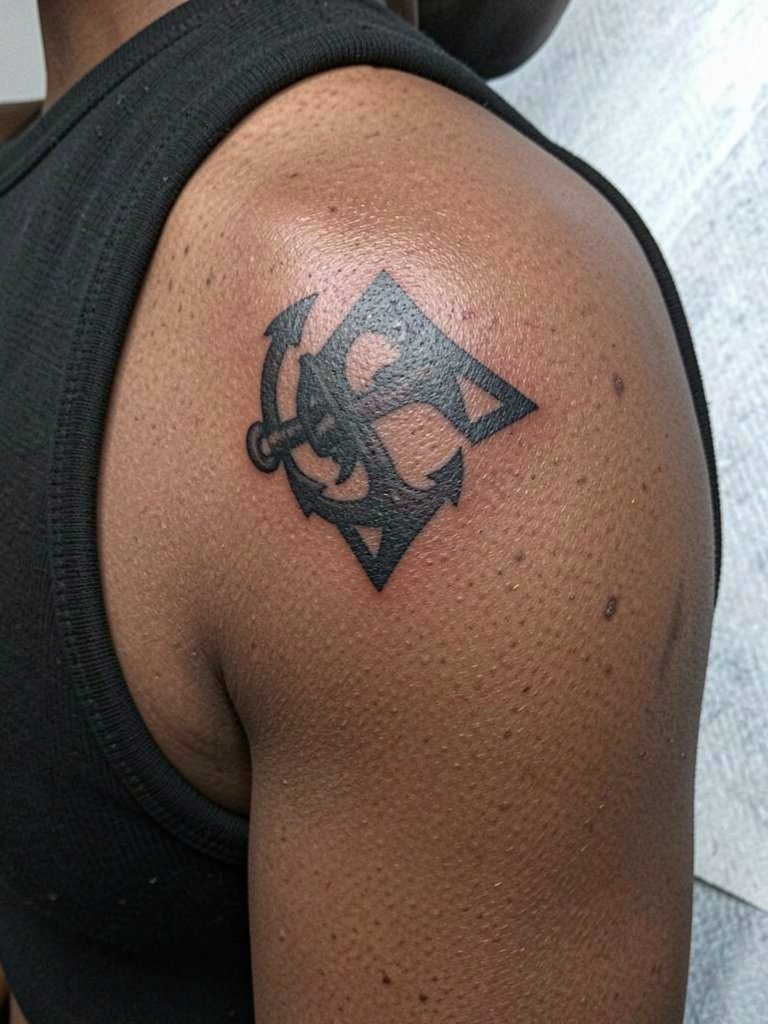
3. Shoulder Cap Shield with Saturated Black
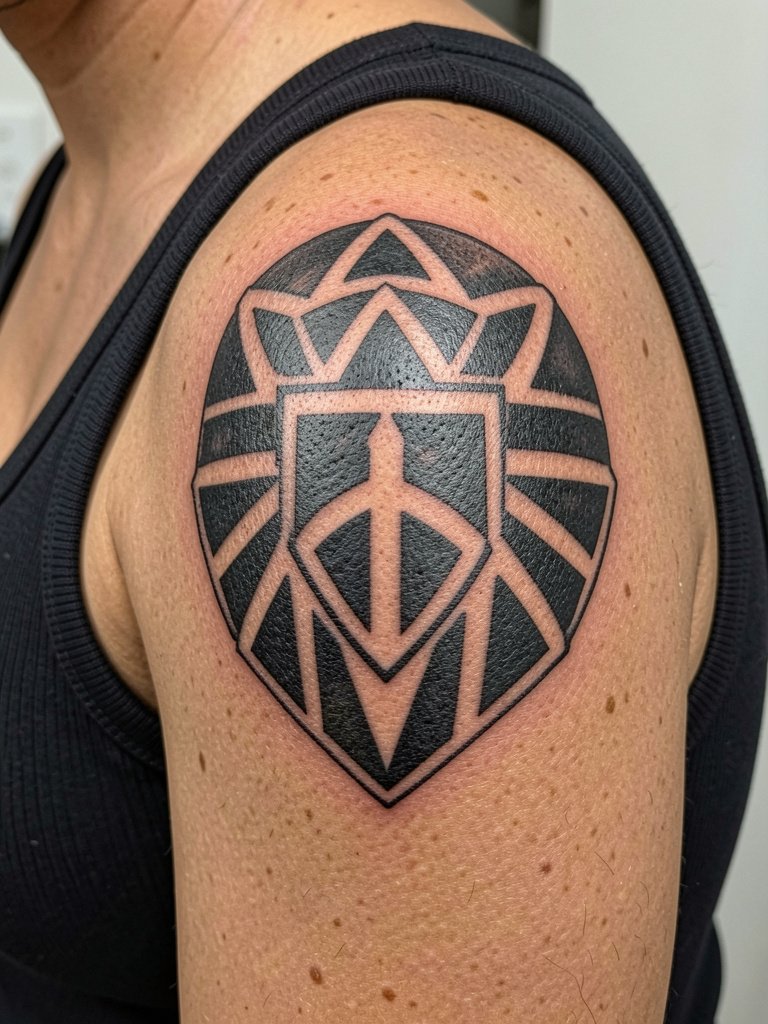
The shoulder cap is forgiving because the skin there holds saturated black well and the curvature helps the pattern read as a unit. Specify that the artist use blocky fills and clean separators to avoid stippling that flattens with motion. A common mistake is choosing a design with tiny interior ornaments, which disappear under shoulder movement. Expect two to three hours for moderate coverage and light-to-moderate pain at the bone edge. For post-wear looks match this piece with tank tops with wide straps that frame the cap without swallowing the motif.
4. Full Bicep Chevron Sleeve Accent

This bicep accent works well for someone who wants cohesive wraparound work without a full sleeve commitment. Tell the artist which bands you want visually dominant and show a photograph of the arm at rest so proportions are tested on your actual curvature. The mistake I see often is trying to compress full motifs into a narrow bicep band, which loses rhythm. Sessions can be split into two shorter appointments to reduce soreness. This placement pairs nicely with short-sleeve tees that end just above the pattern. Try wearing loose drawstring linen shorts the day of the session so you stay comfortable during a longer bicep appointment.
5. Chest Panel That Frames the Collarbone

A chest panel reads as anchored art when proportions account for the collarbone line. I advise discussing symmetry points with the artist, and bring a photo of your chest at rest so the pattern sits natural. Ribs and sternum area vary a lot between bodies so getting the placement mapped matters. A common complaint is a crest placed too high that looks off-center when wearing shirts. Expect moderate pain under the collarbone and a session of two to three hours. For styling, scoop-neck tops let the panel show without making it compete with jewelry. Note on cultural sensitivity: Some people argue these motifs are sacred and should not be adopted outside their cultural context. Other people believe that with study, permission, and collaboration the designs can be worn respectfully. Make your intentions clear and learn the meanings behind chosen elements.
6. Minimal Ankle Chevron Cluster

The ankle is an excellent spot for a small, bold motif that reads in motion. Tell the artist to avoid needle-fine details because repeated shoe friction and swelling can blur them. A common mistake is requesting a delicate filigree there, which fades fast. The session is short and tingly, and the first week demands careful protection from socks and shoes. For the session wear low-cut sneakers or sandals so the ankle is accessible without pressure. Try pairing the healed piece with cuffed jeans that sit above the ankle to show the motif off.
Pre-Session Picks
These items smooth the first 48 hours and make the wrist, ankle, and forearm pieces above easier to manage while healing.
-
Stencil transfer paper kit. Lets you preview line placement on skin before the needle goes down, which is handy for the forearm band and koru panel.
-
Topical numbing cream. Apply 45 minutes before a sensitive ankle or chest session to reduce discomfort without affecting linework.
-
Thin protective film roll. Keeps ankle and finger tattoos clean during the first week of friction from socks and daily washing.
-
Fragrance-free body wash. Gentle cleansing for areas like the inner forearm and chest that helps the tattoo heal without irritation.
-
Aquaphor healing ointment. Thin layers in the first days lock in moisture for dense blackwork without clogging fine channels.
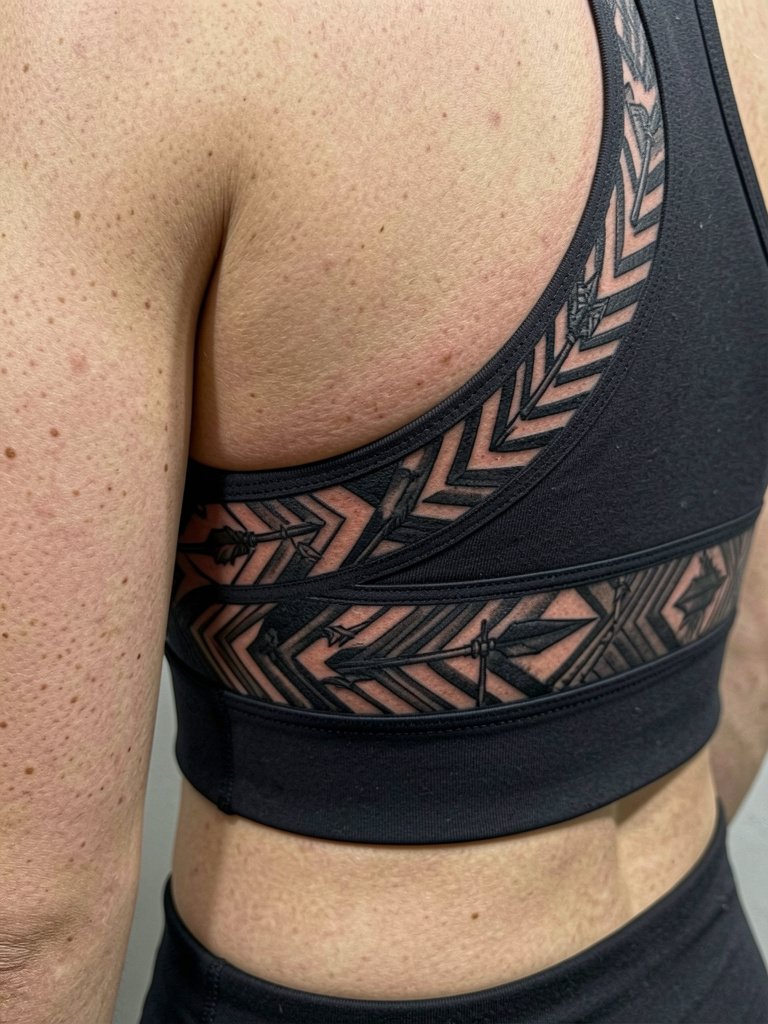
7. Ribcage Wave Band for Side Torso

Ribcage bands can look dramatic but demand spacing that accommodates breathing and movement. One camp of artists warns that fine line work on ribs blurs quickly because the skin there stretches. Another camp says properly placed, slightly bolder linework with breathing room will settle and remain distinct. Be explicit about line thickness and spacing during layout so the band survives normal torso motion. Sessions on the ribs are higher on the pain scale and often split into shorter sittings. For the appointment wear a fitted cropped top that gives clear access while keeping you covered.
8. Full Back Panel with Central Medallion

A back panel gives the freedom to balance dense areas with roomy separators. During consultation bring full-body reference photos so the artist can map a medallion to your spine and shoulder blades. A frequent error is overfilling the negative space which flattens the composition. Expect multi-session work and plan for touch-ups around year two if you sunbathe often. For showing off the healed panel choose open-back dresses or tops that leave the central medallion visible. For travel to sessions pack a loose drawstring linen pant to stay comfortable during long sittings.
9. Sacred Motif Accent on the Sternum

Sternum pieces are intimate and often carry symbolic meaning. One camp says certain patterns are sacred and should never be taken without community permission. The other camp argues respectful adoption can happen when wearers study meanings and commission culturally informed work. Both perspectives deserve consideration. Because the sternum moves with breathing and sits close to sensitive tissue, recommend a simple, bold framing line and avoid tiny interior dots that will blur. Sessions can be intense and are best split. For the appointment wear a fitted sports bra that gives access without constant readjusting.
10. Thigh Shield with Stipple Accents

Upper thigh shields handle larger compositions and allow for some stipple shading inside heavier separators. Tell the artist the exact amount of stipple you want because dense stipple can soften into a gray patch over several years. A common mistake is asking for micro-dot shading across a large field which loses structure. Sessions are comfortable when seated and you will need to plan for movement restrictions in the first week. For evenings pair the healed thigh shield with midi skirts that show the pattern when you walk. Bring a pair of modest athletic shorts to the appointment to keep the area accessible and comfortable.
11. Hand-Edge Chevron for Visible Detail

Hand-edge work takes constant exposure and washes into account. Ask the artist to slightly thicken border lines because hands receive a lot of friction. The frequent mistake is choosing ultra-fine detail that fades within a year. Sessions are fairly quick but healing is messy and touch-ups are common in the first six to twelve months. For the session wear sleeves that can roll above the wrist without rubbing. When showing off the piece try minimal rings so the chevrons remain visible.
12. Calf Panel with Repeating Wave Bands

Calf panels age well because the area rarely stretches and maintains saturation. Tell the artist which bands you want to dominate visually and bring photos of your calf at rest so length and flow are mapped correctly. The error I see is overcomplicating patterns in a narrow strip which makes the design lose its rhythm. Sessions are usually under three hours and pain is moderate. For wearing, pair the healed calf with mid-calf boots or cropped pants that reveal the band. Use rolled hem shorts to show the panel during casual outings.
13. Collarbone Accent Linework

A collarbone accent needs deliberate spacing to avoid migrating into a blur as the chest moves. Ask the artist to increase negative space near the bone so the anchors do not merge. People often request hairline chains that vanish after a year. The session is short but can be sharp where the bone is thin. For the session wear an open-collar shirt that exposes the collarbone naturally. For evenings pick wide V-neck tops that frame the line without covering it.
14. Finger Glyphs in Solid Black

Finger tattoos demand bold, simplified glyphs to survive constant washing and motion. Specify to the artist that you want solid blocks and avoid cross-hatching. The mistake most people make is choosing fine script on the finger, which nearly always disappears inside a year. Sessions are quick but you should expect at least one touch-up for consistent saturation. For the session wear short sleeves so the artist can steady the hand. Rings will compete with the glyphs, so minimalist bands work best when showing off the healed work.
15. Lower Leg Wave Strip
A lower leg strip stays readable because that area gets less friction than ankles and hands. Ask the artist to map the strip against natural calf lines so it flows with muscle contours. A frequent error is angling the strip awkwardly so it appears off-balance when you stand. Sessions are steady and tolerable, with minimal swelling in most people. Pair the healed piece with cropped pants or sandals for a clean reveal and consider casual canvas sneakers for a day-to-day look that keeps the strip visible.
16. Scapula Crescent with Bold Fill

Scapula crescents look striking when the fill is saturated and the separators are generous. Tell the artist which edge you want to align with your shoulder blade so the curve reads naturally in movement. A common mistake is compressing too many internal marks into the crescent which blurs when the shoulder rotates. Sessions here are moderate on pain and usually one to two hours. For showing off the piece pick open-back tops or dresses. Wearing a loose racerback tank to the session keeps the area accessible and comfortable.
17. Hip Bone Motif with Framing Lines

Hip motifs benefit from anchor lines that keep the shape crisp against movement and clothing. During layout show the artist your usual waistline and preferred low-rise fit so the motif sits where you expect under clothes. The mistake I see is placing the motif too close to the waistband which causes constant rubbing. Session pain is low to moderate and you should plan comfortable bottoms for the trip home. For the healed look try low-rise jeans or cropped tops that let the hip motif peek out naturally.
18. Nape of Neck Sigil

Nape pieces are small and private until you wear your hair up. Ask the artist for a bold outline so humidity and hair contact do not blur inner detail. People who request micro-detail behind the ear often need touch-ups sooner. Sessions are brief and relatively low on pain. For the appointment wear a top that exposes the nape naturally and is easy to remove if necessary. For styling select open-collar tops that let the mark show when your hair is up.
19. Outer Thigh Chain of Panels

A cascade of thigh panels gives flexibility in coverage and lets the pattern breathe. When you consult show the artist the length you want and how the panels align when standing. The error people make is compressing panels too tightly which kills rhythm. Sessions can be split and are comfortable when you're seated. For wearable reveals try midi skirts with side slits that flash the panels when you move. Bring modest athletic shorts to the session to keep things modest and accessible.
20. Rib-to-Back Connector Band
Connector bands need careful mapping so the pattern reads continuous across a curved surface. Ask for a mockup with you standing and with arms at rest to see how it travels. The common mistake is not testing the design in multiple positions which makes the connection look disjointed. Expect multiple sittings and more swelling because of the torso movement. For comfort on the day wear a fitted cropped top that stays still during layout and work.
21. Micro-Back-of-Arm Totem

Back-of-arm totems are subtle and age reasonably if kept bold. Make it clear you want strong anchor lines because the tricep movement can blur delicate fills. A common error is loading too many internal marks into a small totem. Sessions are short and discomfort is mild. Wear sleeveless tops to the appointment so the artist can work without fabric interference. For showing off the healed totem, short sleeves that sit above the piece look best.
22. Mid-Spine Vertical Chevron Stack
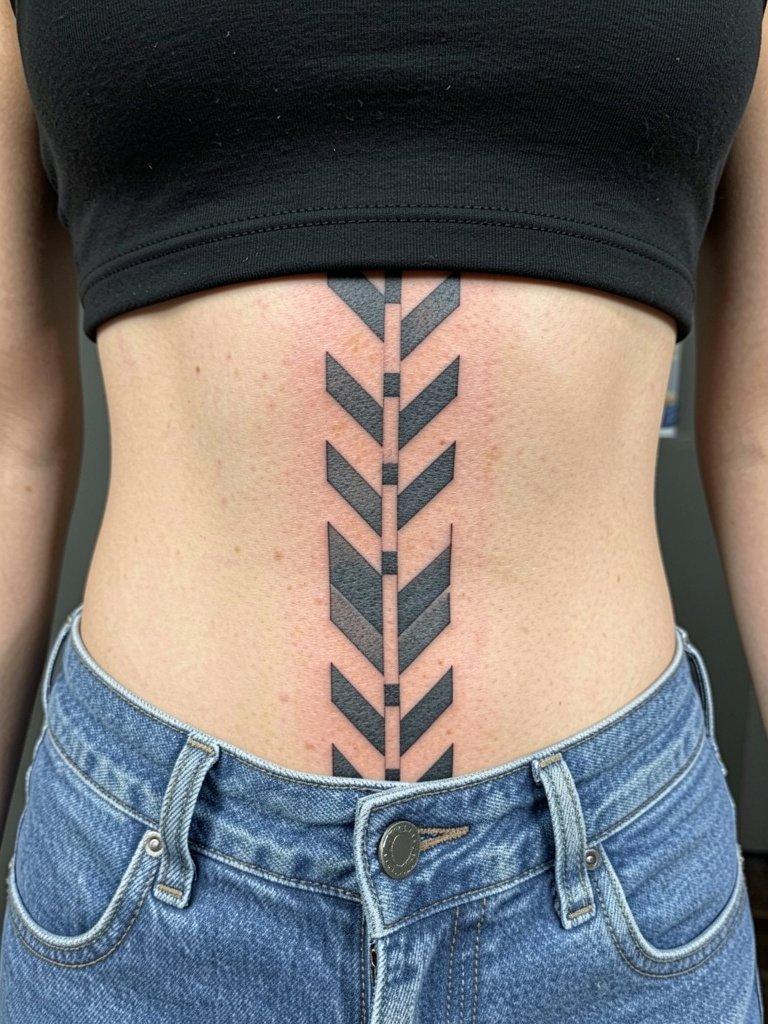
Spine stacks rely on perfect centering to read like a column. Ask the artist to mark your vertebra landmarks and photograph the mock stencil to confirm alignment. Mistakes happen when the column is off-center or the chevrons are too tight to breathe. Sessions can be awkward because of position, so split them. For clothing, low-rise jeans and cropped tops leave the column visible when you want to show it.
23. Shoulder Blade Corner Motif
Corner motifs like this are low commitment and easy to conceal. Ask for a heavier outer anchor so the small motif retains shape against shoulder motion. A common oversight is selecting many inner dots that coalesce into a gray patch over time. Sessions are brief and healing is straightforward. For showing the piece pick tops with open backs or racerback cuts that let the corner peek out.
Frequently Asked Questions
Q: How do I avoid cultural appropriation when getting Polynesian-inspired work?
A: Start by learning the meanings behind the elements you like and use those meanings to guide your design choices. Some people refuse to use certain sacred panels outside their communities, while others work with knowledgeable cultural consultants or commission collaborators from within those cultures. Be explicit about intent and be prepared to explain your research to the artist you hire.
Q: What placements hold Polynesian patterns best over time?
A: Shoulder caps, calves, and back panels tend to hold saturated blackwork the longest because those skins move less and keep saturation. Areas like fingers, inner wrist, and the sternum face higher touch-up probabilities due to friction and stretch. Plan line weight and spacing accordingly during the layout.
Q: How should I dress for a two-to-three-hour session on the chest or ribs?
A: Wear a fitted cropped top or a sports bra that stays in place and exposes the area without being adjusted during the session. Bring comfortable bottoms such as loose linen drawstring pants that you can sit in for long periods and that do not press into fresh work.
Q: How soon will a Polynesian-style tattoo need a touch-up?
A: Expect to evaluate saturation at six to twelve months. Bold separators usually age well and may only need small touch-ups around year two, while high-friction small pieces like fingers often need work within the first year.
Q: Where can I find portfolios and healed examples without naming individual artists?
A: Search hashtag combinations on social platforms and use location filters to find healed photos near you. Community forums and gallery aggregators are useful for seeing multiple healed shots and comparing how motifs age on different skin tones.
Q: Can I mix motifs from different island traditions in one design?
A: Mixing elements can work if you treat each element with respect and deliberate placement, but some traditions view certain motifs as specific to lineage or role. Talk through the meanings you want to combine and the artist can help translate them into a cohesive composition.
