
Small bird tattoos are everywhere, but what lasts and what becomes a smudge are not the same thing. Tiny single-needle sparrows often look fragile at first and then blur where the skin creases. Placements that rub against clothing or wash a lot need deliberate spacing, and some spots simply hurt more than others. Read on for bird designs that balance presence, placement, and long-term wear, starting with a wrist piece that actually keeps its shape.
1. Fine Line Flying Bird on Inner Wrist
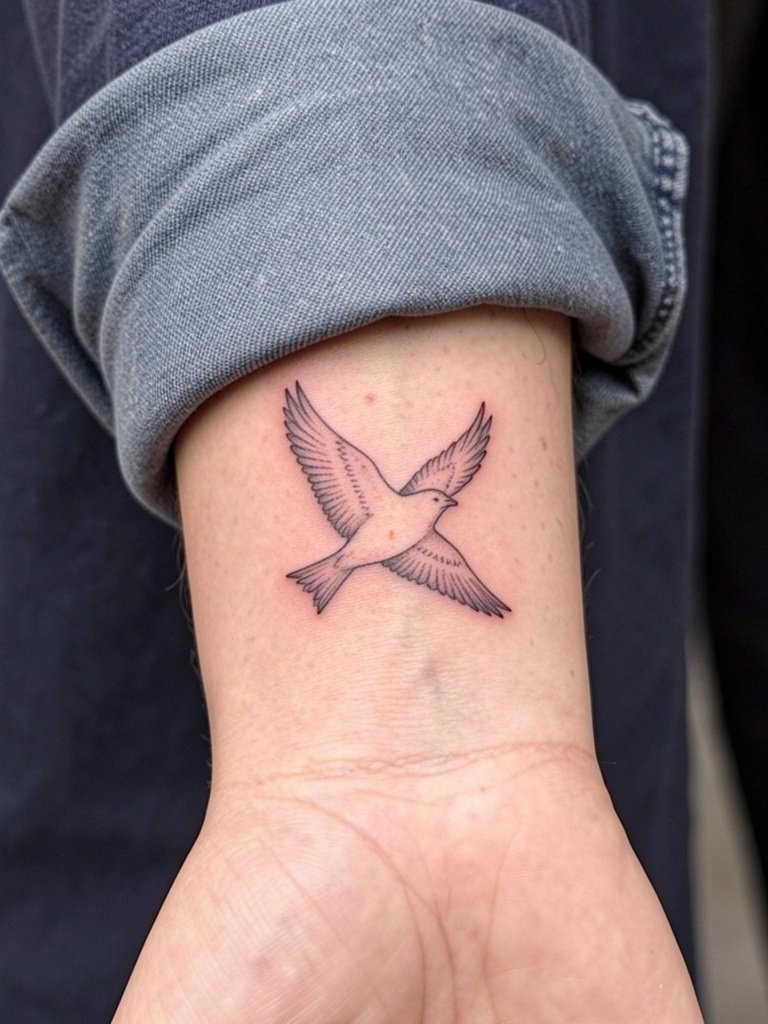
A small flying bird on the inner wrist reads elegant for the first year, then tiny veins and frequent hand washing can soften single-needle strokes. Ask for slightly heavier linework than your saved reference so the wing tips do not feather into a blur by year three. The session feels like light buzzing with a brief stinging around bone, usually a 30 to 60 minute appointment. Common mistake is making the bird too tiny; give the design three inches of breathing room. For show-off outfits pair it with rolled cuff linen shirts that keep the wrist visible.
2. Micro-Realism Sparrow on Collarbone

Micro-realism on the collarbone gives a tiny sparrow an intimate, jewel-like presence. Expect a longer session for dot work and greywash, often 90 minutes with short breaks. The collarbone can be a higher pain area because of thin skin over bone, but strategic shading hides minor aging effects. A common aging issue is over-shading that turns soft wings into a gray blotch. During consultation bring close-up healed references so the artist can plan dot density and spacing. For nights out, a wide V-neck top frames this placement; try scoop-neck tanks that keep the artwork visible.
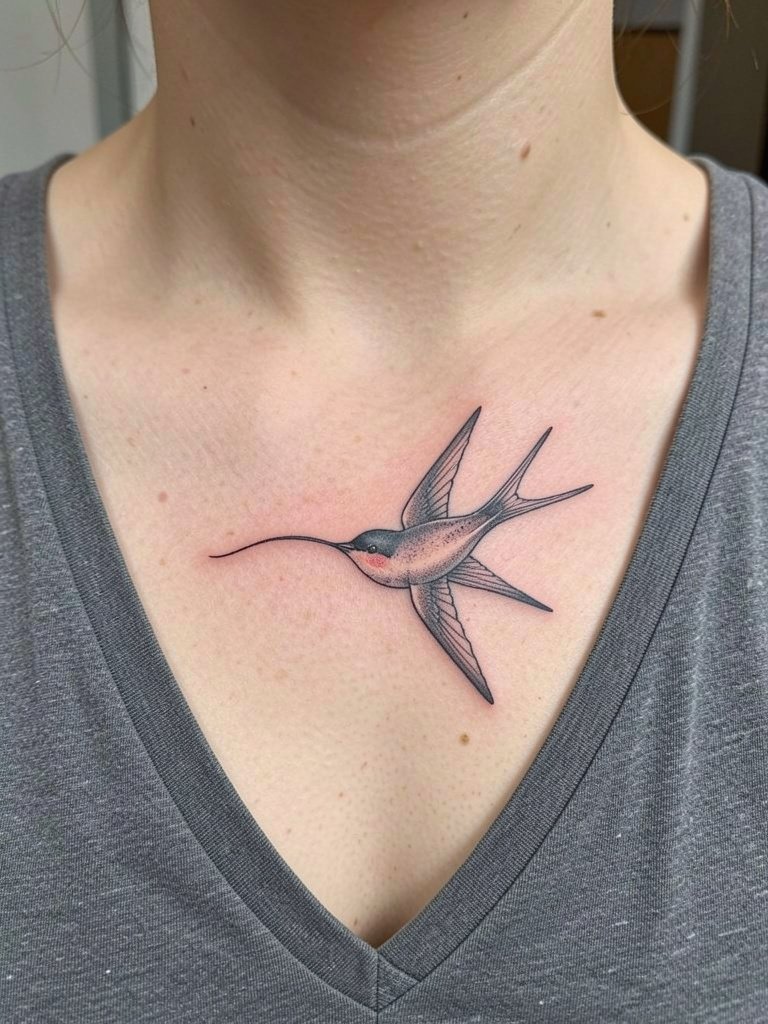
3. Traditional Swallow on the Hand Edge
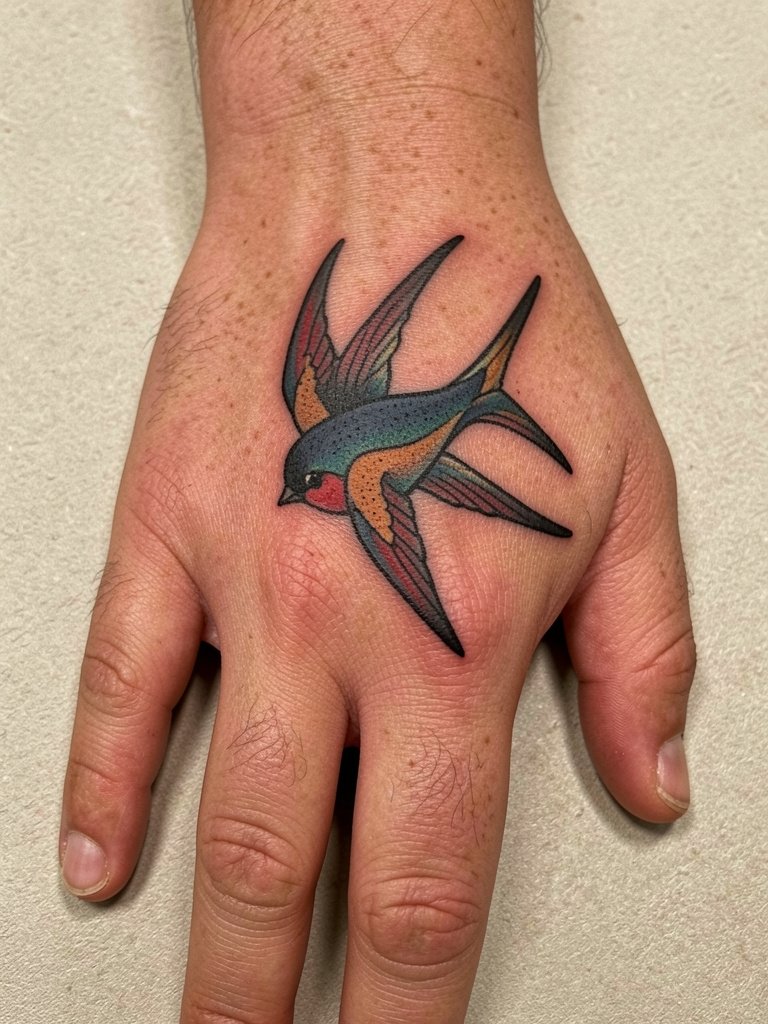
Hands age differently from limbs because they see daily scrubbing and sun. A traditional swallow with thick outlines and saturated fills holds up better than a tiny single-needle bird. Expect touch-ups around the one-year mark for saturation and edge crispness. The session is quick but uncomfortable, often split into two short passes if needed. Avoid asking for micro detail in this spot since blowout risk is higher on thin skin and near joints. Wear a lightweight glove on the non-tattooed hand to steady during the session. For styling pair it with stackable rings that draw the eye to the hand.
4. Watercolor Hummingbird on Shoulder Blade
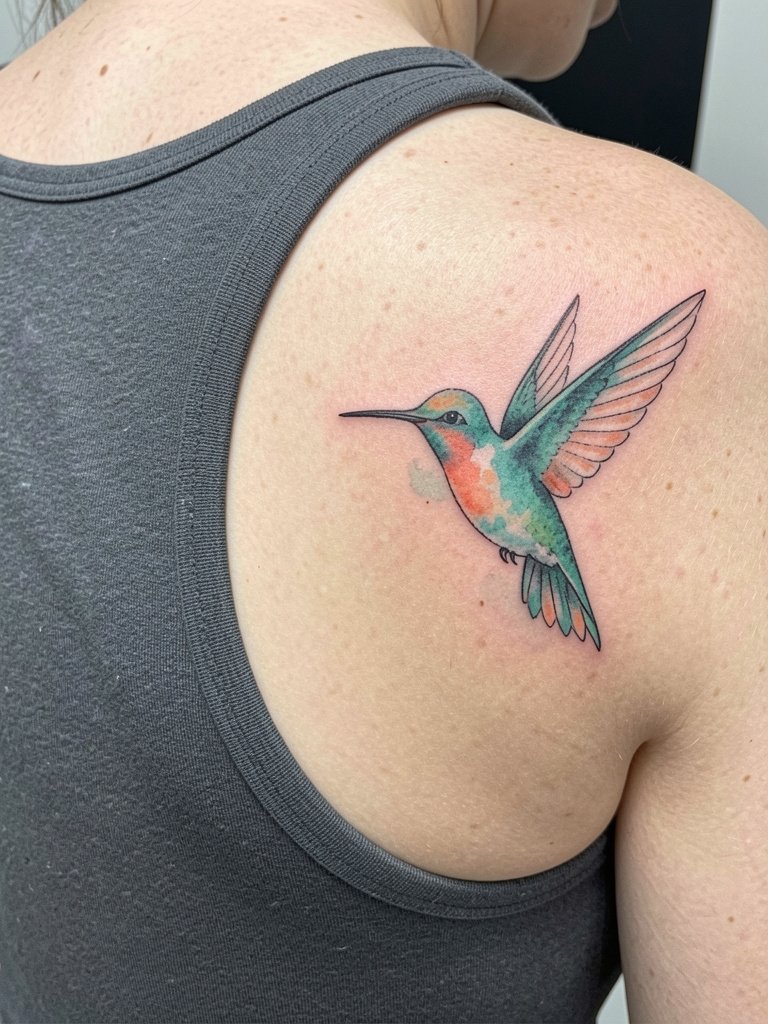
Watercolor bird pieces look like brushstrokes, but that style splits artists and clients into two camps. One camp says watercolor fades into indistinct patches and needs frequent touch-ups to keep color direction. The other camp argues careful layering and crisp anchor lines preserve the painterly look for years. If you prefer lower maintenance, ask for subtle black anchors under the color to guard edges, and specify gentle saturation rather than flooded pigment. Shoulder blade skin moves less during daily activity, so the design often keeps its painterly flow even after a few years. Show it off with open-back dresses and try scoop-back tanks for evenings.
5. Minimal Outline Flock Along the Ankle
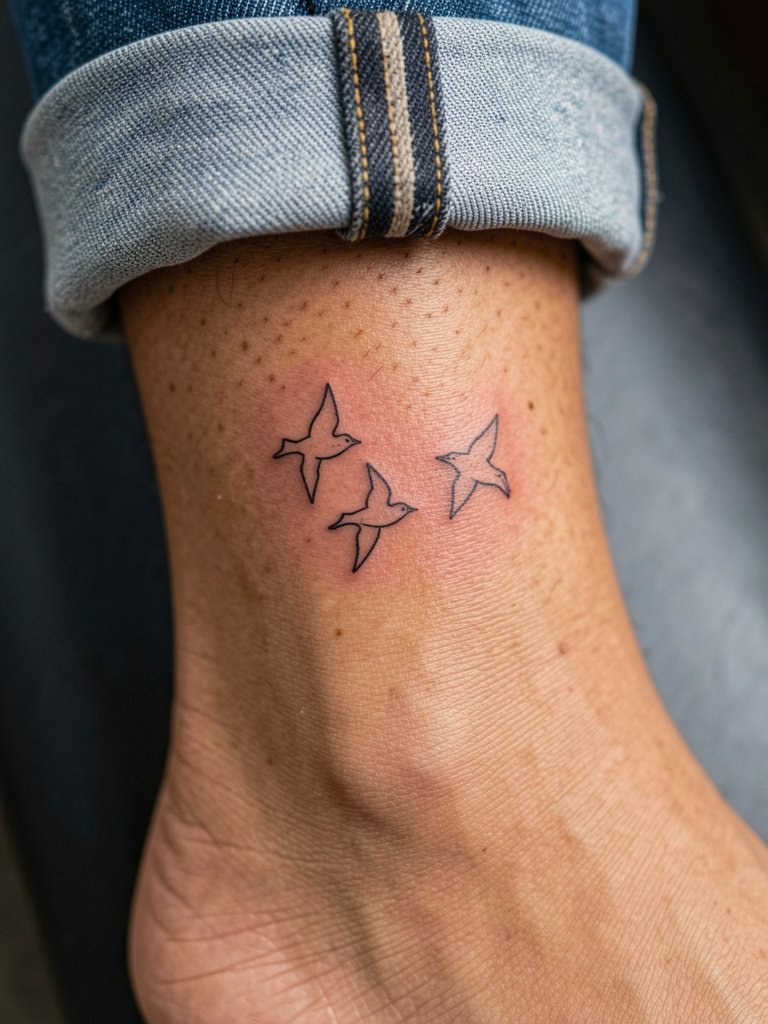
Ankle tattoos face friction from socks and shoes during the first weeks, so thin outlines can fade unevenly. Request slightly bolder outlines and a low-saturation fill to avoid early patchiness. Sessions are brief, under an hour, and the area can feel sharp when the needle crosses bone. A common mistake is placing the flock too low near the shoe line where constant rubbing erodes ink. For casual wear, pair this with cuffed jeans or ankle boots that keep the tattoo visible but protected.
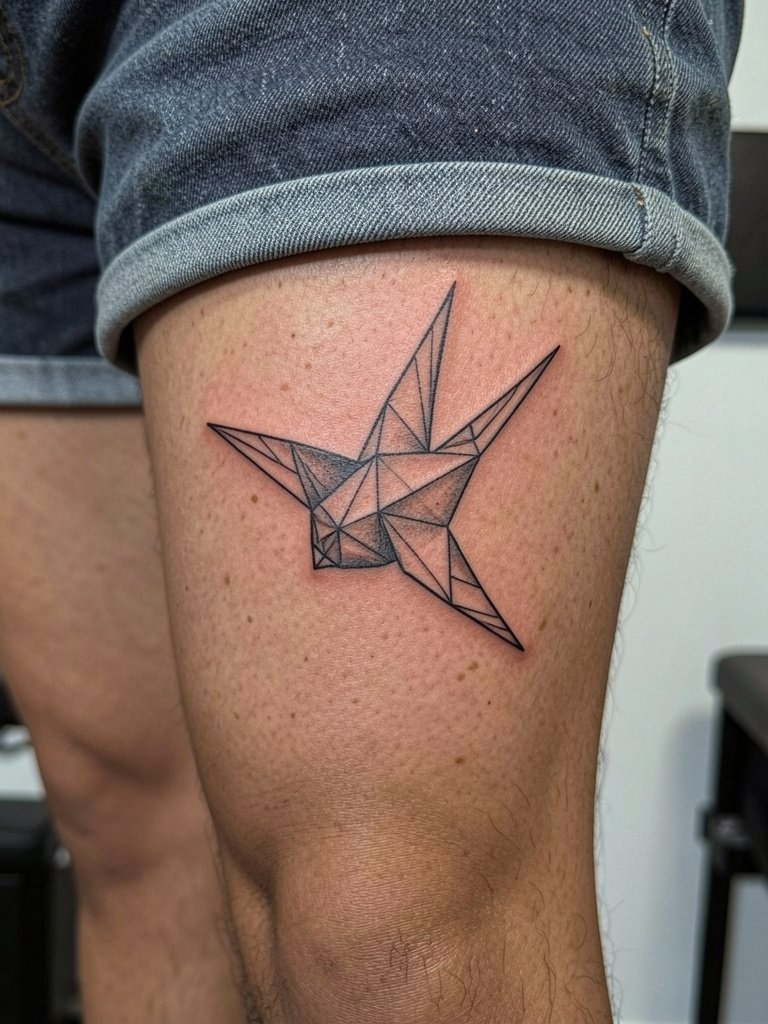
6. Geometric Origami Bird Behind the Ear
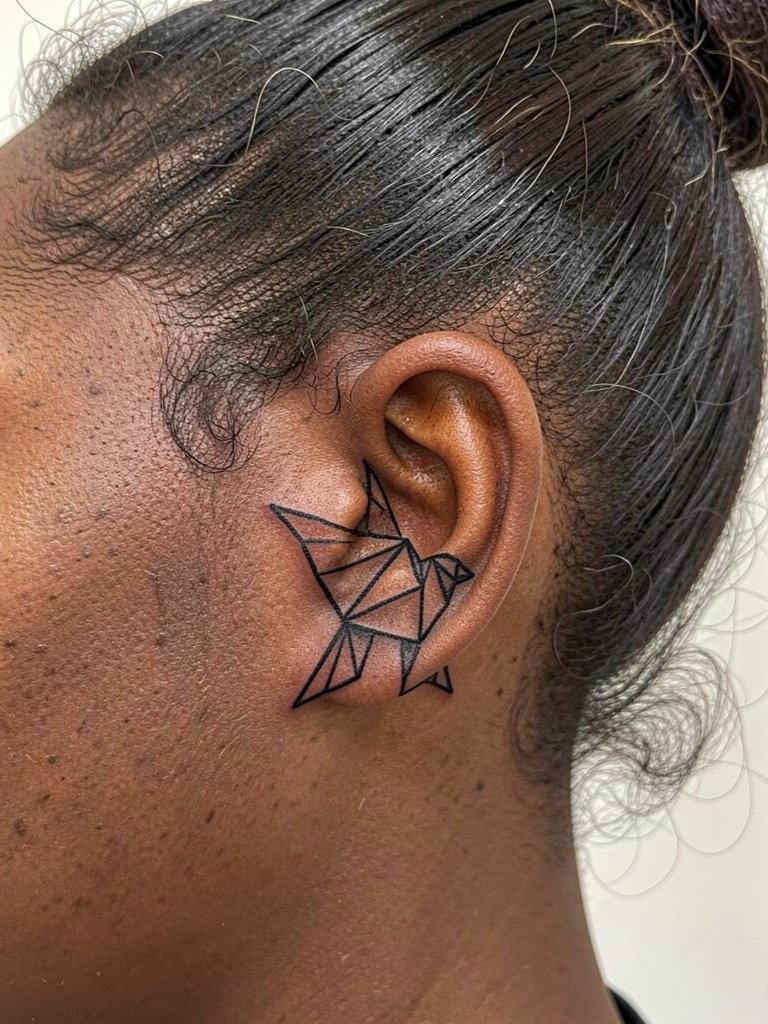
Behind-the-ear pieces need precision because the area is small and the skin shows texture. Go for clean geometric planes rather than micro detail that will blur. Session time is short but the spot can be sensitive, so plan for a 30 to 45 minute visit. A common error is trying to cram shading into a space that only suits crisp linework. For discreet styling, tuck hair into a low bun and add delicate hair clips on days you want the tattoo visible. Professional consideration note: this placement may require an artist experienced with small, high-precision work.
Session Day Picks
The wrist, collarbone, hand, shoulder blade, ankle, and behind-the-ear pieces above heal differently, so a few items smooth the session and the first week.
-
Stencil transfer paper kit. Lets you preview line placement on skin before the first pass, which is helpful for small flock and geometric pieces above.
-
Topical numbing cream. Applied as directed before the appointment takes the edge off high-sensitivity zones like the collarbone and behind the ear.
-
Thin protective film roll. Useful on ankle and hand tattoos to protect against friction during the first days.
-
Fragrance-free gentle body wash. Cleanses healing skin without stripping pigment from shallow linework.
-
Soothing healing balm. A thin layer in the first 48 hours helps maintain moisture for delicate linework and color.
7. Silhouette Crow on Upper Back
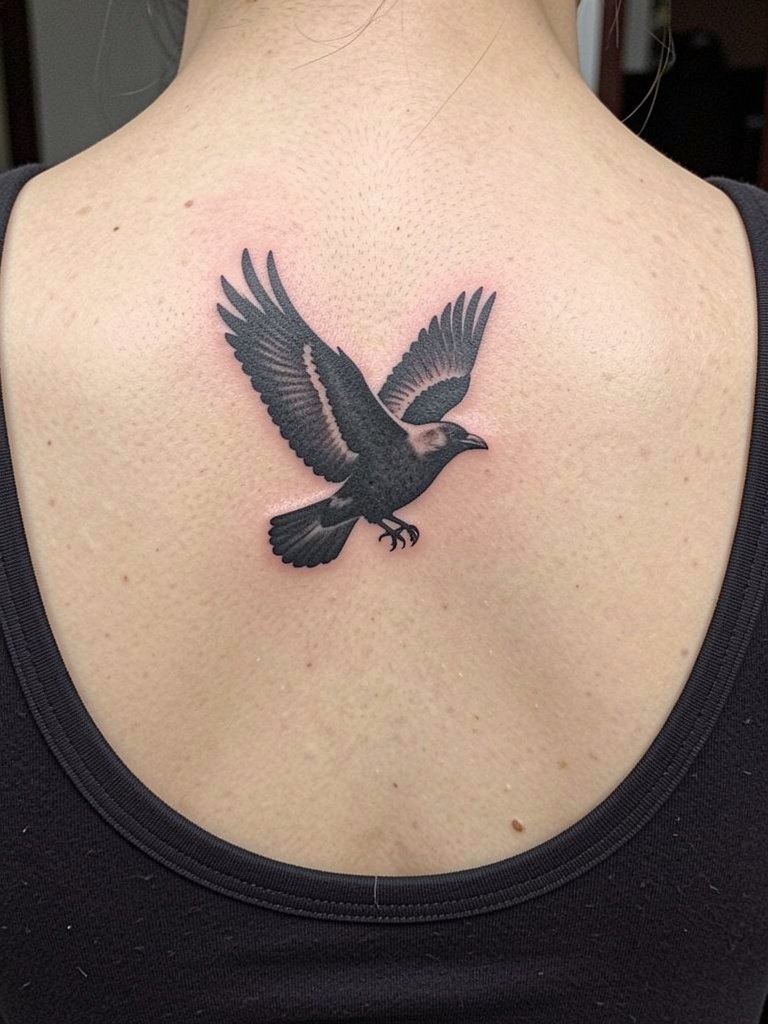
A bold crow silhouette on the upper back is forgiving of aging because strong shapes resist softening. The session can be 60 to 120 minutes if you want a larger wing span. One mistake is over-texturing the interior with fine feathers; solid negative-space shapes last better. For comfort wear a loose button-up on the day so it is easy to remove without rubbing the fresh ink. This placement pairs with open-back tops for showing off at events, try a scoop-back dress when you want to display the piece.
8. Tiny Kinglet on the Finger Side
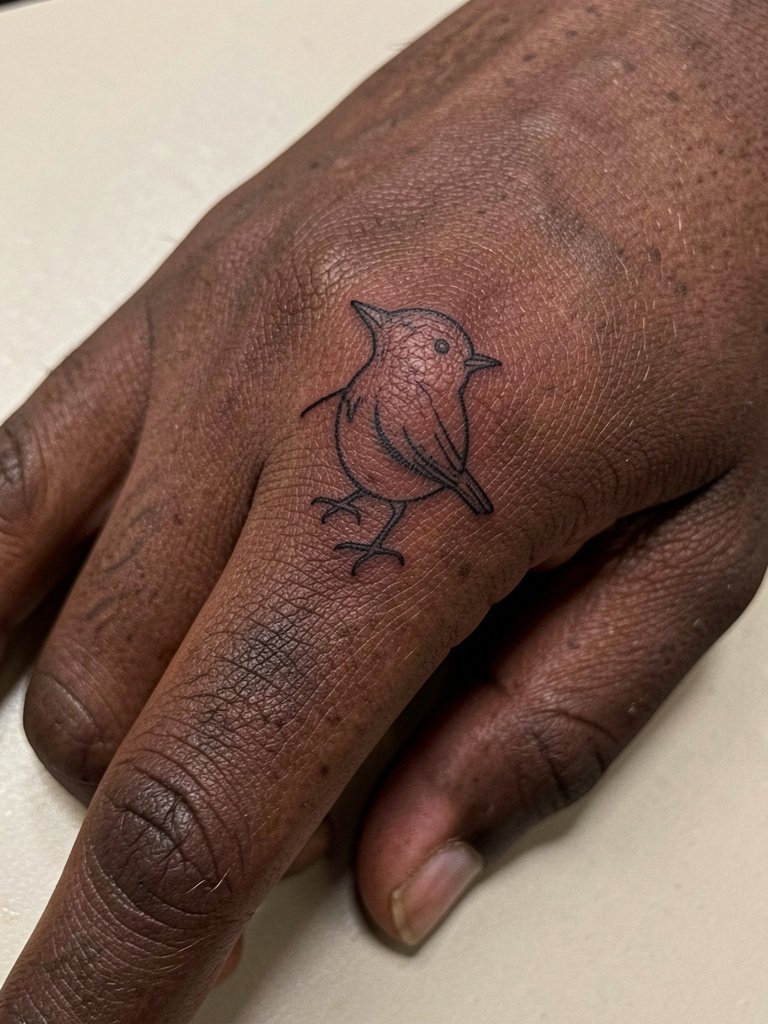
Finger tattoos are high maintenance because skin there regenerates quickly and washes often. Prefer a bold outline with tiny negative-space details rather than hair-thin strokes that vanish. Expect a touch-up within six to twelve months. The session is short but sharp, and the area will scab visibly, so factor in a week of lighter activity. A typical error is placing the motif on the joint where movement causes early blurring. For accessories, choose thin adjustable bands that do not press on the tattoo while it heals, like a slim silicone ring.
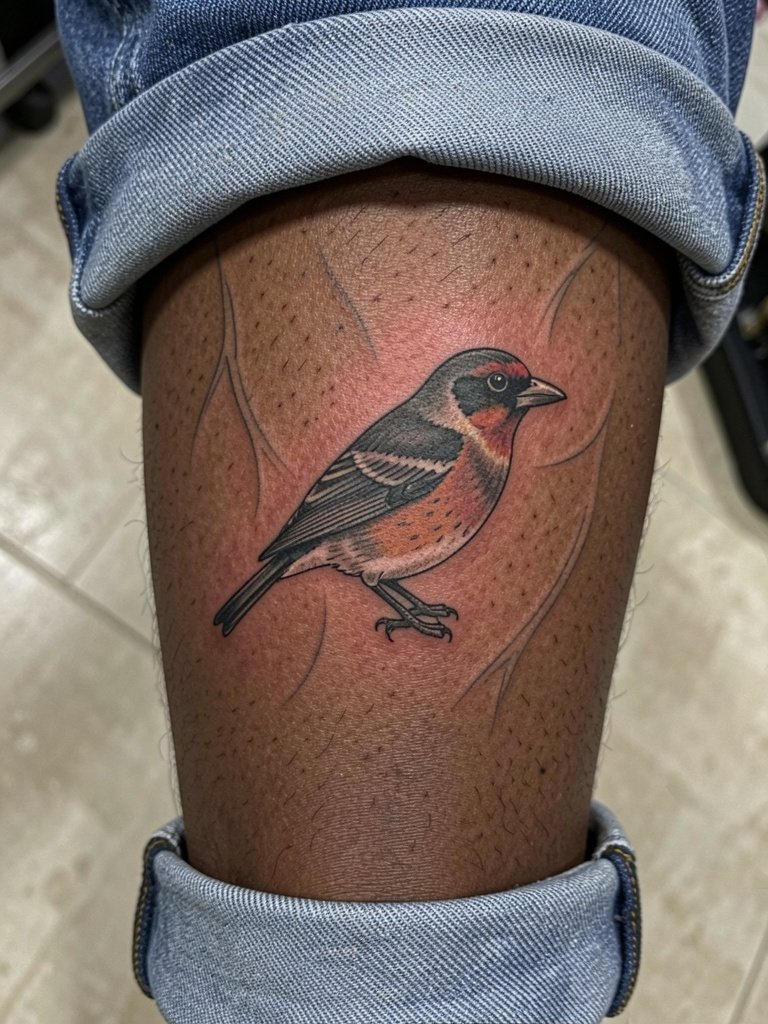
9. Neo-Traditional Parrot on the Thigh
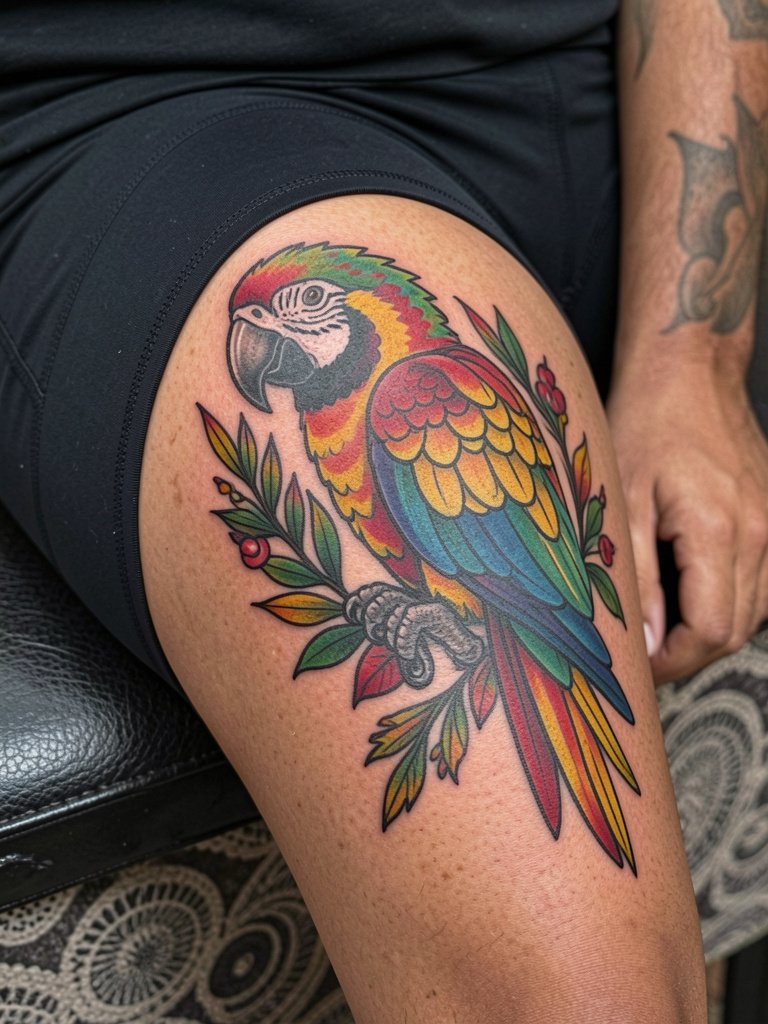
Thigh pieces hold color well thanks to thicker skin and less sun exposure. Neo-traditional parrot work rewards strong outlines and rich saturation that read from a distance. Expect a two- to three-hour session for color layering. A common mistake is crowding foliage too close to the bird; allow negative space so each color field ages independently. The thigh is great for larger, more detailed parrots and for concealment during recovery. During sessions wear loose drawstring bottoms so the artist can roll the leg up without compressing the area; a loose linen pant works well for travel to and from the studio.
10. Delicate Swallow on the Collarbone Curve
Collarbone pieces show quickly when styled right but are vulnerable to fading if lines are too thin. For a lasting delicate swallow request slightly increased line weight in the outer contour and subtle stipple inside to retain shape. The session can feel sharp near bone and might need a one-hour window with small breaks. A frequent error is centering the bird too medially where chest movement distorts the image. This placement dresses well with open-neck blouses and layered necklaces; try a delicate pendant necklace to frame the tattoo.
11. Stippled Kingfisher on the Ribcage
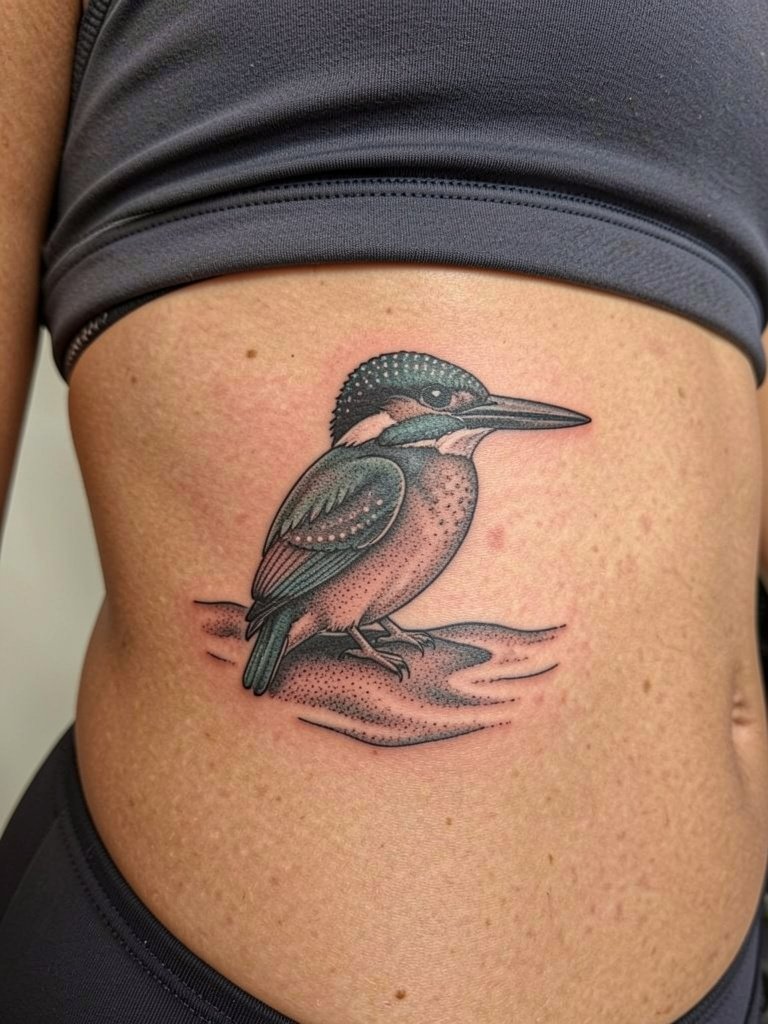
Ribcage bird pieces spark a clear debate in the community. One camp argues fine-line rib work blurs because the skin stretches and moves with breathing, making thin lines merge after a couple of years. The other camp says with slightly wider spacing, controlled needle depth, and planned dot work the design settles and remains readable. If you choose this area plan for higher pain and a longer healing window. Discuss spacing and dot density so the kingfisher retains contrast as it ages.
12. Minimal Flight Line Across the Sternum
Sternum pieces are intimate and require careful planning because movement and tension can affect ink retention. Keep lines simple and avoid micro detail. The session can be intense depending on sensitivity, so plan for breaks. A common mistake is requesting extremely thin connecting lines that compress into a smudge near the breast crease. For session comfort, pick a supportive yet easily removable top like a fitted sports bra that will sit in its normal position during application.
13. Dot Work Swallow Sleeve Accent

Using dot work to tie a small swallow into a sleeve creates texture without heavy lines. Dot density and spacing determine whether the pattern will hold or blend into a gray mass. Expect multiple passes and a few hours across sessions for larger accents. Avoid asking for dots too close together or too shallow, which causes early fading. For wardrobe pairings this arm accent looks great with rolled sleeves and linen button-ups; try linen button-up shirts to let the artwork peek out.
14. Cultural Phoenix Motif on the Back Shoulder
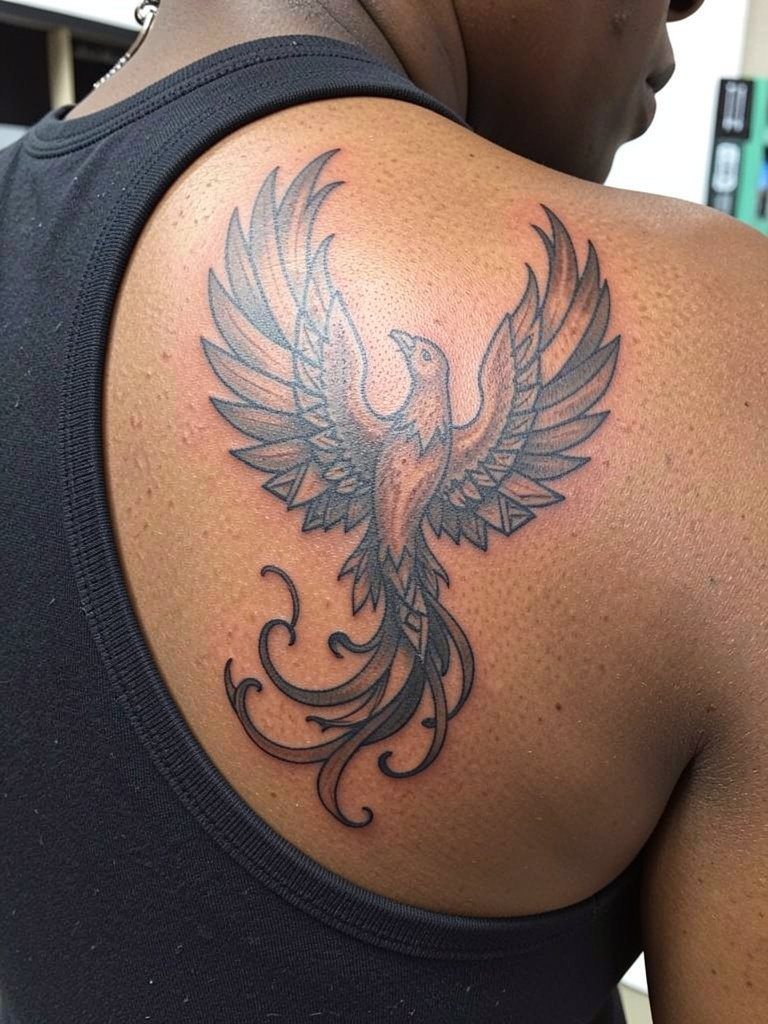
Mythic bird designs like phoenix motifs bring a controversy about cultural origins and stylization. One camp stresses strict respect for origin and calls for research into the motif's cultural meaning before using key symbols. The other camp favors creative reinterpretation that borrows aesthetic elements but avoids sacred or specific cultural markers. If you want a phoenix-style piece say which cultural features you want honored and which you want adapted. Shoulder placement gives you room to scale up comfortably and keeps the motif visible when you wear open-back tops.
15. Linear Falcon on the Outer Thigh
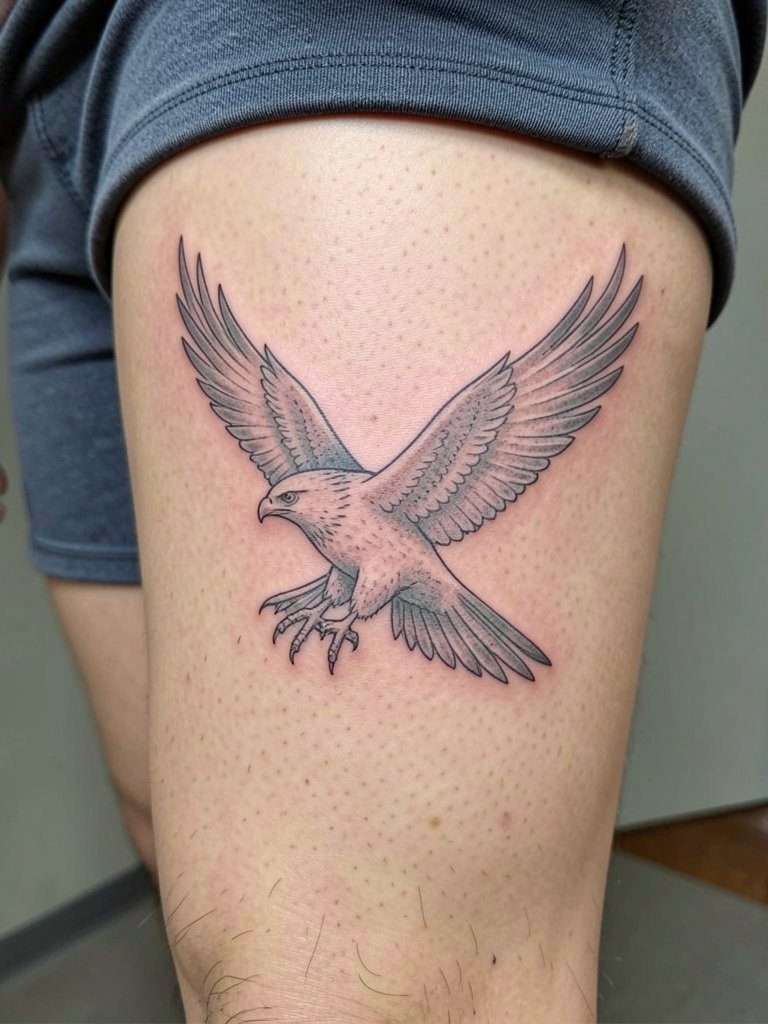
Outer thigh is forgiving and great for medium-scale linear designs like a falcon. Lines maintain clarity and color stays vivid longer than on hands or feet. Sessions can run one to three hours depending on size. A typical mistake is making the falcon too narrow; widen primary feather fields so they retain definition. For showing it off with skirts and shorts try high-waisted denim shorts that let the design sit visibly on the outer thigh.
16. Stylized Crane on the Calf
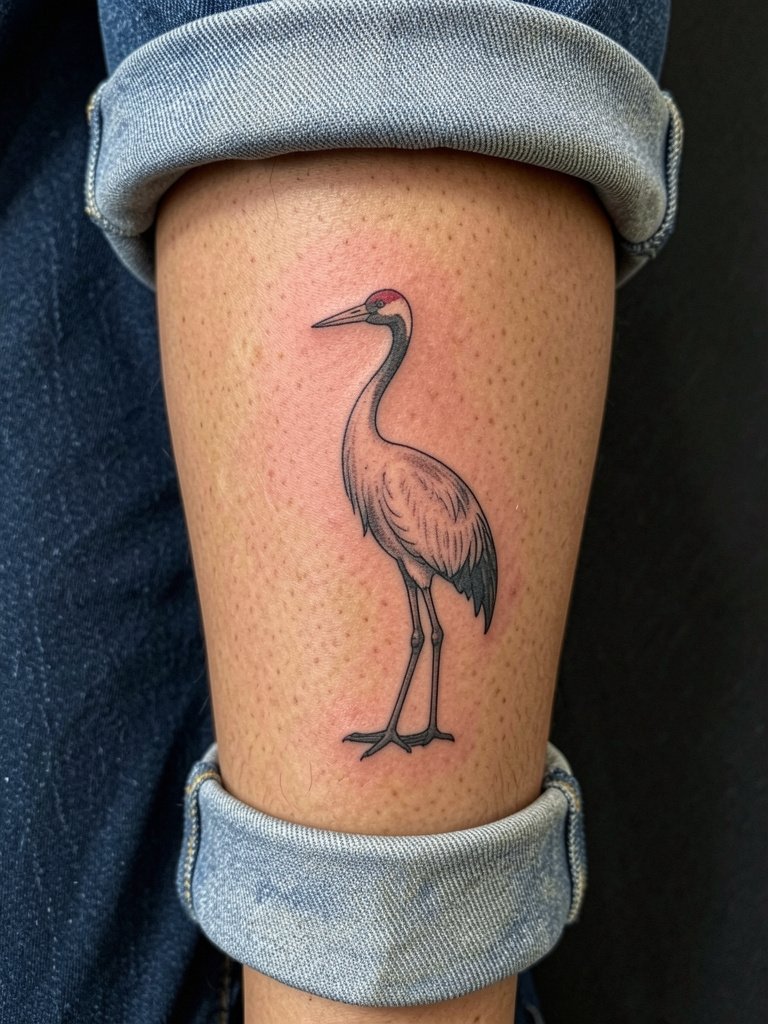
Calf placement handles linear movement well, and cranes in stylized form benefit from moderate spacing and bold contours. Sessions here are moderate in discomfort and usually take under two hours. A mistake is filling small negative spaces that later look muddy from calf muscle movement. For footwear pair this with ankle boots or low-top sneakers; try classic white sneakers to keep the calf visible.
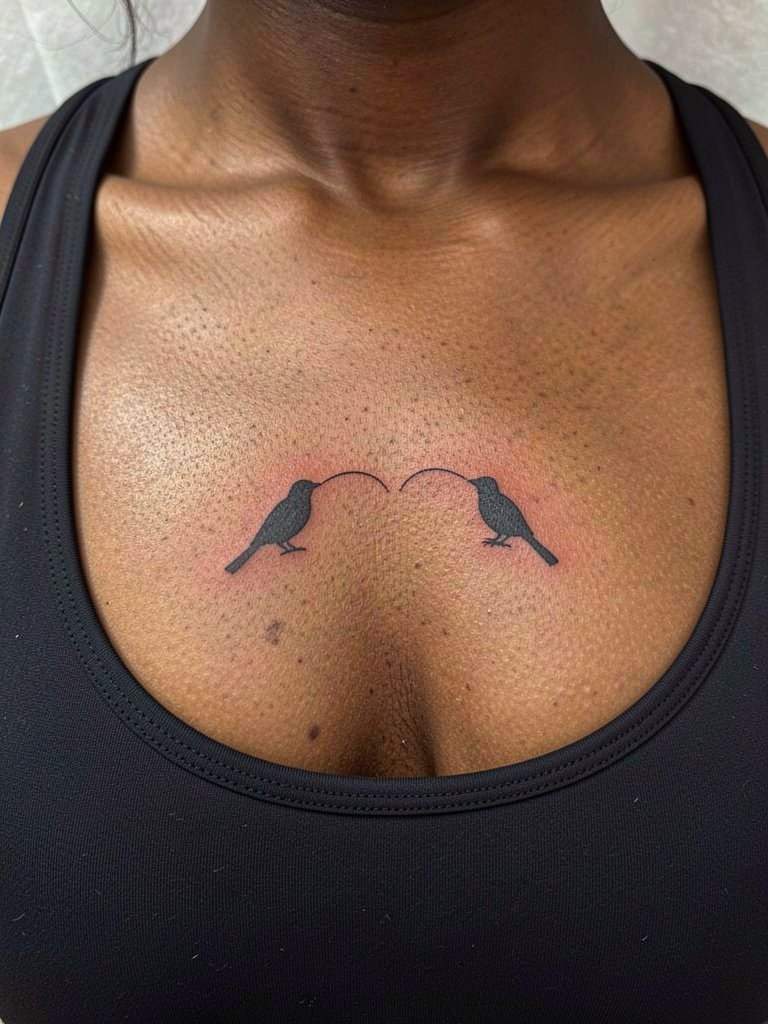
17. Blackwork Sparrow Chest Cluster
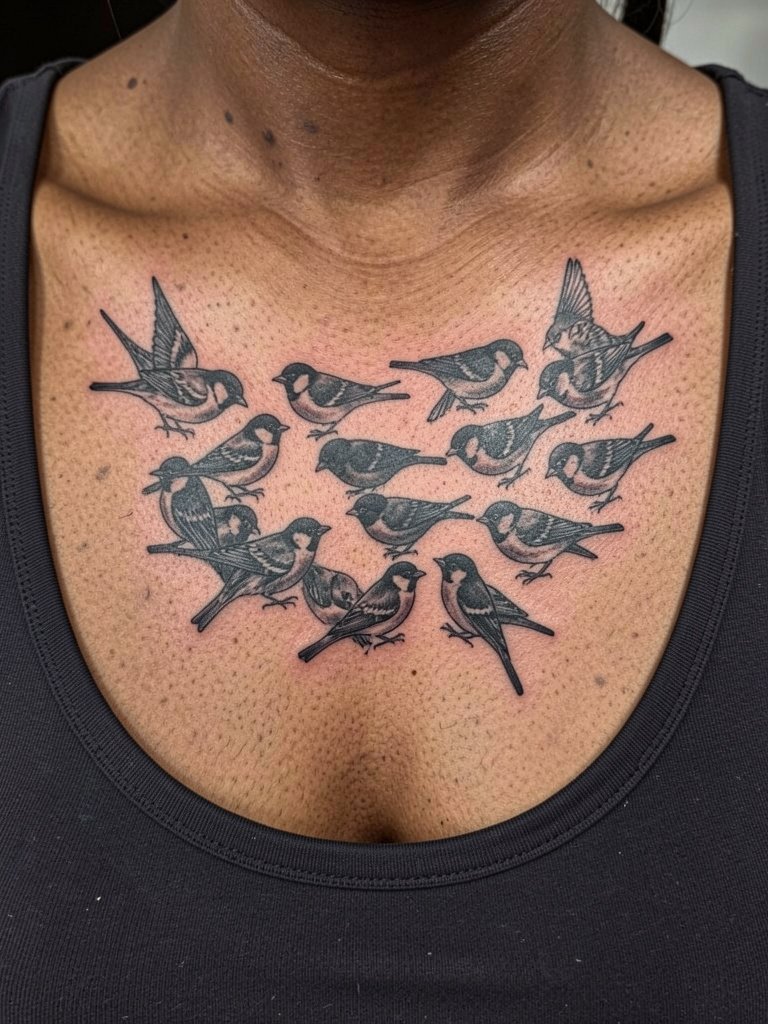
Blackwork clusters age well because strong saturation resists light loss. Chest clusters need clear spacing so individual birds remain readable over time. The session can be long and may require a break before completion. A common error is packing birds too tightly so they merge into one shape as the skin shifts. For outfits pair with low-cut sweaters or v-neck shirts; a scoop-neck sweater keeps the cluster visible.
18. Fine Line Dove on the Upper Arm
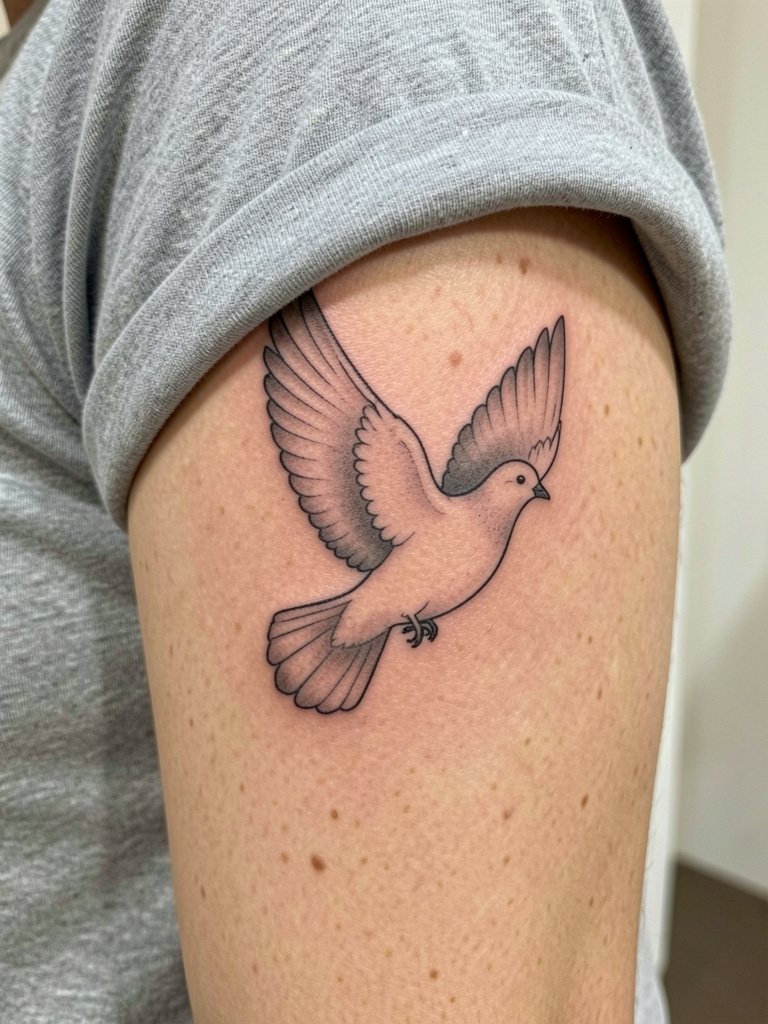
Outer upper arm is one of the safest places for fine line doves because it avoids constant friction. Expect the session to be under an hour for a modest size. The main mistake is too-weak interior shading that disappears; ask for a soft greywash to provide structure without overpowering linework. Touch-ups are typically less frequent here. For casual outfits, a rolled-sleeve tee or sleeveless dress frames the dove nicely.
19. Origami Swallow Behind the Knee
Behind-the-knee tattoos demand careful placement because the area flexes with walking and sitting. Geometric origami forms can survive movement if lines are balanced and spacing is generous. The session can be more painful than the outer calf, so schedule shorter sittings if needed. A frequent mistake is placing thin detail across the crease where it will blur. For visibility pick cropped skirts or shorts; try casual summer shorts that let the area show.
20. Minimal Line Swallow on the Hip Bone
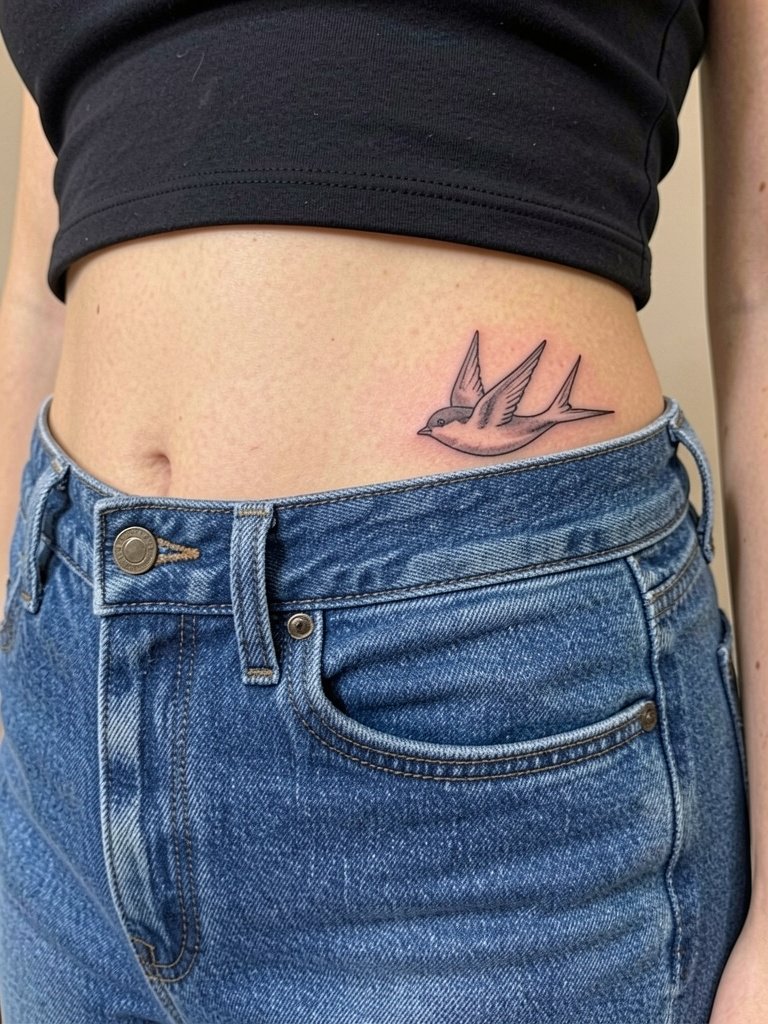
The lateral hip is a playful spot for a minimal swallow that stays mostly private. Thin-line designs can hold here if they avoid the immediate waistband area that sees friction. The session is comfortable and usually brief. A common error is placing the motif too close to seams where movement and pressure cause early fading. For reveal outfits pick low-rise or cropped styles; try low-rise denim that leave the hip visible.
21. Whip-Shaded Finch on the Shin
Shin tattoos can be striking because the area shows well with skirts and shorts. Whip shading provides movement without heavy fills. The session may feel more intense near bone. A common mistake is overdoing shading density which leads to banded gray patches as the area heals. For footwear and visibility choose low cut shoes or sandals; simple leather sandals complement shin placements.
22. Minimal Script with Small Bird on Sternum Edge
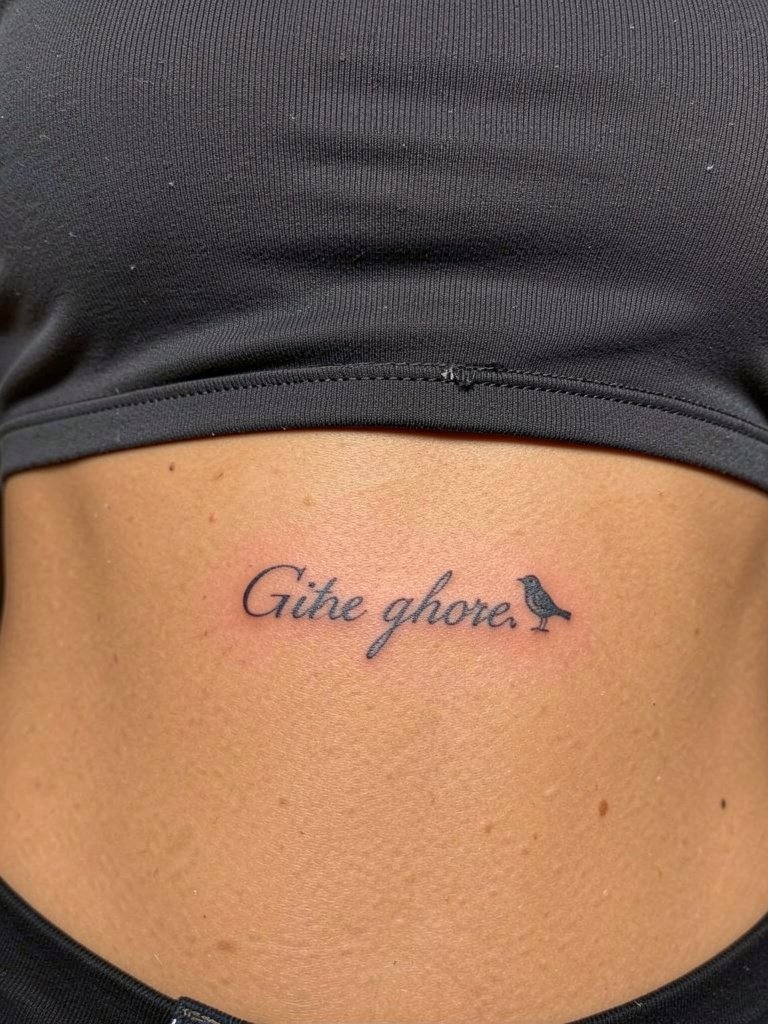
Combining script and a bird at the sternum edge calls for moderate letter spacing and a bold micro bird so both elements remain legible. The sternum can be painful so plan for 30 to 90 minutes. Avoid hairline script that will blur; opt for a slightly heavier stroke that preserves the word over the long term. For sessions choose a supportive top you can remove without stretching the area.
23. Small Nightingale on the Nape
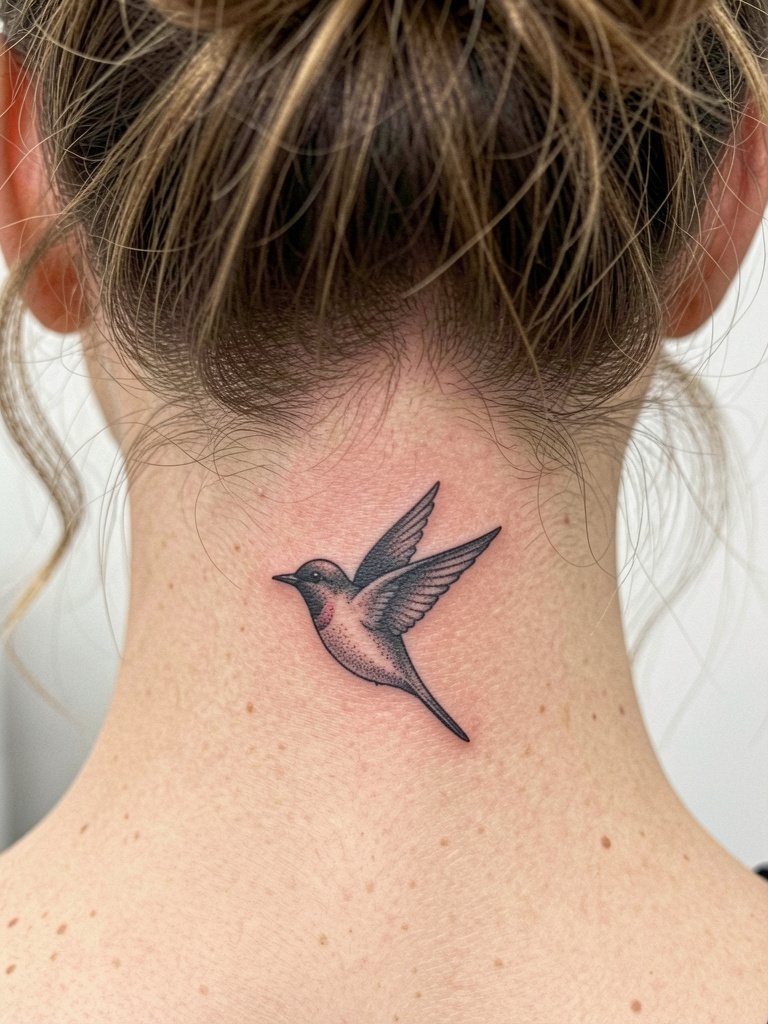
Nape tattoos are subtle and delicately placed. Single silhouettes or minimal stipple work age better than dense color there because the area sees less sun but more hair contact. Session time is short and tolerable for most people. A common mistake is placing too much fine detail that gets hidden by hair growth. For discreet reveal wear your hair up and accessorize with simple hairpins; minimal hair pins work well.
Frequently Asked Questions
Q: How do I choose between fine line and blackwork for a bird that I want to keep clear over time?
A: Fine line looks delicate but needs more space and slightly heavier single-needle choices to survive five years. Blackwork gives immediate longevity through saturation and bold edges. Decide based on placement and how often the area is exposed to friction and sun, then ask for spacing adjustments and subtle anchors so the shape still reads as the skin changes.
Q: Which placements are the most painful and which heal fastest for bird tattoos?
A: Generally ribs, sternum, and collarbone rank higher in pain because of thin skin over bone. Thighs, outer upper arm, and back shoulder tend to be less painful and heal with fewer touch-ups. Healing speed depends on friction, sun exposure, and aftercare; areas that rub against clothing need extra protection in the first week.
Q: Where can I find healed examples and community portfolios without naming artists directly?
A: Search platform hashtags for healed shots, use location filters on TikTok and Instagram to narrow to your city, and browse portfolio keyword searches on tattoo network sites. Reddit tattoo threads often include follow-up photos at one year or later, which help you compare how styles look on different skin tones and placements.
Q: How often should I expect a touch-up for small bird pieces on hands, fingers, and ankles?
A: Expect touch-ups within six to twelve months for fingers and hands, and within twelve to eighteen months for ankles if the original lines were fine. Larger or bolder work usually needs fewer touch-ups. Plan touch-ups sooner if you see uneven fading or edge softening.
Q: Are there cultural concerns I should know about before choosing a mythic bird motif?
A: Yes. Some designs carry cultural or spiritual significance. One approach is to avoid sacred symbols tied to a living community unless you have a clear connection and permission. Another approach is to work with your artist to create an inspired, respectful reinterpretation that avoids direct appropriation of sacred elements.
