
The neck is one of those places where a little choice goes a long way, and what looks perfect on Pinterest can lose shape faster than you think. Fine single-needle vines read fragile on fresh skin but can soften into a gray line if spacing and scale are wrong. I pulled together neck-specific ideas that balance readability, placement, and wardrobe so you can pick a look that still reads clean after a few seasons.
1. Fine Line Botanical Vines on the Nape
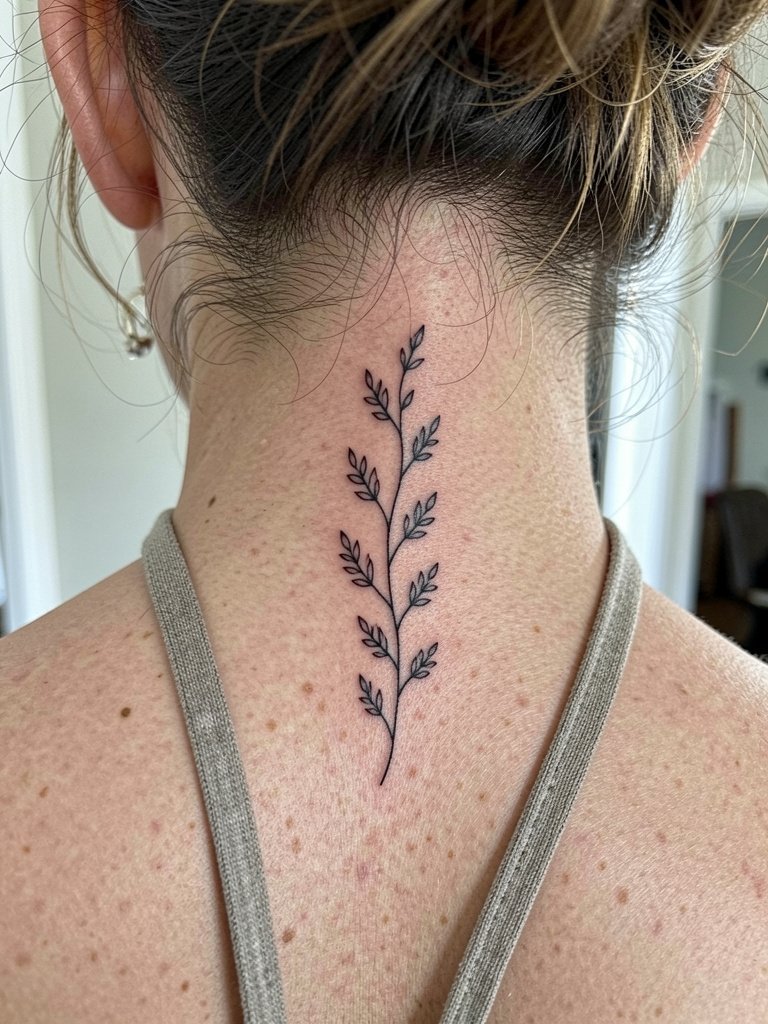
Fine line vines follow the natural curve of the nape and flatter shorter necks when oriented vertically. Use a slightly more open spacing and a hair heavier line weight than the picture you saved so the leaves keep definition at year two and beyond. One common mistake is asking for hairline-thin detail everywhere; that reads crisp at six months and washes into gray by year two. In the chair you will feel moderate sting for a short session because the nape is bony near the hairline, but overall it is quick. For the appointment wear a halter neck top women so the artist can access the area without fabric tugging.
2. Micro-Floral Lotus at the Side Neck
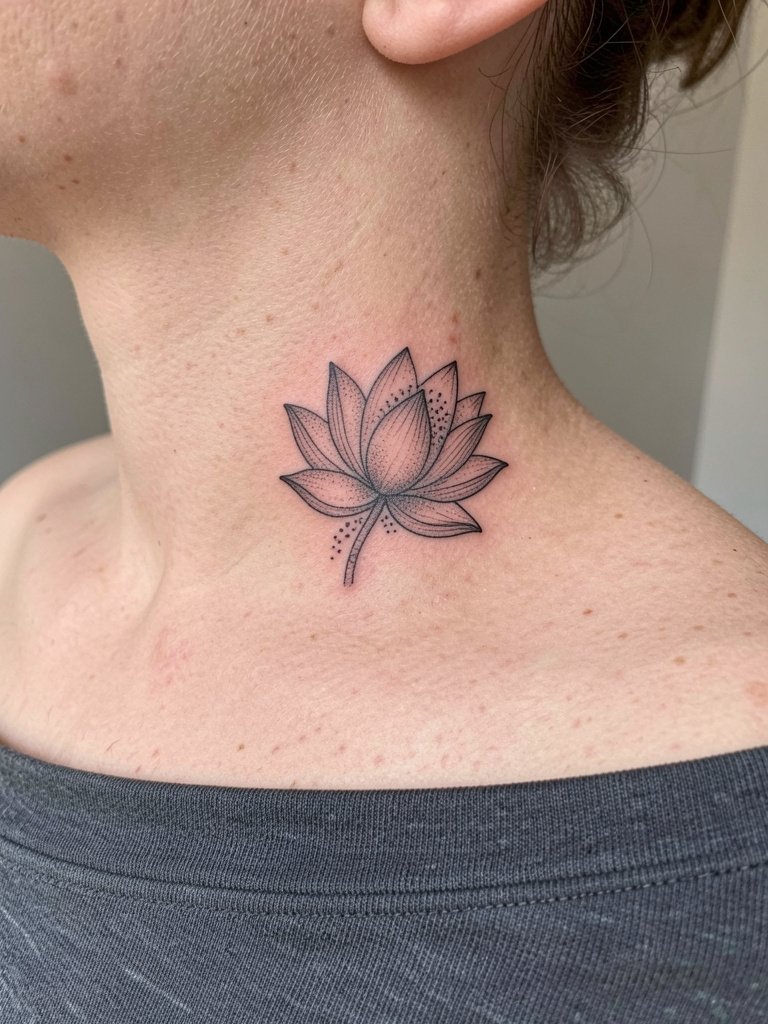
This micro-lotus sits on the lateral neck and reads feminine without dominating the jawline. I recommend a 2–3 inch size so petals keep shape rather than disappearing into neck texture. Tell your artist you want single-needle linework but with slightly increased spacing between strokes and stipple shading for the petal depth. Tiny pastel fills often look pretty fresh and then fade unevenly on exposed neck skin, so black and soft gray will age better. Session feel is sharp but brief, and you should plan for a single short appointment. Show-off pairing: an off shoulder top women frames the area and keeps the focus on the flower.
3. Vertical Script Single Word at the Center Nape
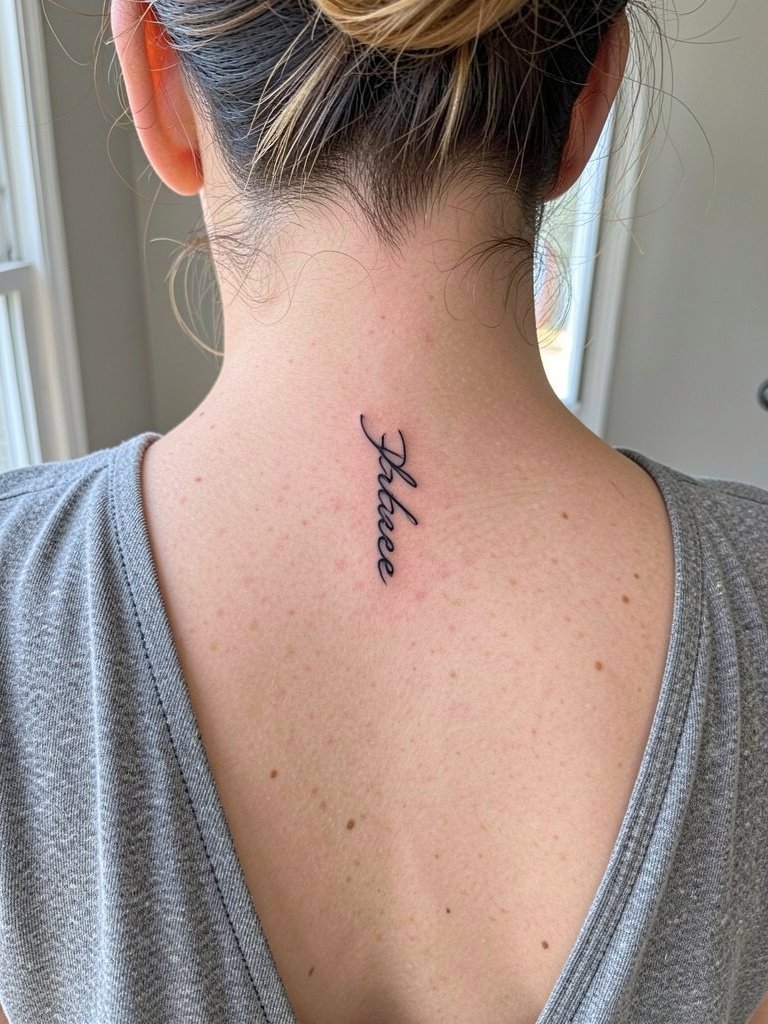
Vertical script lengthens the neck visually and is a smart orientation for shorter necks. Ask your artist to show how the word reads at three and five inches so you can see the line weight change; request a slightly heavier line than the thinnest reference to protect against blur. The usual error is copying a transcribed micro-script that looks elegant on a phone but blurs into gray within a year. Expect a quick one-session tattoo with a moderate sting near the spine. For wearing, a open back dress casual will highlight the vertical composition without overlapping the letters.
4. Tiny Infinity Loop Behind the Ear
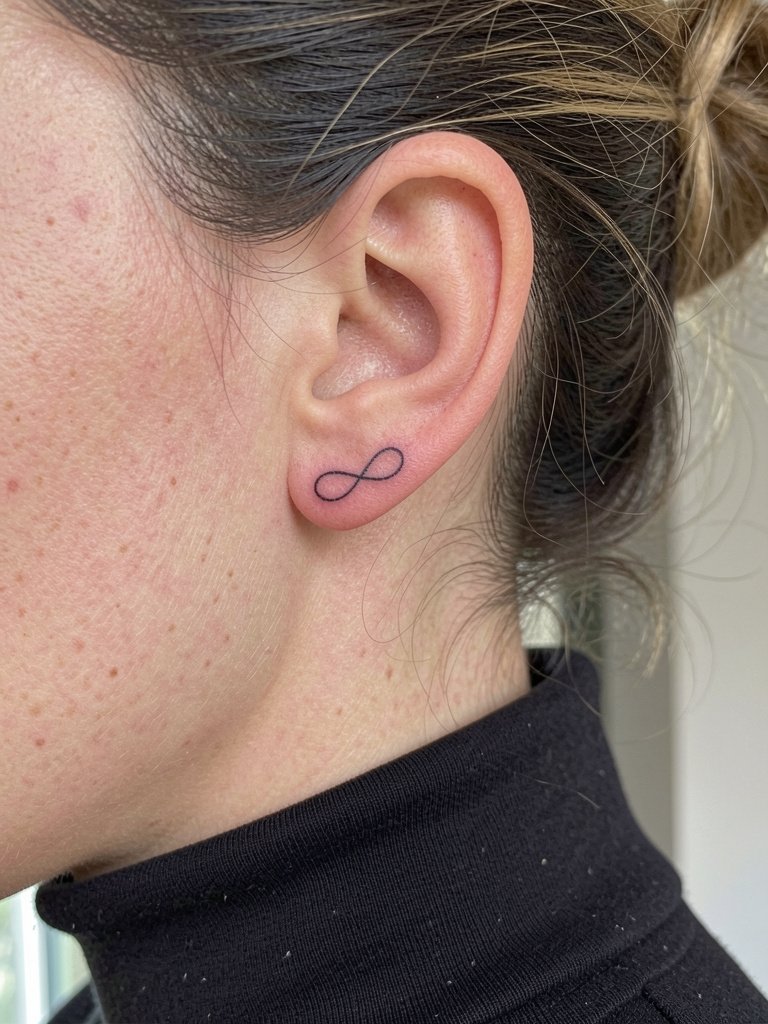
Behind-the-ear placements are discreet and easy to cover with hair if needed. Because the mastoid skin can be thin, ask for a continuous single pass rather than multiple faint strokes to avoid patchy healing. The most common mistake is pushing detail into a space too small, which ends up as a grey smudge. Pain is lower here because the area is small and sessions are short. Session wear tip: pull hair back and bring a high collar top women or a shirt that you can slip on without tugging the ear area.
5. Ornamental Jewelry-Style Choker from Collarbone to Nape
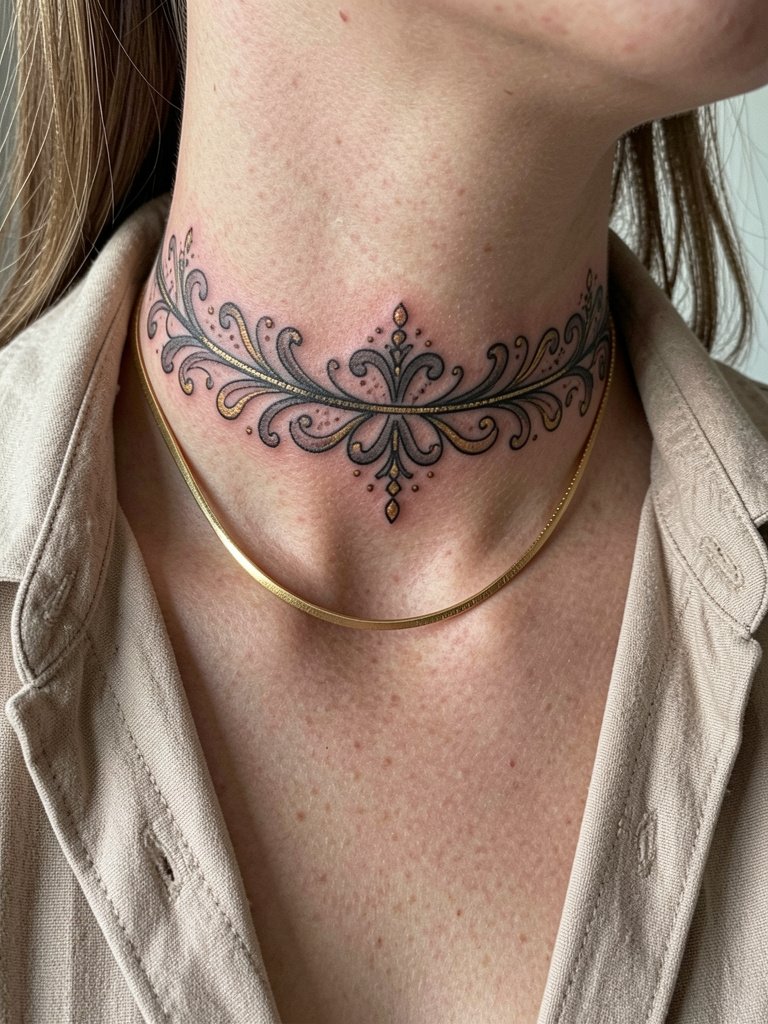
A jewelry-style piece reads like a permanent pendant without metal and frames the neck elegantly when sized properly. In consultations, bring a photo of the necklace height you like and specify that the tattoo should sit just above or below standard necklace placement to avoid overlap. There is a debate about nape versus side neck for first tattoos. One camp says the nape is superior for first-timers because it is easily covered by hair and clothing and thus safer for work situations. The opposing camp prefers the side neck for its elongating visual and feminine placement even though it is more visible, and they accept the tradeoff. This piece takes longer and may need two short sessions if it wraps, so wear a loose button-down or a choker necklace gold to preview how the tattoo will sit with jewelry.
6. Butterfly Motif Running Lengthwise on the Side Neck
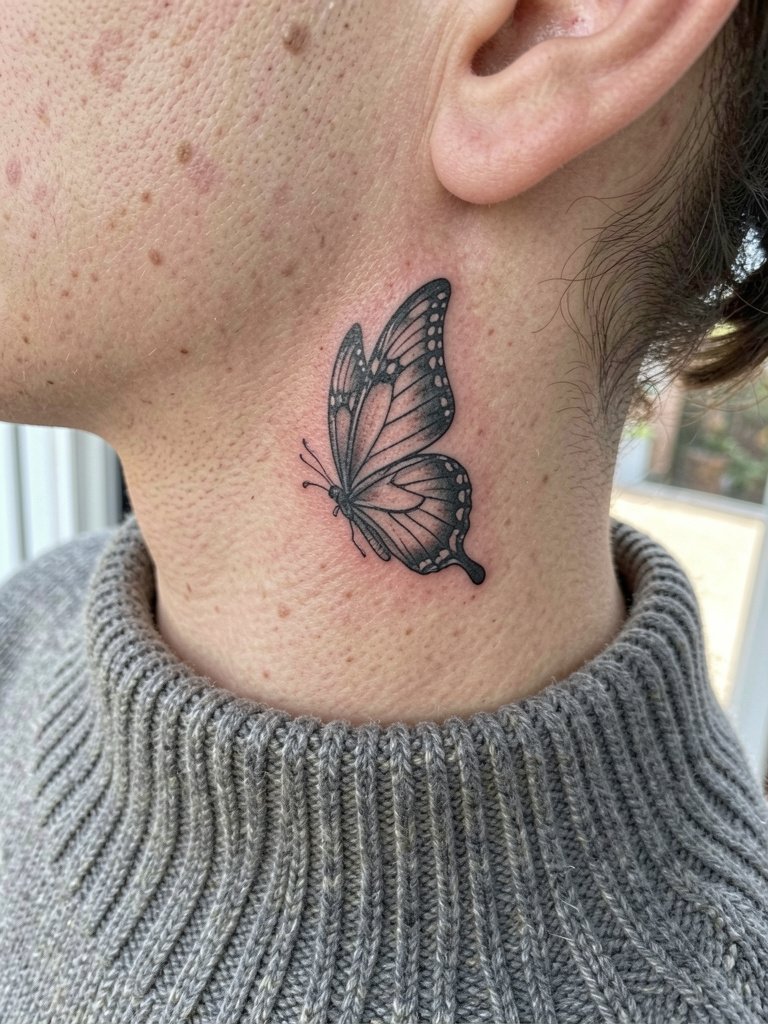
A vertical butterfly wing elongates the neck and sits naturally on the lateral plane. Specify to the artist that you want the wing oriented lengthwise and to avoid tiny internal filigree; ask for denser shading near the base so the piece keeps contrast after sun exposure. Many people pick a symmetrical butterfly with dense inner detail and later see the interior soften into a flat gray. Expect a short appointment and a stronger sting than a behind-ear micro because the lateral neck is more exposed. For evenings out, pair the placement with a wide neck sweater so the wing peeks out casually.
Heal Smart
The floral, script, and jewelry ideas above sit in high-movement zones, so a few practical items make the first week easier and protect pigment retention for the long run.
- Hypoallergenic barrier cream. A thin, non-occlusive barrier helps prevent irritation when collars brush the nape during the first week.
- Silk pillowcase set. Sleeping on silk reduces friction against the nape and side neck while you sleep, which helps with scabbing and transfer.
- SPF 50 mineral sunscreen. Daily high-SPF mineral protection keeps exposed neck tattoos from fading under sun exposure.
- Fragrance-free hypoallergenic moisturizer. Apply gently three times a day during the initial healing window to avoid dryness without irritating the ink.
- Fragrance-free body wash. A gentle cleanser keeps neck skin clean without stripping the protective oils needed during healing.
7. Tiny Stars Along the Jawline
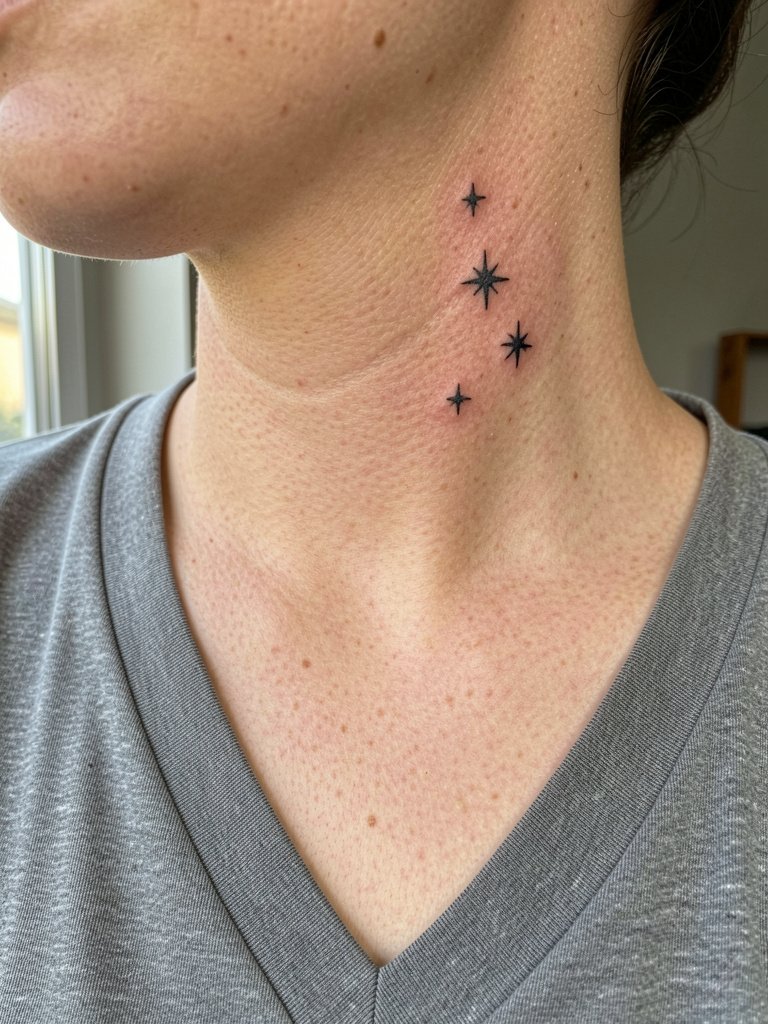
A small star cluster is a low-commitment way to test neck ink and it heals quickly. Specify placement relative to your ear and jaw angle so the cluster reads as an intentional arc rather than a random scatter. Tiny motifs are more likely to blur if you compress too much detail into under an inch, so keep shapes clean and slightly spaced. Pain is mild because each star takes a moment and the session is short. Showing them off with a layered thin chain necklace on the opposite side of the neck balances attention without overcrowding the jawline.
8. Floral Branch Cascading from Nape to Shoulder
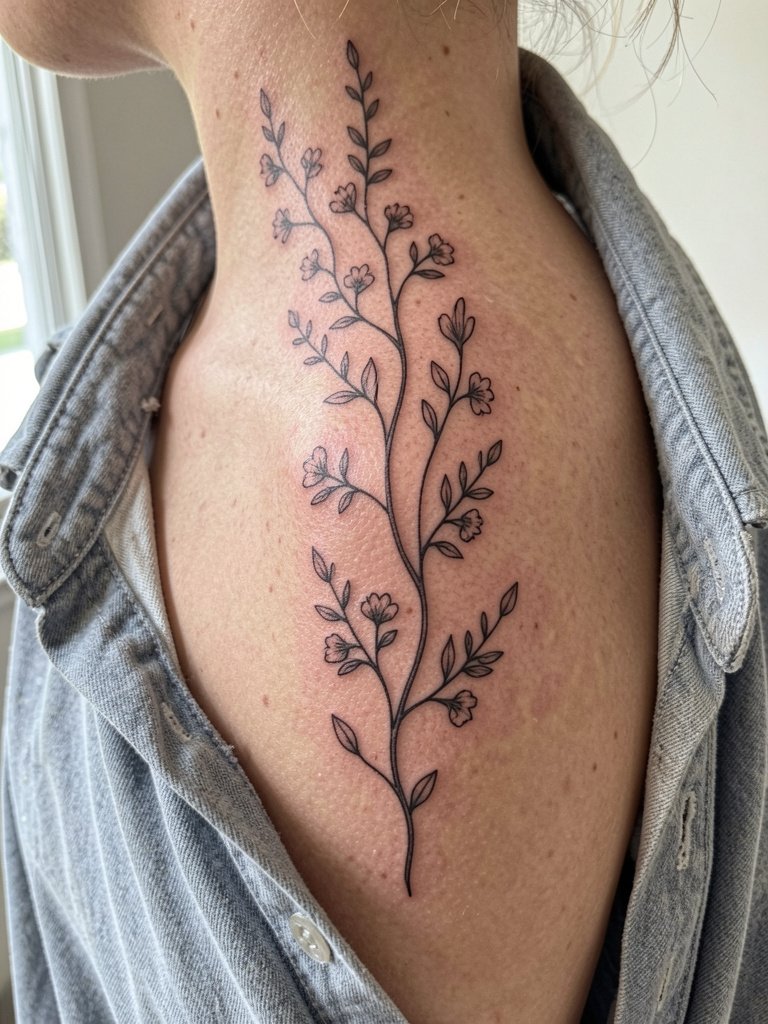
Long botanical branches are great when you want a piece that connects into shoulder or back work later. Ask the artist to map the stem flow while you stand in a relaxed posture so the cascade reads natural with your shoulder slope. A common misstep is forcing a straight down stem on a curved shoulder, which puckers and distorts as skin moves. Expect a longer session but only moderate pain because the muscle under the skin absorbs a lot of motion. For the session wear a loose button-down shirt so you can remove it without rubbing the fresh ink.
9. Bold Geometric Band at the Back of Neck
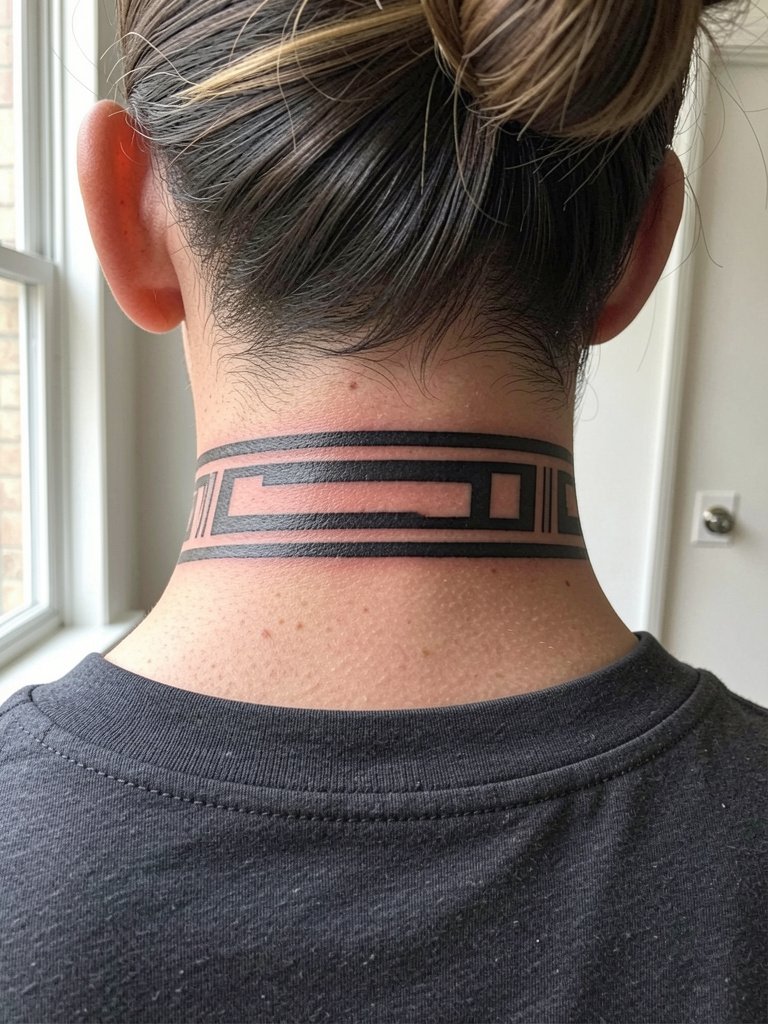
A solid geometric band reads as fashion-forward and ages dependably because it uses bold contrast rather than tiny detail. When you consult, ask the artist to measure the band across your neck while you tilt your head so the line sits level in everyday posture. Small, intricate fills in a band are a common aging error because the skin movement can compress pattern into blotches. Expect a medium session with some vibration on the spine area. For styling try an open back dress casual or cropped tees to frame the solid band.
10. Micro-Realism Animal Silhouette on Side Neck
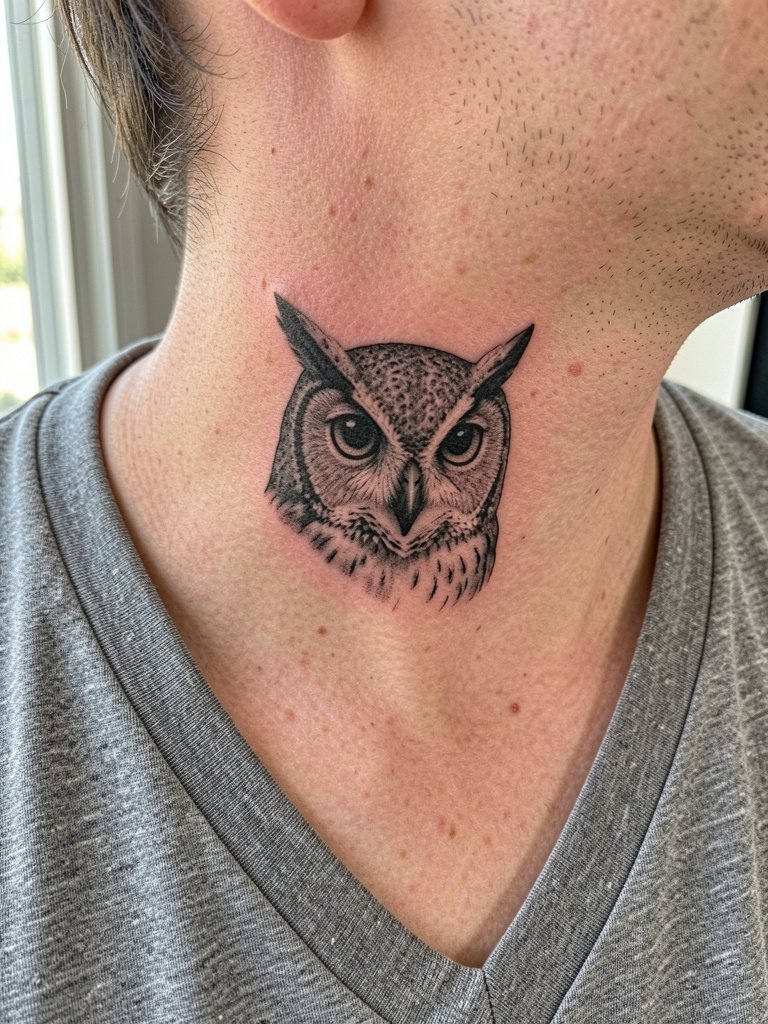
Micro-realism can deliver surprising detail at small scales, but it needs contrast to keep shape over time. Ask the artist to show how the silhouette reads from three feet away so you can confirm it will hold in photos. The frequent mistake is cramming tiny highlights into shaded areas without solid outlines, which then dissolve into an indistinct gray after sun and years. Sessions can take longer than a simple line piece because of the shading passes. For appointment comfort wear a V-neck shirt so the artist can reach the lateral area easily.
11. Dainty Vine with Small Leaves Along the Side Neck
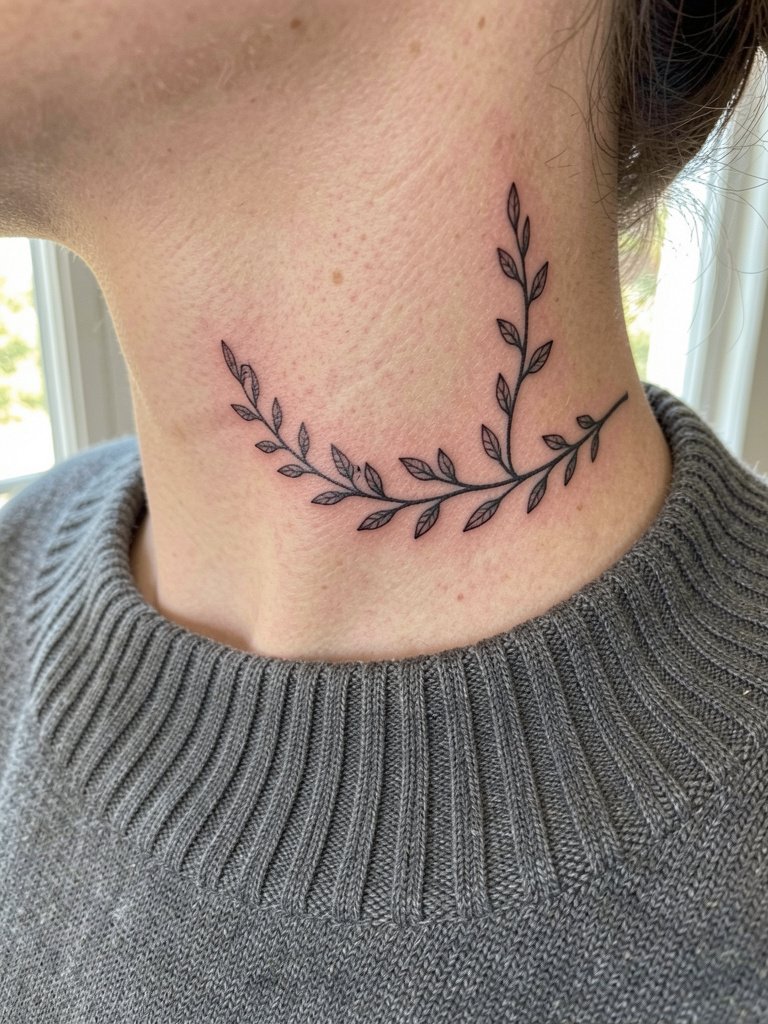
A dainty vine is a versatile option that works for both first-time and repeat ink seekers. In the consultation bring a photo of how you want it to curve around the shoulder or jawline and ask the artist to trace it with a washable marker so you can approve the flow. Tiny repeated leaves need room to avoid merging, so scale up slightly from your initial thumbnail sketch. The touch-up timeline is commonly one year for exposed neck pieces, so plan accordingly. To show it off, try an off shoulder top women and tuck hair behind one ear.
12. High-Contrast Abstract Shape Centered on the Nape
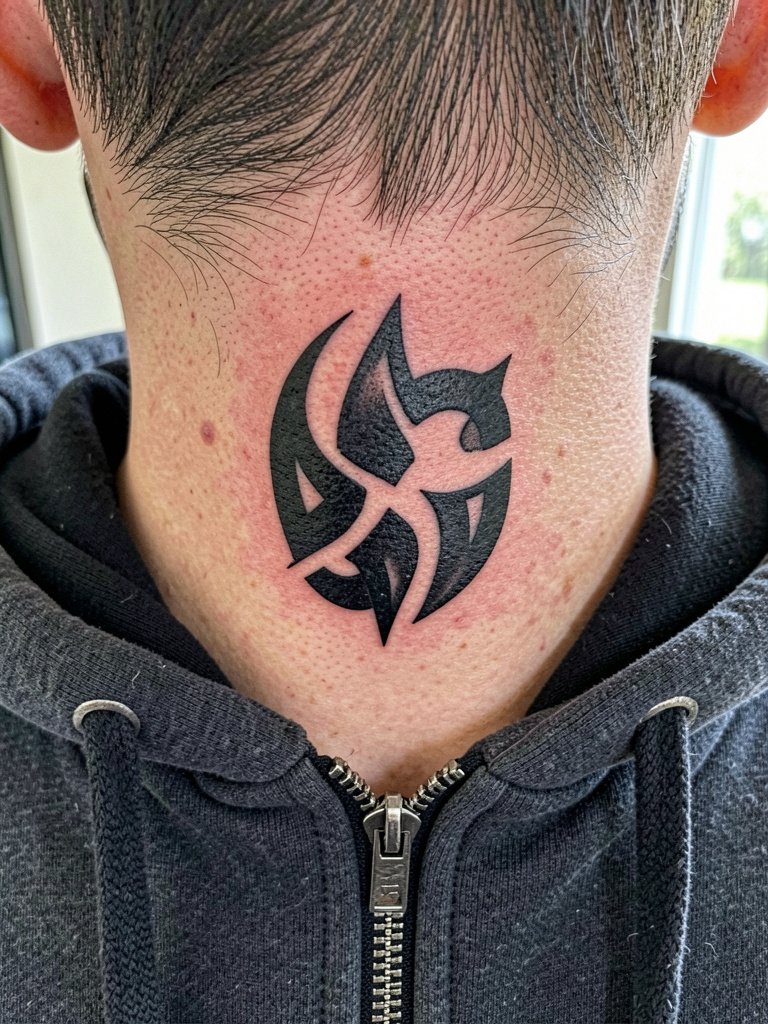
Abstract shapes avoid the tiny filigree that tends to blur on high-motion neck skin and therefore often hold up longer. Artists split on the fine-line longevity question. One camp argues fine line on the neck blurs into a blob within two years because stretch and daily friction from collars and hair cause tiny details to lose edge. The other camp says fine line will hold on the neck if the artist uses slightly wider spacing and avoids ultra-fine internal detail, pointing to healed photos that show success. If you lean into bold shapes, plan for a one-session visit and ask about a one-year touch-up to preserve crisp edges.
13. Tiny Heart or Dot Cluster Behind the Ear
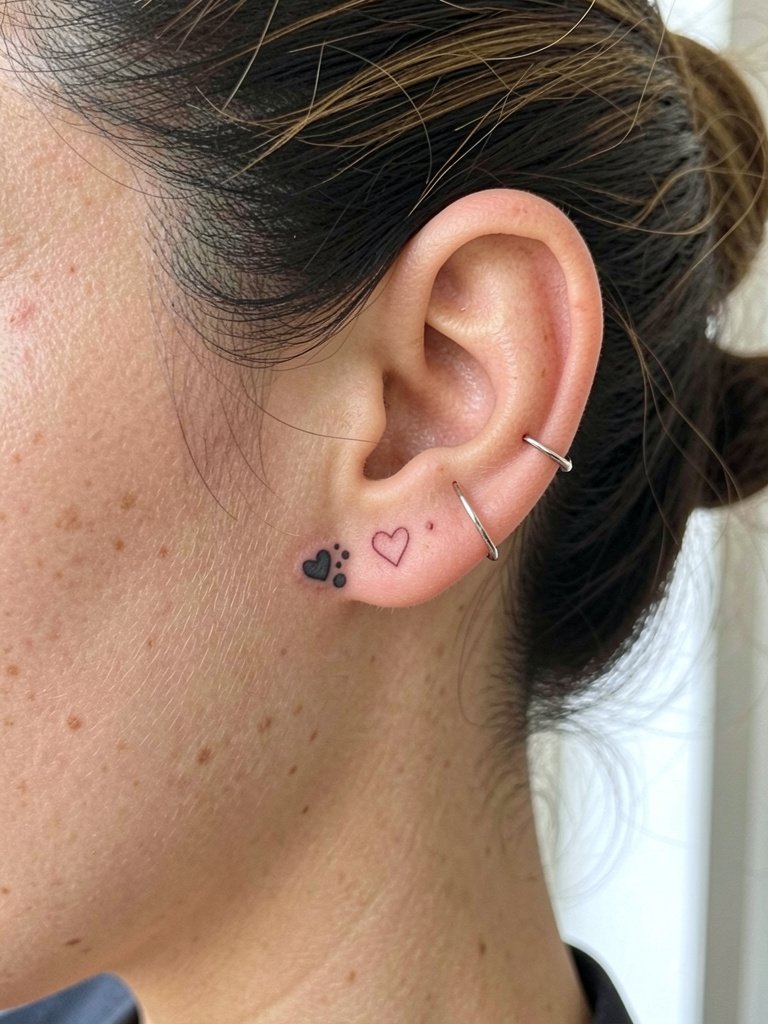
Minimal dots or hearts are a gentle first neck tattoo because they limit ink and pain. The key consultation detail is that you want clear, single passes for each dot with small gaps between them so the cluster does not merge later. A common error is asking for too many dots in a tiny area which leads to a gray patch as pigment spreads. Sessions are very short and surprisingly tolerable. For a subtle reveal, tuck hair behind the ear and add a thin ear cuff set on the opposite ear to balance visual interest.
14. Vertical Butterfly Wing as a Side Neck Accent
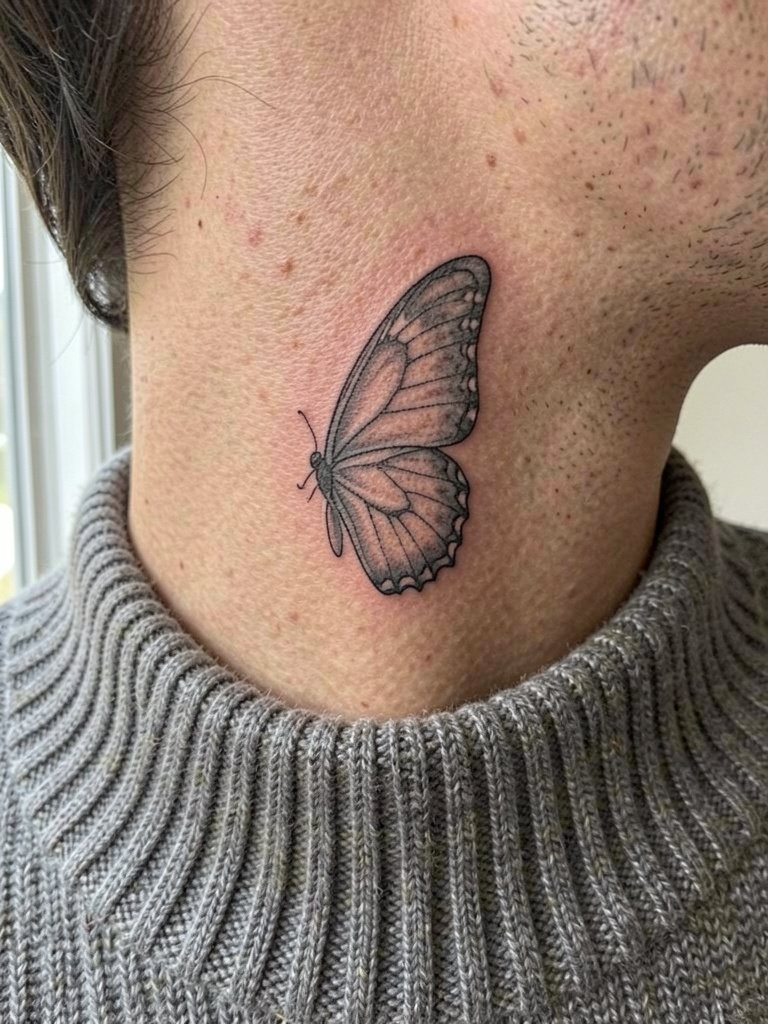
A single vertical wing reads elongated and refined when executed with open negative space between veins. Ask for a mockup that shows the wing at varying heights because a few millimeters change how it follows the jawline. The mistake is centering too much ornate filigree inside the wing on thin neck skin which softens into an unclear shadow. Expect a short session and a slightly higher sensitivity than the nape. Try pairing the wing with a layered thin chain necklace on the opposite side for balance.
15. Ornamental Mandala Placed on the Nape
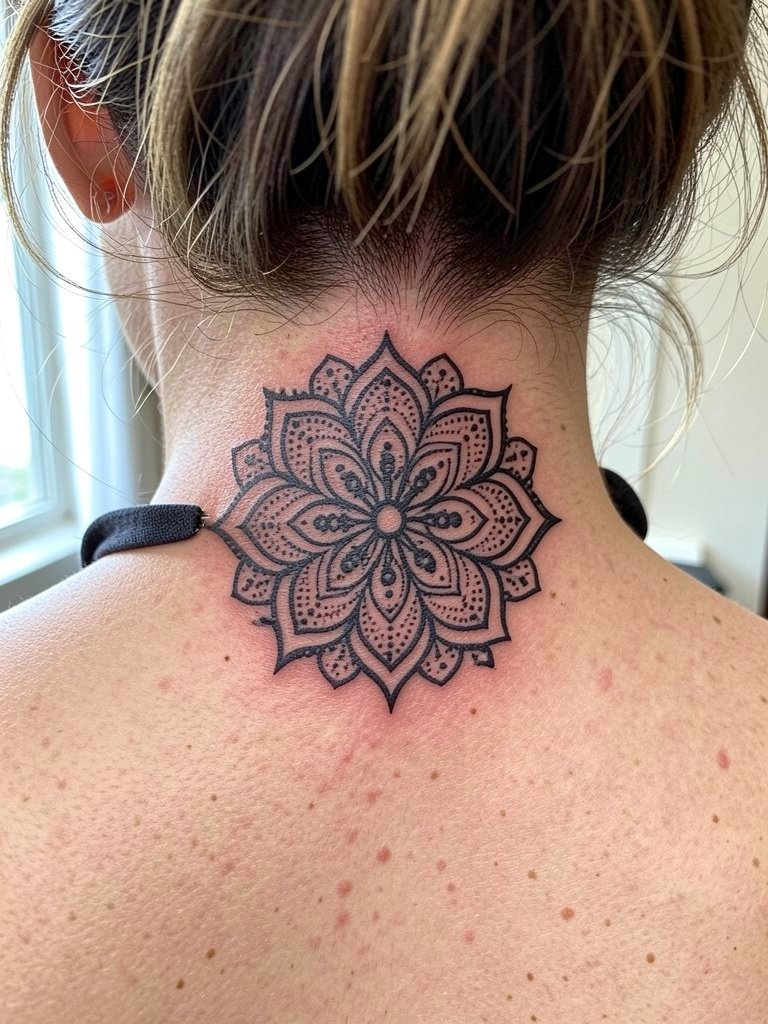
Mandala work can be stunning on the nape when it has breathing room. Ask for a stenciled placement that you can view seated and standing because neck posture changes the way symmetry reads. The usual problem is cramming radial details into a small diameter which blurs into a muddle after a few years. This tends to be a longer single session or two short sessions depending on diameter. For showing it off, an open back dress casual or halter top frames the radial geometry without overlapping the design.
16. Scripted Coordinates Along the Side Neck
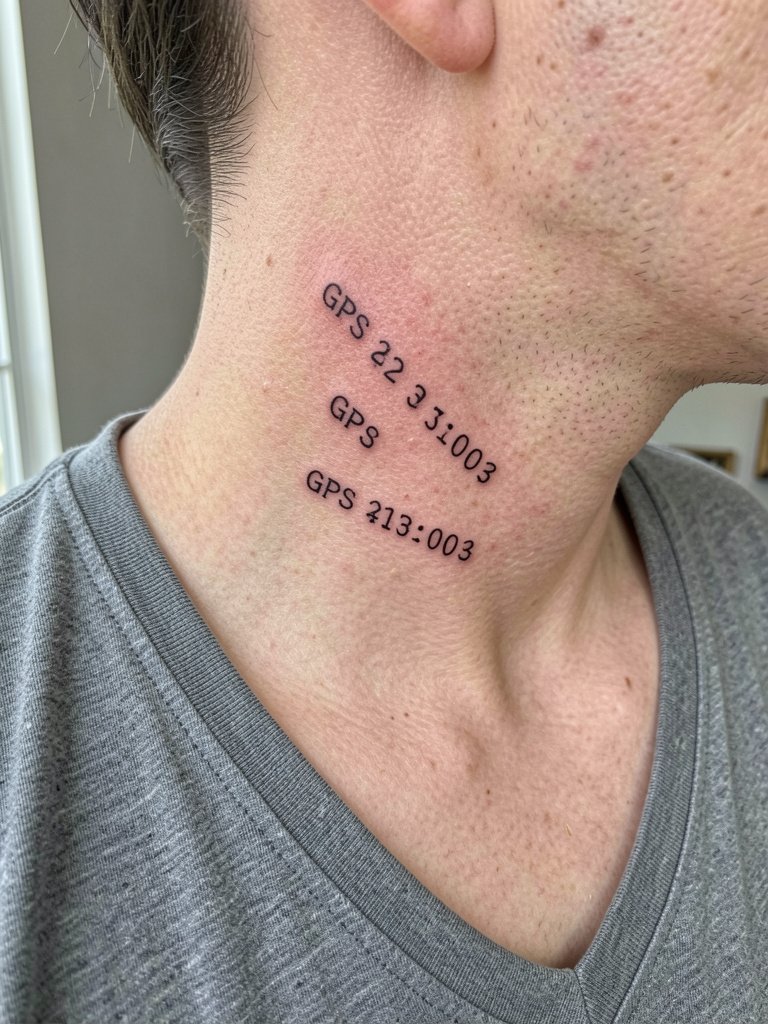
Coordinates are discreet and personal without relying on cliché phrasing. Insist on the exact text you want so the artist can stencil it precisely and so the healed lettering remains legible. The common mistake is choosing a script font that is too fine for neck skin. Expect a short session and light stinging; plan for a one-year check to see if any touch-up is needed. For the appointment pick a V-neck shirt so the artist can work the lateral area without fabric interference.
17. Small Crescent Moon Cluster at the Nape
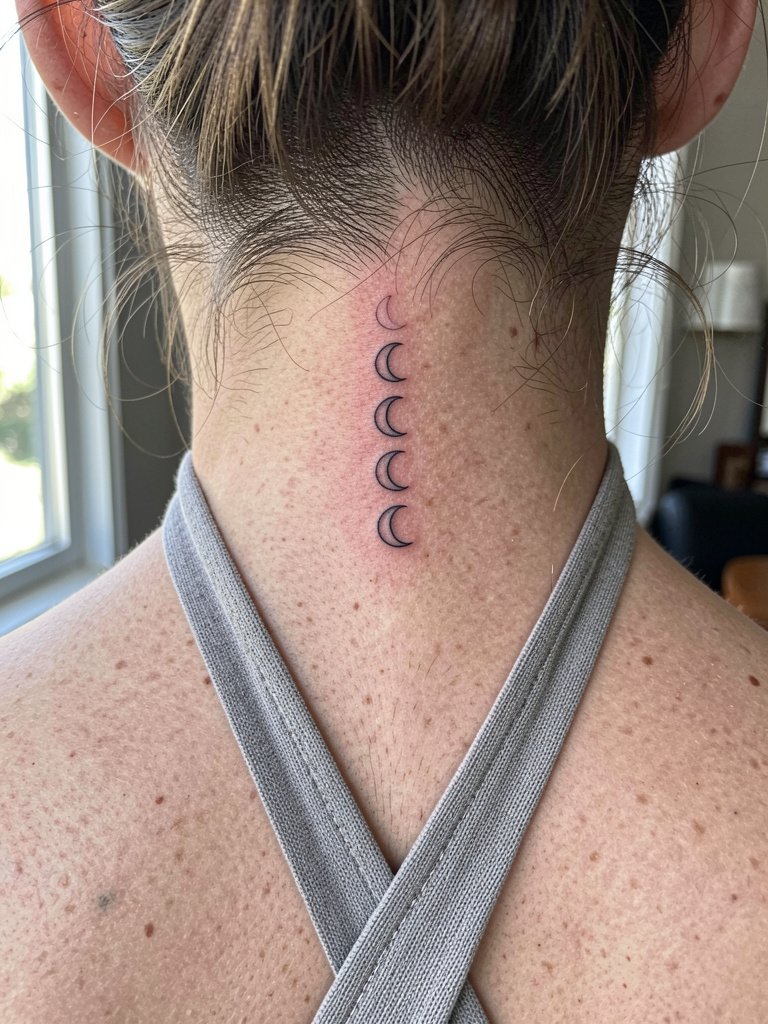
A vertical cluster of simple crescents gives a subtle editorial effect and resists blur if each crescent has clear spacing. In the consult ask for mockups at two sizes and pick the one that keeps the crescents distinct at arm's length. The mistake is stacking crescents too close which causes them to blend into a single shape after pigment migration. Session time is short and tolerable. Style pairing: a delicate pendant necklace gold that sits just below the hairline can complement the nape cluster without touching it.
18. Single Bold Leaf Silhouette on the Side Neck
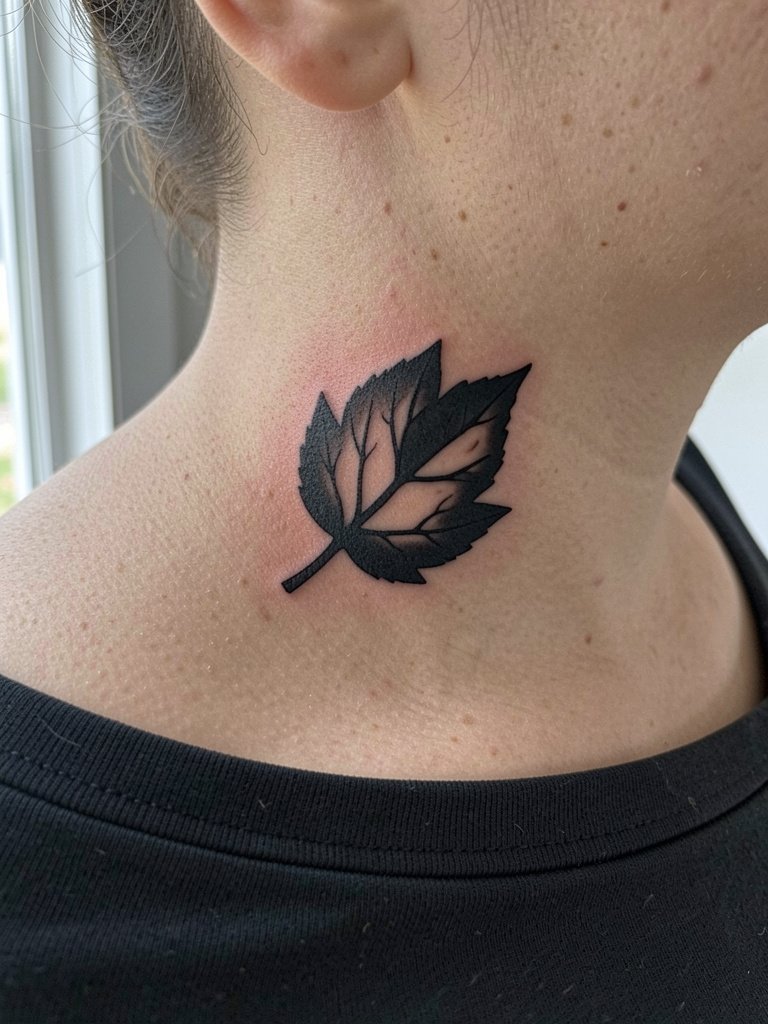
A single solid silhouette keeps clarity over time because it avoids fragile linework. Tell the artist you want a bold negative-space vein rather than tiny internal lines so the shape keeps contrast as pigment settles. The usual error is asking for small internal details inside a silhouette, which get lost. This is one of the more durable neck choices and usually needs only occasional touch-ups. Pair with an off shoulder top women to show the silhouette without competing textures.
19. Stacked Tiny Symbols Along the Jaw-to-Neck Line
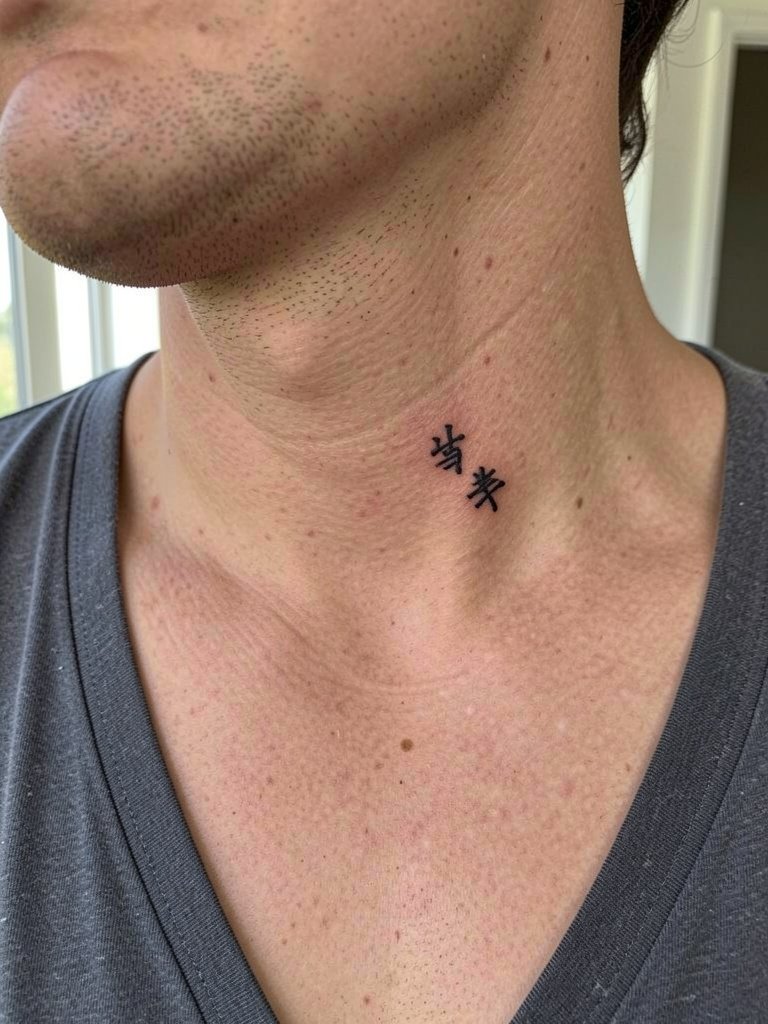
Stacked symbols are a compact way to combine small motifs while keeping a tidy visual story. During the consult, lay out the exact three symbols and ask for spacing measurements so the diagonal reads intentional. People often pick symbols too close together and then find they merge into an unclear mass. Sessions are short and tolerable, but the jawline movement can cause faster pigment softening. For styling, a layered thin chain necklace on the opposite side helps distribute attention.
20. Tiny Script Word Behind the Ear with Dot Accent
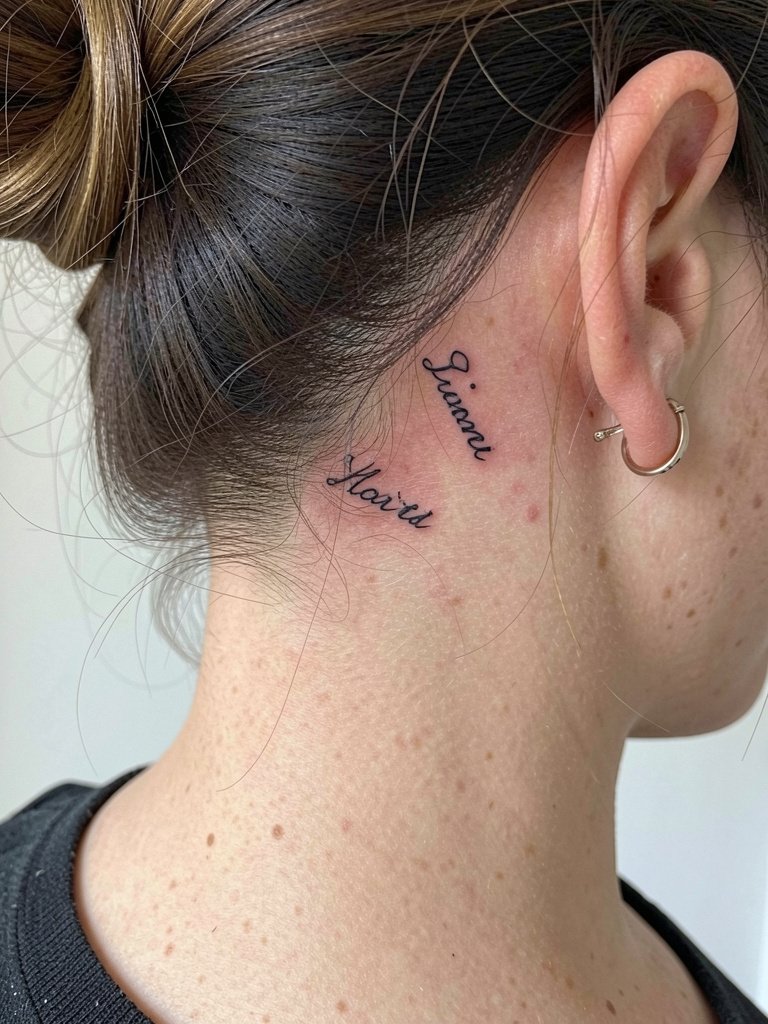
A tiny script behind the ear is an effective discreet choice that reads best when the lettering is simple and spaced. Ask the artist to stencil the exact word in the intended font and to show it on you before the needle. The common error is trusting a very ornate script at this size. Sessions are quick and the pain is brief. For a minimal highlight wear hair back and a thin ear cuff set to keep attention balanced.
21. Delicate Collarbone Accent That Extends Toward the Nape
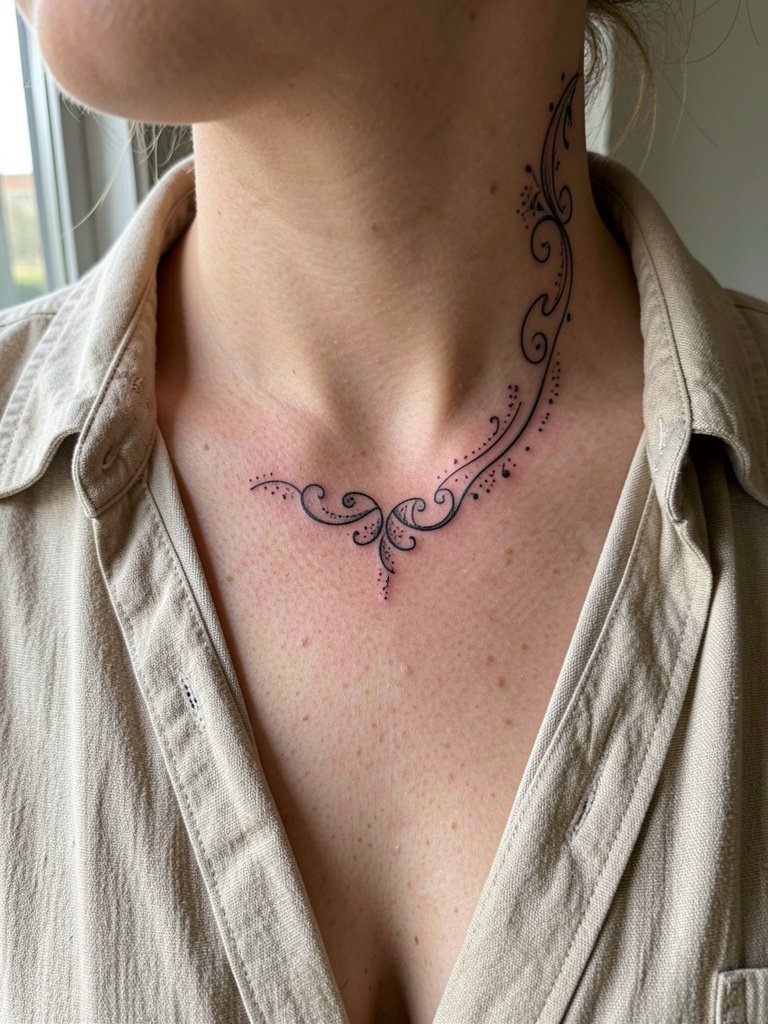
This collarbone-to-nape accent reads like a framing piece for necklaces when done in the right scale. Ask the artist to map the height so the tattoo does not sit under a typical choker. A frequent mistake is extending too far into the clavicle crease which rubs against clothing and speeds fading. Expect a moderate session and a low-to-moderate pain level. For show-off outfits try an open neck blouse women to let the collarbone accent breathe visually.
Frequently Asked Questions
Q: How painful is a neck tattoo compared with other spots on the body?
A: Pain varies by placement and by person. In general, tiny behind-ear pieces and small clusters are brief and relatively tolerable. The nape and areas closer to bone or thin skin feel sharper, so plan for short breaks and consider a tiny initial design if you are nervous.
Q: How long should I avoid perfume, hair products, and makeup near a fresh neck tattoo?
A: Opinions split and people follow two main approaches. One view insists on a 21-day strict ban on perfume, makeup, and hair products because chemicals and friction can interfere with early healing. The other view accepts careful cleaning and fragrance avoidance for 10 to 14 days as sufficient for many people, with ongoing sunscreen after the crusting stage. I recommend following the stricter window if you have a job that exposes the neck to products, and ask the studio for their specific timing.
Q: Will fine line neck tattoos blur faster than bold pieces?
A: Fine line pieces can lose crispness faster because of skin stretch and friction, especially when tiny details are packed into a small area. Bold, high-contrast shapes tend to hold their readability longer. If you want a fine line look, request slightly wider spacing and a heavier single-needle weight so lines age more predictably.
Q: How should I dress for my appointment depending on placement?
A: Pick clothing that gives the artist clear access without tugging the fresh tattoo. For nape work choose a halter neck top women or a loose button-down to slip off easily. For lateral neck pieces wear a V-neck or wide-neck sweater. Behind-ear tattoos need hair up and a top you can pull over the head without catching the ear.
Q: Where can I look for healed examples and local portfolios without naming artists?
A: Search style-specific hashtags such as #necktattoo, #necktattooforwomen, and #finelinenecttattoo on Instagram and TikTok, then filter by location to find nearby portfolios. Use Tattoodo to search keywords like "fineline nape" for healed images. Reddit communities like r/tattoos and r/necktattoos surface peer recommendations and healed photos across skin tones if you want real-world examples.
