
The stencil sat crooked on the inner forearm, the client breathing steady while the artist peeled it and smoothed the placement. Those five minutes of repositioning make the difference between a design that reads clean at year three and one that slumps into blur. Forearm work is public and forgiving when planned right, and the best pieces start with scale, spacing, and a simple plan for how the ink will age on moving skin.
1. Fine Line Arrow on Inner Forearm
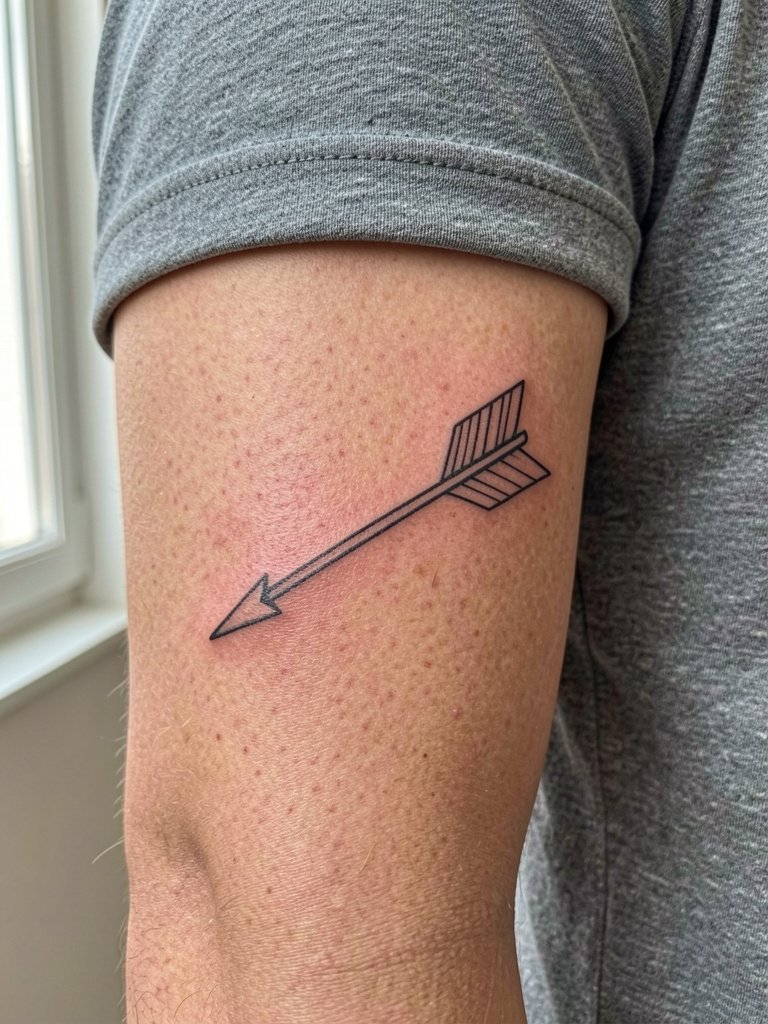
This is a low-friction, appointment-friendly pick for someone who wants subtle direction without heavy contrast. I recommend the inner forearm because it lies flat when the palm is up and holds single-needle work better than the outer curve. Ask for the linework to be drawn a hair thicker than your favorite reference so the shaft stays crisp by year two. Common mistake is asking for a three-inch arrow on textured skin, which loses its definition. Pair it with rolled short sleeves to show it off. For the session wear a loose cotton tee so the artist can access the underside easily.
2. Micro-Realism Wolf Head on Outer Forearm

Choose micro-realism for a detailed portrait that still reads at arm's length. This works best on the outer forearm where the surface is flatter and the artist can layer stipple shading without risking blowout. Discuss contrast points with the artist and ask them to show a printed mockup at life size so you can see how details hold at four inches. The version that ages poorly is the ultra-tiny portrait squeezed into a one-inch circle. Expect a two-hour session and plan for a touch-up at the 12 to 18 month mark if you want crisp fur texture long term. Show-off tip with an affiliate link: wear cuffed short sleeves and a soft cotton henley to frame the piece.
3. Script Band Wrap with Single Word

A script band reads elegantly across the forearm when spacing is generous. Recommend sizing the letters so the thinnest strokes are still two to three pixels wide at stencil scale. A common mistake is choosing an ultra-delicate hand-lettering that fades into a grey smudge after two years. Bring two reference scripts at different scales and ask the artist to adapt the stroke weight for forearm skin texture. Session time is often under ninety minutes for a single word. For daily wear, a lightweight bracelet or watch with a slim strap keeps attention on the script without covering it.
4. Neo-Traditional Rose Cluster

Neo-traditional florals give bold visual punch and age into character because the outlines take time to soften, not all at once. This style is a great choice when you want color with low maintenance. Tell the artist you prefer saturated fills that are slightly desaturated from flash to avoid muddying in a touch-up. The version that goes wrong is the tiny, delicate rose with watercolor washes; those bleeds under arm movement. Expect a two-hour session for a medium cluster and plan a touch-up at year two to boost saturation. For an outfit that complements the palette try a short-sleeve denim shirt to frame the artwork.
5. Geometric Mandala Panel

Mandala work demands precise linework and even spacing to avoid a warped look after healing. Prefer the outer forearm because the surface sits flat and the stencil holds better during long sessions. Ask for the central ring to be two to three millimeters wider than your visual preference to allow for slight spreading. A common mistake is placing a dense mandala too close to the wrist where movement blurs radial lines. Sessions run long for symmetry, and you should budget a touch-up at the one-year mark. Wear a crisp fitted tee when you want to show the piece cleanly.
6. Blackwork Band and Negative Space

A saturated black band reads from a distance and works well where you want bold negative-space shapes. This choice suits someone who likes heavy contrast and low-detail upkeep. Tell the artist you want the black block to have a crisp edge and discuss how the negative spaces will age into a soft halo so spacing needs to be generous. The common aging issue is patchy saturation from rushed packing. Expect a longer session for full saturation and a likely touch-up a few months after healing. For showing it off try short sleeves and a slim bracelet that sits above the band.
Before You Book
That solid black band and the mandala above will react differently in the first week, so a couple of small session-day items smooth the experience.
-
Stencil transfer paper kit. Lets you preview how linework and placement wrap on the forearm before the needle hits, which helps avoid the common misplacement issues described above.
-
Sensitive skin numbing cream. Applied as directed eases wrist and inner forearm sensitivity without affecting detail work during shorter sessions.
-
Breathable protective film roll. Useful for areas that rub against shirts in the first week, especially helpful for outer forearm pieces that meet sleeve seams.
-
Fragrance-free gentle body wash. Cleanses the area during the shower phase without stripping pigment, which is handy for color and blackwork alike.
-
Aquaphor healing ointment. A mainstream option many people use for the very early healing window to keep fine line work from drying into flakes.
7. Mechanical Gear Sleeve Accent

Mechanical motifs age well when linework and shading are dense because the graphic contrast persists. Use the outer forearm for wrap accents that meet sleeve lines. Ask the artist to show how the gears overlap at full scale so you can judge negative space. The mistake I see is forcing hyper-detail into narrow bands which then fade into a muddy grey. Sessions can be two to three hours depending on coverage. To frame this look, add a cuffed short-sleeve work shirt that keeps the forearm exposed.
8. Minimalist Wave Line Along the Radius
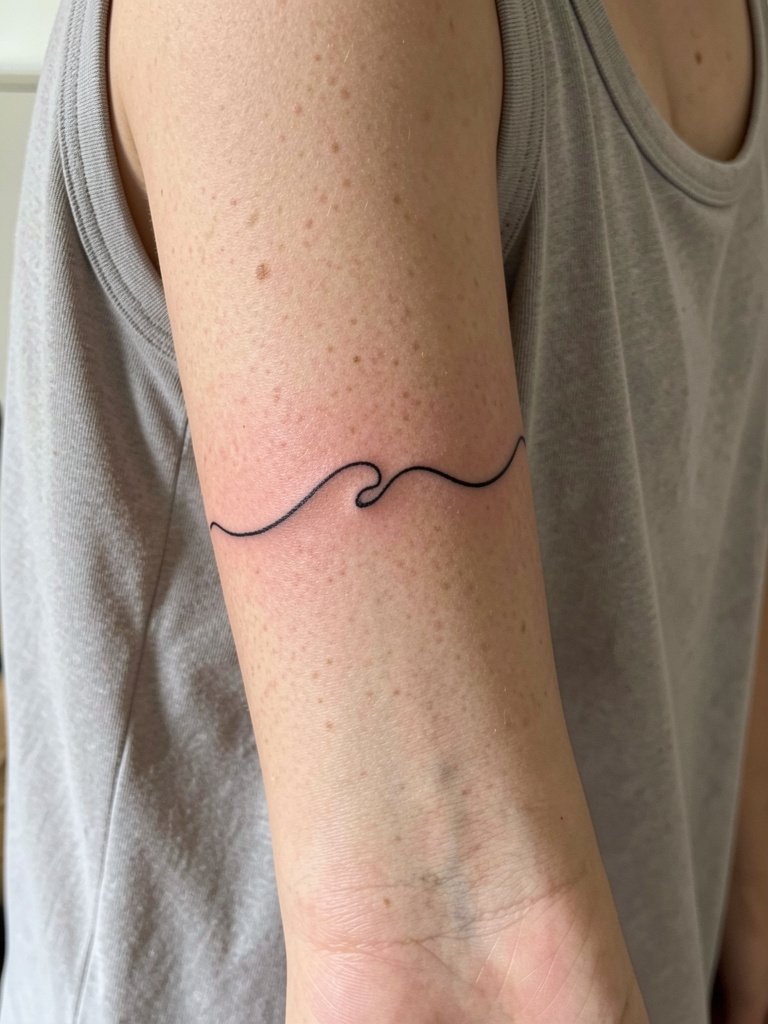
A single continuous line is elegant and session-friendly. The inner forearm placement gives the motif a quiet curve that follows natural anatomy. Specify in consultation that the line maintain a consistent width and avoid ultra-fine tips that disappear after one year. The common error is trying to translate a twenty-point digital line directly to skin without compensating for grain. Expect a short session and a touch-up if you wear the area in heavy sunlight a lot.
9. Stipple-Shaded Skull with Negative Highlights

Stipple shading gives a textured, vintage look without heavy solid fill. It suits the outer forearm where the stipple can be layered slowly without pushing ink too deep. Tell the artist you want visible negative-space teeth and ask to see a high-resolution stencil to check dot density. The version that fails is dense grey wash over tiny features which becomes a flat tone. Sessions take time because the artist builds dots deliberately. For styling try a loosely fitted short-sleeve tee so the skull sits center stage.
10. Watercolor Splash with Black Outline

Watercolor accents can be striking but carry an aging trade-off because diluted pigments fade faster than saturated fills. Artists split into two camps on how to handle it. One camp prefers bold black outlines around watercolor to preserve silhouette and anchor pigment. The other camp favors painterly edges without outlines to keep the soft aesthetic. State which camp you prefer during consultation and ask the artist to point to healed two-year examples in similar skin tones. Plan on stronger initial saturation and periodic color touch-ups if this is your route. Pair with a lightweight linen shirt to show the colors.
11. Compass Rose Near the Wrist
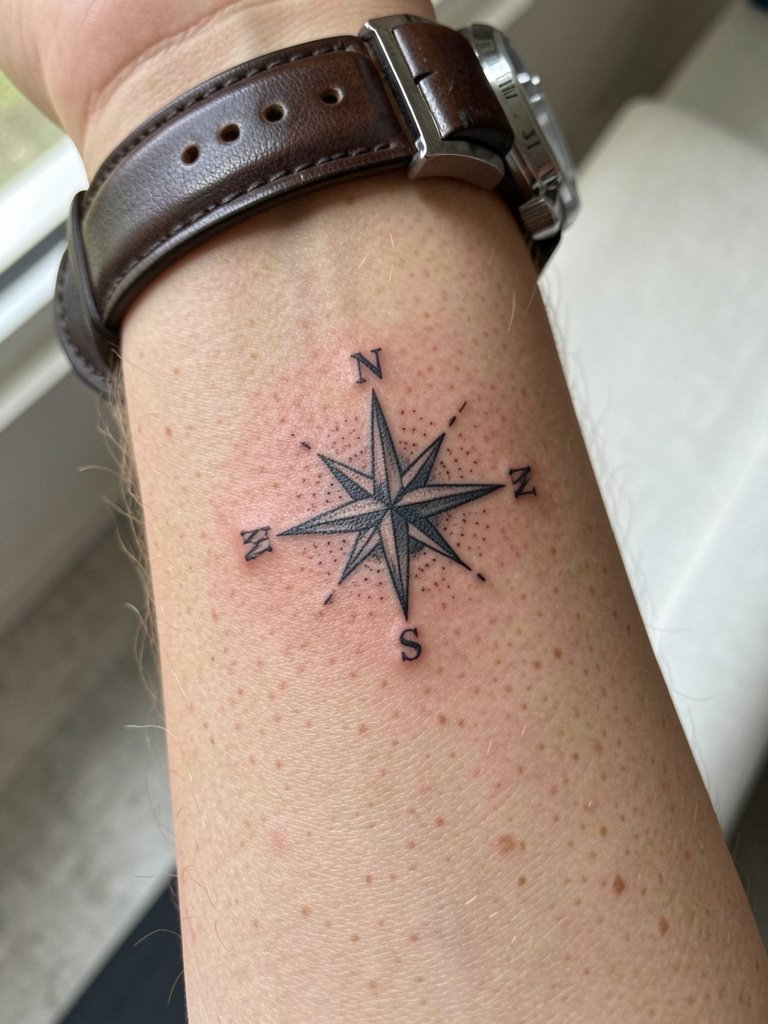
A wrist-adjacent compass reads well at small scale if the points are spaced intentionally. Discuss how the compass will sit next to your watch and whether the strap will cover any cardinal points when you wear it. The mistake many make is cramming a detailed compass into a two-inch area which blurs into a grey star. Expect a one-hour session and tell the artist you want slightly open negative spaces so the design survives daily wear. Styling note with an affiliate link: a slim strap watch complements the compass without hiding it, try a minimal leather watch strap.
12. Scripted Coordinates on Inner Forearm

Coordinates are a timeless, personal statement and forearm placement keeps them visible. Precise letterforms are essential because text can blur with movement. Bring the exact characters you want in the final layout and confirm letter spacing at life size. The common error is choosing a decorative script that breaks legibility after a couple of years. Sessions are short and touch-ups are rare if spacing is generous. For a simple display, cuff your sleeve or wear a rolled-cuff tee so the text reads cleanly.
13. Tribal Armband Reimagined

Tribal motifs look strong when they respect the original cultural origins and avoid direct appropriation. If you choose motifs with indigenous roots, say so and ask about respectful adaptation. This armband benefits from clean saturation so the shapes remain bold. The mistake is tiny interlocking elements that clog up after healing. Plan for a single session with heavy black packing and a touch-up if any patching appears. This placement pairs naturally with rolled sleeves and a slim bracelet to frame the band.
14. Botanical Vine Climbing the Inner Forearm
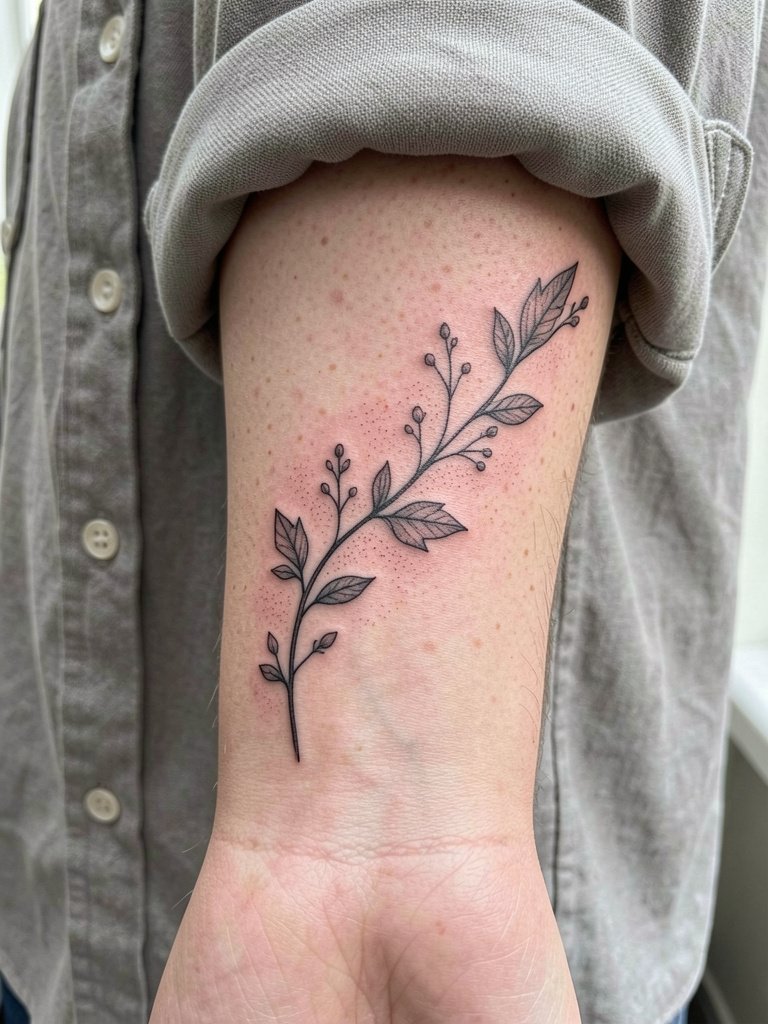
Vine pieces work with the inner forearm contour and look graceful when leaves are spaced to survive movement. Request slightly larger leaf outlines than the smallest reference so detail does not blur. A common failure is dense micro-detail near the wrist where friction softens edges quickly. Expect a one to two hour session and consider a light touch-up at year one if tiny leaf veins matter to you. When showing this piece off, unbutton a top button or roll cuffs to let the vine breathe. Try a casual button-down shirt for a refined look.
15. Portrait Silhouette with Negative Space

Silhouette portraits convert a complex face into bold graphic form and last because they rely on shape, not tiny features. Choose the outer forearm for a vertical silhouette that reads at arm length. Ask for a test print to confirm that facial negative space reads as intended at full size. The frequent misstep is forcing hyperrealism into a silhouette frame. Sessions are moderate length and usually do not require color. A simple leather cuff or rolled sleeve showcases the silhouette well.
16. Celtic Knot Panel

Knotwork needs breathing room so every crossing is visible after healing. Use the outer forearm where the braid can run in a long vertical strip. Ask the artist to map knot thickness at full scale and keep crossings at least three millimeters apart to limit blurring. The mistake is compressing a complex knot into a tiny band. This session can be time consuming for tight interlacing and often benefits from a planned touch-up to sharpen intersections. A snug short-sleeve knit keeps the pattern visible and intentional.
17. Nautical Sleeve Accent with Anchor
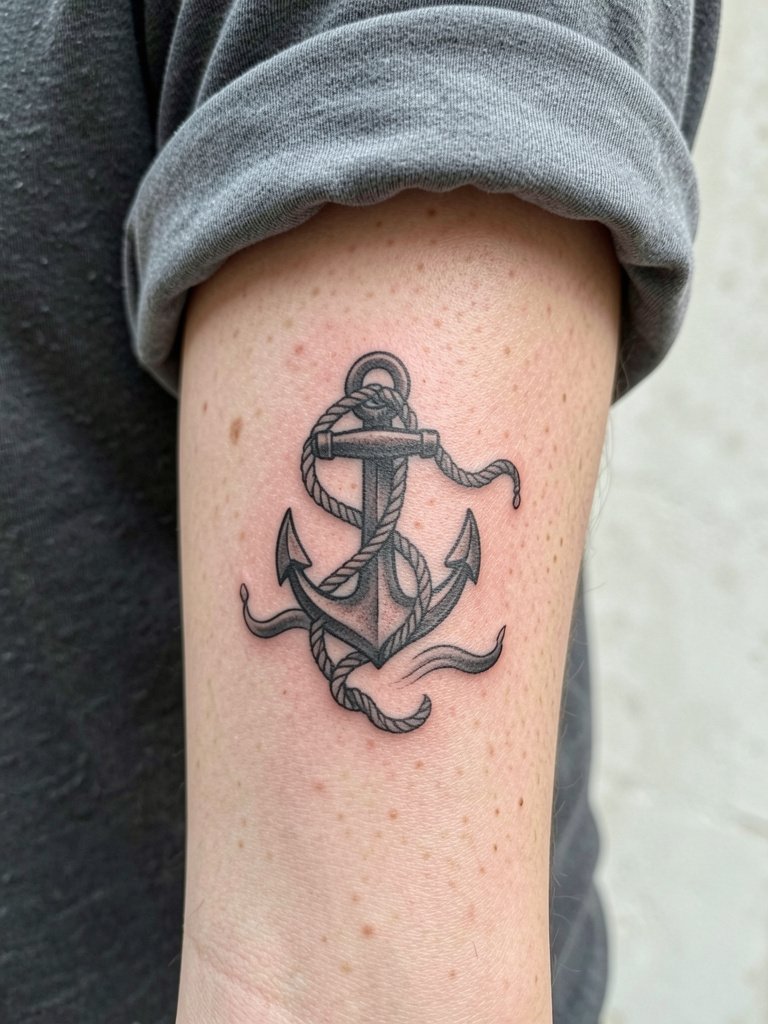
Classic nautical pieces are timeless when you keep the anchor size balanced for the wrist area. Decide whether the anchor should have negative-space rope or solid shading and confirm that with the artist during stencil review. Small anchors packed with too much shading can go flat after a year. A compact anchor can be done in under an hour and looks good with casual rolled sleeves and a canvas bracelet.
18. Single-Needle Portrait Line on Inner Forearm

Single-needle portraits can be poetic but fragile. Inner forearm placement helps these lines settle because the skin is less exposed to friction than the wrist. Ask the artist to thicken the faintest contour lines slightly so they remain legible by year two. One camp of artists avoids single-needle portraits on forearms citing inevitable loss of micro-details. Another camp says careful depth and slightly bolder strokes prevent that. Both perspectives are valid so review healed examples in similar placements. Plan for a touch-up at the one-year mark and wear a relaxed tee to protect fresh work in the first week.
19. Botanical Sleeve Starter Piece

If you plan a sleeve later, use the forearm as an anchor with larger botanical shapes and negative space for future extensions. Tell the artist your sleeve plan so they can orient stems and leaves for smooth connections. The mistake is over-detailing early on which leaves no room to harmonize later. Sessions vary but starting pieces are often multi-hour. Style-wise, a lightweight cuff or rolled sleeve photo shows the anchor intent and pairs well with a casual bracelet.
20. Neo-Japanese Koi with Flowing Water

Koi designs look dynamic on the forearm when the flow follows muscle lines. Decide in advance whether you want heavy color saturation or a more muted palette, because color touch-ups differ from blackwork. The common error is shrinking a complex scene into a narrow strip which loses its movement. Sessions can be longer for color layering and you should expect a saturation check after healing. Wear a fitted tee to display the vertical flow and keep sleeves rolled when you want the full piece visible.
21. Barbed Wire Accent Near Wrist
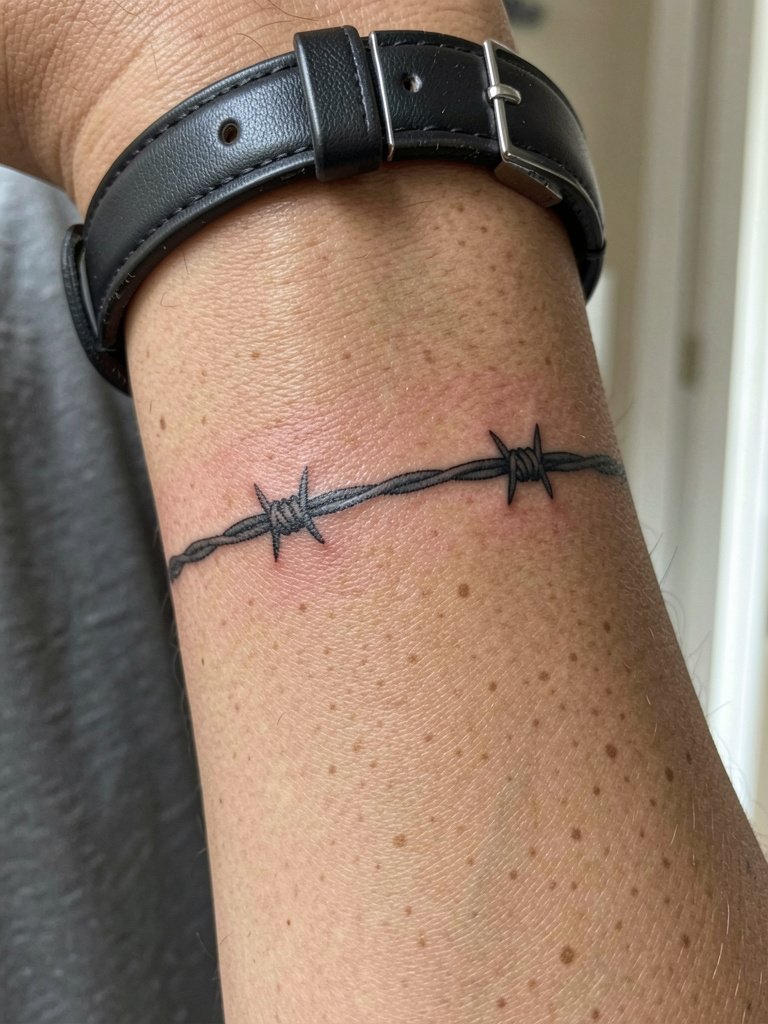
Barbed wire works as a graphic wrist accent if spacing keeps the knots from merging. Ask the artist to space barbs at a minimum width so the negative points do not soften into a blob. The common mistake is forcing tiny knots into the wrist crease where motion causes distortion. Sessions are short and touch-ups are uncommon if spacing is correct. Style it with a slim leather bracelet or no accessory to let the simple geometry speak.
22. Mechanical Compass with Map Fragment
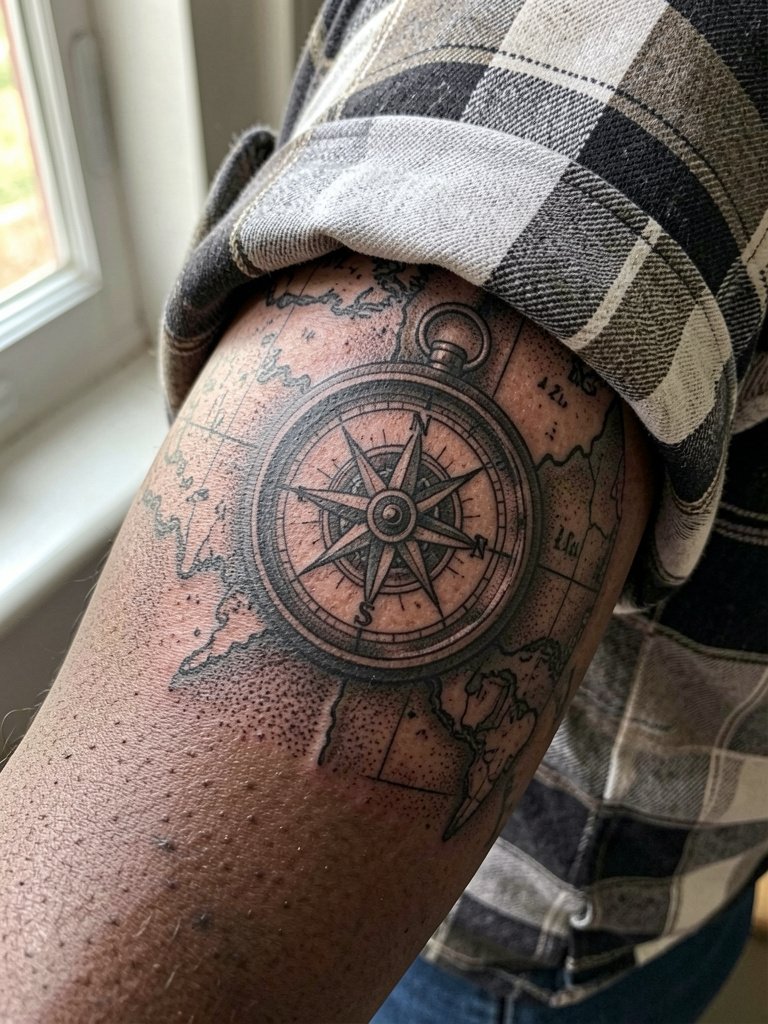
Combining a map fragment with a compass delivers narrative without needing large surface area. Make sure the map lines are slightly bolded compared to a paper draft or they will disappear over time. A mistake is treating the map like a high-detail print that forearm skin cannot sustain. Expect a two to three hour session and consider a touch-up for line clarity. For showing this off, cuff a flannel sleeve and let the map sit exposed with a casual watch.
23. Barcode or QR-Style Graphic
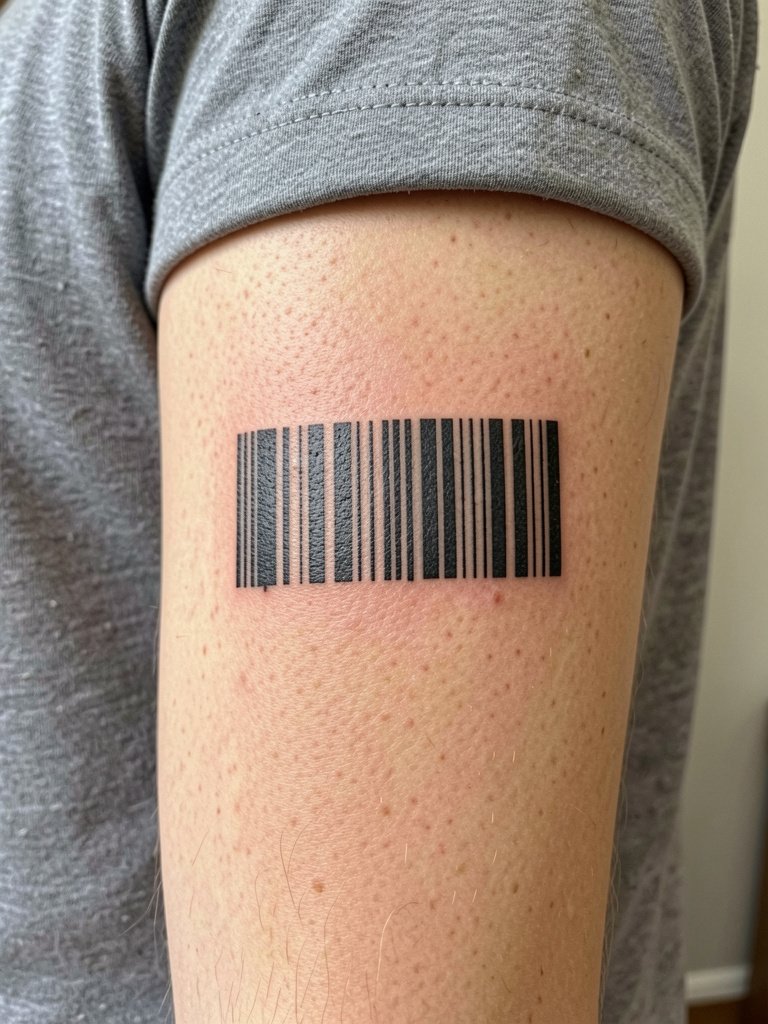
Graphic barcodes rely on even spacing and crisp edges to maintain the optical effect. Confirm the exact barcode proportions and test a mock stencil so the bars are not too thin. The error I see is compressing too many bars into a small band which blurs into a grey block. These pieces are fast to execute and look modern with a pared-back sleeve or rolled cuffs.
24. Anchor Textured Script with Underline
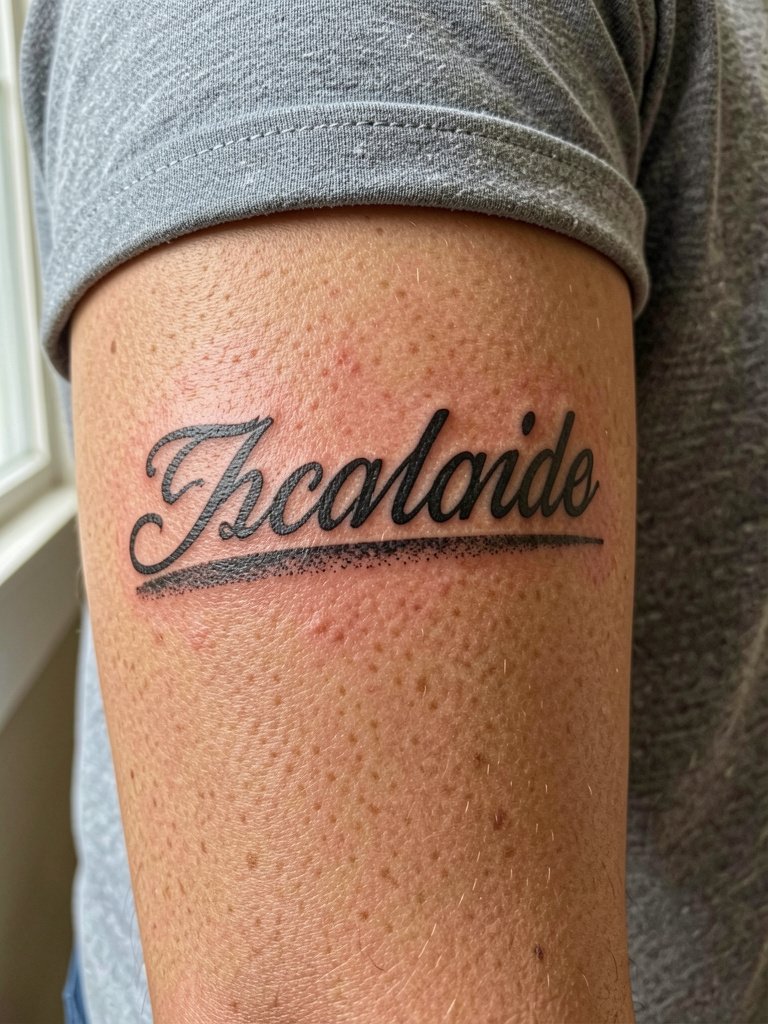
A weighted script with a textured underline makes a statement while keeping readability as the priority. Specify that the underline be about the same thickness as the boldest script strokes to balance aging. The common mistake is choosing an ornate hand-lettering where the thin connectors disappear. One session usually covers this and a touch-up is rare if the underline carries a bit of extra pigment. Pair with a simple short-sleeve tee for clean display.
25. Dot Work Mandala Strip

Dot work requires time and patience but yields a textured, soft result that scales well along the forearm. Ask for intermediate images of dot density during consultation so you can see how contrast will read at arm's length. The mistake is overpacking dots in tiny areas which then look muddy. Sessions often run long and a light touch-up can restore contrast if needed. This pairs with a minimalist short sleeve to let the texture show.
26. Small Geometric Portrait Panel

Combining geometry with portraiture creates a compact, modern panel that reads as art and not literal likeness. Request a clear framing box in the stencil so the edge remains crisp over time. The frequent misstep is detailed facial shading crammed into the small rectangle. Sessions vary but this can be a focused two-hour piece. Wear short sleeves for a gallery-like reveal and consider a slim cuff to complement the rectangular frame.
27. Wrist-to-Elbow Sleeve Starter Linework

If you intend a full sleeve, use a wrist-to-elbow starter with larger shapes and defined negative-space panels that future work can anchor to. Ask the artist to design connecting pathways now so future sessions do not feel forced. The mistake is over-detailing early which leaves no room to blend styles later. Expect multiple shorter sessions to build the sleeve seamlessly. For session wear bring a loose tee that the artist can move without tugging at fresh ink. Rolled sleeves work well for early reveals.
Frequently Asked Questions
Q: How much does a forearm tattoo typically cost and how long does it take?
A: Prices vary widely by region and artist and depend on size and detail, so it depends on the piece. As a time guide, small single-line motifs often finish in under an hour while half-sleeves and detailed portraits can be multiple sessions. For planning, ask to see the artist's hourly rate and a session-length estimate for your exact stencil before booking.
Q: Will fine line on the forearm blur faster than bold blackwork?
A: Fine line is more vulnerable to blur because the strokes are thinner and the forearm sees sun and friction. One group of artists avoids ultra-thin single-needle work on highly exposed forearm areas arguing that lines soften within two years. Another group believes slightly bolder single-needle strokes and careful spacing let the work hold. Look at healed examples in similar skin tones and discuss specific line weight at your consultation.
Q: How should I dress for a forearm tattoo session and what helps it look best after healing?
A: Wear clothing that gives the artist unobstructed access without you needing to manipulate fabric. For forearm work that usually means a loose short-sleeve tee or a button-down you can roll and leave in place. To show off healed pieces, cuffed sleeves, fitted tees, and slim watches or bracelets complement forearm placements. One helpful item to have for sessions is a soft cotton henley that you can wear both during and after the appointment.
Q: Where can I find healed forearm examples and portfolios without naming artists directly?
A: Search platform hashtags and location filters for healed shots, for example targeted tag searches plus words like "healed" and "forearm." Use social discovery on image-forward platforms with phrases that match your design interest and filter by timeframe to see older healed posts. Community forums and portfolio aggregators also surface curated healed galleries so you can judge aging across skin tones.
Q: Do forearm tattoos need touch-ups and when?
A: Many forearm tattoos benefit from at least one touch-up. Thin scripts and watercolor areas often need a touch-up at around twelve months. Saturated blackwork sometimes requires a short follow-up to even out packing. Discuss an expected touch-up window with your artist during booking so you know how the first-year timeline looks for your specific piece.
