
Bold black eagle pieces that keep their edge years later often share one thing, they were given room to breathe at the stencil stage. Small, overcrowded talons and ultra-tight script lose contrast fast on textured skin. Pick a design with clear negative space and a plan for touch-ups at year two, and you keep the fierce look without constant worry. Below the first image you will find chest-focused inspiration that leans on line weight and placement to last.
1. Classic Traditional American Eagle on Upper Chest
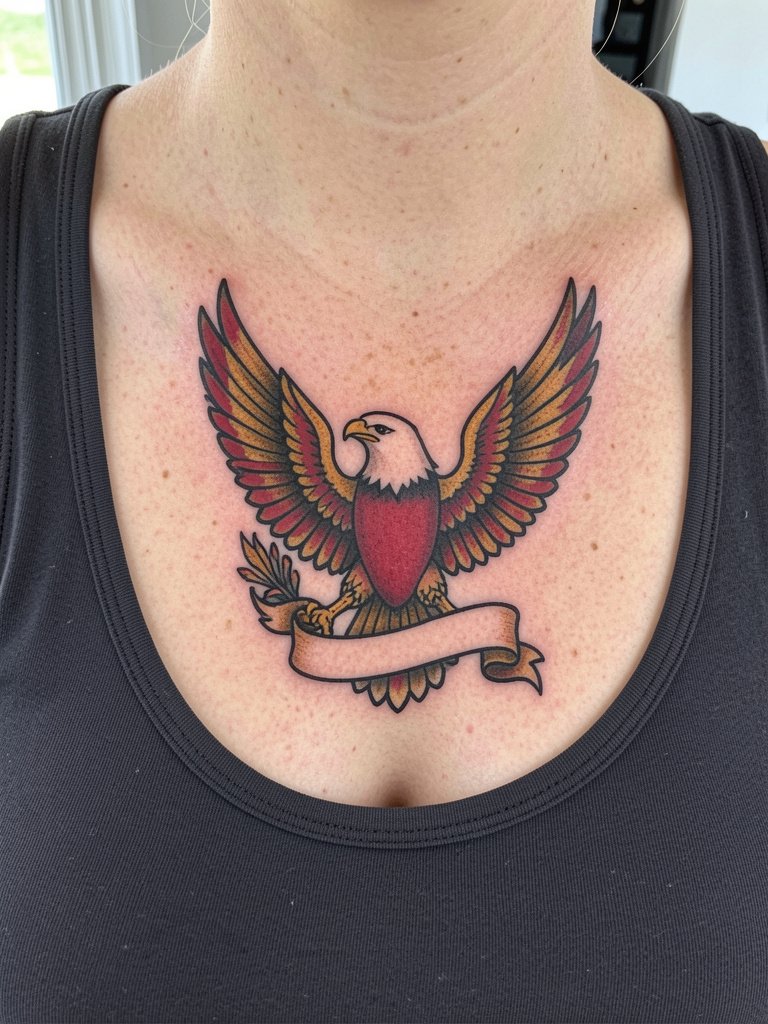
A chest eagle reads like a badge when done in American traditional style, and it suits anyone who wants a centerpiece that still looks sharp at five years healed. Expect moderate pain, the sternum edge ups sensitivity, and a single session of two to four hours for a three to five inch piece. The most common mistake is asking for too much tiny detail inside the wings. Wider feather blocks and bold outlines hold up better than ultra-fine filigree. For the session, wear a wide V-neck top so the artist has clear access to the collarbone without you having to undress. This placement ages with bold contrast, and a touch-up around year two often restores peak saturation.
2. Minimalist Single-Needle Flying Eagle on Inner Forearm
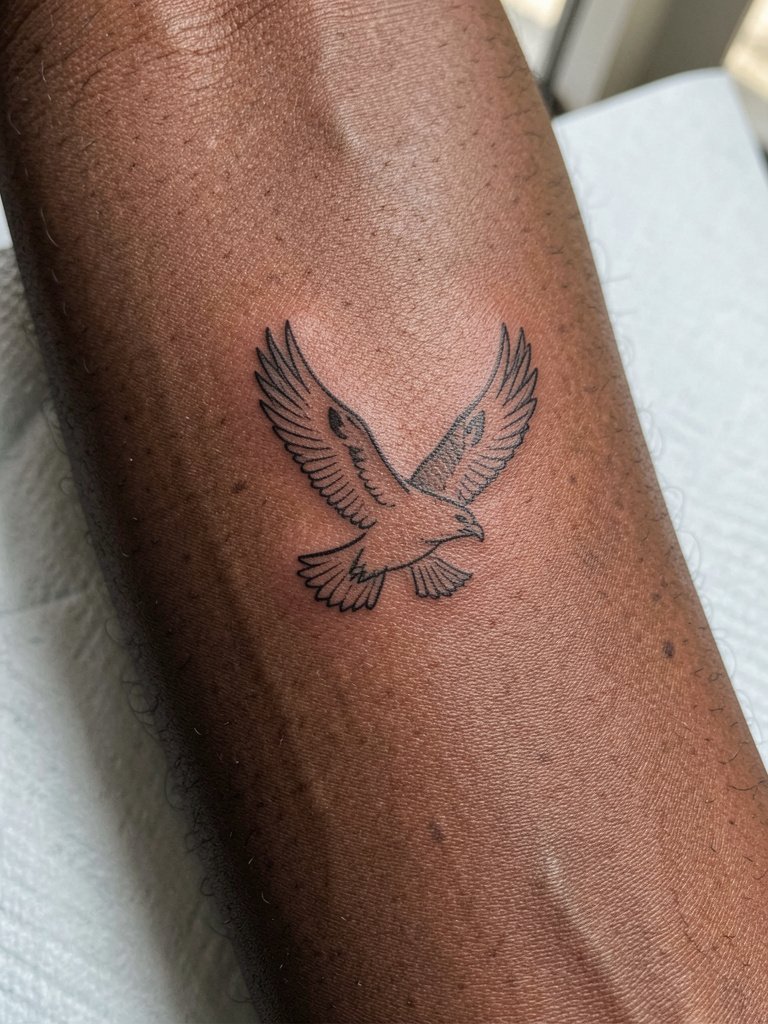
A delicate single-needle eagle on the inner forearm looks airy at first, but the inner forearm can soften detail with time. Pain is low to moderate and a one-hour session can do a modest piece. If you want this to last, request slightly stronger line weight than the reference and allow extra negative space inside the wings. The common aging problem is loss of crispness by year three, so expect a small touch-up sooner than with blackwork. For outfits that show it off, rolled-up linen shirts in neutral tones frame the forearm nicely, and a casual open-back midi dress complements the silhouette during evenings out.
3. Neo-Traditional Eagle Portrait on Shoulder Cap
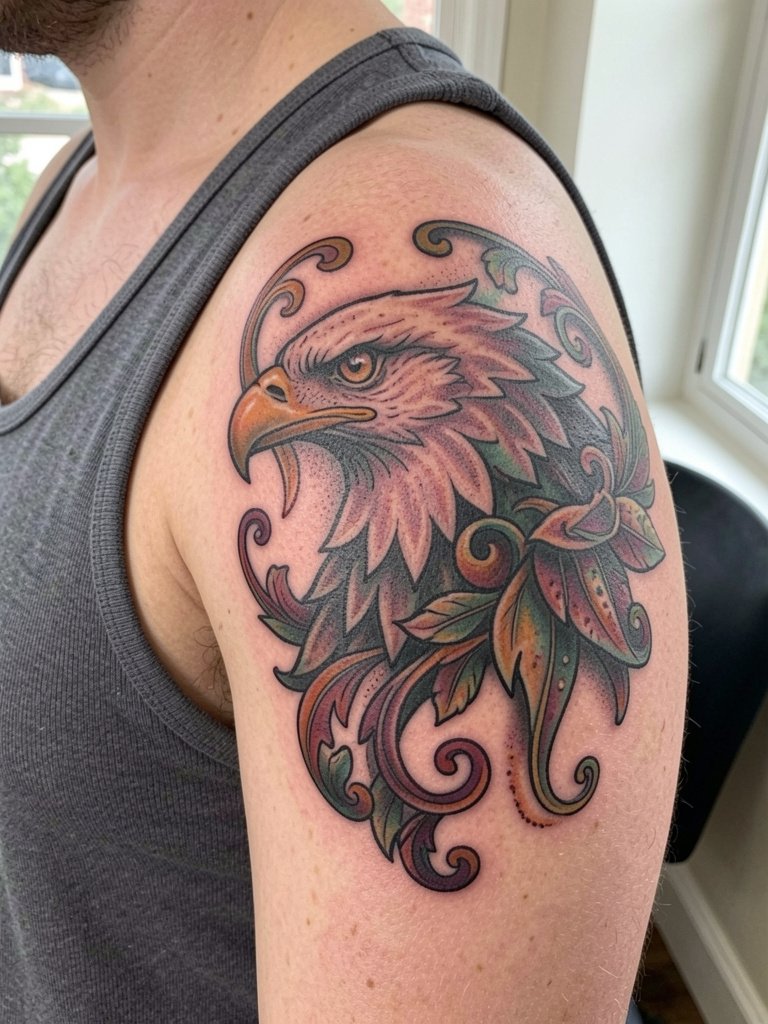
The shoulder cap is forgiving on detail, so a neo-traditional eagle with saturated color looks vivid and lasts. Expect low to moderate pain and a two to three hour session for a medium-sized portrait. A mistake people make is cramming tiny text or tiny objects near the beak area. Let the beak read clean and keep decorative elements slightly larger. If you want to show this off, pair it with a loose linen tank that dips at the shoulder to frame the artwork. Healed at six months the color is bold, at two years the edges soften slightly, and a touch-up at three to four years preserves saturation.
4. Blackwork Spread-Wing Back Piece
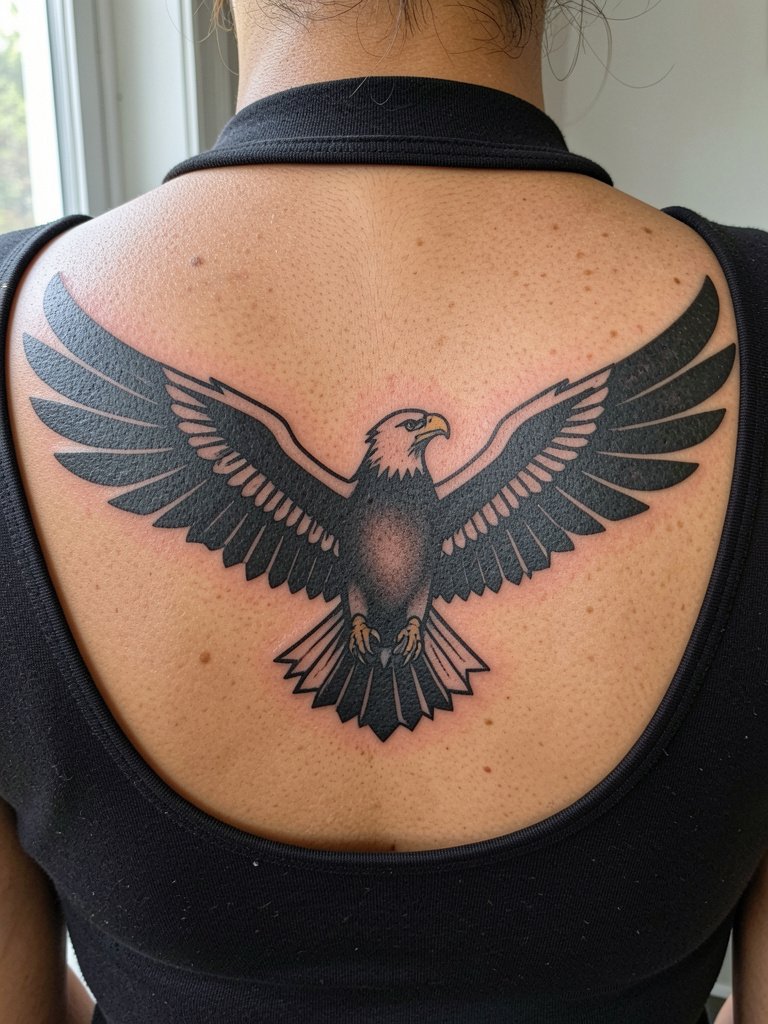
A blackwork back piece reads from distance and ages predictably because large saturated areas retain contrast. The back is a low-pain zone compared with ribs, and a session plan of multi-hour blocks is common for full spread wings. The error is trying to fit too many micro-details into a bold composition. Leave room between feathers so the saturation breathes. For the session, wear a scoop-neck top that you can easily remove and replace without stretching the tattooed area. Healed at six months these pieces still look dramatic, and they usually need a touch-up at year two to even out any patchy saturation.
5. Geometric Linework Eagle on Calf
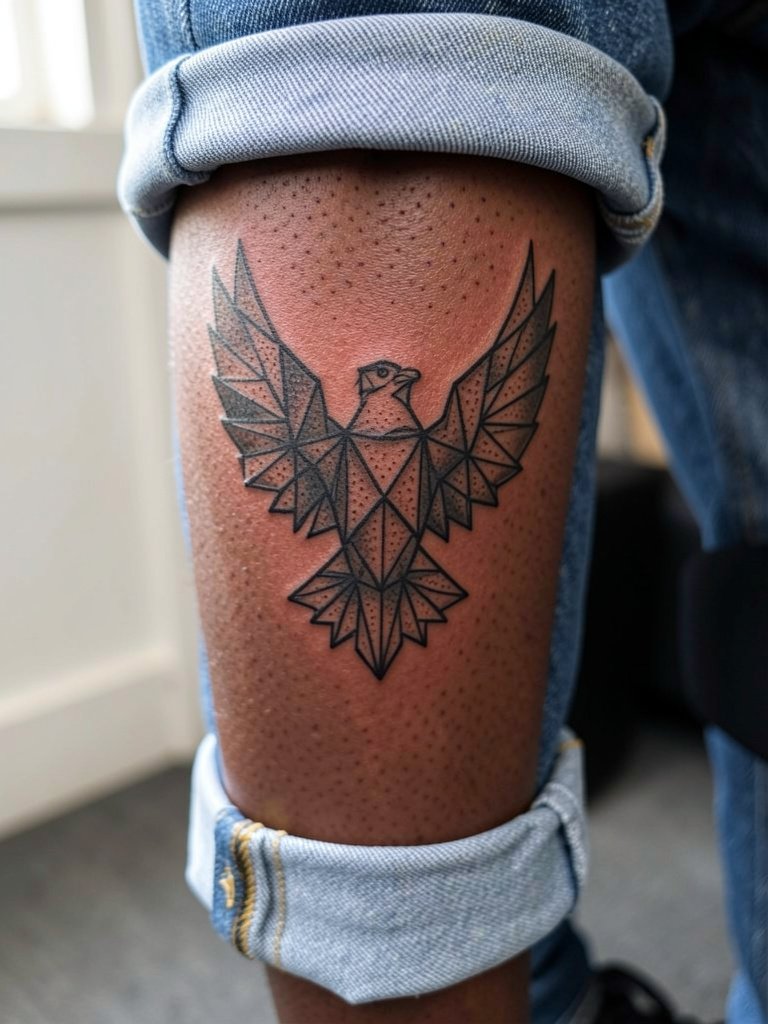
On the calf the geometric approach benefits from muscle contour, so the design should flow with the leg. Expect moderate pain and a session around one to two hours for a three to five inch piece. A typical mistake is making the geometry too dense for the calf size, which blurs after a few years. Ask for spacing that lets the intersections remain distinct at walking and flexing. For show-off outfits, cropped trousers or a mid-length skirt reveal the calf elegantly. Dot work ages differently than solid lines, so plan for a light touch-up to restore stippling clarity by year three.
6. Small Perched Eagle on Inner Wrist
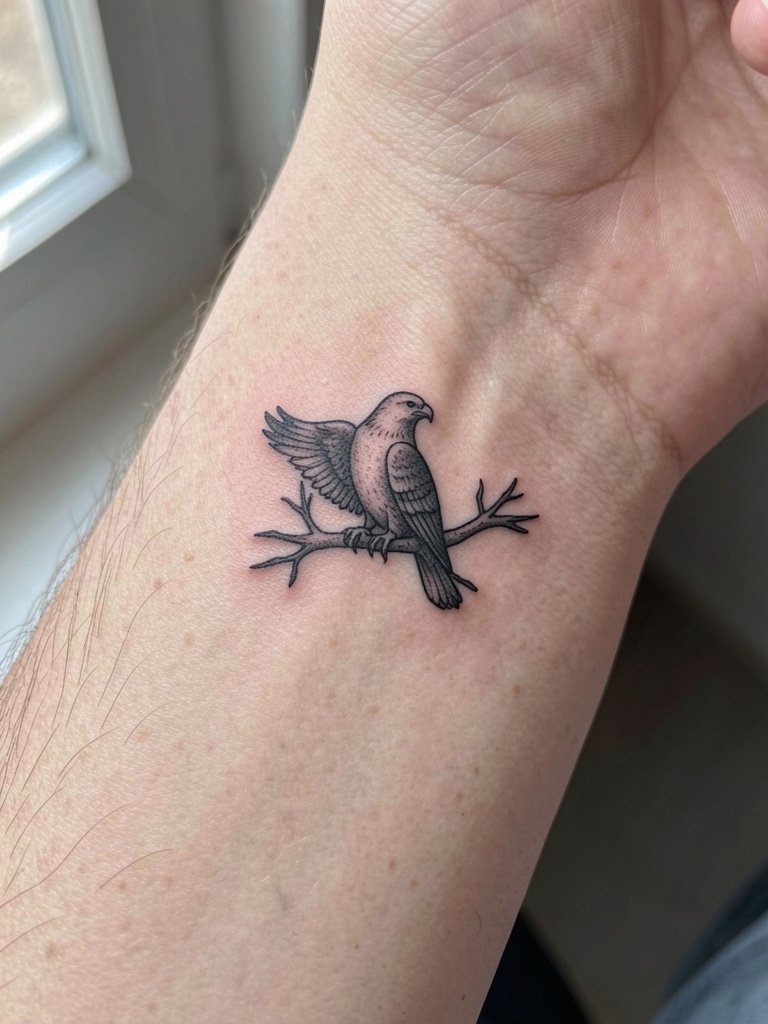
Wrist tattoos face constant washing and abrasion, so a perched eagle here needs slightly thicker linework than the reference image. Pain is low to moderate and a small wrist piece takes 30 to 60 minutes. The usual mistake is insisting on ultra-fine detail that the wrist will not keep over time. Ask for bolder contour lines and less internal shading to reduce blowout risk. For session comfort, wear a loose long-sleeve shirt you can roll up so the cuff does not press against the fresh ink. To show it off, a cropped sleeve or bracelet works well, and a thin delicate bracelet complements the scale without covering the art.
Pre-Session Essentials
The chest, forearm, and wrist pieces above heal differently, so a few reliable items smooth the session and the first week.
-
Stencil transfer paper kit. Lets you preview the linework on skin before committing, which is helpful for chest banners and wrist silhouettes in the ideas above.
-
Thin silicone healing patches. Protects smaller placements like the inner wrist and finger pieces from friction during the initial healing window.
-
Antimicrobial gentle body wash. Keeps larger areas like back and chest clean without stripping pigment while you shower.
-
Thin protective film roll. Useful for covering awkward placements overnight and reducing bedding rub during the first two nights.
-
Aquaphor healing ointment. A mainstream occlusive used sparingly during the first few days to keep fine line work from drying out.
7. Realistic Head Study on Thigh
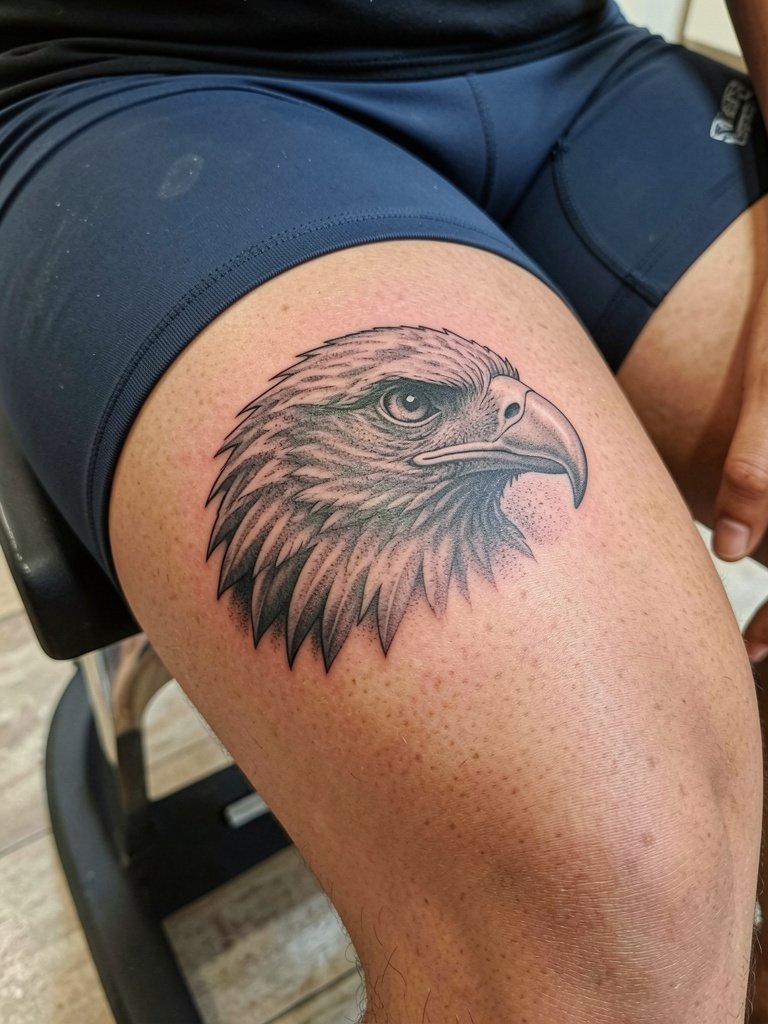
A realistic eagle head on the upper thigh allows for fine texture and depth, and the thigh is forgiving for detail. Pain is moderate and a single session of two to four hours works for a medium portrait. Common mistakes include asking for extreme micro-detail without increasing size. If you want realism that lasts, scale up slightly and expect a lighter touch-up at two years. For the appointment, wear shorts that you can pull on and off without rubbing a fresh piece. Thigh pieces hide well under most clothing and show spectacularly with a mid-thigh dress when you choose to display it.
8. Heraldic Crest Eagle on Ribcage
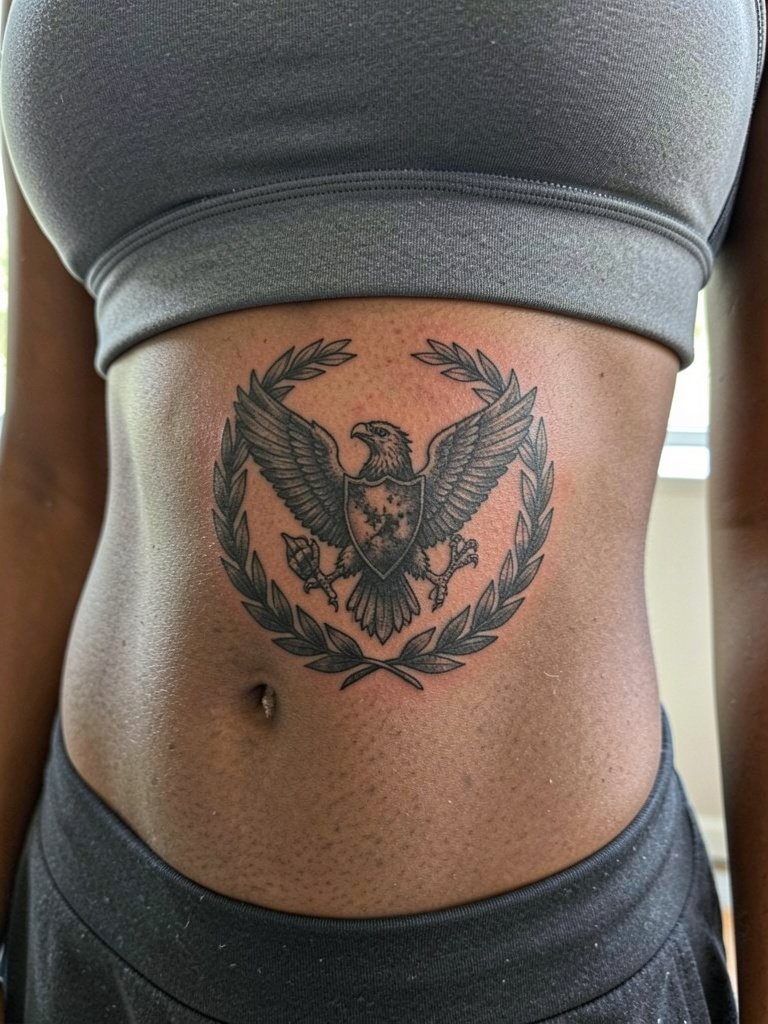
Ribcage work shows off a crest well but it divides artists into two camps. One camp argues that the constant expansion and contraction of the rib area blurs fine lines within two years, especially near the underbust crease. The other camp says that with slightly deeper needle depth and wider spacing the lines can settle cleanly, and they will point to three-year healed photos to support that position. Pain here is high, and sessions are often broken into multiple appointments. The mistake is insisting on single-needle filigree across curved ribs. If you want to sit through it, plan for breaks and numbing applied before the session.
9. Line-Only Signature Eagle on Collarbone
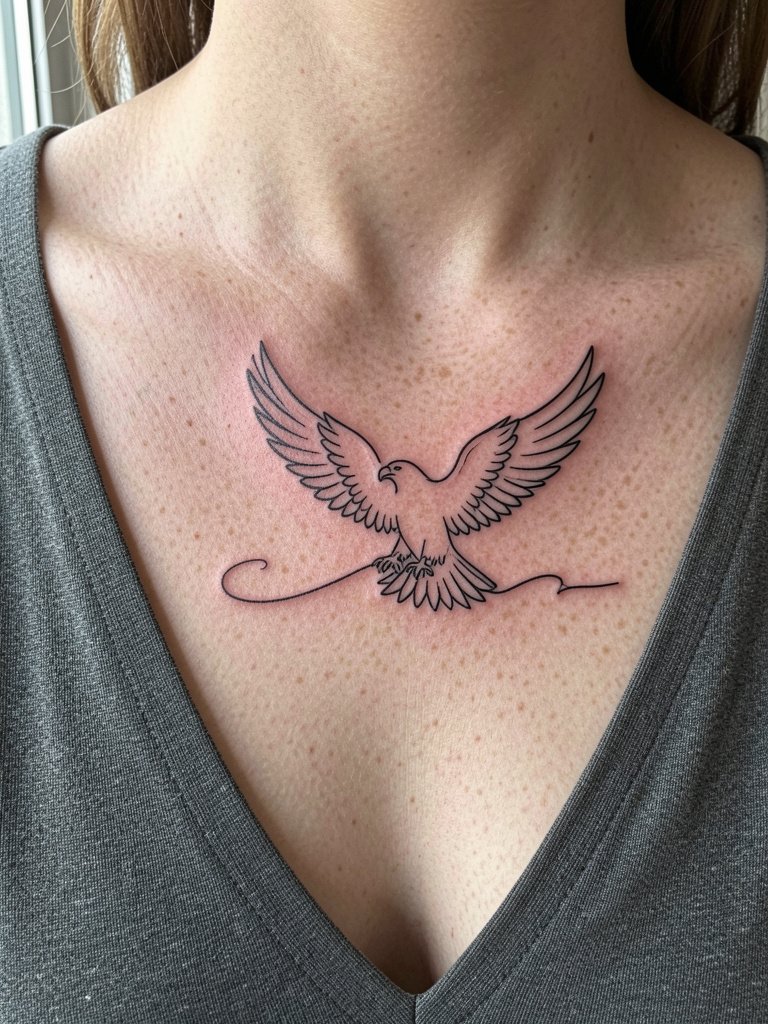
Collarbone placements show beautifully but are unforgiving on single-line work. Pain is moderate and the session is brief, often under an hour for a small piece. A typical error is using a line that is too thin for the movement of the chest area. Ask for a hair heavier line weight and for the stencil to be checked in seated and standing positions so the line flows with your posture. For outfits that highlight the area, a delicate V-neck blouse frames the collarbone without covering the art. Expect slight softening at two years and plan a small touch-up if needed.
10. Americana Flash Eagle on Outer Bicep
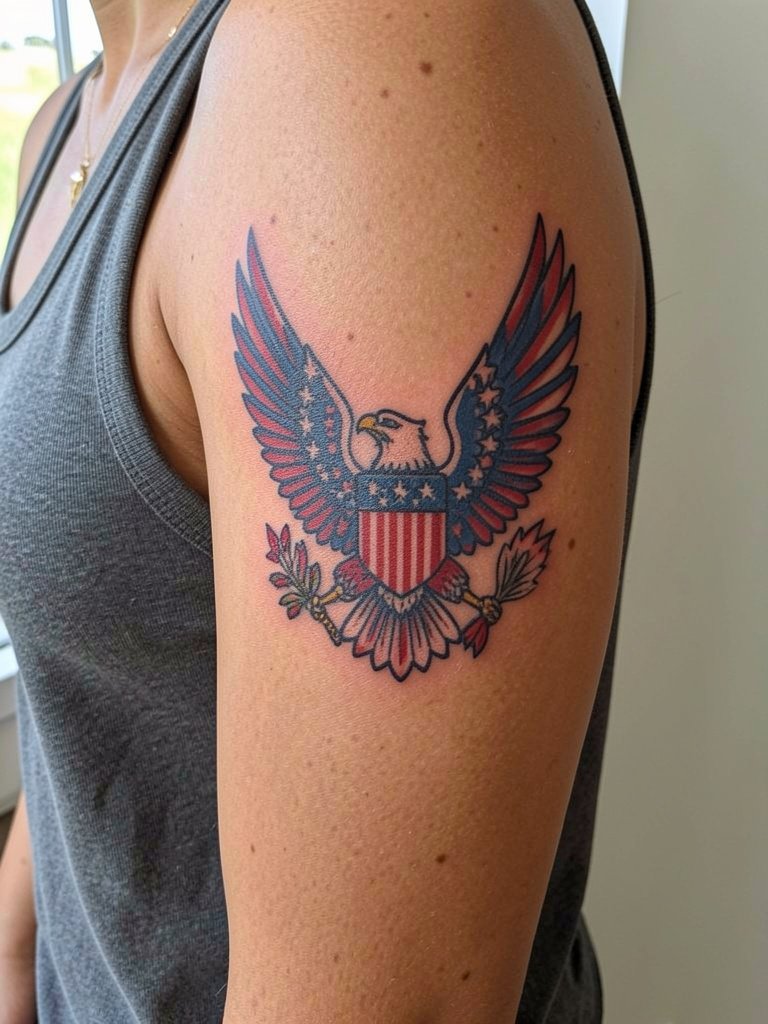
The outer bicep is a low-pain placement that lets bold Americana flash sing. Session time is moderate for a colorful patch, and saturation holds well because the area sees less friction. The classic mistake is shrinking a flash down to a wrist scale, which loses the intended impact. If you want to show it off, roll a sleeve or choose a sleeveless denim vest, or pair with a loose drawstring linen pant for a festival look. Healed color remains strong for years, with touch-ups recommended to restore bright red areas which tend to fade faster.
11. Small Geometric Eagle on Ankle
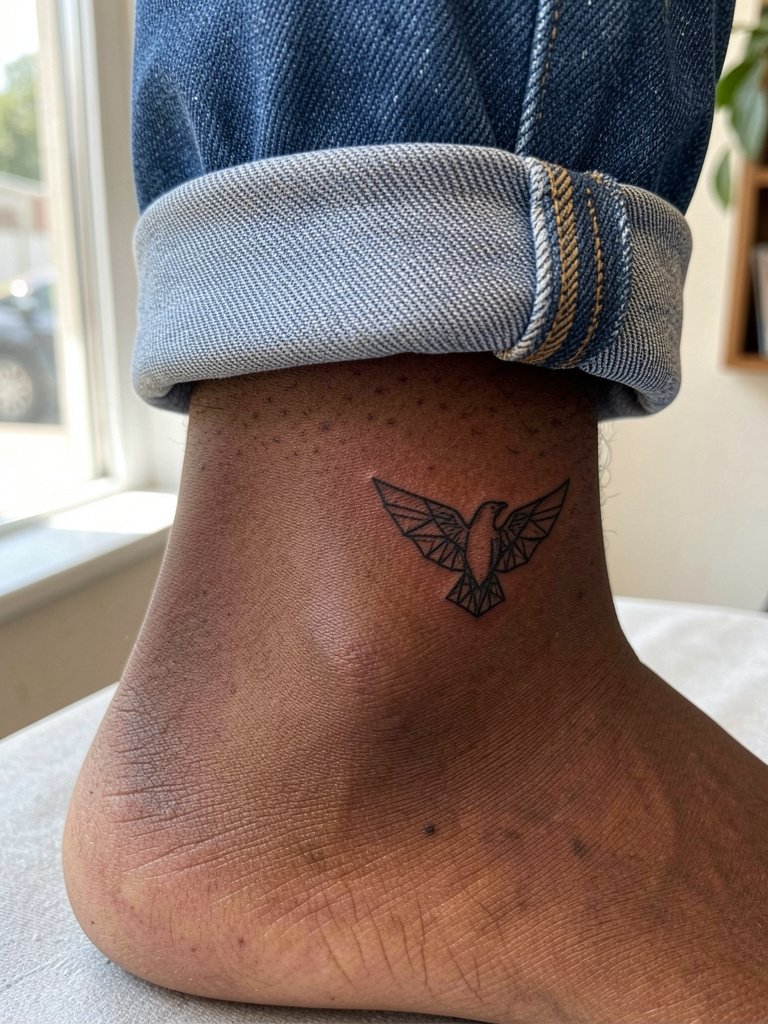
Ankle tattoos are exposed to friction and shoe rubbing, so compact geometry with bolder lines fares better than micro-detail. Pain is moderate and a small piece is usually done in under an hour. The usual mistake is overcomplicating the negative space, which fills in over time. For the session, wear shoes that slip on easily and trousers you can roll without stretching the ankle area. To display it, try cropped jeans or sandals paired with an anklet chain that complements the design without covering it. Plan for a minor touch-up after the first year if edges soften.
12. Stippled Dot-Work Eagle on Upper Arm Sleeve Edge
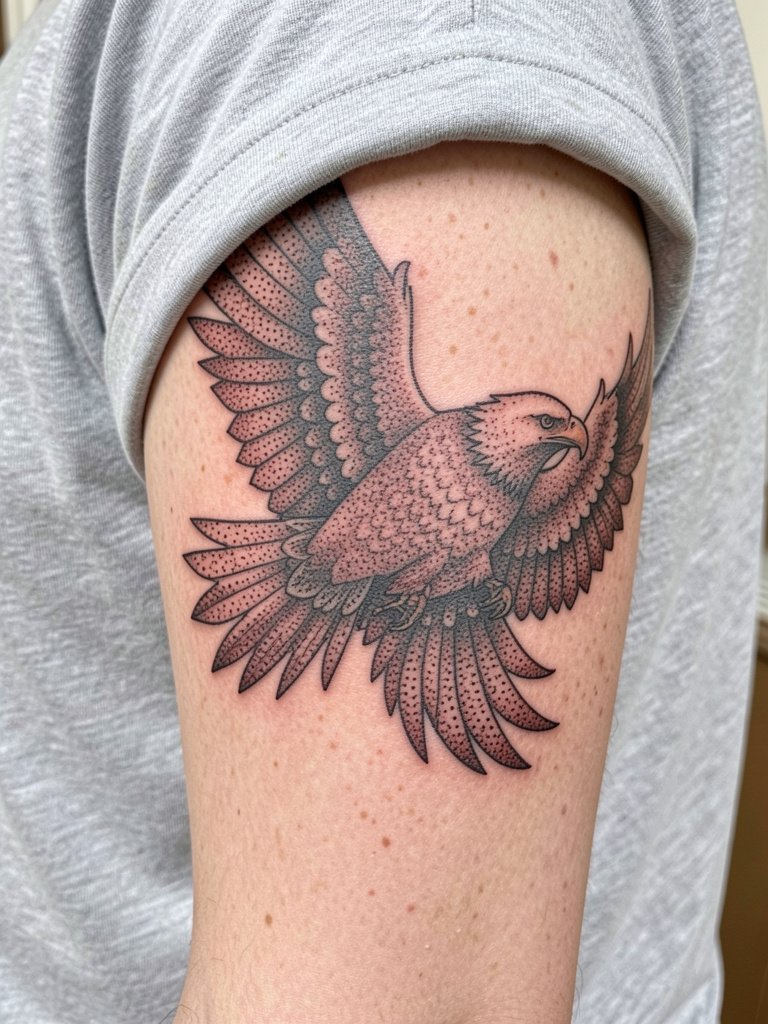
Dot-work reads beautifully on the upper arm but requires patience during the session because stippling takes time. Pain is low to moderate and expect multi-hour blocks if the dot gradient is extensive. A common mistake is packing dots too close in a small area, which turns into a muddy patch when healed. Ask the artist to keep the stipple spacing consistent and to show a healed sample at a similar scale. For evenings out, short-sleeved shirts frame the edge, and a subtle stacked ring set on the hand draws attention up the arm without overshadowing the sleeve art.
13. Small Negative-Space Eagle on Finger Side
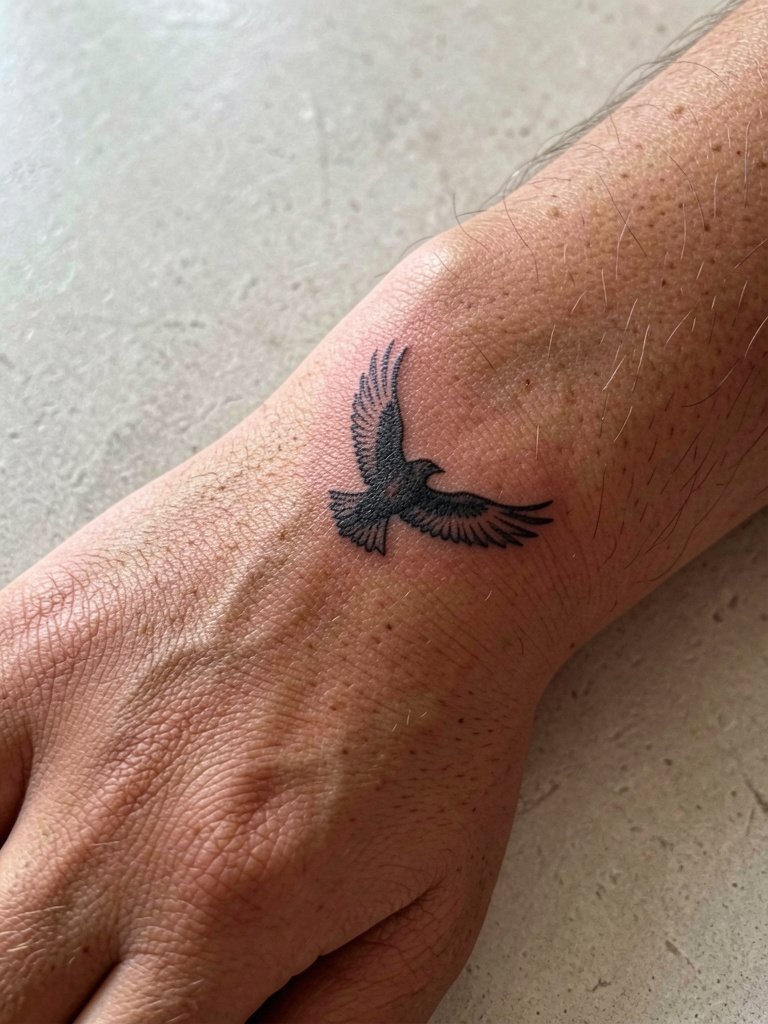
Finger-side tattoos carry high wear and a higher risk of ink loss and blowout due to thin skin and frequent washing. Pain is moderate and sessions are brief, but expect faster fading than on the torso. The mistake is choosing too intricate a composition for the tiny canvas. If you want longevity, use solid negative-space shapes rather than tiny lines. For session day, keep hands clean and avoid rings that press on the fresh ink. When showing the piece off, thin adjustable rings work well and avoid rubbing the tattoo while it heals.
14. Heraldic Chest Panel with Banner
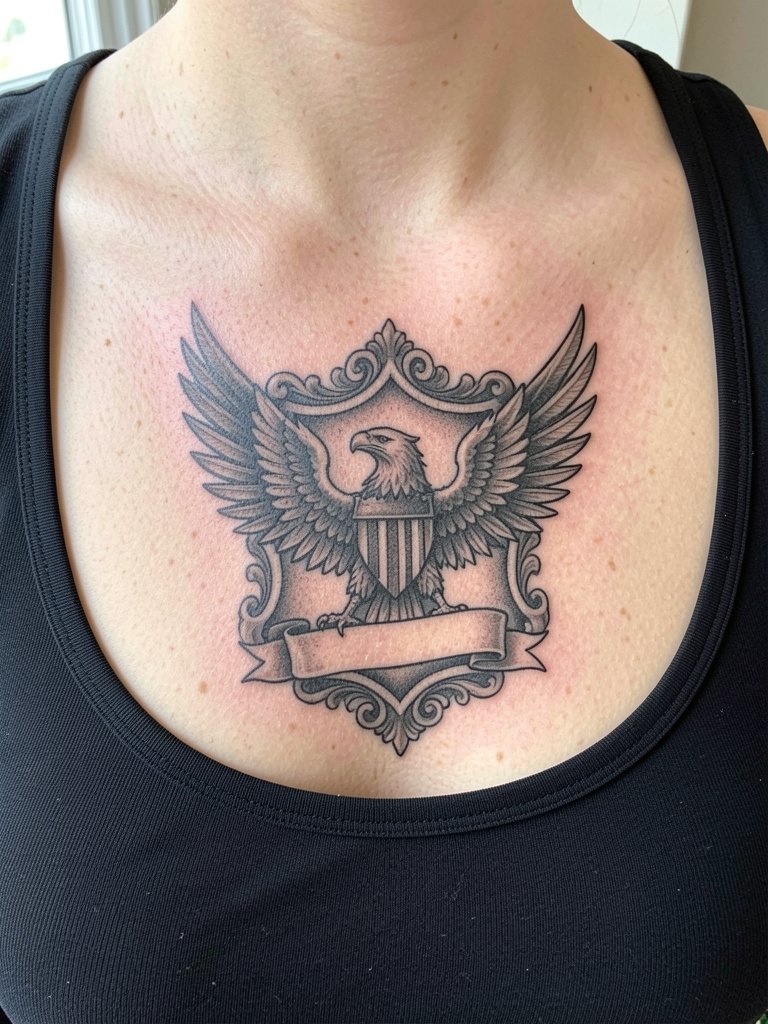
Center-chest panels make a bold statement but the sternum area can be quite sensitive. Pain is high and sessions are often split. One mistake is compressing too many small ornamental details into the banner and crest. Instead, choose a clear banner size and larger ornamental motifs so the composition remains legible as your skin moves. If you plan dresses that show the chest, an open-collar or scoop-neck top highlights the panel, and a delicate pendant necklace can complement the design without obscuring it. Expect to book a touch-up a couple of years in to maintain crisp banner edges.
15. Small Midline Sternum Eagle Accent
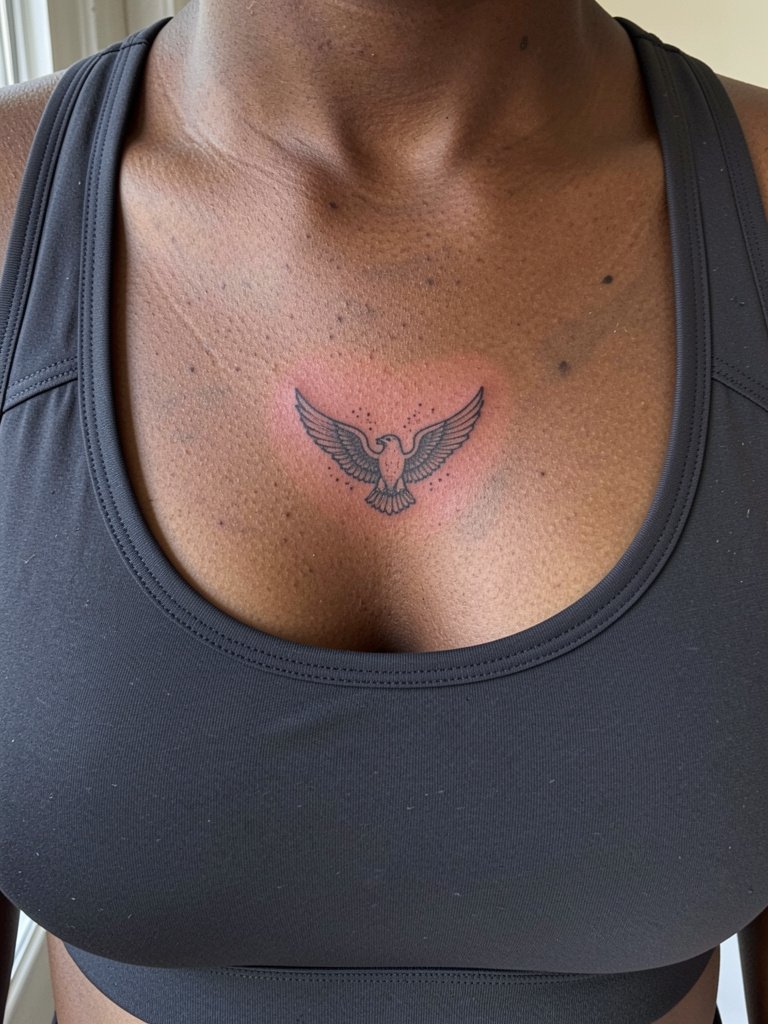
Sternum accents can be intimate and visually striking, but the area shifts with body movement and underbust pressure. Pain is high and most people book short sessions spaced across multiple appointments. The common mistake is choosing a complex symmetrical motif at too small a scale. Opt for a simplified shape that allows for slight asymmetry and space around the central bar. For the appointment, wear a sports bra that is easy to remove and put back on without stretching the area. Healed results look refined at six months, and a touch-up at year two will help keep fine dots visible.
Frequently Asked Questions
Q: How painful are these American eagle placements, and how should I prepare?
A: Pain varies by placement. Sternum and ribs are commonly the highest pain zones, wrists and ankles sit in the middle, and upper arm and back are more forgiving. Prepare by eating and hydrating the day of your session and wearing clothing that gives the artist unobstructed access to the area. Numbing options applied 30 to 45 minutes before can help for ribs and sternum, but be specific about timing with your provider.
Q: Which eagle styles hold up best long term on oily or textured skin?
A: Large, bold blackwork and traditional pieces tend to hold up best on oily or textured skin because saturation and thicker linework resist blur. Single-needle and extreme micro-detail are the styles most at risk of softening. If you have textured skin, ask for stronger line weight and more negative space so the design keeps contrast as it heals.
Q: Where can I find healed portfolio examples and discovery pathways without naming artists directly?
A: Search Instagram and TikTok with targeted hashtags such as #AmericanEagleInk, #EagleTattooHealed, and location filters to find healed examples in your city. Reddit tattoo communities often have dedicated healed-photo threads and will point to portfolios by keyword. Use portfolio aggregators and galleries that allow "eagle blackwork" or "eagle realism" filters to compare styles across skin tones.
Q: How often do these designs need touch-ups, and which placements need them sooner?
A: Small placements like fingers, wrists, and ankles commonly need touch-ups within one to three years. Larger saturated pieces such as back or bold chest panels hold longer and often need touch-ups at year two to even out any patchy saturation. Light stipple work and bright reds typically fade faster than solid black, so plan your touch-up timeline around color and placement.
Q: Are there special professional considerations for chest, sternum, or face placements?
A: Yes. The sternum and chest require artists experienced with curved anatomy and multi-session planning to avoid distortion. Face and hand work need artists who specialize in those zones because blowout and social considerations are higher. For intimate placements, expect a conversation about sterilization, privacy, and session pacing during booking.
