
Fine Korean-style fine line work looks like a whisper on skin until it does not. Small single-needle florals and pastel washes photograph beautifully, they can also soften with time if you pick the wrong placement or go too tiny. Expect to weigh longevity, cost, and how easy it is to find an artist who specializes in hairline strokes before you book. The first idea below shows a dependable forearm placement that plays to this style's strengths.
1. Fine Line Botanicals on the Inner Forearm
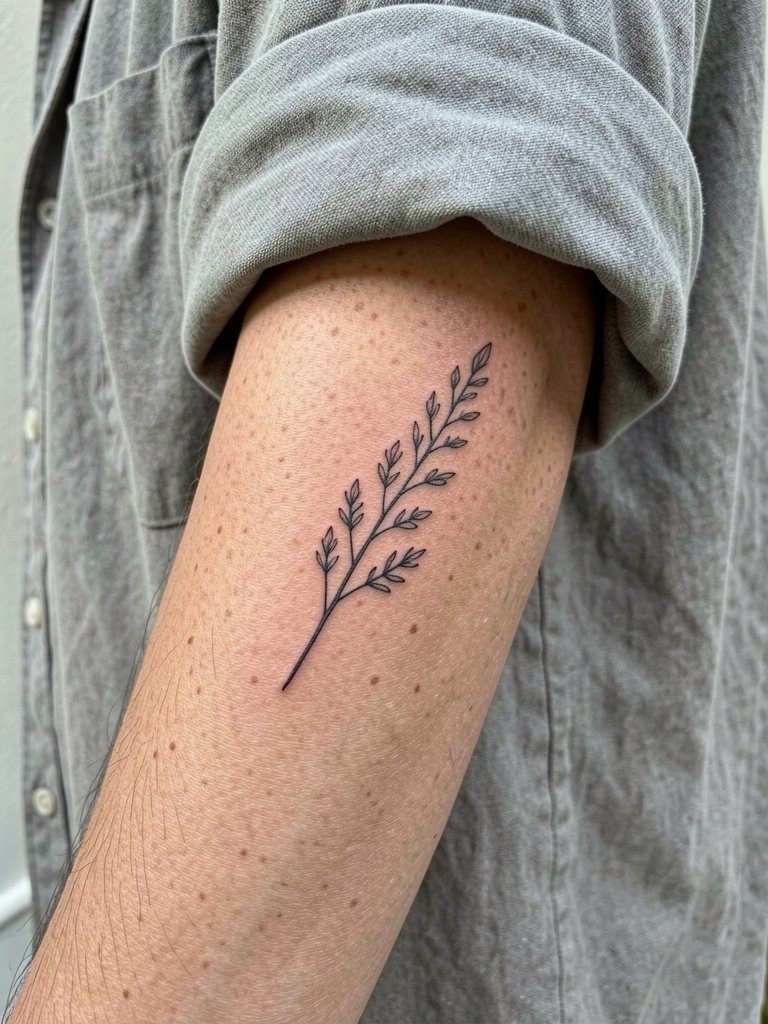
A classic for the Korean restraint aesthetic. I recommend this when you want something visible but low-impact, because the forearm gives linework room to breathe. During the consult bring two photos at different scales so the artist can show how the sprig will read at three inches versus five. The common mistake is going too small near the wrist. At six months the hairline edges look crisp, by two years tiny leaves can blur if the artist packed lines too close together. Wear a linen button-down on session day so the sleeve rolls up without pressure, and show-off looks pair well with dainty gold bracelets.
2. Watercolour Animal Portrait on the Inner Thigh
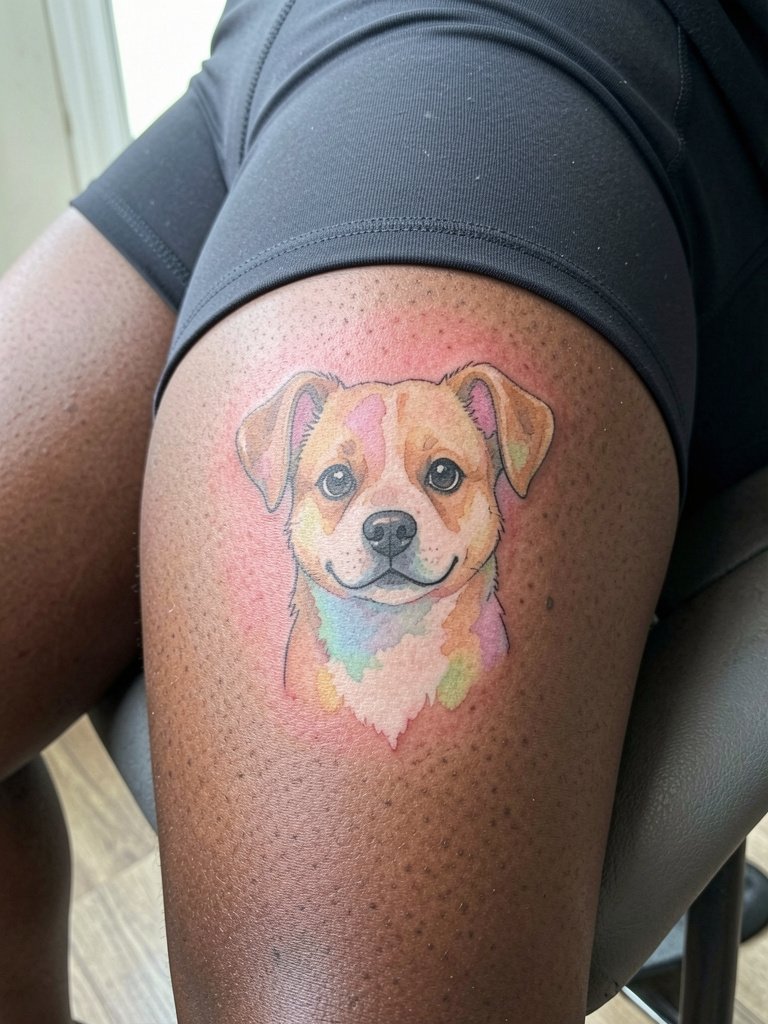
This is the go-to for pet portraits that feel airy rather than graphic. Recommend this for people who want color without heavy outline. Be specific in the consult about color density and where you want saturation deeper so it reads on darker skin tones. One camp says watercolor without outline is truest to the South Korean look and will photograph softly. Another camp adds subtle thin outlines to stop pastels from washing out as they fade. Expect tenderness during inner-thigh work, but a single session typically does it. For showing it off, flowy pastel skirts work best, and bring loose shorts for the session.
3. Single-Needle Portrait on the Inner Upper Arm
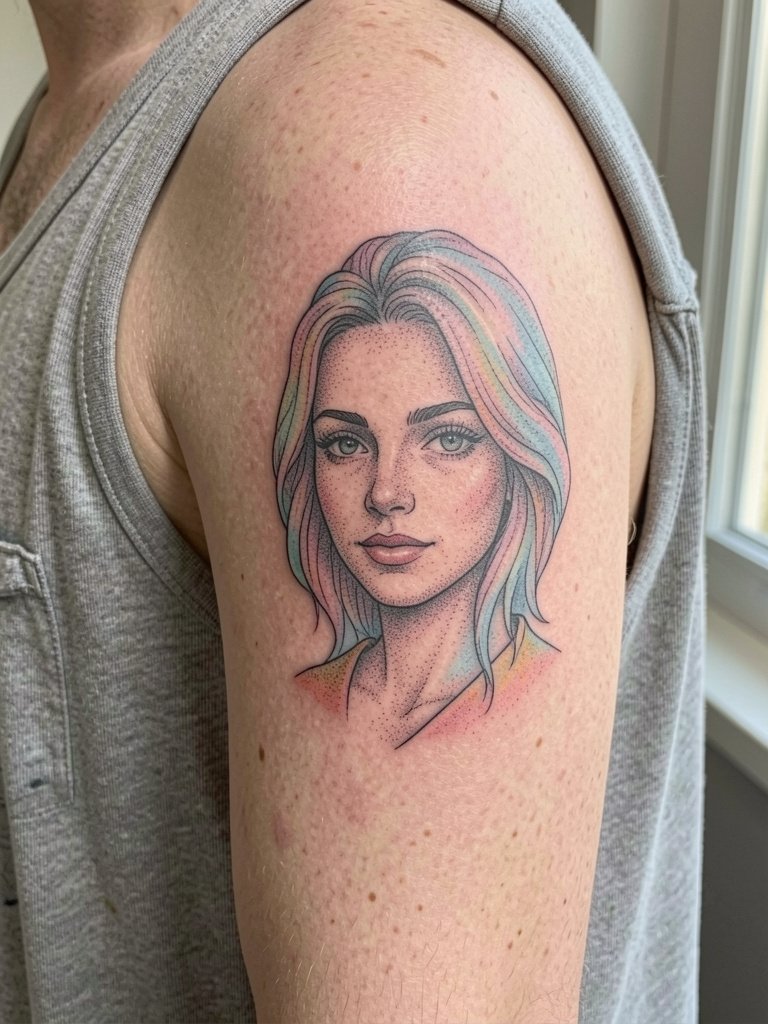
Micro-realism portraits are popular for memories and pet faces. Recommend this placement when you want privacy and a canvas large enough for detail. Ask the artist to show a mockup scaled to your arm so you know how small details will read. One risk is single-needle overdetail. Some say single-needle portraits are the Korean hallmark and hold beautifully. Others warn single-needle work blurs faster if depth or spacing is off. Expect a two-session window for detailed shading and a likely touch-up around year two.
4. Minimalist Single-Line Geometry on the Lateral Wrist
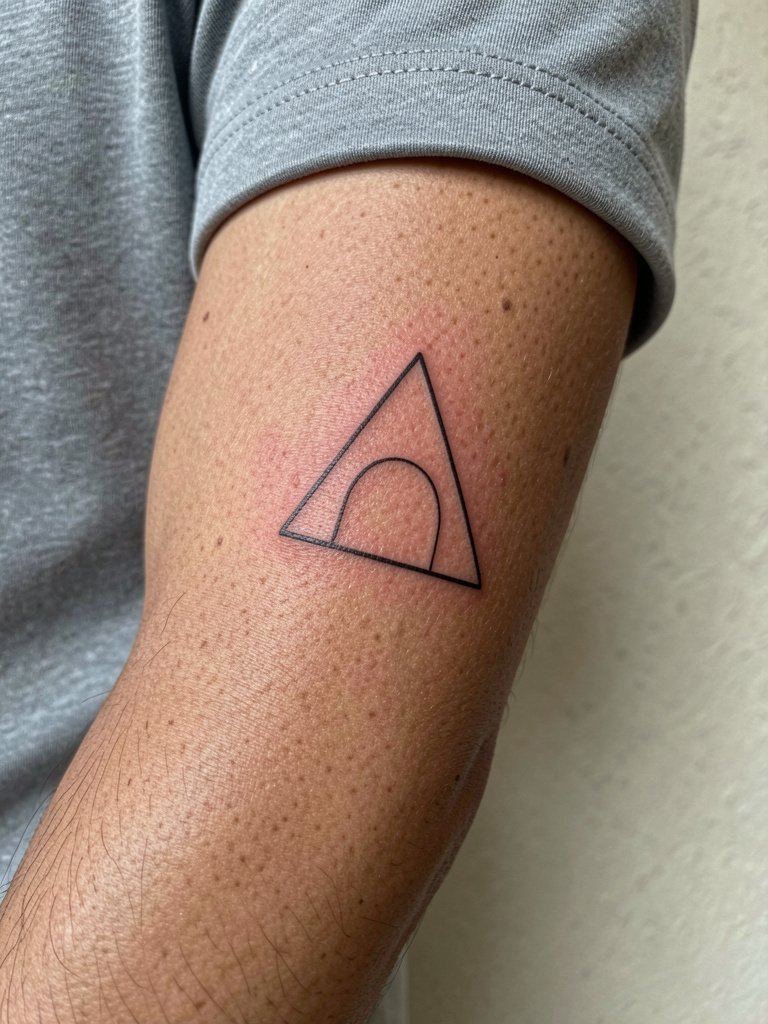
A single-line geometric piece reads clean when given breathing room. Recommend it if you want a minimalist accent that still photographs well. Tell the artist to make the line weight a hair heavier than your reference image so the wrist's movement does not swallow the work by year two. The common mistake is making the geometry too small. Session time is short and pain is low. Pair it with a minimalist watch on the opposite wrist to balance the look.
5. Reimagined Joseon Motif on the Outer Forearm
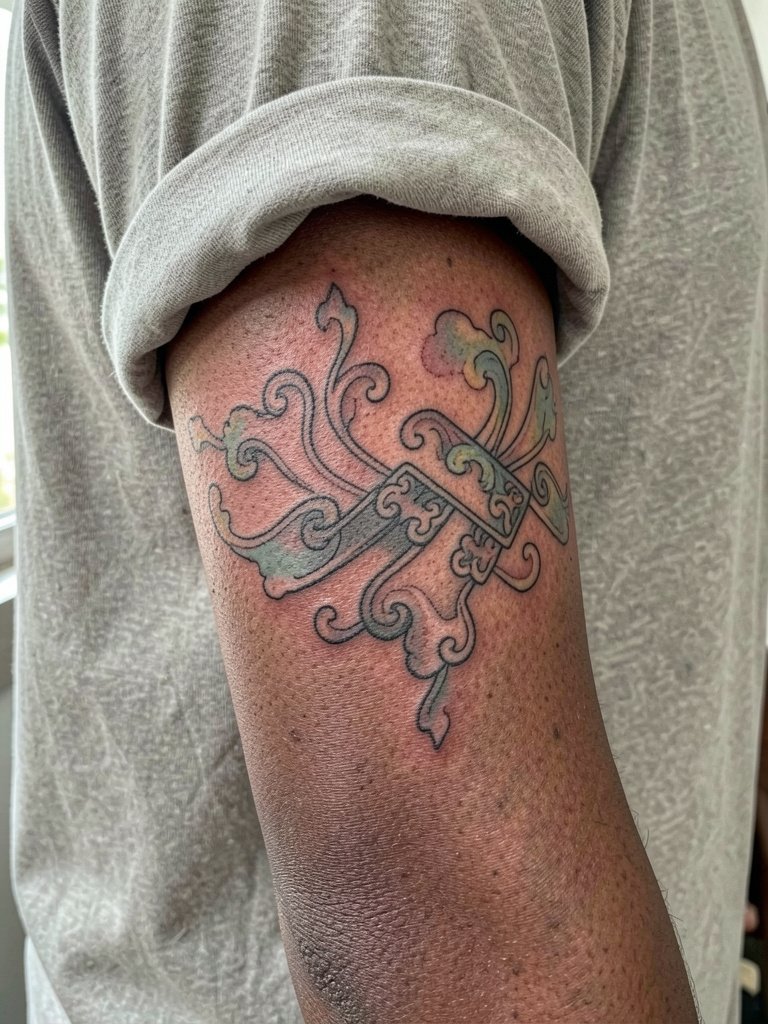
Heritage motifs reworked into fine line feel modern when done respectfully. If you choose a cultural motif mention its origin and ask for a restrained composition that avoids obvious appropriation. A common aging error is cramming too much detail into a small panel. This placement is forgiving because the forearm has flat surface area. Expect moderate session time and ask the artist to show healed examples of similar motifs on comparable skin tones. For wardrobe, plain solid tees in navy or black make the linework pop.
6. Blackwork Dark Art on the Ribcage
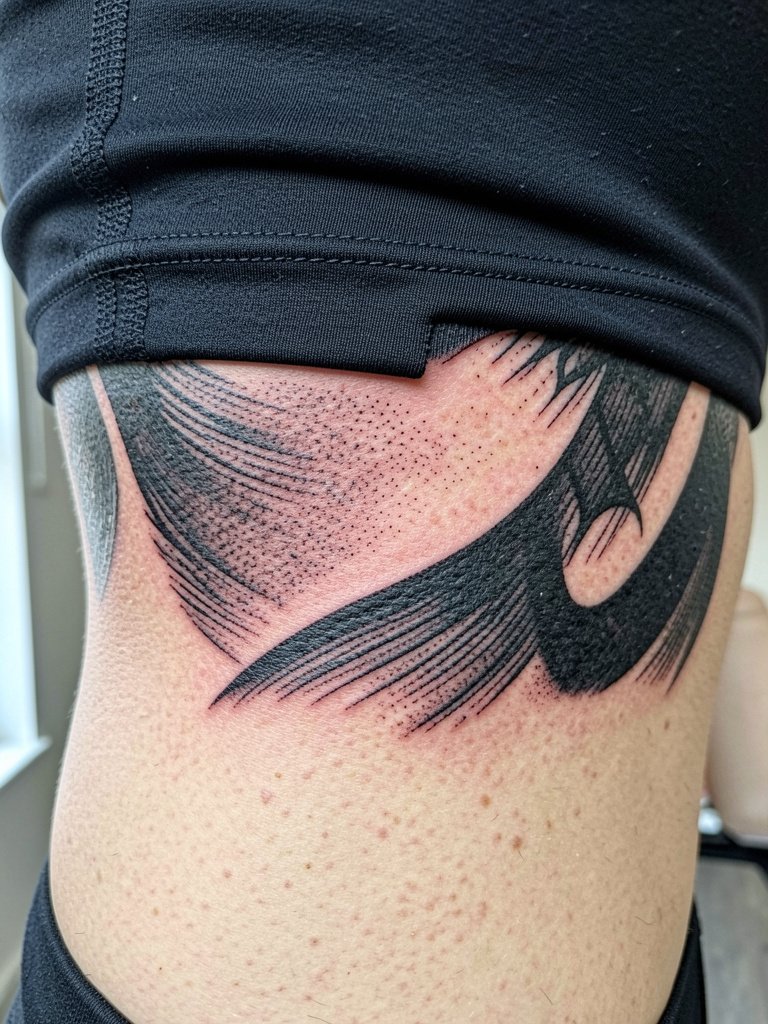
Ribcage placements give drama but bring debate. Some artists argue that the skin there stretches and fine line blurs within two years. Others insist that with slightly wider spacing and correct needle depth fine line can hold well and show healed examples to back that up. If you want fine-line blackwork here, plan for a more spaced composition and a possible touch-up at year two. Pain is higher on the ribs and numbing strategies help. For showing this off wear crop tops in dark colors.
Pre-Session Essentials
The first six ideas include placements that vary from forearm to ribs, so a few specialty products smooth the session and healing window.
-
Bepanthen-style healing balm. A thin, non-greasy balm is often recommended for fine line pieces to avoid pore-clogging while keeping the skin hydrated.
-
Hush balm alternative. Lighter Australian-style balms can reduce the heavy ointment feel that some people say obscures hairline detail during initial healing.
-
Breathable protective film alternatives. For finger and wrist work a breathable film can cut down on rubbing and keep the area clean through the first few days.
-
Thin protective film roll. Useful at home for reapplying between showering and work, especially on high-friction placements covered in ideas above.
-
Aquaphor healing ointment. A mainstream option for the initial 48 hours that many people still keep on hand for spot hydration during the first week.
7. Paw Bean Detail Behind the Ear
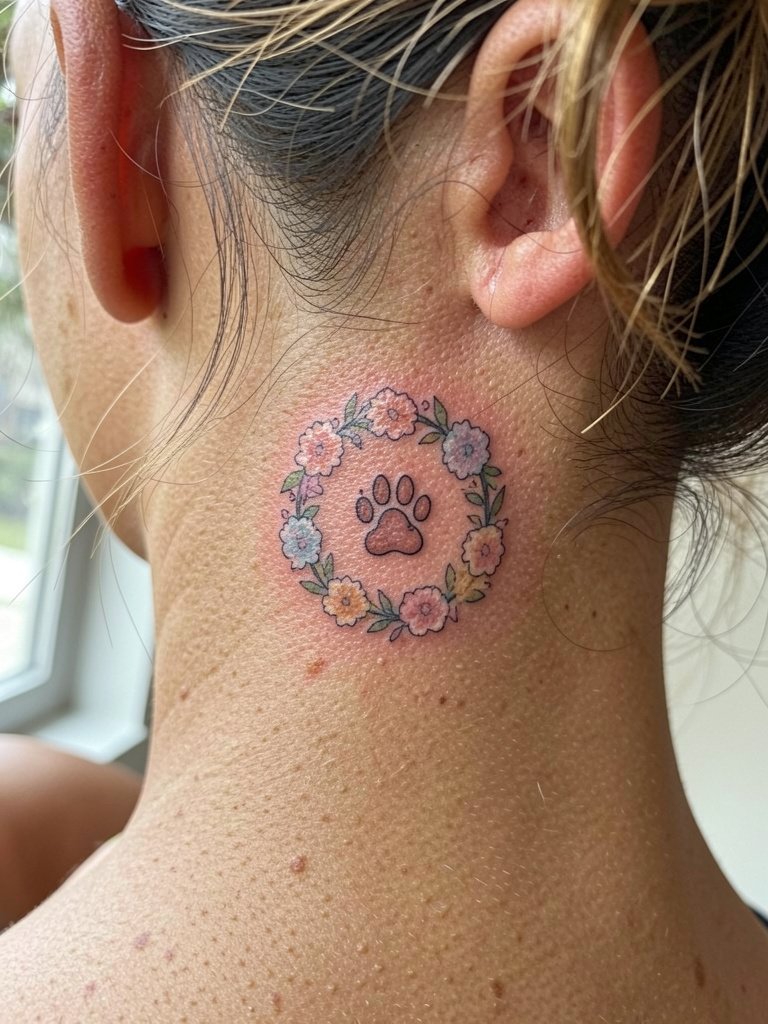
Tiny pet details perform best behind the ear because they stay intimate yet peek out with updos. Tell the artist exactly how much color you want in the wreath so it reads on darker or lighter skin. The usual mistake is overstating color density in a very small area. Session time is short and pain is mild. Plan to wear your hair up for the appointment and bring delicate ear cuff accessories for aftercare photos.
8. Micro-Realism Floral on the Inner Upper Arm
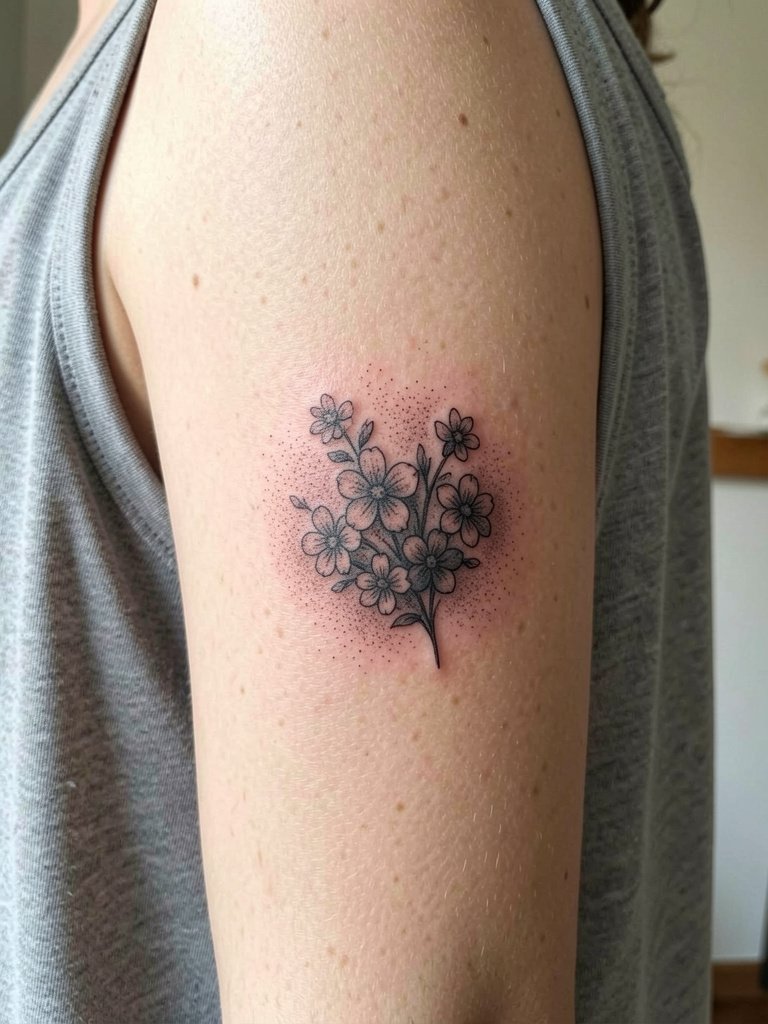
Micro floral clusters reward a larger inner-arm canvas because tiny petals need room. Ask the artist to map out negative space between blooms so the group does not become a dark blot over time. A common error is too much detail at too small a scale. Expect a single longer session for this area. Off-shoulder tops show the piece well, and wear a sleeveless neutral tank to the appointment for easy access.
9. Negative Space Script on the Inner Forearm
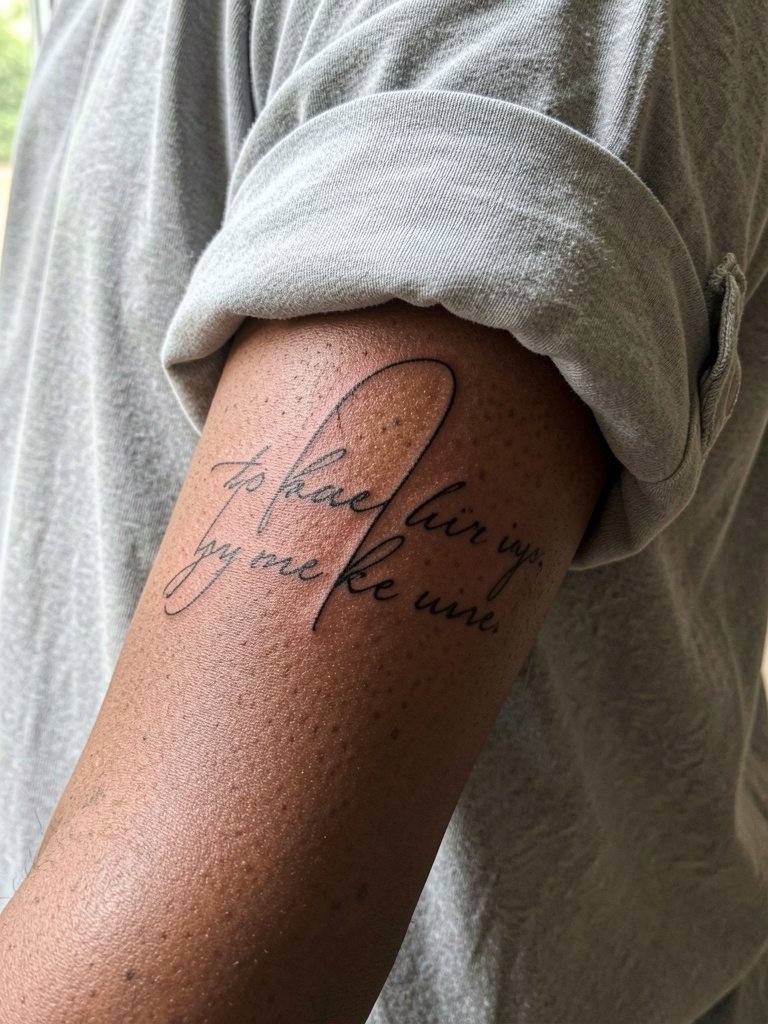
Thin script that uses negative space looks refined on the inner forearm. When you meet the artist show the exact font at scale so they can judge spacing and stroke weight. A typical mistake is choosing very small lettering that later merges. At one year hairline scripts soften but still read if the strokes were slightly bolder to begin with. For session wear choose short sleeves that the artist can easily roll without rubbing the fresh ink.
10. Pastel Gradient Collarbone Wash
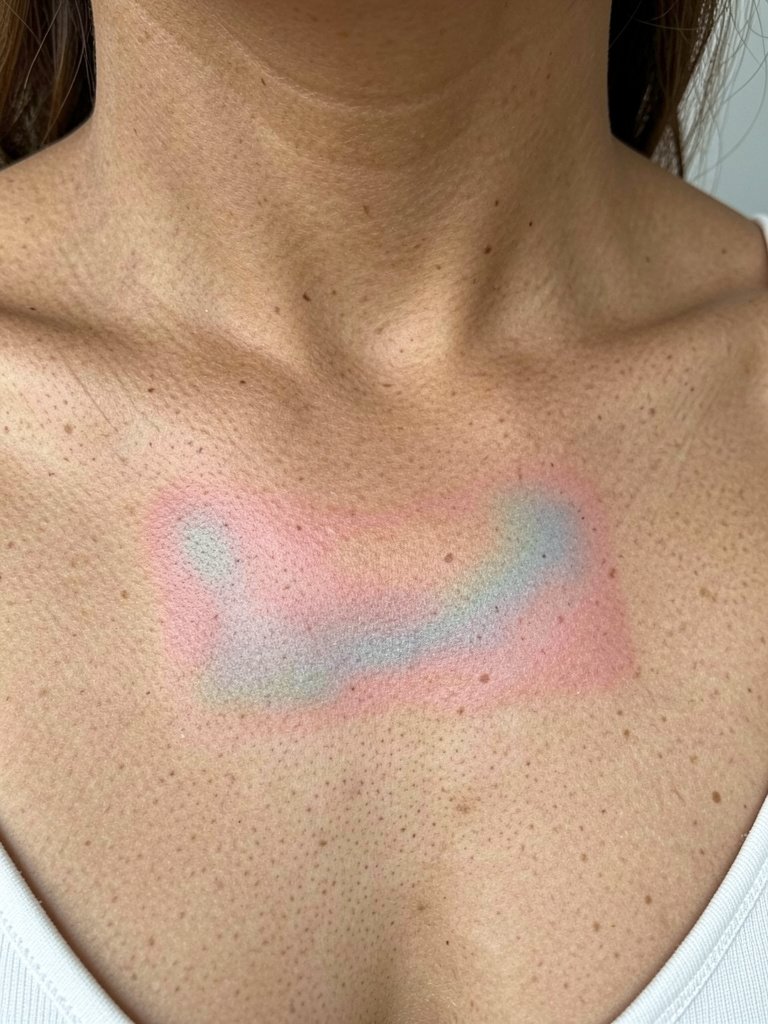
Gradient washes on the collarbone can be striking and soft. Ask the artist how they plan to preserve edge definition without outlines, because color migration is the main risk. Some clients find pastel washes fade quickly on sun-exposed collarbones, so plan sun protection. Strappy tops and open-neck blouses highlight the tones, and for the session wear a strap that you can unclasp or move without tugging on the area.
11. 1980s Gathering Scene on the Upper Thigh
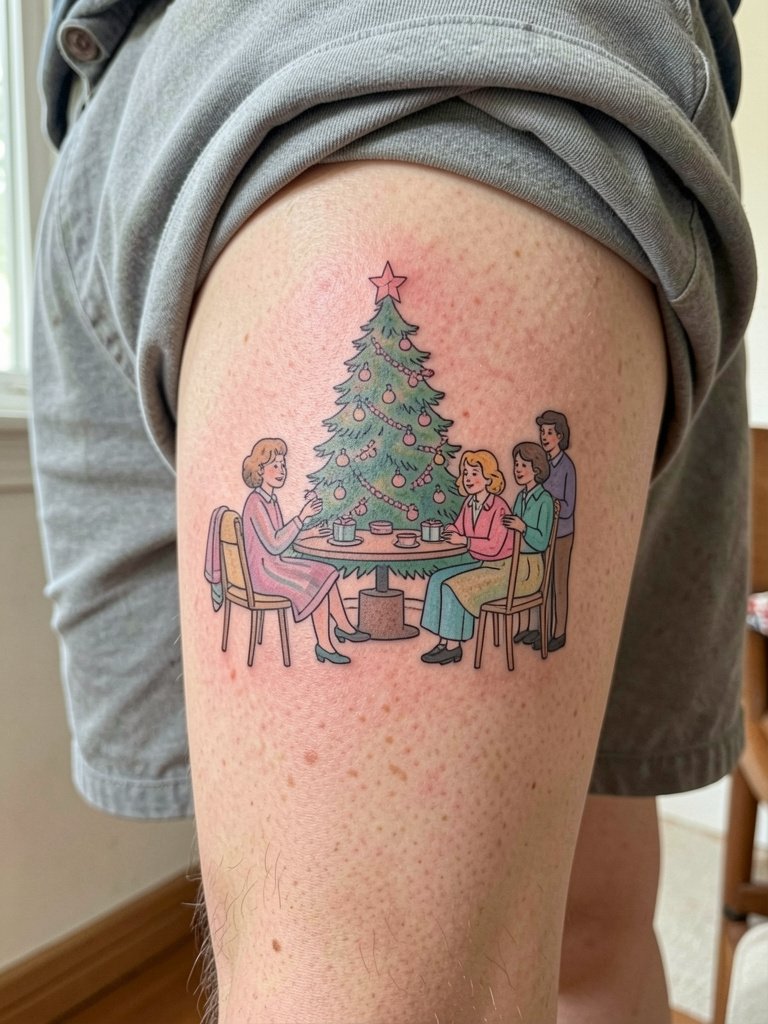
Narrative scenes need enough space to breathe and the outer thigh is forgiving. Bring compact reference photos that show the exact scene composition you want and ask the artist to simplify background elements to avoid blurring later. Weight fluctuation can distort thigh scenes, so plan placement on steadier skin near the hip bone if you expect body changes. High-waisted shorts make scenes visible, and wear loose shorts to the session.
12. Minimalist Ornamental Mandala on the Lower Back
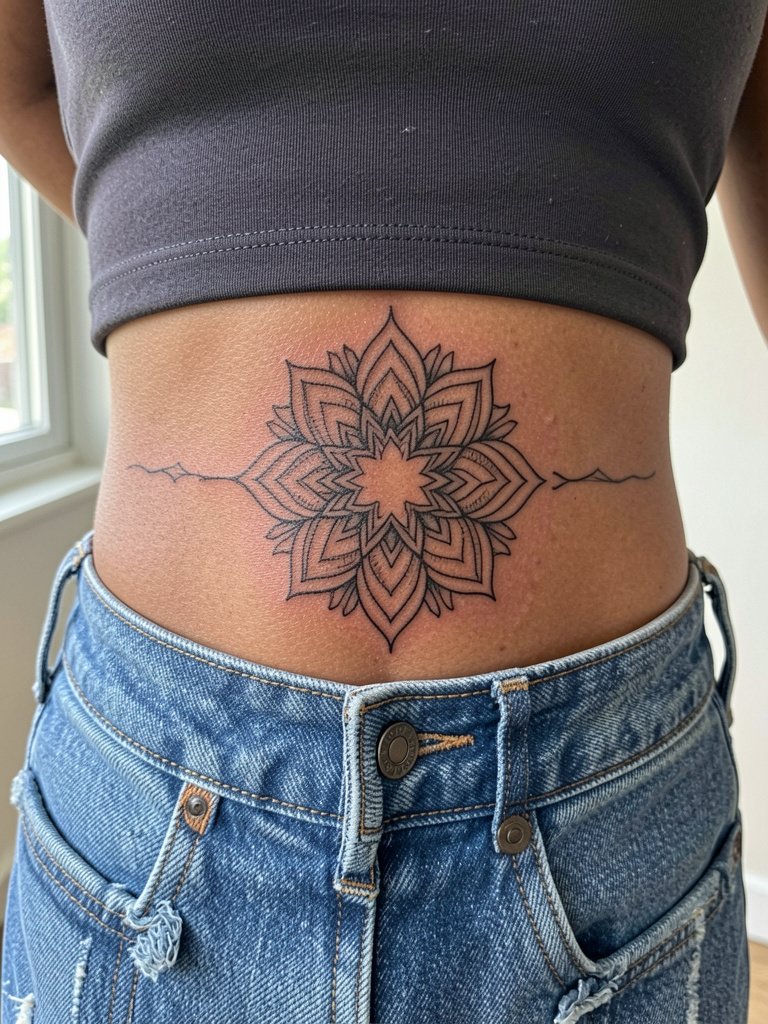
Mandala symmetry depends on precise placement and steady linework. Request a centered template that the artist marks while you stand with usual posture so the design aligns with your waist. A common error is undersized mandalas that lose detail as skin stretches. For show-off looks wear low-rise pants or crop tops and remove tight belts for the first two weeks while the area settles.
13. Paw Print Wreath on the Lateral Hip
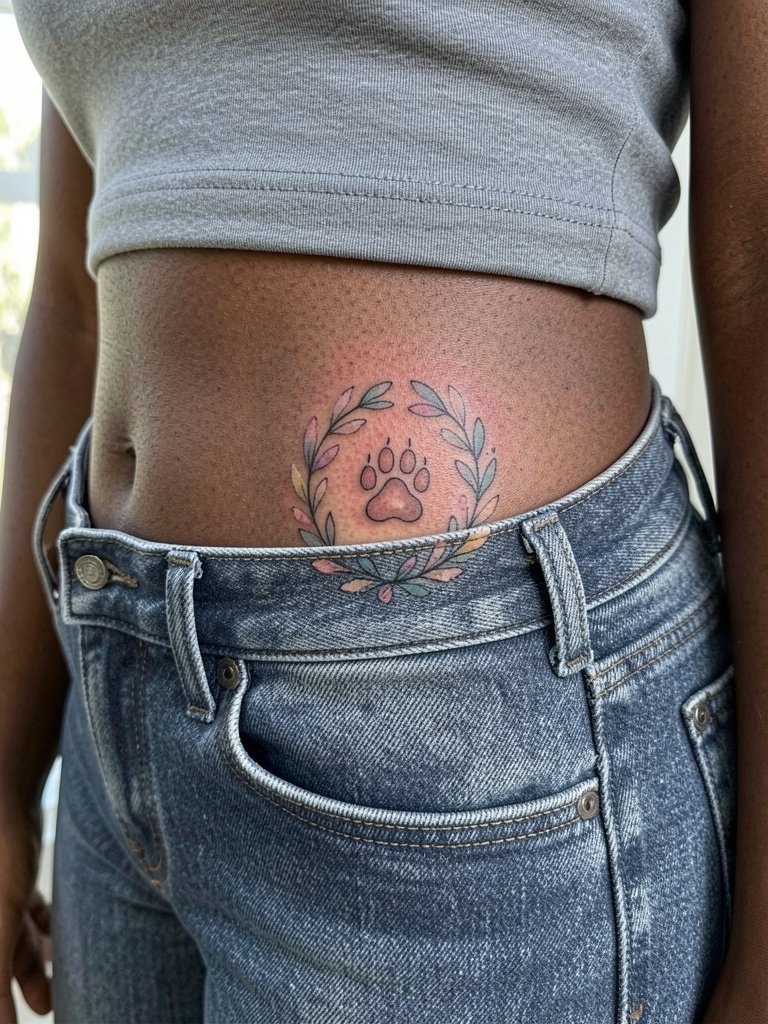
Hip wreaths can be intimate and cute. Ask the artist to map how the wreath will look when you sit and when you stand, because hip curvature changes the silhouette. The usual mistake is clustering too many tiny flowers in a rigid circle. Flowy skirts or high-waisted shorts pair nicely. For the appointment low-rise jeans that are easy to roll down slightly without tugging are best.
14. Abstract Drip Nape Piece
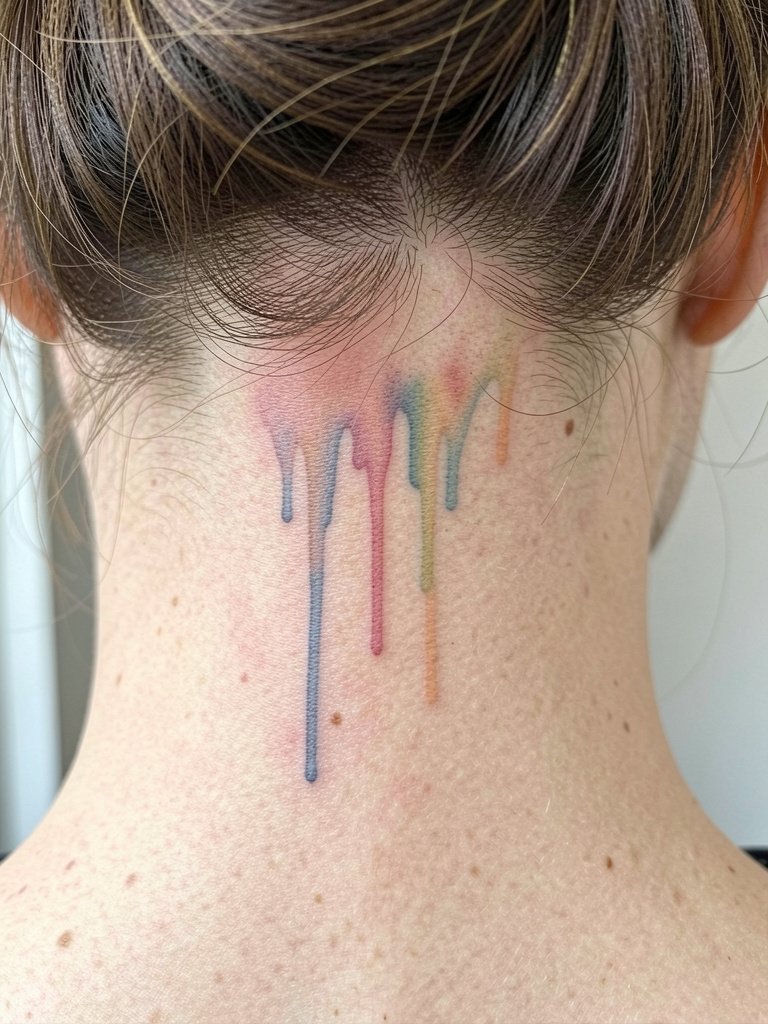
Nape placements are subtle when hidden by hair and bold when revealed. Specify exactly how low you want the design to sit relative to your hairline. Common errors include placing the drip too close to roots where hair growth obscures detail. Pain is low to moderate. Updos make this one visible for evenings out, and bring simple chokers for a framed look.
15. Micro Symbol Cluster Behind the Ear
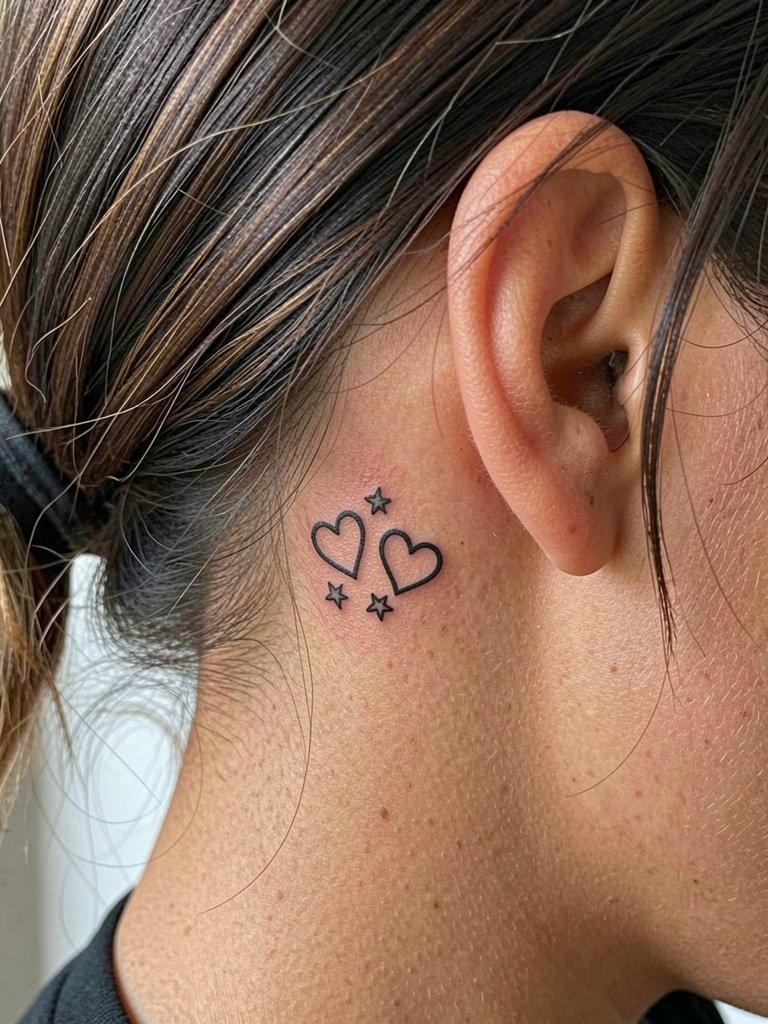
Tiny symbol clusters are low-commitment and fit behind the ear well. Ask the artist to space symbols slightly so each retains identity after a year. A common issue is cramming three marks into too tight a spot. Session time is minimal and pain is low. For photos, wear hair up and add a delicate ear cuff for asymmetry. Bring an open-back top or a shirt you can pull down slightly for access.
16. Stipple Shaded Floral on the Inner Thigh
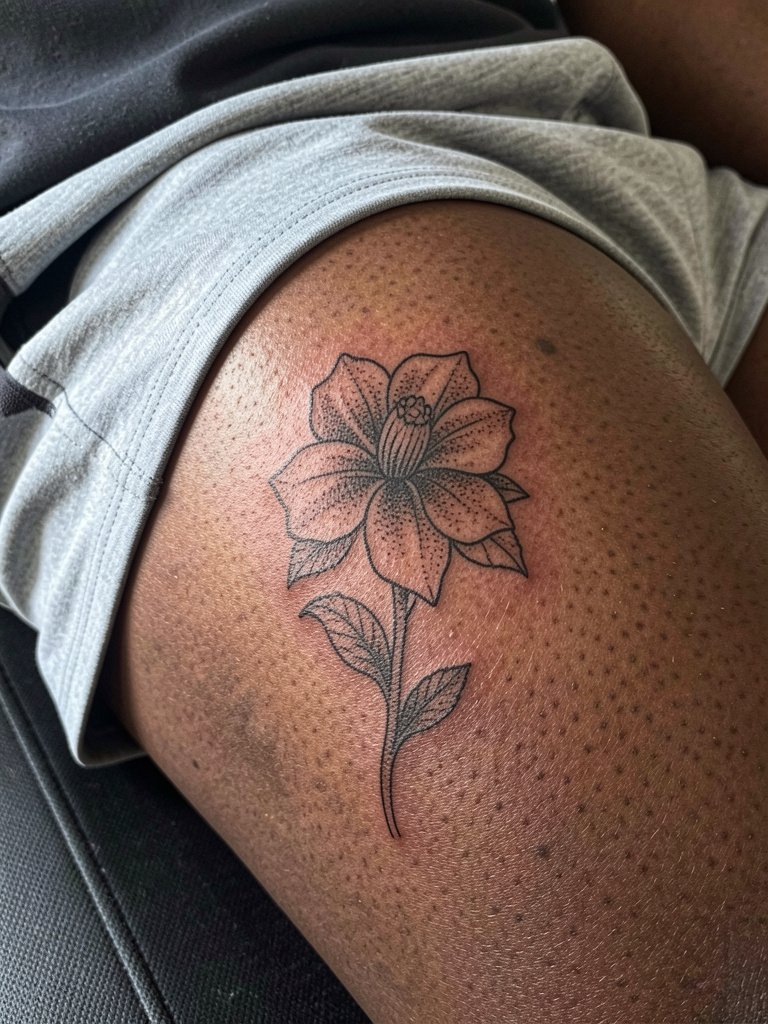
Stipple shading adds depth without heavy saturation. Recommend inner-thigh placement when you want a private, painterly piece. Discuss dot size and stipple density so the artist avoids dense stippling that may look muddy after healing. Inner-thigh skin is forgiving but stretches with weight change so plan placement carefully. Bring loose shorts to the session and expect to sit through a longer single session for dense stipple work.
17. Tiny Coordinates on the Lateral Wrist
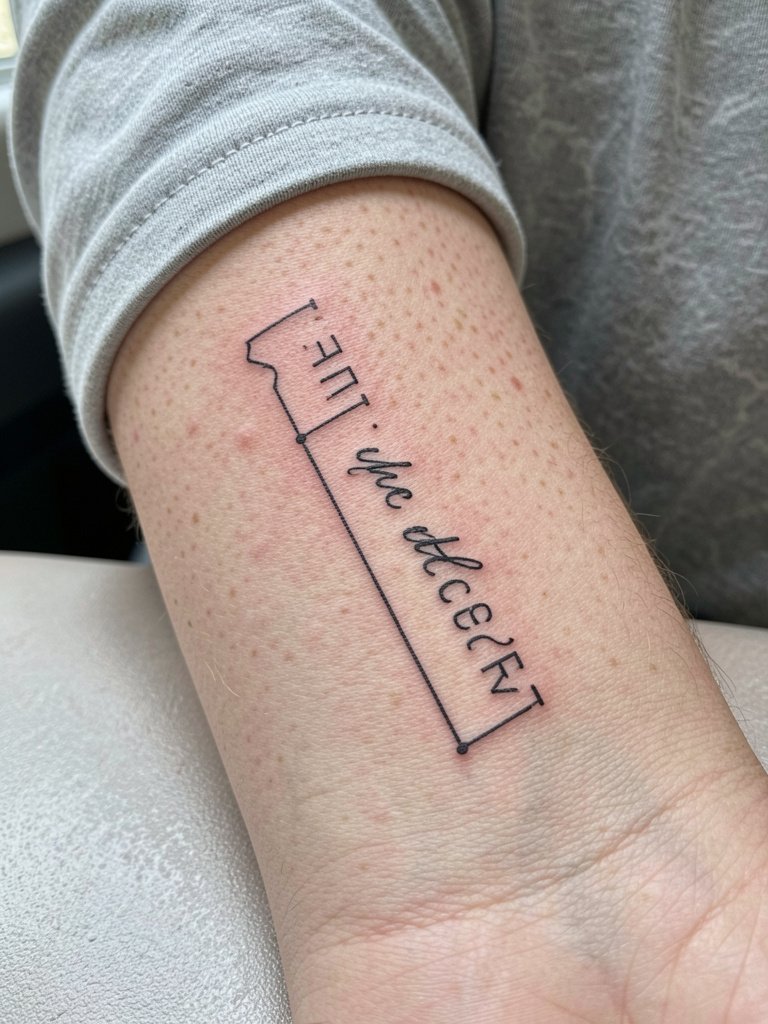
Coordinates feel personal and read well in a tiny linear layout. Give the artist the exact numeric string you want in the consult so no transcription errors occur. Mistakes happen when letters or numbers are too small. This placement has high visibility and modest pain. Pair with a thin chain bracelet on the same wrist and remove watches during the appointment for access.
18. Minimal Mountain Range on the Outer Forearm
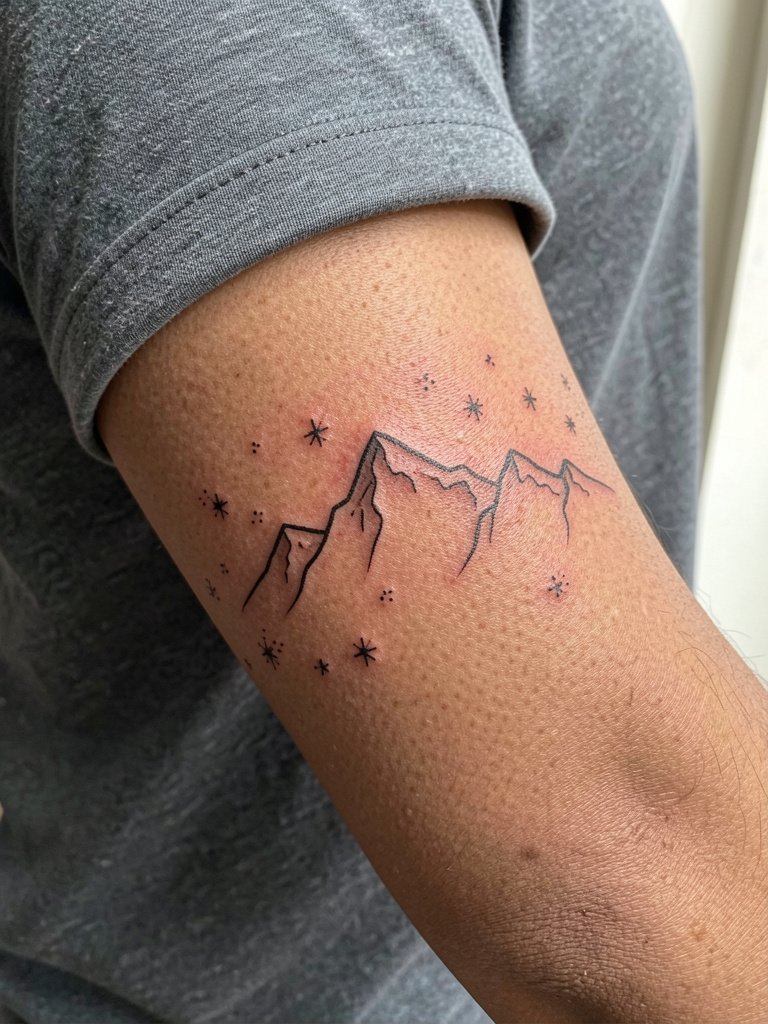
Geometric landscapes read best when scaled to the forearm width. Ask for mockups at different widths so peaks don't collapse into a bar over time. The common error is compressing a long scene into a tiny band. Session is short and pain low. Solid color tees frame the piece well.
19. Tiny Sun and Moon on the Collarbone
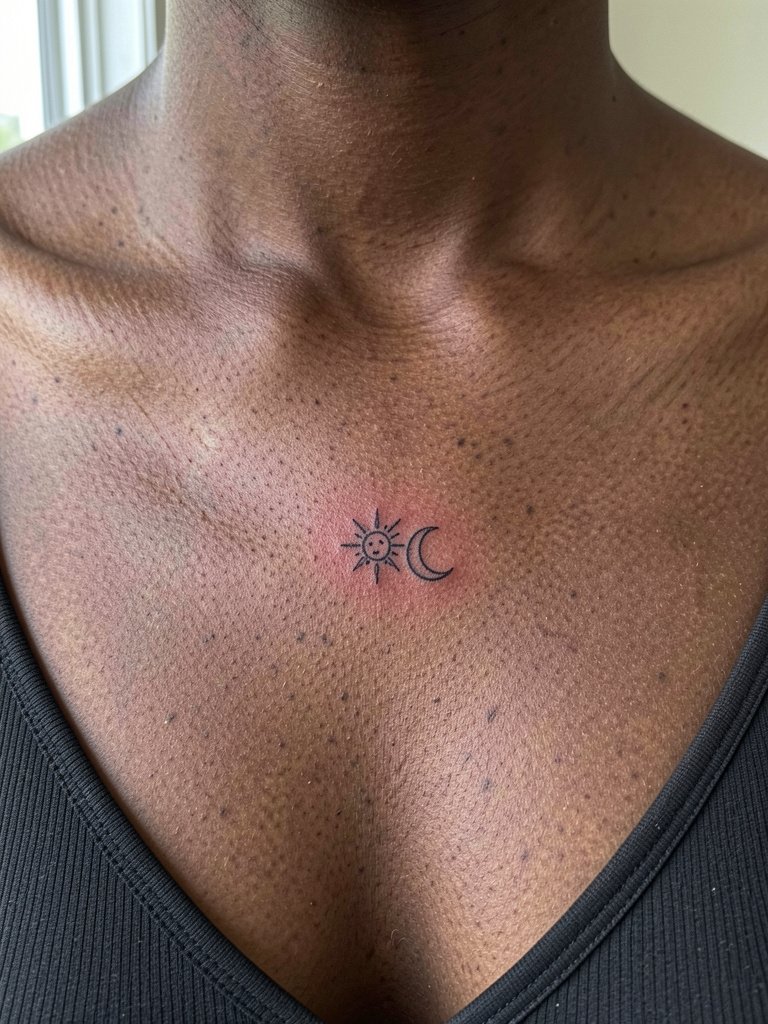
Celestial pairs are classics for shallow placements. Specify relative scale to the artist so the moon and sun retain identity as they age. Tiny flat punctuation-style marks can merge if placed too close. For session wear, choose a top you can easily expose or detach at the neckline. Soft pastel necklaces complement the gradient washes nearby.
20. Single-Line Animal Silhouette on the Ankle
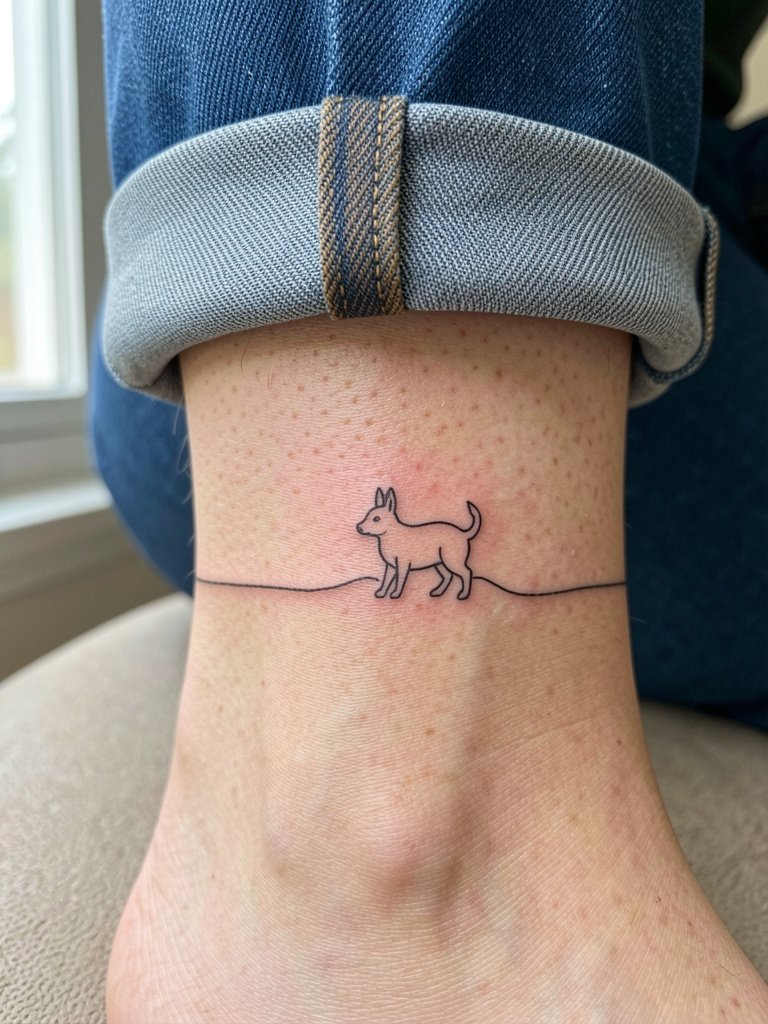
Ankle lines need slightly bolder strokes than the reference to survive daily socks and shoe friction. Tell the artist if you plan regular ankle jewelry so they can place the piece where bracelets or straps won't rub it raw. The typical mistake is making the line too thin for a high-friction zone. Roll-your-jeans styling shows it well and keeps the area easy to check during healing.
21. Fine Line Keyhole on the Sternum
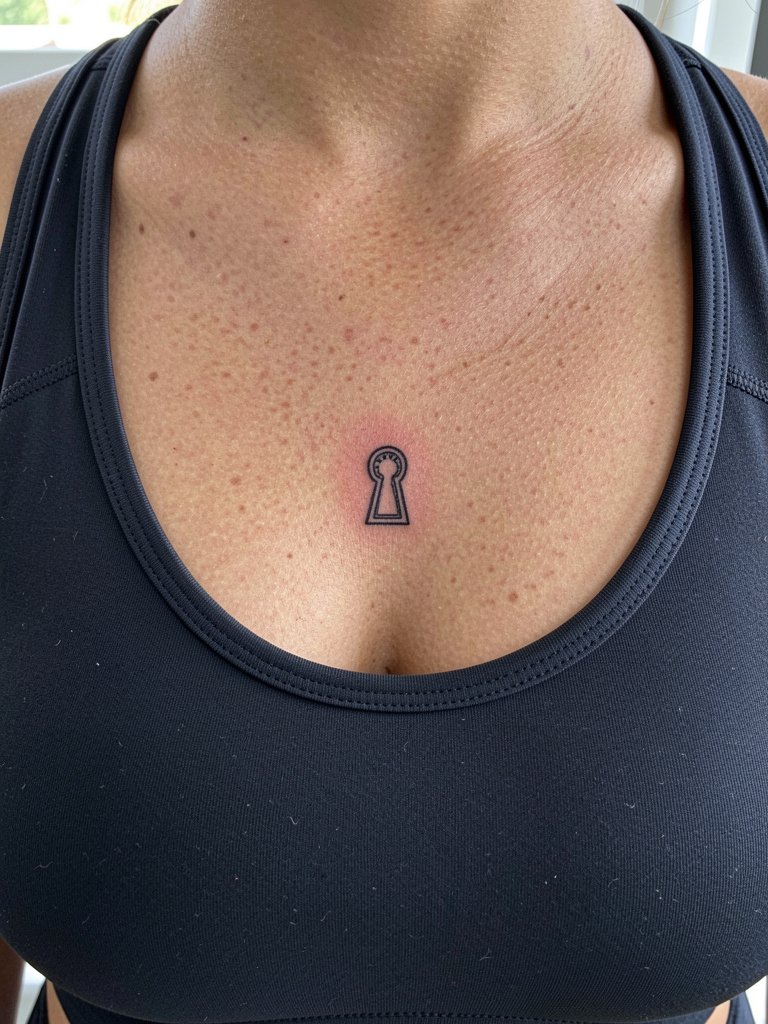
Sternum placements demand careful orientation and a specialized hand because the area sees stretching and movement. Request healed photos of sternum work from the artist. A common error is placing intricate filigree too close to the breasts where skin moves and detail blurs. Wear a fitted sports bra that you can lift slightly without tugging the fabric for the session, and expect moderate pain.
22. Fine Line Wave on the Side Torso
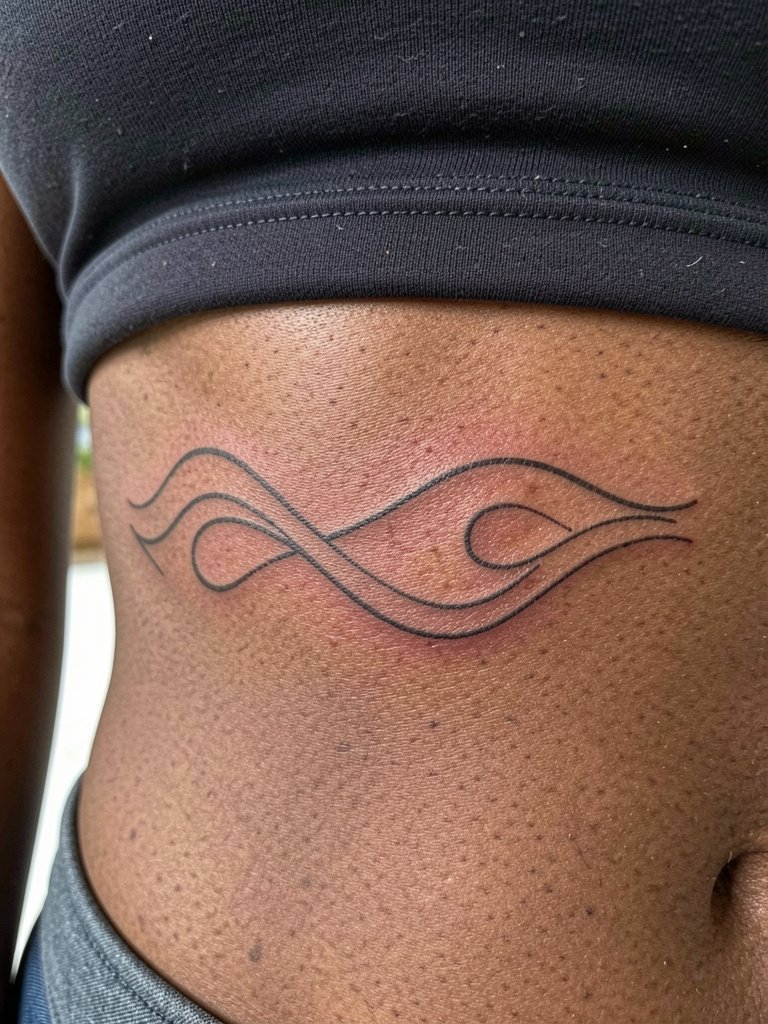
Side-torso waves look dramatic but need spacing to avoid future blurring. Describe exactly how you want the negative space to function so the artist can plan line spacing. Ribs are a high-movement area so expect greater chance of touch-up. Crop tops in dark colors highlight the contrast and protect against sun.
23. Tiny Anchor on the Wrist
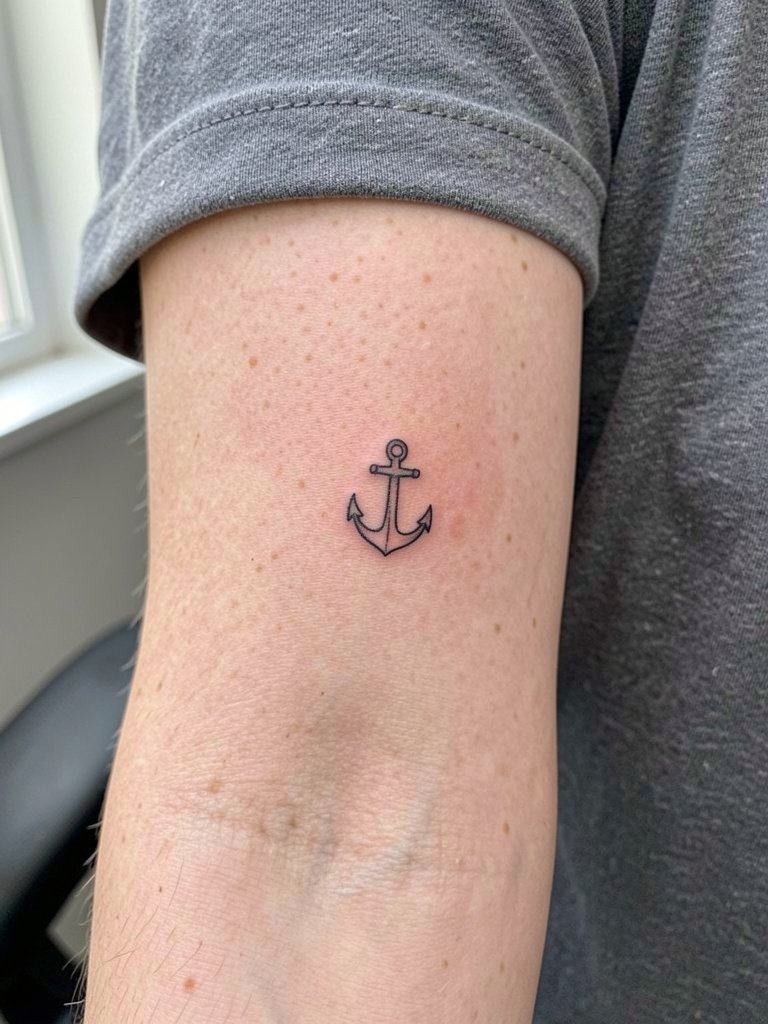
Tiny wrist anchors are low-commitment but need a slightly heavier line than one might expect. Ask for a mockup at life size so the anchor does not shrink into a smudge by year three. Watches should be removed during the session and rotated afterward to avoid persistent pressure on the fresh ink. Thin chain bracelets frame the piece well.
24. Fine Line Lotus on the Lower Back
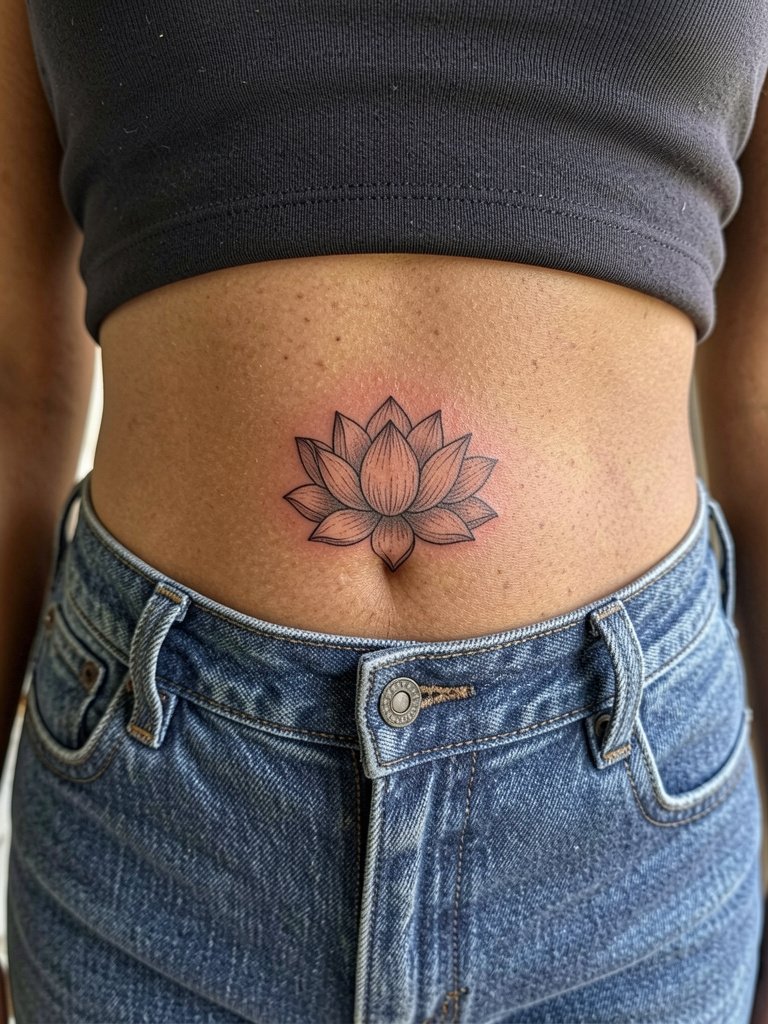
Lotus motifs have spiritual connotations so approach with respect for origin. Request simplified petals that can hold up if you sit often or wear belts. The lower back has a history of migration in some designs, so plan slightly bolder spacing. Low-rise pants and crop tops showcase the area and make aftercare access easier.
25. Micro Script on the Side Neck
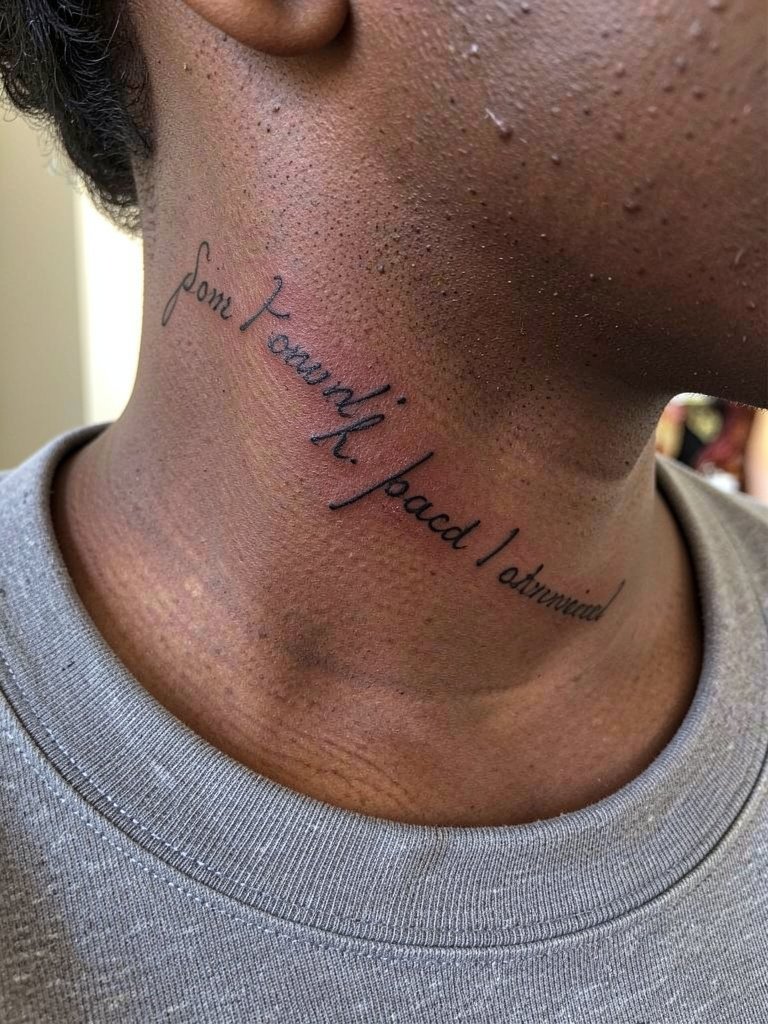
Neck script reads well when kept short and spaced. Tell the artist the exact word and font size so the letters do not blur together. The neck can be touchier to heal and may require more touch-ups. For sessions wear a top with a wide neckline that can be slipped on without rubbing the fresh ink. Delicate chokers work for styling once healed.
26. Small Compass on the Outer Thigh
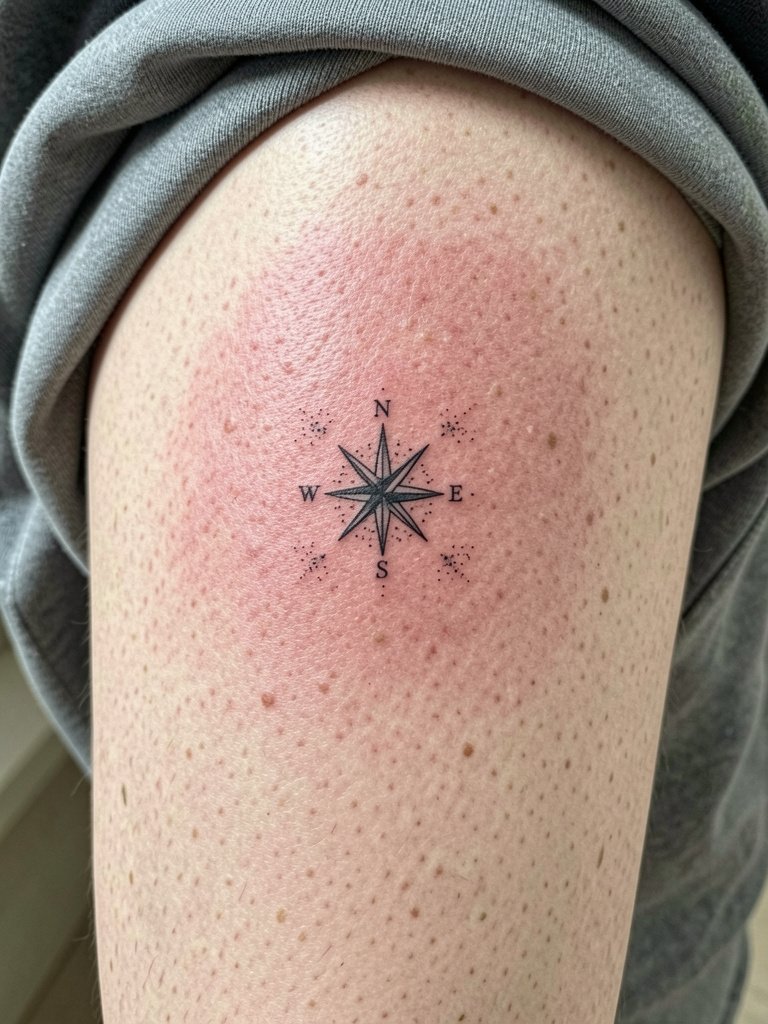
Thigh compasses are a great option when you want a symbolic piece with room for tiny detail. Discuss whether you want open negative-space cardinal points to preserve clarity long-term. Thigh skin is stable, but weight changes can alter proportion, so choose a placement closer to bone if you expect body shifts. High-waisted shorts pair well and keep sun off the area as it heals.
27. Geometric Chain Link on the Lateral Hip
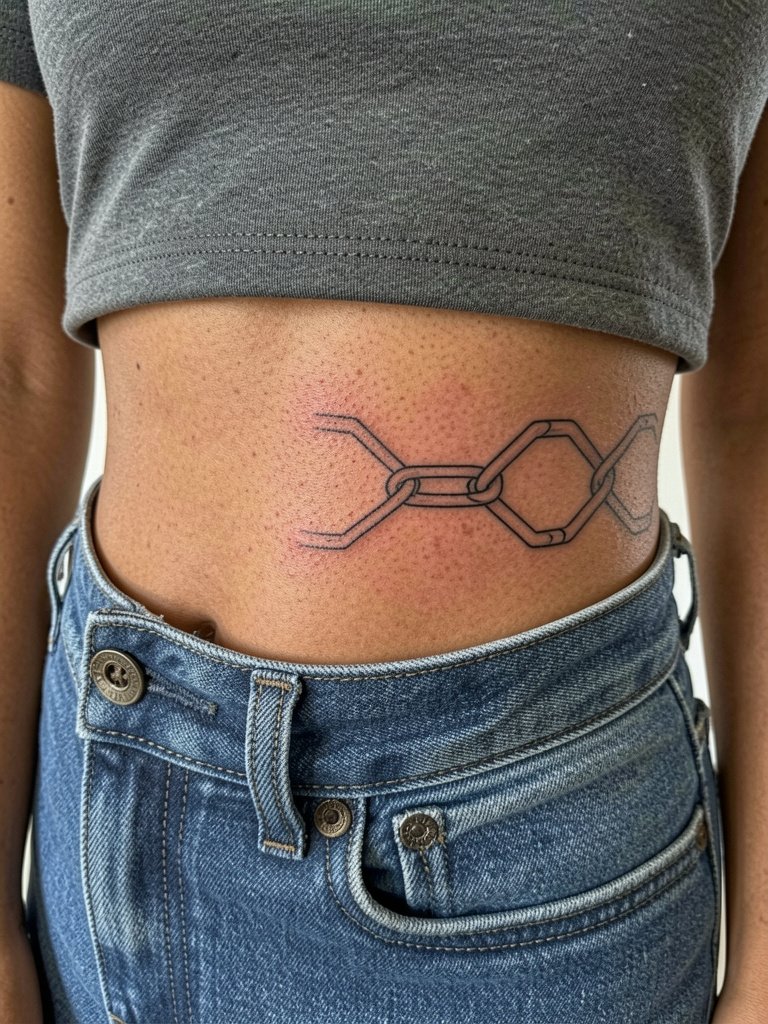
Geometric chains on the hip read modern when spaced so negative space becomes part of the pattern. Ask for a template placed while you stand naturally so the rhythm follows your body curve. Avoid tiny links that can smudge with movement. Flowy skirts or low-rise jeans show off the design. Bring easy shorts for the appointment.
28. Tiny Key on the Collarbone
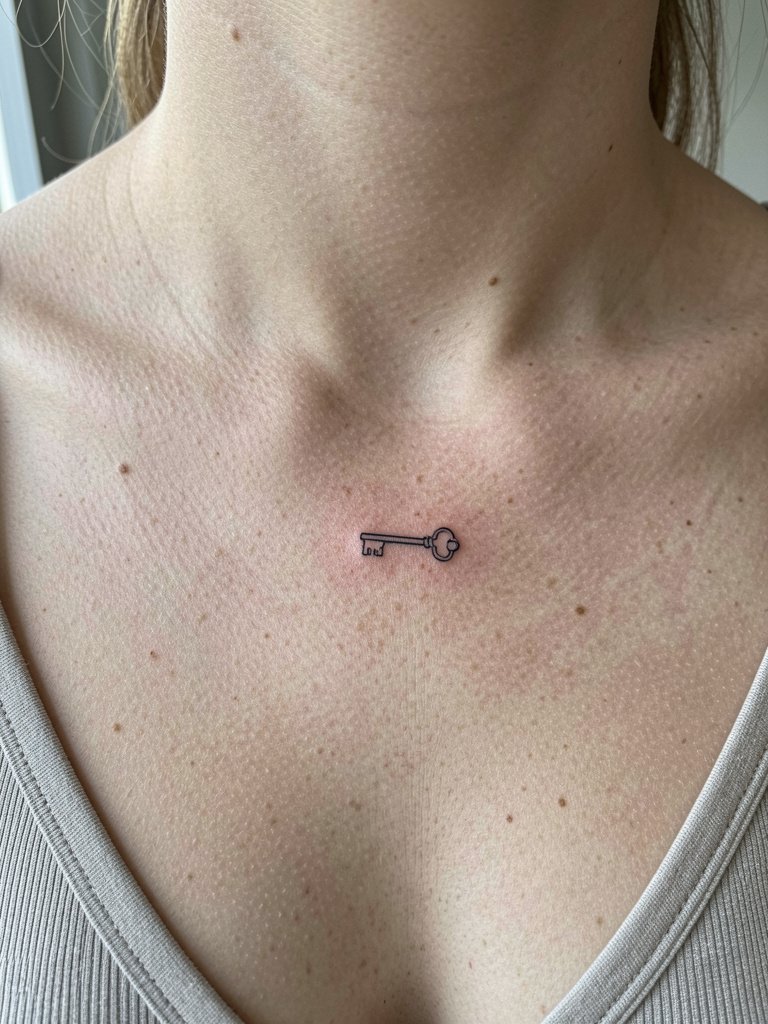
A tiny ornamental key is a neat, private symbol for the chest. Specify scale and orientation to avoid a design that looks like a smudge in photos. Strap tops or open-neck blouses show it nicely. For the session wear a top you can easily remove or lift without pulling at the collarbone.
29. Fine Line Bird in Flight on the Upper Back
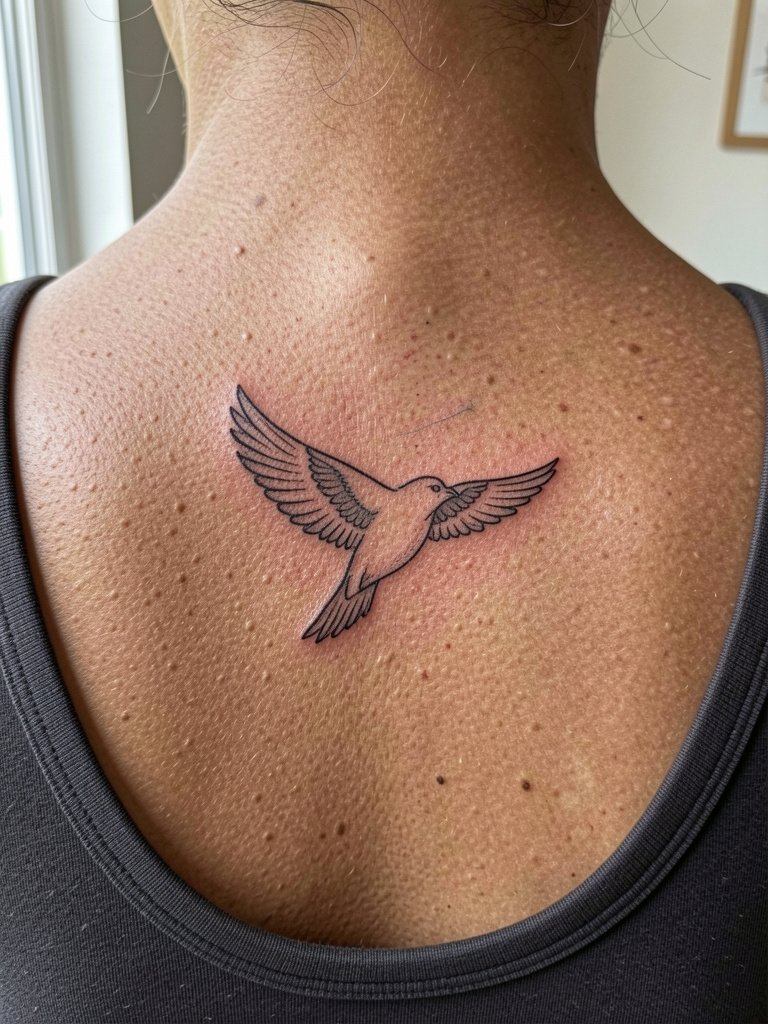
Upper-back birds are subtle and frame well with everyday necklines. Ask the artist to show how the wing tips will read at arm reach so you avoid overly fine feather detail that loses shape. The area is low-friction so healing is straightforward. For the session bring a top you can drop down without tugging the shoulders and minimal jewelry.
Frequently Asked Questions
Q: How long do Korean-style fine line tattoos usually last before needing a touch-up?
A: It depends on placement and scale. Hairline single-needle work on high-friction spots like the wrist, fingers, or ribcage often needs a touch-up around year two. Pieces on forearms, upper back, or outer thighs usually hold longer. Plan on a realistic touch-up timeline of one to three years for most micro designs.
Q: I'm darker-skinned, will pastel watercolour washes show up?
A: Pastels can read softly on darker skin but they require deeper saturation and careful contrast. A common practical approach is to use black linework for the core motif and reserve pastels for small accents. Ask for healed photos on similar skin tones during the consult to set realistic expectations.
Q: How do I find artists who do Korean fine line if I do not want to name specific people?
A: Search style-specific hashtags on social platforms and filter by location. Try tags like #koreantattoo, #finelinetattoo, and #koreanstyleink, and use location filters on Instagram and TikTok to narrow to studios near you. Tattoodo and other tattoo directories let you search by keyword and often show healed portfolio shots. Reddit threads in r/tattoos and r/finelinetattoos also surface peer recommendations and healed examples.
Q: Are micro tattoos worth the cost now that prices have risen?
A: Prices rose because artists are pricing time and the precision required for single-needle work. Budget realistically in the mid-hundreds for quality fine line work. Cheaper walk-ins can be tempting but they sometimes cut corners on depth and spacing, which is the main reason small tattoos blur.
Q: What should I wear to a session for forearm or thigh work?
A: Wear clothing that gives the artist unobstructed access without rubbing the area afterward. For inner forearm go with a rolled-cuff linen shirt. For inner thigh choose loose shorts that allow the artist to work and for you to sit comfortably during longer sessions.
Q: Are there any designs I should avoid because they age poorly?
A: Very tiny fonts and ultra-dense micro-detail in high-motion areas age worst. Designs that compress lots of thin strokes into a small footprint are the primary culprits. If you love fine detail pick a placement with flat, low-friction skin and request slightly heavier line weight or purposeful negative space.
Q: How can I tell a good portfolio from one that only shows fresh work?
A: Look for healed photos at multiple time points and images on real skin textures across different skin tones. Fresh work often has bright saturation and redness. Healed shots show settled linework and any natural fading. Peer forums and directory filters that sort for healed examples are helpful when you cannot name artists directly.
