
Coordinates tattoos can feel like a private bookmark on the body, but the tiny text you pick today might blur into a smudge later if you treat it like a lipstick-line detail. Slightly bolder type, a modest buffer of negative space, and placement that avoids high-friction areas all help coordinates age clearly. Below are practical, save-now designs with notes on how they heal, what to ask about during the stencil phase, and how to style them so the ink reads the way you want.
1. Fine-Line Coordinates on the Inner Wrist
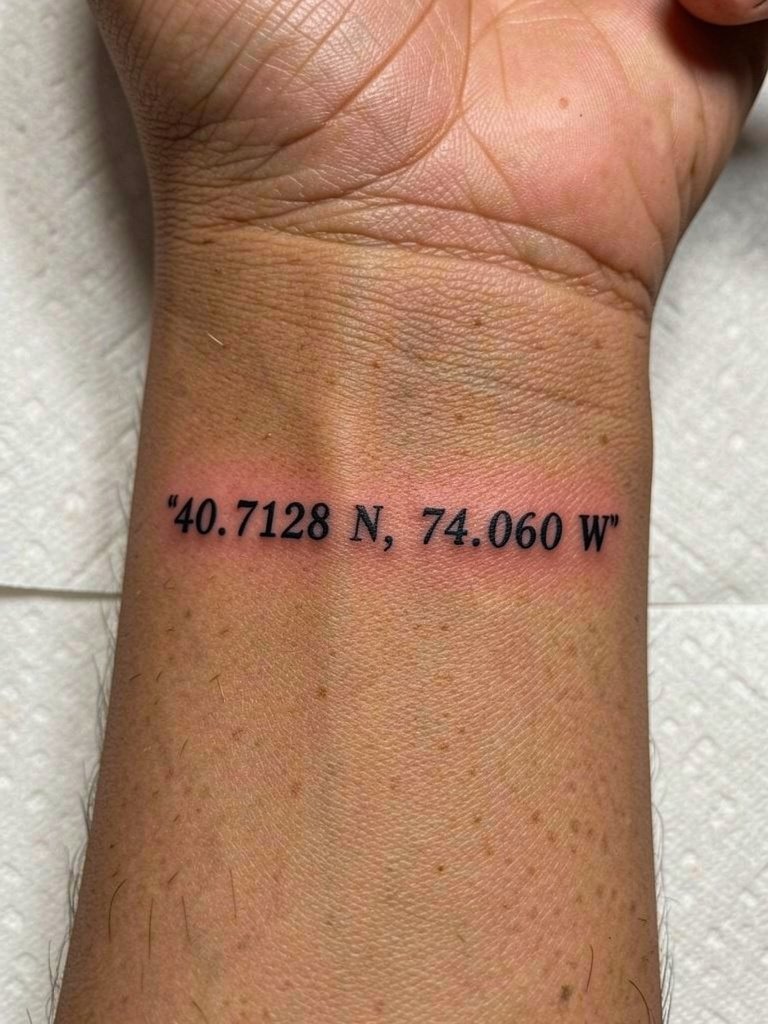
The inner wrist is classic for coordinates because it reads like a small label you can glance at. Fine-line monospace type works well at three to four centimeters across, and I recommend asking for letterspacing that leaves a hair of breathing room between numerals. Tiny script under two inches often softens into blurring by year three, especially on active wrists. Plan for a touch-up at the 12 to 18 month mark if you want the digits crisp long term. For the session wear, pick a short-sleeve tee that slips on easily so the artist can access the area without tugging. Pain is low to moderate because of thin skin over tendons, and the session usually runs 20 to 40 minutes.
2. Bold Monospace Coordinates on the Ribcage
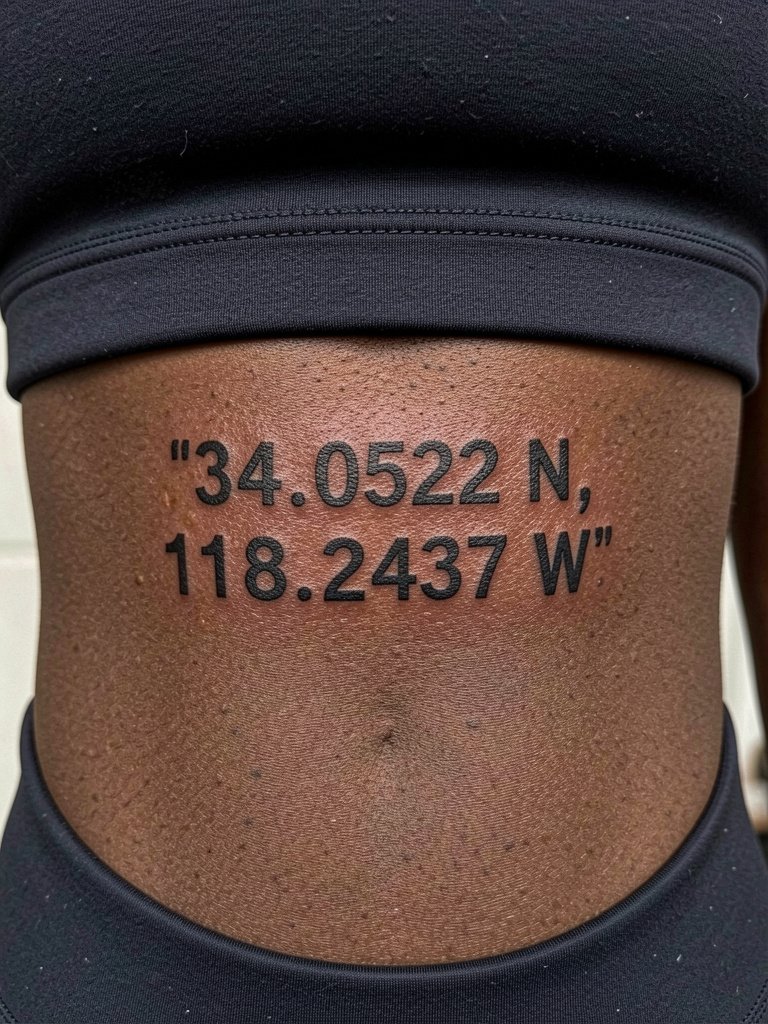
Ribcage coordinates photograph beautifully but the area is known for motion and stretching. Artists split into two camps on fine line ribs. One camp says fine-line on ribs blurs within two years because the skin stretches and the motion causes lines to feather. The other camp argues that slightly heavier spacing and disciplined needle depth let fine line settle fine, and they will show healed photos to support that. If you lean toward longevity, pick a modestly bolder type with small dot separators and ask for extra spacing between characters during the stencil check. Expect moderate to high pain and a longer session, around 60 to 90 minutes. For session comfort, wear a fitted sports bra or bandeau to allow access without fabric shifts.
3. Coordinates with Tiny Compass on the Ankle
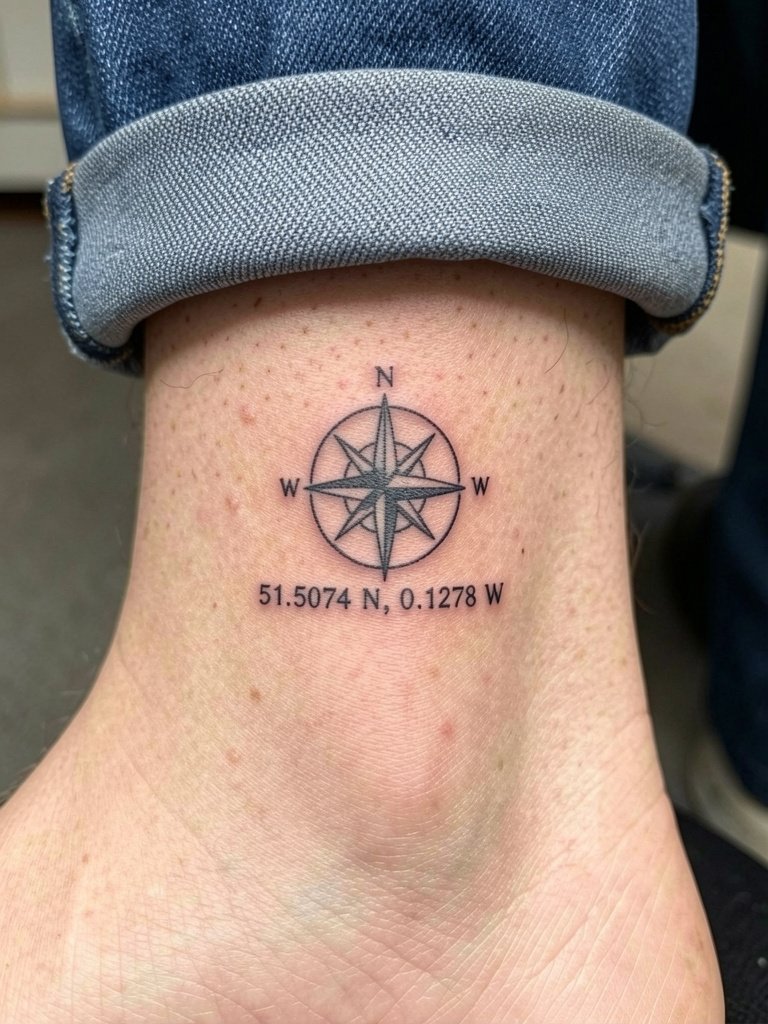
The ankle is exposed to constant friction from socks and shoes, so silhouettes outperform fiddly detail here. A tiny compass paired with coordinates does well when the compass is solid black with a micro negative-space center, rather than delicate filigree that can fill in. Ask the artist to preview the stencil while your foot is relaxed, because a slightly rotated ankle will change how the text reads on the curve. Healing tends to be fine if you avoid rubbing the area and keep footwear loose for the first week. Session time is short, around 30 to 45 minutes. For showing it off, cuffed jeans or cropped trousers frame the area nicely, and you can link a rolled cuff denim pant for outfit ideas.
4. Back-of-Neck Coordinates with Dot Work Band
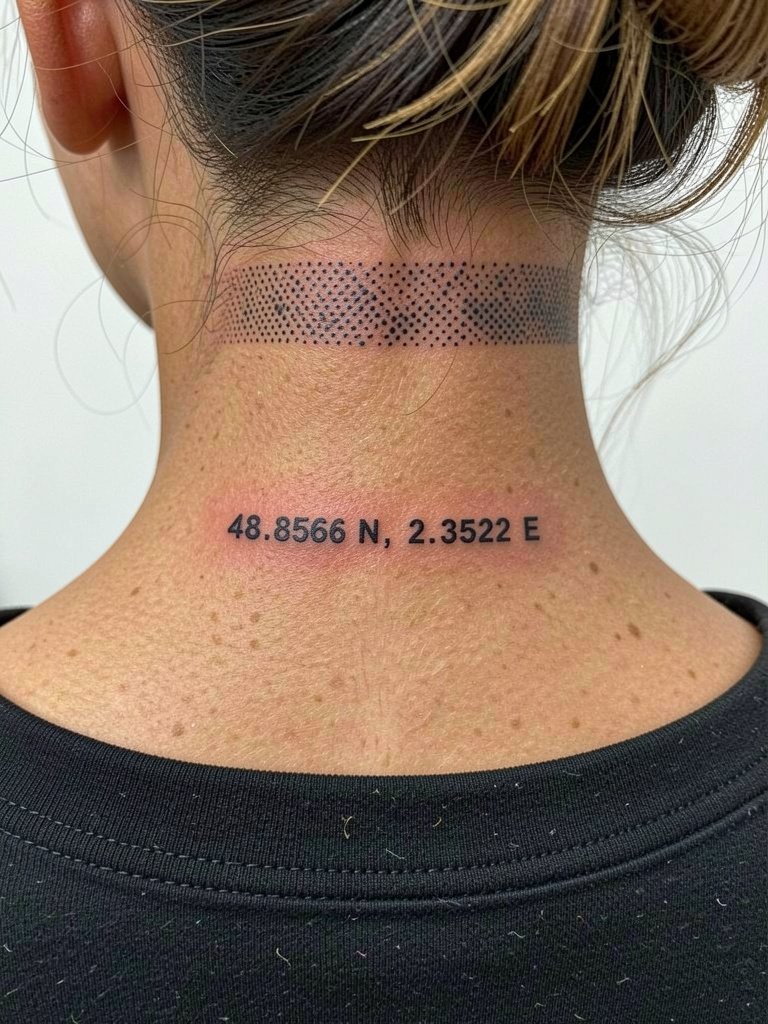
Back-of-neck coordinates read private when your hair is down and deliberate when it is up. The nape heals predictably if the dot work band is given room so stippling does not merge into the digits. A common mistake is to squeeze detailed dots too close to tiny numerals. During the stencil check, request the artist preview the distance between dot work and numbers at actual size. Pain is moderate and the session typically lasts 30 to 50 minutes. For daytime aesthetics, a scoop-neck or wide collar complements the placement, and a wide-neck linen tee is an easy piece to pair.
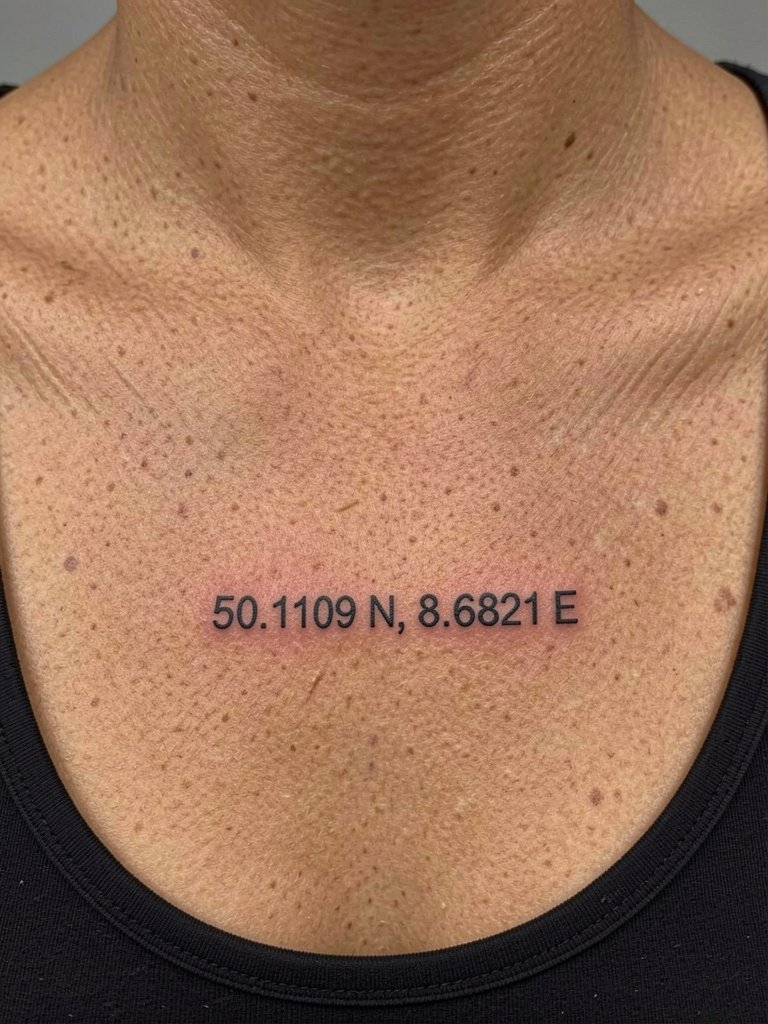
5. Collarbone Coordinates in Typewriter Font
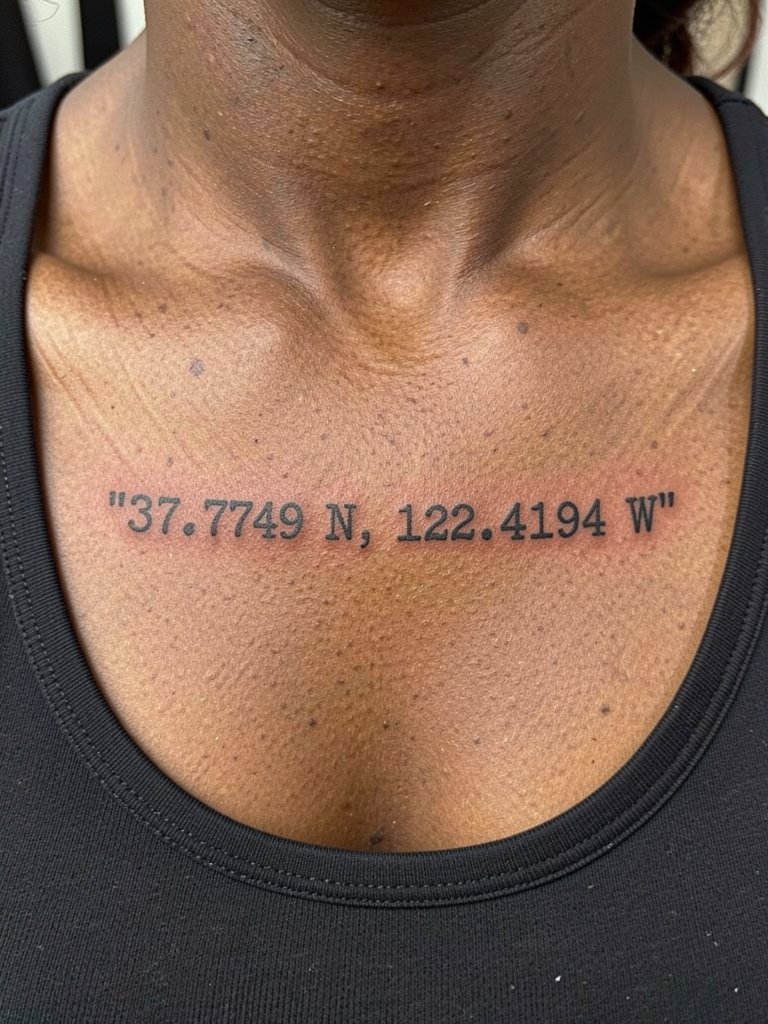
The collarbone gives coordinates a classic label look, and typewriter or monospace fonts keep numerals legible as they age. A common version that ages poorly is tight cursive hugging the bone. The better option is a slightly bolder monospaced stamp with consistent character height. During the consultation, ask for the stencil to sit exactly on the bone edge so the artist can adjust for curvature. Session time is often 30 to 60 minutes depending on length. For outfits that show the work, open-neck blouses and scoop-neck tanks pair well, so consider an open-front blouse for evenings out.
6. Tiny Coordinates Behind the Ear
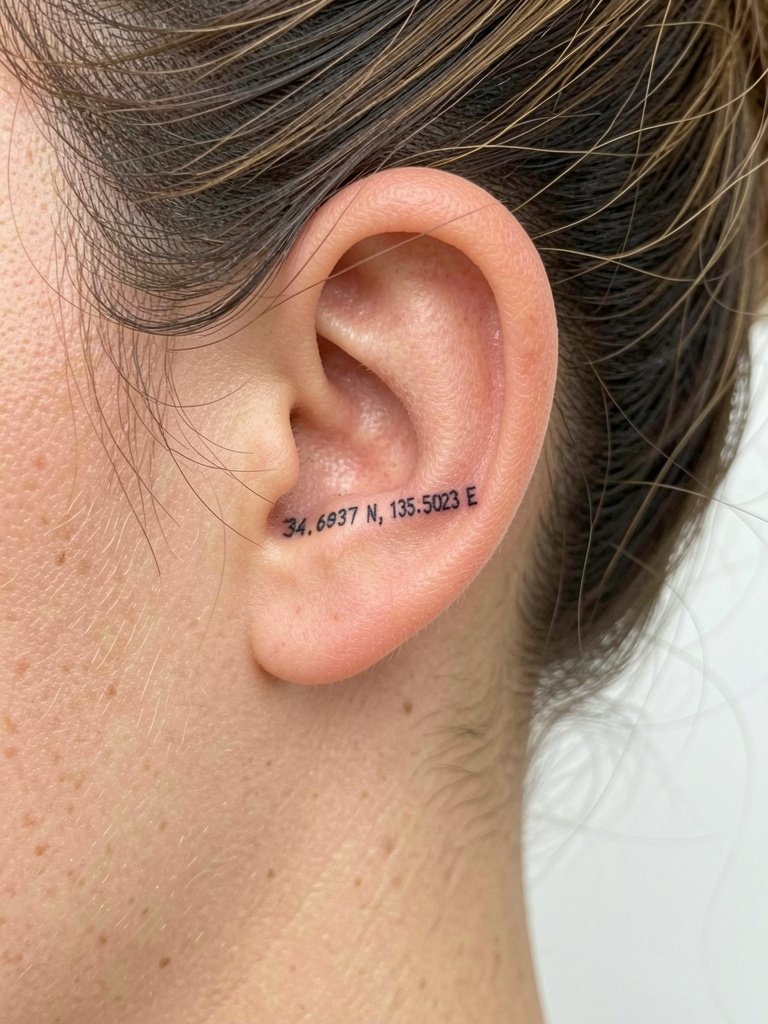
Behind-the-ear coordinates are extremely subtle and can weather faster than expected because of the skin's thinness. Ask the artist to show the exact size on the skin so you can confirm legibility at arm's length. A common mistake is requesting script that reads fine in a flat photo but loses character in the curve behind the ear. Pain is low to moderate and the session is brief. For post-session sleep comfort, opt for a soft pillowcase and avoid headphones that press directly over the area. Because this is a discreet spot, there are no sizing expectations when you want minimal visibility.
Heal Smart
These first six small placements have shared needs, from stencil checks to first-week protection.
-
Stencil transfer paper kit. Lets you preview the linework on skin before committing, especially helpful for wrist and behind-the-ear placements where scale is critical.
-
Topical numbing cream. Applied 30 to 45 minutes before eases sensitivity for ribcage and sternum sessions without blurring the stencil when used correctly.
-
Thin protective film roll. Keeps ankle and finger tattoos clean during the first week of friction from shoes and frequent hand washing.
-
Fragrance-free gentle body wash. Cleanses healing areas without irritation, good for collarbone and chest placements after the initial scab phase.
-
Healing ointment balm. Thin application in the first days locks in moisture for fine-line work without clogging the needle channels.
7. Stacked Coordinates on the Side Rib with Negative Space
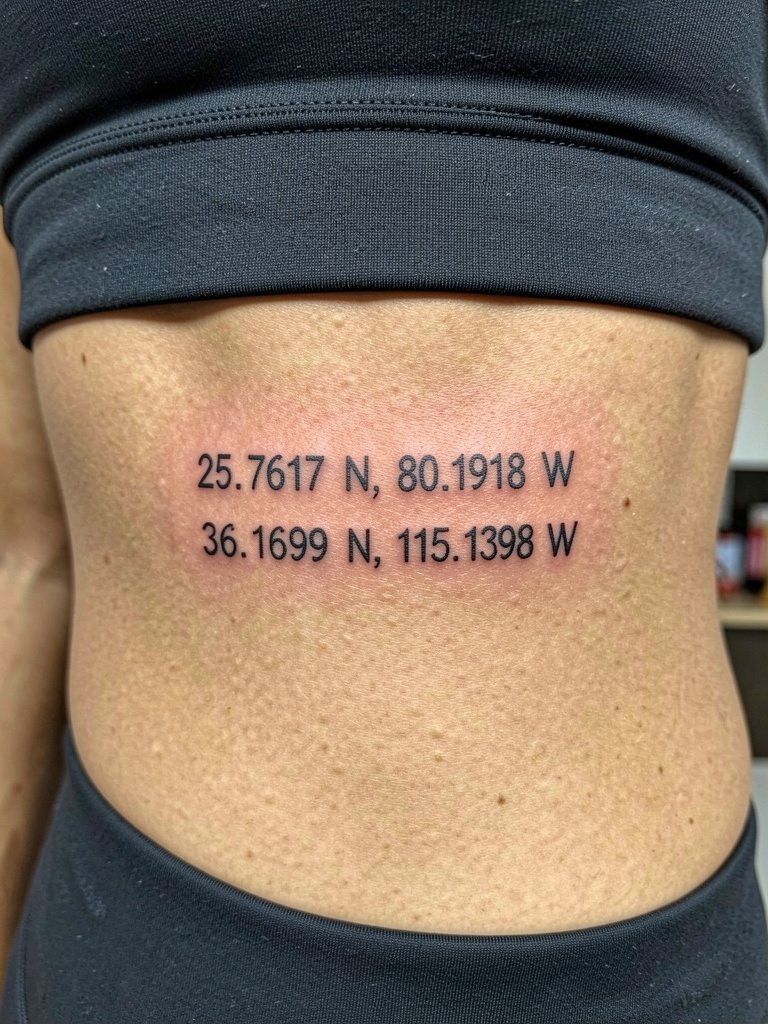
Stacking coordinates can read intentional and map-like if you leave a clear vertical buffer. The aging risk on ribs is that stacked numerals can blur into a block if spacing is too tight. A specific stencil request is to preview the stack at actual size and ask the artist to increase line gap by at least two millimeters. Pain runs high on the ribs, and sessions can span 60 to 120 minutes with breaks. For the appointment, wear a fitted top that exposes the side torso without requiring adjustments. Also remember that breathing alters how the stencil sits on the skin, so breathe naturally during the stencil placement.
8. Inner Forearm Linear Coordinates with Small Icon
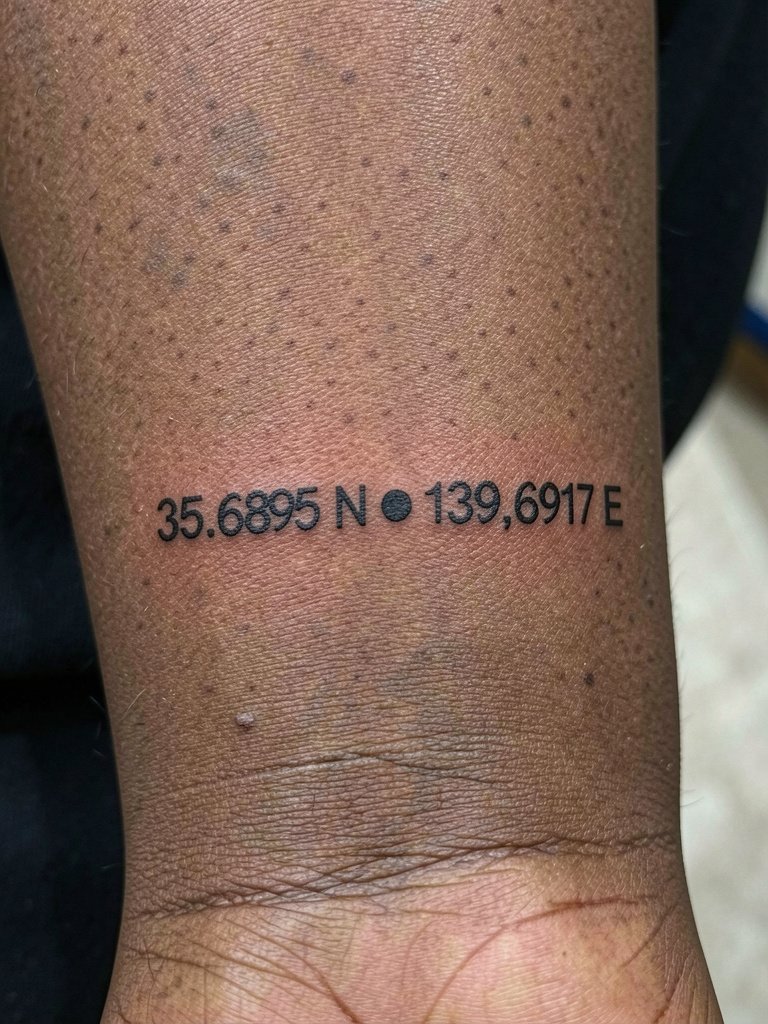
Inner forearm coordinates sit in a mid-visibility sweet spot and usually hold detail well because the skin is relatively stable. I recommend a small filled separator rather than a hyphen because that dot reads cleaner as numbers age. Ask the artist to preview the font at the exact wrist-to-elbow scale to see the weight. Sessions are typically 30 to 60 minutes. For show-off outfits, roll up sleeves or choose cropped linen shirts, and try a button-up linen shirt for a polished look.
9. Micro-Realism Coordinates with Tiny Wave on the Calf
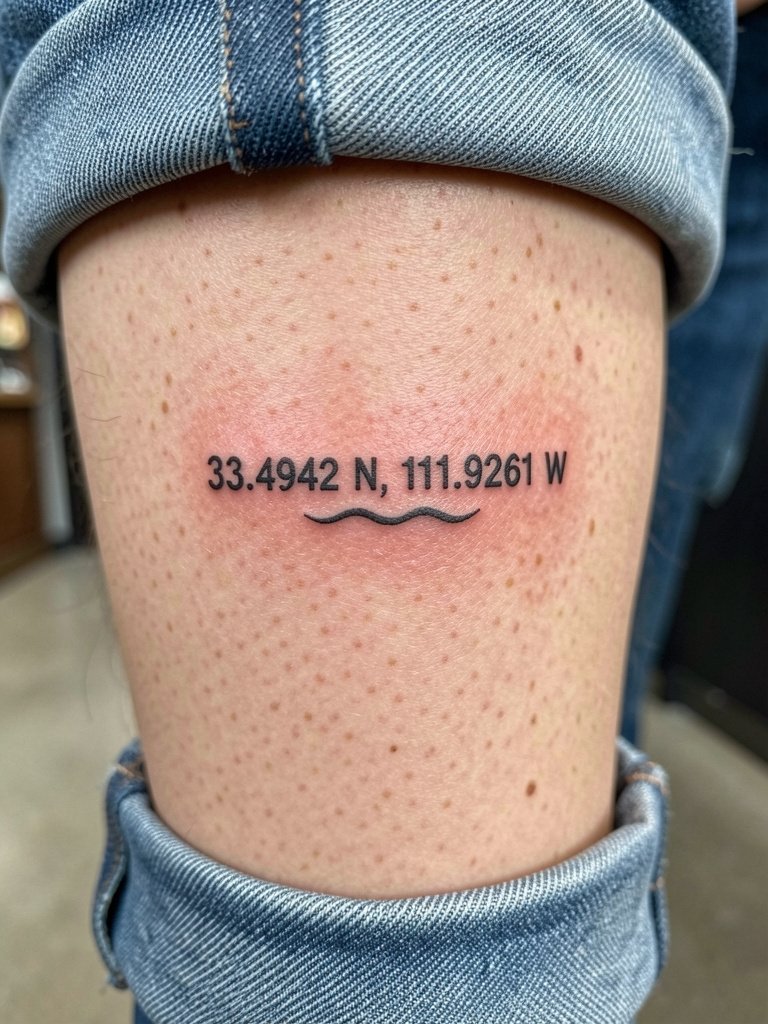
The calf is forgiving for length and detail, which makes it a strong spot for micro-realism additions like a tiny wave or skyline accent. A common mistake is to cram too many visual elements into a space meant for simple digits. During the consultation, bring two scale references so your artist can show you exactly how the wave and numbers will read at three and six inches. Expect moderate pain and a straightforward session of 45 to 90 minutes. For styling, cropped trousers or midi skirts work well to showcase a calf piece, try a cropped summer skirt.
10. Inner Thigh Coordinates in Clean Serif
Inner thigh coordinates feel intimate and private. Because the area encounters friction from clothing and movement, pick a font weight that will not wash out with scabbing and normal abrasion. A clean serif with slightly wider character spacing tends to hold up better than ultra-fine script. The session is moderate pain with a longer healing window, and the artist may recommend avoiding tight pants for two weeks. For session comfort, wear modest athletic shorts that you can sit in without tugging to expose the area during the appointment.
11. Horizontal Sternum Coordinates with Cue Markers

Sternum coordinates can be striking but the skin flex and breast movement complicate healing. Artists disagree on whether extra-fine script should be used here. One camp warns that fine line across the sternum can blur with normal chest movement and after two years may become indistinct. The other camp points out that with slightly heavier line weight and careful placement between natural creases, the work remains legible. If you want a piece that stays readable, ask for a modestly heavier type and preview how the design aligns with the contour of the chest. Pain is high on the sternum and sessions are longer. For appointment wear, choose a fitted sports bra that offers access without fabric shifts.
12. Outer Shoulder Coordinates with Minimal Map Pin
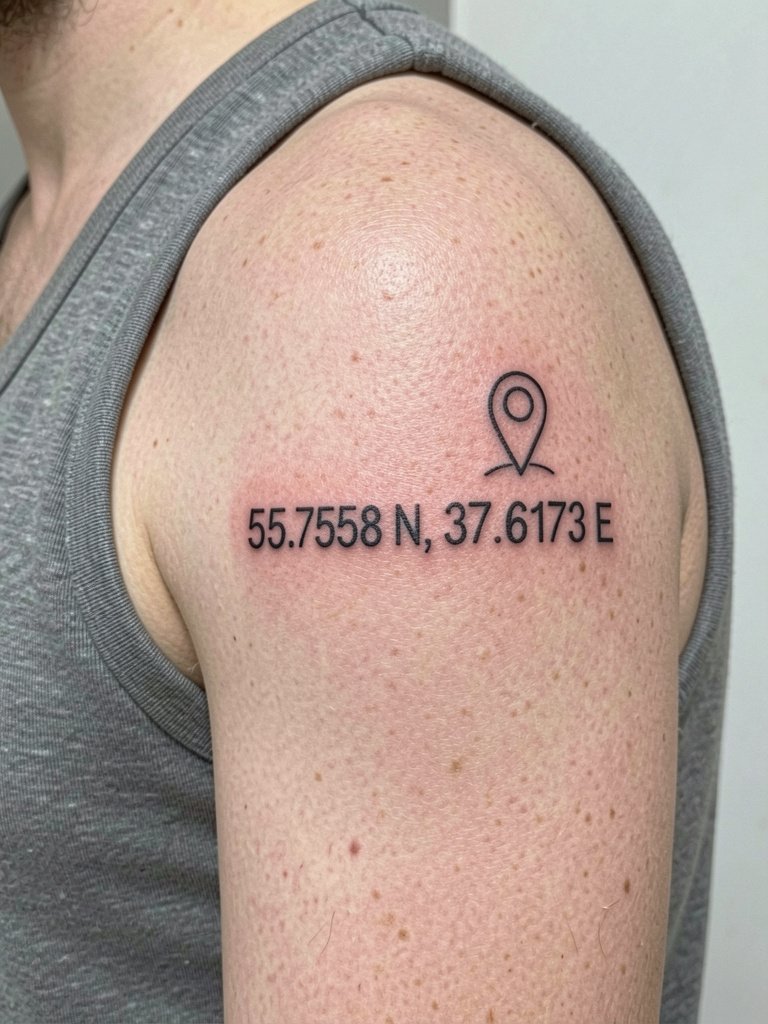
The outer shoulder tolerates more saturation and is forgiving on touch-ups. The map pin icon reads nicely when kept simplified and black. A common mistake is requesting a detailed pin with tiny interior lines that bleed together over time. During the stencil review, check how the pin looks from a few feet away so you know it will read on casual glances. Pain is low to moderate and sessions run 30 to 60 minutes. For show-off styling, sleeveless tops and summer dresses frame shoulder work. Consider an oversized linen tank for easy styling.
13. Rib-Wrap Coordinates in Script with Buffer
Wrapping coordinates around the ribs gives a cinematic feel but requires extra attention to spacing. The ribcage moves when you breathe so letterspacing should be previewed while sitting and breathing normally. If you insist on script, widen the spacing and consider a touch-up milestone at one year. Pain is high and sessions can be split into multiple sittings. For the appointment, wear a fitted top that stays put so the artist can adjust the stencil without fabric movement.
14. Tiny Roman Numeral Coordinates on the Finger

Finger placements are notoriously delicate because of constant washing and skin turnover. Some artists advise against single-needle work on fingers, while others accept the maintenance trade with the understanding that periodic touch-ups will be needed. If you choose the finger, request slightly thicker numerals and plan for a six- to twelve-month touch-up. Sessions are brief but painful, and healing requires gentle care. For daily wear, minimal jewelry avoids abrasion during the first month, and a lightweight ring can frame the numeral once healed. This placement reads best when you want visible but small notation.
15. Vertical Clavicle Coordinates with Single Dot Accent
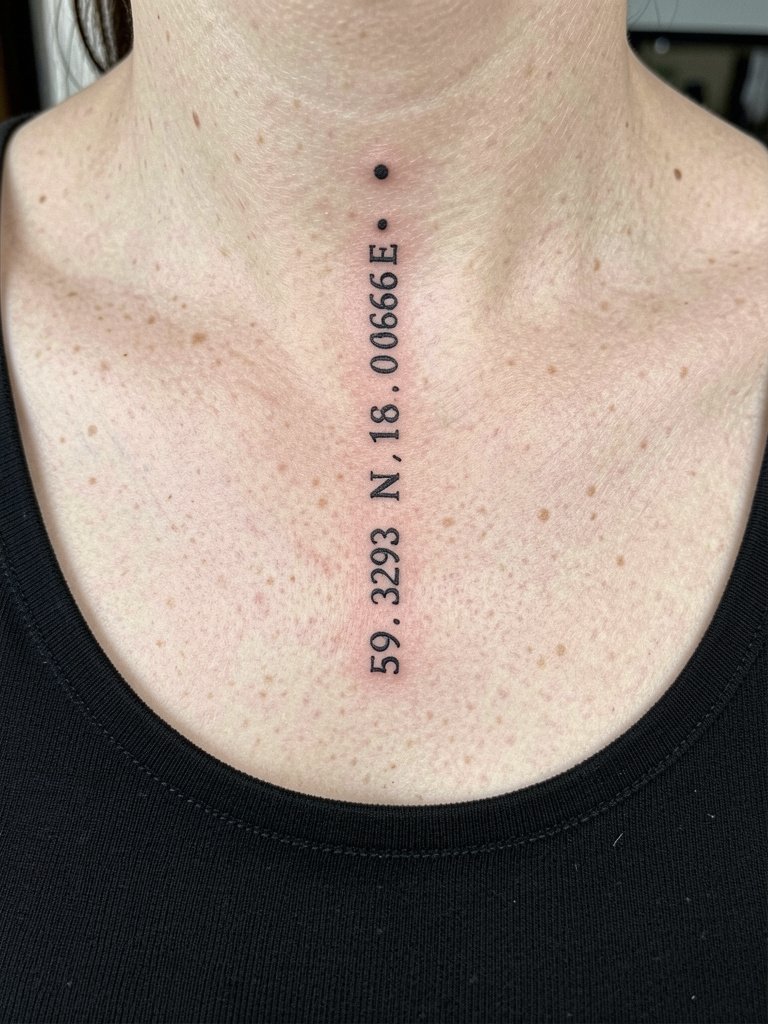
Vertical clavicle coordinates make a subtle statement without crowding the bone. The key is to allow a dot accent to float clear of the digits so stippling does not invade the numerals. A common mistake is placing accents too close, which speeds up the need for a touch-up. Expect moderate pain and a session around 30 to 45 minutes. For show-off outfits, scoop-neck tops or delicate necklaces that sit below the work help highlight the area. Try pairing with a dainty pendant necklace to balance the look.
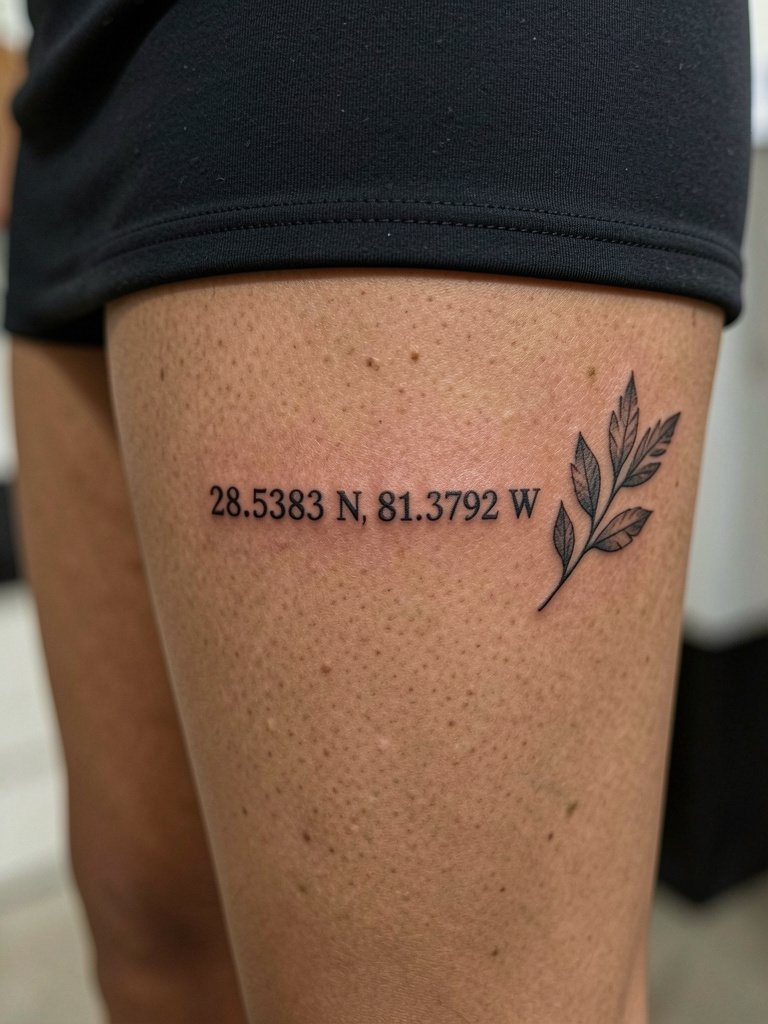
16. Inner Arm Vertical Coordinates with Small Leaf Motif
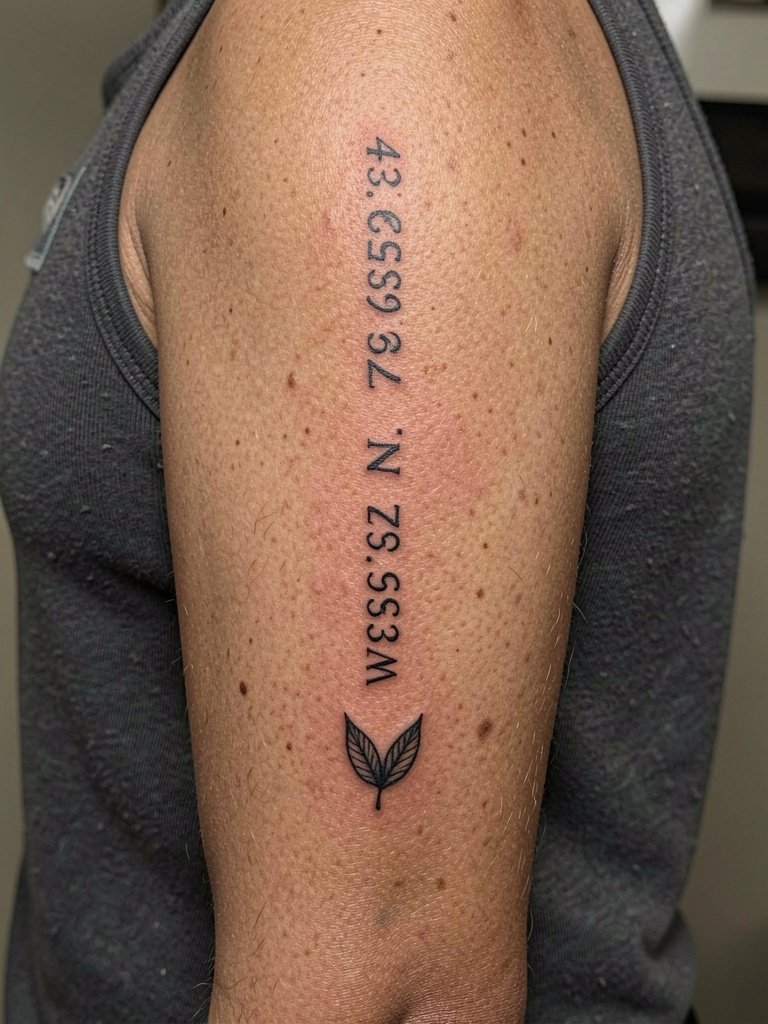
Inner arm placements let you keep coordinates private or reveal them by choice. Because the inner bicep can be prone to slight stretching, request the stencil be previewed with the arm relaxed at your side. A small leaf motif anchors the composition without crowding the numerals. Pain is moderate and the session is 40 to 70 minutes depending on length. For appointment comfort, wear a sleeveless top so the artist can work without fabric shifts, and plan to avoid heavy lifting for a few days after.
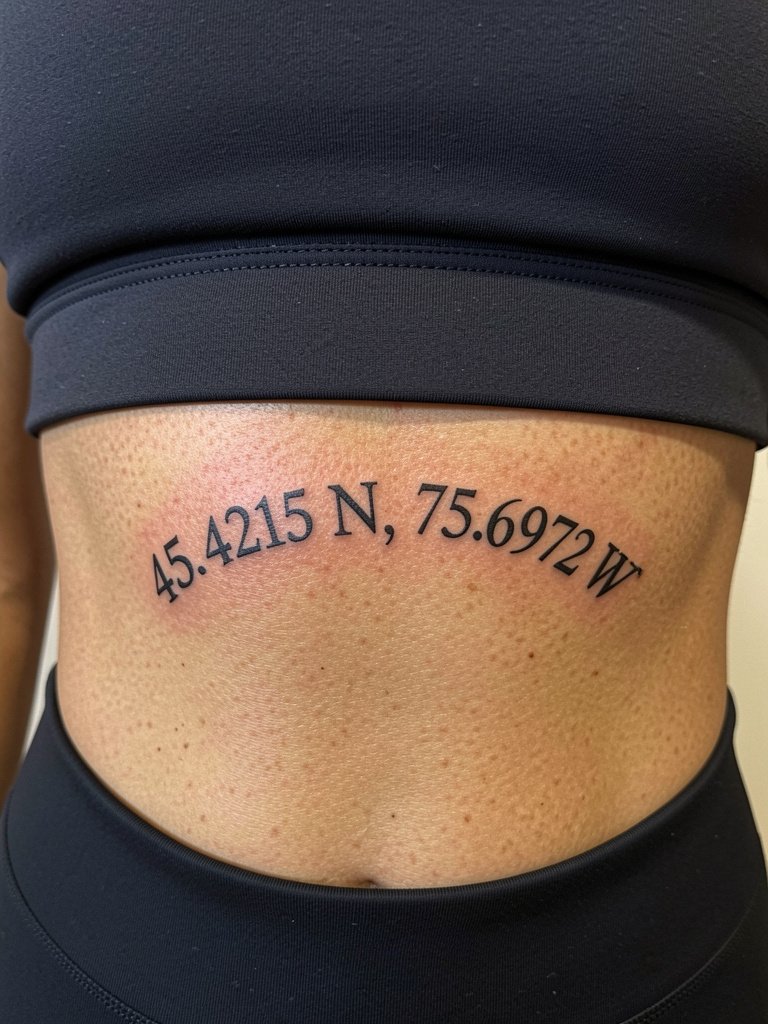
17. Small Latitude Only on the Side Hip
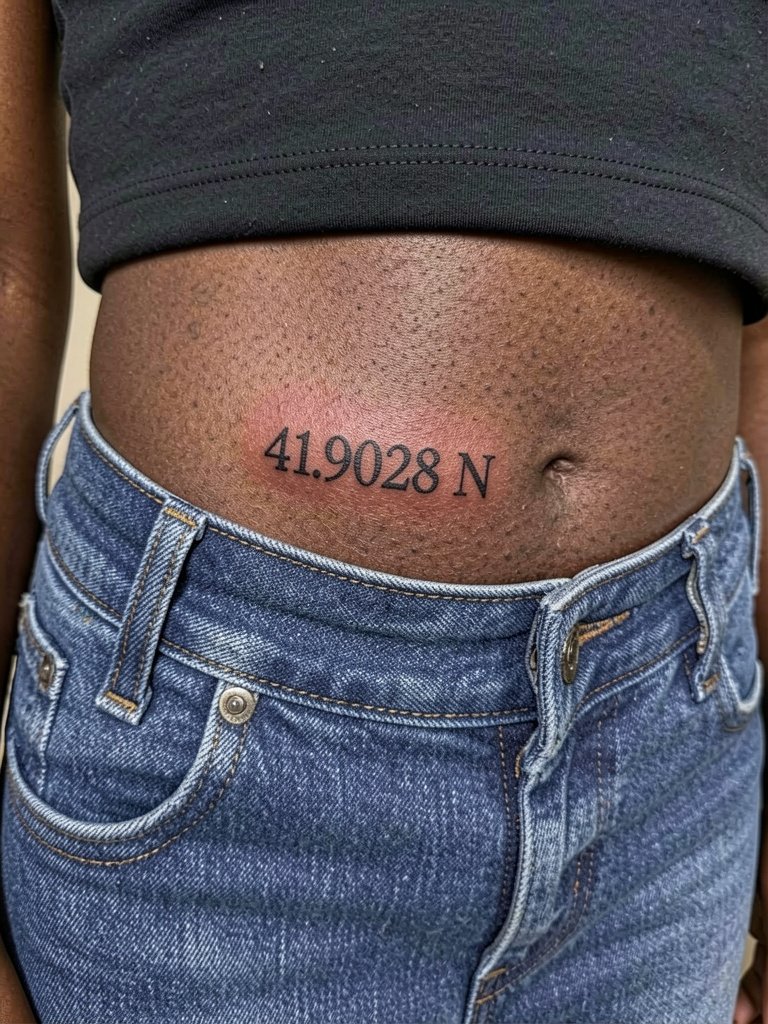
A single latitude on the hip reads private and elegant. The lateral hip experiences friction from waistbands, so position the numeral above where the waistband will sit to avoid chafing. A common mistake is placing the ink too close to the top of pants where rubbing accelerates fading. Expect moderate pain and a shorter session. For after-appointment comfort, wear low-rise, fully fastened jeans or loose skirts that do not press directly on the tattoo.
18. Ankle Ring of Coordinates Around the Ankle Bone
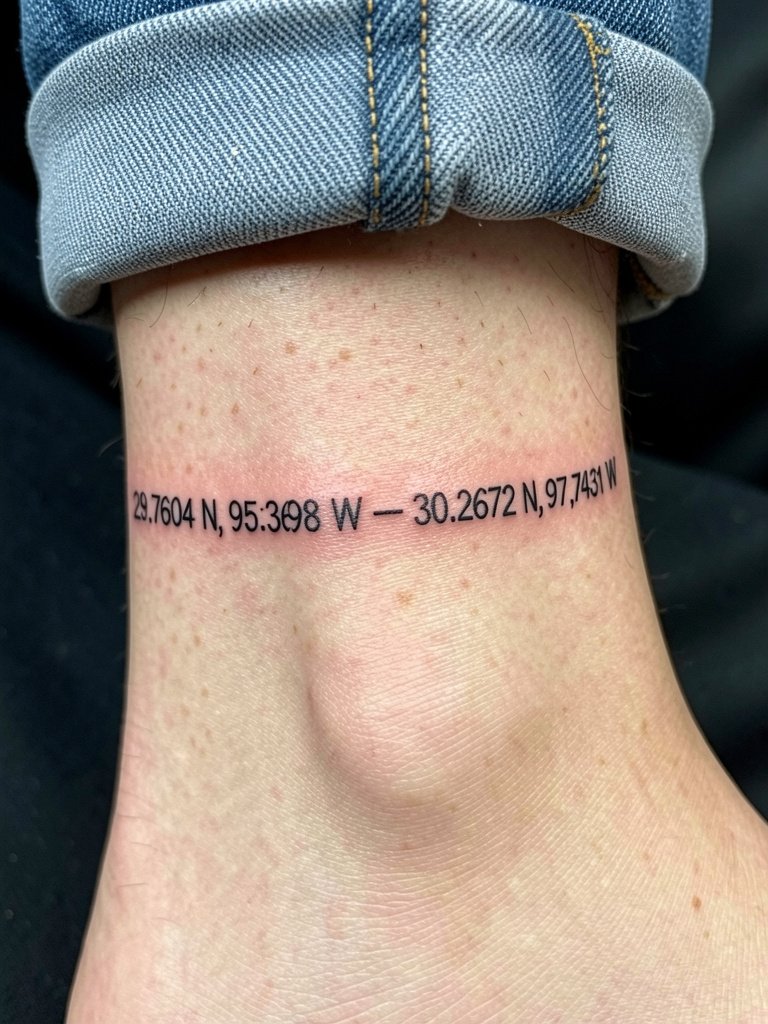
Anklet-style coordinates can be graphic and work well when the spacing prevents digits from merging. Because ankles face regular movement and footwear friction, keep the band narrow and bold enough to survive washes. During consultation, check the ring curvature while standing to ensure even spacing. Healing needs a bit of extra attention to avoid socks rubbing. Sessions vary 30 to 50 minutes. For footwear, low-cut loafers or sandals show the piece without constant rubbing, and cuffed jeans let the band peek out.
19. Inner Wrist Coordinates with Watercolor Accent
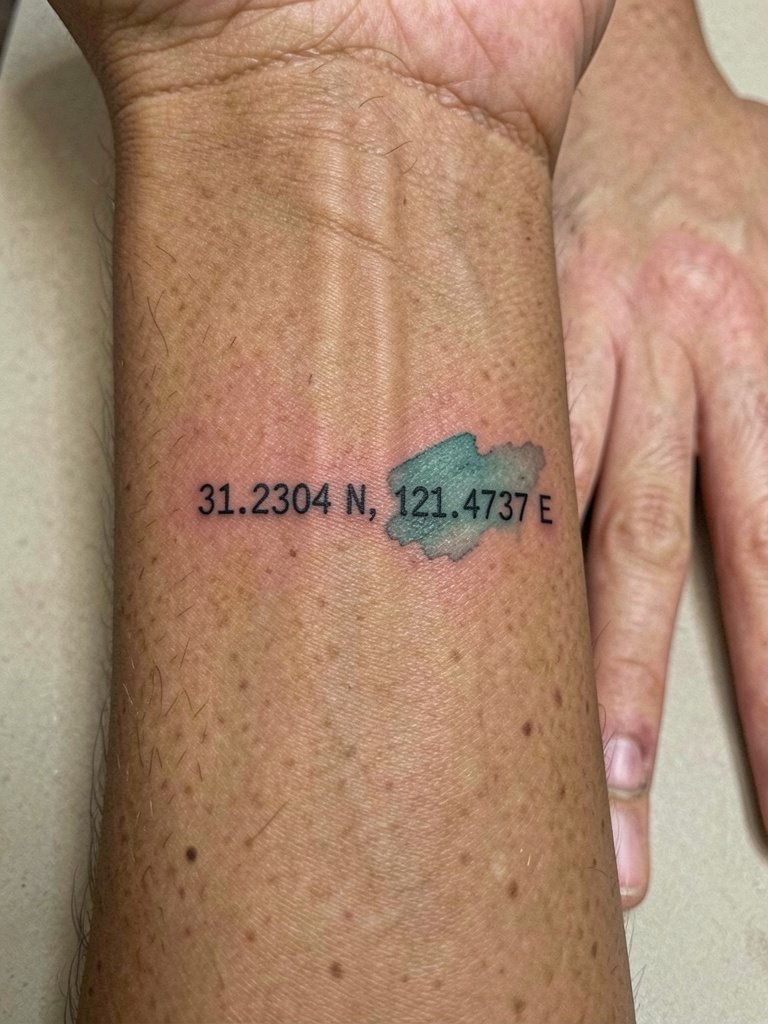
Watercolor behind coordinates creates a subtle highlight but carries risk because soft color can spread into thin numerals. If you want color, ask for a small reserved background area and slightly bolder numerals so the digits stay readable as the color softens. A touch-up at one year is common for mixed black-and-color micro pieces. Sessions are short to moderate and the wrist area heals over 2 to 4 weeks. For outfits, rolled sleeves and bracelets can frame the wash, and a simple cuff bracelet can complement the band.
20. Sternum Vertical Stack with Small Anchor
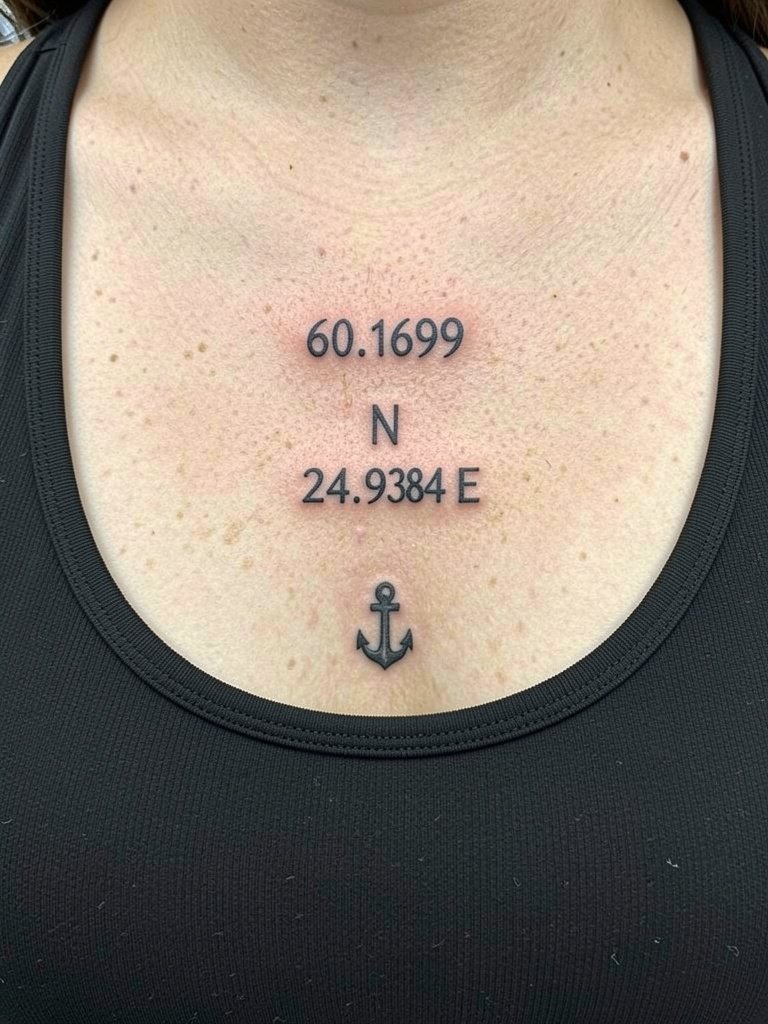
A vertical sternum stack with a small anchor reads balanced when aligned to the center. Because the chest moves, spacing and alignment are essential to prevent the stack from looking off-center after healing. A common mistake is assuming the midline is obvious; have the artist mark it while you stand naturally. Pain and session length are high, and expect the usual sternum aftercare. When styled, a bandeau or open-front shirt can show the modern vertical layout.
21. Collarbone Pair: Coordinates and Tiny Star
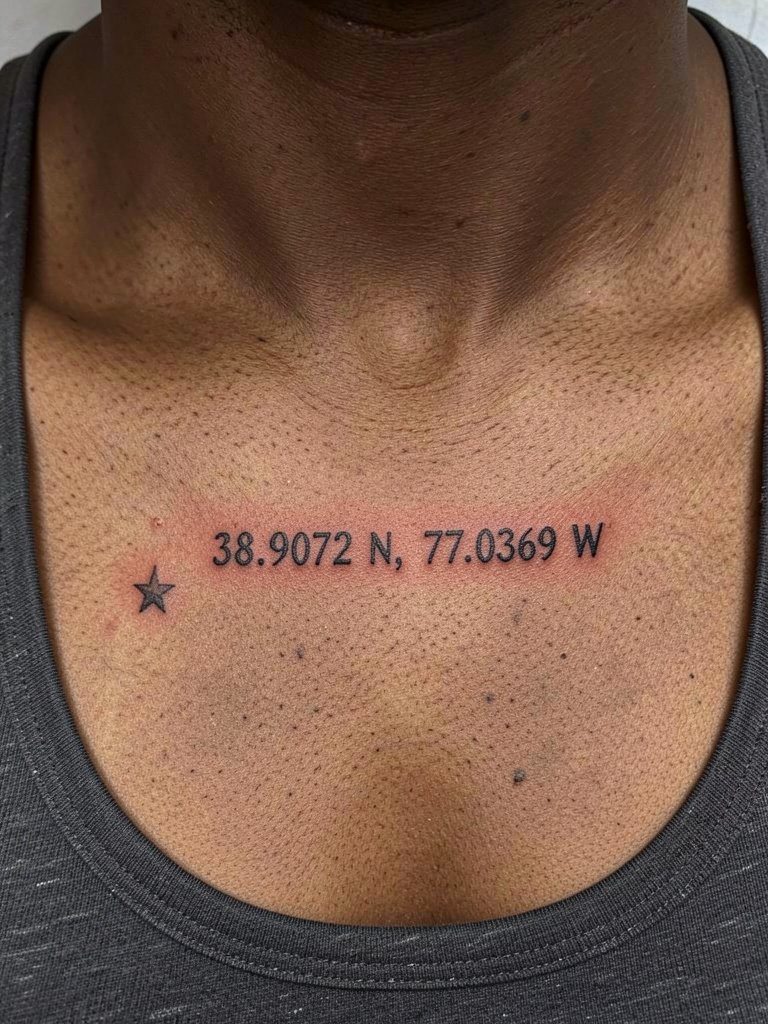
Small paired collarbone coordinates are a modern take that stays readable if the star is simple and not overly dotted. The clavicle area heals predictably when the stencil is properly aligned. Ask your artist to position the star so it does not crowd the digits, because tiny accents can encroach over time. Sessions are brief and pain is low to moderate. For styling, open-neck blouses and delicate chains frame collarbone ink well, try a delicate chain necklace for evenings.
22. Vertical Back Coordinates Along the Spine
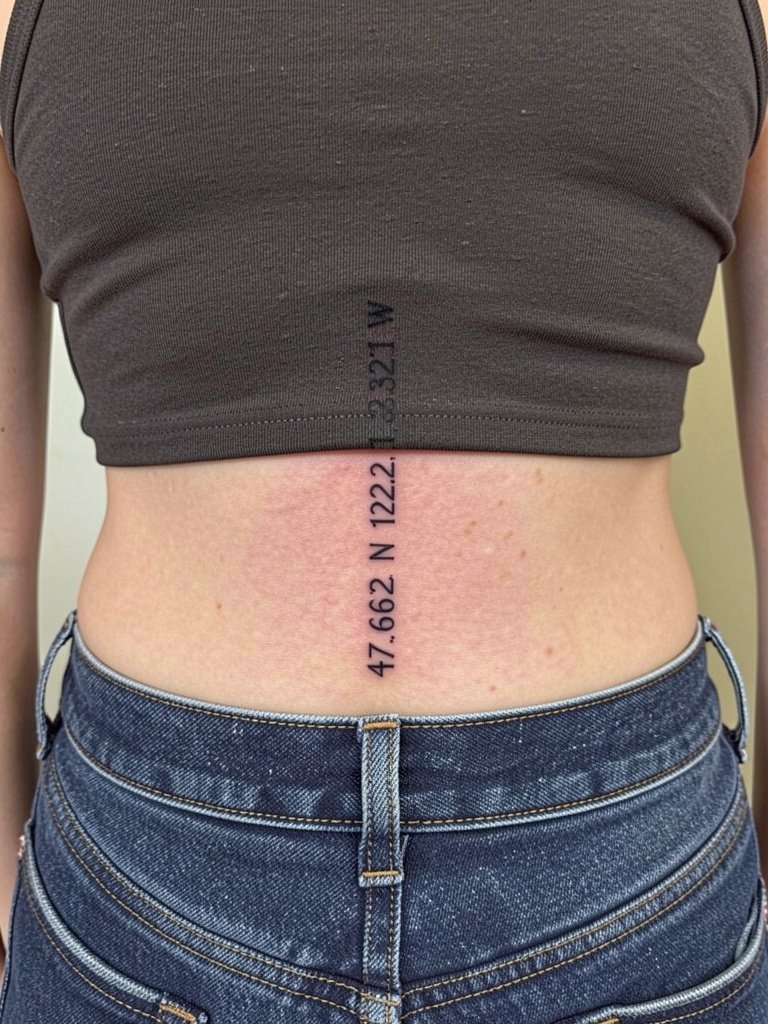
Spine coordinates form a clean architectural line. The spine area is fairly stable, but be mindful of curvature changes and clothing rubbing at the waistband. Ask for center alignment checks while standing and bending so the piece reads straight in most poses. Pain varies with level on the spine, and sessions can be 60 minutes or split into parts. For outfits, cropped tanks and low-rise bottoms showcase the vertical work without interference.
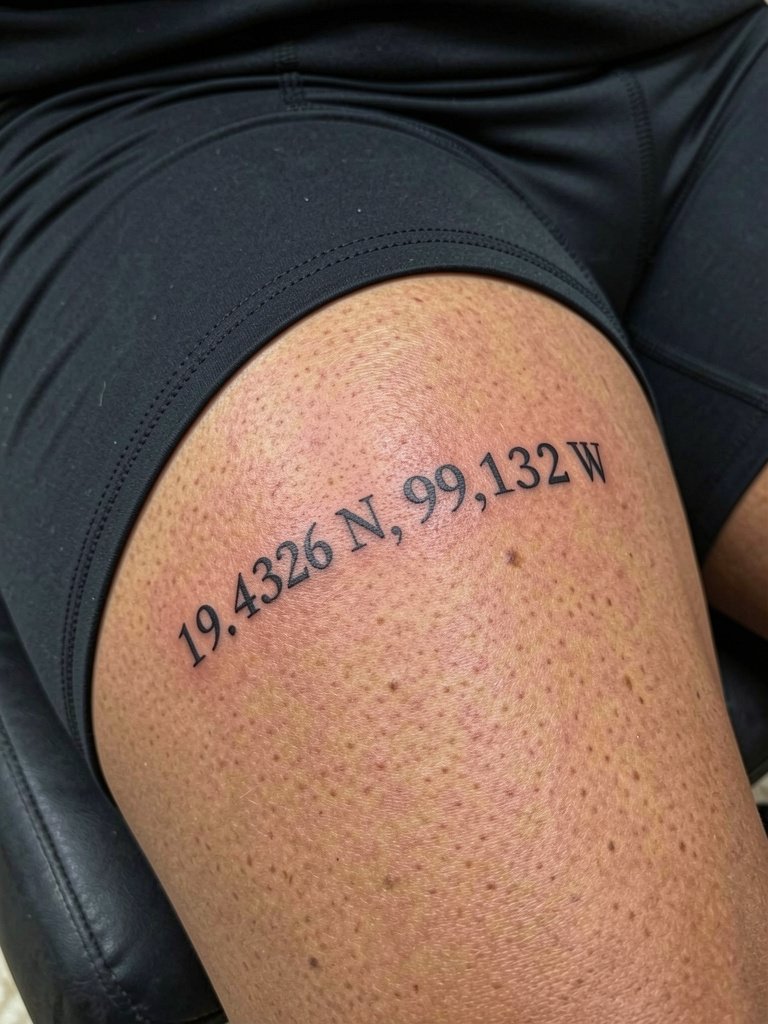
23. Thigh Horizontal Coordinates with Botanical Accent
Upper-thigh coordinates allow larger fonts and a decorative accent. The thigh heals reliably and supports heavier saturation if you want the numbers to stay bold. If you prefer subtlety, keep the accent small and ask for the botanical element to sit just off to the side to avoid closure with numerals. Sessions are moderate in length and pain. For showing the piece, midi skirts or shorts are ideal, and a flowy midi skirt pairs neatly.
24. Inner Bicep Coordinates in Narrow Sans
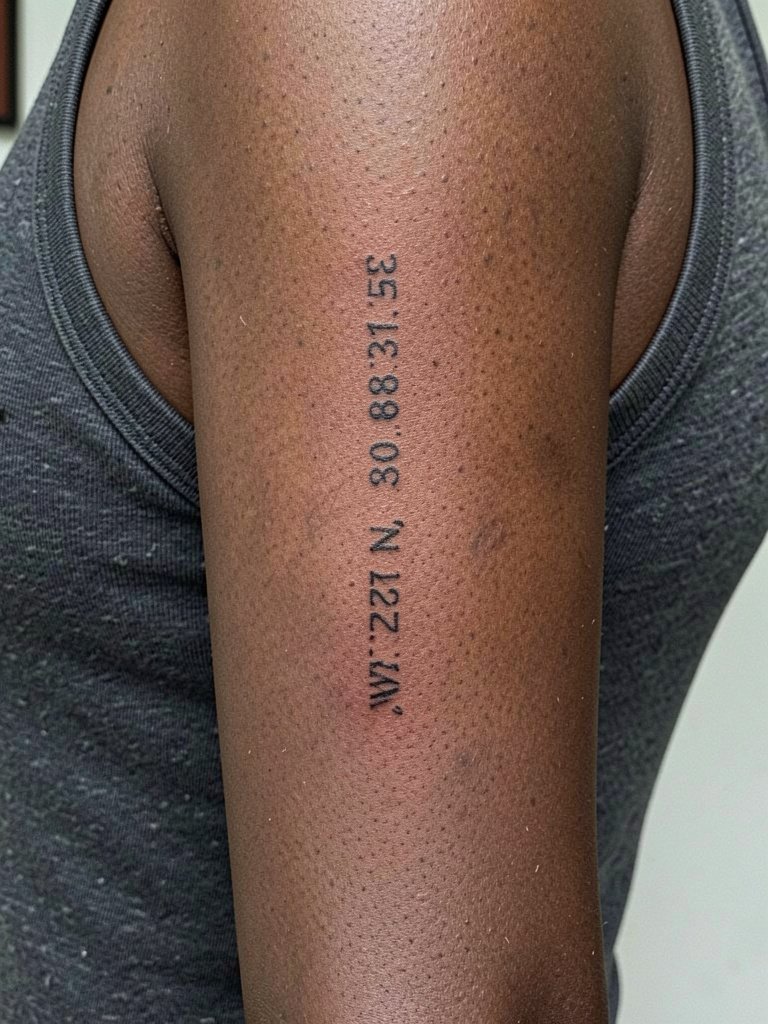
Inner bicep coordinates are easy to conceal and look crisp when the font is narrow but not too thin. The biggest error is requesting ultra-fine weights which the inner skin will eat. Ask the artist to show how the narrow sans reads when your arm is relaxed. Pain is moderate and sessions last 40 to 80 minutes depending on size. For the appointment, a sleeveless top ensures access and reduces fabric shifting.
25. Tiny Script Coordinates on the Foot Arch
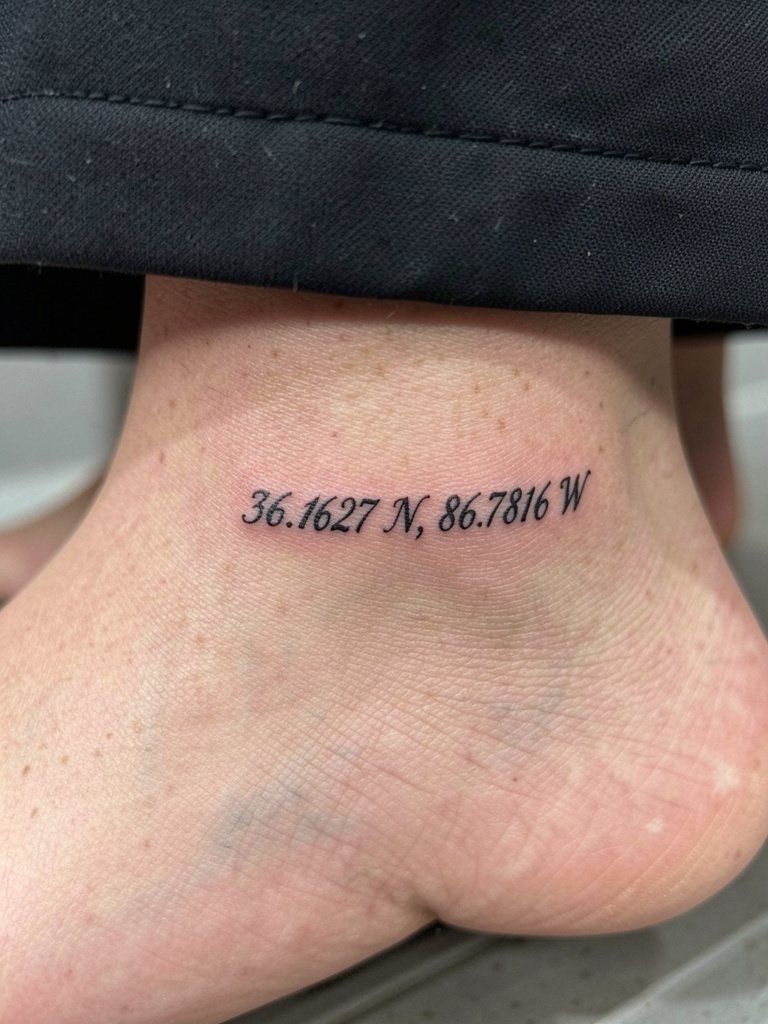
Foot arch tattoos sit in an unconventional place and face pressure from shoes and walking. Script here must be robust enough to handle early wear. A small cursive can look lovely but plan for touch-ups and avoid tight footwear for two weeks. Sessions are short and the area is moderately painful. For show-off footwear after healing, sandals reveal the arch elegantly, and a minimal sandal pairs well.
26. Collarbone Micro Coordinates with Layered Necklace Pairing
Micro collarbone coordinates play nicely with delicate necklaces. If you plan to layer jewelry, ask the artist to place the numerals so pendants sit below rather than over the digits. A common mistake is centering both tattoos and jewelry without considering overlap during movement. Sessions are brief and pain is low to moderate. For styling, pick thin layered chains that sit just under the work, and try a layered necklace set for evening looks.
27. Large Map-Style Coordinates Panel on the Back
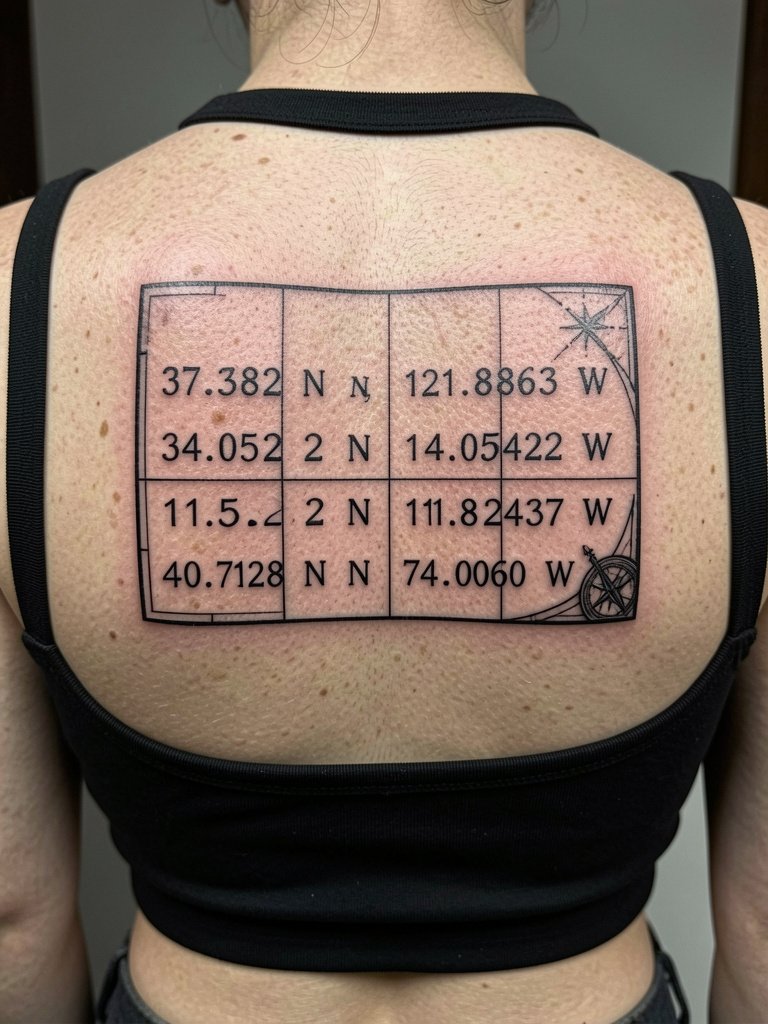
A larger back panel gives you room to treat coordinates as design elements rather than a fine-line label. The advantage is longevity because heavier linework and bigger spacing age predictably. A common mistake is cramming a dense grid into a small area. Plan a custom stencil session to map out spacing across the back and expect multiple sittings for larger coverage. Pain is moderate to high depending on area, and healing requires standard back-care routines. For show-off outfits, back-baring tops or open-back dresses display the panel dramatically, and a backless dress provides one styling option.
Frequently Asked Questions
Q: How do I choose the right font size so coordinates stay readable over time?
A: I suggest testing the stencil at actual size on your skin and viewing it from an arm's-length distance. If the numerals look cramped when you step back, increase font weight or spacing by a hair. For high-friction spots like fingers and ankles, pick a slightly bolder type and expect a touch-up at about a year.
Q: Where can I find healed portfolio examples and discover artists without naming individuals?
A: Search social platforms with targeted hashtags like #CoordinatesTattooHealed, #SmallMapInk, and #MapDots on Instagram and TikTok, and filter by location to find recent healed shots in your skin tone. Reddit tattoo threads and curated portfolio sites also show healed examples across stages, which helps you evaluate how similar placements age.
Q: Are there placements I should avoid if I want minimal maintenance?
A: Yes. Fingers, sides of the ribcage, and the ankle require more upkeep because of constant washing, stretching, and footwear friction. The forearm, outer shoulder, and upper back are lower-maintenance options if you want minimal touch-ups.
Q: How long should I plan for a session for different coordinate sizes and placements?
A: Small wrist or behind-the-ear coordinates often take 20 to 45 minutes. Ribcage, sternum, or larger back panels can stretch from 60 minutes to multiple sessions. Inner thigh or chest pieces fall in between, so plan your day accordingly.
Q: What should I wear to the appointment for access and comfort?
A: Pick clothing that exposes the area without shifting during the stencil and session. Examples include a scoop-neck tank for collarbone work, a fitted sports bra for sternum pieces, or a sleeveless top for inner-arm tattoos. Wearing easy-slip clothing makes the appointment smoother.
