
Bold, high-contrast wolf designs age more predictably than the tiny single-needle faces that flood feeds. Too-fine linework on textured skin often softens into a gray blur by year three. Choose scale and placement with longevity in mind and you get a wolf that keeps its bite for years, not just on the day it heals.
1. Realistic Wolf Head on the Shoulder
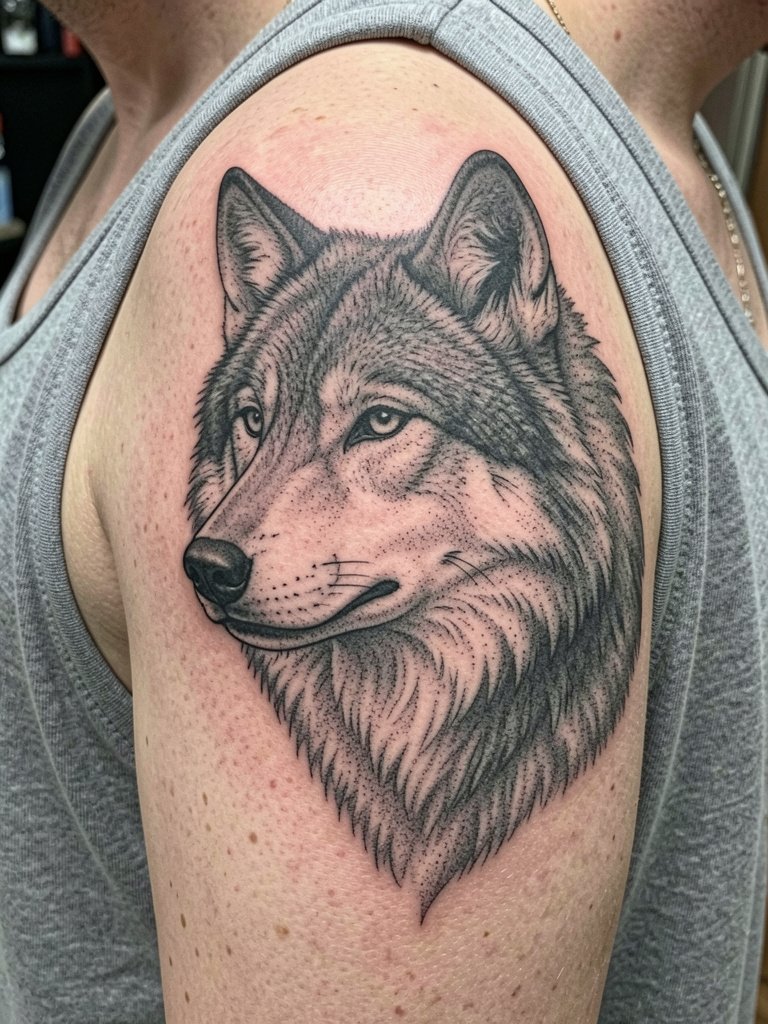
A realistic shoulder wolf reads as a statement without needing huge scale. The shoulder gives the artist space for varied linework and saturated shadow, so the fur texture keeps depth at three and five years healed. Session time for a chest-to-shoulder portrait is typically two to four hours depending on size, with moderate pain because the deltoid has more meat. A common mistake is cramming too much tiny detail into a small shoulder piece, which leads to early blur. For a show-off outfit, wear a loose tank top so the artist has access and you can frame the finished shoulder with sleeveless looks after healing.
2. Geometric Wolf on the Inner Forearm
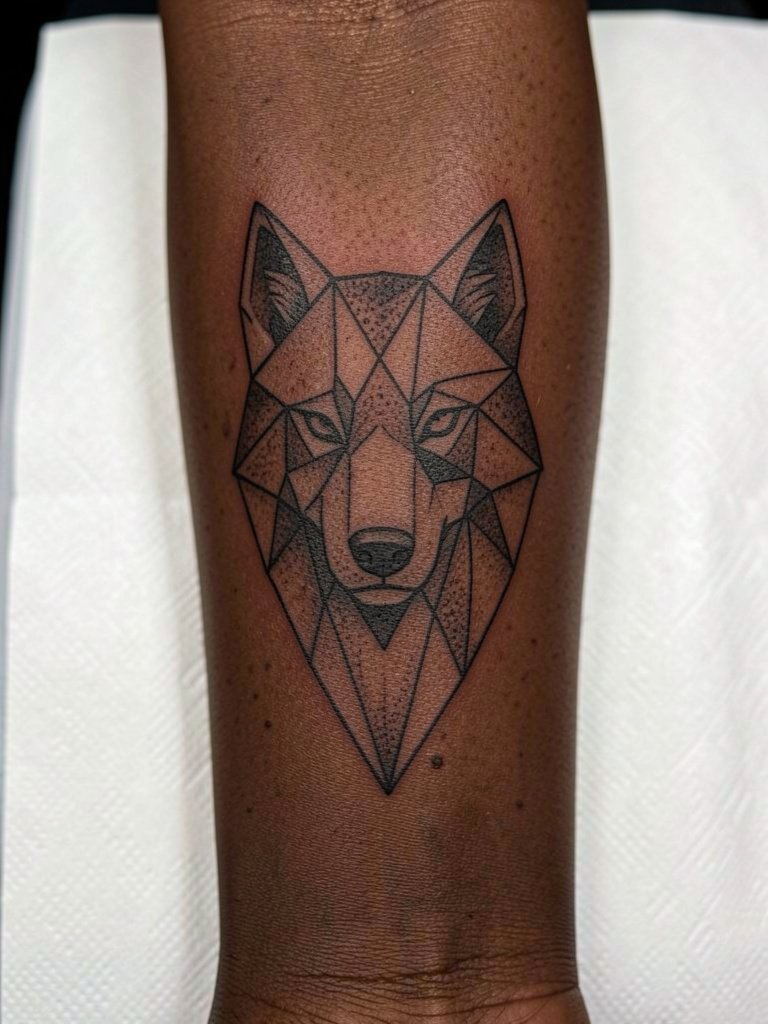
Geometric wolves favor crisp linework and negative space over soft realism. On the inner forearm the main risk is blowout when lines run too close together. For this placement ask for slightly heavier linework and more spacing between polygons so the angles hold after a couple of years. Expect one to two hours for a small-to-medium piece and a low-to-moderate pain level. The mistake I see most is requesting single-needle geometry on thin skin, then wondering why the facets fuzz. To show it off, roll the sleeves of a men’s linen shirt and let the forearm read in daylight.
3. Blackwork Howling Wolf on the Chest
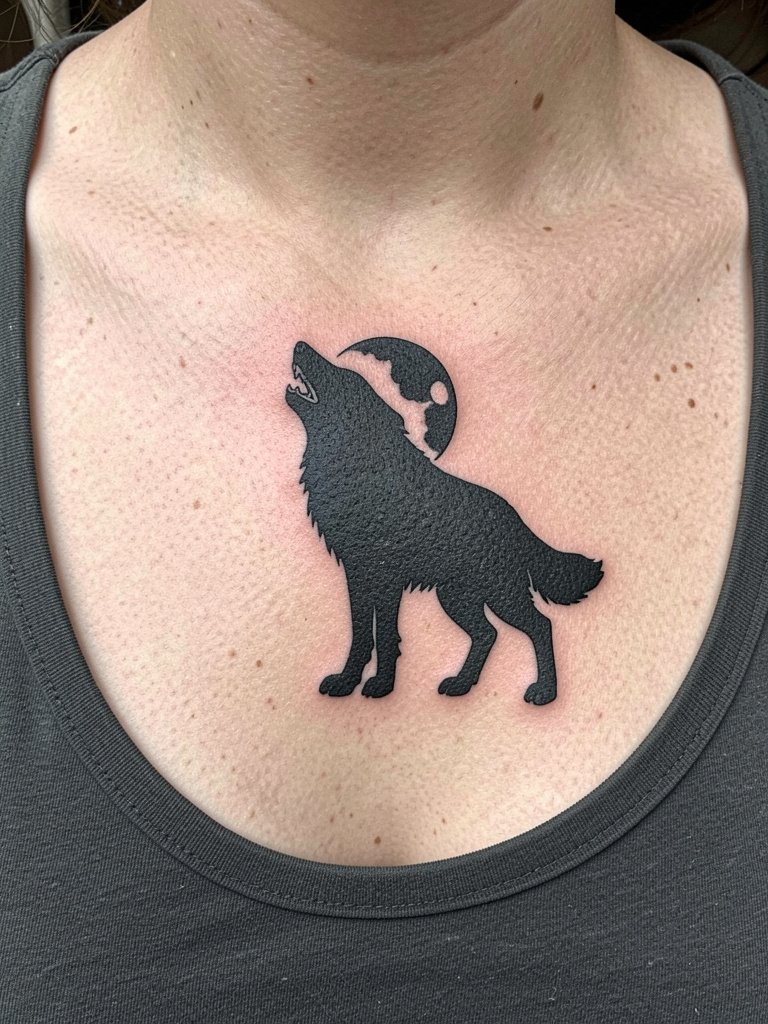
A chest howler is classic for men who want impact and longevity. Heavy blackwork saturates and ages into a strong silhouette, which is why many clients pick it over delicate portraits. Session time varies from one to three hours for a medium piece. Pain on the upper chest is usually moderate because the skin sits over bone here. Avoid tiny interior details that need touch-ups every few years. For wardrobe, open-neck tees and low V-shirts frame the piece. Try a scoop-neck tee in neutral tones to let the saturated black read against the skin.
4. Fine Line Wolf Paw on the Wrist
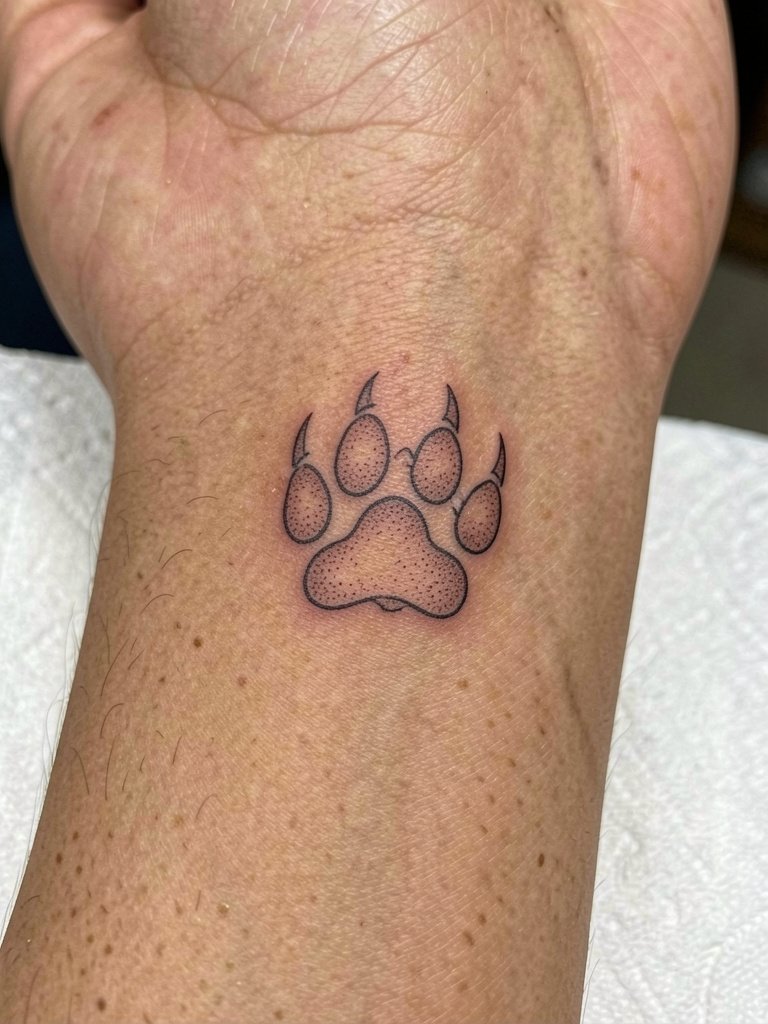
Tiny wrist paws look great at first but carry real longevity trade-offs. One camp argues the wrist’s repetitive motion and thin skin blur single-needle work within two to three years. The other camp says if you widen the line weight a touch and avoid overly tight internal detail, the result holds as a crisp symbol for much longer. Plan for a short 30 to 60 minute session, expect higher visibility to daily abrasion, and budget a touch-up around year two. A common mistake is asking for micro-detail that the wrist cannot keep. Pair a wrist paw with a minimal leather bracelet to frame the design without covering it.
5. Neo-Traditional Wolf and Dagger on the Bicep
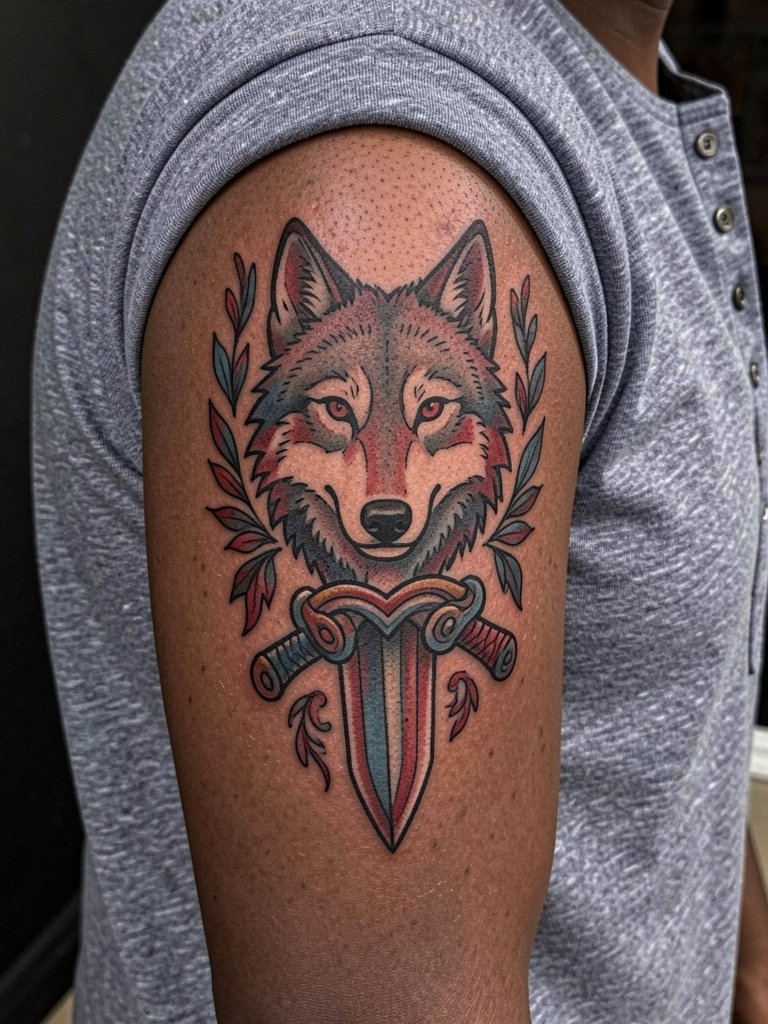
Neo-traditional wolf-and-dagger pieces age well because bold outlines and saturated fills keep structure. On the bicep, muscle movement can distort a tiny motif, so choose a size that breathes with the arm. Session time is typically one to three hours and pain is low to moderate. A real mistake is insisting on pastel fills with thin linework in this style. If you want versatility while showing off the bicep, a short-sleeve henley keeps the artwork visible without hiding it under long sleeves.
6. Watercolor Wolf Portrait on the Calf
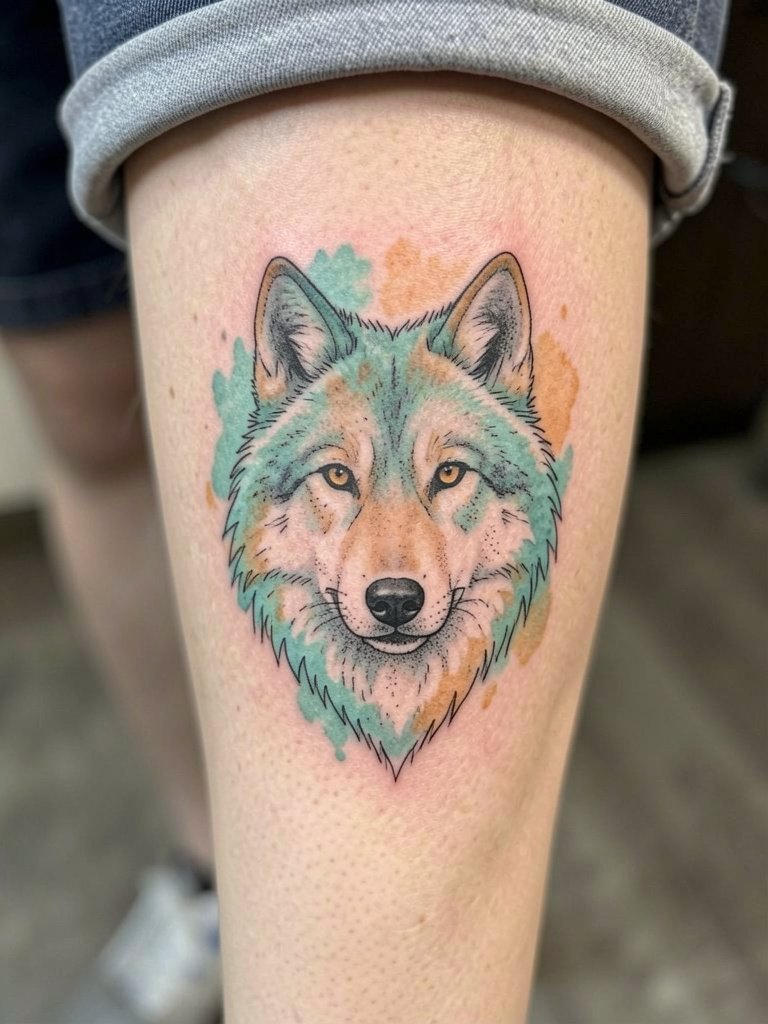
Watercolor wolf portraits are energetic but they do demand maintenance. Some artists say watercolor elements fade unevenly and need touch-ups to stay lively. The opposing view is that careful saturation and layered color work can hold well for years if touch-ups are accepted as part of the style. On the calf this design fares better than on wrists because the skin is thicker and less exposed to friction. Sessions run two to four hours and pain is moderate. Wear shorts to the appointment and after healing your calf looks sharp with cropped trousers or shorts. For session comfort consider breathable men’s casual shorts.
7. Mandala-Bordered Wolf on the Upper Back
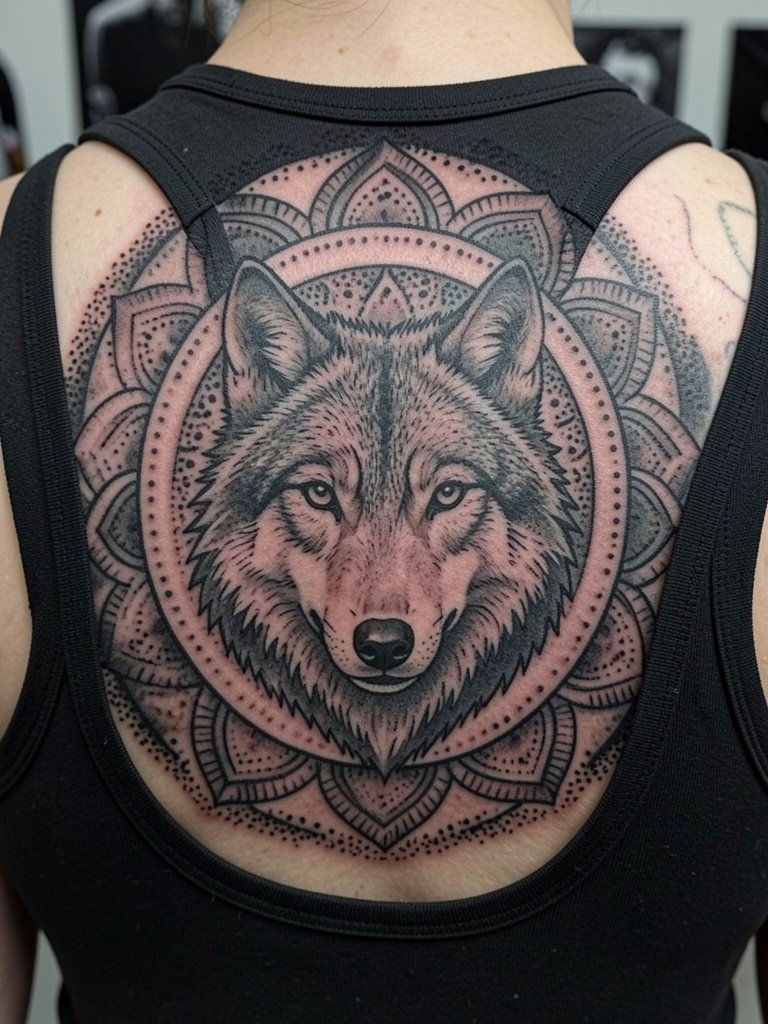
An upper-back composition gives space for mandala framing that keeps a wolf portrait centered and readable. This placement hides well under shirts but shows in backless or racerback tops. Plan for longer sessions, often split into two sittings, and expect moderate pain because the back offers both soft and bony zones. A common mistake is crowding the mandala too tight to the wolf face, which makes the center lose its focal pull after a few years. When healed, this piece pairs well with men’s racerback tanks for nights when you want the upper back visible.
8. Minimalist Wolf Silhouette on the Ankle
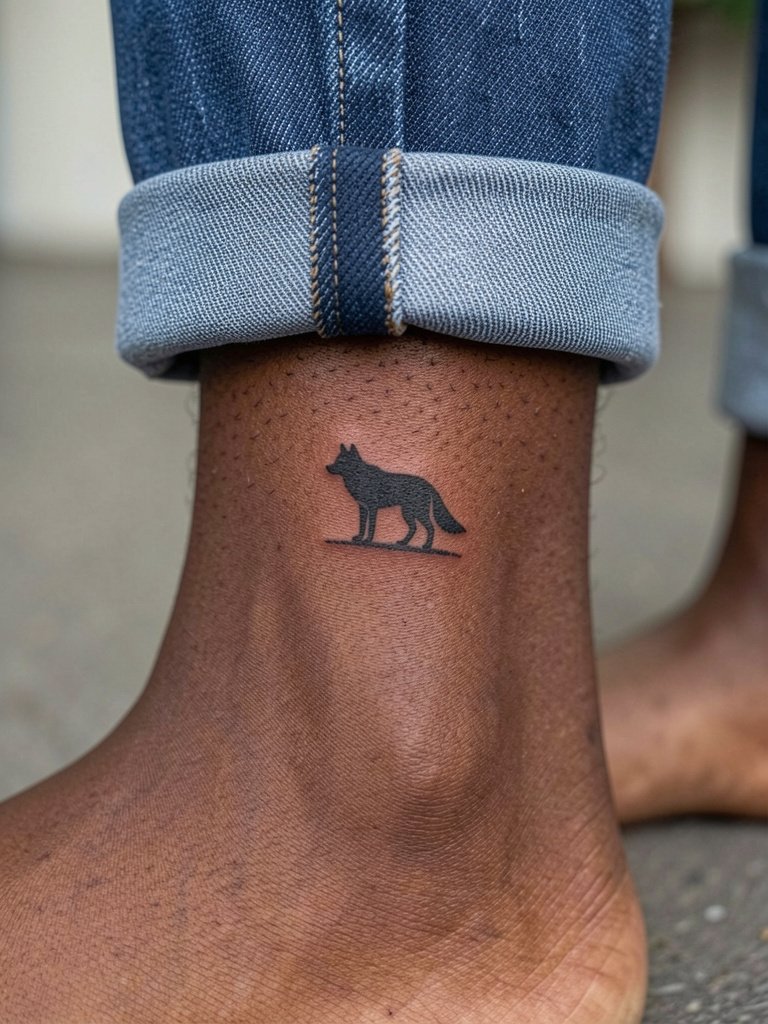
Ankle silhouettes are low-profile but need bold simplicity to survive daily abrasion from socks and shoes. For this spot choose solid fills and avoid thin internal lines that the ankle will not keep. Expect a quick session under an hour and a higher chance of touch-up because of constant movement and footwear friction. A frequent error is trying to cram texture into a tiny ankle piece. Style it with rolled jeans or cropped trousers so the silhouette shows. A dependable option is a pair of rolled denim or cropped pants like men’s rolled cuff jeans to frame the ankle cleanly.
9. Japanese-Style Wolf Sleeve on the Arm
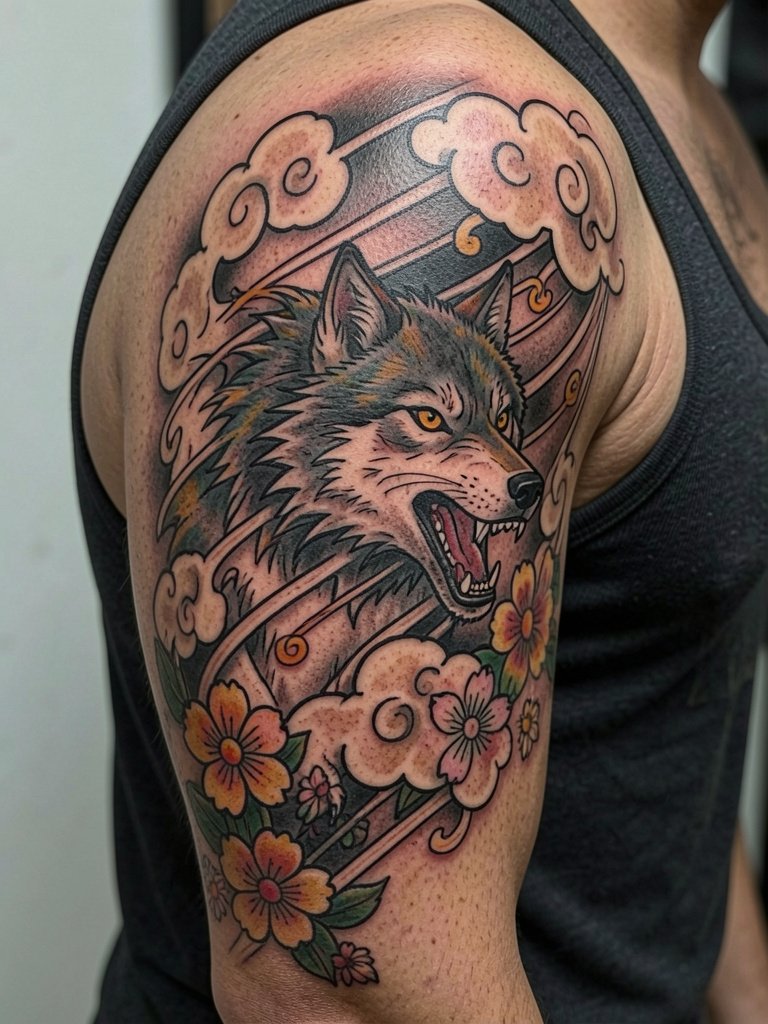
Irezumi-inspired wolf sleeves are about flow and narrative rather than a single portrait. On the arm, layout matters more than tiny detail, because the sleeve should read from a distance. Sessions run long and often require multiple sittings. Pain is variable depending on inner arm versus outer arm placement. One real mistake is giving the artist a collage of unrelated references instead of a clear movement direction. For showing the sleeve in progress and after healing, sleeveless tops or a muscle tank let the full composition be visible and let the linework breathe.
10. Dotwork Moon and Wolf on the Sternum
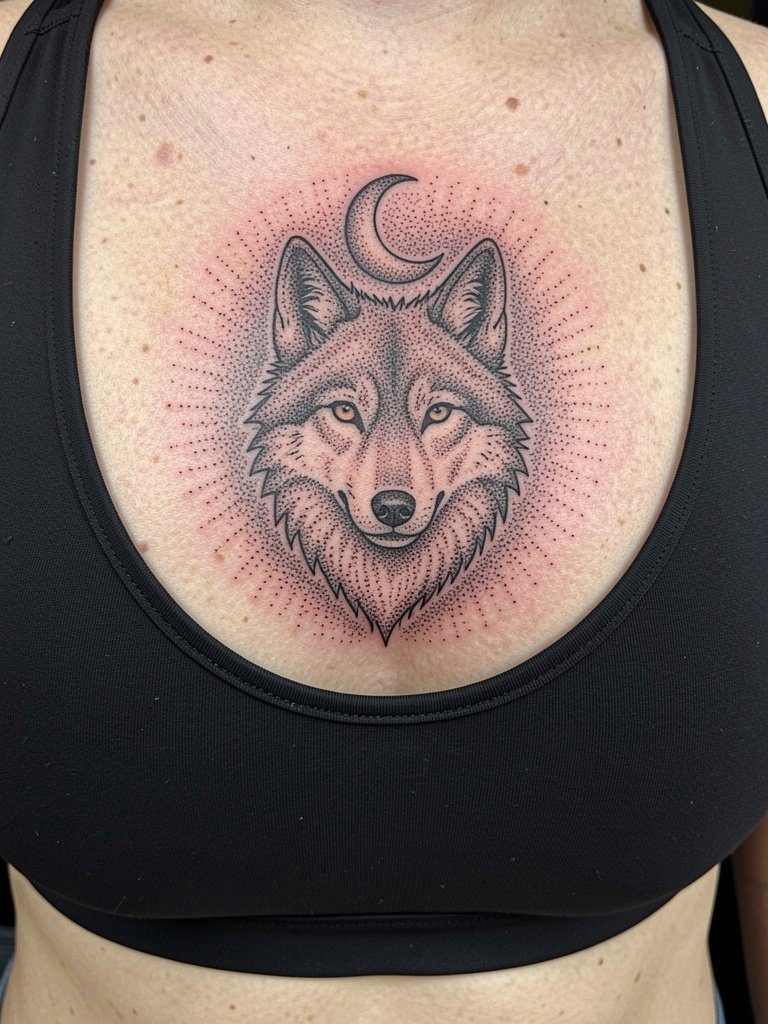
Sternum dotwork creates a striking central piece but requires a specialist touch. The sternum is a sensitive area and not every artist does dense dotwork there. Expect high pain and longer sessions, often split to allow healing. The mistake is underestimating discomfort and choosing a single long session. Because this area is intimate, seek an artist with proven healed sternum dotwork experience and plan for a careful touch-up schedule. Session wear should be a fitted sports bra or bandeau so the artist can access the sternum without fabric shifting during work. Note that some artists avoid heavy single-needle work here because of skin stretch under the chest line.
11. Tribal-Inspired Wolf Band Around the Upper Arm
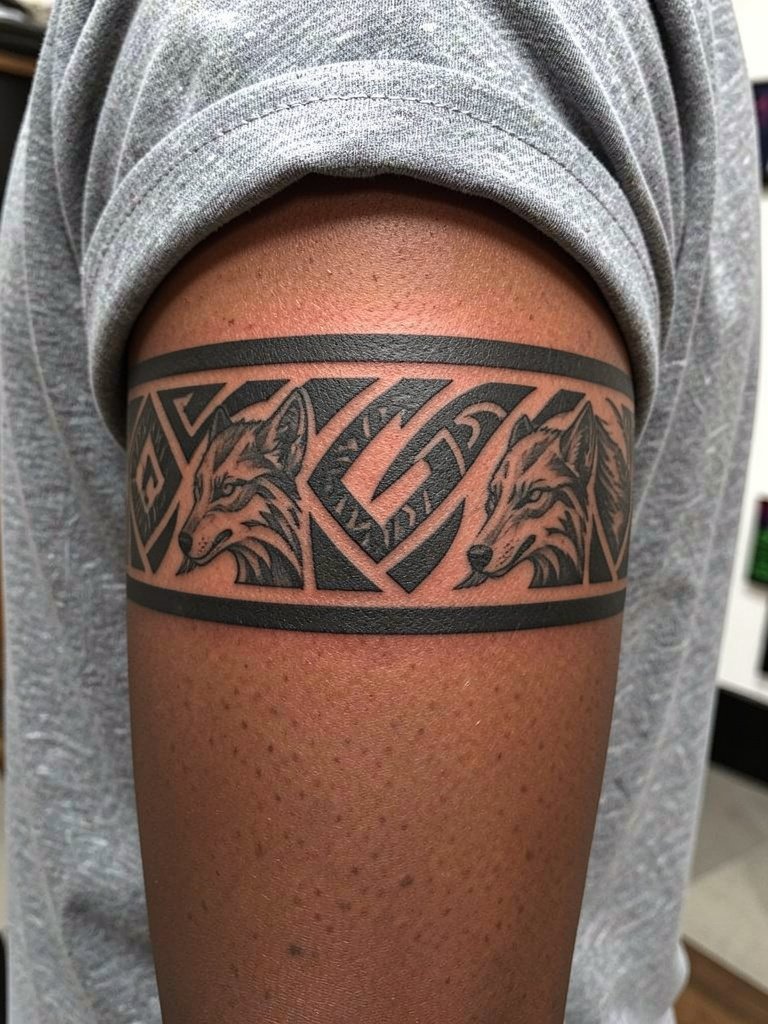
A tribal-inspired band reads strongly because of the contrast and repetition. Upper-arm bands should be mapped to muscle contours so the pattern does not warp during movement. Sessions are usually one to two hours for a medium band and pain is low to moderate on this fleshy area. A common error is wrapping a pattern without checking how the pattern meets at the seam, which can create an awkward visual break. Short sleeves and rolled cuffs show off a band well. Try a men’s short-sleeve tee that hits above the band for effortless display.
12. Split-Face Wolf and Human on the Thigh
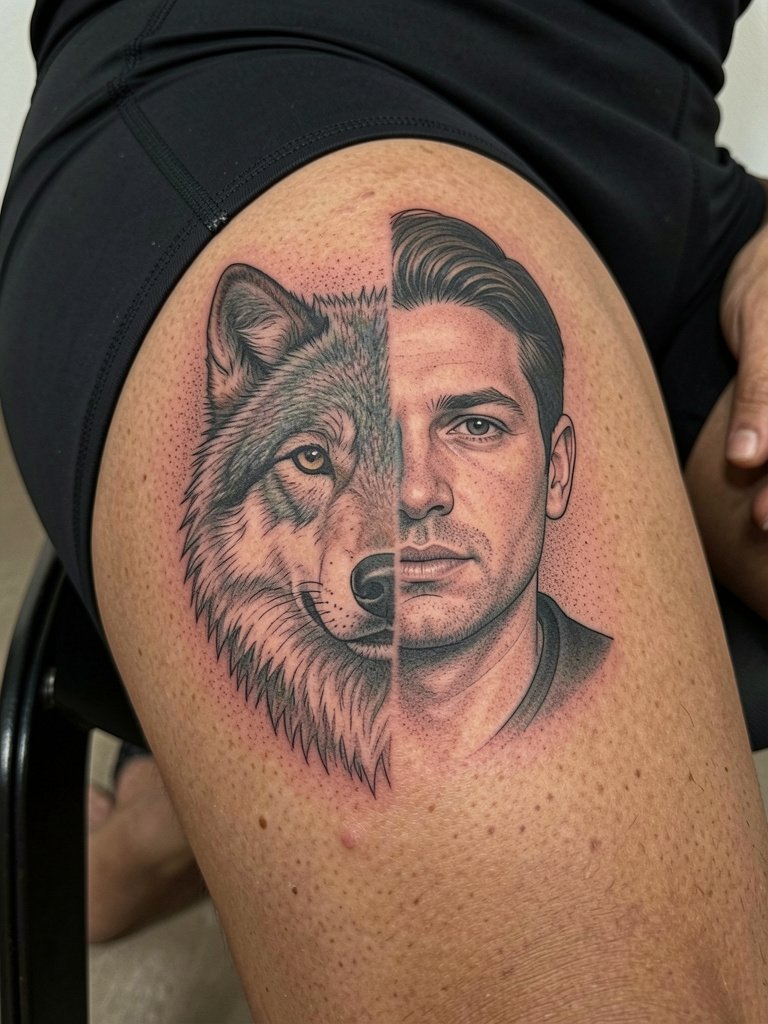
Thigh pieces handle large, complex compositions and give artists room to render fine gradations. The upper thigh is relatively low-pain in the fleshy zone, though closeness to the groin changes sensitivity. Expect multi-hour sessions and a need to plan stretching and breaks. A frequent mistake is squeezing too many small facial details into a busy split composition. For a better result, set the scale so both halves have breathing room. This placement also ages well because friction is lower, and you can hide or reveal the piece according to your wardrobe.
13. Wolf Pack Scene Along the Ribcage
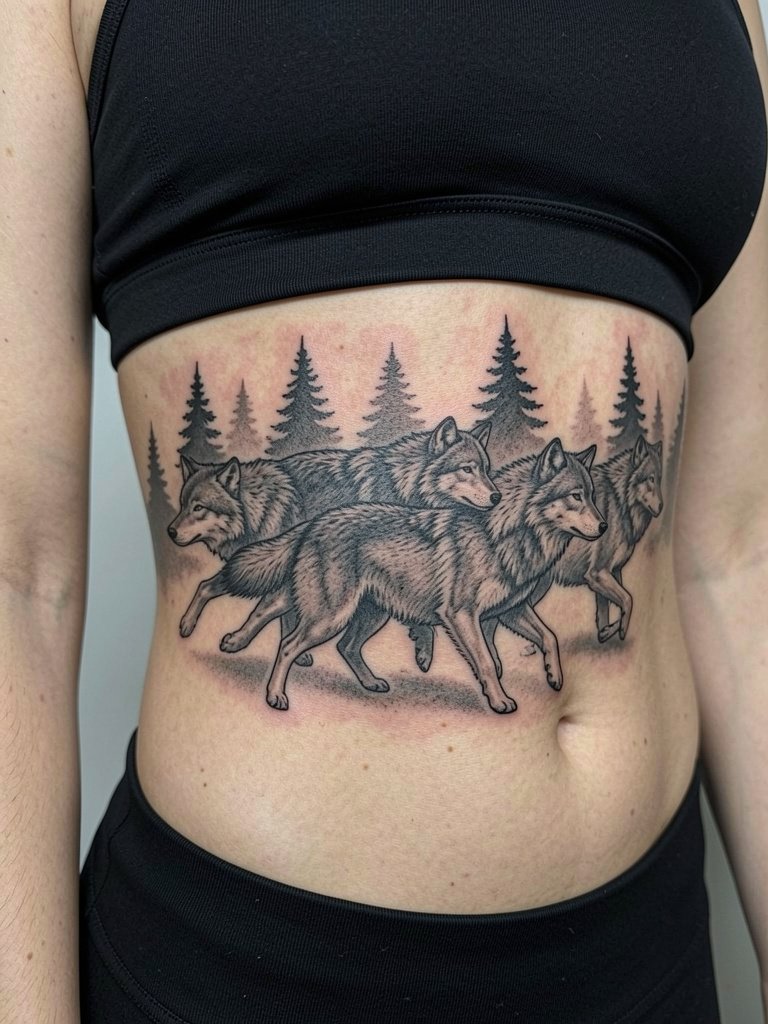
Ribcage wolf scenes have high drama but high pain and motion challenges. Fine-line work on ribs splits artists into two camps. One camp argues the skin stretch and constant motion blur fine lines within two years, particularly near the lower ribs. The other camp says with slightly wider spacing and thoughtful depth the lines settle and remain clear, and they will show you healed images to back that up. Sessions are often split and you should plan for a realistic touch-up timeline. Bring comfortable clothes for the session, and consider that ribs are one of the more painful zones to sit through.
14. Micro-Realism Wolf Eye Behind the Ear
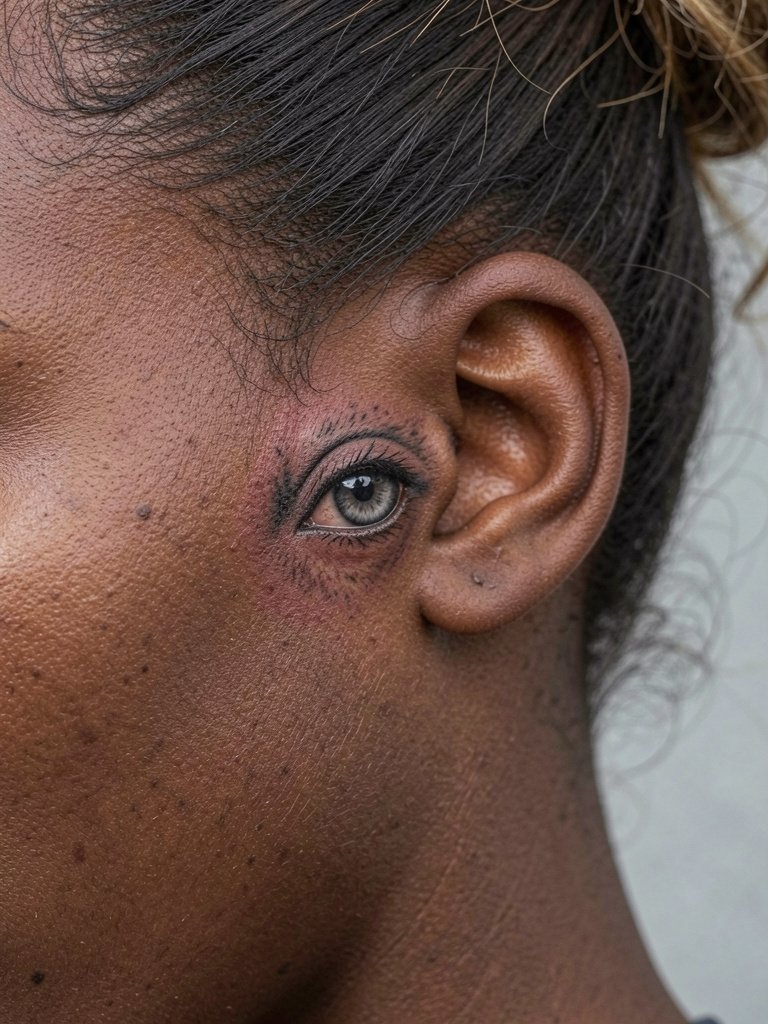
Behind-ear micro pieces are intimate in scale and need an artist comfortable with tiny realistic detail. Pain is relatively low but the canvas is small and sometimes fibrous, so expect a short session and the possibility of a follow-up to sharpen the catchlight or pupil if blur occurs. A common mistake is asking for photorealistic texture at a scale too small to hold. If you want to show off this placement, wear your hair up or use a subtle hair clip during outings. A packable hair tie set keeps that area visible when you want it seen.
15. Geometric Wolf Skull on the Hand
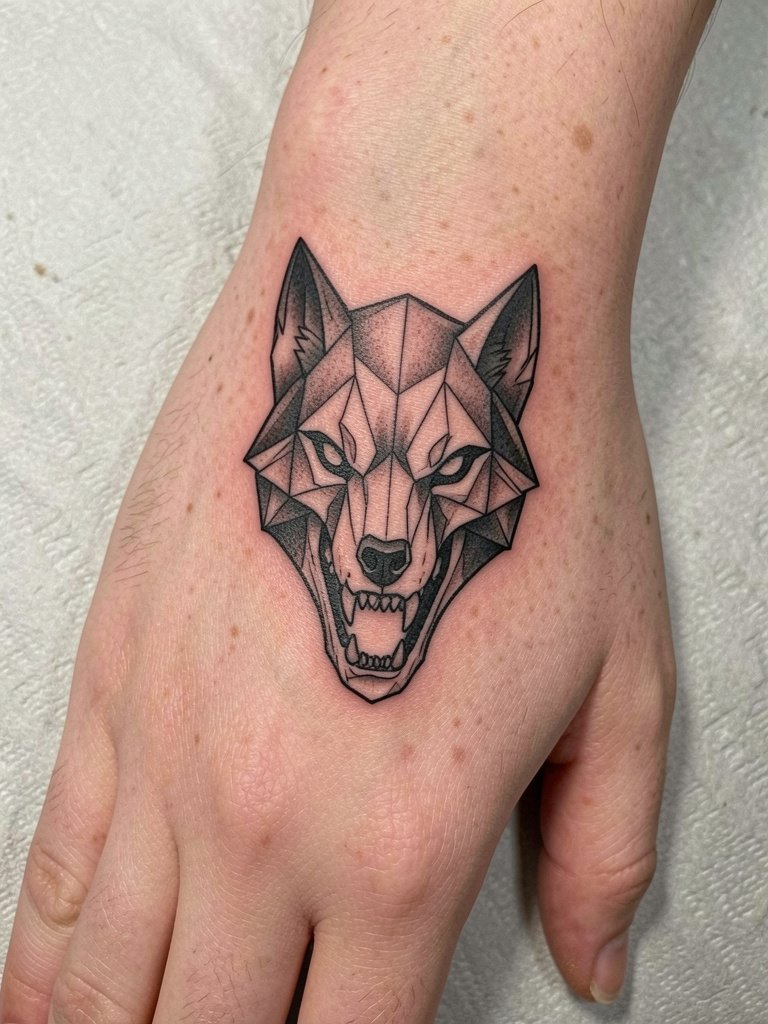
Hand pieces are high-visibility and high-maintenance. The skin on the hand is thin and in constant motion, so plan for multiple touch-ups over the years. A common mistake is asking for too many tiny interior shapes that the hand will not retain. Sessions are shorter but the healing window requires careful care. If you want the hand skull to read, choose heavier positive shapes and leave breathing room in the geometry to limit blowout. Rings and simple accessories accent hand tattoos well and will frame the piece when you wear them.
Session Day Picks
The first six designs above include placements that benefit from simple session-day prep and a couple of small tools to smooth the first week.
- Transfer stencil paper kit. Helps you preview placement on skin before the needle hits, which is handy for shoulder, forearm, and chest layouts above.
- Topical numbing cream. Apply per the product instructions before longer rib or sternum sittings to reduce pain peaks without affecting linework.
- Thin protective film roll. Useful for keeping ankle and hand pieces clean during the first week of movement and washing.
- Fragrance-free gentle body wash. Cleans the healing area without irritating fresh linework on chest and back pieces.
- Aquaphor healing ointment. A widely used option for the initial few days to lock in moisture on dense blackwork without clogging the channels.
Frequently Asked Questions
Q: How do I decide size and placement for a wolf head between shoulder and forearm?
A: Think about how much detail you want to keep long term. Shoulders suit larger portraits and crisp saturation, while forearms favor simplified geometry or bold linework. Bring two reference sizes to your consultation so your artist can mock each one on skin and show how lineweight and spacing change with scale.
Q: Will single-needle fine-line wolves blur on the wrist and hand?
A: Fine-line work on wrists and hands is more likely to thin out because of skin movement and daily abrasion. If you like delicate detail, ask for slightly heavier lineweight and more negative space inside shapes to preserve definition. Expect touch-ups in a couple of years for high-motion spots.
Q: Where can I find healed wolf tattoo portfolios and discover artists without relying on specific names?
A: Search platform tags and keywords like #WolfTattooHealed, #RealisticWolfInk, and location filters on Instagram and TikTok for recent healed shots. Reddit tattoo communities and portfolio collections named by style can also show healed examples across skin tones and placements. That approach helps you compare how linework and saturation hold on different skin types.
Q: How painful is a ribcage wolf scene and what should I wear to the session?
A: Ribs are among the more painful zones because skin sits close to bone. Sessions are often split and you should wear a fitted cropped top or sports bra that stays in place so the artist can access the ribs without you adjusting fabric mid-session. Bring snacks and plan for breaks.
Q: How should I style clothing to show off a shoulder or upper-arm wolf after healing?
A: Short sleeves and open-neck shirts frame shoulder and upper-arm artwork best. A classic short-sleeve tee or a henley sits above the bicep band and keeps the shoulder silhouette visible. Try a light henley or rolled cuff tee like a men’s short-sleeve henley for a casual display.
