
A wrong line weight on a knot can look ornate the first month and like a muddled blob three years later. For Celtic shield work the fix is simple to explain but harder to execute: give the interlace breathing room, favour solid blackwork where detail must last, and pick placements that do not fold the pattern. Below are shield-forward designs and sensible variations that keep the knot readable, the shield silhouette strong, and the healed result looking intentional.
1. Circular Shield Knot on Outer Forearm

A circular shield knot reads well on the outer forearm because the curved silhouette follows the arm across from elbow to wrist. For this placement plan for one session under two hours and expect a light touch-up after the first year if you want the interlace crisp. Common mistake is asking for too many micro turns in a 2 inch circle, which leads to crowded linework and blowout over time. Wear a rolled short-sleeve tee to the session so the artist can work with the sleeve comfortably rolled. To preserve readability, ask the artist to widen the negative space between crossings by about 10 percent compared with your reference.
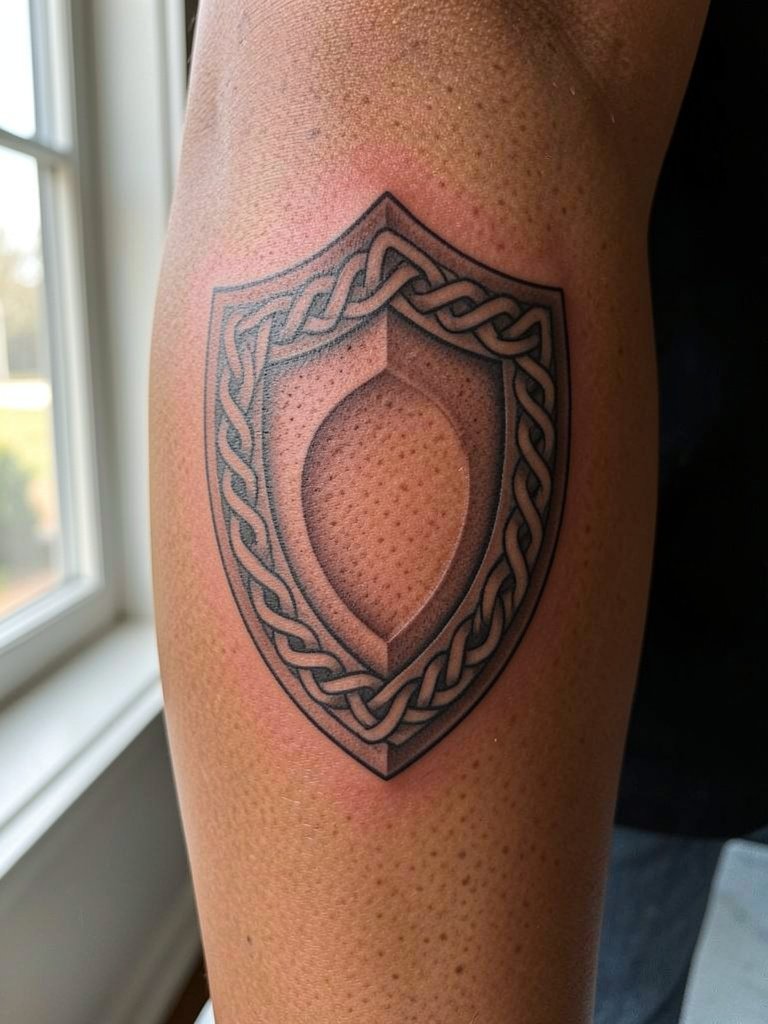
2. Shield Knot with Braided Border on Calf

The calf is forgiving for braided borders because the flesh stays relatively flat and the area tolerates several passes. Expect a medium session time and a moderate pain level that most describe as steady rather than sharp. A frequent age-failure is dense hatching inside a small shield which collapses into gray. Keep the center negative-space open and use stipple shading only if you want texture. This placement looks great with straight-leg jeans cuffed above the tattoo when you want to show it off. During consultation bring an example at actual physical scale so the artist can map how the braided border will read two and five years out.
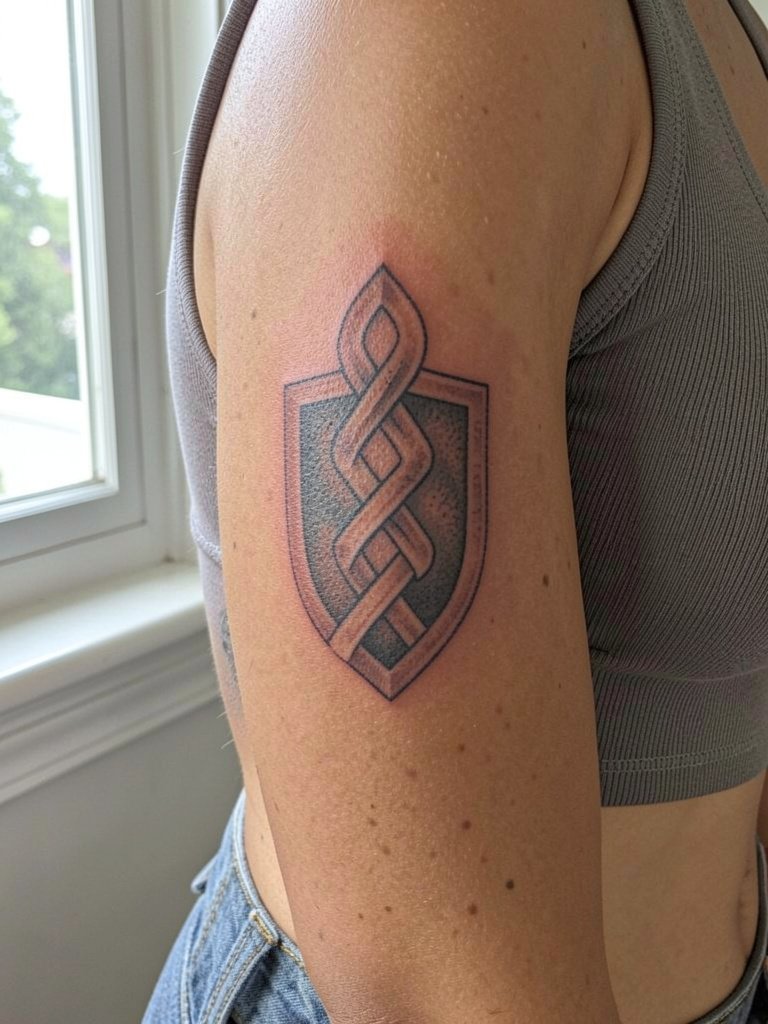
3. Traditional Shield Silhouette with Knot Fill on Outer Upper Arm

A classical shield silhouette frames the knot and gives the design a heraldic presence. This combo benefits from a bold outline to hold the shape as skin texture shifts. Artists split on color here. One group argues muted accent color lifts a crest and gives identity. Another group insists black and gray retains the knot detail longer. Both sides are valid. One practical choice is muted green accents only in the shield field while keeping the knot lines heavier. For sessions wear a muscle tank or sleeveless tee so the artist has clear access and the arm can rest naturally.
4. Small Shield Medallion Behind the Ear
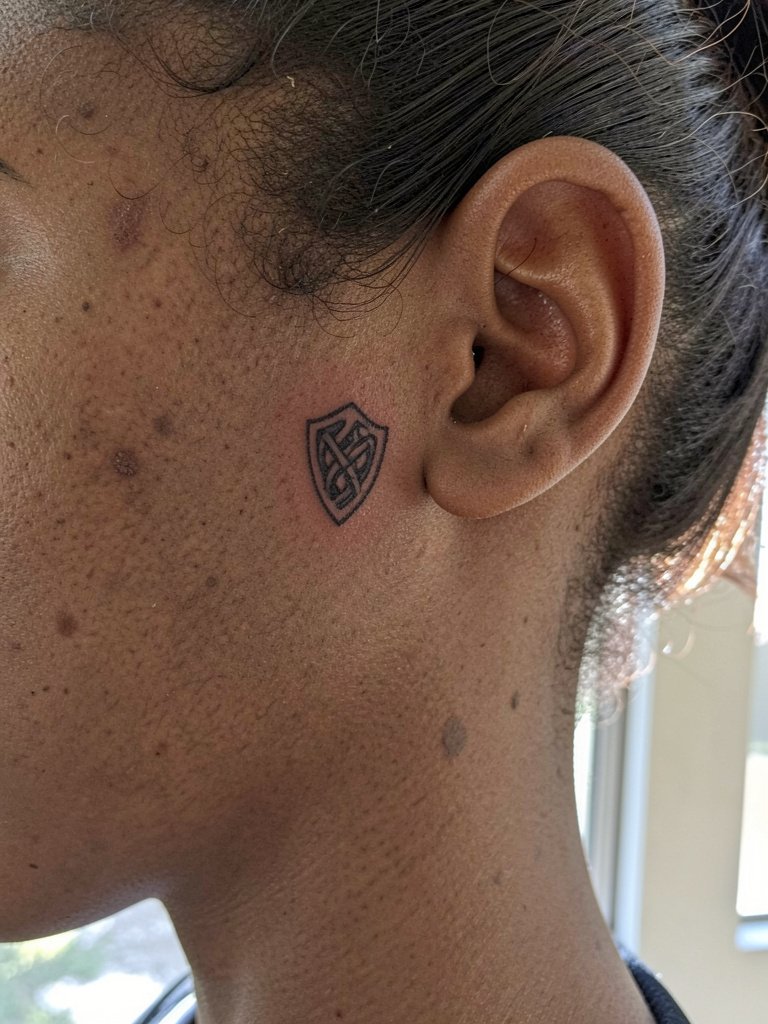
Micro-medallions behind the ear make subtle statements but they demand bold decisions about line weight. Single-needle work looks elegant fresh and then can fade or blur on textured mastoid skin. The safe route is a simplified knot with slightly heavier linework than the reference. Expect a quick session under thirty minutes and a higher chance of a touch-up at six to twelve months. For the appointment have your hair up and bring a hair claw clip so the artist can see the mastoid area without tugging. Professionals appreciate healed examples from the same placement more than glossy portfolio shots.
5. Shield with Banner on Inner Upper Arm

An inner arm shield reads as a private crest that shows when you choose to reveal it. The biggest mistake is asking for a long banner in a narrow field. Ask the artist to sketch how initials compress at the intended size. The inner upper arm moves with the torso so linework should be bold enough to avoid softening at two years. For session wear a loose tank top or an oversized button-down shirt to give side access without rubbing fresh ink. Expect moderate discomfort because skin there is thin and tender.
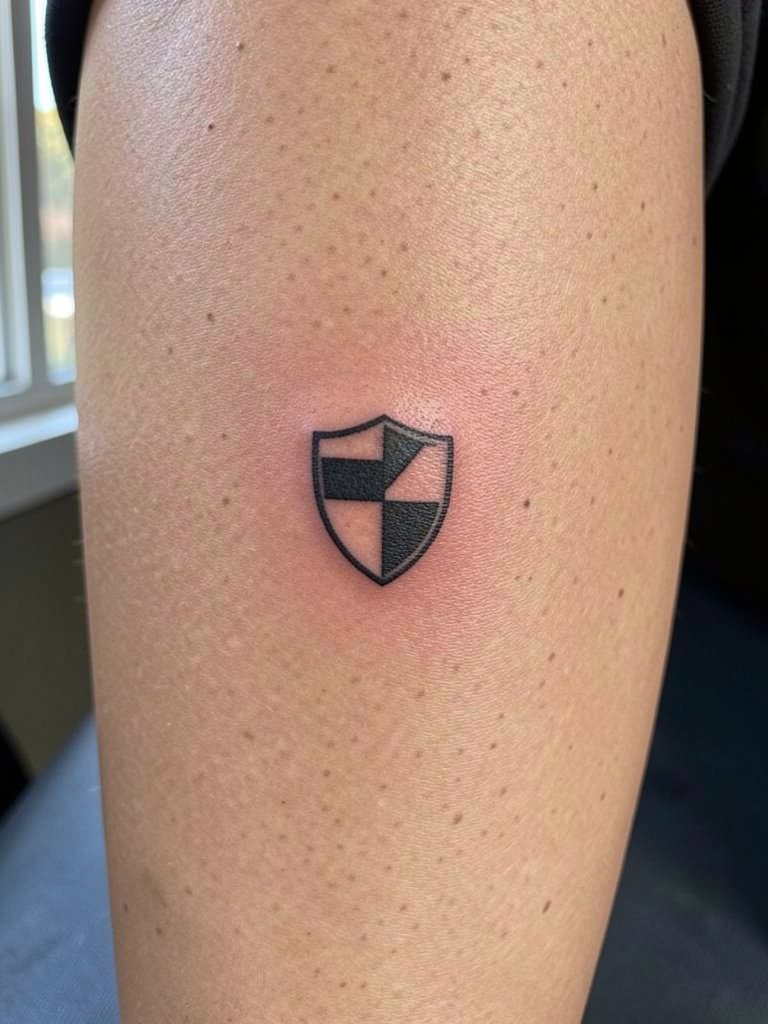
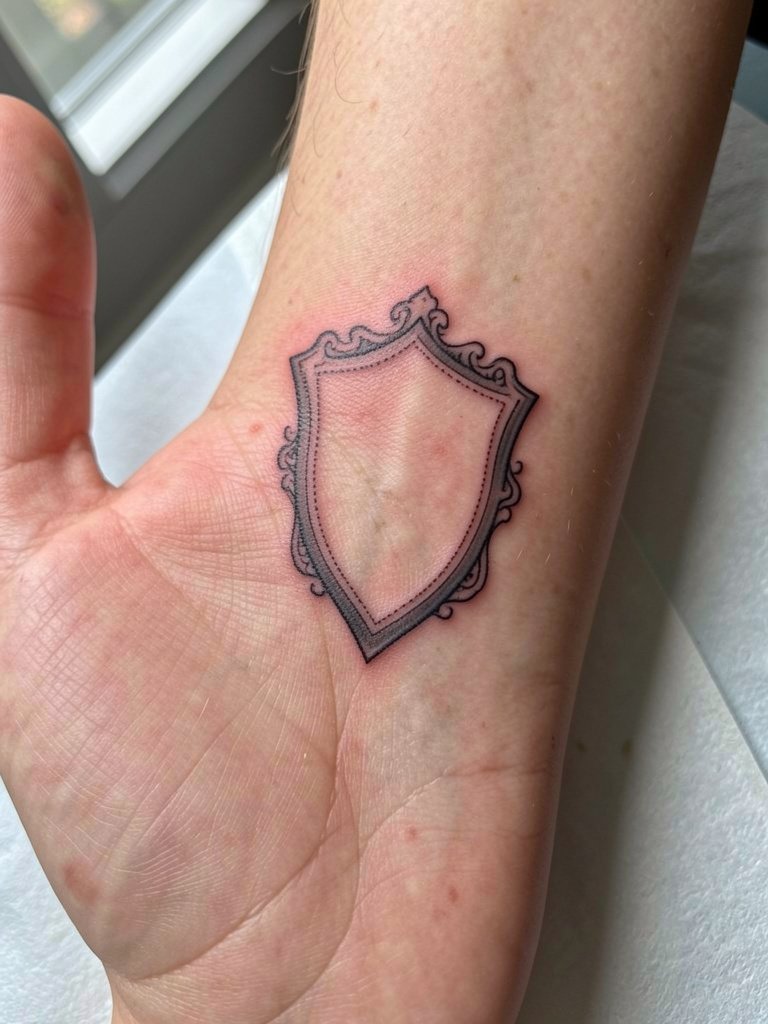
6. Minimalist Shield Icon for the Wrist

Wrist shields are compact and discrete but also the most vulnerable to washing friction and tight accessories. If you want a wrist medallion accept that the knot must simplify and the negative space must be increased. The session is short but plan for a touch-up at six months. A common error is adding heavy stipple inside a one-inch icon which turns to gray. For showing off consider thin bracelets on the opposite wrist and keep the tattoo wrist free of watches for the first week. Bring a short-sleeve tee to avoid cuff irritation during healing.
Session Day Prep
The small placements above react differently to washing and clothing friction, so a few targeted items smooth the first week and the appointment.
- Tattoo stencil paper kit. Lets you preview line spacing on skin before the needle goes down, which matters a lot for compact wrist and behind-ear pieces.
- Topical numbing cream. Applied as directed before short, sensitive sessions reduces twitching and helps the artist keep linework steady.
- Thin protective film roll. Useful for areas that rub against clothing in the first 48 hours, like the wrist or inner arm.
- Fragrance-free gentle body wash. Gentle cleansers remove oils without stripping the ink channels.
- Aquaphor healing ointment. A thin layer for the first two days helps prevent dry cracking on fine-line work.
7. Shield Knot as Patchwork Filler on Calf
Collectors building Irish-themed sleeves often use small shield motifs as patchwork fillers. The advantage is flexibility; each element can be planned as a standalone session. A common mistake is repeating identical scale across the leg which leads to a flat composition. Vary sizes and stitch patterns so the eye moves. Session feel for a 2.5 inch patch is moderate with low sharpness. For showing off pair the calf with cuffed straight-leg jeans and midi skirts when weather allows. Keep records of each healed piece so future sessions match line weight and saturation.
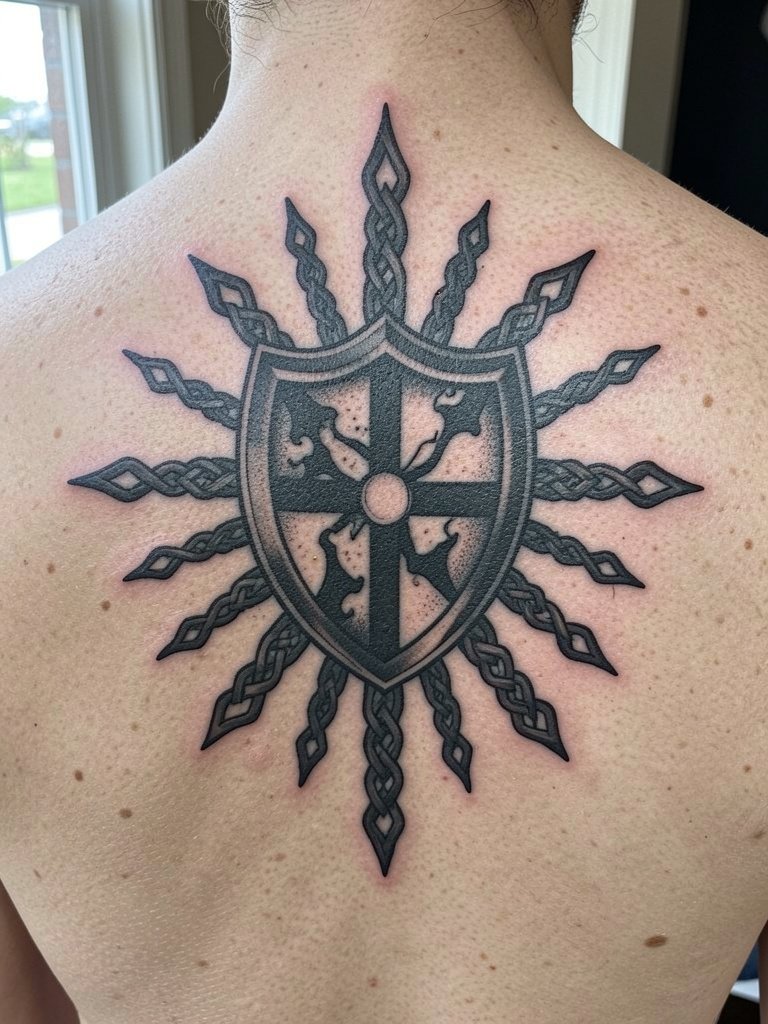
8. Large Back Shield with Knotwork Rays

Large back shields are ideal when you want dense knot detail that stays readable. The back gives room for layered ray motifs and negative spaces that prevent a muddy result. Expect multiple sessions and a staged shading plan. A bad approach is cramming tiny filler knots into a 6 inch field without strong outlines. During consult bring examples of healed large back pieces so the artist can accurately predict saturation and touch-up timelines. For post-session visibility choose open-back tops and racerback tanks when you want to show the work.
9. Heraldic Shield with Celtic Texture on Shoulder

A heraldic shield leans into crest language and reads as identity. The shoulder cap curves so the shield needs a slightly adjusted silhouette to avoid distortion. A common mistake is using a strictly rectangular shield reference that warps on the deltoid. Ask the artist to mock up the silhouette on your shoulder at the intended angle. For sessions a sleeveless top or cutout shoulder tee gives clean access and avoids rubbing. If you want muted color, keep it limited to panels rather than linework.
10. Shield and Cross Hybrid on Upper Chest

Merging cross and shield works for people who want heritage and faith visually combined. The sternum and upper chest move with breathing, so lines should be robust and not overly hairline. A frequent regret is insisting on micro filigree over a mobile surface which smudges with time. For the session wear a button-down shirt that opens fully or a scoop-neck top so the artist has unimpeded frontal access. If you plan color, pick muted saturation that will not compete with knot clarity.
11. Shield Knot with Negative Space Center on Calf
Negative-space centers keep knotwork crisp even in medium-scale pieces. On the calf this approach prevents internal shading from collapsing. A mistake is overusing gray washes in the center which reduces contrast. For the appointment wear shorts or loose joggers that can be pulled up without pressure on the healed skin. Plan for a single session for a medium shield, and budget a touch-up after the initial healing window.
12. Fine-Line Border Accents on Inner Forearm
Fine-line borders soften heavier Celtic structure but they are vulnerable when the forearm is small. The debate is active. One camp says fine line feels elegant and suits the inner forearm. Another camp insists bolder blackwork is more practical because the forearm's constant movement can blur hairline threads within a few years. Both views are credible. If you prefer the fine-line look, ask the artist to thicken border lines minimally and to show healed forearm examples. For showing off pair this placement with rolled shirts and a boxy overshirt.
13. Ribcage Shield for a Private Statement
Ribcage shields are intimate and dramatic. Pain is higher there and the skin moves with breathing which affects line placement. The common failure is requesting micro detail that cannot be supported by the thin rib skin. For this spot discuss numbing and break timing in detail, for example where and when a second short break helps; that concrete plan eases the session. Wear a loose bra or zip hoodie that opens fully for post-session comfort. Expect a two-pass touch-up more often than with deltoid or calf pieces.
14. Shield Motif as Sleeve Anchor on Outer Upper Arm

Using a shield as an anchor for a sleeve lets you build a cohesive Irish-themed composition. The shield should have a strong border and clear negative space so surrounding elements do not compete. A practical mistake is anchoring a sleeve with several small shields rather than one dominant shield which weakens the focal point. For session wear an easy-open button-down so the arm can be reached without rubbing fresh work. When planning layout, have the artist show scaled mockups at actual arm circumference so the shield sits upright when your arm rests.
15. Shield with Knotwork Rays on Full Upper Back
A central upper back shield with rays plays well when paired with symmetry and shoulder framing. The back tolerates heavier saturation so artists can use thicker baton lines for long-term legibility. A common problem is sketching too many thin rays that merge after a few years. Choose broader rays and stronger linework. For showing off select open-back tops or cropped jackets and consider layered chains to balance the top of the torso. Plan for multi-session shading that staggers sessions by at least four weeks.
16. Mini Shield on the Ankle

Ankle shields are vulnerable to footwear and socks rubbing during healing. The best micro designs here use bold contour lines and minimal internal detail. A common misstep is choosing intricate interlace at one inch square. For the appointment wear jeans cuffed above the ankle or shorts and bring low socks. This placement pairs well with low-cut sneakers and low-cut socks to display the art. Expect a touch-up after the first winter if you wear heavy boots.
17. Shield Emblem on the Chest Near Clavicle

Clavicle shields sit in a visible but not overly public spot. The bone creates shallow skin which affects needle depth choices. A frequent error is insisting on heavy stipple shading that looks patchy as the bone settles. For session wear a button-down or scoop-neck to avoid pressure after the tattoo. For showing off pair the placement with layered necklaces and a layered chain necklace that echoes the crest feel. Discuss exact placement in centimeters from the collarbone so the artist can mark it symmetrically.
18. Shield Knot on the Shoulder Cap

Shoulder cap shields benefit from the natural round frame the deltoid provides. The main technical note is expanding the shield breadth slightly to accommodate curvature so the knot does not compress visually. People often choose thin corner filigree which disappears on rounded anatomy. For the session wear a sleeveless top to allow the arm to rest naturally. This placement pairs well with tank dresses and tank dress summer styles for warm-weather visibility.
19. Simplified Shield for the Wrist Band
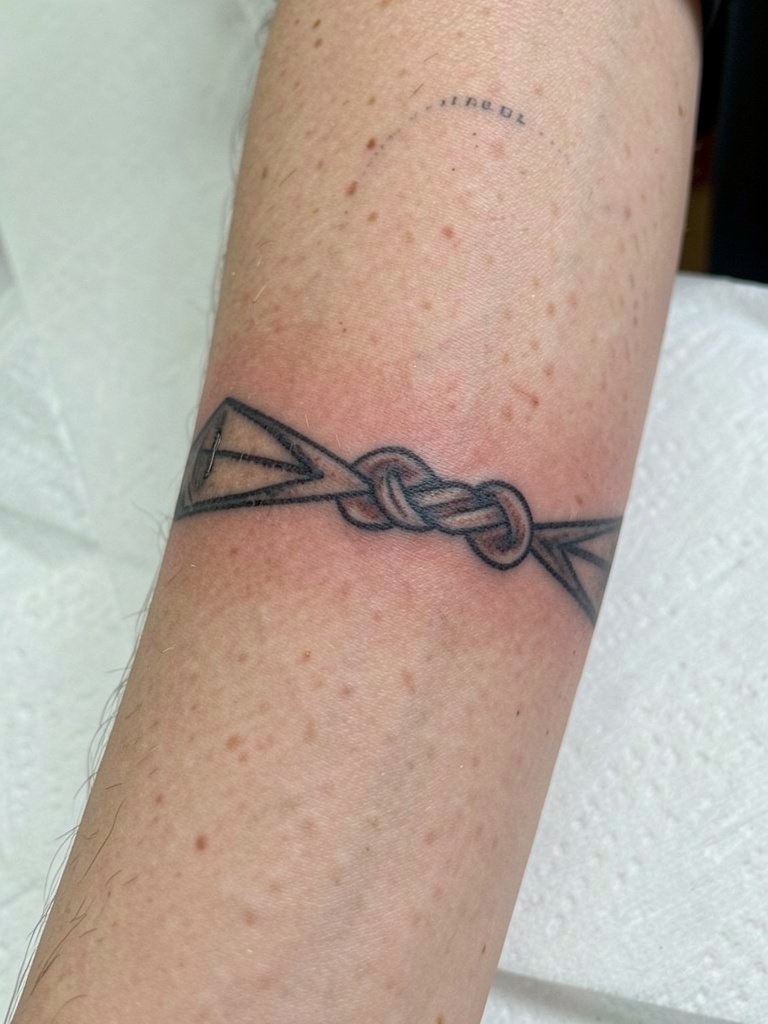
A cuffed shield motif around the wrist works as a modern take on heraldry but requires strict simplification. Too much crosswork leads to blurring under repeated hand washing. The edge-to-edge approach should use bold outlines and controlled negative bars. For showing off keep bracelets thin on the opposite wrist and avoid watches for two weeks. Bring a minimal watch or thin bracelet stack to balance aesthetics after healing. Expect a short first session and a likely touch-up if you frequently expose the wrist to sunlight.
20. Shield with Stipple Shading on the Outer Thigh
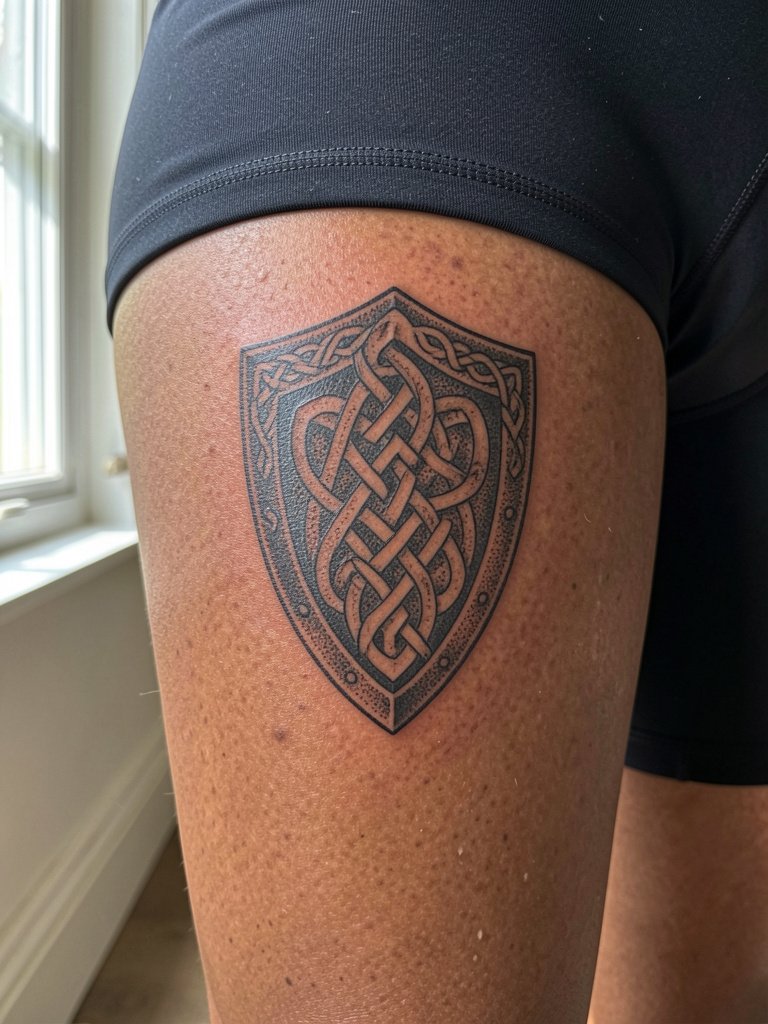
Outer thigh shields allow for texture like stipple shading without risking fold-related blur. The skin there is stable and supports dot work well. A mistake is applying dense stippling that blends into gray at close range. For the session wear shorts or loose joggers that can be adjusted without pressure. This spot pairs with midi skirts or shorts when you want to show the shield, so consider midi skirts for styling. Plan touch-ups two years out to refresh any stipple that softens.
21. Shield Knot as Chest Centerpiece for Men

Chest-centered shields on men carry a strong heraldic look when executed with bold linework and restraint on color. The risk is overdense internal knotting that competes with pectoral curvature. If your goal is a long-lasting emblem, prefer black and gray saturation over many accent colors. For the session wear a button-down that opens fully and consider a layered chain for balance after healing. Touch-up timelines here are usually one to three years based on activity and sun exposure.
22. Heraldic Shield with Textured Field on Outer Shoulder Blade

An outer shoulder blade placement keeps shields visible with most shirts off and easy to conceal with sleeves. The artist needs to scale the knot so it reads across a curved plane. A common mistake is relying on fine-line filigree there which loses contrast at two years. For showing off pair the area with crop jackets or open overshirts and wear a cropped utility jacket when you want edge. Ask for healed examples from the same placement and similar skin tone.
23. Shield Knot as Upper Arm Patch with Banner

Adding a banner to a shield gives a crest-like option for initials or a short name. The pitfall is choosing a long phrase that compresses and becomes illegible. For clarity, limit banner text to initials or a single short word and request the artist mock it at the exact final width. Session wear a sleeveless shirt or easy-open top. This placement pairs well with relaxed camp collars and camp collar shirts when you want to expose the arm.
24. Shield Knot Framed by Knotwork Halo on the Back

A halo frame keeps the shield feeling sacred and central. The risk with halos is too many small links that merge once the skin settles. Opt for fewer, bolder halo strands and stronger negative space. For sessions wear a liftable tank top or a zip hoodie that opens at the front. If you plan coordinated pieces later, save room around the halo for future connectors. Healed-photo evidence from similar halo work is worth requesting.
25. Vertical Shield Column on the Rib Edge

Vertical shields along the rib edge are dramatic and intimate but present high sensitivity for the client. Pain is significant and lines should be slightly heavier than the reference to avoid early blur. One camp advises against single-needle ribs entirely because of stretching and breath movement. The other camp says with correct depth and spacing it can settle well and will show healed photos as proof. Both stances are credible. For the session set up numbing and plan breaks as needed. Wear a loose bra or sports top and avoid tight waistbands that might rub during early healing.
26. Shield Crest on the Upper Thigh

Upper thigh shields benefit from the stability of that skin and allow for mid-scale detail without the risk that wrists or hands face. The main mistake is using too fine internal knotwork for a piece expected to be seen from a distance. For session wear shorts that allow the artist to work without waistband pressure. This style pairs nicely with midi skirts and shorts when you want to reveal the work, so consider midi skirts for styling. Expect a touch-up at one to two years for saturation refresh.
27. Shield Outline with Minimal Knotwork on Sternum

Sternum shields are bold and require precise placement because the area shifts with breathing and movement. The successful versions use a clear outline and minimal internal knotwork to prevent smudging. For the session plan a comfortable breathing strategy and numbing if needed, and wear a fitted sports bra or strapless-friendly top to avoid fabric rubbing. Because this is a high-motion zone expect a possible touch-up within the first two years. When considering a crest effect, keep banners short and the lettering large enough to read without crowding.
Frequently Asked Questions
Q: What size should a Celtic shield knot be to avoid looking like a blur in a few years?
A: Aim for a minimum of three inches across for detailed knotwork and about two inches for simplified icons. Healed linework needs spacing between crossings, so ask the artist to show a mockup at the exact size on your skin and to mark negative-space widths in millimeters.
Q: Blackwork or muted color for a shield, which lasts better?
A: Two camps argue this point. One camp favors black and gray because stronger contrast and bolder outlines tend to retain clarity as skin ages. The other camp supports restrained muted color to add crest identity if saturation is controlled. Both approaches work with correct spacing and line weight, so choose the one that matches your long-term maintenance plan.
Q: How do I find artists who show healed Celtic knot examples near me?
A: Use location filters on Instagram and TikTok when you search relevant hashtags and look specifically for healed shots. Try hashtags like #celticshieldtattoo and #blackworktattoo and add your city name in the platform search box. Reddit threads about local shops can also point to portfolios with healed work.
Q: How often should I expect touch-ups for chest, ribs, and wrist placements?
A: Chest pieces often need a touch-up around year two depending on sun and activity. Ribs can require an early touch-up at six to twelve months because of movement and shallow skin. Wrists and hands commonly need a touch-up within the first year due to washing and friction. These are general observations and depend on your skin, aftercare, and lifestyle.
Q: What should I wear to my appointment for different shield placements?
A: Match clothing to the placement so the artist has clean access. For shoulder and upper arm wear sleeveless tops. For ribs choose a loose zip or button shirt. For calf and thigh wear shorts that can be pulled up without pressure. A small wardrobe investment like a scoop-neck top or loose tank keeps the session comfortable.
