
A tiny wave can feel like a secret talisman when it sits where you see it every day. Pick the wrong line weight or placement and that neat crest will blur into a smudge within a couple of years. Pick the right one and it still looks crisp after touch-ups. Below you get 17 compact wave ideas, practical notes on how each ages, what to bring to the session, and simple outfit picks that actually help the design read.
1. Tiny Minimal Wave Band
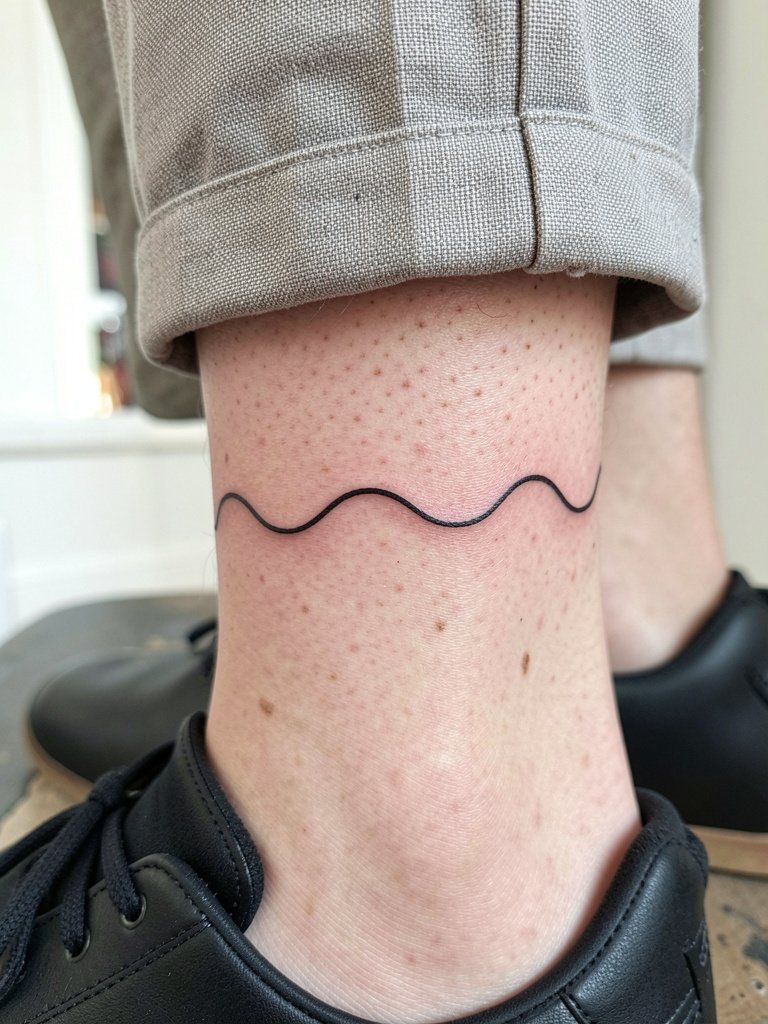
An ankle band is jewelry that travels with you. Suggest the artist use a slightly thicker single-line than the thinnest single-needle version so the band keeps its silhouette after a year of socks and shoes rubbing. A common mistake is asking for the skimpiest needle and then needing a touch-up at year one. For the appointment wear cropped linen pants so the artist can roll the hem up without tight fabric pressing on the area. Expect low session pain and a quick heal if you keep footwear roomy for two weeks.
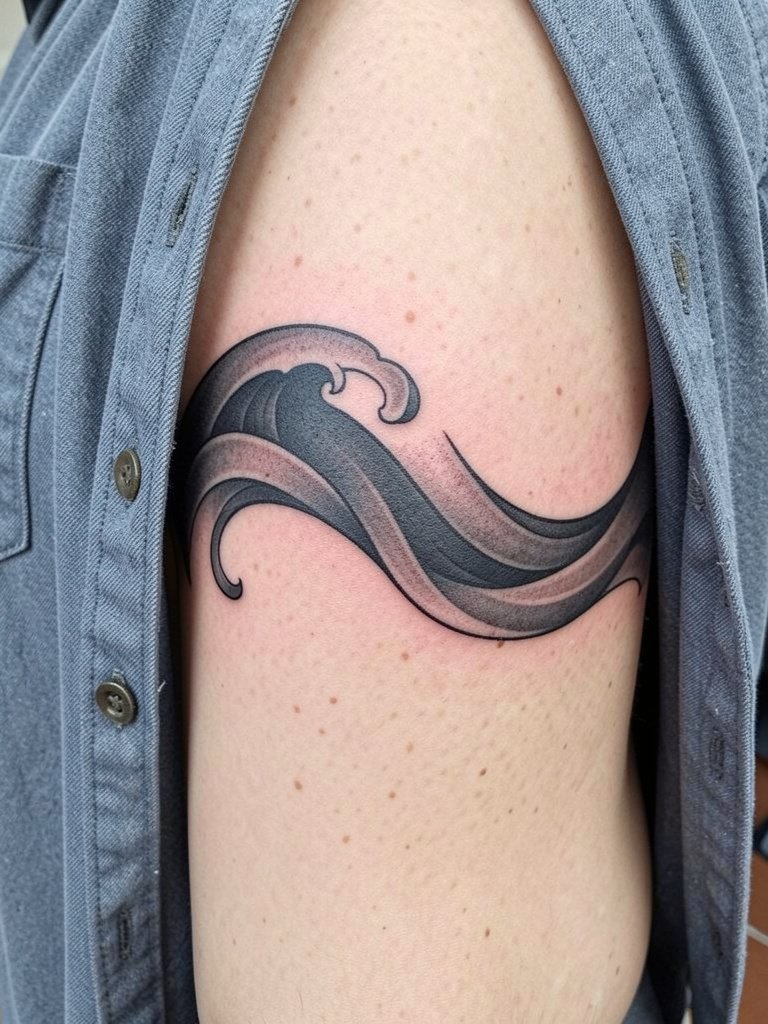
2. Cresting Line Wave for Upper Arm
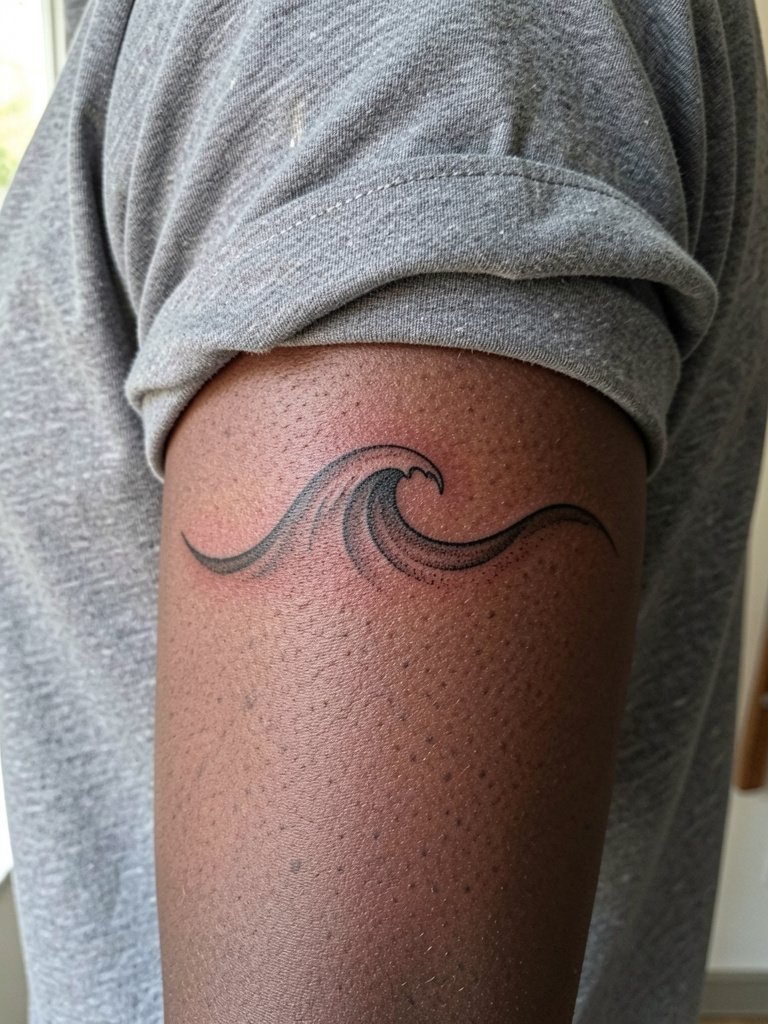
This placement reads like a quiet motion study when the arm moves. Ask for a taller crest and a touch of stipple shading so the design keeps dimension as it heals. One aging issue is that very thin single-needle crests can mellow into a blur on textured or sun-damaged skin. Bring two reference photos at different scales so the artist can show how the crest reads at one inch versus two inches. Session time is short. The area tolerates fine line well, but plan for a possible touch-up around year two.
3. Japanese-Style Small Forearm Wave
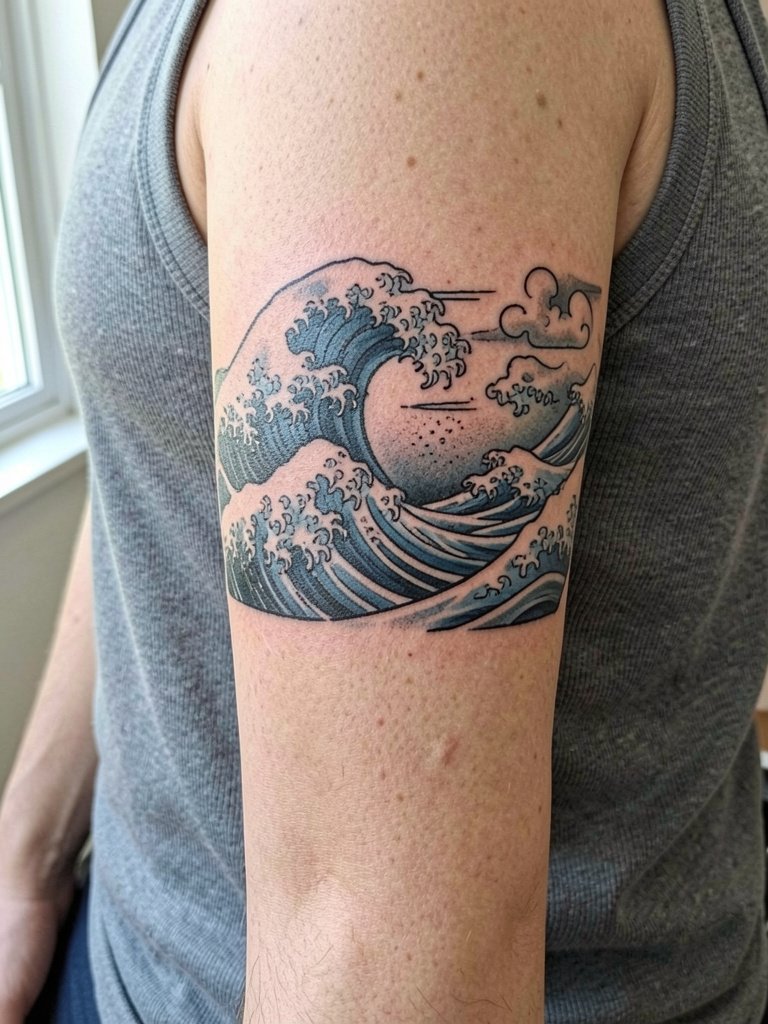
Scale down classic motifs carefully so the foam and wind bars still read as separate elements. The design benefits from bold outlines and compact negative space. A mistake is copying a full-scale panel and shrinking it, which collapses details. Expect moderate session discomfort where the wrist meets the forearm. Black-and-blue shading holds better than watercolor on this style, so choose saturation over pastel fills if you want longevity.
4. Minimal Wave with Tiny Script on Collarbone
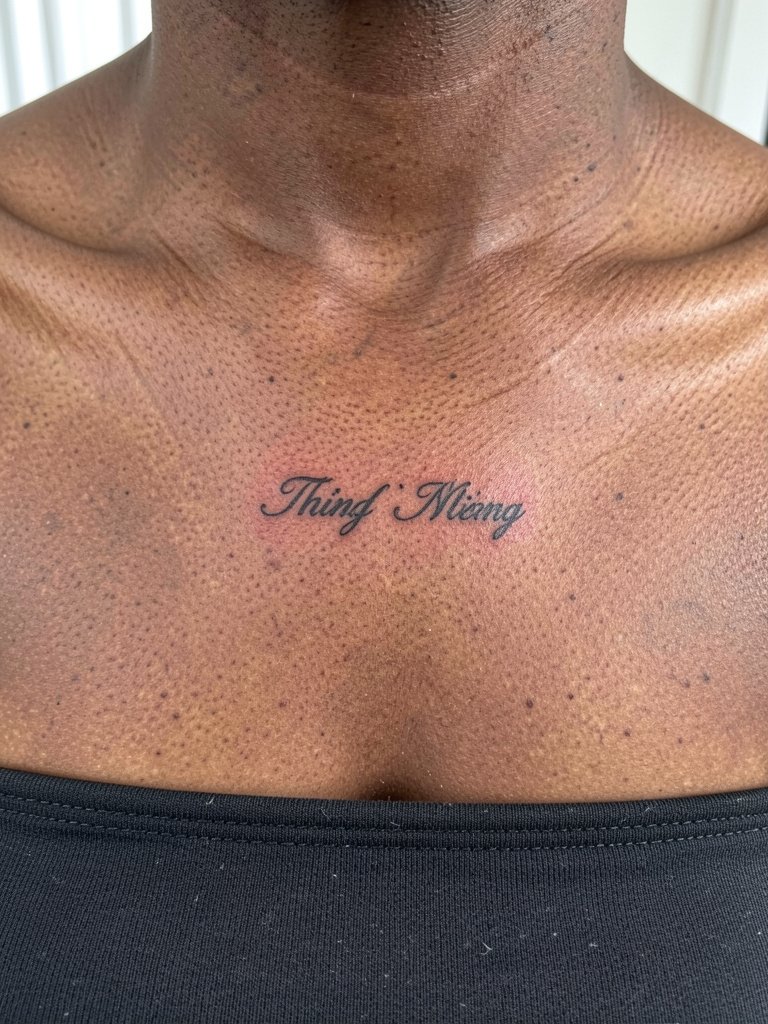
Collarbone placement gives a graceful horizontal read. Keep the script set a bit below the crest so shoulder movement does not press the letters into the linework. A frequent mistake is placing text too close to the bone where healing puckers and softens letters. For session day wear a strapless top so the artist can access the area without fabric rubbing the fresh ink. This area is more sensitive than the forearm, but most people tolerate a short session.
5. Curved Wave That Follows the Ribs
Rib pieces curve with your breathing and your posture, so the composition should be flexible rather than rigid. Pain here is high and sessions are best kept short. Artists disagree about numbing cream. One camp supports topical numbing to help clients get through high-pain spots, arguing it prevents flinching and preserves linework. The other camp warns that numbing can make skin feel rubbery and may encourage over-penetration, increasing scarring risk. If you consider numbing, ask for a precise plan such as timing of application and a capped session length so the artist can adjust technique accordingly. Expect touch-ups and take breaks during the session.
6. Single Clean Crest on the Inner Ankle
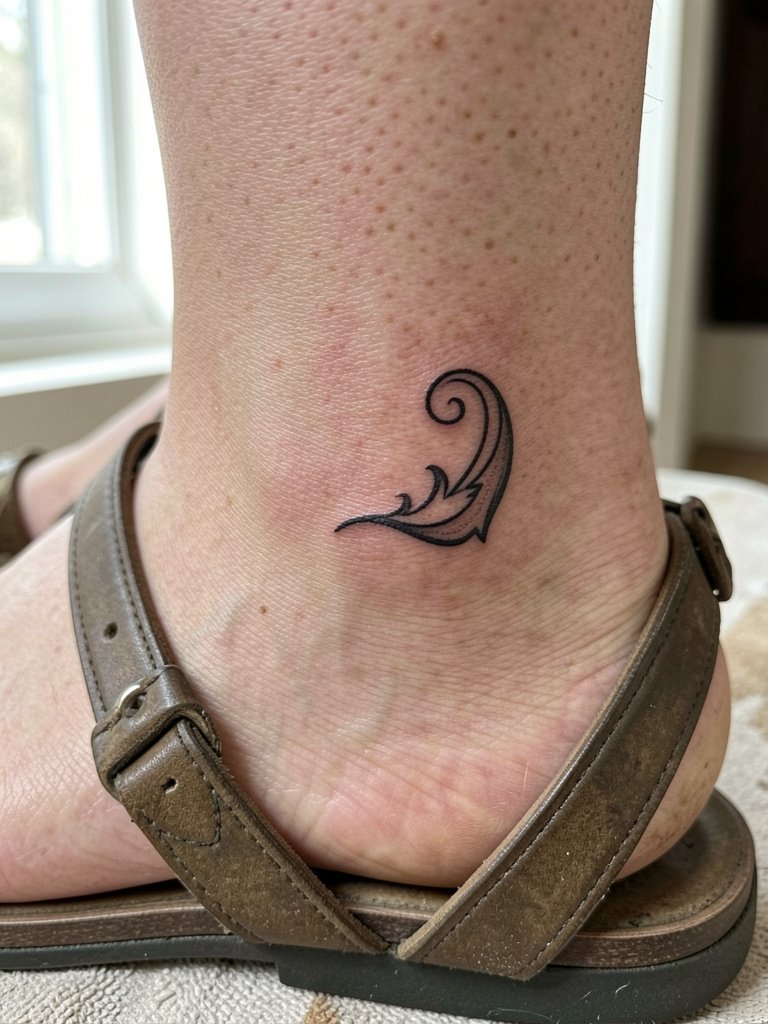
An inner ankle crest is discreet and visible in summer. The biggest practical issue is friction from shoes. Wear open toe sandals and avoid tight socks for two full weeks after your session. For longevity, a hair heavier line weight than the absolute thinnest single-needle will keep the crest readable at year two. Expect light to moderate pain and plan for a small touch-up if the skin is frequently rubbed.
Pack Smart
The first six ideas include several high-friction placements and delicate linework, so a small kit can prevent early scabbing and irritation.
- Mad Rabbit Tattoo Balm (travel size). A lighter balm option for short sessions and on-the-go care when you want less grease during healing.
- Tokyo Tattoo Ink Black. For collectors who want to talk pigment choices with studios, this brand is noted for stable black saturation in fine work.
- Tattoo Gone Cream. An emergency option some people keep on hand if they start regretting a micro design very early on. Use only after professional consultation.
- Trigger Tattoo Balm. Lighter than thick ointments and often recommended for sweaty areas like the ribcage during warm months.
- Saniderm Second Skin. A protective film useful for ankle and wrist placements where footwear or bracelets cause repeated rubbing in the first five days.
7. Single Clean Crest on the Inner Wrist
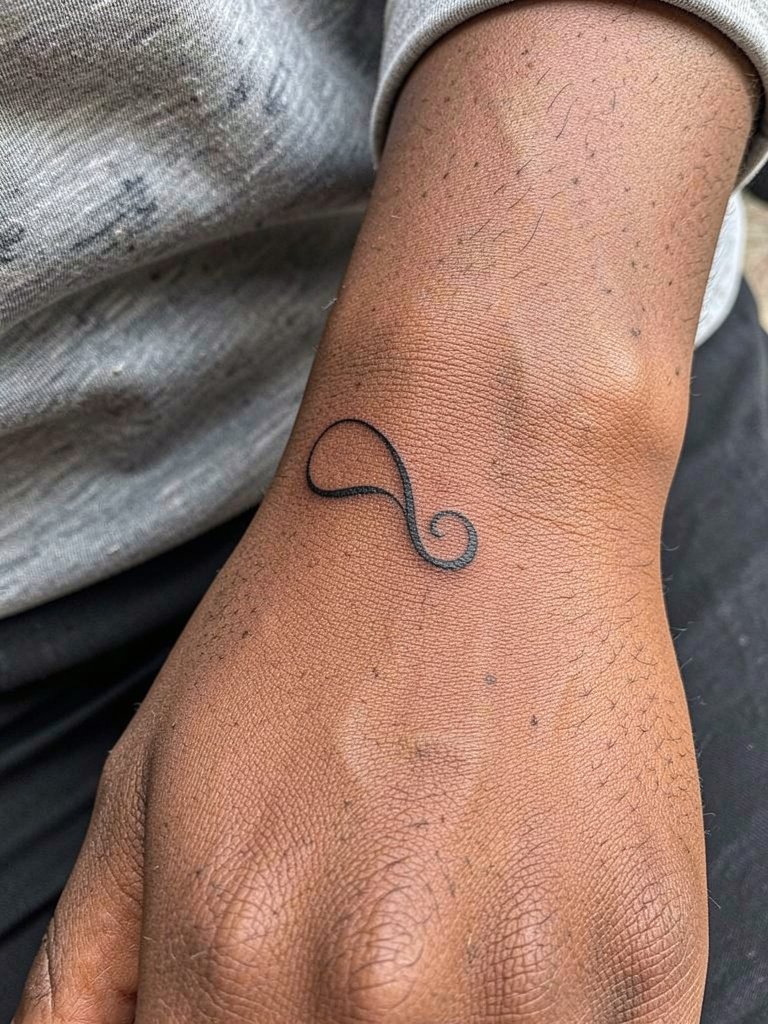
Wrist skin sees a lot of motion and contact, so durability is a real concern. Artists split into two camps about fine-line wrist work. One camp says fine-line crests on wrists blur within one to two years because the skin stretches and is exposed to daily friction. The other camp argues that with correct needle depth and slightly wider spacing, fine line can hold clean for multiple years and will show healed examples to prove it. If you want to maximize longevity, ask for a slightly heavier line or a double-line variant and bring photos showing the exact line weight you prefer. Expect frequent sun exposure to fade black ink faster, so plan on sun protection.
8. Outline Wave on the Shoulder Blade
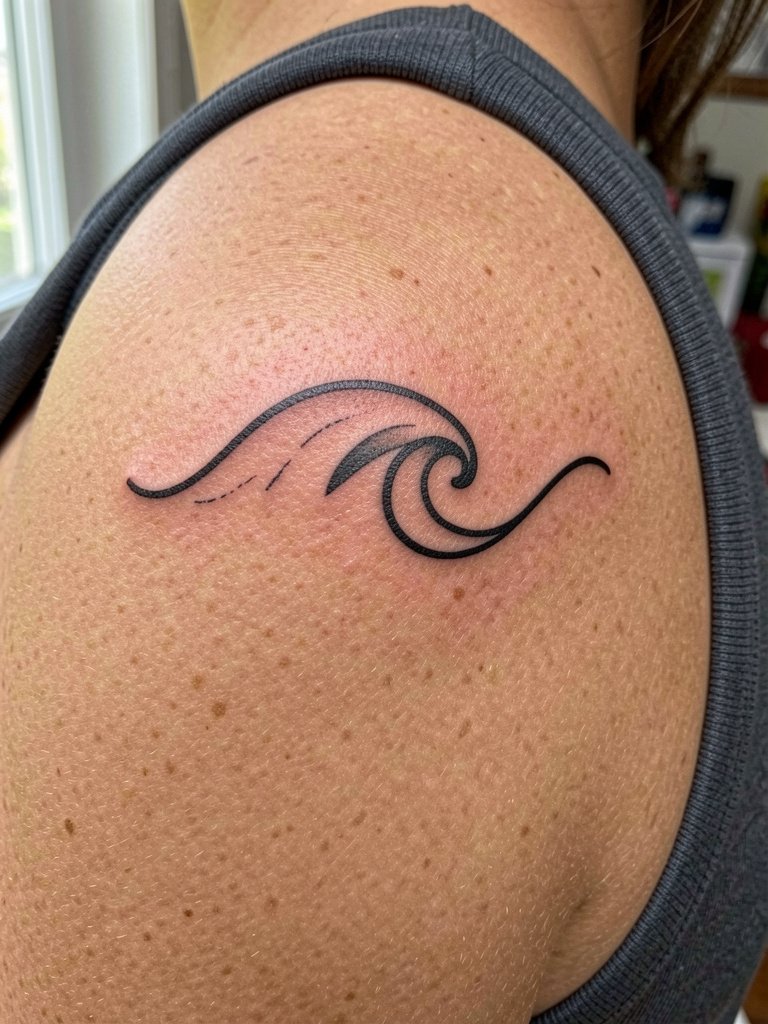
Shoulder blade skin is forgiving and ages well if the lines have room to breathe. The visual win here is bold contour over micro detail. A common error is cramming too many elements into the small shoulder canvas. Session discomfort is low and healing is straightforward. If you plan to show the design, wear tops with an open back. Mention to the artist that you want the outline to read from across a room, not only up close.
9. Black-and-Grey Wave on the Ribs
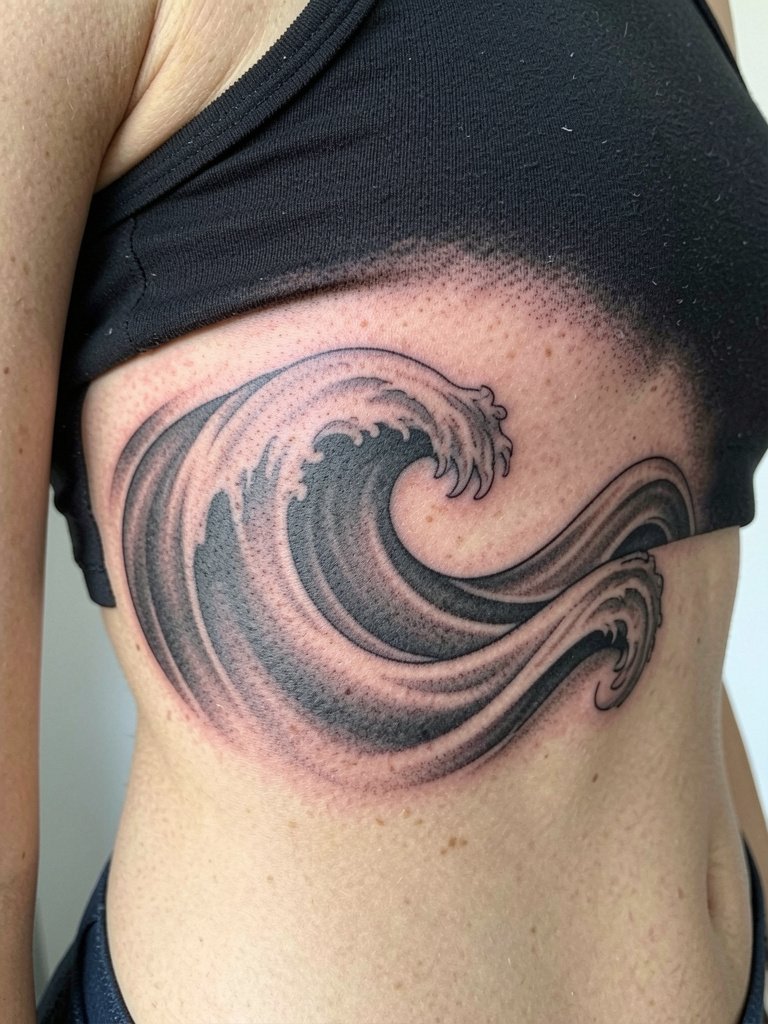
Rib shading adds depth and feels sculptural when the design follows the body curve. For durability choose black-and-grey gradients rather than diluted color washes. Discuss session pacing with your artist so you can pause between passes if needed. Expect high pain and a longer healing window because the rib skin flexes with breathing. Plan wardrobe for aftercare, such as loose tops that do not rub the area. A realistic shading approach often needs a touch-up at year two to restore contrast.
10. Wind Bar Accent Wave on Outer Forearm
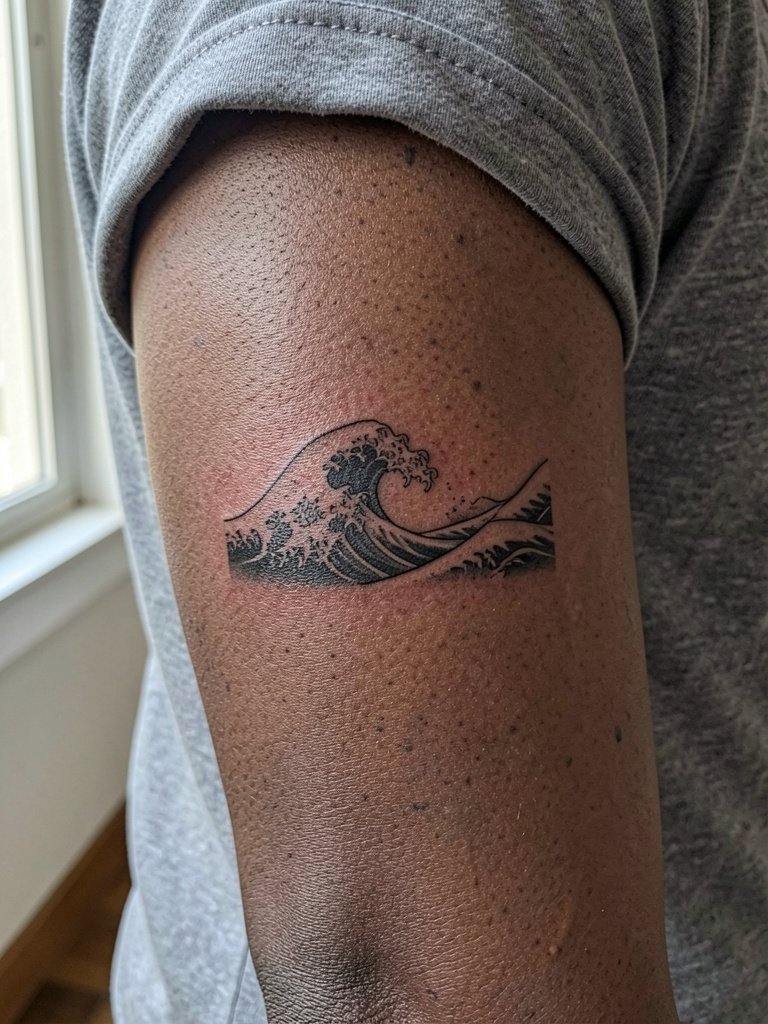
Adding wind bars gives a sense of motion without adding physical size. The style benefits from strong outlines and measured shading so elements do not blur together. A usual mistake is over-detailing the wind bars at tiny scale. Session pain is low and visibility is high, so the piece works well for people who want an everyday reminder without being loud.
11. Micro-Realism Wave on the Side of a Finger
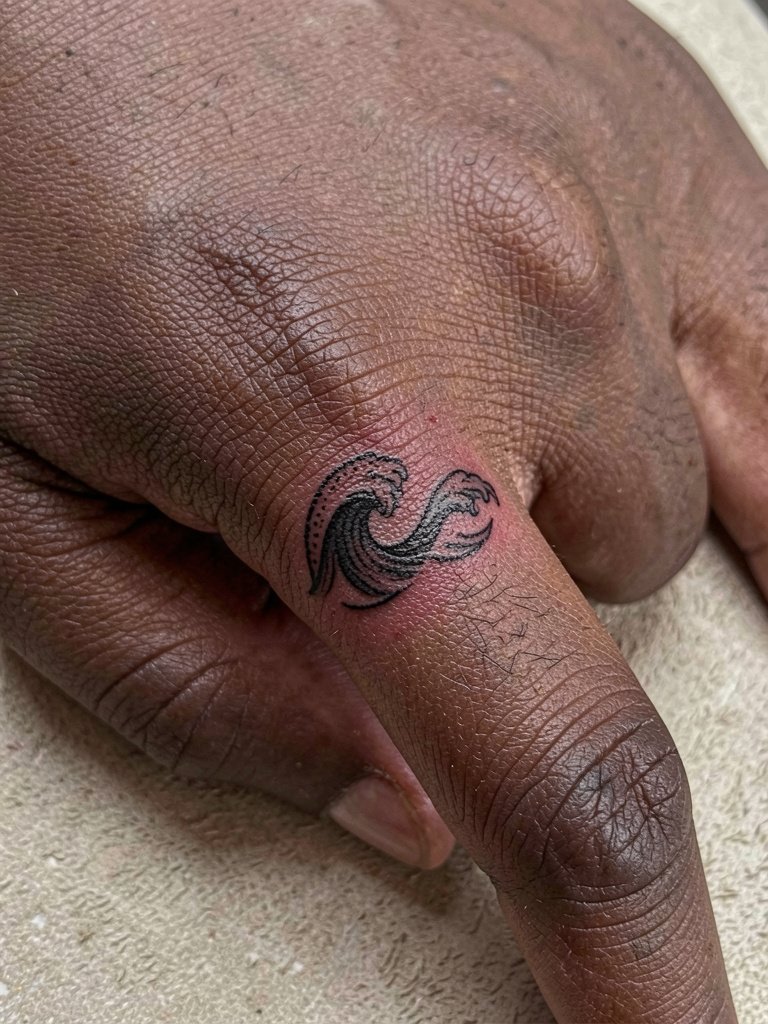
Finger placements are intimate but high maintenance. Expect heavy fading and faster blurring. A micro-realism crest should be placed on the side of the finger to limit abrasion from daily use. The common mistake is choosing the top of the finger where wash and wear remove pigment quickly. For the session wear clothing so hands are accessible but not rubbing the area afterward. Budget for touch-ups within 12 to 18 months and keep daily moisturization consistent after the initial heal.
12. Watercolor Accent Wave on Upper Thigh
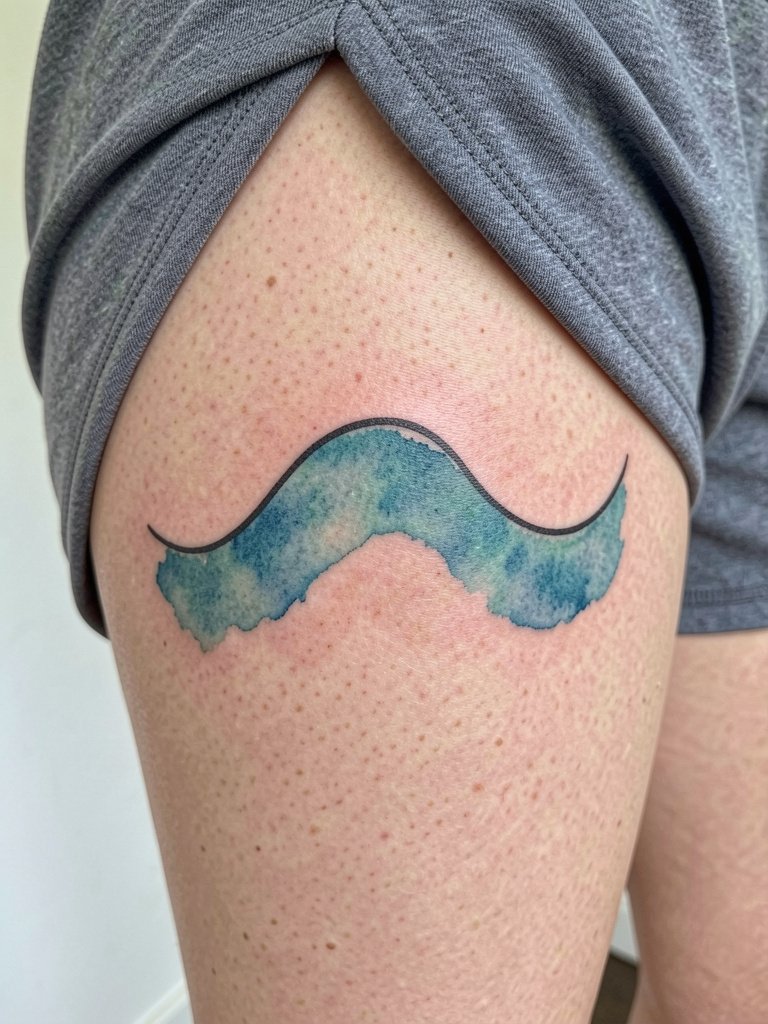
Watercolor accents are eye-catching but need careful saturation to avoid turning into a faint bruise after a few years. If longevity matters, pair the wash with a crisp black outline so the silhouette stays readable. Inner-thigh sessions are private and low-friction during everyday wear, making them ideal for color accents. Aftercare is straightforward, but avoid tight shorts while the piece heals.
13. Geometric Triangle Wave at the Nape
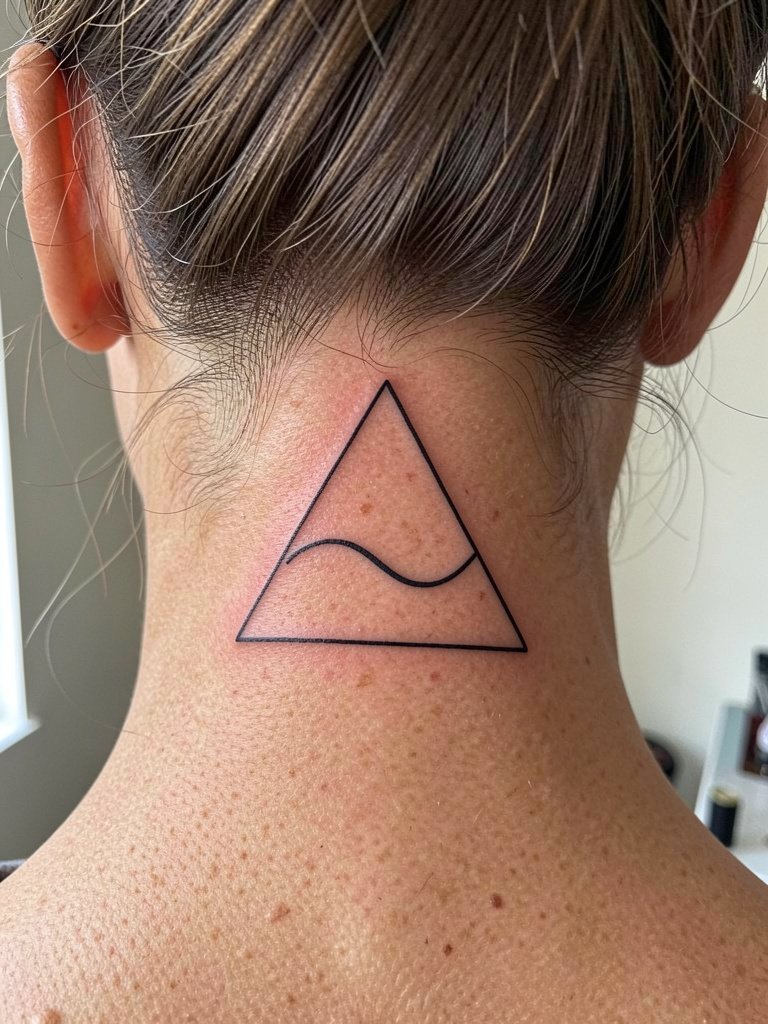
The nape is a subtle place to hide detail that peeks out with certain hairstyles. Keep geometric elements simple so lines do not crowd each other at small scale. For session wear tie hair up and bring a small clip to keep it out of the way. A common mistake is overcomplicating the interior of the triangle, which ages into visual noise. If you want the piece to show, consider short hair or updos that reveal the area.
14. Outline Wave on the Smooth Inner Upper Arm
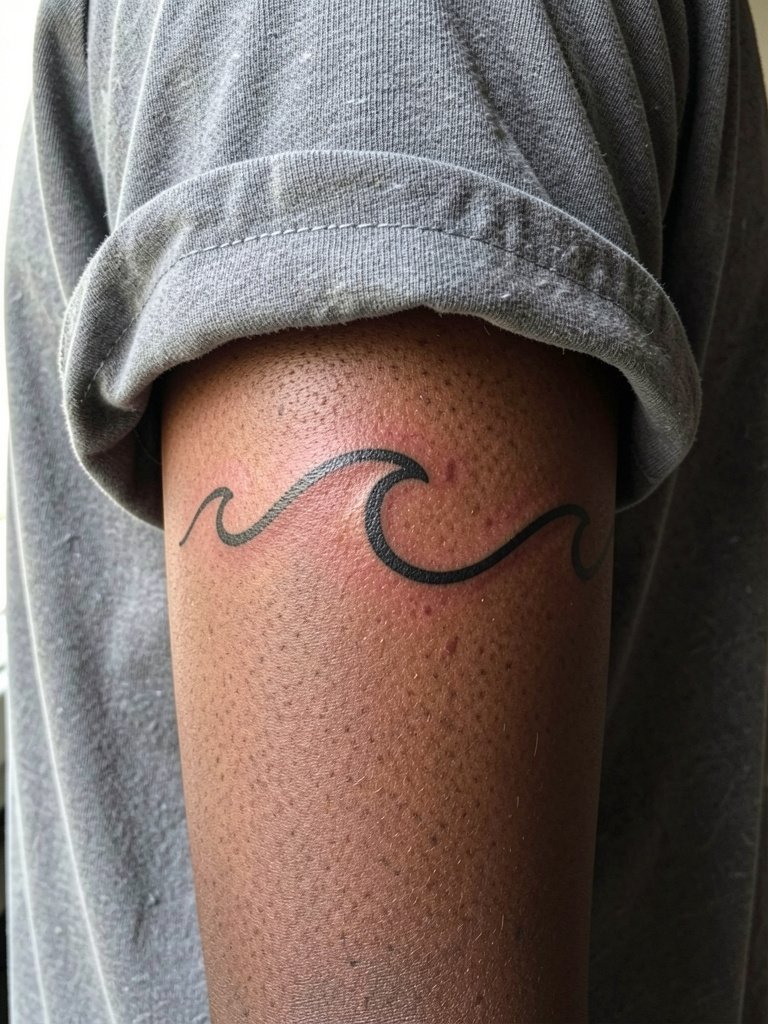
The inner upper arm is a private spot that slides between visibility and concealment. Bold outlines work well here because the skin is smooth and does not see constant abrasion. A common error is placing too many tiny fills, which gets lost after healing. Session pain is mild and touch-ups are infrequent. If you plan to expand this into larger work later, ask the artist how the outline will flow into a future piece.
15. Double-Line Wave Ankle Band for Durability
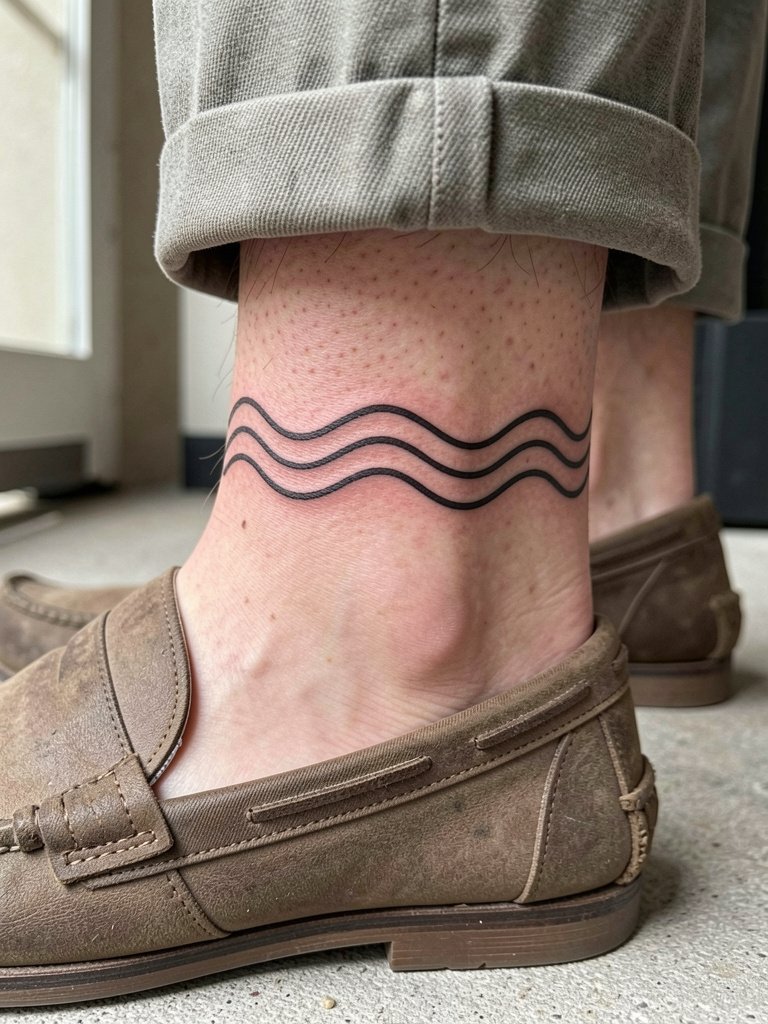
Double-line bands are a practical response to fading in high-contact places. Reddit and forum reports show double lines hold their visual separation longer than single ultrafine lines on ankles. Choose enough spacing between the two lines so each keeps its identity as the skin moves. For the session wear slip-on loafers or sandals and avoid tight socks for the first fortnight. Expect a short session with low to moderate pain.
16. Curved Wave Bracelet on the Wrist with Accessory Pairing
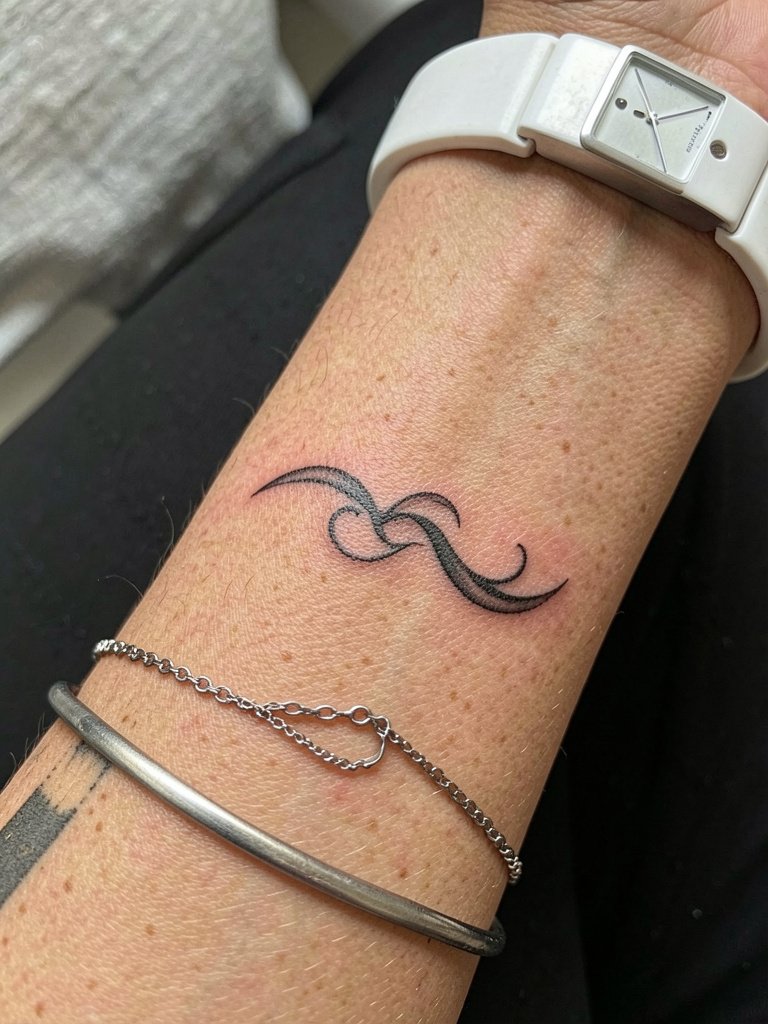
Wrist bracelet-style waves pair naturally with thin jewelry. To keep the look balanced, choose a wave whose crest aligns with the watch face when your arm is at rest. During the session remove watches and bracelets so the artist has unobstructed access. If you like a layered aesthetic, a thin chain bracelet set frames the tattoo without crowding it. Be realistic about fine-line wear here and expect a touch-up window within the first two years.
17. Wave with Geographic Coordinates on Inner Upper Arm
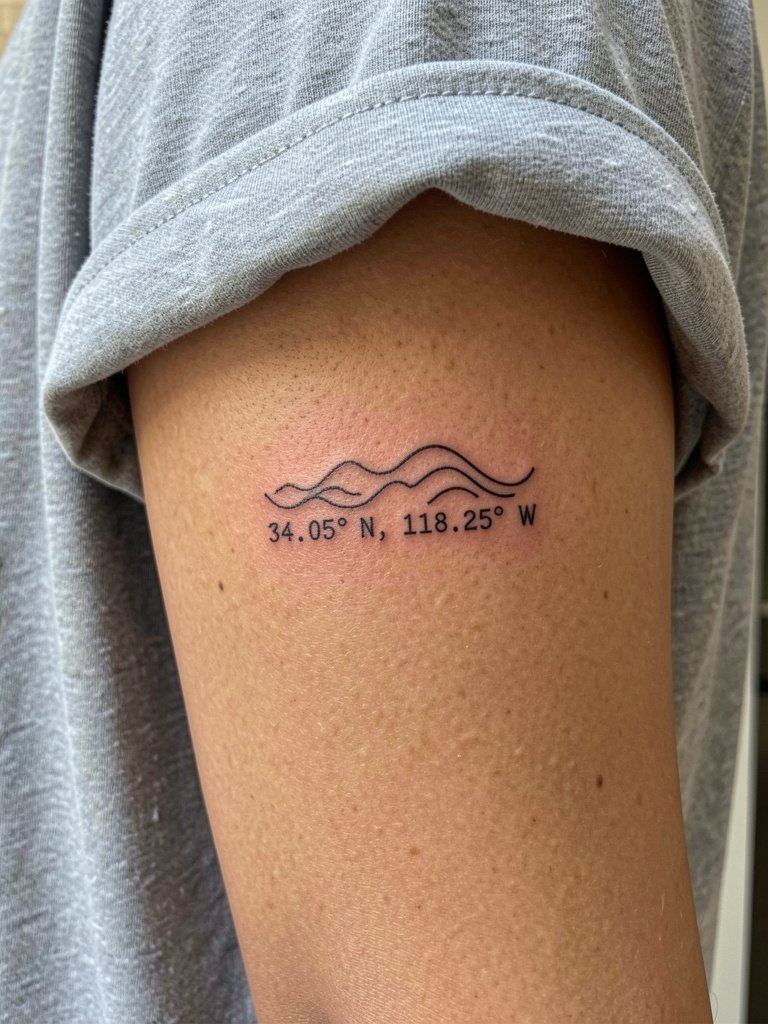
Pairing a wave with coordinates locks the design to a place without a long caption. Make sure the coordinates are set in a clear monospace or small serif so numbers do not blur into each other over time. A typical mistake is choosing tiny type with minimal spacing. For the session bring exact coordinates and ask the artist to show you a stencil in the scale you plan to tattoo so you see letter spacing upfront. The inner upper arm heals well and is private, so this is a discreet way to anchor the wave to a memory.
Frequently Asked Questions
Q: How long will a small wave tattoo last before needing a touch-up?
A: It depends on placement and line weight. High-friction spots like wrists and ankles often need a touch-up within one to three years if the design is ultra-fine. More saturated black-and-grey or slightly heavier line weights can go longer, often two to five years before a small refresh.
Q: Where can I find artists who post healed examples of small wave work?
A: Search hashtags like #smallwavetattoo, #finelinetattoo, and #minimaloceanwave on Instagram and TikTok, then filter by location. Tattoodo and the Inked App let you search by keywords such as "tiny black wave" and show healed portfolios. Reddit communities like r/tattoos and r/tattooadvice are useful for peer recommendations and real healed photos across skin tones.
Q: Which placements are most likely to blur quickly and why?
A: Fingers, the top of the hands, and high-friction ankle spots blur the fastest because those surfaces see repeated washing, contact, and sun. Wrists also wear faster due to motion and bracelets. If you want a small wave in these spots, choose slightly heavier line weight or a double-line version to delay blurring.
Q: Do numbing creams help for rib or nape sessions?
A: People divide on this. One position argues numbing cream helps clients get through painful sessions and reduces flinching so the artist can work cleanly. The other position warns that numbing can change skin feel and cause artists to over-penetrate, which may increase scarring. If you consider numbing, state exactly when and how long you expect the product to be applied so the artist can adapt technique.
Q: How much should I budget for a small wave tattoo?
A: Shop minimums push many tiny pieces into a range. Expect typical small tattoos to fall roughly in the 100–250 USD range depending on studio minimums and location. Larger styles, color, or multi-session work raises that estimate.
Q: What should I wear to my appointment for different placements?
A: Practical session wear matters. For ankle pieces wear cropped linen pants or sandals. For collarbone or upper chest choose a strapless or button-down top. For ribs bring a loose button-down so the artist can access the side without tight fabric. As a small accessory tip, a minimalist watch on the opposite wrist keeps the look balanced once healed.
