
Shoulder florals look effortless until they age poorly. Pick the right style and placement now and the tattoo you love at one year will still read clean at five. Focus on bloom stage, leaf direction, and building contrast rather than chasing the tiniest needle work. Below are 23 floral shoulder designs with practical notes on how each one heals, what to ask for during the stencil stage, and how to show it off.
1. Black Floral Shoulder Tattoo, High-Contrast Wrap
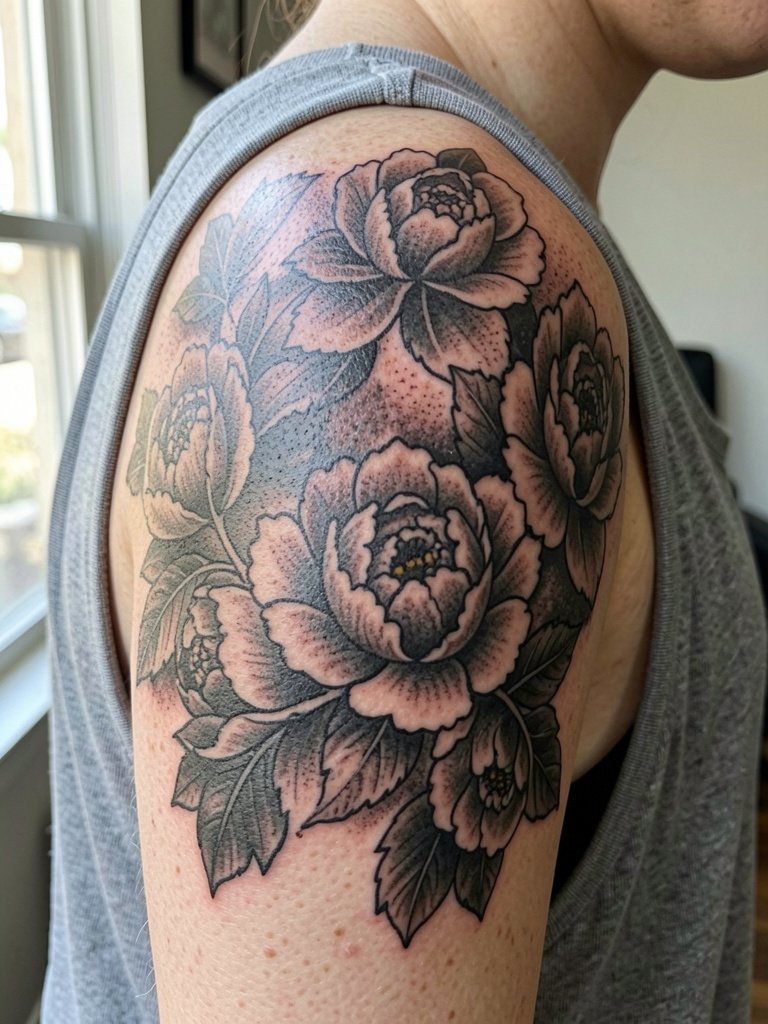
This is the shoulder cap piece that reads from across the room. It works best in one session with medium to thick linework and solid black fills to keep contrast as the piece ages. Bring reference photos showing final healed saturation rather than fresh redness so the artist can match depth. Common mistake: asking for tiny single-needle petals inside heavy black fills, which creates an unreadable middle. Expect a moderate pain level on the deltoid and a one to two hour session for a medium wrap. For showing off, consider an off-the-shoulder top in a neutral color to frame the silhouette.
2. Fine Line Peony with Petal Layering
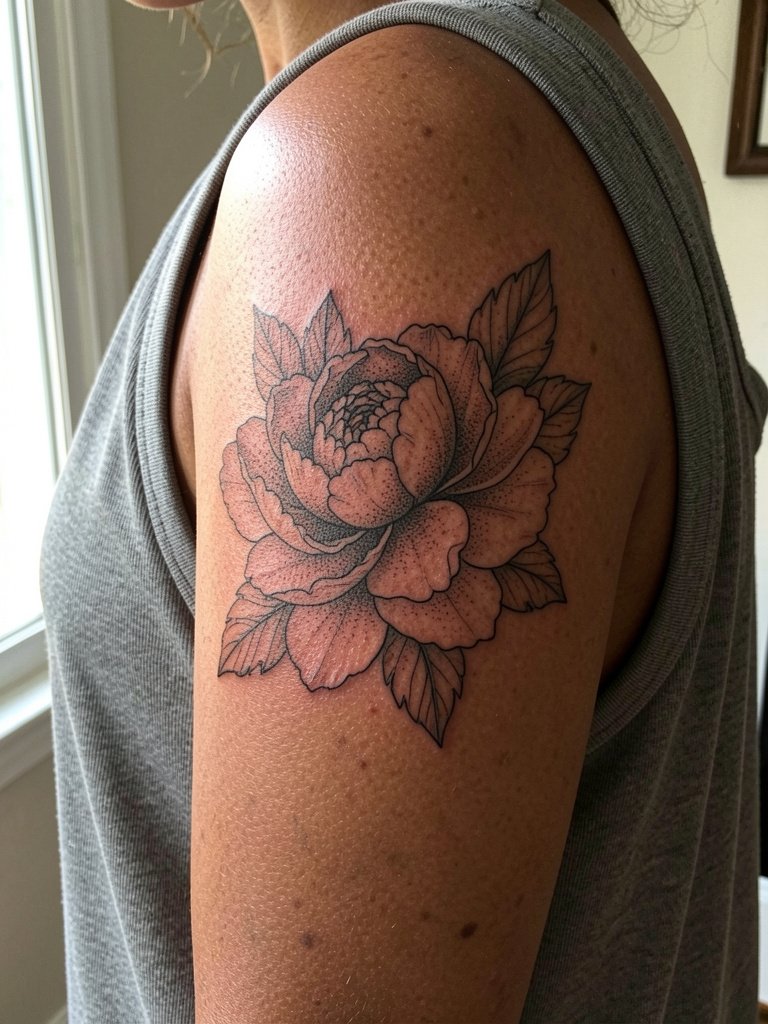
If you want the softness of single-needle work without a flat drawing look, ask for petal layering where outer contours are slightly thicker than inner veins. Specify varied lineweight and show healed photos so the artist knows how much contrast to leave. The aging risk on the shoulder is that ultra-thin inner veins disappear by year two. Typical session time is about one hour. Mistake to avoid: asking for uniform pencil-thin lines across the whole bloom. For a casual outfit that highlights the wrapping petals, try a loose cotton tank.
3. Watercolor Floral Shoulder, Painterly Washes
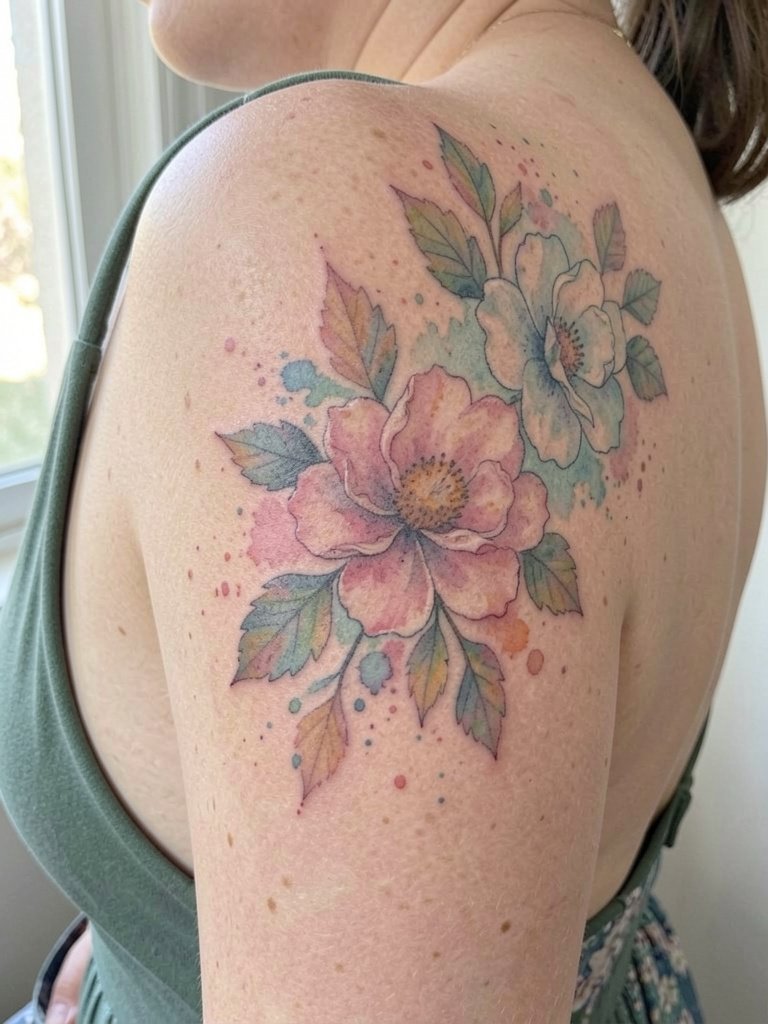
One camp champions pure watercolor for its dreamy look and soft color transitions. The other camp argues soft shading with faint outlines holds up better on shoulders because structure prevents color from bleeding as skin moves. If you prefer a painterly finish but worry about longevity, ask for implied outlines or subtle contour lines around key petals. Session time can increase to two hours for layered pigments. A typical mistake is requesting no boundary lines at all on the deltoid, which makes touch-ups happen sooner. For date-night outfits pick a backless dress in a pastel hue that echoes the tattoo tones.
4. Bold Colorful Peony with Thick Outlines
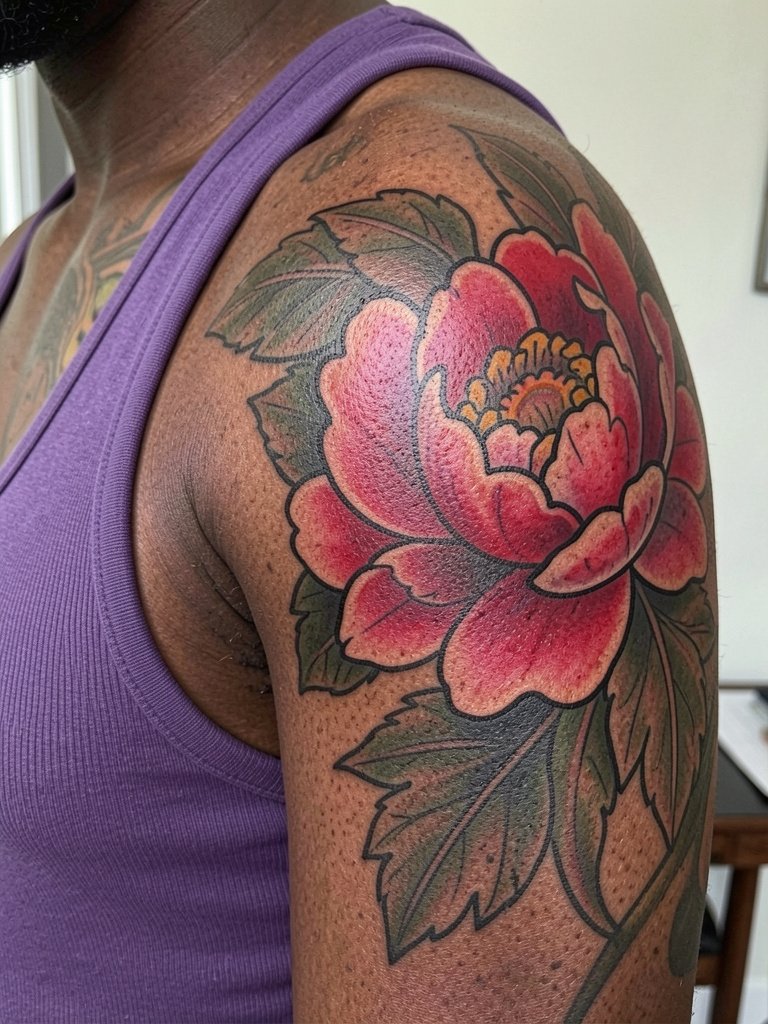
This one reads boldly and keeps its personality as the skin ages because of strong outlines and saturated fills. Specify high saturation and thicker outer linework to preserve petal shapes over time. Common mistake: shrinking a neo-trad peony down to a tiny size, which causes the color to merge into a blur. Expect two sessions for layering and color saturation. To pair with everyday wear, try a solid jewel-tone tank that makes the floral colors pop.
5. Minimalist Single-Needle Blossom near Collarbone
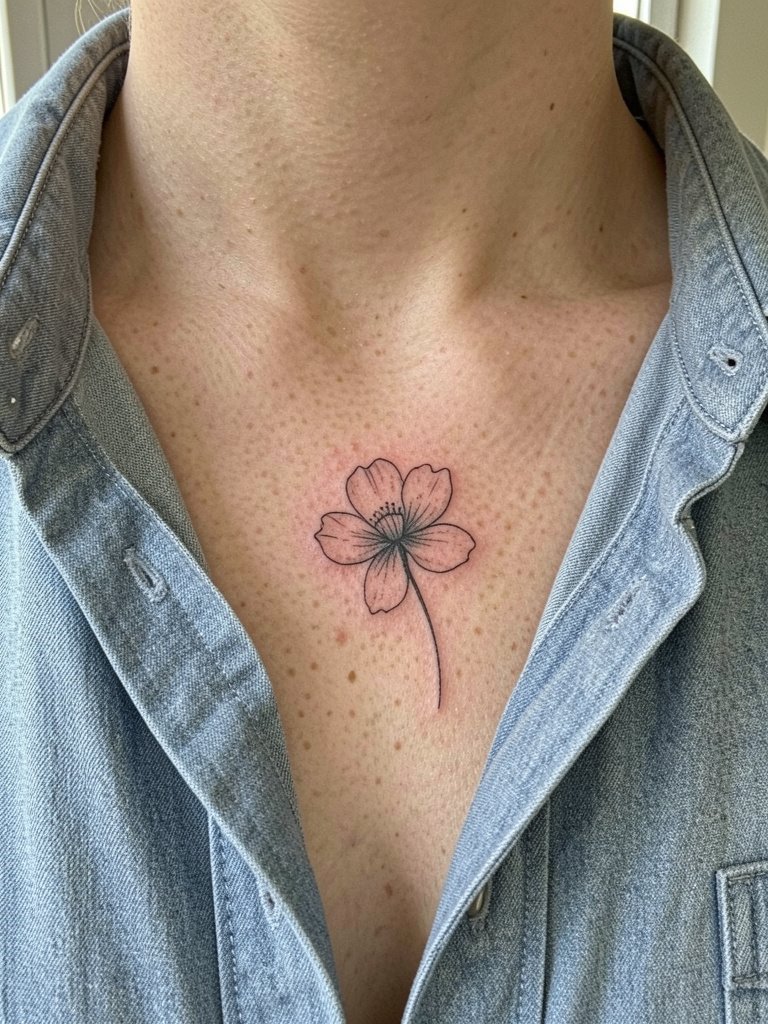
The collarbone edge is elegant but higher on the pain scale than the deltoid. One camp prefers the delicate collarbone placement for its editorial look. The other camp points out the bone there amplifies pain and can make tiny lines blur if placed too close to the edge. If you choose this spot, ask for slightly wider spacing between lines than you see in tiny references and request placement sketches in the exact posture you plan to wear. Session time is short, thirty to sixty minutes, but expect more sensitivity. Show it off with a crisp button-down shirt with the top button undone.
6. Peony Half-Open Bloom, Natural Movement
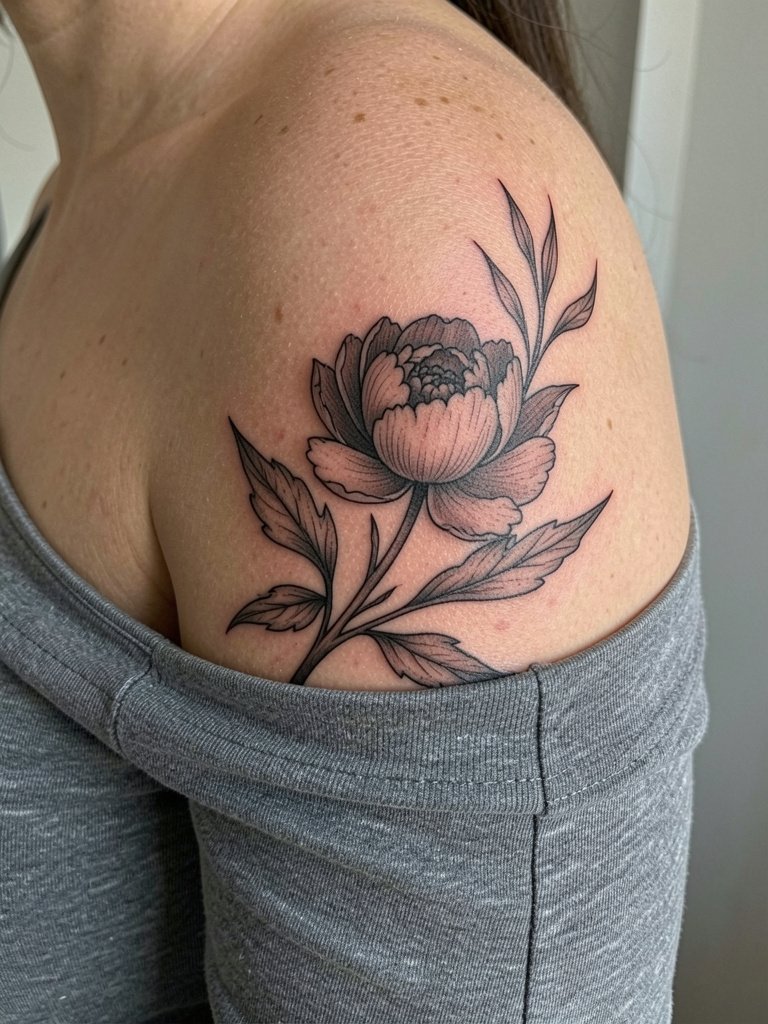
Choosing a half-open peony gives a balance between bud potential and full bloom drama. The leaf direction should follow the deltoid curve so the design wraps naturally. A practical move is to request a freehand draft drawn on your shoulder so you can see how leaves sit over muscle. Common mistake: static leaves placed as if on flat paper. For session wear, bring a loose tank top so the artist can access the shoulder and upper back without tugging fabric.
Pre-Session Essentials
These picks smooth the appointment and the first healing days for the shoulder pieces above. They help with stencil checks, numbness management, and keeping fine work clean during the crucial first week.
- Stencil transfer paper kit. Use a printed transfer to preview line placement on the curve of your deltoid before the needle touches skin, especially helpful for wrap designs in ideas 1 through 6.
- Topical numbing cream. Applied as directed prior to the session eases collarbone sensitivity without affecting linework when used correctly.
- Thin protective film roll. A lightweight barrier keeps a shoulder cap piece clean during early showers and reduces friction from clothing.
- Fragrance-free body wash. Gentle cleansing during the first week helps avoid irritation around fine line petals and negative space.
- Hustle Butter Tattoo Aftercare Balm. A breathable balm is useful after the initial bandage period for maintaining hydration on detailed floral work.
7. Fine Line Peony with Strategic Negative Space
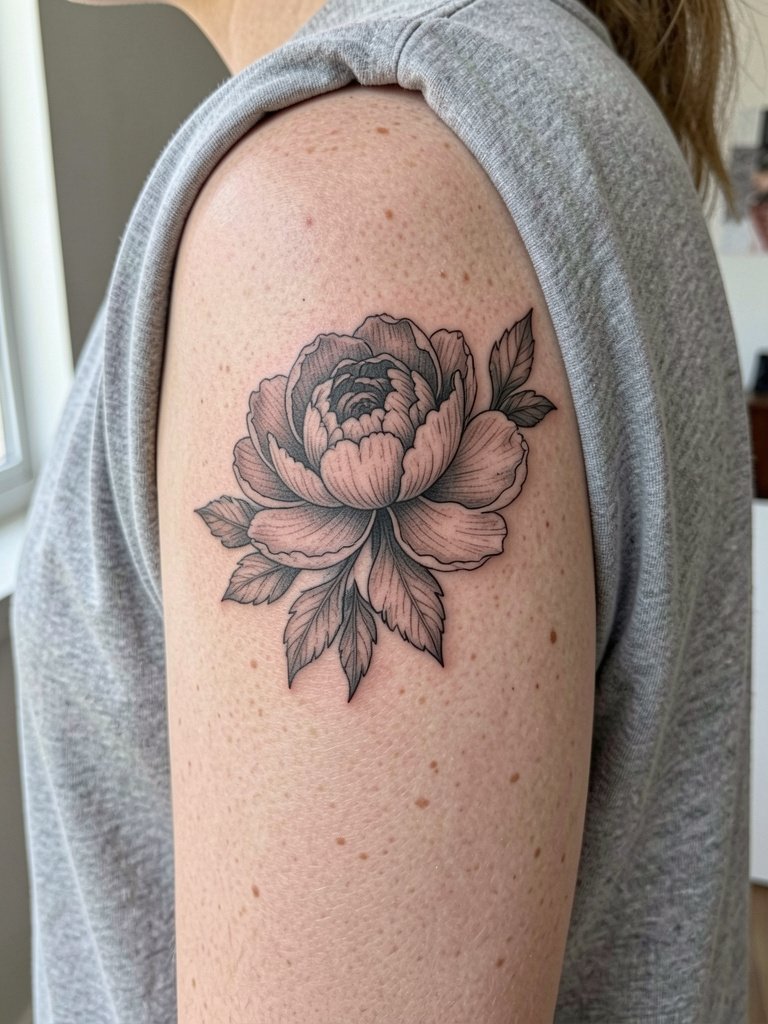
Negative space is the aging hack for botanicals. Ask for unshaded petal areas and slightly wider gaps where petals overlap so the flower keeps depth without extra ink density. A common error is filling every petal in the initial session, which gives an immediate impact but looks muddied in years. Session time is about an hour. If you want an outfit that frames the empty spaces, an off-the-shoulder top in cream or olive complements the airy feel.
8. Peony with Leaf Direction Following Shoulder Curve
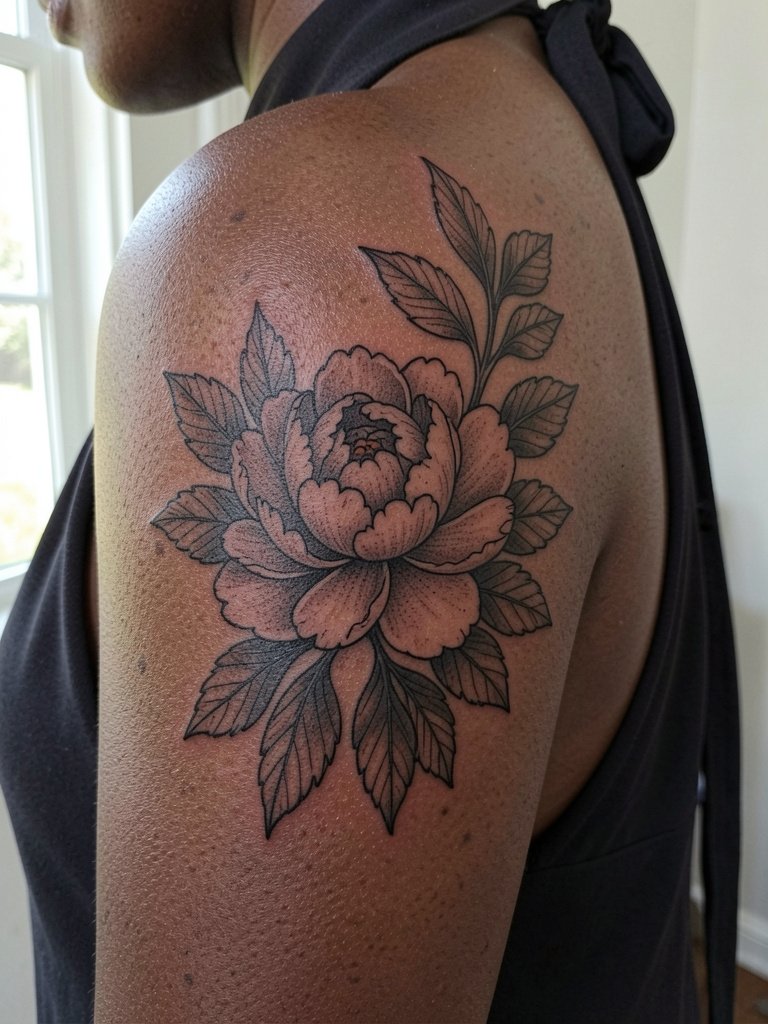
The leaf direction rule matters more than most people expect. Leaves should arc with the shoulder so the bloom looks like it sits on the body instead of being pasted on. During consultation present photos of your shoulder at rest and in motion so the artist can place stems on muscle tension areas. The usual mistake is copying a flat photo reference and ignoring anatomy. For evenings out, try a halter dress pastel that exposes the upper back and shoulder curve.
9. Hybrid Peony with Wildflower Extras
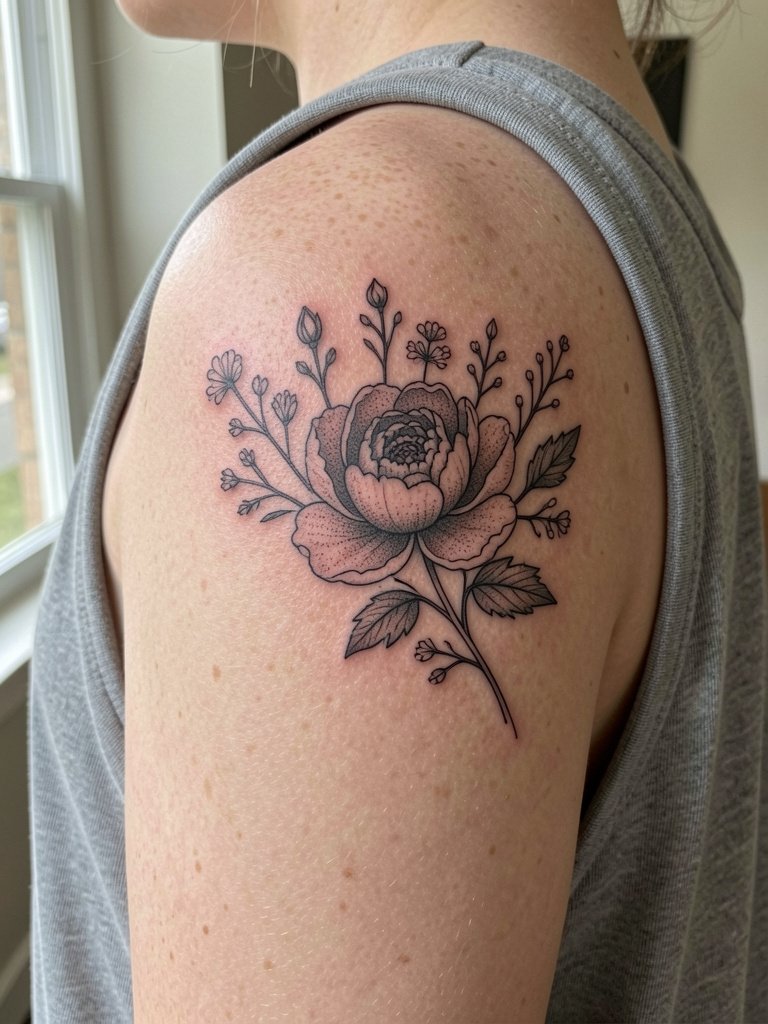
Adding tiny sprigs and wildflowers keeps a peony from feeling like a staged bouquet. Request smaller secondary blooms that read as accents rather than competing shapes. A common mistake is overfilling the negative space with extras, which steals clarity. Session time is typically under two hours for a medium cluster. For show-off styling, a simple delicate gold chain necklace balances the horizontal floral wrap.
10. Botanical Detail Shoulder Tattoo, Neo-Realism
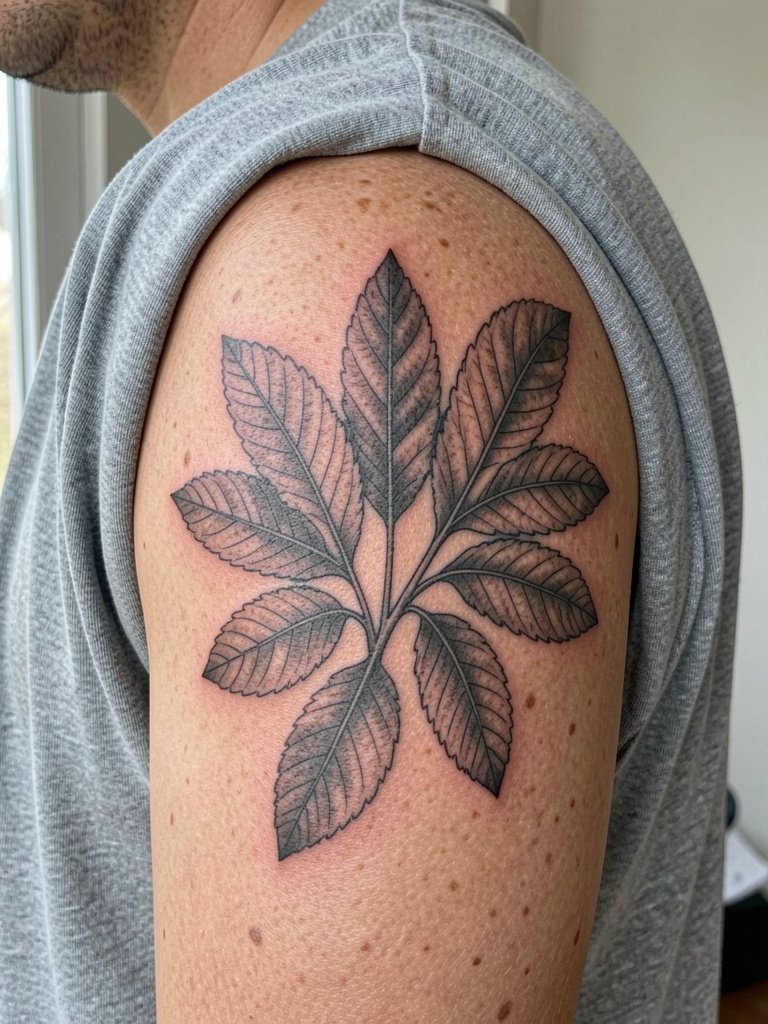
Choose this if you want botanical accuracy and high detail. Discuss healed reference photos with your artist so they know the amount of grey wash to use. The main risk is turning tiny veins into smudges if the spacing is too tight. Sessions for high-detail pieces can run one to two hours and may need a touch-up after a year on shoulders. Pair with a solid color tank top that lets the shaded detail read clearly.
11. Abstract Flower Shape Shoulder, Modern Edge
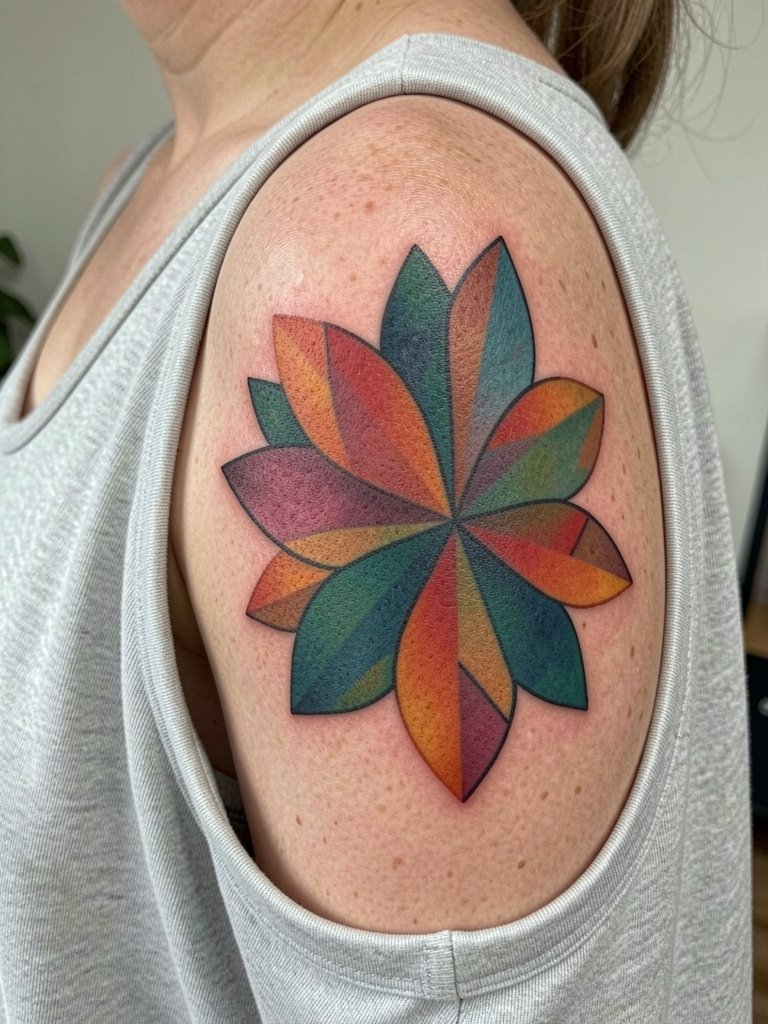
Abstract florals let color and negative space do the talking. Plan the composition so color blocks have breathing room on the shoulder curve. Mistake to avoid: compressing geometric shapes into the wrong axis so they read distorted on the rounded deltoid. Expect an hour plus for layout and color blocking. For a casual reveal, a backless top keeps the modern composition visible.
12. Black Floral with Stipple and Dot Work
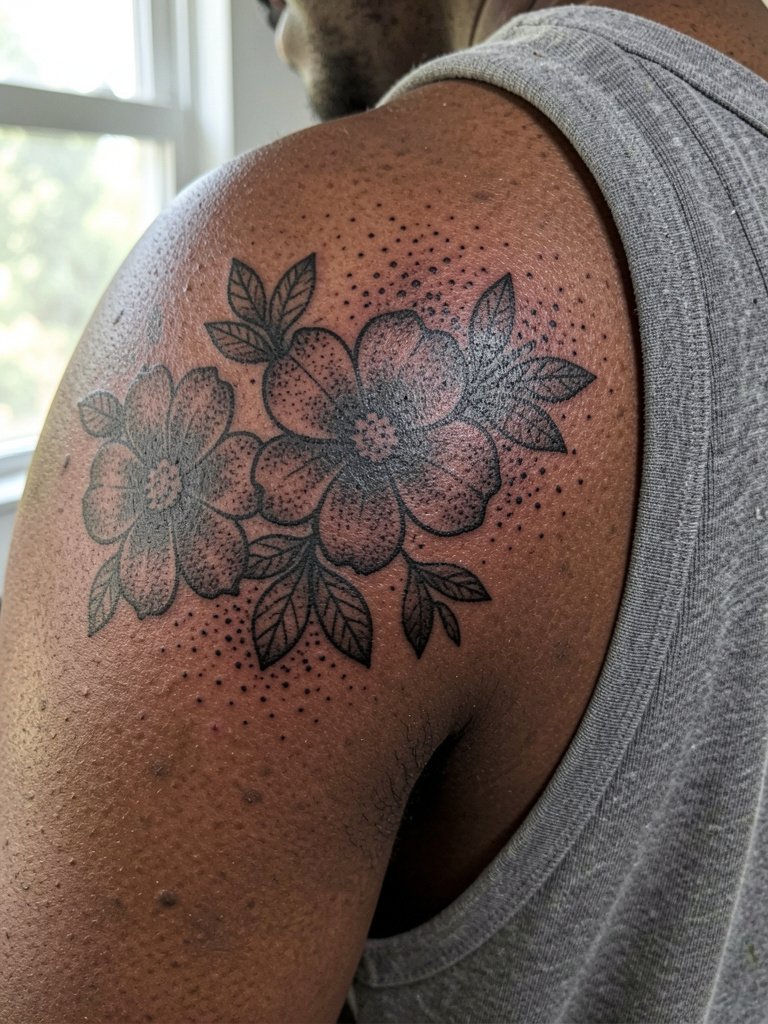
Stipple and dot work give texture without heavy fill, which helps with long-term legibility. Specify dot density in different petal areas so your artist knows where to keep negative space. One mistake is asking for extremely fine dot gradients too close together, which can absorb with time. Session time varies with scale, plan on one to two hours. For layered outfits choose a loose tank that allows the artist to roll sleeves without smudging fresh ink.
13. Small Floral Cluster on Upper Shoulder Cap
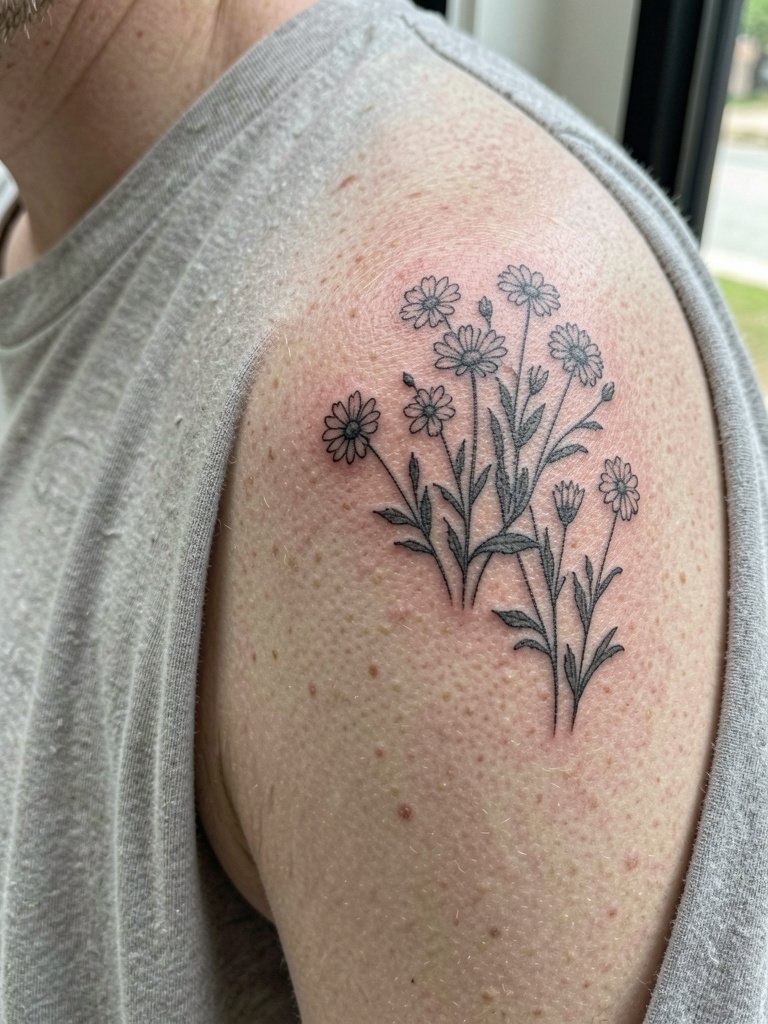
A compact cluster is ideal for first-timers who want shoulder visibility without a big commitment. The deltoid tolerates small pieces well, but shop minimums still apply. Request slightly bolder linework for each tiny bloom so the piece keeps definition beyond the six month mark. Typical session is thirty to sixty minutes. For showing it off, a cropped tee or rolled sleeve does the trick.
14. Floral Shoulder with Vines and Geometric Shapes
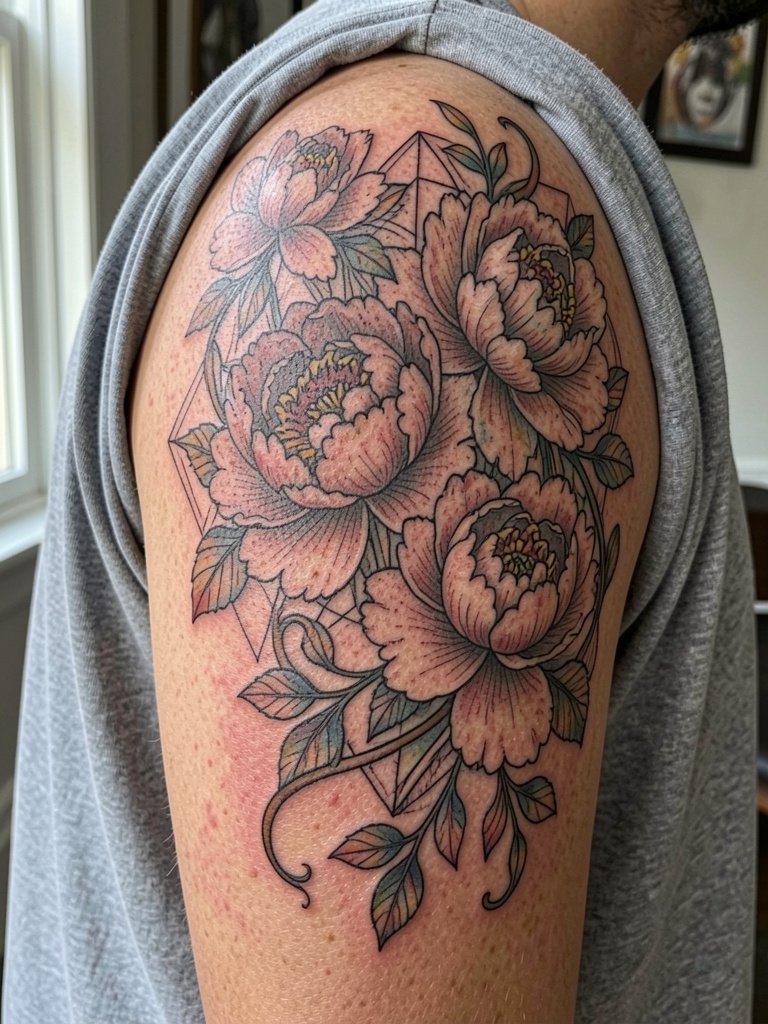
Combining organic blooms with geometry creates tension and longevity when the geometric lines are slightly thicker than the thinnest petals. Tell the artist which element should dominate visually and ask for spacing studies so vines do not cross geometric anchors. Mistake: insisting on matchstick-thin geometry alongside ultra-fine petals, which creates a hierarchy problem. Sessions may span two hours. Pair with high-waisted skirts for a retro silhouette that plays off the wrap.
15. Single-Stem Rose on the Shoulder Cap
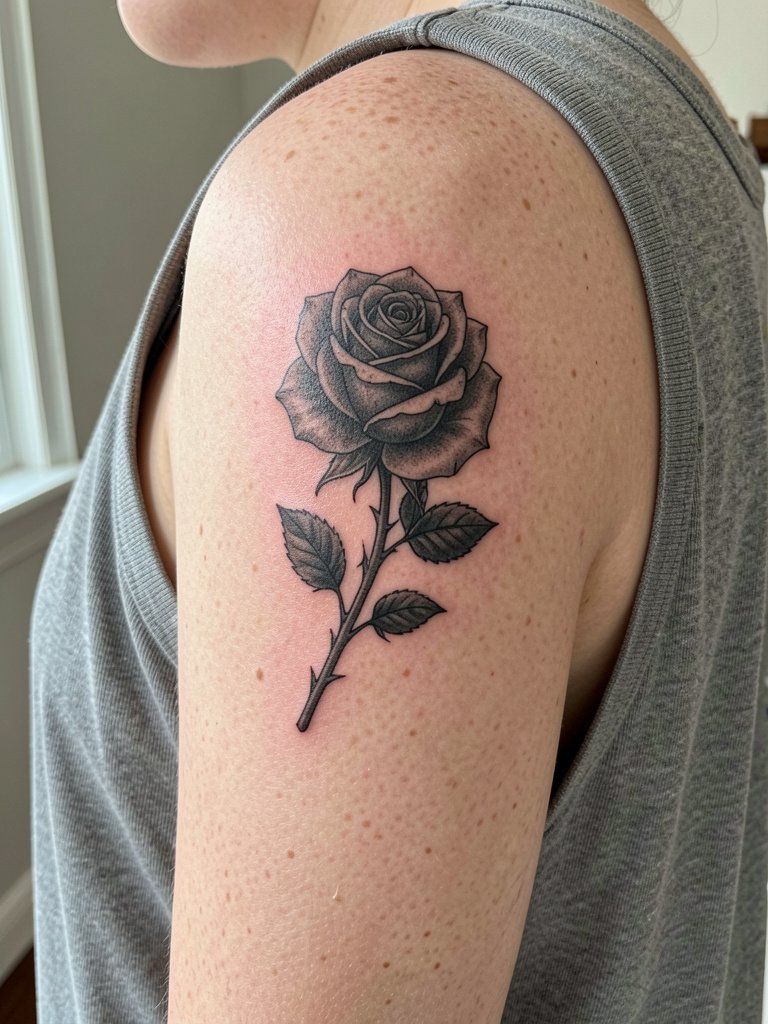
A single-stem rose is classic and easy to scale. For shoulder placement, increase petal spacing and use moderate lineweight so petals maintain shape as they settle. The common misstep is shrinking a rose too small; instead choose a medium size that gives the stem room to curve with the shoulder. Session is generally under an hour. Wear a loose tank to keep the area accessible.
16. Camellia or Peony Duo, Asymmetric Pairing
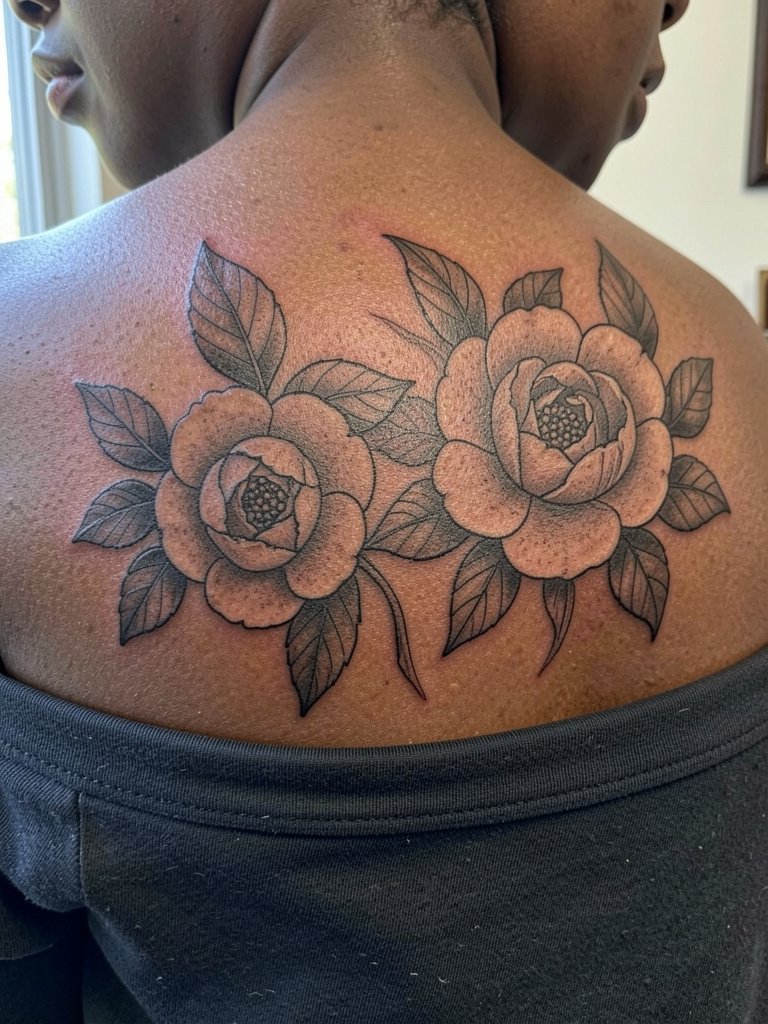
Pairing two blooms gives visual balance and lets one flower be the focal point while the other supports motion. Ask the artist to orient the two blooms so they read differently when your arm is relaxed versus raised. A mistake is mirroring the same bloom twice without size variation, which makes the composition static. Plan for a two-hour session if you want extra detailing. For styling, an off-the-shoulder top in cream or olive highlights the asymmetric flow.
17. Cherry Blossom Branch, Flowing Across the Shoulder
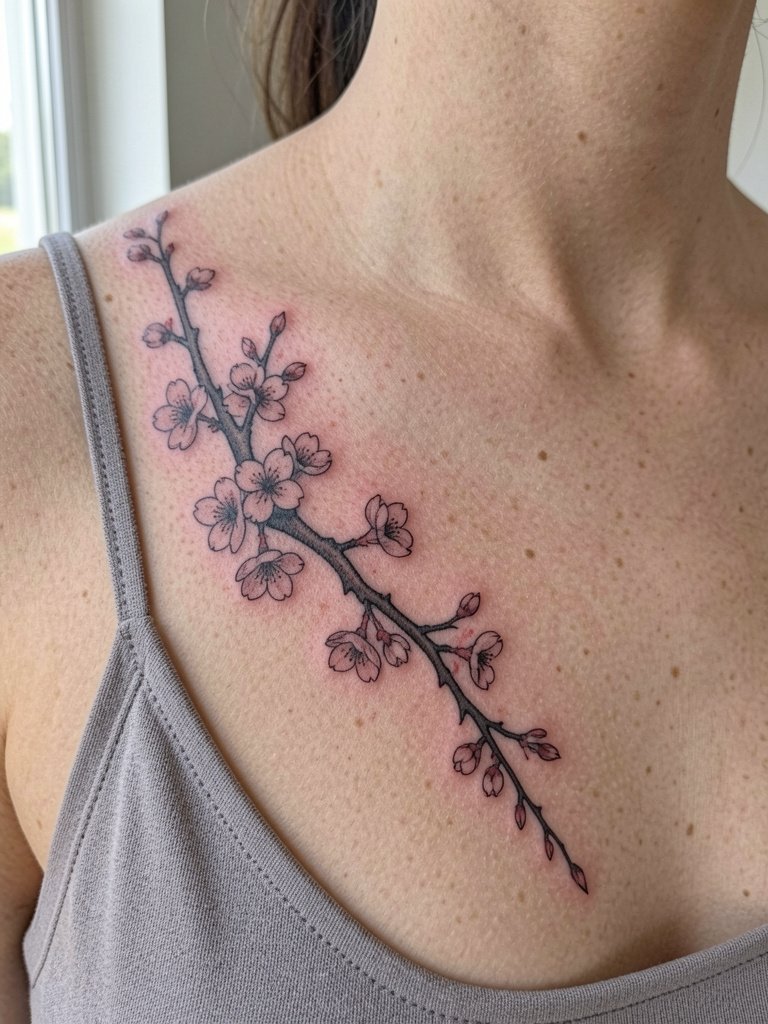
A branch design benefits from directional flow that follows muscle. For shoulders, keep individual blossoms slightly bolder than you might expect so they last. The usual error is making each blossom match a tiny Instagram reference, which fades into a smudge. Session length is flexible, often under two hours. Consider a thin strap camisole to frame the branch along the collarbone.
18. Sunflower Shoulder, High-Saturation Center
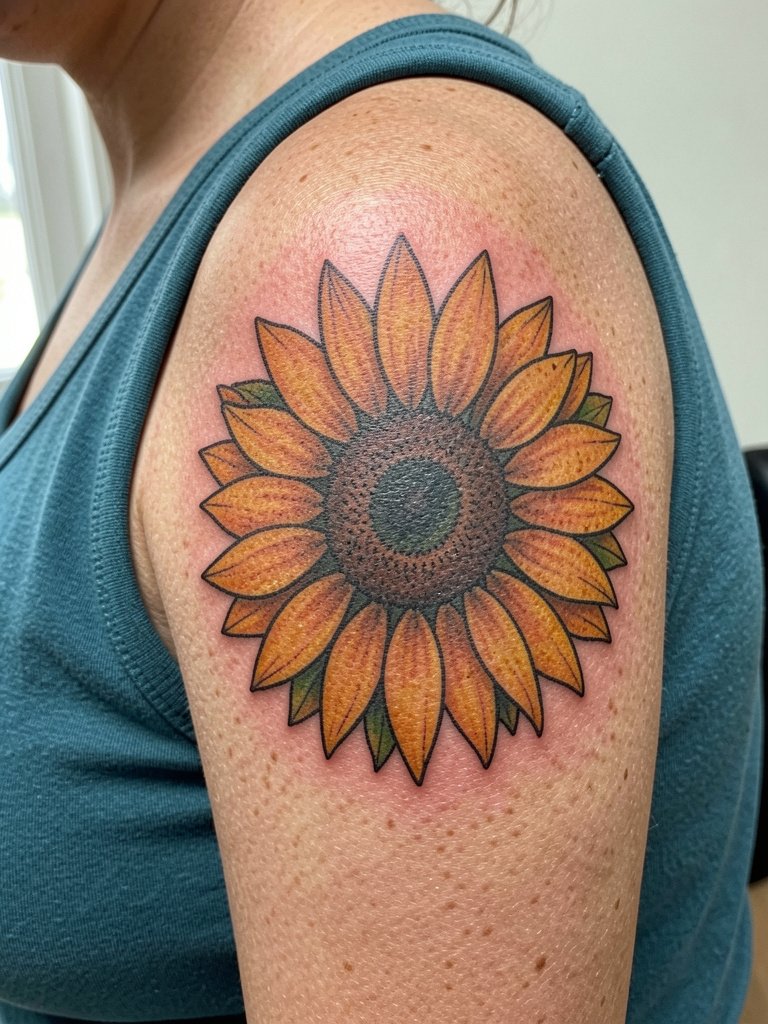
Sunflowers need bold center saturation to remain the focal point over time. Request high pigment density in the disk and slightly thicker outer petal lines. Common mistake: under-saturating the center, which causes the flower to lose identity as colors fade. Expect a two-hour session for a medium piece. For daytime shows, pair with a solid color tank top in a deep tone that sets off warm yellows.
19. Anemone or Poppy Shoulder, Low-Profile Edge
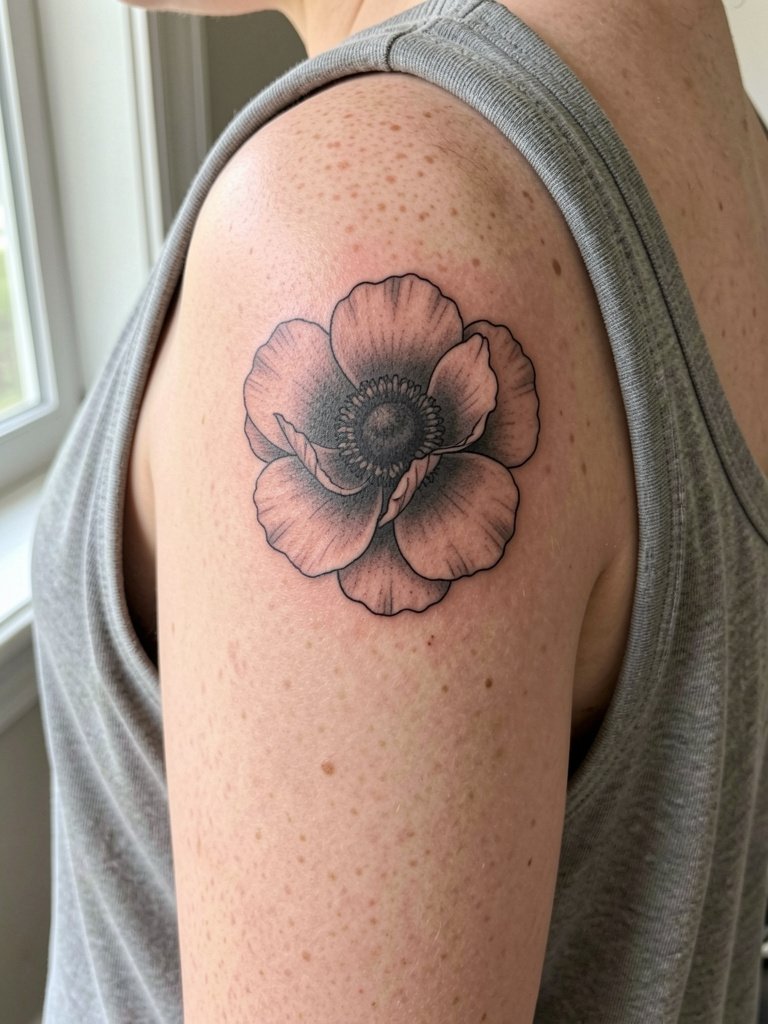
Poppies and anemones read well when centers are slightly darker to anchor the petals. If you want a lower-profile edge, ask for light stipple around the center to avoid dense fills. The mistake is compressing too much detail into a small scale, which ages into a blur. Session time is typically one hour. A loose tank top keeps the area accessible and comfortable.
20. Floral Crescent Shoulder, Moon-Shaped Wrap
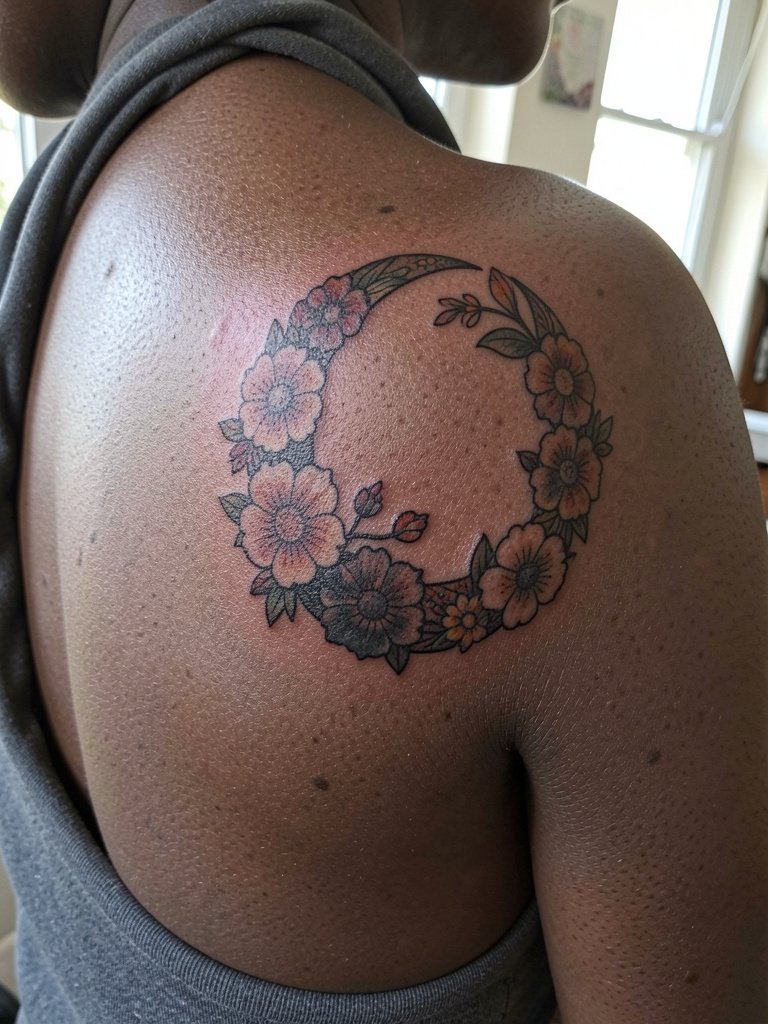
A crescent allows blooms to follow the shoulder arc and creates a natural frame for the clavicle and upper back. Specify which side of the crescent should be bolder so it reads on movement. Common error is creating a fully symmetrical crescent that fails to complement the body's asymmetry. Sessions are one to two hours depending on color choices. For nights out try a halter dress pastel that leaves the crescent fully exposed.
21. Botanical Sleeve Starter: Shoulder to Upper Arm
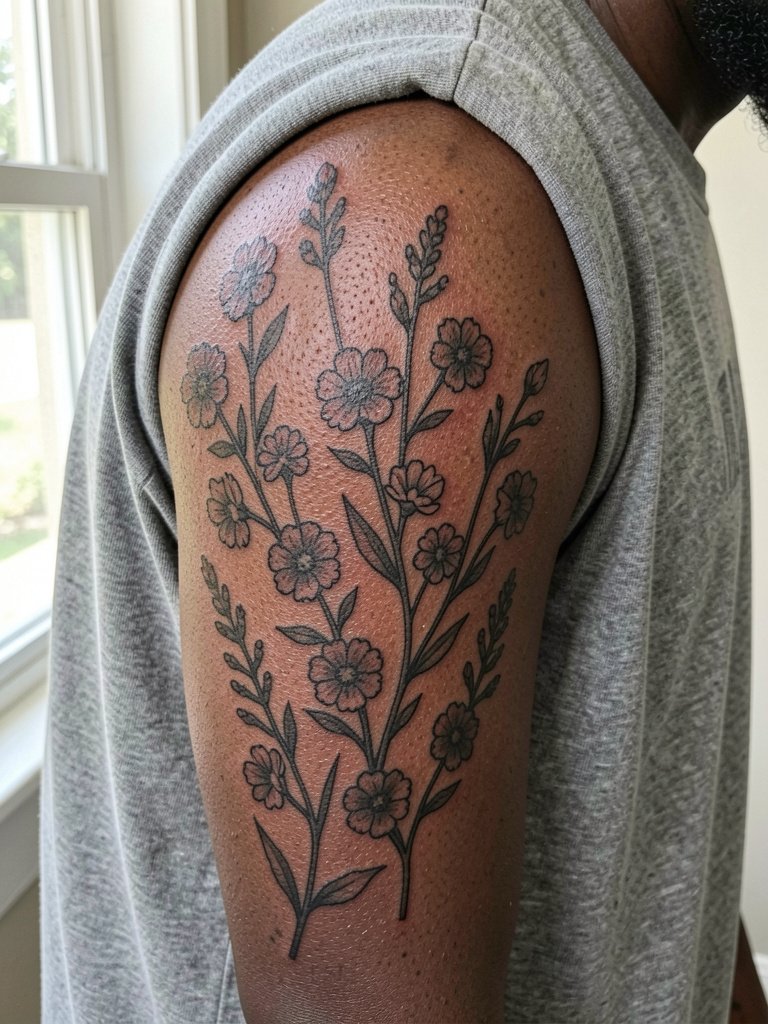
If you plan a sleeve, use the shoulder as a starting composition node and map how elements will cascade. Bring several scaled references and ask the artist to show how the pieces connect when the arm hangs. A typical error is starting with disconnected motifs that later fight for space. Session lengths vary; plan for multiple visits. For comfort during long sessions, wear breathable cotton loose drawstring linen pants so you can sit comfortably without pressure on the skin.
22. Floral Mandala Rosette on Shoulder Cap
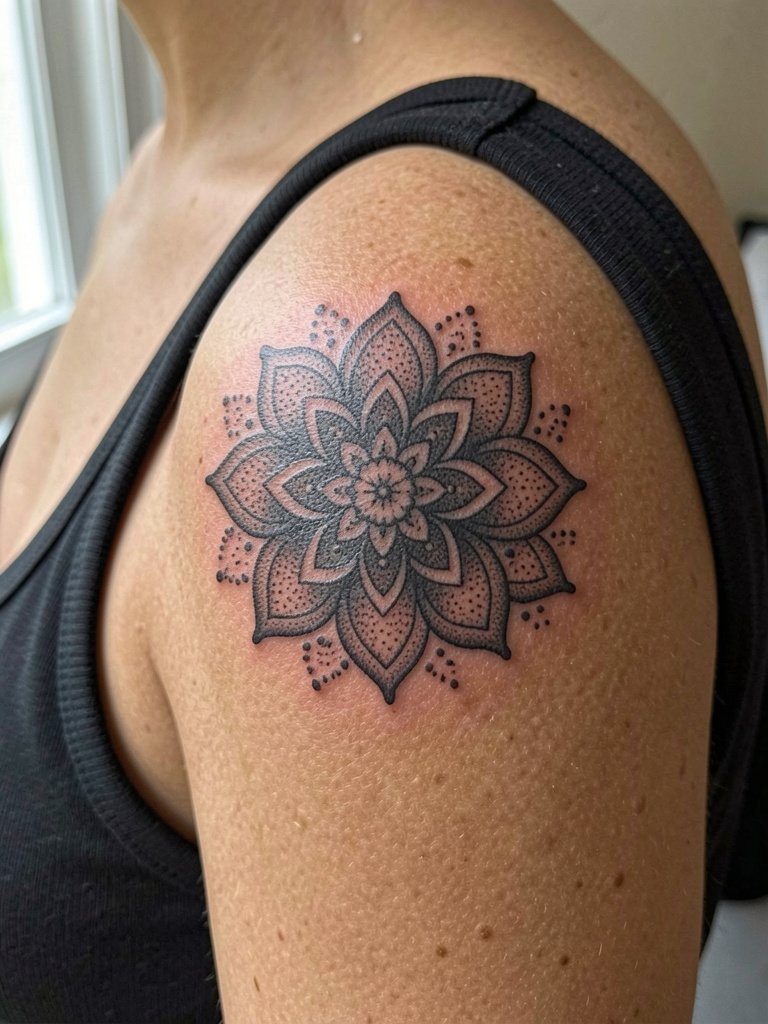
A rosette-style piece benefits from precise symmetry and slightly wider outer petals so the pattern continues to read as you move. Ask for a mockup positioned on your seated posture so the radial lines do not distort with arm motion. The most common mistake is centralizing too small a mandala; enlarge slightly for shoulder curvature. Sessions typically run one to two hours. For a minimalist reveal, a scoop-neck tank leaves the rosette centered and visible.
23. Micro Bouquet Behind the Shoulder, Hidden Charm
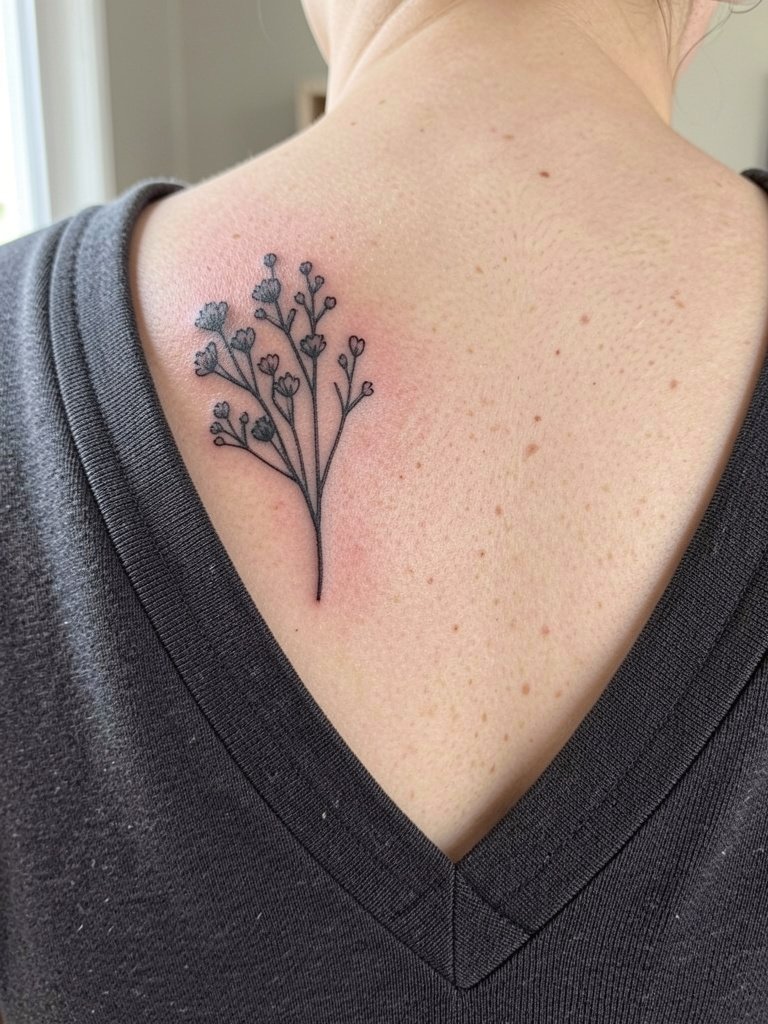
A micro bouquet behind the shoulder sits slightly out of immediate sight and plays with clothing choices. Make sure stems are spaced for longevity and avoid ultra-fine internal detail which the area may lose over time. The session is short and pain is moderate. For wardrobe, a wide V-neck shirt frames the hidden placement without exposing too much.
Frequently Asked Questions
Q: How much should I budget for a floral shoulder tattoo?
A: Expect a wide range depending on size and color. Small single-needle pieces often start in the mid-hundreds, mid-sized color or detailed botanical work commonly falls in the high hundreds to low thousands, and large saturated neo-traditional wraps can exceed a thousand. Also budget for potential touch-ups in the first year.
Q: Which shoulder spot hurts less, the deltoid or the collarbone edge?
A: The lateral shoulder over muscle is usually the least painful and is recommended for first timers. The collarbone edge sits over bone and is noticeably sharper. If you are sensitive, choose the deltoid and ask for breaks during the session.
Q: How do I find artists and healed portfolio examples without naming specific people?
A: Search hashtags like #floraltattoo, #shoulderfloral, #peonytattoo, and #finelinetattoo on Instagram and TikTok and filter posts by location to find nearby artists. Use Tattoodo for keyword searches that surface healed portfolio images, and browse Reddit threads on r/tattoos and r/finelinetattoos for peer recommendations and healed photos across skin tones. Booksy and Inked App are useful directories that filter studios by specialty.
Q: What should I tell the artist about line weight and petal spacing?
A: Specify that outer contours should be slightly heavier than inner detail, and ask for negative space in overlapping petals so the bloom retains dimension as it ages. Bring two healed-photo references at different scales so the artist can match line weight to your desired size.
Q: Do watercolor florals last on the shoulder?
A: Opinions split. One camp prefers pure watercolor for the aesthetic and accepts that fading can happen within a couple of years on the shoulder. The opposing camp recommends soft shading with faint outlines to preserve a painterly look while minimizing bleed and color loss. If longevity matters, opt for soft shading with structure.
Q: What should I wear to the session and for early healing?
A: For shoulder work wear a loose tank top or a button-down that can open easily so the artist has clear access. For pieces extending to the upper back choose a backless or halter-style top to avoid tugging. After the appointment, breathable clothing and gentle, fragrance-free wash are best for the first week.
