
Modern tribal forearm work looks simple in a mirror but the way it heals, photographs, and lives with your body varies a lot by style and placement. Some pieces read best as bold, saturated bands that still look crisp after five years. Other choices need extra spacing or slightly heavier line weight to avoid softening. Read on for 17 forearm tribal directions, how they age, what to wear to your session, and when to choose cultural patterns over modern reinterpretations.
1. Modern Tribal Forearm Band (Bold Black Angular Band)
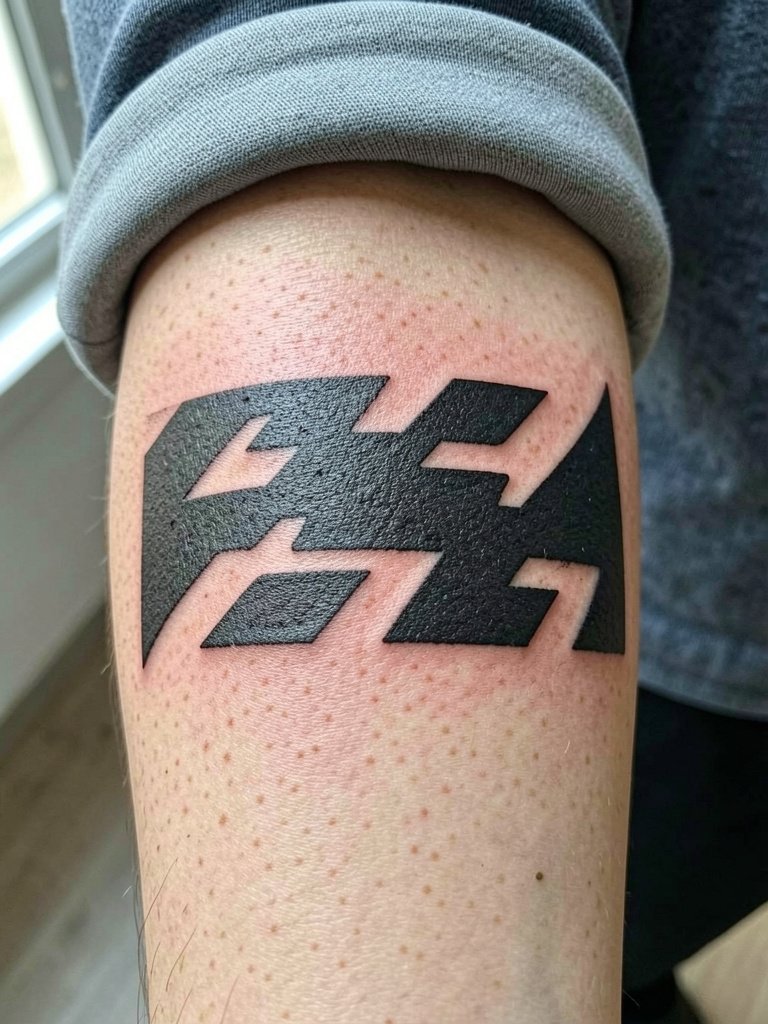
A single bold forearm band reads clean from across a room and tends to age well if drawn with stout line weight and roomy negative space. For inner forearm placement, I recommend 1–2 mm effective line width and a 6–10 inch run so the corners do not blur together at year three. Pain is moderate and most single-session bands take two to four hours. A common mistake is asking for razor-thin 0.5 mm edges; those often feather on forearm skin. For the session wear a loose button-down or short-sleeve shirt so the artist has clear access. To show it off, roll linen sleeves and pair with a dainty gold bracelet for contrast rolled cuff linen shirt.
2. Samoan Tribal Forearm Border (Traditional Polynesian Border Pattern)
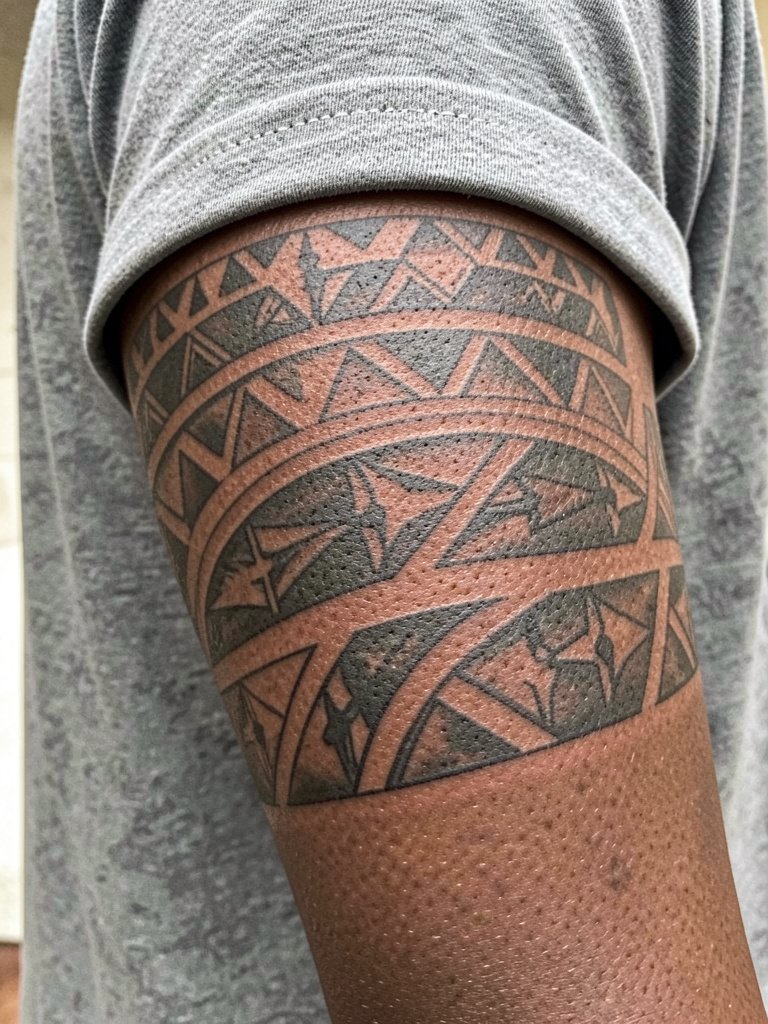
If you are drawn to Samoan motifs, be explicit about origin and placement in the consultation. One camp argues traditional Polynesian patterns should be executed with cultural protocols and traditional hand-tapping methods when possible. Another camp accepts machine-applied Polynesian patterns as a valid approach, provided the artist treats motifs respectfully and explains their meaning. For the outer forearm a border that wraps partially around the arm works well visually and avoids crowding at the elbow crease. Expect one to three sessions and budget for touch-up if you plan dense fills. Show it off in short-sleeve solid tees that let the border sit cleanly against the sleeve line short sleeve black tee.
3. Maori Koru-Inspired Forearm Spiral (Curved Spiral Motif)
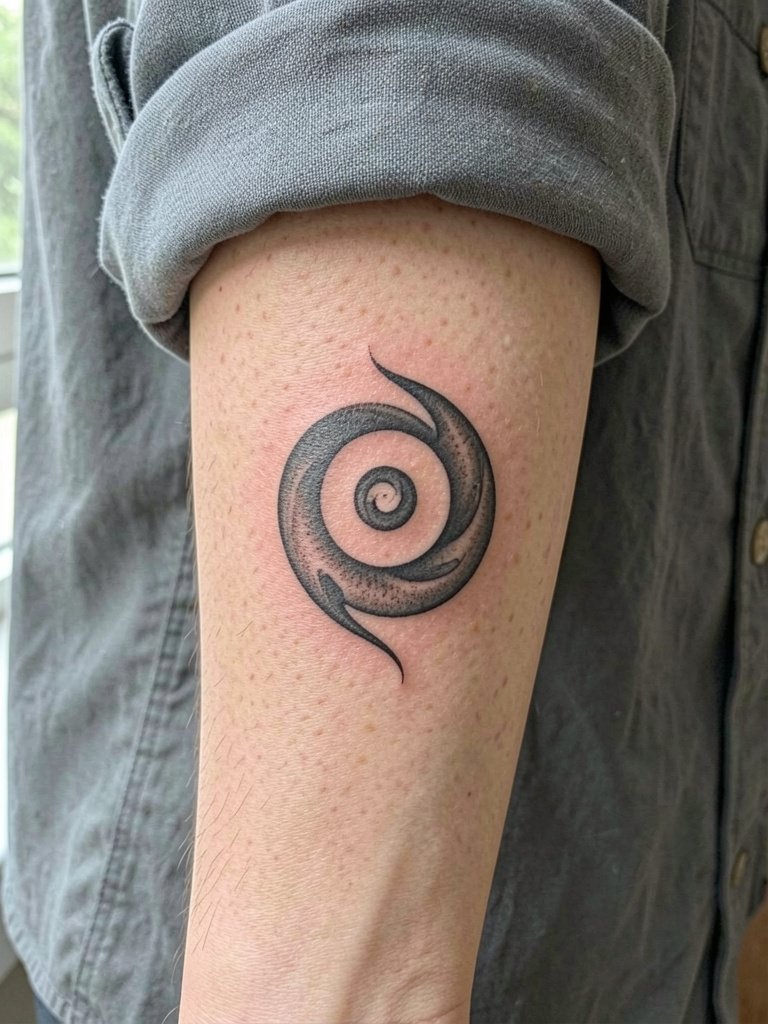
The koru spiral scales beautifully on the inner forearm because the curve follows the arm’s natural flow. If you want the spiral to retain definition at two and five years, insist on slightly thicker terminals and clear spacing between the coils. A frequent error is squeezing too much detail into a small spiral; the interior fills blur with time. The session feels like steady linework with short shading passes, often a single two-hour sitting for a mid-sized piece. For session comfort wear a loose button-down so the artist can roll the sleeve back without tight cuffs. For everyday wear try rolled-up linen shirts in cream to let the spiral sit against neutral fabric linen button down shirt women.
4. Polynesian Forearm Sleeve (Full Traditional Pattern)
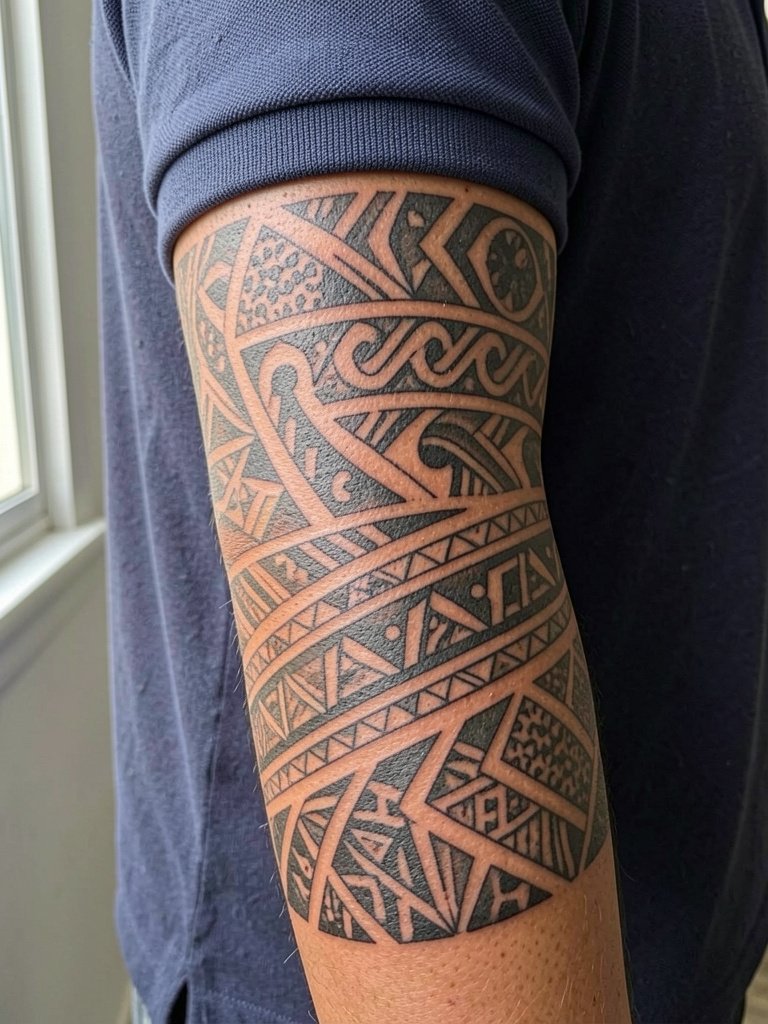
A full Polynesian forearm sleeve is a multi-session commitment that can tell a cultural narrative across the limb. One camp holds that authentic methods like pe’a or tā moko are the only way to preserve cultural integrity. Another camp says well-researched machine work can be respectful when the wearer and artist understand motif meanings and lineage. Sessions usually run multiple blocks of three to five hours, and healing should be staged so adjacent panels do not interfere. Avoid booking a single marathon session unless you have prior large-piece experience. While healing, keep coverage minimal and show off the sleeve in open-collar shirts or short-sleeve polos that reveal the full wrap open collar short sleeve shirt.
5. Modern Angular Forearm Stripe (Thin Bold Stripe with Cutouts)
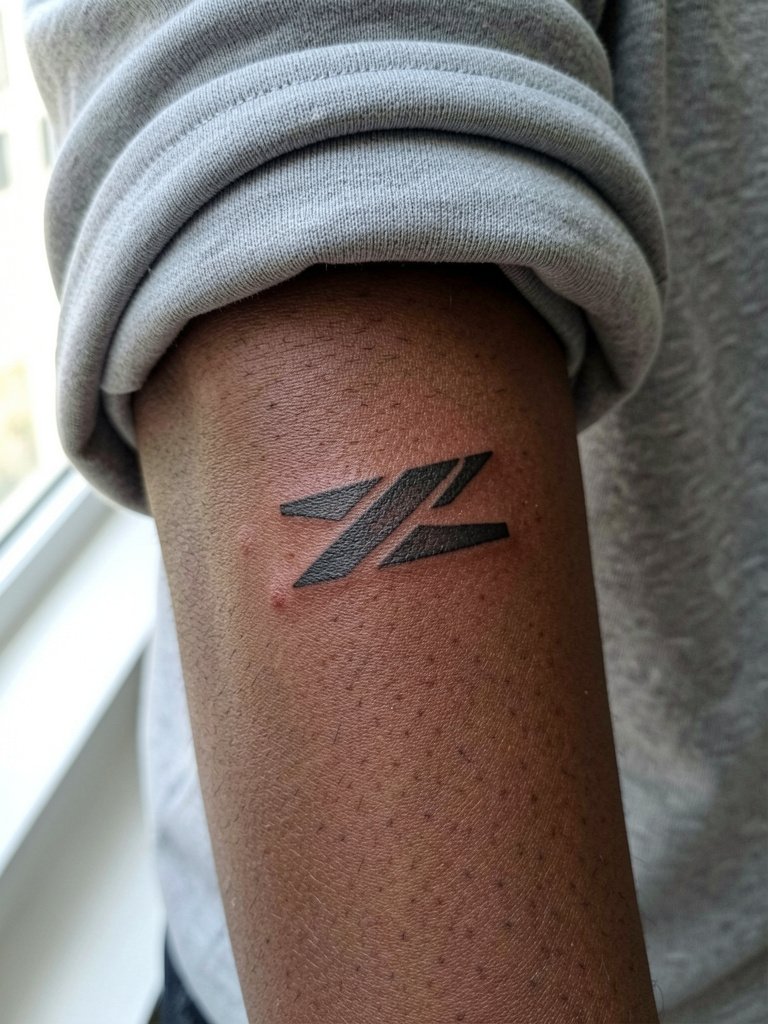
Thin modern stripes rely on precision. If you want an angular stripe that ages well, ask the artist to slightly widen the line at corners and leave breathing space around cutouts. The common failing is making the stripe too narrow across textured skin, which becomes a soft grey line over time. A single-session stripe often lasts one to two hours. Wear a loose long-sleeve you can push up easily so the cuff does not compress fresh ink. For showing off pair the stripe with vintage-cut denim jackets or solid tees that contrast with the black ink vintage denim jacket men.
6. Patchwork Forearm Pieces (Mixed Modern Tribal Shapes)
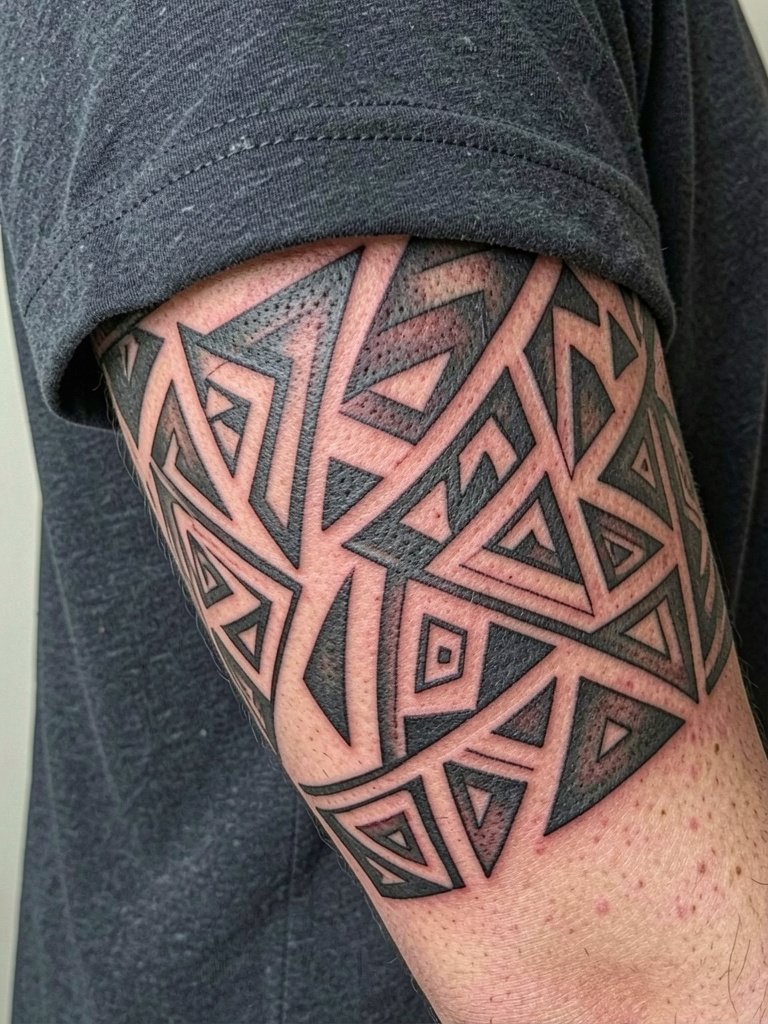
Building a patchwork sleeve over time is a smart route if you want options and gradual cost spread. Plan the negative-space framework in your first session so later pieces fit naturally. A frequent mistake is starting multiple isolated shapes without a unifying rhythm, which makes the sleeve feel disjointed. Expect 1–2 sessions per shape and keep a running folder of scale references so future artists can match proportions. For the appointment wear short sleeves or a sleeveless top so both surfaces are accessible. When you want to show progress, open-collar shirts let the asymmetric arrangement read clearly short sleeve polo men.
Pre-Session Essentials
The bold bands and dense borders in ideas 1 through 6 each heal slightly differently, so pack a few items to smooth the first week and the session itself.
- Australian aftercare balm. Reported by forum users to be less greasy than heavy ointments, useful if you want a lighter feel on large black fills.
- Japanese tattoo balm, thin fast-absorbing formula. Good for dense blackwork where over-moisturizing can slow scab formation.
- Fragrance-free tattoo soap. A gentle soap helps clean the forearm without stripping saturation during daily showers.
- Matte finish tattoo sunscreen. A matte formula reduces shine on bold blackwork while protecting healing ink from fading in summer.
- Aquaphor Healing Ointment. Thin layer for the first two to three days can lock moisture in. Switch to a lighter balm after to avoid clogging dense black fills.
7. Mid-Forearm Cuff (Bold Band Around Center)
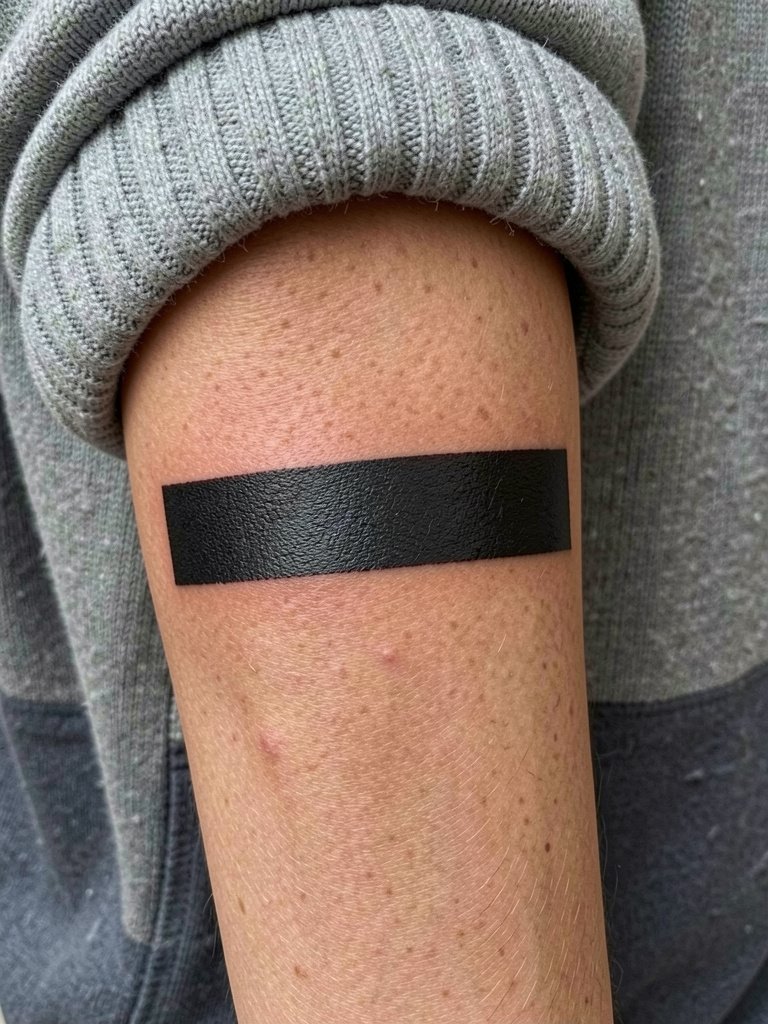
A cuff acts like jewelry without the maintenance of metal. For a mid-forearm cuff choose 1.5–2 mm line widths and leave clear negative inner margins so the band does not read as a solid block that tends to feather. Cuffs heal in one session that runs two to three hours. People often pick a cuff that is too narrow, then wish they had a slightly wider band after ten pounds of weight change. For the appointment wear a loose long-sleeve that pushes up easily. To style, cropped sweaters in neutral tones frame the cuff and keep attention on the linework cropped neutral sweater women.
8. Minimalist Single Line (Thin Line with Angular Ends)
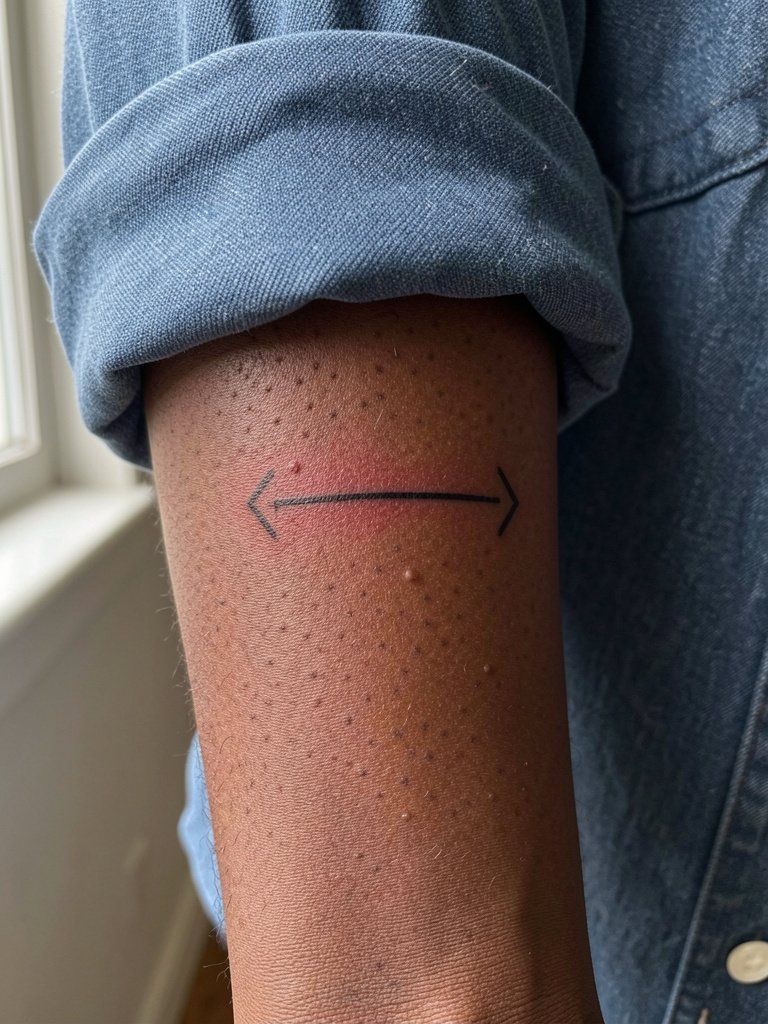
Single-needle minimalist tribal lines suit first-timers who want boldness without heavy coverage. If you choose this, accept slightly wider line weight than pure microline so the work holds at year two. The inner forearm eats very fine detail if placed too close to the wrist. The session is short and often under an hour for a five to eight inch bar. Avoid over-embellishing with tiny cutouts that the skin will blur. For the studio day bring a loose button-down you can roll up easily. If you want it to read in photos, pair with delicate gold stacked bracelets on the opposite wrist dainty gold stacked bracelet set.
9. Single Geometric Panel (Large Geometric Panel on Outer Forearm)
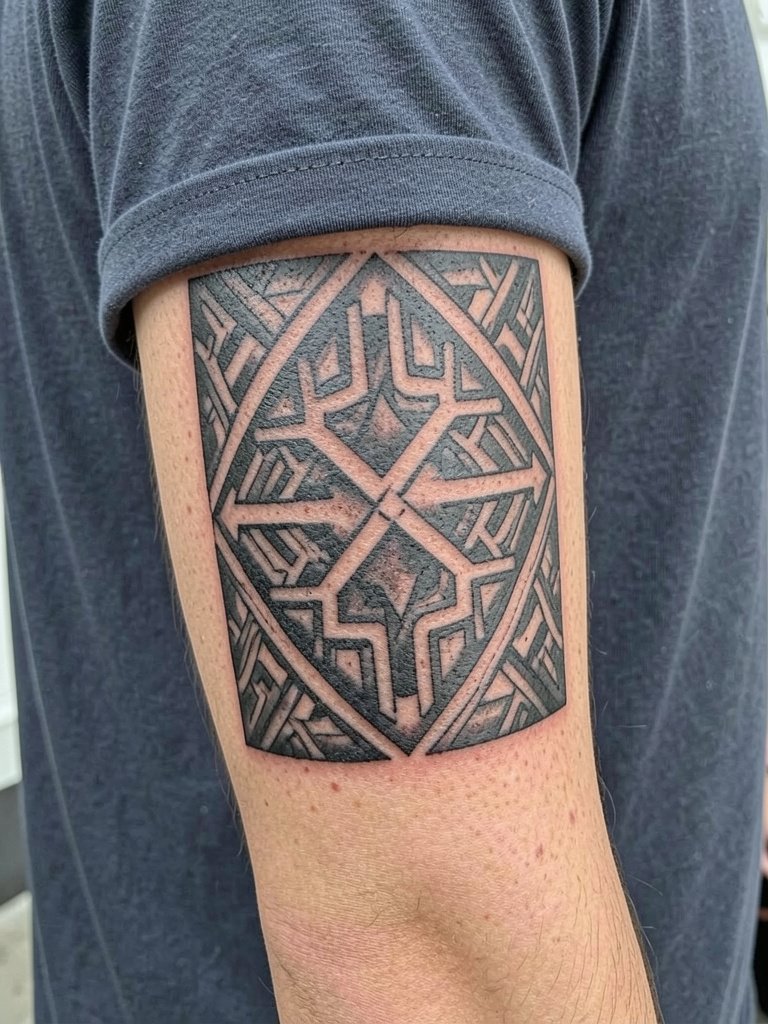
A single geometric panel is a focal point that holds up if given breathing room around the edges. Panels with tightly packed fills can look brilliant fresh and soft at year three, so aim for alternating solid fills and negative space. Expect one to two sessions depending on complexity. A common error is placing a tall panel too close to joints where movement distorts sharp corners. For the session wear short sleeves so the artist can rotate the arm without fabric friction. For styling short-sleeve solid tees make the panel read strong against the sleeve edge short sleeve solid tee men.
10. Arrow Motif (Angular Arrow Pointing Up the Arm)
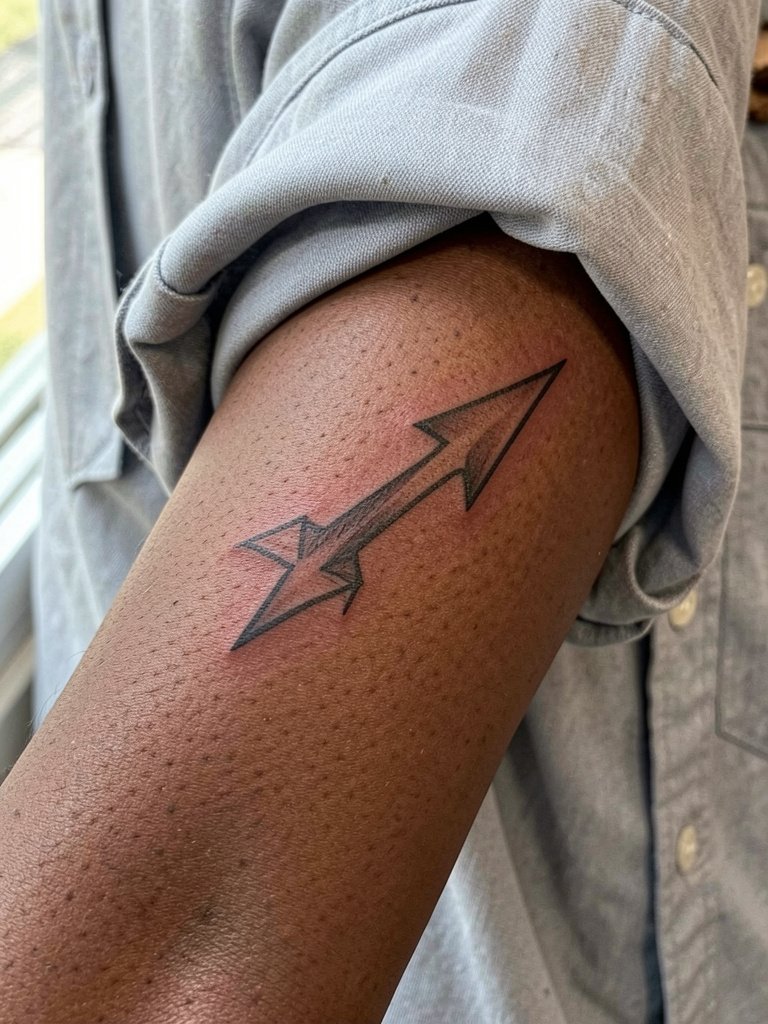
Directional arrow motifs work well on the inner forearm because they emphasize motion. Choose a tapered tail and a slightly thicker head so the point remains crisp over time. The error I see most often is compressing arrow detail near the wrist, which softens in photos. Expect a single session of one to two hours and moderate pain. For the appointment a loose button-down or short-sleeve shirt is ideal. Pair the finished arrow with a vintage denim jacket for a rugged look when you want to highlight directionality vintage denim jacket men.
11. Angular Wing Pattern (Tribal Wing Motif)
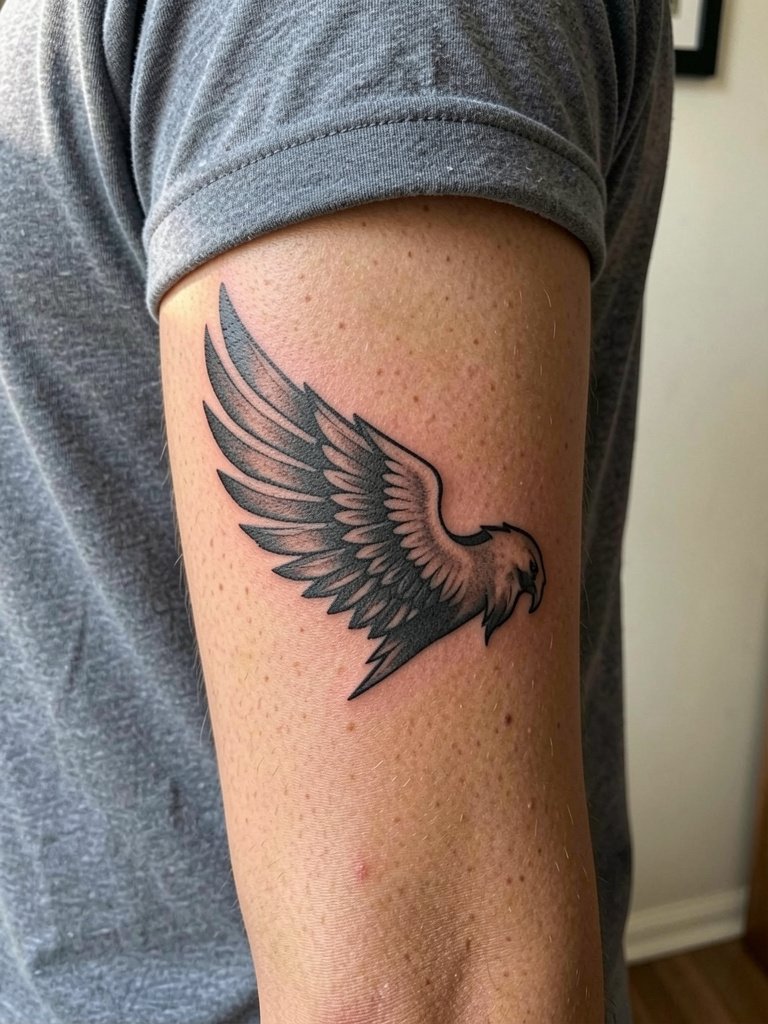
Angular wings read as movement when they extend across the outer forearm. For longevity, balance solid panels with open feather lines and avoid microdot shading that can disappear on active skin. Two sessions are common for larger wing spreads. A typical mistake is matching reference photos sized for broad shoulders to a narrow forearm, which flattens the motif. Wear short sleeves to your session. For showing off pick a solid color tee so the wing silhouette is easy to read from a distance short sleeve black tee.
12. Maori Flow Pattern (Continuous Curved Tribal Flow)
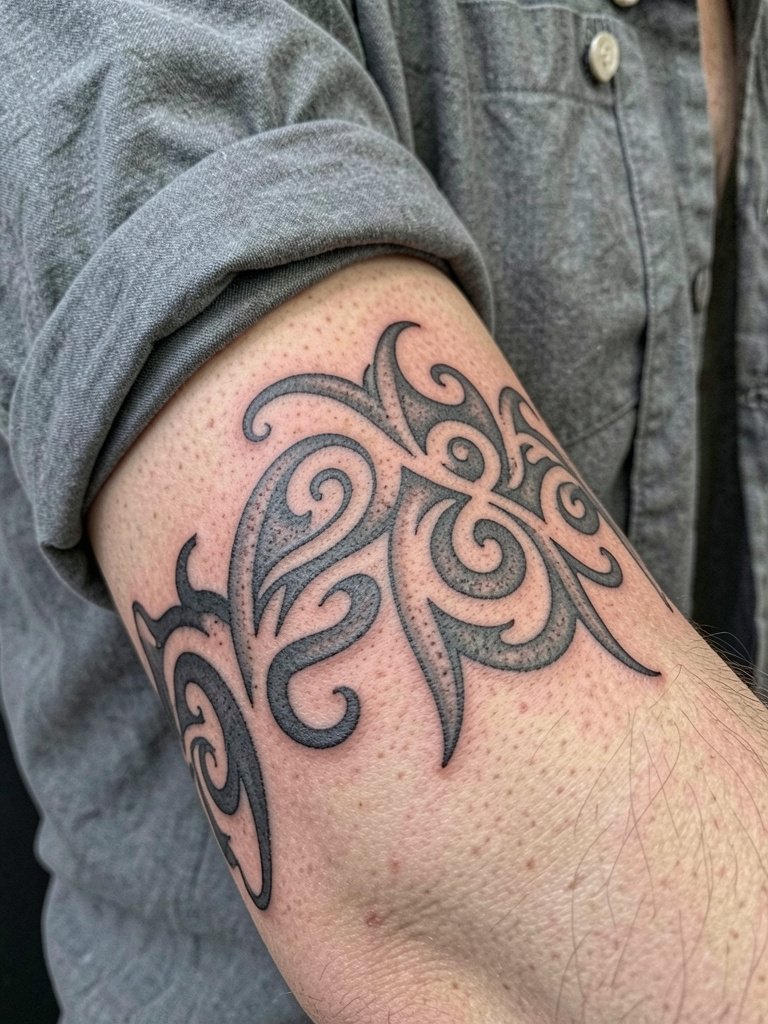
Flow patterns are effective when the line rhythm follows muscle contours. For the forearm, maintain consistent spacing between curves and leave negative bands so the piece does not become a solid mass with age. Two to three sessions usually cover a mid-sized flow. A common mistake is matching torso-scale flow to a narrow arm which compresses repeats. For the appointment wear short sleeves. To let the pattern breathe choose open-collar shirts that reveal the wrap without competing jewelry open collar short sleeve shirt.
13. Spiral-Cut Tribal (Angular Spiral with Cutouts)
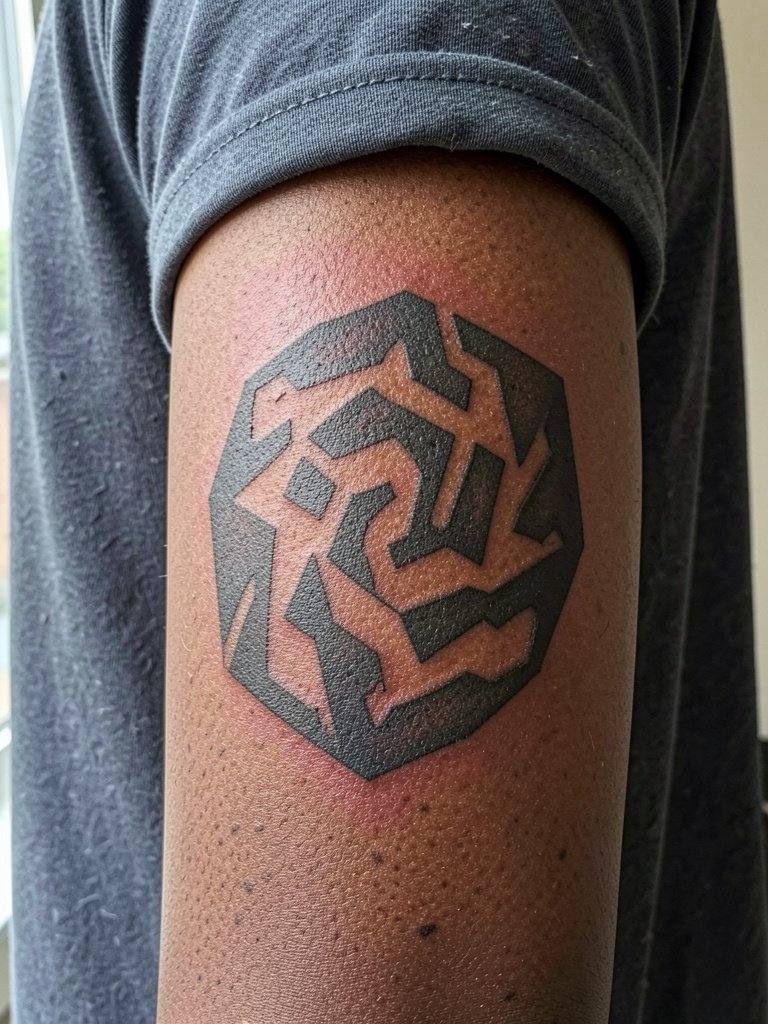
Spiral-cut designs blend spiral symbolism with modern geometry. If you want the spiral to remain legible at five years, insist on larger negative cutouts and avoid tiny internal triangles. Single spirals typically take one to two hours. The mistake I see often is doing mirrored tiny spirals that merge into a blotch after a few years. For the session wear short sleeves so the artist can rotate the arm. Style the healed spiral with short-sleeve solids that create contrast against the black fills short sleeve solid tee men.
14. Shield Motif (Angular Shield on Inner Forearm)
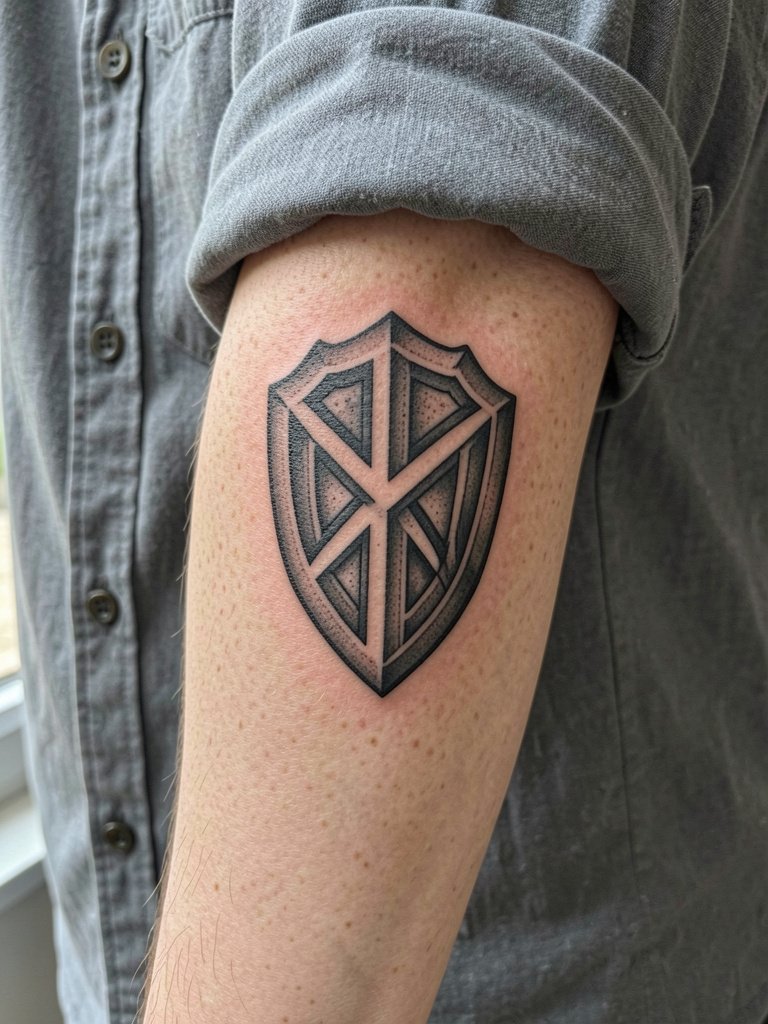
Shield shapes look deliberate on the inner forearm when proportioned to the width of the arm. Use internal negative fields to stop dense black from turning into a single slab with age. One session often suffices for a mid-sized shield. New clients sometimes request tiny internal filigree, which tends to blur; keep internal patterns bold and simple. Wear a loose button-down to avoid cuff pressure during the session. For evenings out a rolled-sleeve linen shirt frames the shield and keeps focus on the center motif rolled cuff linen shirt.
15. Patch Shield Duo (Paired Shield Panels)
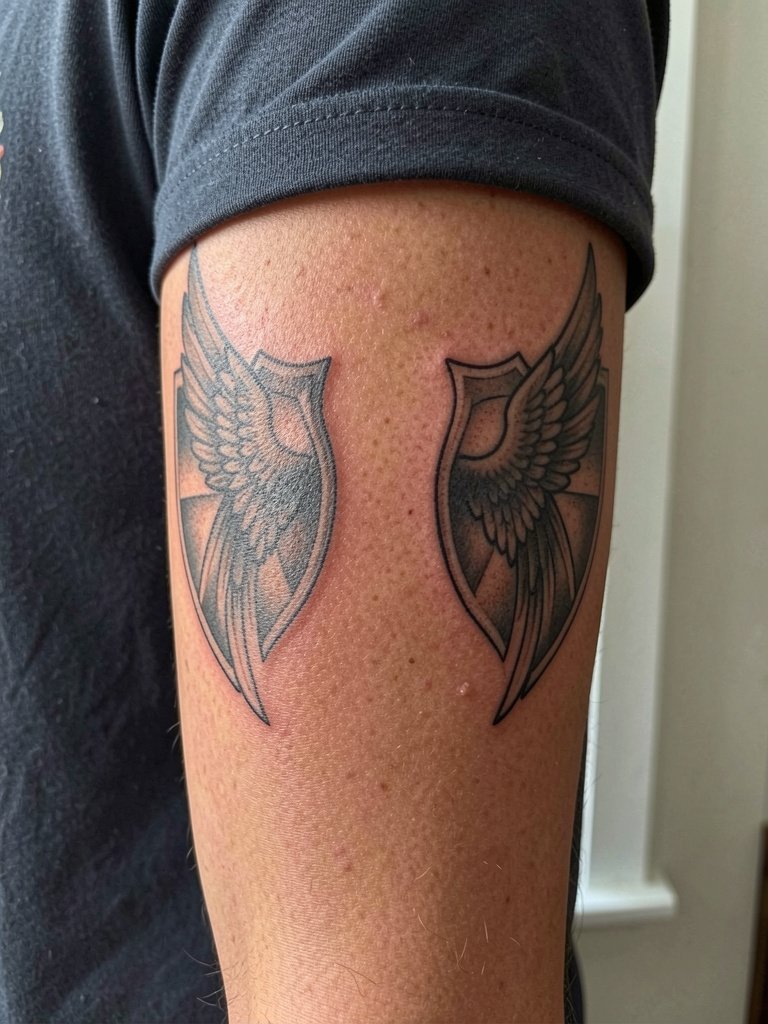
Mirrored shield panels balance the forearm when you want symmetry without a full sleeve. Keep internal detail minimal so mirrored fills age consistently on both sides. A typical timeline is one to two sessions for both panels. People occasionally match mirrored panels to non-matching muscle shapes, which makes one side read heavier; bring photos of both arms to the consult. For the studio day wear short sleeves. Pair the finished duo with layered thin chains on the opposite wrist for editorial balance layered thin chain necklace set.
16. Small Panel Series (Multiple Small Tribal Panels Stacked)
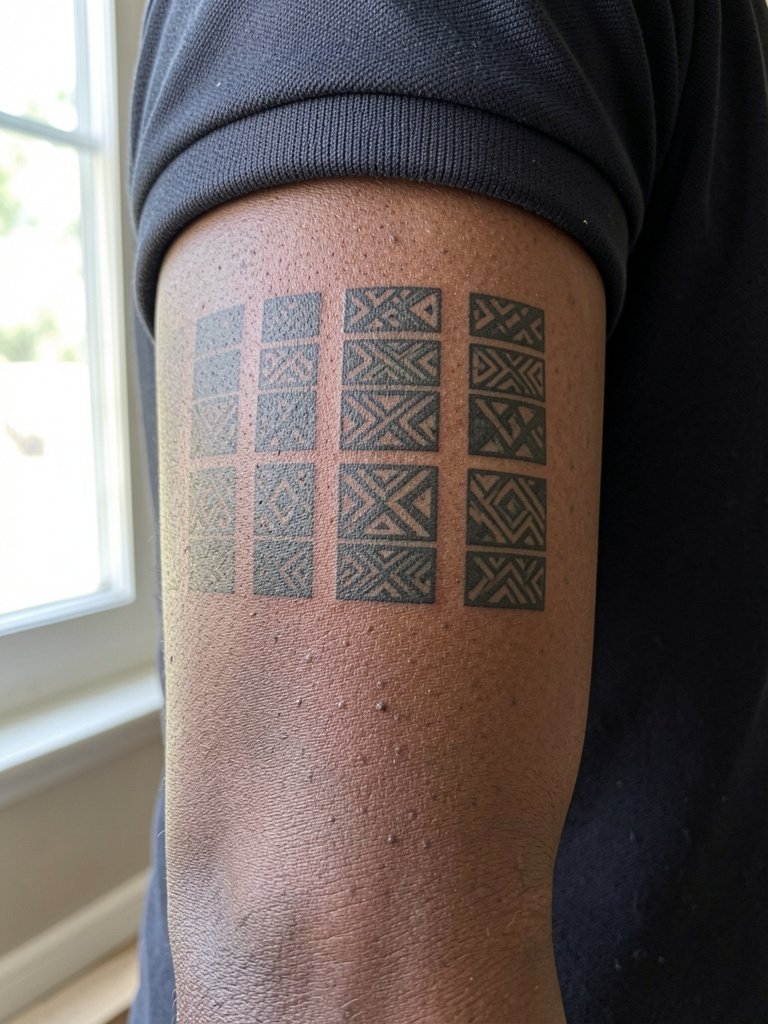
Stacking small panels gives you an incremental sleeve feel and makes touch-ups localized. Space the panels by at least half an inch to avoid visual merging as skin ages. Expect one session per panel and allow several weeks between sessions if the skin is still settling. A common mistake is starting with many tightly spaced panels in a single session, which limits future placement options. Wear short sleeves so the artist can access the outer surface without compression. Minimal jewelry keeps attention on the stacked rhythm short sleeve polo men.
17. Shield-to-Stripe Transition (Partial Band into Panel)
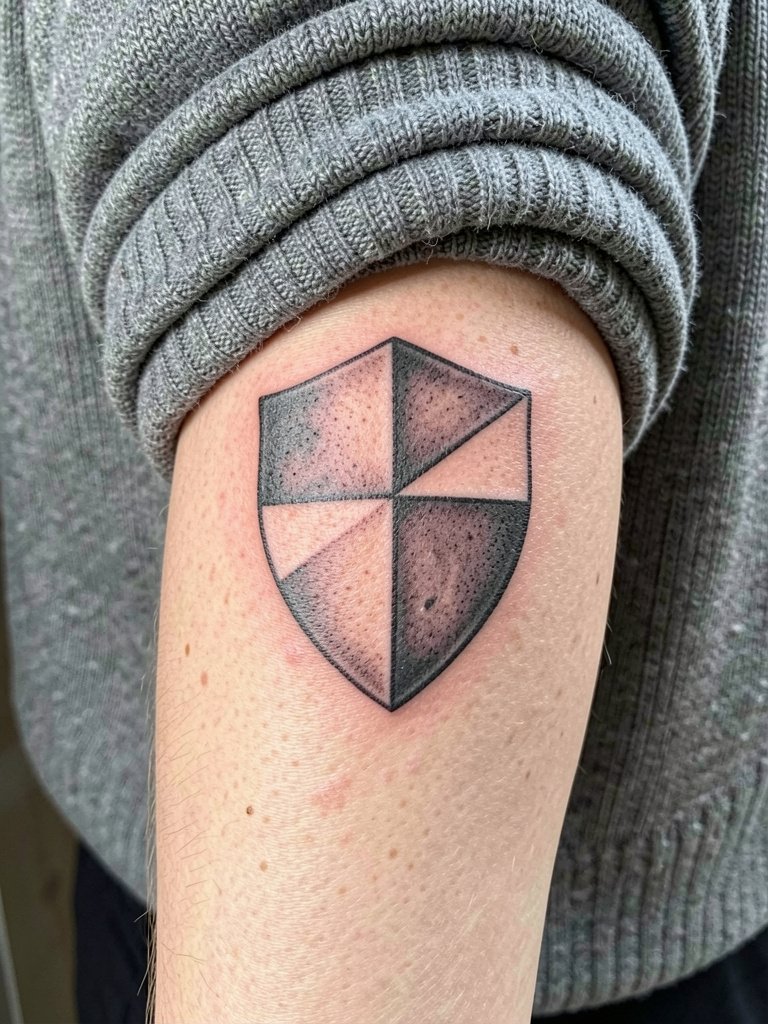
A transition piece that links a cuff to a panel keeps the forearm visually cohesive when you plan a future sleeve. Design with clear transitions and slightly larger negative-space joints where the cuff meets the panel to prevent smudging over time. Sessions generally run two to three hours for the combined layout. Beginners sometimes ask for tiny connecting filigree which softens; use bold bridges instead. For the appointment, a cropped sweater that pushes up without tight cuffs works well. For showing it off, layered chains on the opposite wrist balance the cuff-to-panel dynamic layered thin chain necklace set.
Frequently Asked Questions
Q: How should I choose between modern tribal and traditional Polynesian patterns for my forearm?
A: One practical way to decide is to identify whether you want a cultural narrative or a graphic aesthetic. If you want authentic Polynesian symbolism, prioritize artists who explain motif meanings and offer cultural context. If you prefer a modern blackwork look, ask for clear geometry and wider negative space so the piece keeps contrast over time.
Q: Do bold black bands age better than thin minimalist tribal lines?
A: Artists are split into two camps. One camp favors bold black lines, arguing thicker strokes resist blurring on active skin and hold contrast for years. The other camp shows healed examples of thin lines done with care and spacing, saying slightly wider spacing and correct depth can keep thin work legible. Expect bold bands to need fewer touch-ups than ultra-fine single-needle work on the forearm.
Q: Where can I find artists who do Polynesian, Samoan, or Maori work without naming individual artists?
A: Search hashtags like #polynesiantattoo, #samoantattoo, #maoritattoo and filter by your city on Instagram and TikTok. Tattoodo’s keyword searches and portfolio filters show healed photos labeled by placement. Reddit communities such as r/tattoos and r/tattooadvice surface peer recommendations and healed examples across skin tones. Booksy and Inked App can help you find studios listed under tribal or Polynesian specialties.
Q: What should I wear to my forearm tribal session and why does it matter?
A: For inner forearm work pick a loose button-down or a short-sleeve shirt that you can push up without tight cuffs. For outer forearm pieces choose short sleeves or a sleeveless top. Clothing that presses on fresh ink can rub and disrupt stencil placement. Bring something easy to remove or roll so the artist has clear access.
Q: How do I care for a bold black forearm tattoo during summer?
A: Keep the fresh tattoo out of direct sun while it is peeling and scabbing. Use a matte finish sunscreen once healed to reduce shine on dense blackwork and to protect pigment from UV fade. Avoid heavy ointments that trap sweat during hot weather; switch to a light, fragrance-free moisturizer after the initial two to three days of ointment care.
