
Tiny shamrock tattoos read as a quiet mood piece rather than loud branding. A tiny Shamrock can look delicate and still last if you pick line weight, spacing, and placement that suit your skin and daily habits. I focus on which micro versions hold up, what to ask about line spacing, and everyday wardrobe choices that keep a tiny design visible without compromising healing.
1. Tiny Shamrock on the Inner Wrist

A tiny Shamrock on the inner wrist reads best when the linework is a touch heavier than micro single-needle. The wrist is a high-motion zone and the skin there softens detail over a few years. For a clean long-term result, ask your artist to show a mockup at two sizes so you can see how vein detail and spacing scale. Expect a short session under 30 minutes. Pain is mild. The most common mistake is going too filigreed and losing the lobes into a gray blur by year three. For showing it off, pair with a rolled-sleeve linen shirt that keeps the wrist visible without rubbing.
2. Micro Shamrock Behind the Ear
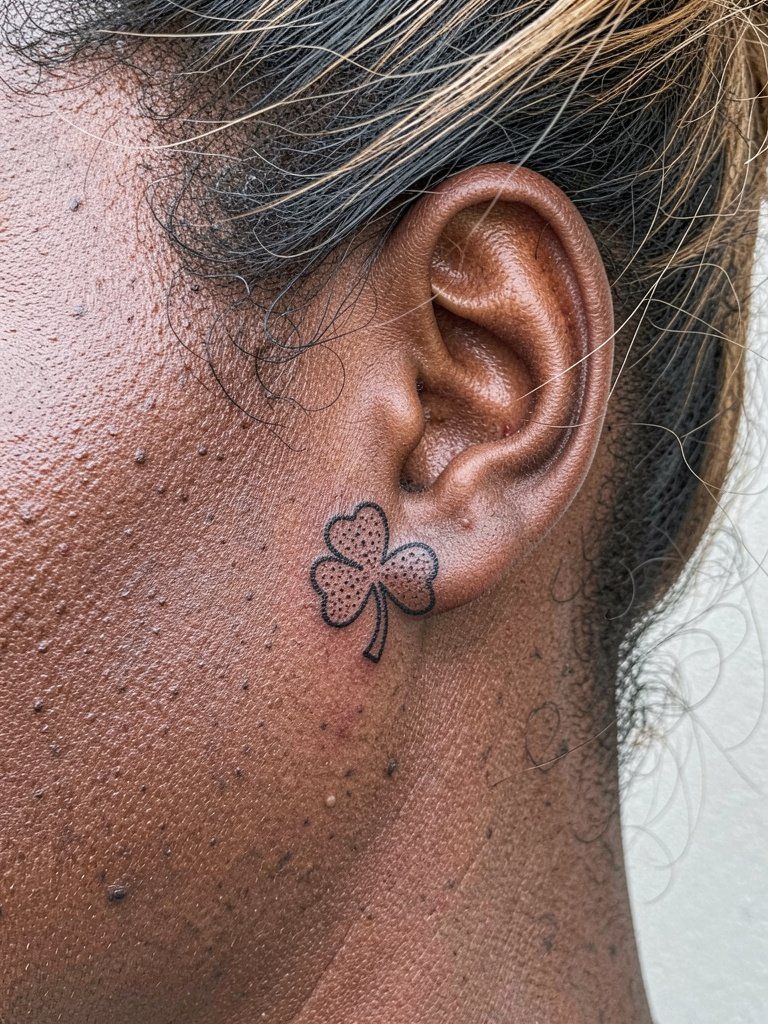
Behind-ear placements wear well because they avoid friction. The session is fast and the pain is mild to moderate because the skin is thin. A tiny shamrock here looks like a punctuation mark when you wear hair up. Tell your artist the exact millimeter size you want so the lobes do not collapse into a single blob. Healed after six months it will look like a crisp dot with shape. For the appointment, wear a crew-neck tee with hair already up to avoid shifting the area during stencil placement.
3. Little Shamrock on the Side of the Finger

Finger and knuckle skin sheds and sees the most washing, which eats fine detail. For a tiny Shamrock on the finger choose a bold silhouette rather than thin veins. The session is quick and stingy. Expect significant fading by year two and a likely touch-up within 12 to 18 months. A common mistake is asking for a micro script-detail inside the leaves. That detail rarely survives. If you plan to show it often, combine the tattoo with stackable rings and a delicate brass ring set that frames the tiny design and draws the eye.
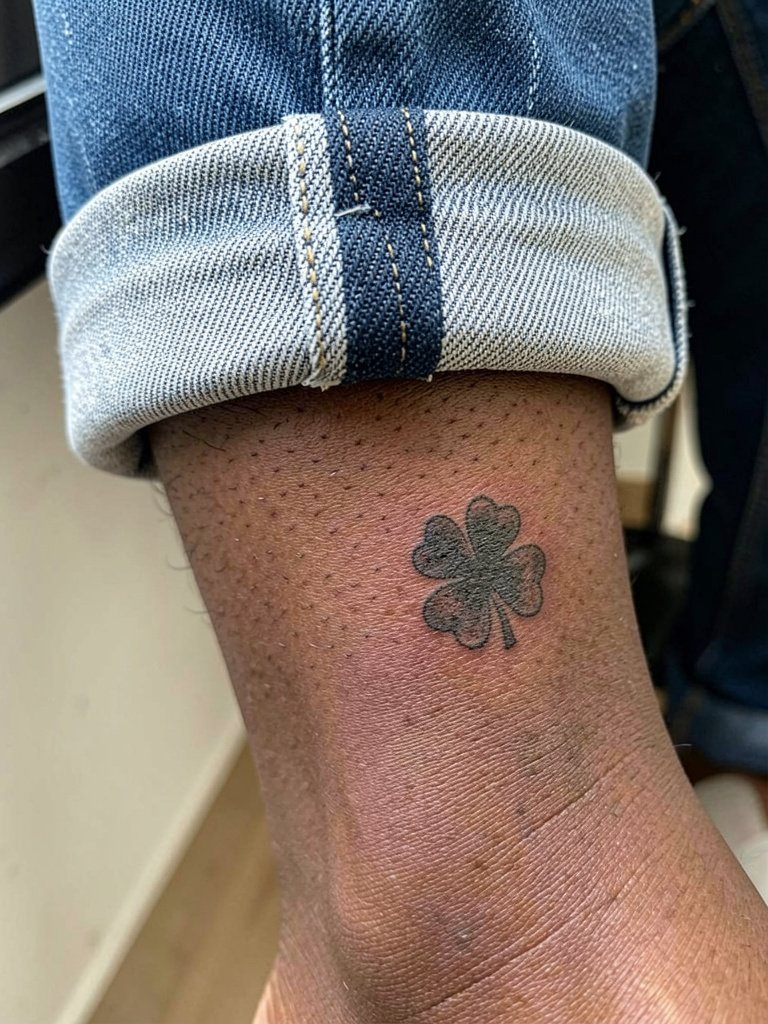
4. Negative-Space Shamrock on the Ankle

Artists openly disagree about ultra-fine microwork on areas that get friction. One camp argues tiny single-needle details on ankles and wrists blur because the skin is thin and moves a lot. The other camp says careful spacing and slightly heavier line weight preserves the shape and they will point to healed photos to back that. For this design, the negative-space Shamrock avoids tiny interior lines and trades fragile detail for lasting silhouette. The ankle tolerates stipple shading well. Plan on a 30 to 45 minute session and a touch-up window at one year. For evening wear pair it with low-rise ankle boots that keep the area visible while the tattoo settles.
5. Tiny Shamrock at the Collarbone
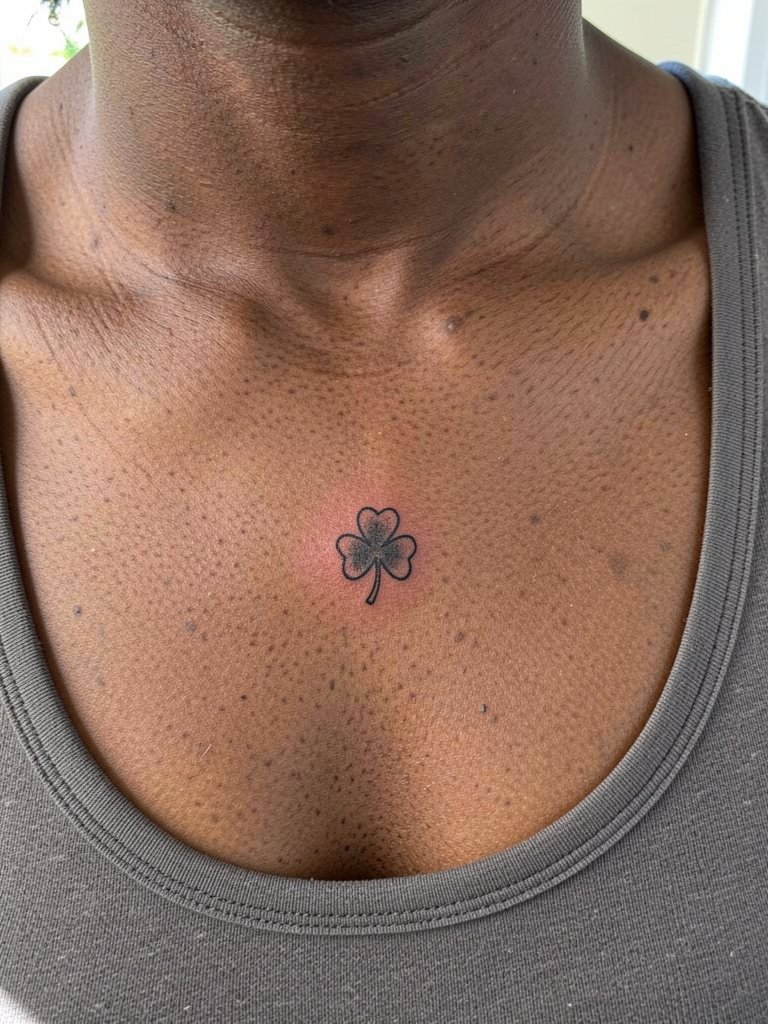
Collarbone tattoos show well and avoid constant abrasion. The pain is moderate because the bone is close. For longevity use slightly bolder outlines around the lobes and minimal interior detail. A useful consultation point is exact placement in relation to the collarbone line, ask for a stencil photograph before the first pass. The session is usually under an hour. Expect the piece to mellow into a softer edge at two years, with touch-up recommended around 18 months if you want crisp contrast. Pair it with open-neck tops and a wide scoop-neck blouse that frames the Shamrock.
Pre-Session Essentials
The tiny wrist, finger, and collarbone pieces above benefit from a few small items that reduce friction, speed setup, and make the first week easier.
-
Silicone stencil stabilizer sheets. These help the stencil hold on curved small zones like the finger and wrist so the design lands where it should.
-
Fast-acting topical numbing gel. A 30 to 45 minute application can make short fingertip or ankle sessions bearable without affecting linework.
-
Thin protective film roll. Useful for covering tiny placements that rub against clothing in the first 24 hours, such as ankles or wrists.
-
Micro stencil transfer pen set. Lets artists refine tiny edges on-site for precise negative-space or dot work Shamrocks.
-
Aquaphor Healing Ointment. Lightweight and non-greasy for the first two to three days, it protects fine line work without suffocating the skin.
6. Tiny Shamrock on the Inner Bicep
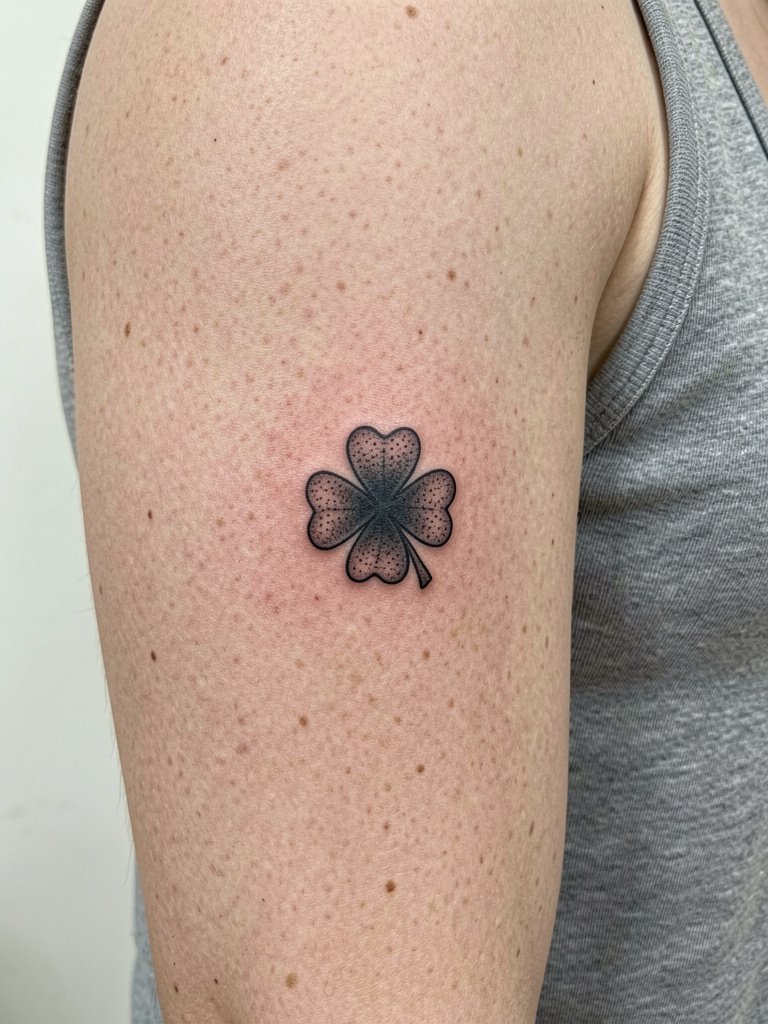
The inner bicep is forgiving with micro designs because it avoids constant friction. The session is a bit more sensitive as the skin is softer. I recommend slightly wider spacing between the lobes to counter natural skin stretch. Discuss stencil size and have the artist press the transfer in place while your arm is relaxed so you can confirm orientation. At six months and two years the shape usually holds well if the lines were not too hairline. Wear a sleeveless tee to show the piece and let the artist access the area easily during the appointment.
7. Dot-Work Shamrock on the Ribcage
Ribcage micro work can produce exquisite results but it also hurts more. One camp of artists says fine single-needle dot work on ribs fades because the area moves with breathing and can cause shallow needle passes. The opposing camp argues shallow breathing control and careful depth yield lasting stipple, and they will show healed photos to support that claim. If you choose stippling, schedule a break in the session to steady breathing. Expect the session to last 45 to 90 minutes depending on density. Avoid asking for dense interior dots that will merge. For session comfort wear a fitted sports bra so the artist can see the area without adjusting clothing.
8. Tiny Shamrock on the Side of the Neck
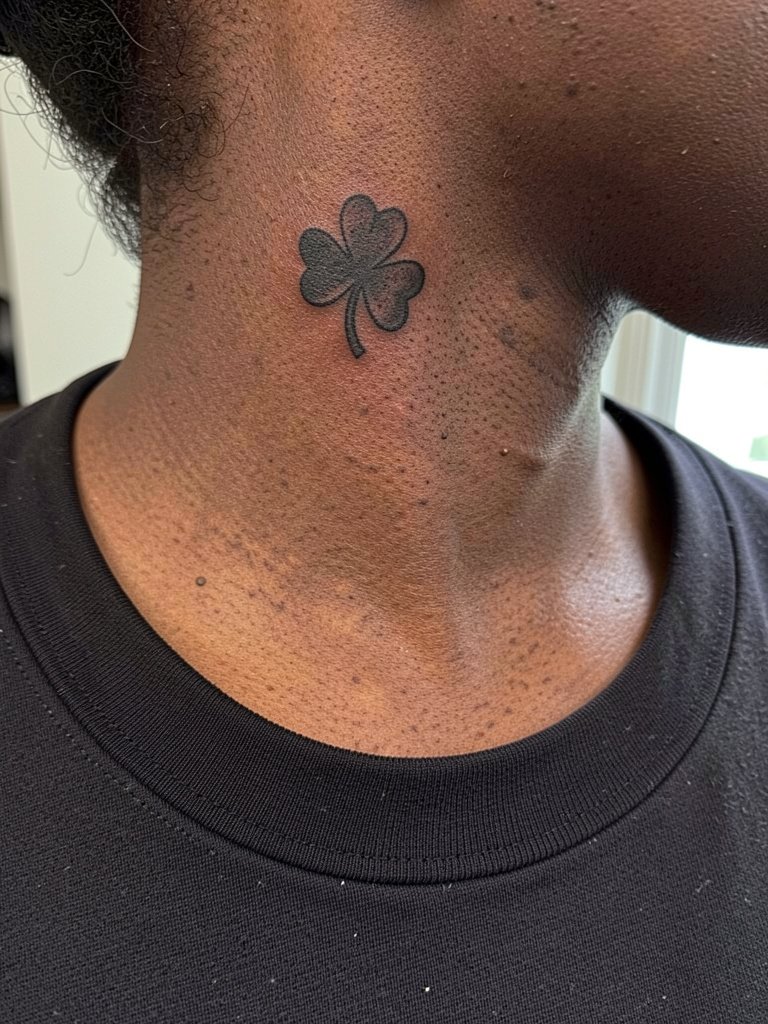
Side-neck placements are visible and show well with tiny shapes. Pain is moderate to high for some people because of thin tissue. For a Shamrock here, choose a solid silhouette rather than interior filigree. Discuss alignment relative to your jawline so it sits elegantly when you turn your head. Healed color tends to soften slightly at two years. A common error is placing the design too low where collars rub it. For styling, a wide-neck blouse will reveal the area without discomfort.
9. Minimalist Shamrock on the Outer Thigh
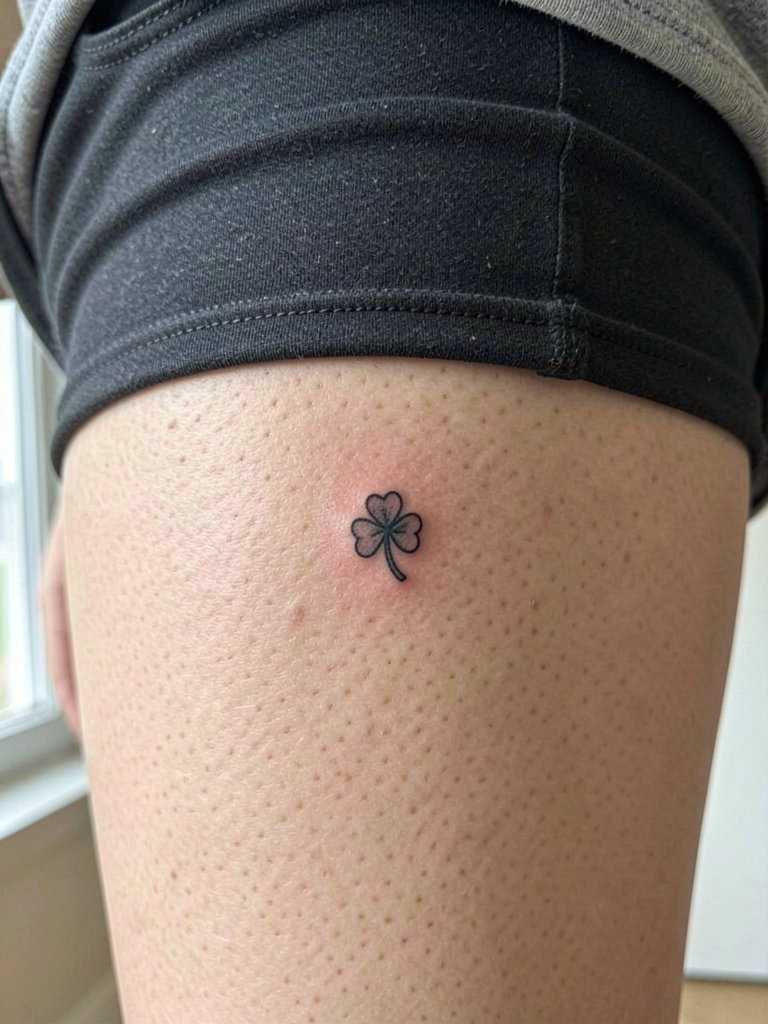
The outer thigh is tolerant of micro detail and is a good spot if you want something private but occasionally visible. The session is low to moderate in pain. For a tiny Shamrock use clean linework and minimal internal shading. Discuss the exact distance from the hip bone so the lace edge of clothing does not rub the ink during healing. It will age well because the area sees less sun and friction. For showing it off in summer choose a high-waisted short that frames the placement.
10. Stipple Shamrock Near the Ankle Chain
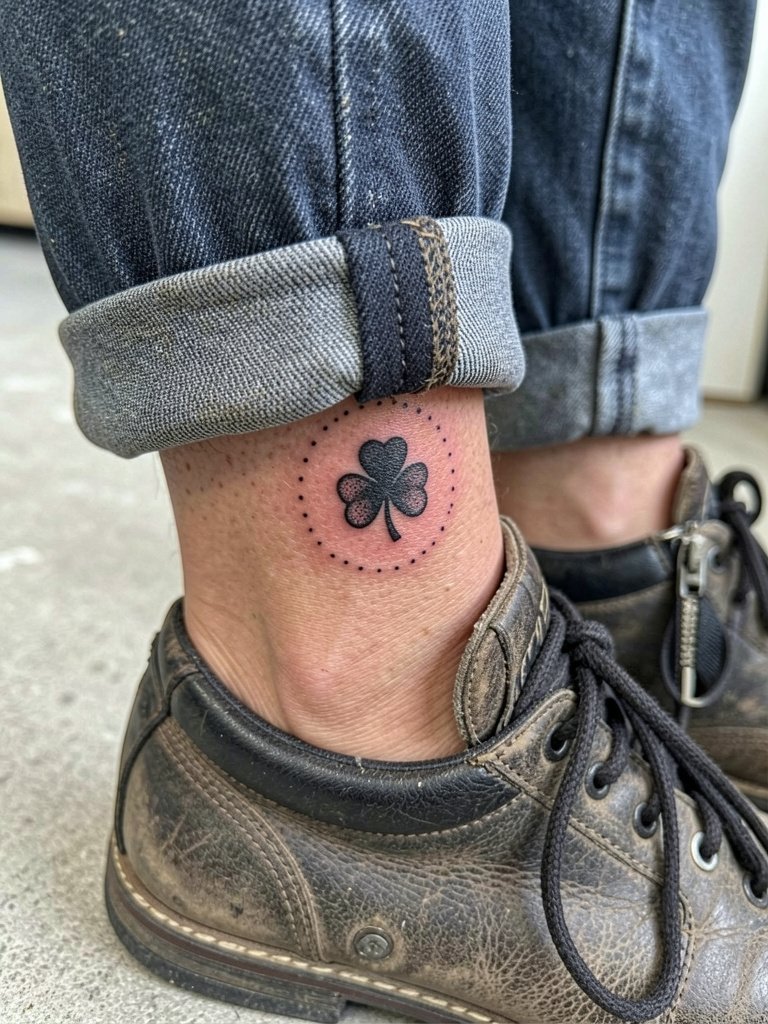
Some artists say decorative ankle chains and tiny dots around a Shamrock add context but risk extra fading because the added dot density sits close to clothing edges. Another group prefers the minimal halo because it preserves negative space and creates a readable silhouette. If you want the halo, ask for slightly more spacing between dots so they do not merge with the Shamrock over time. The ankle area will likely need a small touch-up at 12 to 18 months. For evenings slip on a pair of low-rise ankle boots that display the design without scraping it.
11. Tiny Green-Tinted Shamrock on the Wrist Side

Adding a tiny touch of color to a Shamrock can look beautiful but color behaves differently than black. Lighter green tones lose saturation faster on sun-exposed wrists. A better approach is a small saturated green wash kept inside a defined outline. Ask your artist what pigments they use and how they read on your skin tone. The session will be slightly longer because of color layering. Expect a color refresh sooner than a pure black outline. Pair the piece with a linen rolled-sleeve shirt to keep the skin shaded and show the color without oversun exposure.
12. Tiny Shamrock on the Thumb Side
Thumb-base placements see heavy movement and frequent washing. For a tiny Shamrock here choose a bold silhouette with no interior micro detail. The session is short but the area is prone to early fading and may need a touch-up within a year. A common mistake is trying to cram script or veins into the small shape. For the appointment wear a short-sleeve shirt so the artist can position your hand comfortably without fabric interference.
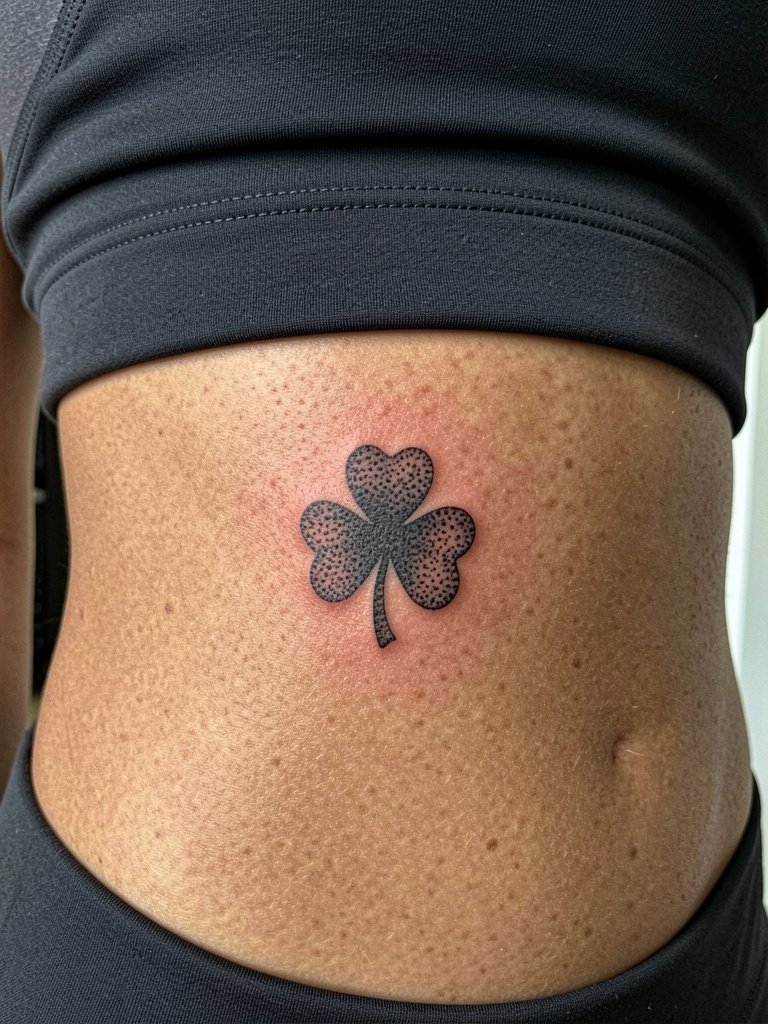
13. Tiny Shamrock on the Lower Back Side

Lower back micro shamrocks are well protected from sunlight and friction. The session is low pain but positioning can feel awkward. Discuss exact height above the waistband because clothing can rub during the first week. A common mistake is putting the piece too low where the waistband interferes. Expect excellent longevity here, with touch-ups seldom needed unless you want perfect black years later. For casual reveal pair with a cropped tank so the tattoo is seen without fabric abrasion.
14. Tiny Shamrock on the Inner Ankle Tendon
The inner ankle tendon location is slightly higher friction than the outer ankle. For a tiny Shamrock pick line weight that can tolerate walking and sock friction. Discuss how your shoe choices affect healing and ask for a protective bandage recommendation for the first 48 hours. The session is brief and sensitivity is low to moderate. Expect minor softening at two to three years if left without a touch-up. For display choose rolled-cuff jeans that keep the area visible without constant rubbing.
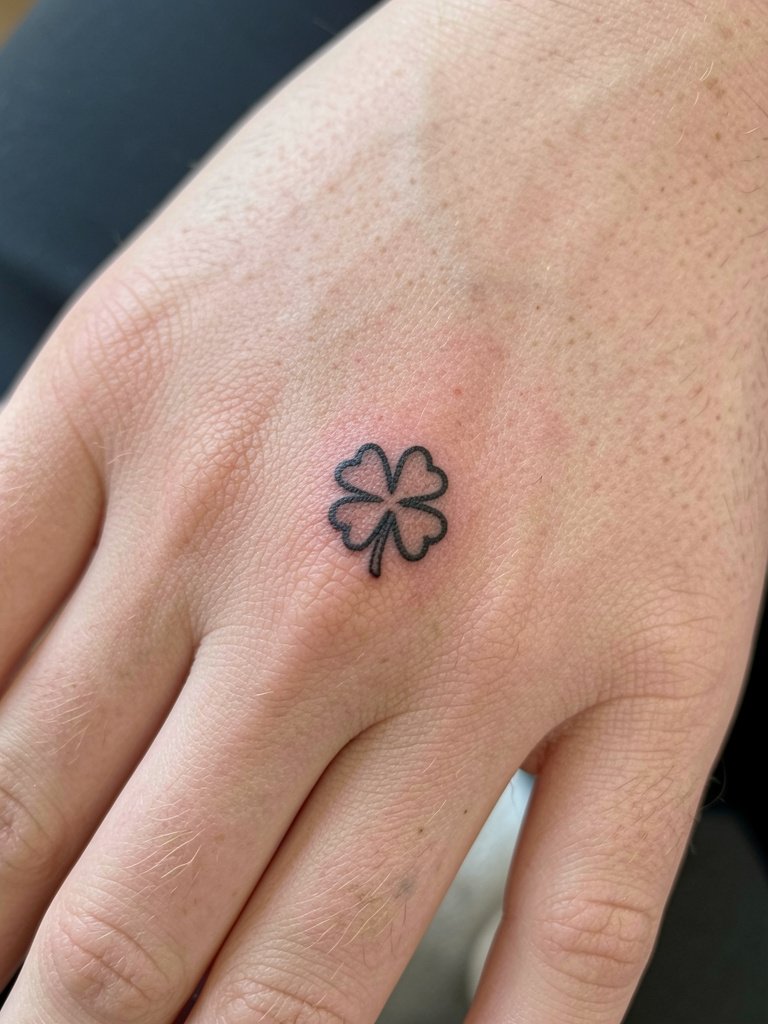
15. Micro Shamrock Cluster on the Back of the Hand

Back-of-hand tattoos are high-visibility and high-wear. If you want multiple tiny Shamrocks here favor bold silhouettes and space them so each holds its shape. The skin experiences frequent washing and sun exposure so plan on touch-ups at the one-year mark. A common mistake is packing too many details into a design that should be graphic. The session stings more than wrist work and lasts 30 to 60 minutes. Style the area with minimal bracelets and a delicate chain bracelet that complements the cluster without rubbing the ink.
Frequently Asked Questions
Q: How small is too small for a Shamrock if I want it to last?
A: As a rule, a Shamrock smaller than about 1.5 to 2 centimeters across risks losing interior leaf definition over a few years. If you want micro size, increase outline thickness and drop interior filigree. Expect a probable touch-up at around 12 to 18 months for high-motion placements.
Q: Which placements need the most touch-ups for tiny shamrocks?
A: Fingers, hands, and the ankle see the fastest fading because of washing and friction. Inner bicep, lower back, and outer thigh usually hold the longest. Plan touch-ups as part of the ownership cost, not as a sign of poor technique.
Q: Where can I find healed examples and discovery pathways without naming artists?
A: Search platform tags and location filters on Instagram and TikTok using phrases like #TinyShamrockTattoo and #MicroShamrockHealed. Browse subreddit threads that focus on healed ink and filter by skin tone. Portfolio sites and local studio tag pages often show progression shots labeled "healed."
Q: How should I dress for the session for different placements?
A: Wear clothing that gives the artist clear access to the area without needing to remove garments. For collarbone choose a wide-neck top. For inner bicep or upper arm bring a tank top. For ankles wear jeans you can roll up. One helpful item is a fitted tank top that makes access simple while keeping you comfortable.
Q: Do small shamrocks need specialized aftercare compared with larger tattoos?
A: The basics are the same but micro pieces are more vulnerable to early scabbing that can pull detail. Keep them out of direct sun, avoid tight fabrics rubbing the area, and follow a light moisturizing routine. If the piece is on a high-wear zone consider a brief protective film for the first 24 hours.
