
Fine-detail animal portraits often read crisp for the first year and blur by year three when placed too small or inked too shallow. I favor slightly heavier hair texture, strategic spacing, and controlled saturation so fur and feather stay legible as skin changes. Expect practical notes on placement, pain, and wardrobe that help these realistic animals read clearly on real bodies for years to come.
1. Wolf Portrait on Outer Forearm
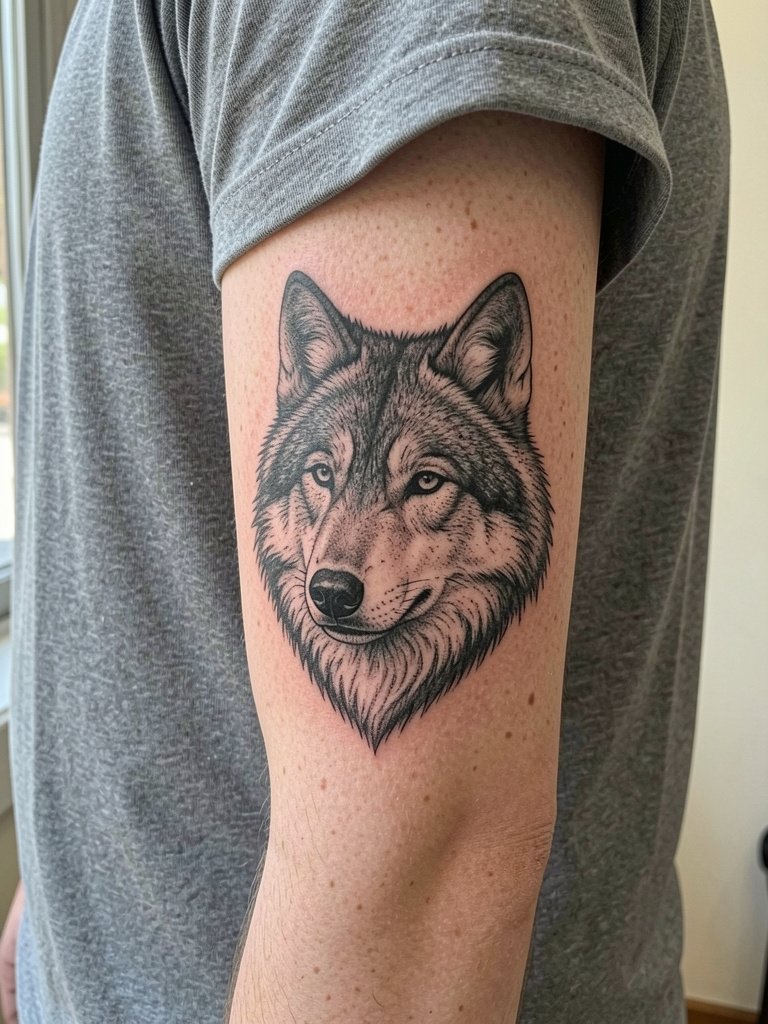
A wolf portrait on the outer forearm works when you want movement in the fur and readable linework from a short distance. Ask for slightly heavier linework on the outermost fur edges so the silhouette does not soften over time. Small sessions usually take 90 to 150 minutes depending on saturation and shading. Common mistakes include asking for ultra-fine single-needle hair that the forearm skin will eat by year two. For showing it off, roll sleeve cuffs up and pair with a linen button-up shirt so the portrait sits in a frame of neutral fabric and the texture of the fur reads against the cloth.
2. Fine-Line Hummingbird on Inner Wrist
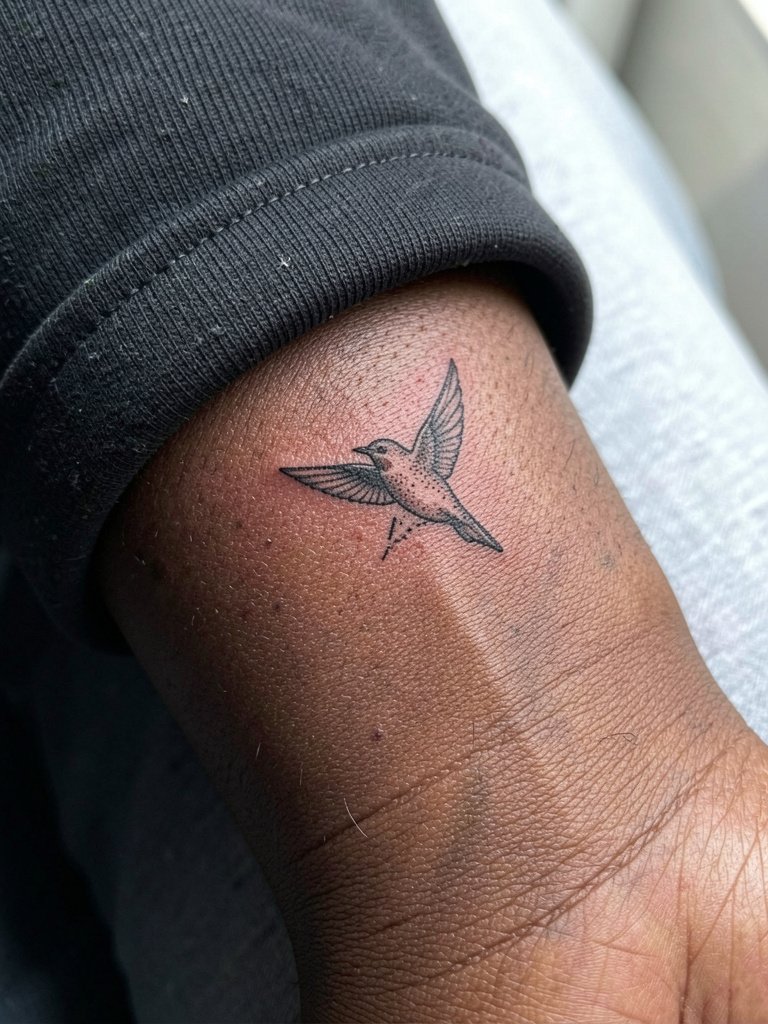
The inner wrist is forgiving for tiny silhouettes if you accept a trade-off between delicacy and longevity. I recommend slightly boosted saturation for the wing edges and a touch of dot work to hold detail. The session feels quick but the wrist has frequent friction from watches and bracelets so expect a touch-up at 12 to 18 months. A common mistake is insisting on hairline weight across the whole bird. Instead, ask for a hairline body and a firmer edge where the wings meet the air. For evenings out, this area pairs with delicate chain bracelets that frame the bird without rubbing the healed ink.
3. Red Fox on Thigh with Stipple Shading
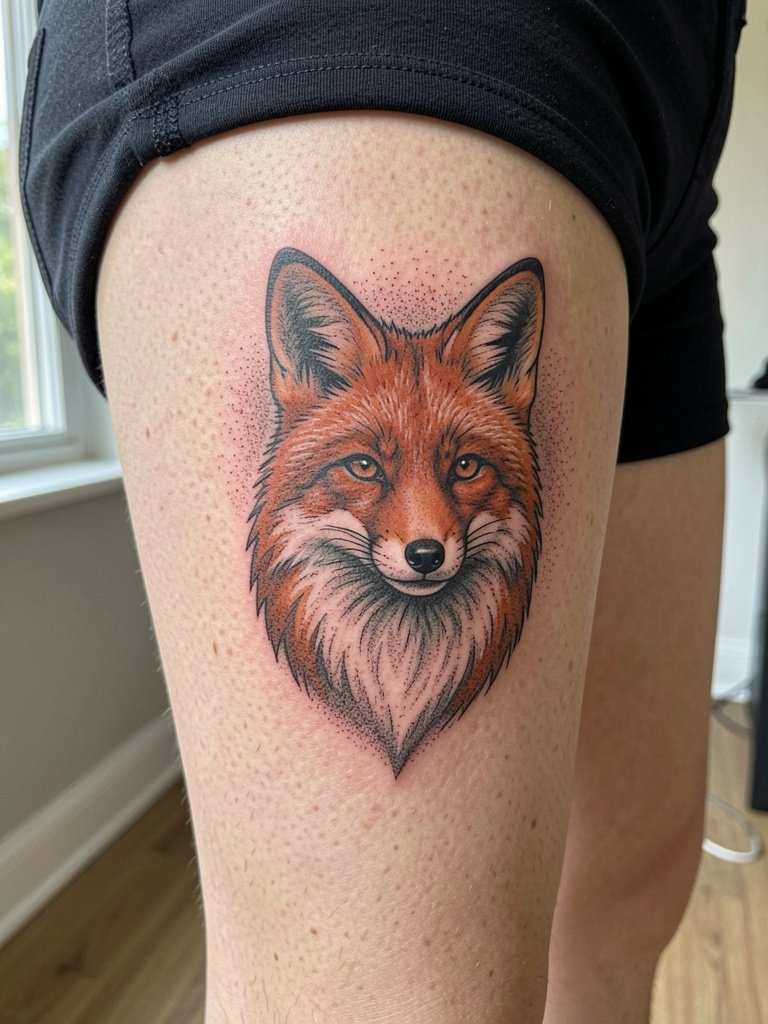
An upper thigh fox gives enough canvas for fur texture and warm color blocking without the heavy blowout risk of thin lines. Discuss specific reference photos that show fur flow at different scales so the artist understands how much stipple and whip shading to use. The thigh ages well and hides sun exposure, so saturation holds longer than on hands or wrists. Typical session time is two to three hours for a medium portrait. For session comfort, wear loose shorts or a long tee that you can sit comfortably in, and bring a loose drawstring linen pant to pull on after the appointment without pressing on the fresh area.
4. Realistic Owl Eye Close-Up on Chest
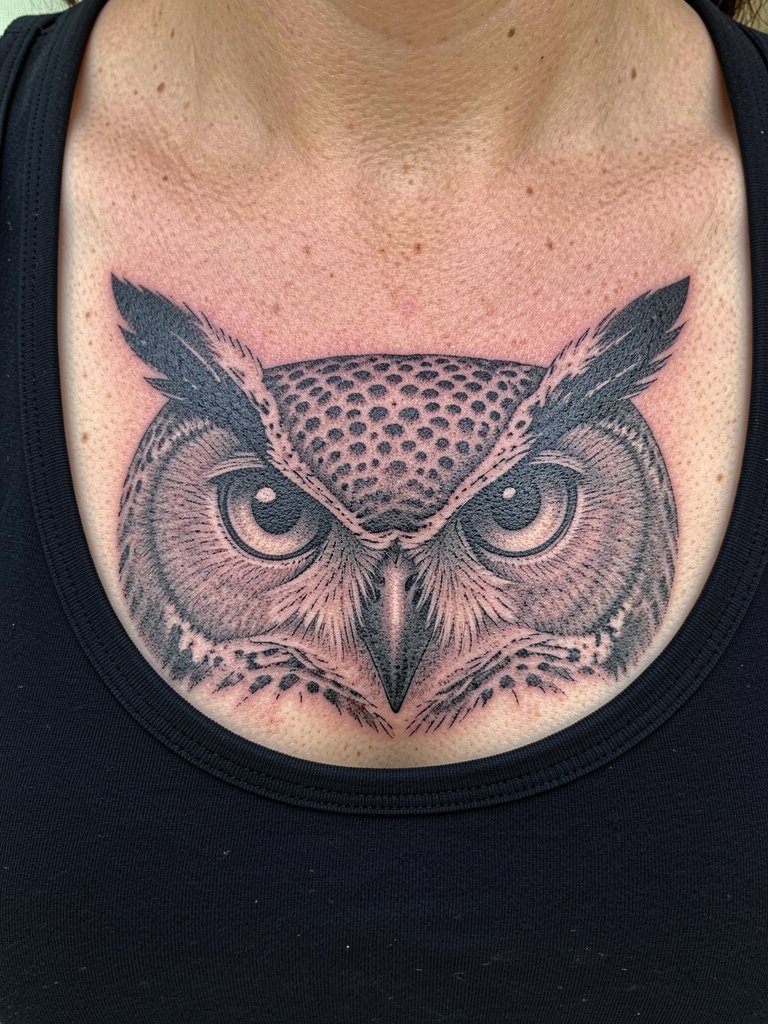
A chest owl eye reads like jewelry when scaled properly and set beneath the collarbone. Expect more discomfort here than on the thigh because the chest is closer to bone and thin tissue. Plan for two shorter sessions rather than one marathon to control swelling and to check how highlights settle. Artists are split over how much microdetail to pack into sternum areas. One camp says ultra-fine detail will blur with the constant expansion and contraction of chest skin. The other camp argues that staged sessions with controlled saturation preserve those micro-highlights. If you want this to age, ask the artist to prioritize contrast and slightly bolder highlights over fragile single-needle filigree.
5. Leopard Spot Sleeve Detail on Bicep
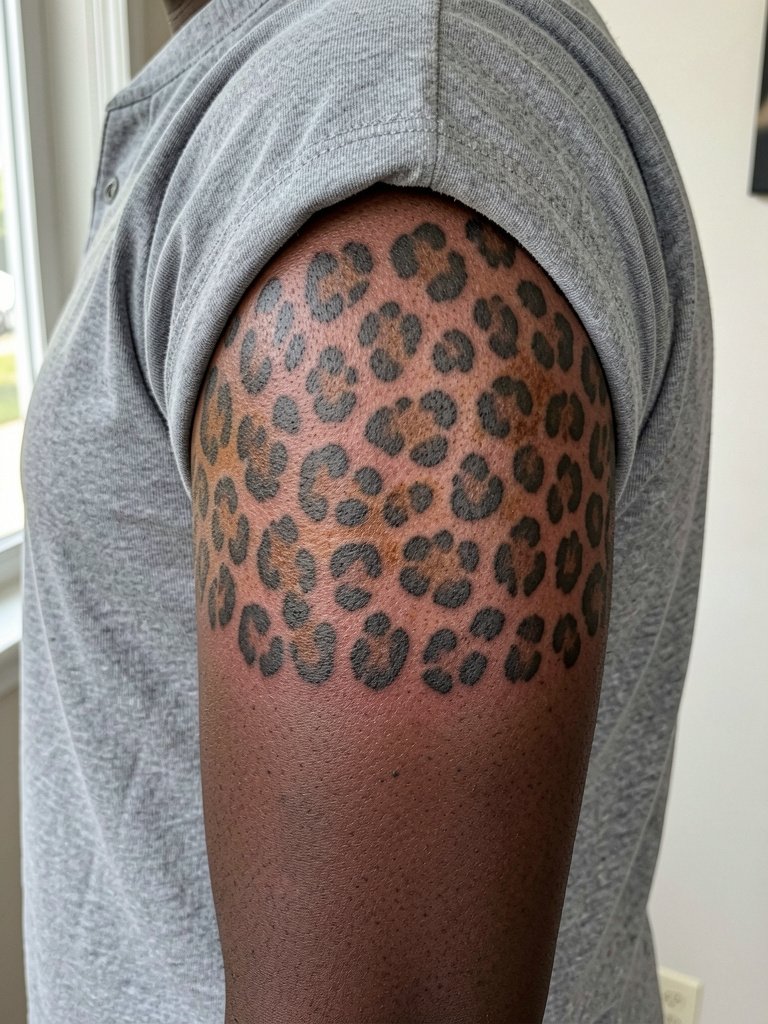
Leopard spots are a strong filler for sleeves because you can vary scale to avoid banding as the arm moves. Recommend the artist use a mix of whip shading and stipple for texture and to prevent flat brown blobs. Biceps are middle-of-the-road for pain so sessions usually run 60 to 120 minutes per section. A common error is repeating identical spots across the arm. Ask for varied spacing and slightly different saturation levels so the pattern reads organic. For nights out, pair this area with a rolled-sleeve tee that intentionally exposes the pattern.
6. Kingfisher in Flight on Calf
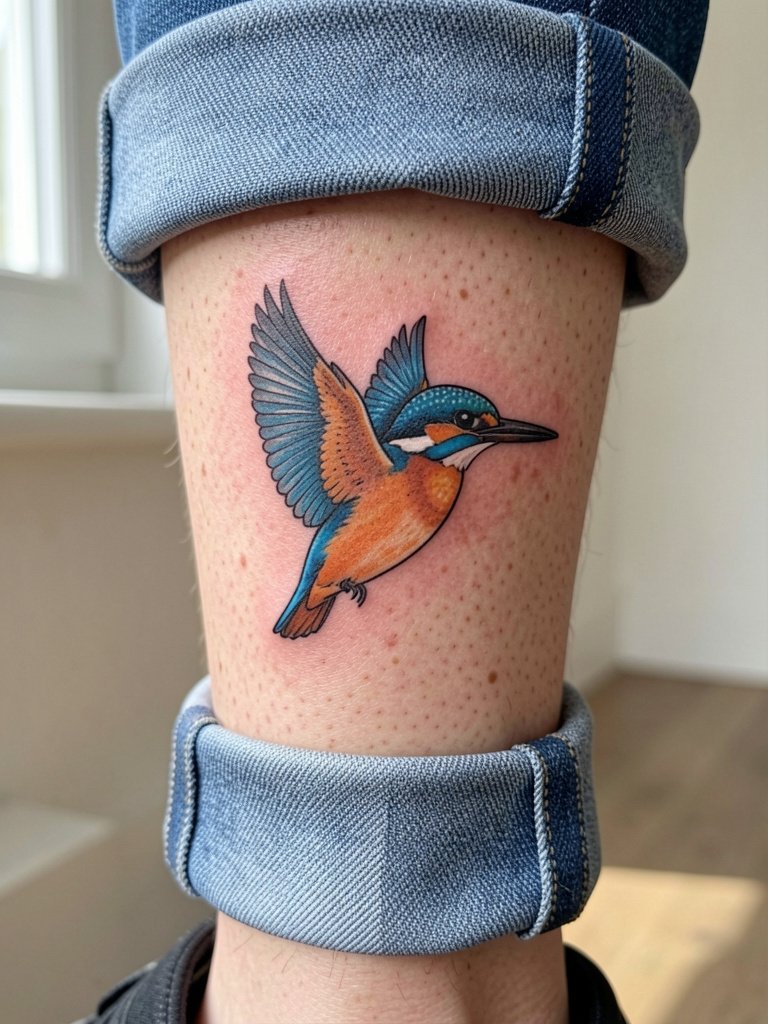
A calf placement holds color saturation well because of thicker skin and lower sun exposure. With bright birds, plan an initial pass for linework and a second session to layer color so saturation reads strong. Expect two-hour sessions for medium-sized birds and a touch-up at 12 months for color refresh. The main mistake is asking for the exact photographic color balance without allowing for the skin tone impact. Have the artist show color swatches against your skin before filling. For showing the bird off in summer, cuffed jeans or low-top sneakers frame the calf and keep the artwork visible.
Session Day Picks
The wrist, calf, and inner thigh pieces above have different exposure and friction profiles, so a few practical items smooth the session and the first week.
-
Stencil transfer paper kit. Lets you preview linework on skin for pieces like the wolf and kingfisher so sizing decisions are clearer before the needle hits.
-
Topical numbing cream. Applied 45 minutes before shortens break time on sensitive spots such as the inner wrist and sternum without affecting shading.
-
Thin protective film roll. Keeps ankle and calf tattoos clean during the first week of friction from socks and footwear.
-
Fragrance-free body wash. Gentle cleansing helps the dot work and stipple shading settle without irritating fresh ink.
-
Healing balm from a mainstream brand. A trusted ointment for the initial 48 hours helps maintain saturation in fine fur work before switching to lighter moisturizing.
7. Brown Bear Head on Shoulder Blade
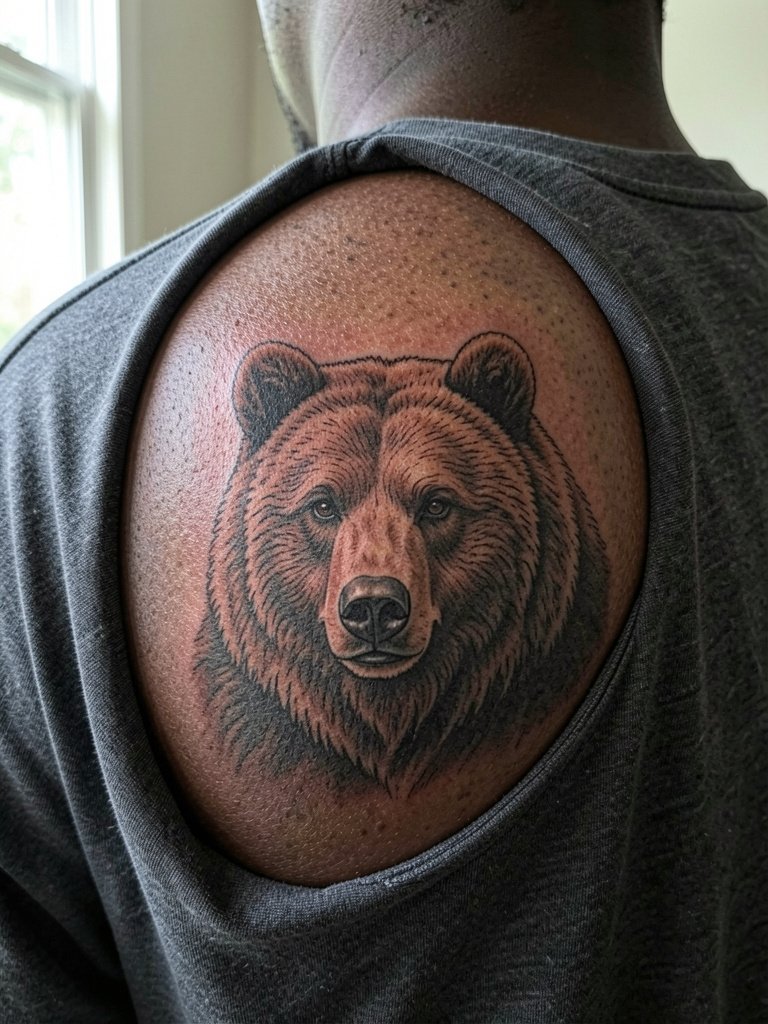
Shoulder blade portraits let you build depth without the compression you get on the forearm or wrist. Tell the artist you want deeper saturation in the outer fur layers and softer grey washes toward the jaw so the face keeps dimensionality as it heals. Sessions here are moderate on pain but may require two passes to balance saturation across the curved surface. A mistake I see often is too-small eyes that lose expression after healing. For wardrobe, this placement looks intentional with open-back tops that frame the artwork without rubbing it.
8. Cheetah Whisker Detail Behind the Ear
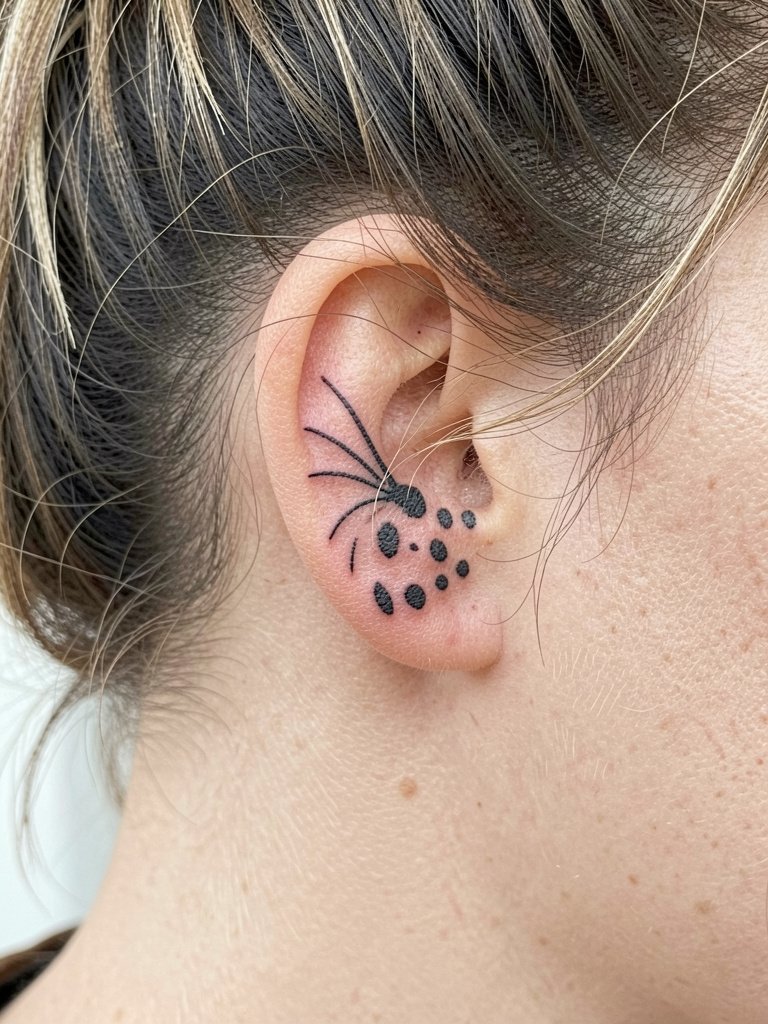
Behind-the-ear pieces are delicate and demand deliberate contrast planning because hair growth and natural oil can soften edges. Ask for bolder outer whisker anchors and a slightly denser dot-fill near the spot clusters. Session time is short but the area can require careful aftercare because of hair contact. Professionals who specialize in small detail on this placement are the ones to seek out. This placement is subtle to style yet effective when you wear small hoop earrings that tuck the hair and show the piece.
9. Photorealistic Salmon Running on Ribcage
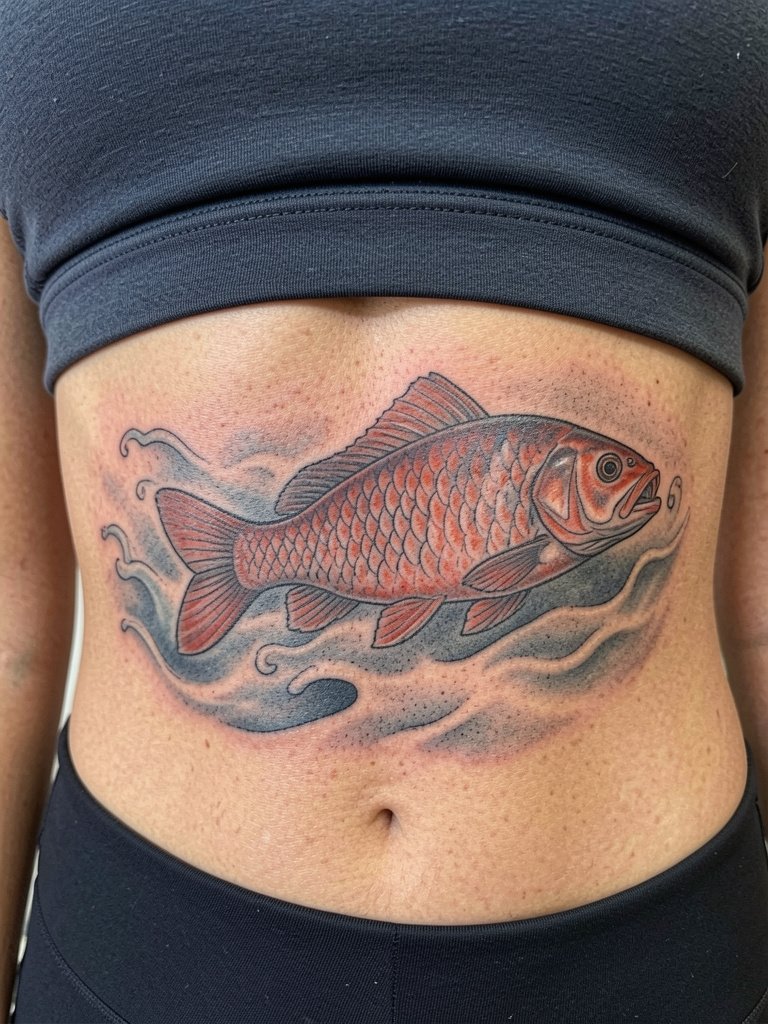
Ribcage work can be spectacular but it also exposes the debate about fine detail in moving skin. One camp argues that ribs stretch and fine-line detail blurs within two years, especially near the underbust. The other camp says staged saturation and slightly wider spacing let even intricate scale work settle fine. For this salmon, plan for staged passes and request mockups at different sizes so you can see how scales read when the torso moves. Pain is higher here so consider numbing strategies and schedule breaks during the session.
10. Skateboarder Raven on Hand Back
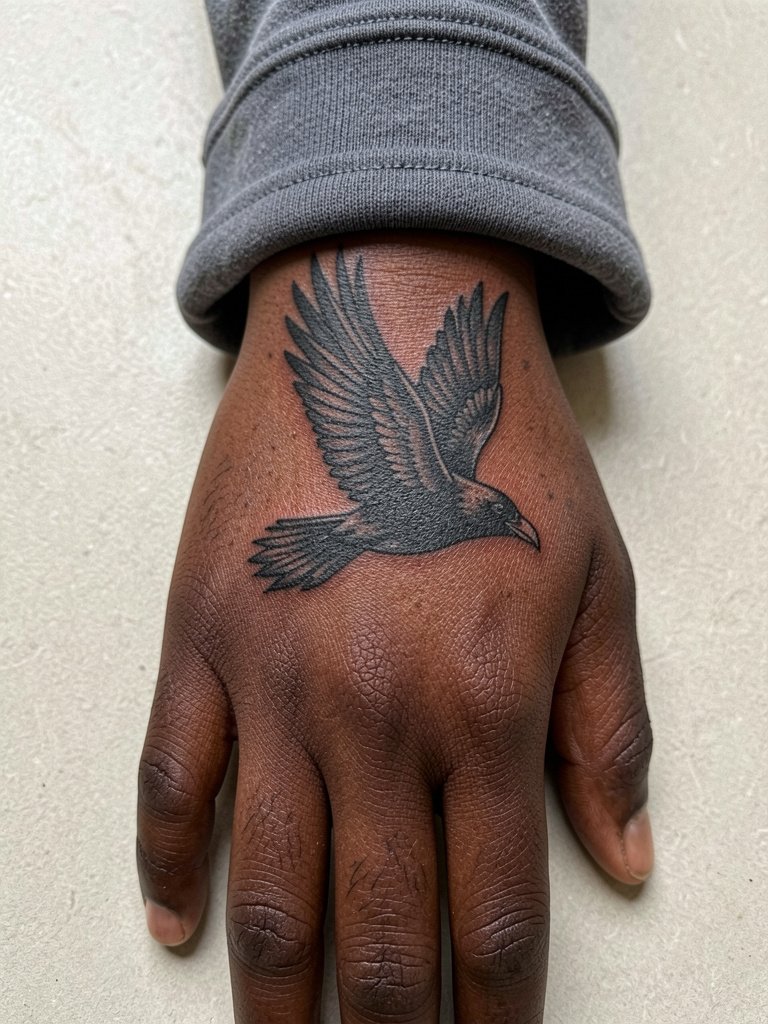
Hand pieces show fast and look bold, but they face constant washing and sunlight so realistic feathers need stronger outlines and heavier saturation to survive. Expect high touch-up rates for hand realism. A common mistake is using light stipple across the knuckles where blowout risk is higher. Discuss reinforced outer contours and accept that touch-ups may be needed at six to twelve months. Because hands are visible in daily life, pair this area with a simple silver ring rather than bracelets that constantly rub the back of the hand.
11. Snowy Owl Collarbone Accent
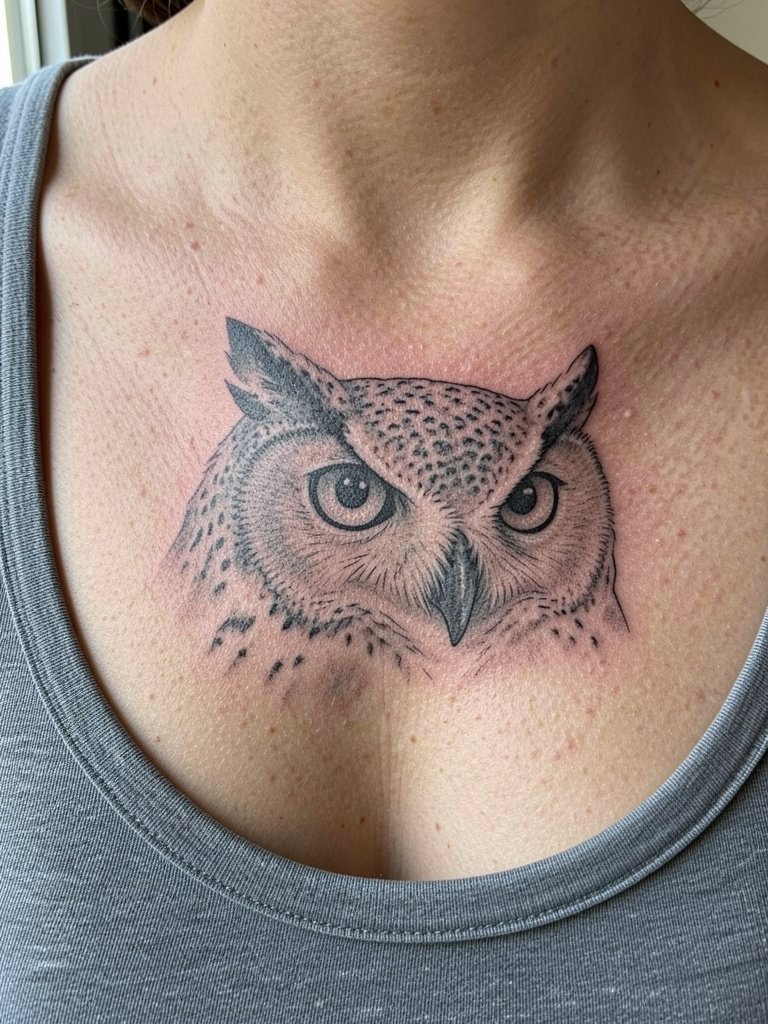
Collarbone accents age differently than sternum pieces because they face more sun exposure. Ask for strong contrast in the eye and a little negative space around the beak so the form does not flatten. Sessions here are short but expect sensitivity where bone is shallow. The most common mistake is too-small composition directly over the collarbone which fades into a blur from daily movement. For outfits, open necklines and delicate pendant necklaces highlight the portrait without covering it.
12. Grizzly Paw Print on Rib Side
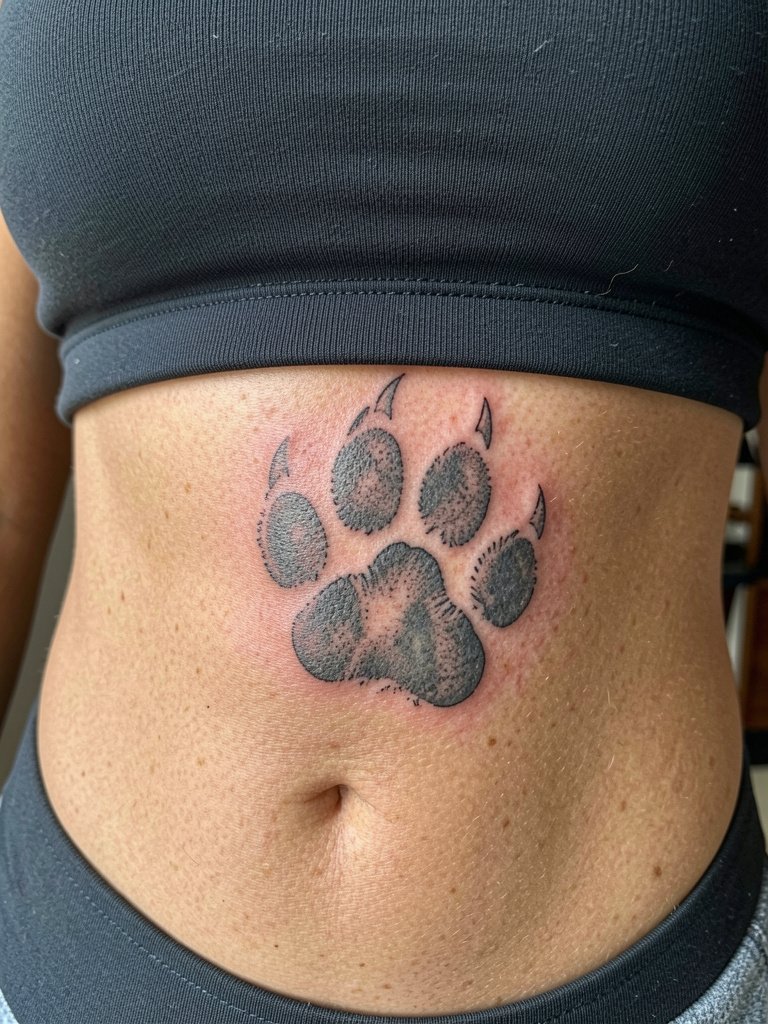
A paw print is deceptively simple and needs texture to feel authentic. Request a reference that shows pad creases so the artist can stipple and shade rather than relying on a flat silhouette. Because ribs are sensitive, plan for a two-part session and discuss numbing timelines and breaks. The mistake I see most is center-heavy saturation that makes the print look like a sticker once healed. For session wear, a fitted sports bra and breathable drawstring shorts let the artist access the area without tugging fabric.
13. Minimalist Swan Neck on Nape
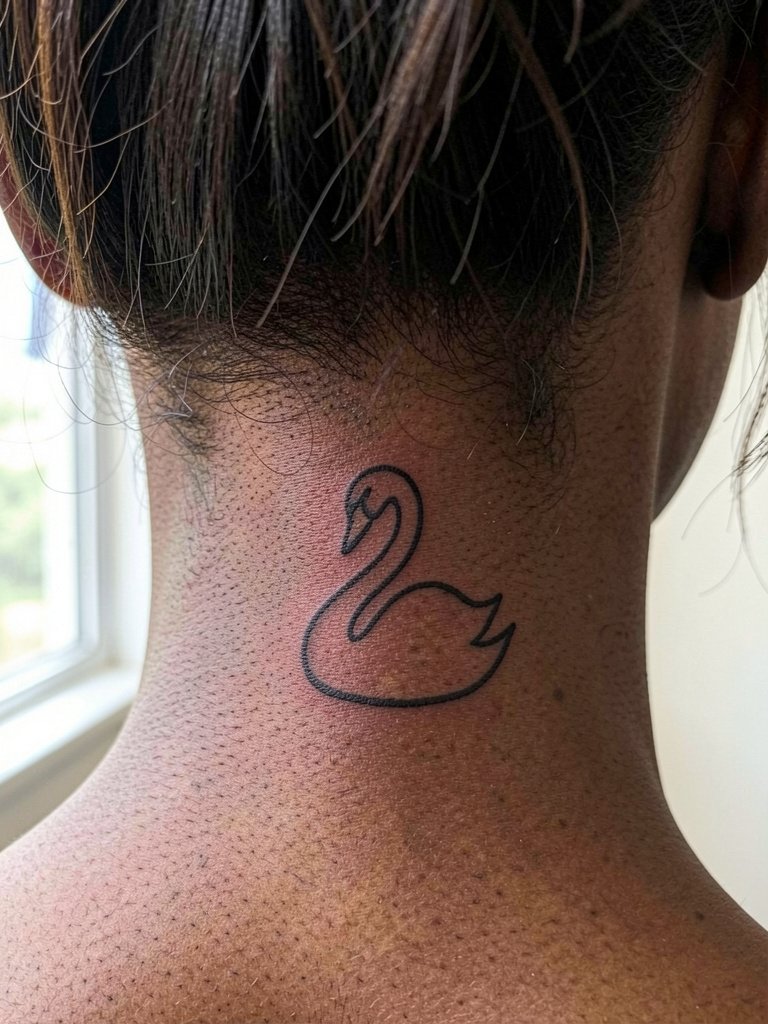
Nape placements can be elegant and low hassle because they stay mostly covered and away from constant sun. For single-line silhouettes make the main curve a touch bolder than your reference so it survives hair oils and occasional friction. This placement is low on the pain scale compared with ribs and the session is often under an hour. A common error is using ultra-fine script-like strokes that fade quickly under hairline oil. If you style your hair up frequently, a pair of hair clips that secure the updo will make the healed piece visible without rubbing.
14. Praying Mantis Micro-Realism on Ankle
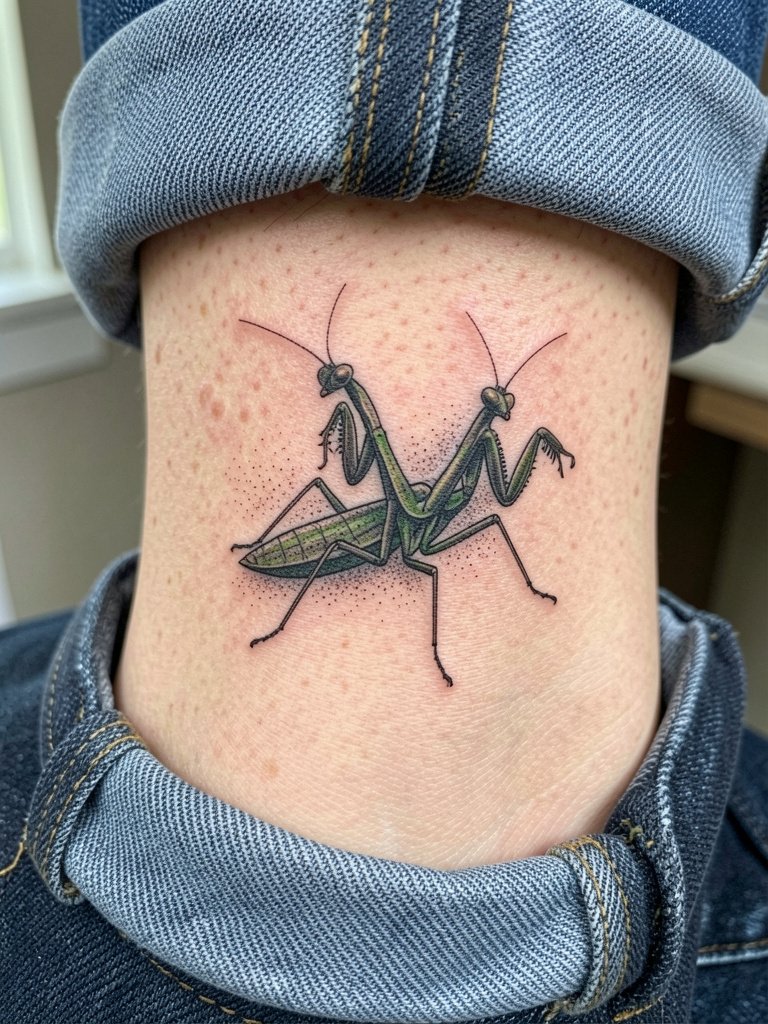
Ankle micro-realism looks intricate but the area rubs against socks and shoes. I recommend slightly stronger outer contours and a denser dot-fill near joints to prevent feathering. Sessions are brief but expect higher touch-up likelihood than on the thigh or back. The mistake is believing tiny legs and antennae will hold without reinforcement. For styling, cropped pants and ankle boots are a useful way to show or hide the mantis while protecting the area when needed.
15. Sea Turtle Shell Panel on Lower Back
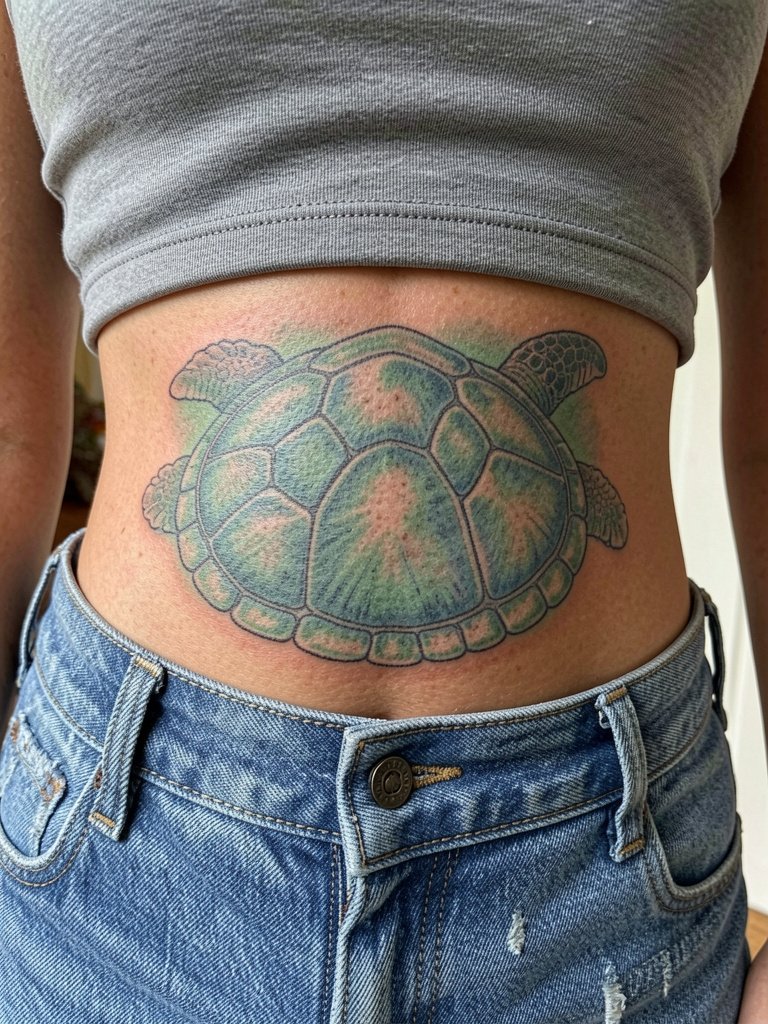
Lower back pieces give you room for pattern work and gradual shading. Ask for distinct scale separations and a touch of contrast along the shell ridges rather than flat washes. Expect two to three hours depending on span and color layering. The area sits near the waistband so choose clothing that will not rub the fresh skin for the first week. For sessions, high-waisted pants that sit above the tattoo and a soft cotton crop top let the artist work comfortably and keep fabric off the area while healing.
Frequently Asked Questions
Q: How do I find realistic animal portfolios without naming artists directly?
A: Search platform tags and keywords that match the species and style you want. Try location filters on social platforms and search phrases like "#RealisticAnimalInk", "photorealism tattoo healed", and species-specific phrases combined with "healed" to see long-term results. Reddit photo threads and portfolio tags often reveal healed timelines across skin tones.
Q: Which realistic animal placements need the most touch-ups and why?
A: Hands, fingers, wrists, and ankles usually need the most touch-ups because of frequent washing and friction. Thighs, upper back, and calves tend to hold saturation longer. In practice a small wrist or hand portrait will usually need a touch-up inside the first year while a calf or shoulder piece may go several years before a refresh.
Q: Should I pick color or black and grey for long-term realism on animals?
A: It depends on the subject and your lifestyle. One group of artists favors saturated color to preserve distinct tones in feathers and fur. Another group prefers black and grey because it ages predictably and is easier to touch up. For highly detailed fur textures I often recommend black and grey with selective color accents so you get definition without risking rapid color fade.
Q: What should I wear to my session for an inner thigh or sternum piece?
A: Choose loose, accessible clothing that lets the artist work without wrestling fabric. For inner thigh sessions a pair of fitted bike shorts or loose shorts works well. For sternum pieces a fitted sports bra or bandeau in its normal worn position is easiest for access and comfort.
Q: How painful are rib and sternum realistic portraits compared with forearm or thigh work?
A: Ribs and sternum register higher on most pain scales because the needle vibrates near bone and thin tissue. Forearms and thighs are generally less painful. If you need strategies for pacing the session mention break timing and staged shading ahead of booking so the artist can plan shorter passes.
