
The tiniest minimalist tattoos that still read clean after a few years are often the ones planned with a little breathing room and slightly stronger linework. Ultra-fine single-needle pieces can look amazing right away but often soften faster on high-friction skin. Read through these compact designs with placement notes, realistic aging expectations, and outfit tips so your new ink looks intentional on day one and at year five.
1. Fine Line Arrow on Inner Forearm
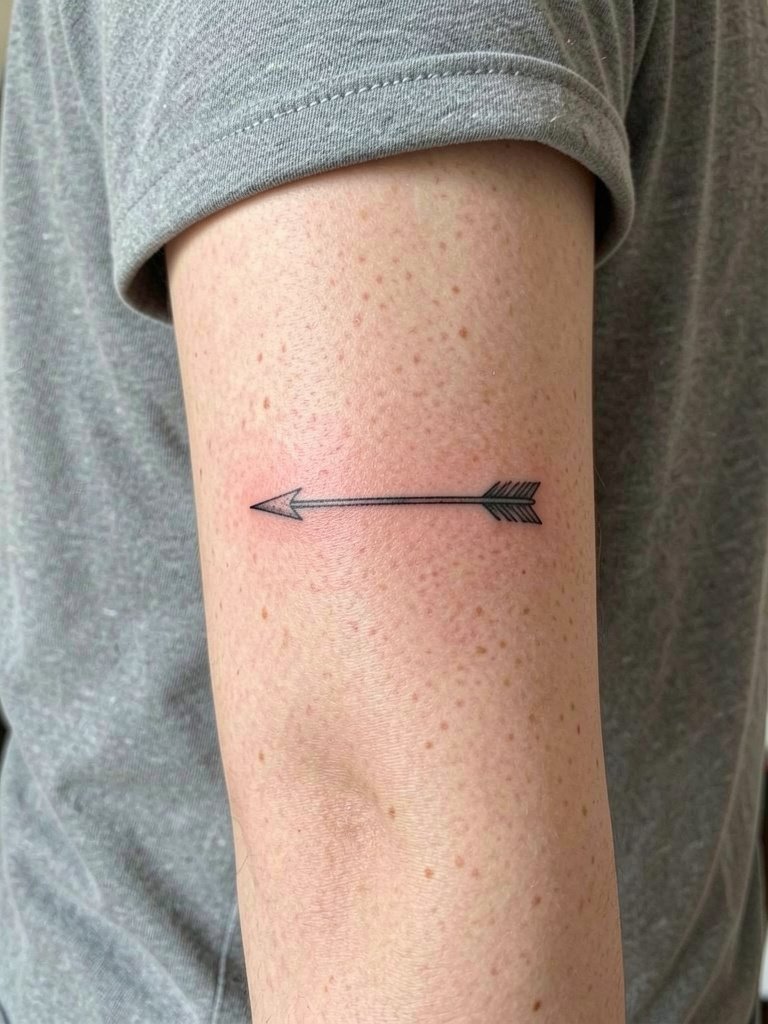
An inner forearm arrow is a reliable tiny piece because that skin holds linework without extreme stretch. Recommend a line weight slightly heavier than ultra-fine single-needle so the point and tail keep definition after a couple of years. Talk to the artist about spacing between the shaft lines and the barbs to avoid early merging. Expect a 30 to 45 minute session and light discomfort, mostly sharp on the inner wrist side and dull on the mid-forearm. Roll sleeves or wear a linen tank the day of your appointment for easy access and comfort.
2. Micro Geometric Triangle Behind the Ear
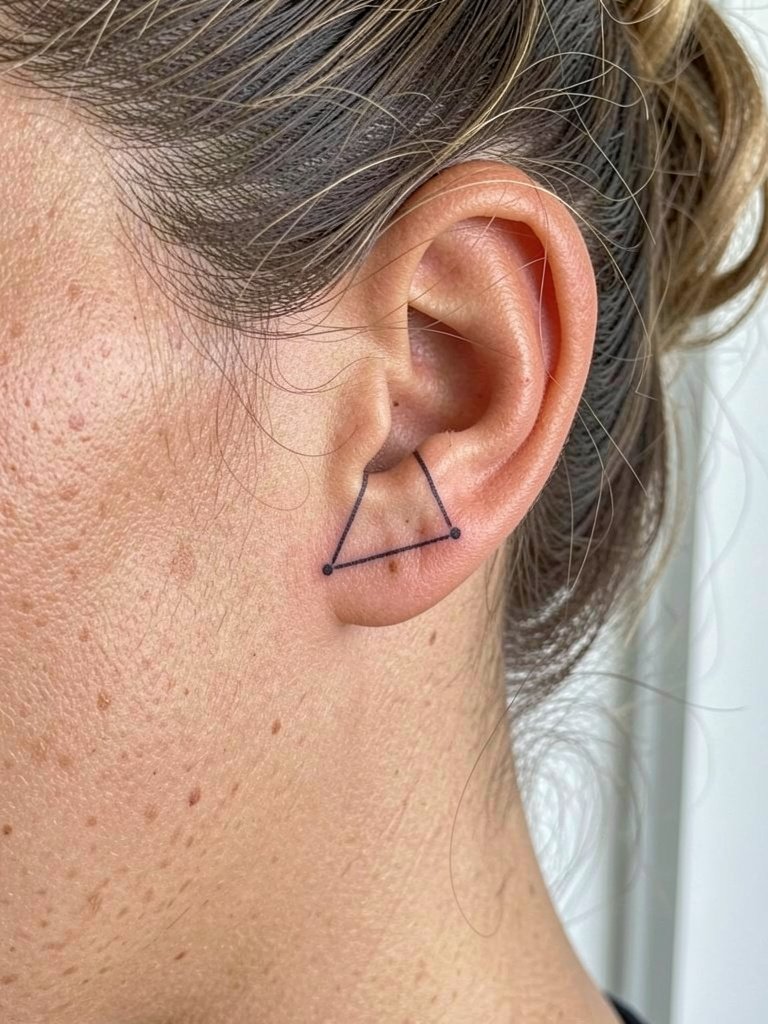
Behind-the-ear placement is discreet and ages predictably if the linework is not too thin. The real risk is overfitting tiny detail into an area that shifts with hair and head movement. Bring a reference showing the exact triangle size in relation to the ear. The session is short, usually under 30 minutes, and the pain is surprisingly mild on the mastoid area. For showing the piece, a low messy bun or hair-tuck frames it nicely. Try a lightweight scrunchie that keeps hair off the neck without rubbing the fresh ink.
3. Dainty Crescent Moon on the Side Neck
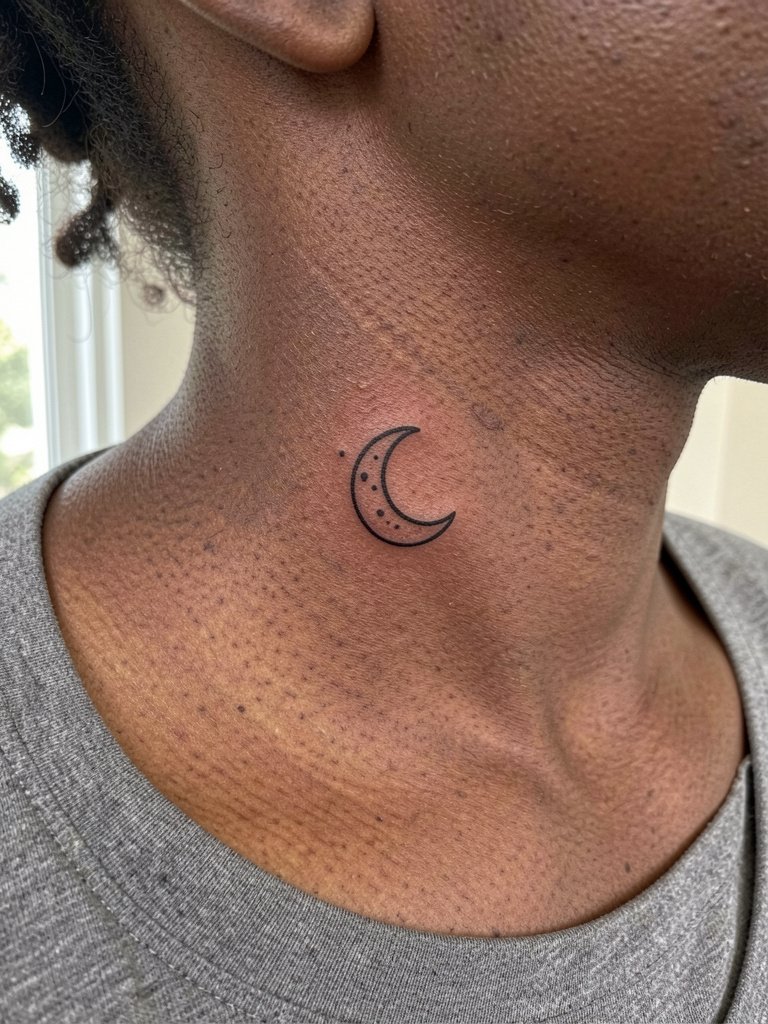
A small crescent at the side neck reads as intentional because the negative space is part of the design. Choose a modest outer-line thickness and ask the artist to stagger the stipple dots rather than pack them. Expect higher sensitivity than the forearm, and plan a single short session under 45 minutes. For showing, a scoop-neck or wide-collar top complements the curve, and the piece pairs well with small hoop earrings. Pack a wide-neck tee for the session so the neckline does not press on fresh ink.
4. Minimalist Ribcage Mountain Range
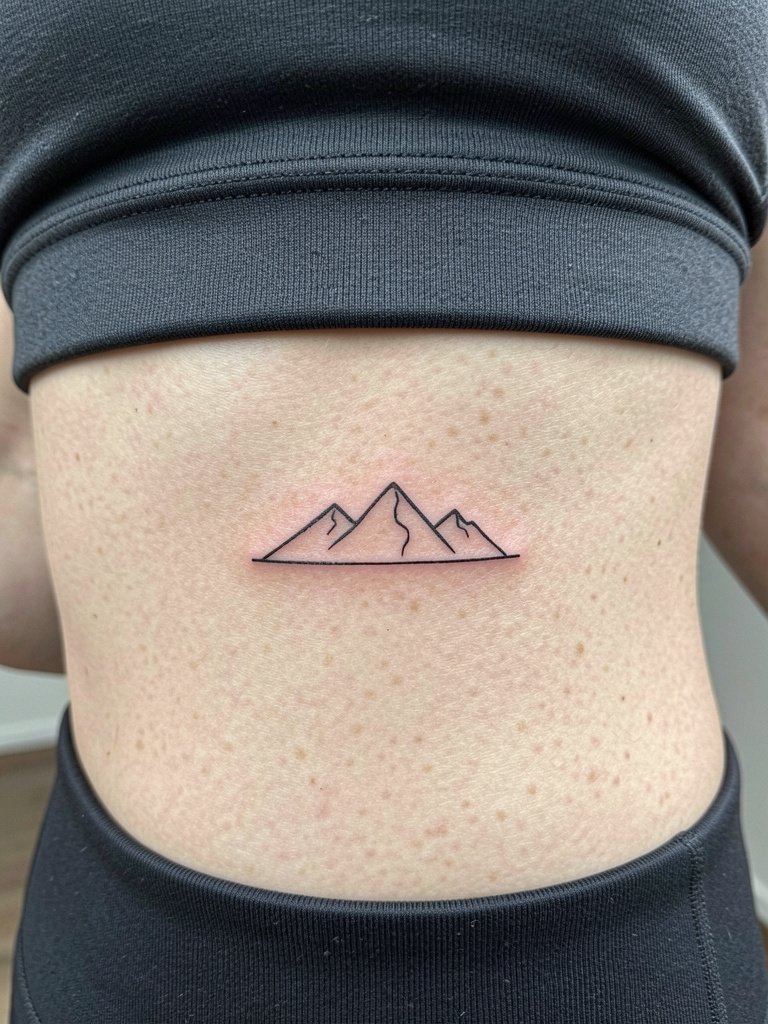
Fine line on the ribs sparks two clear camps. One group argues that ribs stretch and the thin lines blur within a couple of years, especially under the breast crease. The other group says with slightly wider spacing and controlled needle depth, a minimalist mountain silhouette can remain legible for many years. If you want the long-term look, ask for slightly bolder contour lines and minimal internal detail. Expect a longer appointment and higher pain than an arm piece. For the session, wear a fitted sports bra that sits naturally so your artist can access the side torso without fabric tugging.
5. Micro Realism Single Eye on the Wrist
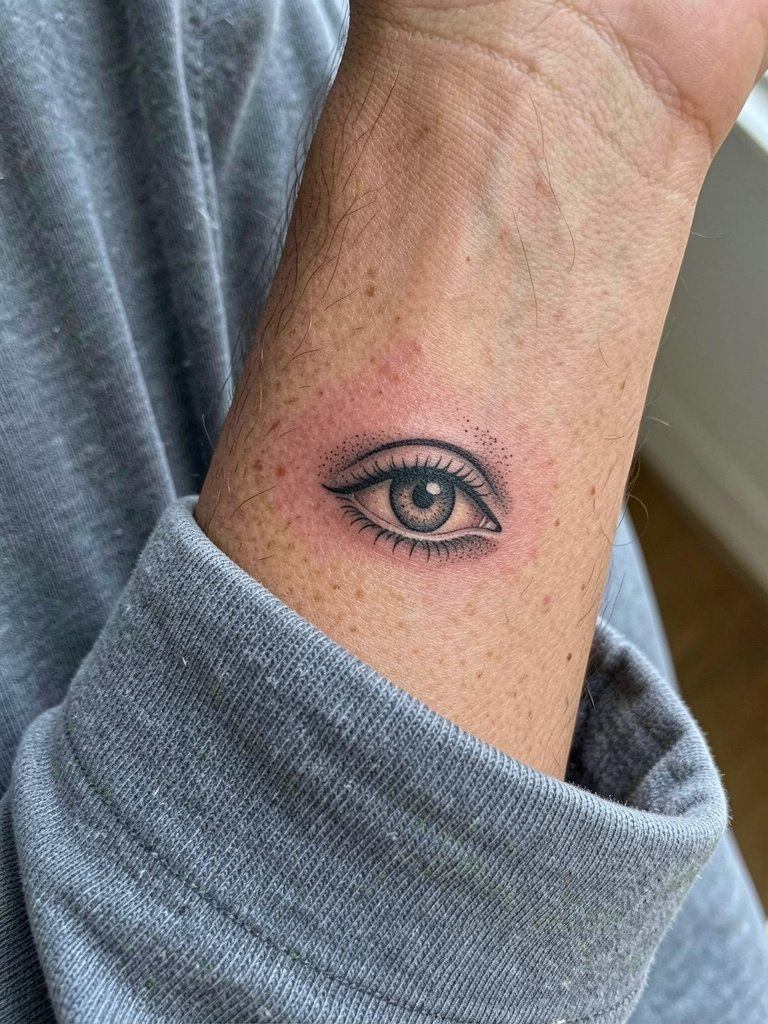
A micro-realism eye on the wrist reads as a tiny portrait when contrast is preserved. The common mistake is packing in lashes and shading at single-needle scale. Instead, ask the artist for sparse lashes and focused stipple shading to keep the pupil crisp after healing. Wrist skin sees daily washing and friction, so expect a touch-up around year two for most people. Session time is 30 to 60 minutes and sensitivity is moderate. For showing off, cuffed sleeves or a slim bracelet will frame the piece. Consider a thin woven bracelet so jewelry does not rub the area while it heals.
6. Tiny Botanical Sprig on the Collarbone
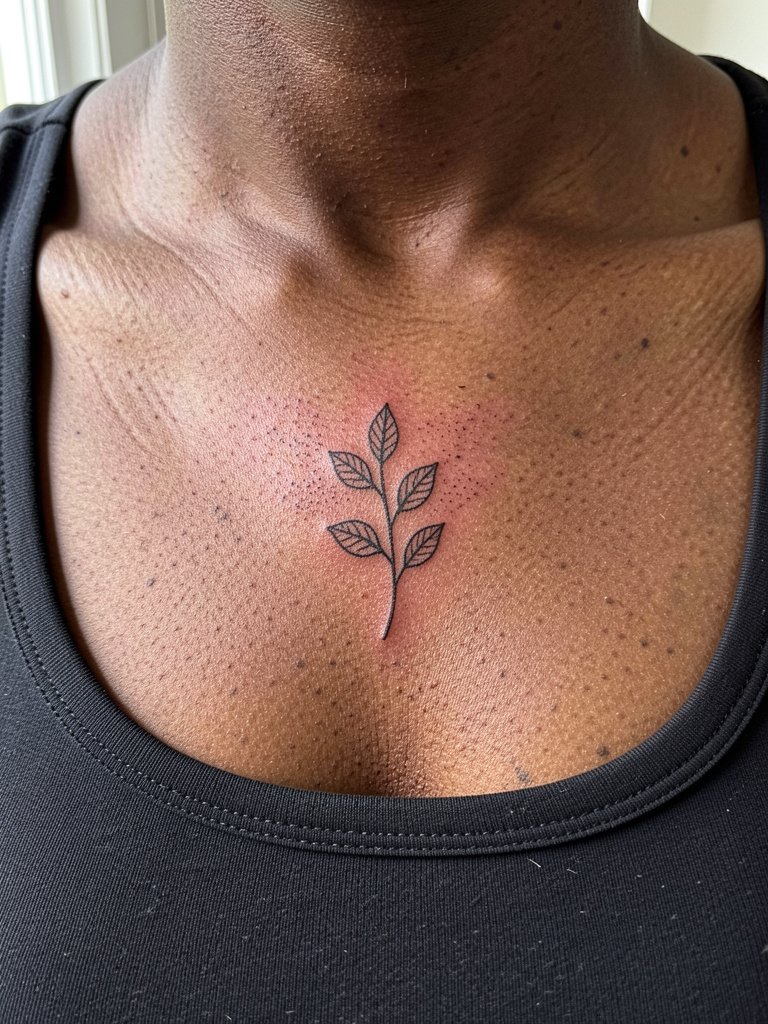
Collarbone sprigs look elegant when scaled with negative space. The usual mistake is making the stem too busy with tiny cross hatching. Ask for smooth continuous linework and sparse stippling. Sensitivity varies with body fat and if the bone is shallow the session may feel sharp over small areas. Plan a 30 to 50 minute appointment and wear a scoop-neck top for easy access. For dressing up the piece, open-neck blouses and delicate pendant necklaces highlight the collarbone without covering the tattoo. Try an open-neck blouse if you want the collarbone visible after healing.
Session Day Picks
These first six tiny placements range from wrist to ribs and they share practical needs for easy access and low-friction healing.
-
Stencil transfer paper kit. Lets you preview linework placement on skin before the needle touches, especially useful for the collarbone sprig and wrist eye above.
-
Topical numbing cream. Applied 30 to 45 minutes before a sensitive rib or sternum session steadies the start and can reduce mid-session breaks.
-
Thin protective film roll. Keeps finger and wrist tattoos cleaner during the first week of frequent washing and typing.
-
Fragrance-free gentle body wash. A soft cleanser for showers that will not strip freshly tattooed skin.
-
Aquaphor healing ointment. A mainstream simple ointment for the initial days that helps maintain moisture without heavy buildup.
7. Minimalist Constellation on the Side Finger
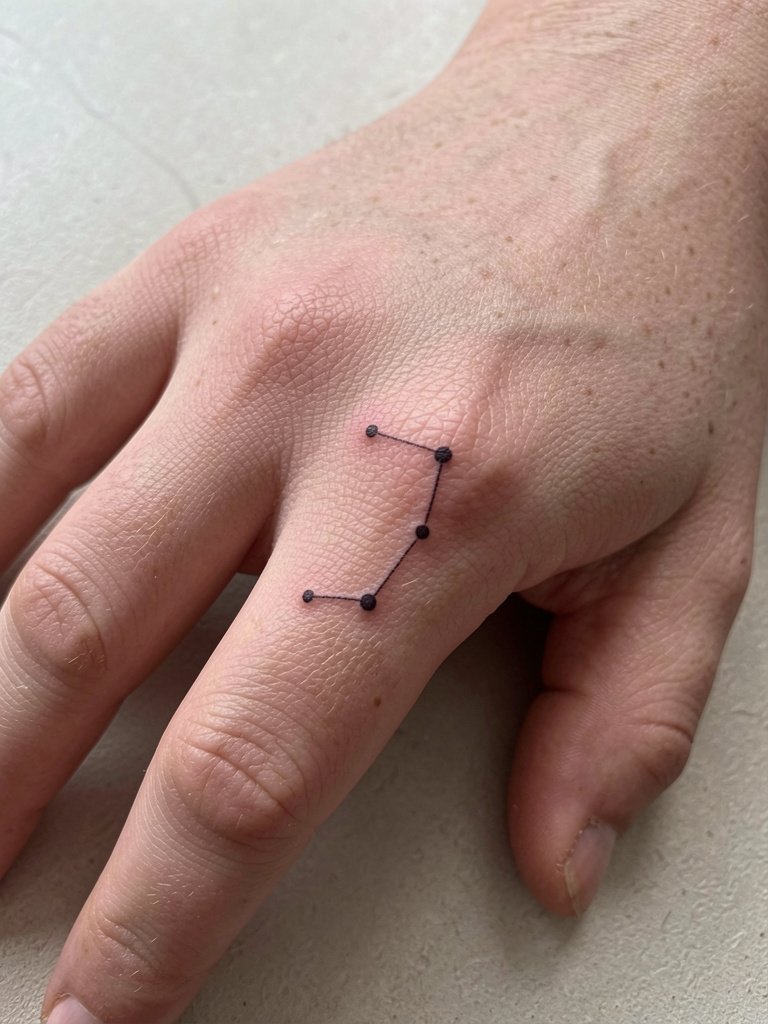
Side-finger dots and tiny connecting lines age faster because finger skin moves and washes constantly. The common mistake is keeping dots too close together. Space them slightly so the connections remain visible. Expect visible softening by year two and plan a touch-up if you want crisp geometry long term. Sessions are quick but feel sharper than forearm work. For daily style, thin stacking rings avoid covering the tattoo. Wear a soft cotton glove home after the session to reduce initial rubbing if you will be doing a lot of handwork.
8. Single Needle Script Word on the Inner Wrist
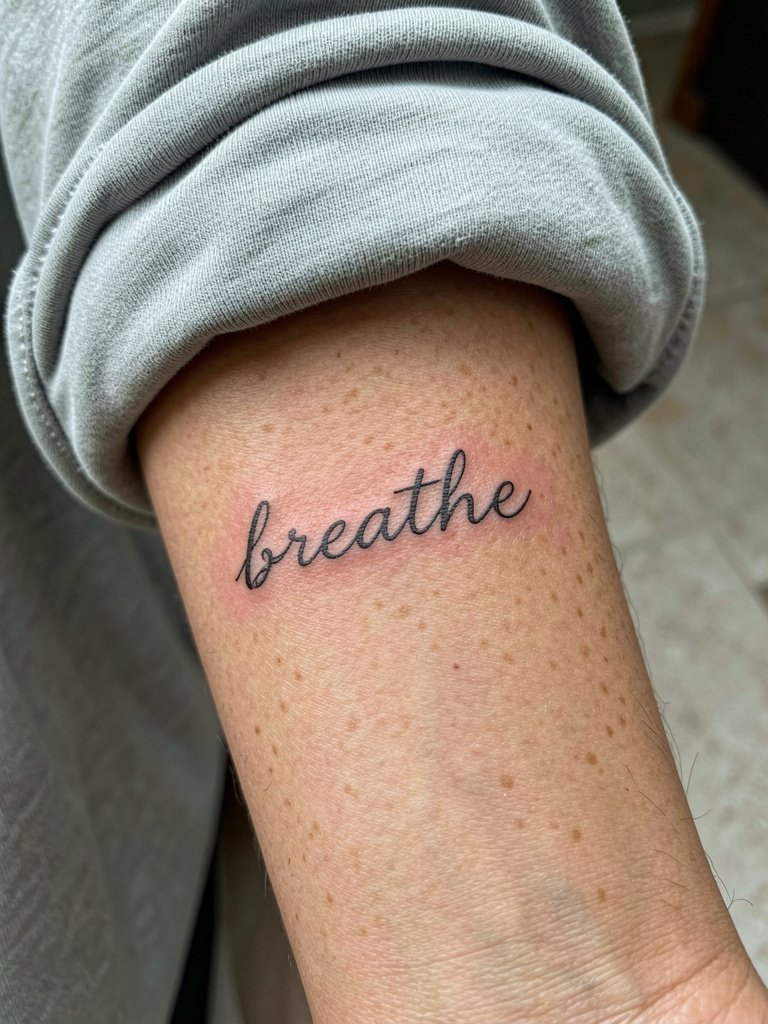
Single-needle words can look intimate but the inner wrist is a high-wash area. The usual mistake is picking extremely thin lettering that disappears under normal wear. Ask for slightly more saturation in the downstrokes and a small gap between letters. Expect a potential touch-up at 18 to 24 months. The session is short and the sensitivity is moderate. When showing the script, cuffed sleeves and thin bracelets highlight the placement. For the appointment, bring a loose button-up shirt so the sleeve can be rolled without pressing on fresh ink.
9. Tiny Linework Mountains on the Ankle
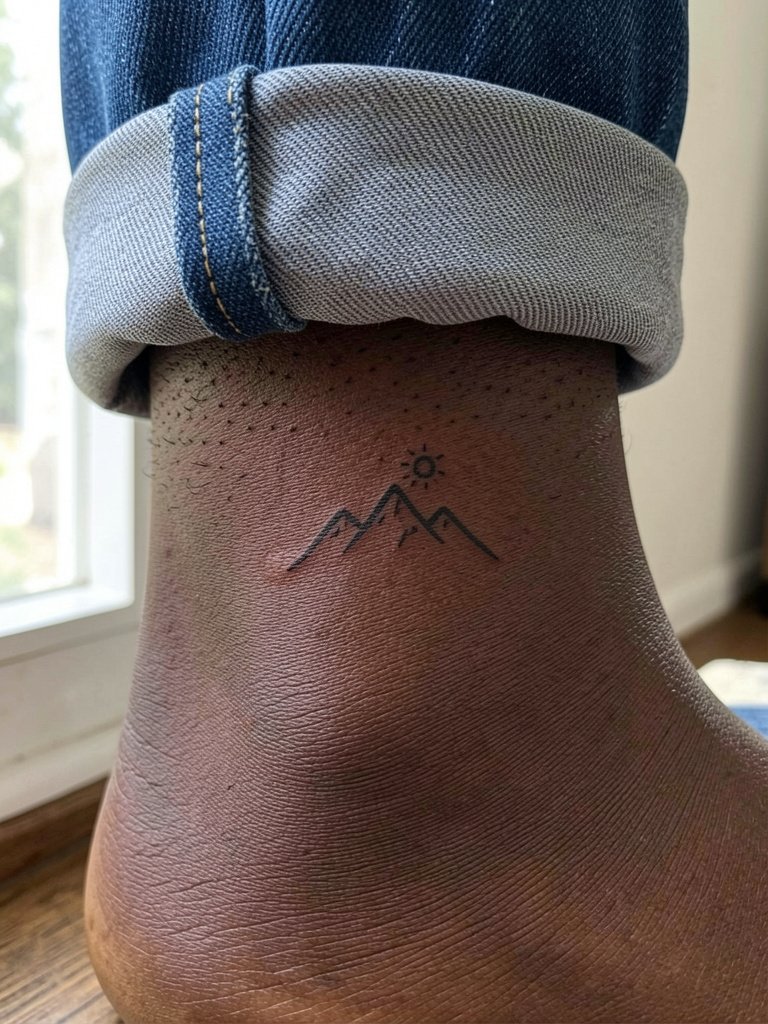
Ankle linework benefits from slightly stronger contour lines because shoes and socks rub the area. The most common error is placing the design too close to the ankle crease. Position it on the lateral bone for less friction. Sessions are quick, with sharp moments during the initial pass. Plan for a touch-up if you wear low shoes that hit the tattoo often. For outfits, rolled jeans and cropped trousers frame the piece. Try pairing with rolled cuff jeans so the ankle remains visible while the area settles.
10. Micro Dot Mandala on the Back of the Neck
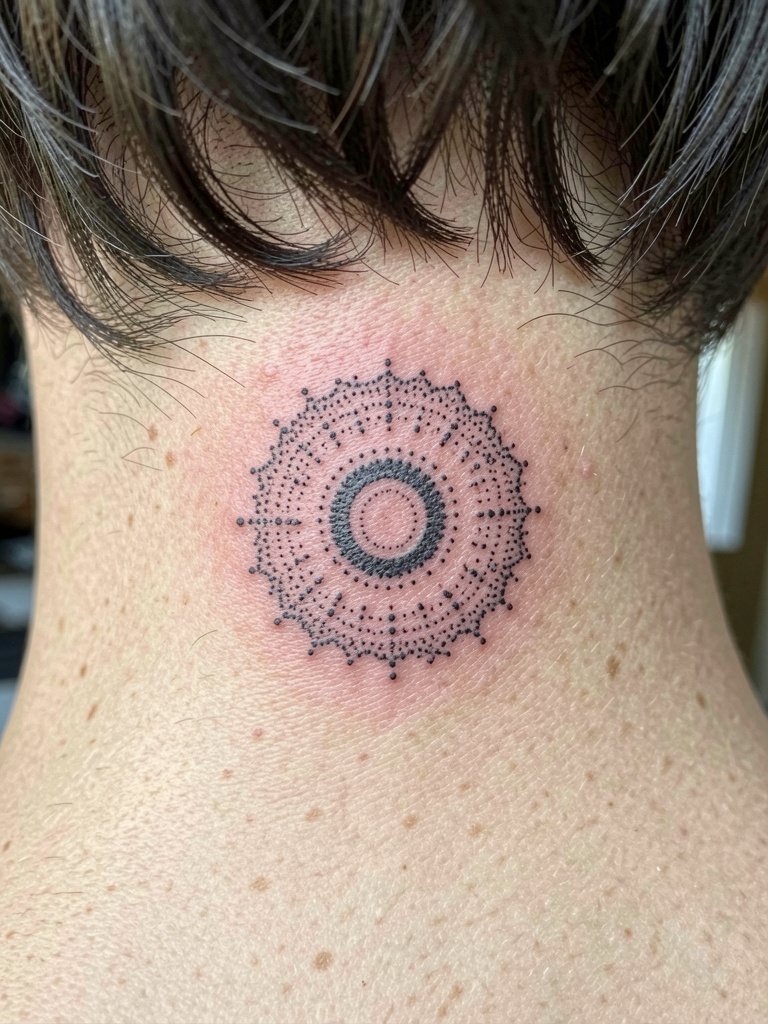
Dot-work mandalas rely on consistent stipple saturation to hold texture over time. A frequent mistake is using dots so tiny they blur together. Ask for slightly larger dot clusters on outer rings so the pattern keeps its radial definition. Nape sessions are moderately uncomfortable but brief. Because hairline growth can rub the area, expect slower peeling and avoid tight collars while healing. For styling, half-up hairdos or low ponytails show the mandala. Keep a soft hair tie handy so you can adjust your style without rubbing the fresh ink.
11. Tiny Anchor on the Side Finger Knuckle
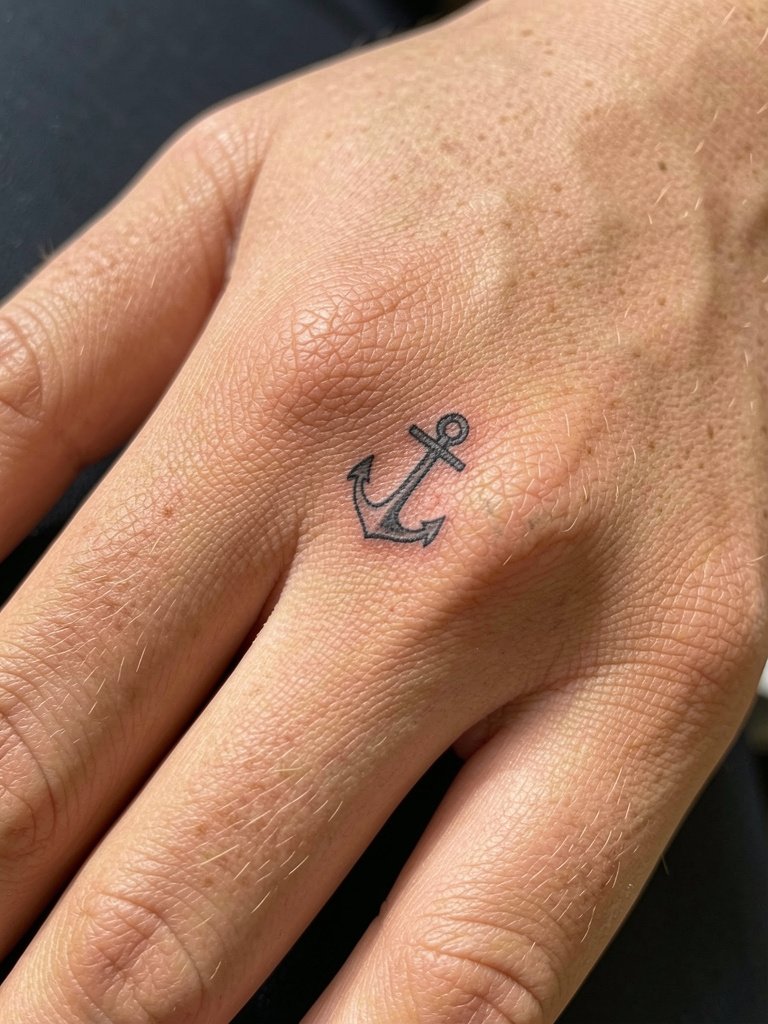
Knuckle and side-finger placement is a high wear area with frequent washing and movement. The safe version uses bold micro outline rather than single-needle detail. The usual mistake is squeezing shading into a tiny anchor where it cannot hold. Expect touch-ups sooner than arm work if you use your hands heavily. Sessions are brief and feel sharp. For jewelry, thin open rings avoid covering the anchor during healing. Wear gloves when doing messy chores for the first week to reduce scabbing.
12. Micro Silhouette Bird on the Upper Chest
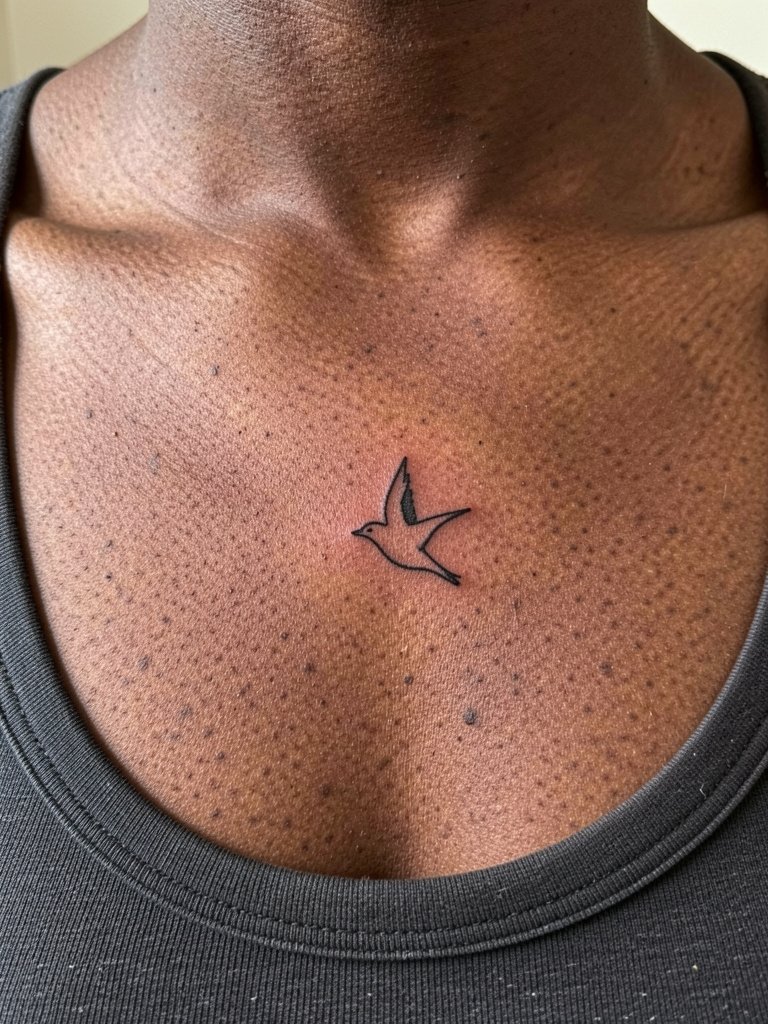
A small bird silhouette reads well on upper chest because bone structure gives a flat canvas. The common error is adding micro feathers that blur. Keep the silhouette clean and use negative space for wing definition. Sternum or chest pieces require a steady breath plan and slightly deeper shading at the edges to avoid patchy healing. Session time is 30 to 50 minutes depending on placement. For showing the piece, wide-neck tops highlight the shape. Pack a wide-neck tank to make access easy on chair day.
13. Single Tiny Wave on the Side Rib
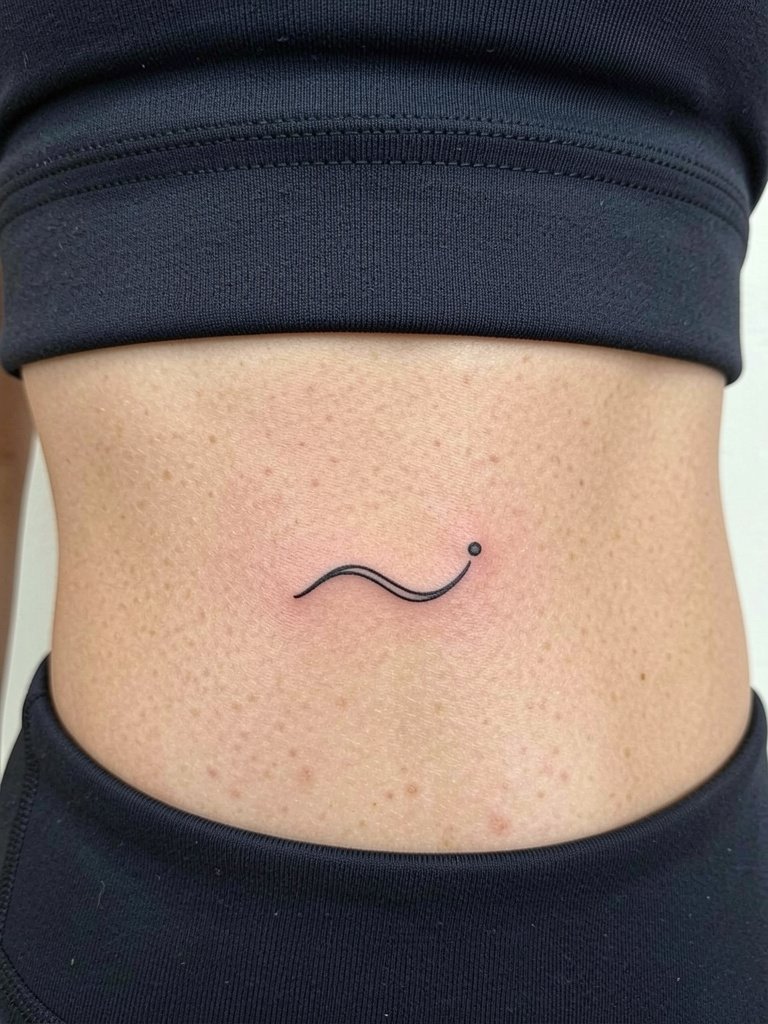
Tiny ribline waves look delicate but face the same risks as other rib pieces. The mistake is trying to pack in shading or additional curls. Keep it as a single confident stroke with a small accent dot. Pain will be higher and the session may require short breaks. If you plan to sunbathe, delay exposure until fully healed. For session comfort, wear a sports bra or crop top that sits naturally below the ink. A breathable fitted sports bra makes access and post-session comfort easier.
14. Micro Heart Outline on the Collarbone Edge
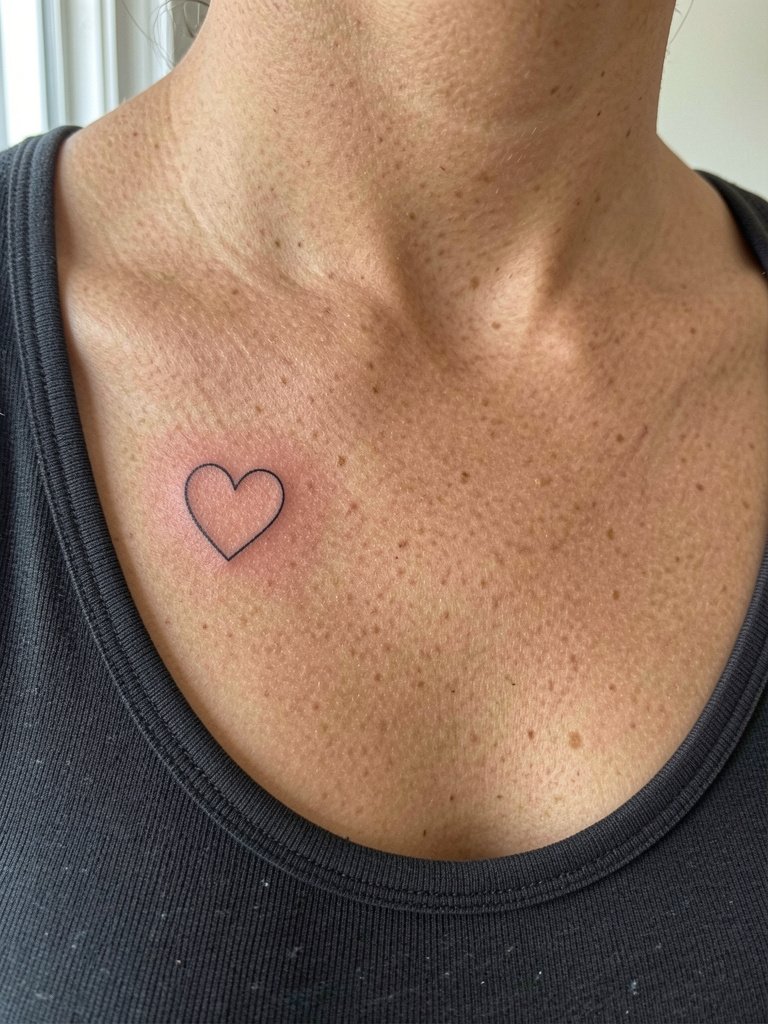
A tiny heart on the collarbone edge needs a confident outline so it keeps form on thin skin. The common mistake is adding tiny inner decorations that muddle the silhouette. Ask for a single pass outline with a small outer margin to preserve shape. Expect a 20 to 40 minute session with variable tenderness. When wearing jewelry, thin chain necklaces sit below the collarbone and do not sit on top of the ink. Pair with a delicate chain necklace to draw attention without rubbing the area.
15. Tiny Cross on the Side Rib Near Underbust
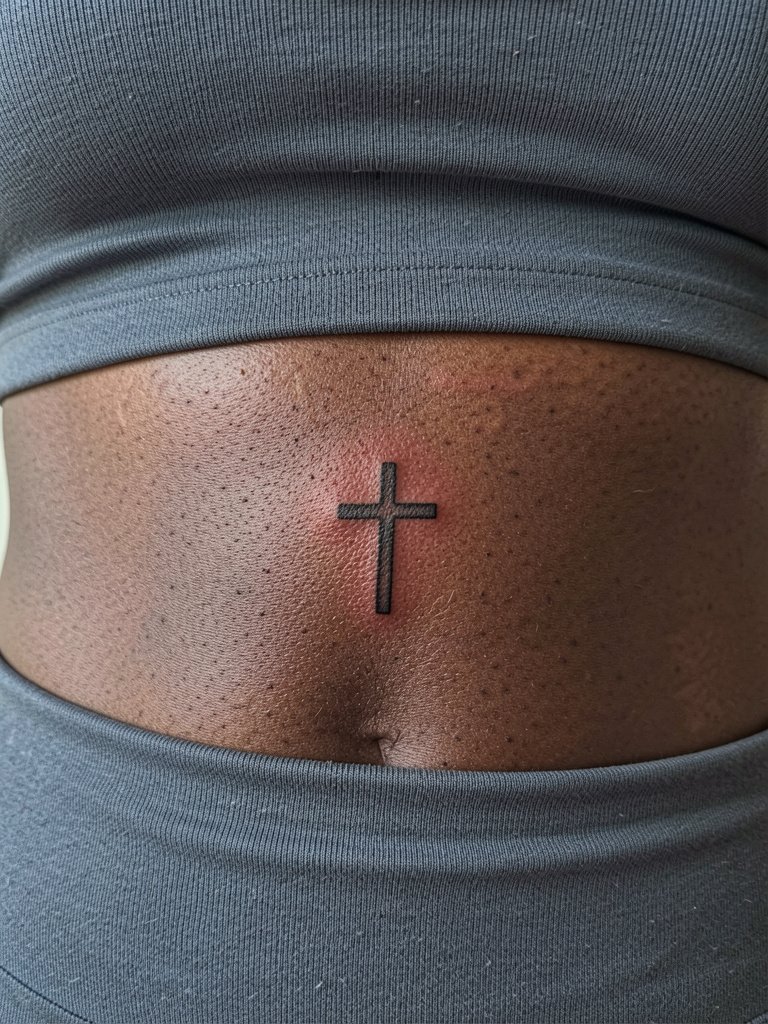
Religious symbols on the rib and sternum bring a practical debate in the community. One camp says that delicate symbols here blur quickly because the skin flexes and sweat increases, making fine detail unreliable. The other camp contends that with slightly bolder linework and careful placement away from the highest crease, such symbols can remain legible for years. If longevity matters, ask for a modestly increased stroke width and minimal interior detail. Sternum-adjacent skin is sensitive, so prepare for a sharper session and possible brief breaks. For comfort, wear a fitted bandeau that sits naturally without moving.
16. Tiny Paper Airplane on the Outer Forearm
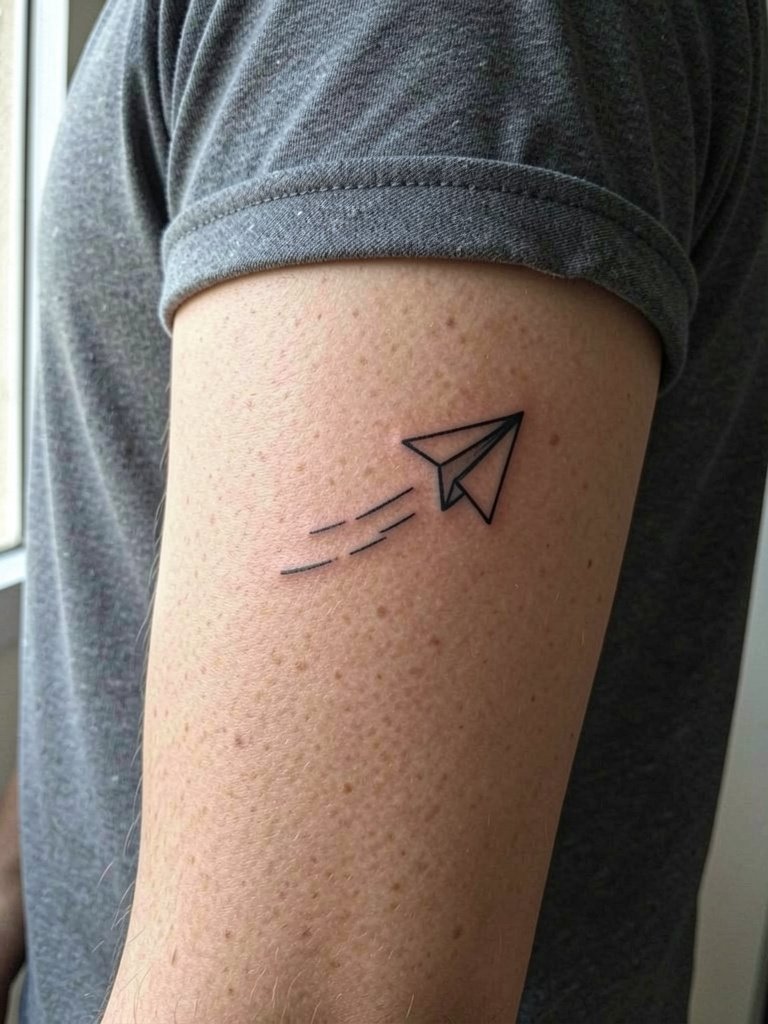
Outer forearm pieces are forgiving and show detail well over time. The common error is slanting the plane so the composition reads awkwardly with arm movement. Sit with the artist and check the angle with your arm relaxed so the plane points naturally with your wrist. Expect a 20 to 40 minute session and mild to moderate discomfort. For styling, short sleeves and bracelets showcase the artwork. Choose a short-sleeve tee that sits comfortably while the area heals.
17. Tiny Geometric Diamond at the Base of the Thumb
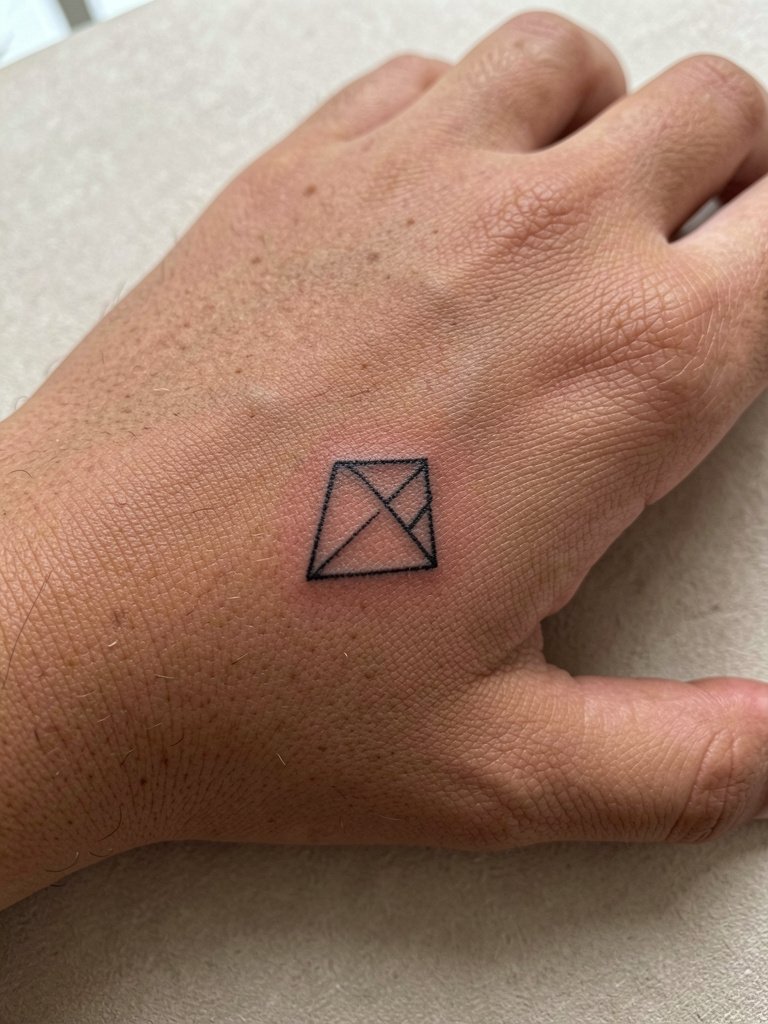
Hand placements demand slightly bolder micro-outline to resist early fading and blowout. The usual mistake is treating the dorsal hand like forearm skin. Request a small margin around the diamond and avoid tiny internal linework. Healing here is slower and touch-ups are common for active hands. Expect short, sharp sessions and protect the area from heavy soap and scrubbing while it seals. Small rings and open cuffs showcase this spot. A thin leather cuff will frame the area without covering the tattoo.
18. Micro Arrow Ankle Band
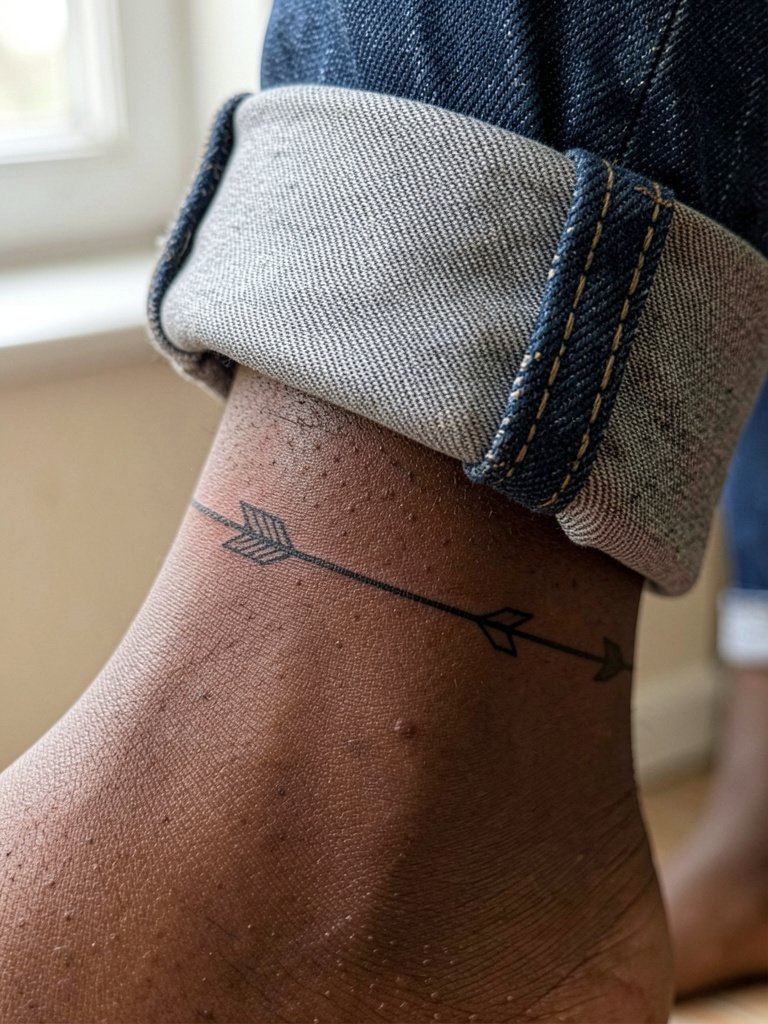
Partial ankle bands benefit from consistent spacing so the arrows read as a unit. A design wrapped too tightly can blur where skin folds. The common mistake is over-crowding the band with arrows. Keep two or three icons spaced evenly and allow the ankle bone to be the focal point. Sessions are short with moderate discomfort. For showing it off, rolled jeans and ankle boots work well. A slim ankle bracelet can complement the design without stressing the tattoo during healing.
19. Minimalist Palm Leaf on the Outer Thigh
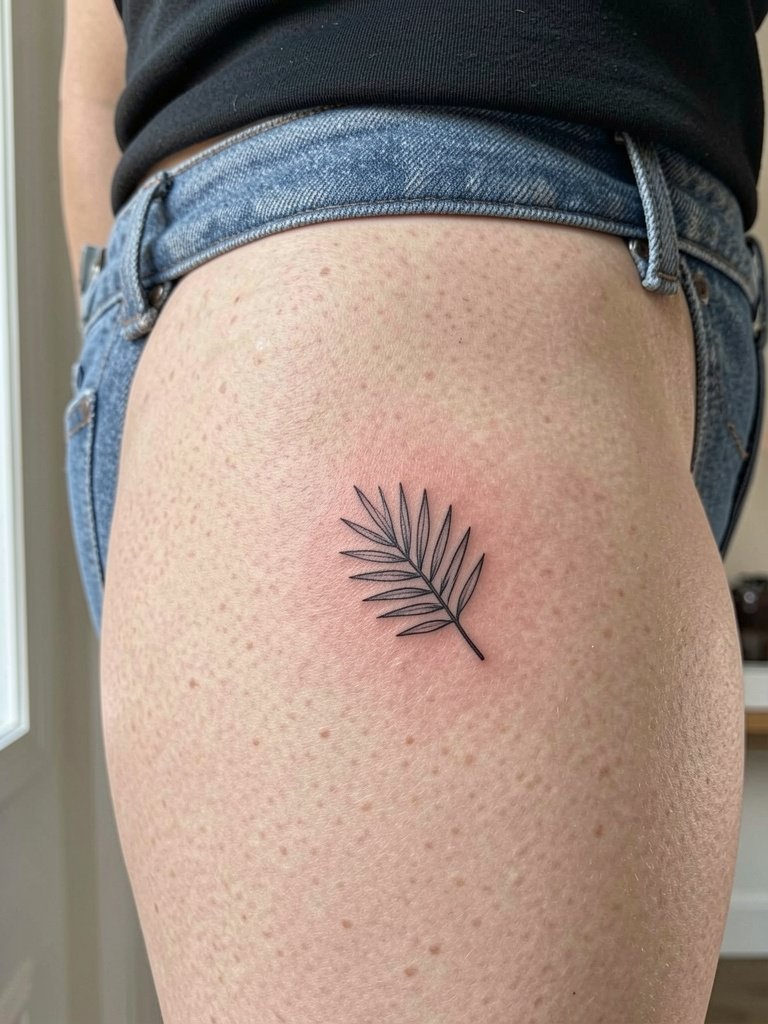
Outer thigh skin is great for minimal pieces because friction is lower and flat area allows clean linework. The common mistake is trying to cram dense stipple into a small silhouette. Keep the vein and frond lines simple and leave open space. Sessions are comfortable and often faster than ribcage work. For dressing, high-waisted shorts or skirts show the area. A pair of high-waisted shorts frames the leaf without rubbing the fresh ink.
20. Tiny Planet with Orbit Line on the Upper Back
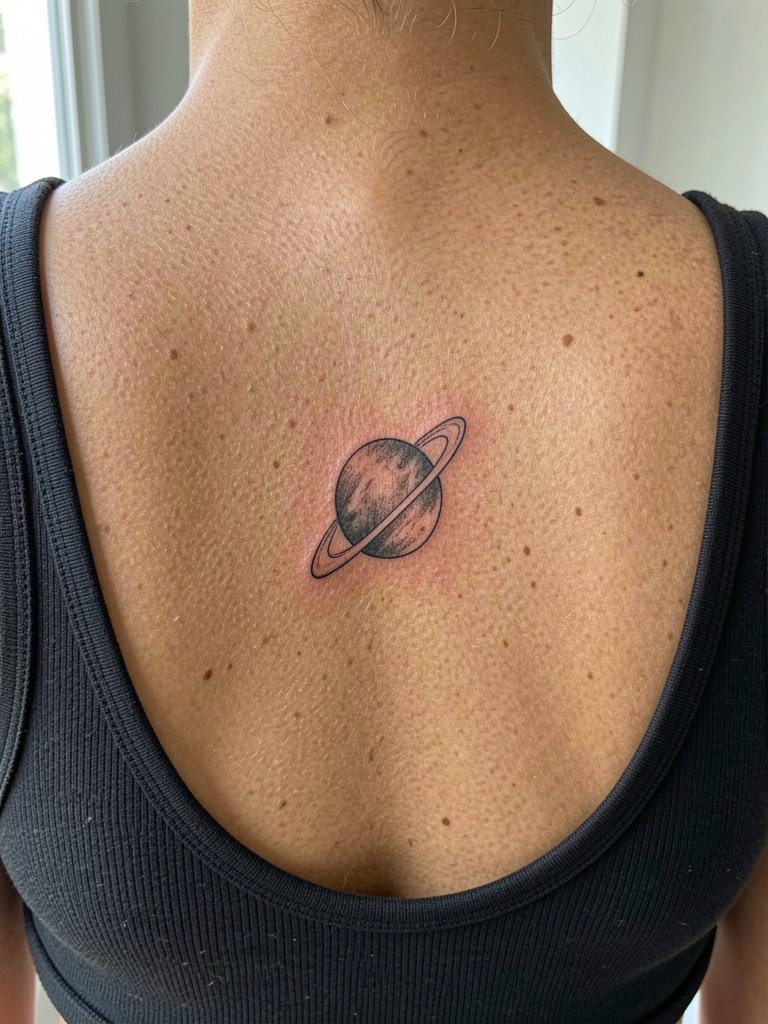
Upper back micro designs have low friction and heal predictably if placed away from spine creases. The mistake people make is centering too close to the hairline or shoulder blades where clothing can rub. Place the orbit a few centimeters below the nape and ask the artist to preview while you move your shoulders. Sessions are short and relatively comfortable. For showing, a low-back or open-back dress will frame the planet. A low-back dress is an easy wardrobe choice once the piece is healed.
21. Tiny Crescent and Star on the Thumb Knuckle
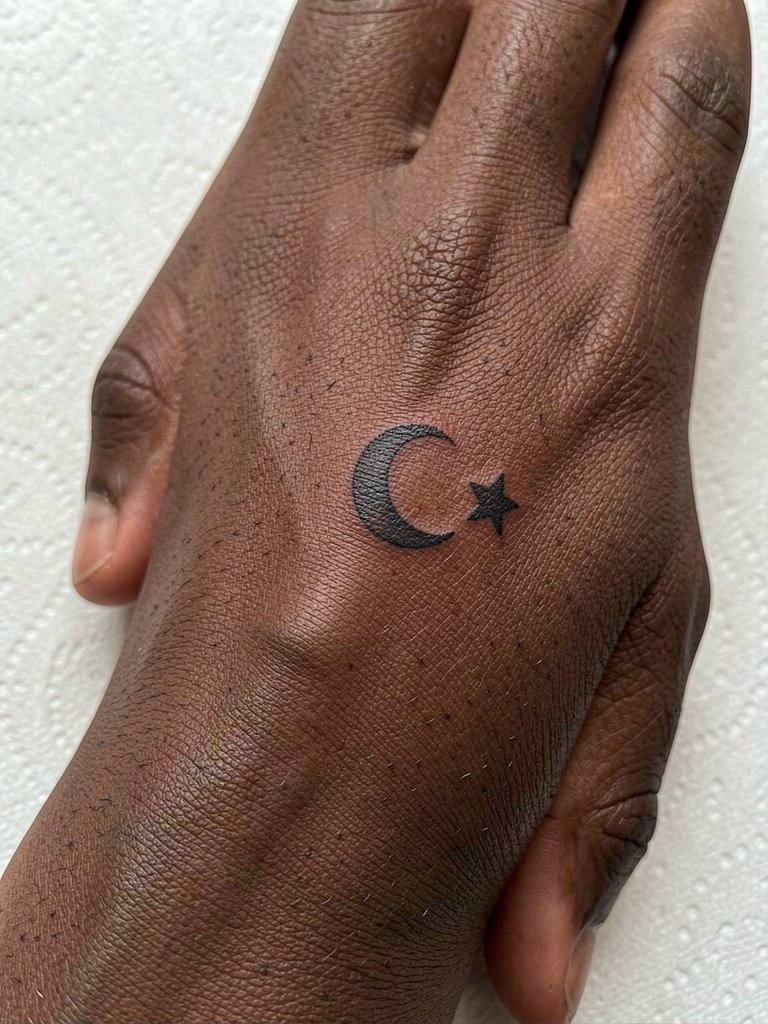
Knuckle-area designs require thicker micro-lines and a simple silhouette. The frequent error is adding tiny stars or shading that will not retain clarity with constant hand use. Request clean shapes and plan for a touch-up in the first 18 months. Healing is slower because the hands are active. For styling, short nails and simple rings keep attention on the piece without covering it. A slim nail file helps keep nail length comfortable while the knuckle heals.
22. Micro Floral Dot Cluster on the Inner Ankle
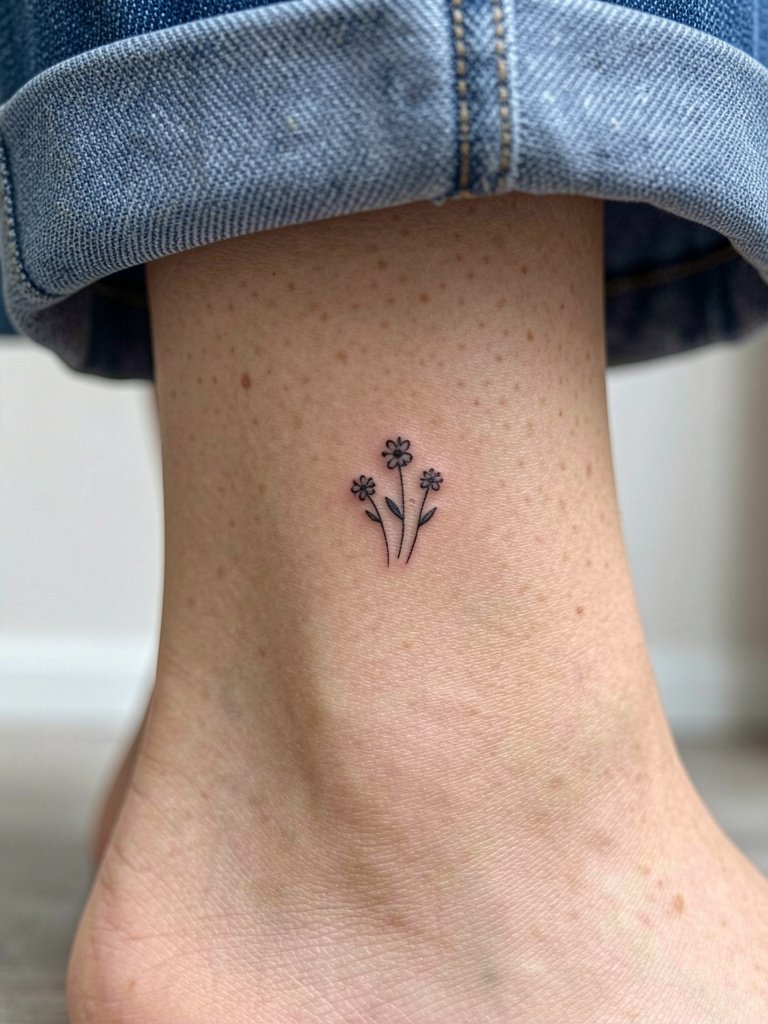
Inner ankle clusters look delicate but see moderate rubbing from socks and shoes. The mistake is packing too many tiny dots close together. Space the blooms and use slightly larger stipple dots for outer petals. Sessions are quick and sensitivity is moderate. For healing, avoid tight socks and wear looser footwear for the first week. A pair of soft ankle socks reduces pressure while you move around.
23. Micro Compass Needle on the Side Wrist
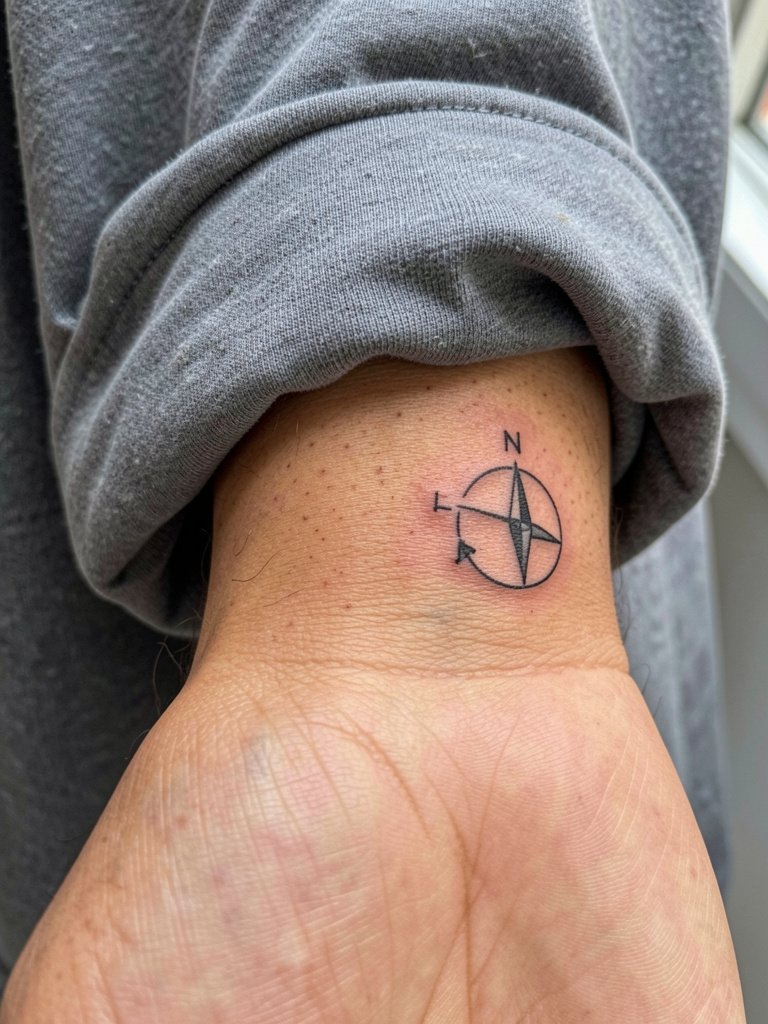
A compass needle on the side wrist benefits from a clean north marker and slightly reinforced outer ring so the tiny geometry stays legible. The most frequent mistake is making the ring too thin. Ask for a small margin on the outer circle and minimal internal tick marks. Expect a 30 to 50 minute session and moderate sensitivity. For accessories, thin leather bands or slim watches that sit below the needle will not cover the tattoo. A slim watch band complements the placement without rubbing while the area heals.
Frequently Asked Questions
Q: How do tiny minimalist tattoos hold up on different skin tones?
A: In my observation minimalist black linework can read clearly across tones when the artist adjusts lineweight and saturation. On darker skin, slightly stronger lineweight preserves contrast. Ask for healed examples on similar skin tones and a preview stencil to confirm scale.
Q: Where can I find portfolios and healed examples without naming artists directly?
A: Try searching platform hashtags like #MiniTattooInspo and #MicroLineworkHealed on Instagram and TikTok and use location filters to find local studio posts. Reddit tattoo communities often share multi-year healed shots. Look for tags that include "healed" and the placement name to see realistic aging.
Q: How often will I need touch-ups for finger and hand micro pieces?
A: Hands and fingers typically need touch-ups sooner than forearm or chest work because of frequent washing and thin skin. Many people plan a touch-up around 12 to 24 months. If you want extra longevity, request slightly stronger outlines and expect maintenance as part of the plan.
Q: Are there styling tips for showing off tiny collarbone or ankle pieces during healing?
A: Yes, breathable fabrics that do not press on the area are best. For collarbone tattoos, open-neck tops and delicate chains highlight the area without rubbing. A wide-neck tank works well during both the session and healing period.
Q: Do fine-line pieces on the ribs and sternum always blur faster than bolder lines?
A: Artists are split on this matter. One camp says fine-line ribs blur within a couple of years because the skin stretches and sweat can affect saturation. The other camp argues that with proper spacing and slightly increased needle depth, fine lines can settle well and remain crisp.
Q: What should I wear to a session for a tiny inner thigh or rib tattoo?
A: Wear fitted shorts or a cropped top that exposes the area without shifting. For inner thigh pieces, fitted bike shorts let the artist work without fabric moving. For rib sessions, a sports bra or bandeau that rests naturally is practical and avoids accidental fabric tugging.
