
Surreal forearm pieces look effortless in photos, but the reality is they ask you to plan for scale, line weight, and how the design will age against arm movement. Pick a theme that can flex with touch-ups, choose a placement that suits the illusion, and pack reference images that show the design at different sizes. Read these forearm-specific ideas and you will leave the stencil conversation armed with clearer questions for your appointment.
1. Melting Clock and Eye Collage, Outer Forearm
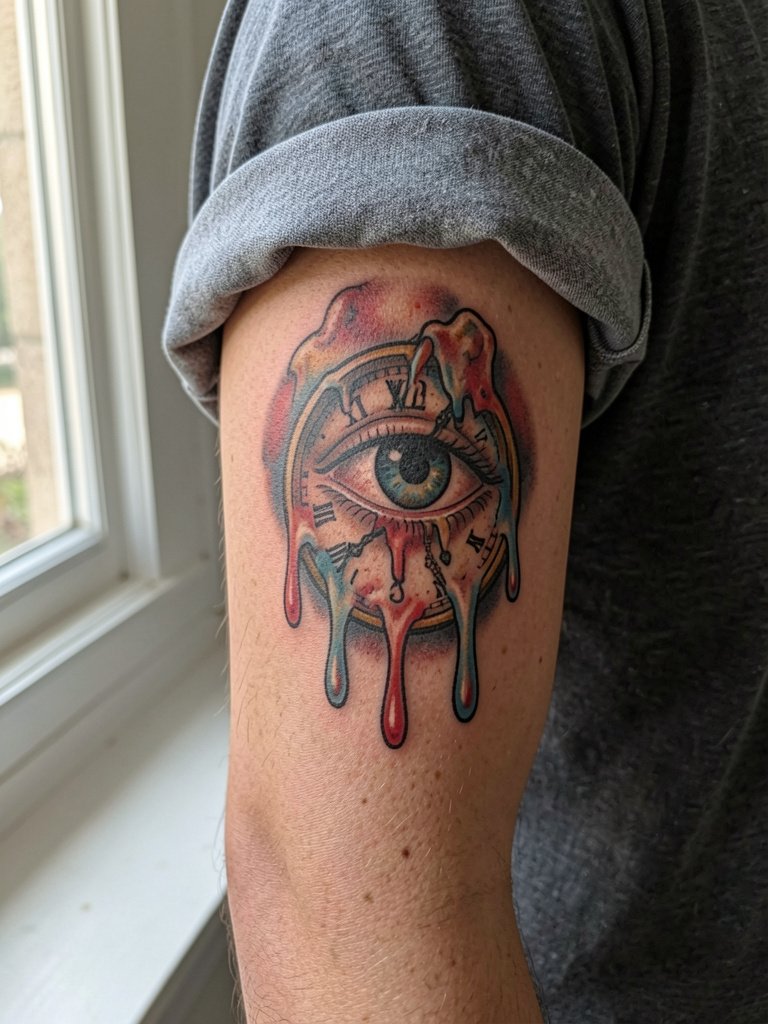
A melting clock over a single eye reads like intentional surrealism more than a collage if you commit to contrast and scale. I recommend a medium-to-large layout so the melting forms keep negative space between drips; tiny drips blur faster. Discuss exact eye size and the clock numerals during consultation so the artist maps where the clock will bend with the forearm muscles. The common mistake is shrinking the clock to fit a wrist band visual, which causes the melt areas to mush into each other by year two. Expect 2 to 4 sessions for full color and layering. On the outer forearm the piece benefits from short sleeves and dark tees when you want it to pop, and wear a loose short-sleeve top to the session so the artist can roll the sleeve up without pressure.
2. Impossible Landscape Folding on Inner Forearm
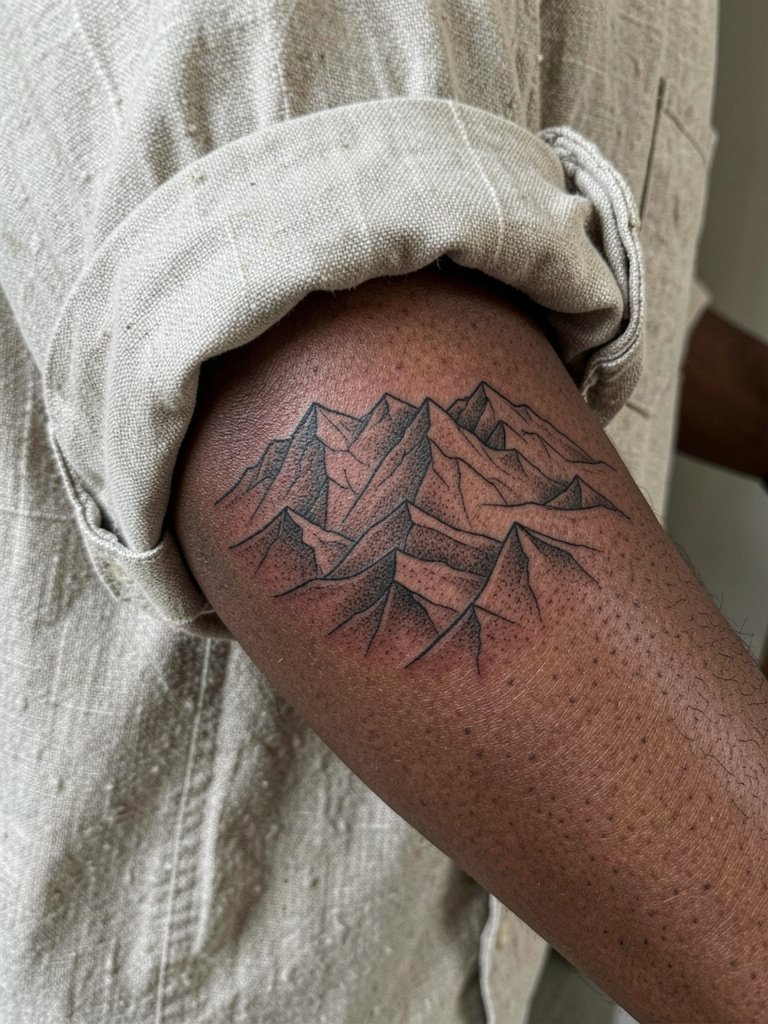
This one works best when the landscape folds perpendicular to the arm grain so the illusion reads while the arm rests palm up. Ask the artist to show a mockup at both three and five inches so you can see how tiny texture holds up. The version that ages poorly uses ultra-fine single-needle lines for tree silhouettes and tiny waves; those details soften into gray fuzz. For longevity, request slightly bolder micro strokes and concentrated contrast in the horizon line. A single session can cover a small rendering, but larger impossible scenes take two sessions to layer depth. For showing off, roll up a linen shirt in cream or olive; the neutral fabric keeps attention on the shading and linework. During the session wear a loose button-down so the sleeve can be adjusted without constriction.
3. Floating Geometric Fractures Wrap, Outer Forearm
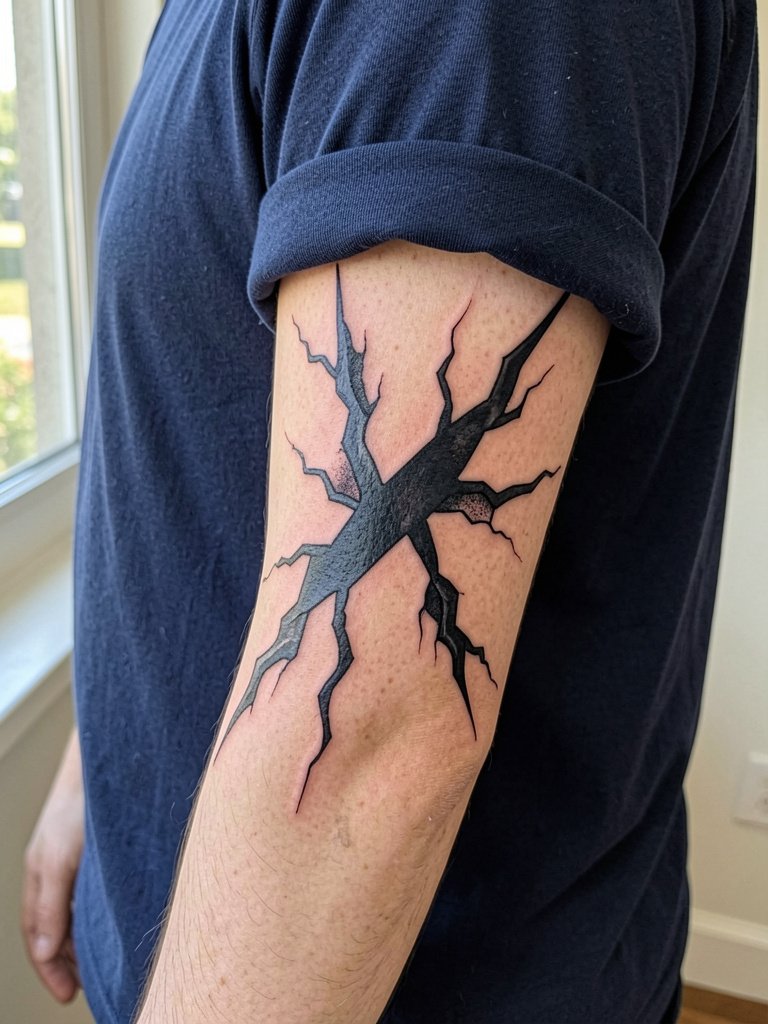
Geometric fractures use the arm curve to sell 3D separation, so prefer outer forearm wraps that read around the limb. A mistake I see is asking for laser-thin lines with tiny negative gaps; those gaps close over time into irregular bars. Specify line spacing and where you want flat black anchors so the artist spaces elements to tolerate skin migration. This style is low blowout risk if lines are given room and the blackwork is saturated in one or two passes. Session time depends on coverage but plan for at least one two-hour pass for medium wraps. Show-off pairing is a solid black or dark navy tee with the sleeve rolled up to let the high-contrast geometry pop. For the appointment, wear a t-shirt you can easily roll without tugging at the area.
4. Juxtaposed Dual Realities, Inner Forearm
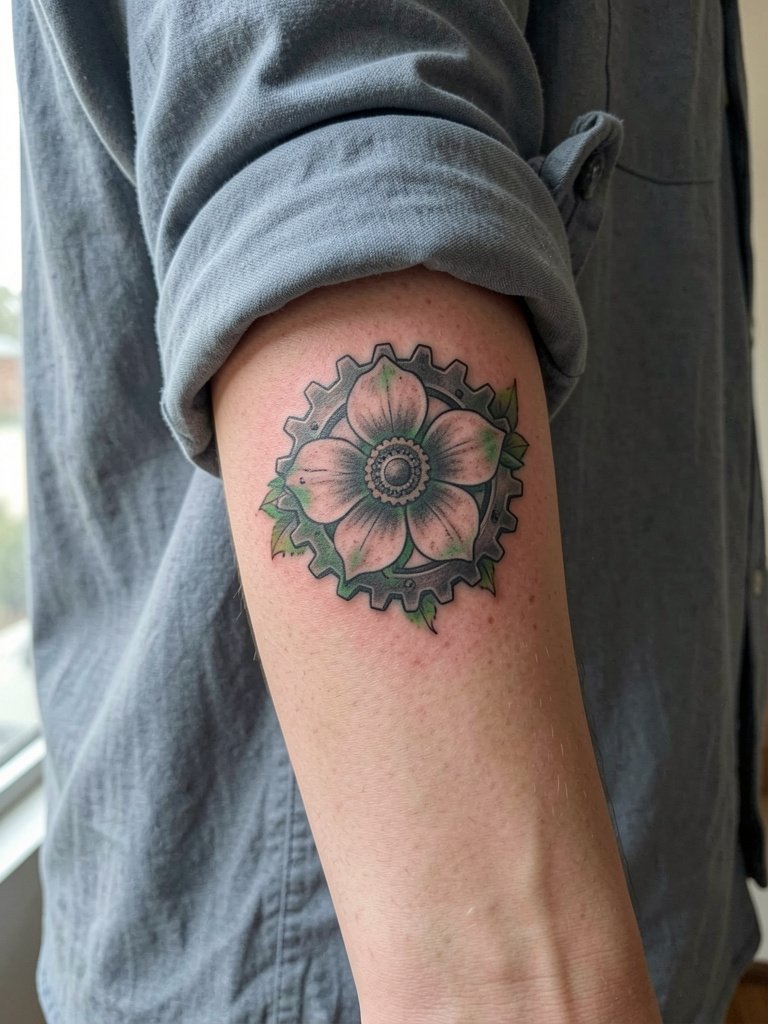
Mash-ups are a great fix when you want the emotional weight of a floral but the edge of mechanical detail. When booking, bring two separate references: one close-up of the botanical texture and one of the gear teeth, so the artist can plan the splice. A common error is asking for full photoreal detail at two inches; the textures merge after healing. Ask for moderate saturation on the gear and a matte greywash on the petals to preserve contrast. Expect two to three sessions depending on color layering. Inner forearm placement is forgiving for portraits and mash-ups because the skin is smoother there. For showing off, roll a linen shirt cuff in cream or sand to keep eyes on the blended forms.
5. Eyes Peering Through Skin Tears, Inner Forearm
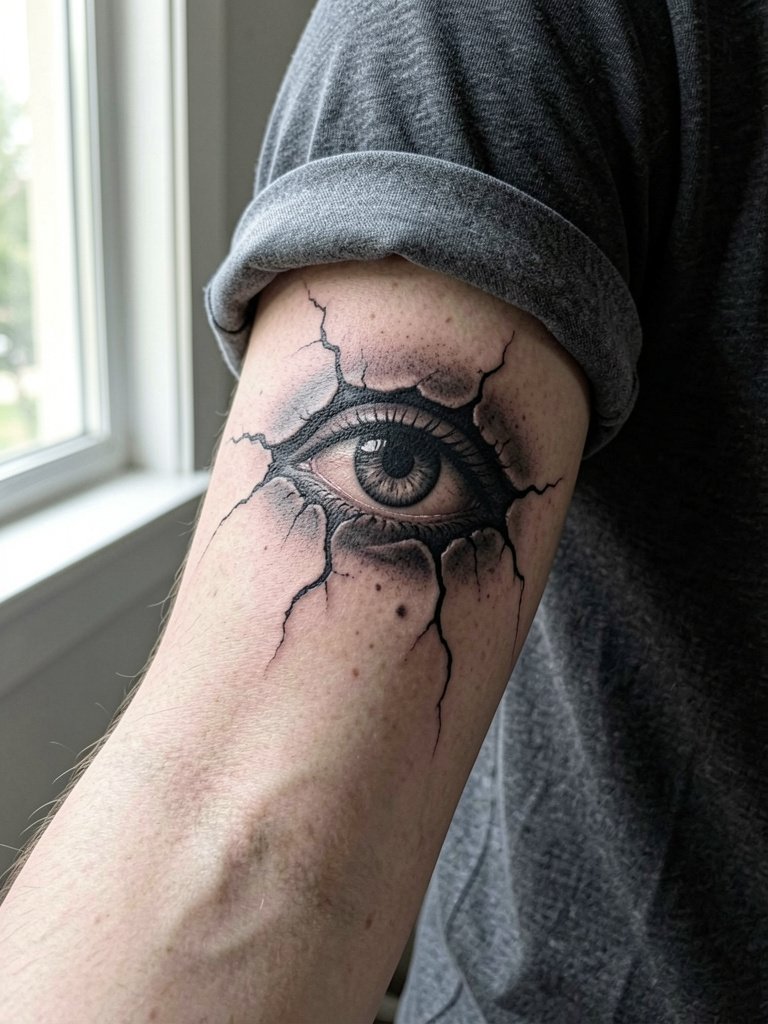
This darker psychological motif reads best when the "tear" edges are thickened slightly so the eyes keep separation from surrounding texture. Tell the artist exactly how glossy you want the iris highlights rendered; white ink highlights tend to fade and can create an odd pale halo if overused. The common failing is using fine fissure lines that blur into a single grey patch over time. Two sessions usually let the artist build contrast and depth. The inner forearm's flat surface keeps the eyes readable for longer, but plan a touch-up in 18 to 30 months if you prioritize sharp pupils. Session wear: a loose button-down with sleeve easy to roll protects against cuff pressure during the appointment.
6. Optical Illusion Grid Wrap, Outer Forearm
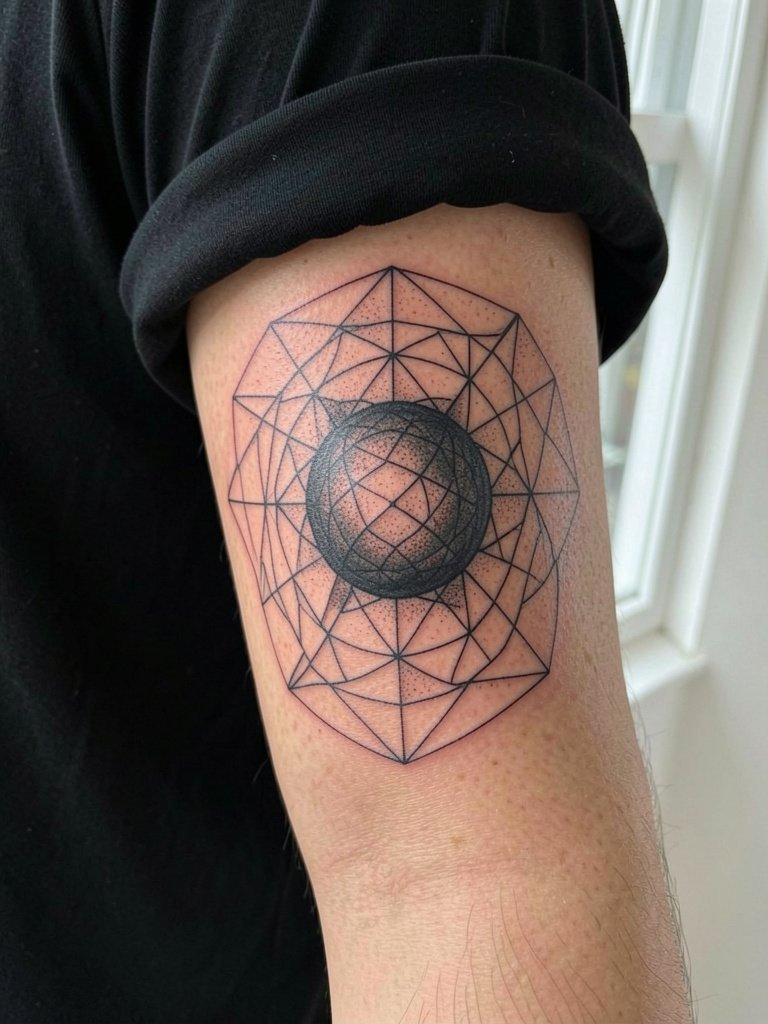
Optical grids rely on perfect line rhythm to trick the eye, so ask the artist to mark a central axis and mock up how a sphere will warp the grid at rest. Artists disagree about the best forearm surface for this. One camp says inner forearm is better for fine-detail warp because the skin there is smoother and less prone to stretching. Another camp argues outer forearm enhances depth because muscle contours give the illusion more dimension. Both views are common. Fine-tune by requesting a healed reference from the artist that shows the same arm curvature as yours. These pieces often take one long precision session or two shorter ones. For showing off, solid dark tees with rolled sleeves make the high-contrast pattern read from a distance.
Session Day Picks
These first six forearm ideas can be detail-heavy, so a few session items smooth the day and the first week.
-
Neon Gold Aftercare Balm. A thinner balm that some collectors prefer for blackwork pieces because it moisturizes without heavy residue, handy after the second-day clean for the grid wrap and blackwork fractures.
-
Eclipse Black Tattoo Ink (indie black alternative). Artists doing dense blackwork and optical fills often recommend a high-contrast black to hold the geometry longer.
-
Japanese Silicone Healing Sheets. Dry-healing sheets can protect fold-heavy areas like the inner forearm during sleep and lower friction on fresh tears and portrait seams.
-
Compact Stencil Transfer Paper Kit. Lets you preview placement on your skin before the artist inks, which is useful for clock drapes and fusion points in mash-ups.
-
Aquaphor Healing Ointment. A mainstream go-to for initial thin-layer moisture during the first days, especially when fine line work needs light protection without suffocating the skin.
7. Melting Flesh Transformation, Inner Forearm
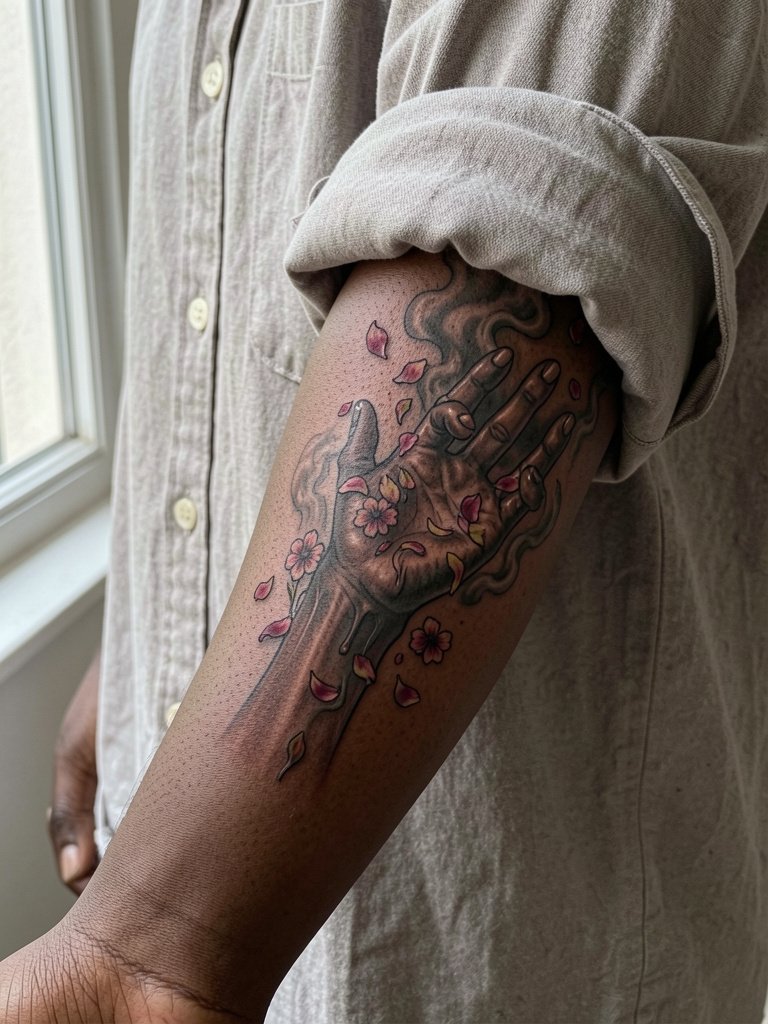
Melting-body transformations look visceral fresh and can lose clarity if the "melt" becomes a single shaded blob. To avoid that fate, plan the flow lines with the artist so each transition reads as its own visual unit. Bring photos that show how the face or hand will orient along the forearm grain. Complex color blends and semi-transparent petals usually need three to four sessions. A real mistake is asking for super-fine tonal gradients at a small scale; those gradients smooth into soft gray rather than defined elements. The inner forearm helps because the flat surface holds shading well. For the session, wear a loose short-sleeve or button-down so the artist can access the area without fabric pulling.
8. Floating Objects in a Void, Inner Forearm
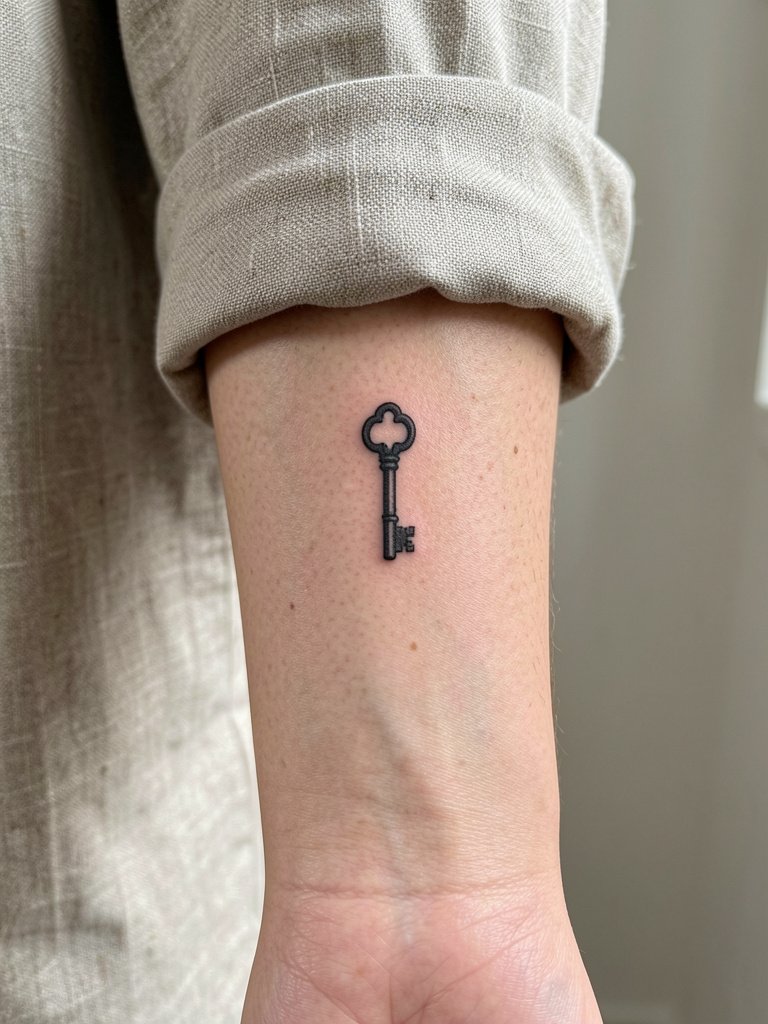
For first-timers who want surreal without commitment, a single isolated object floating in negative space is a practical choice. Decide on the exact object silhouette and its orientation on the arm before the appointment because scale changes the mood. The most common mistake is requesting micro-sized floating objects with white-ink highlights; on forearm skin that white ink often disappears and leaves a faint blur. This typically heals clean in one session, but ask for proof of healed single-needle work from the artist to confirm their line consistency. Wear a loose button-down the day of the session for easy sleeve control. For showing off, roll cuffs on cream or olive linen to keep the focus on the single silhouette.
9. Surreal Botanical Snake Wrap, Outer Forearm
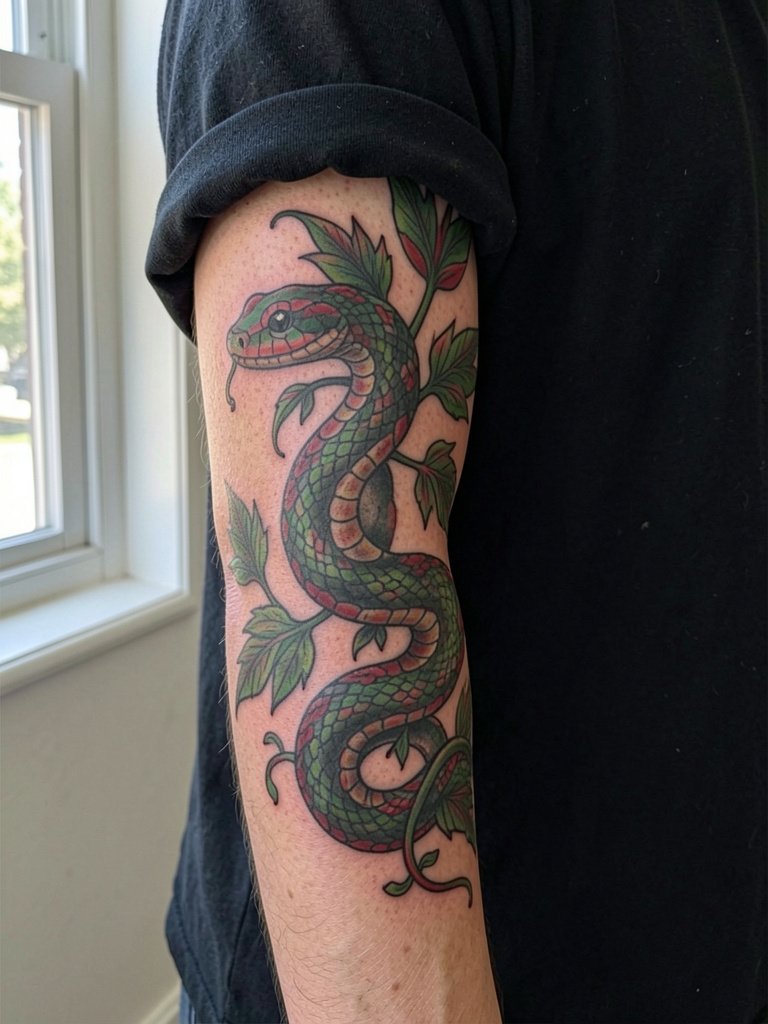
A botanical snake wrap works when the scale pattern and leaf veins are given breathing room. Ask the artist to map where the snake crosses the elbow crease and how the pattern will look when you bend the arm. The typical poor version reduces the snake to tiny scales that blur into a gray mass after healing. Choose medium-scale scales and deliberate color anchors so the wrap keeps definition. Two sessions usually cover color layering and background shading. Outer forearm wrap reads well against dark tees and pairs with minimalist silver rings. For the appointment, wear a short-sleeve top you can roll without stretching the arm.
10. Impossible Doorway Portal, Inner Forearm
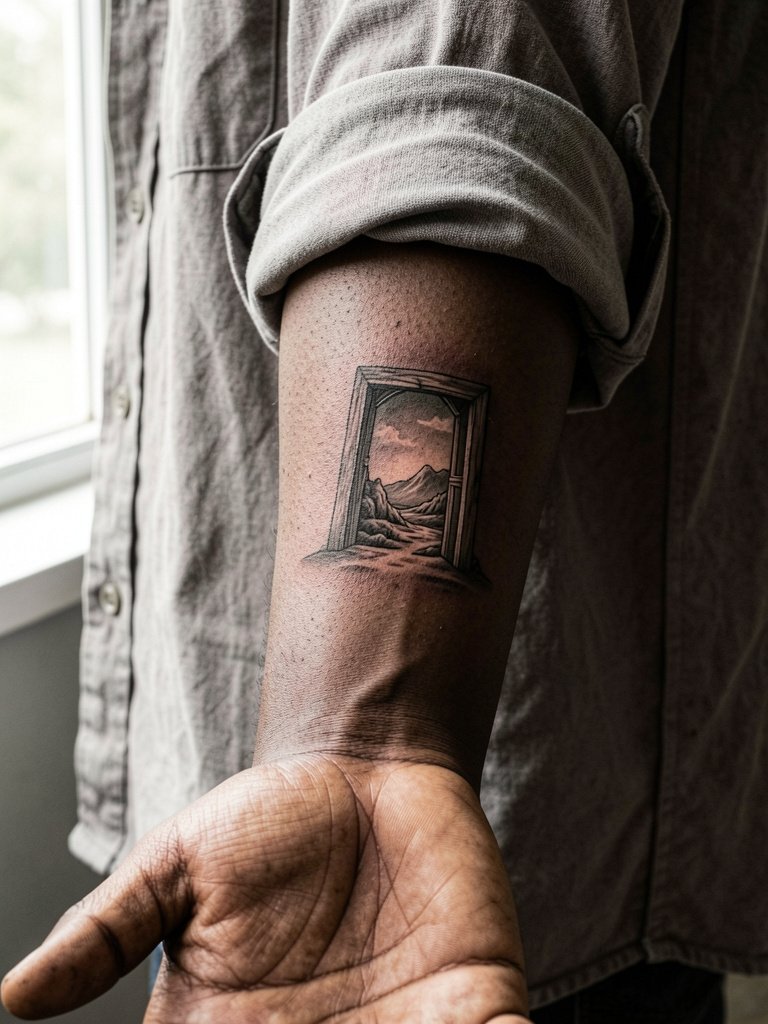
Portals look convincing when the frame has strong shadowing and the interior landscape has a clear horizon. During the consultation, request a mockup showing the doorframe edge at full size so you see where the shading will land across tendons. A frequent mistake is a tiny doorframe with an overly detailed scene; the interior muddies by the six-month mark. Two to three sessions allow depth layering. This placement benefits from loose sleeves like a rolled-cuff linen shirt for reveal shots, and session wear should avoid tight cuffs that press the frame edge while healing.
11. Gravitational Collapse Sphere, Outer Forearm
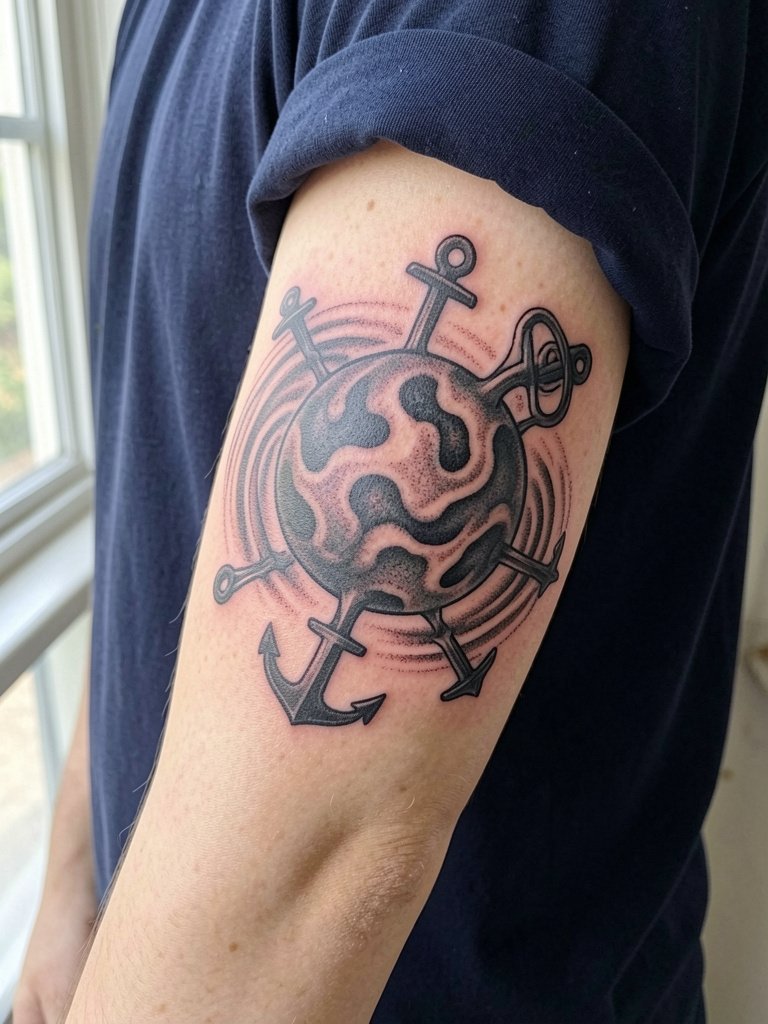
Abstract spheres sell because they do not demand photoreal accuracy, which reduces blowout risk when spaced correctly. Ask the artist to show a one-to-one stencil so you can judge ripple spacing. The common mistake is crowding the ripples too close to the center, which creates gray muddiness after healing. These designs take one session for small-to-mid sizes with tight stippling. For showing off, pair the piece with a black or navy tee and minimalist rings. Wear a short-sleeve shirt you can roll without compressing the area during the appointment.
12. Dream Logic Fragmented Portrait, Inner Forearm
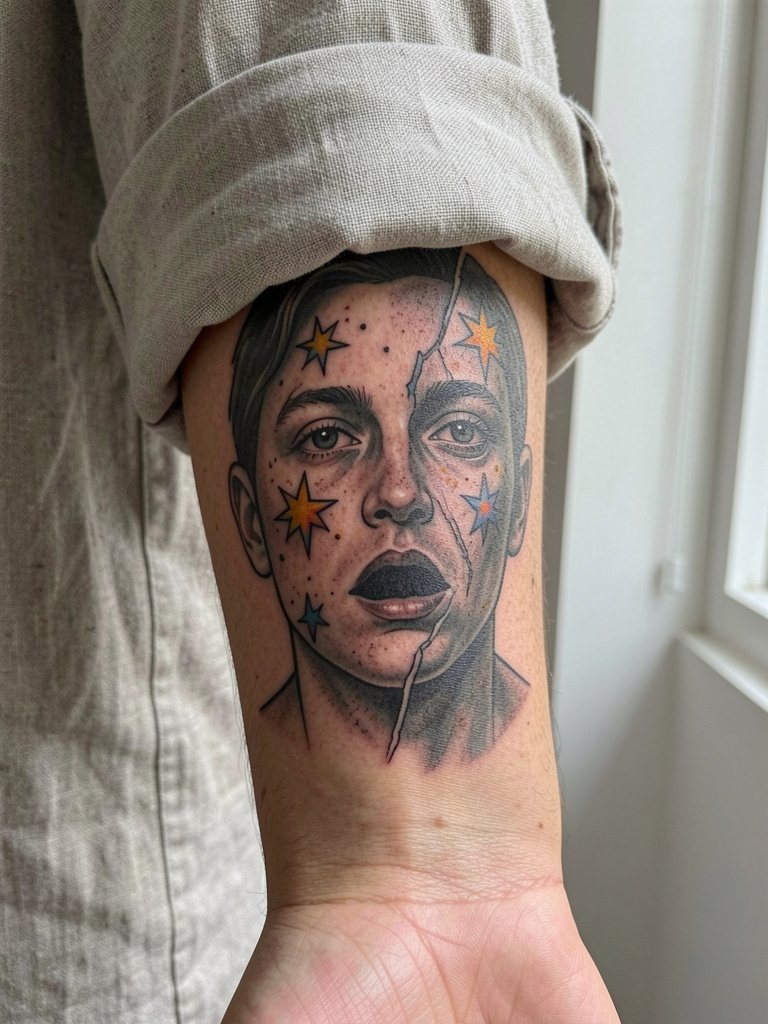
Portrait fragmentation needs space to keep features readable as the ink settles. Tell the artist which features must remain crisp and which can dissolve into texture so they can prioritize line weight. A mistake is cramming multiple facial fragments into a narrow wrist area, which results in a muddled healed portrait. These portraits often require three to four sessions for fine shading and selective color. Inner forearm placement is preferred by many for portraits. For show-off outfits pick neutral rolled-cuff linen shirts and dainty stacked bracelets on the opposite wrist so the tattoo keeps the focus.
13. Liquid Metal Object, Outer Forearm
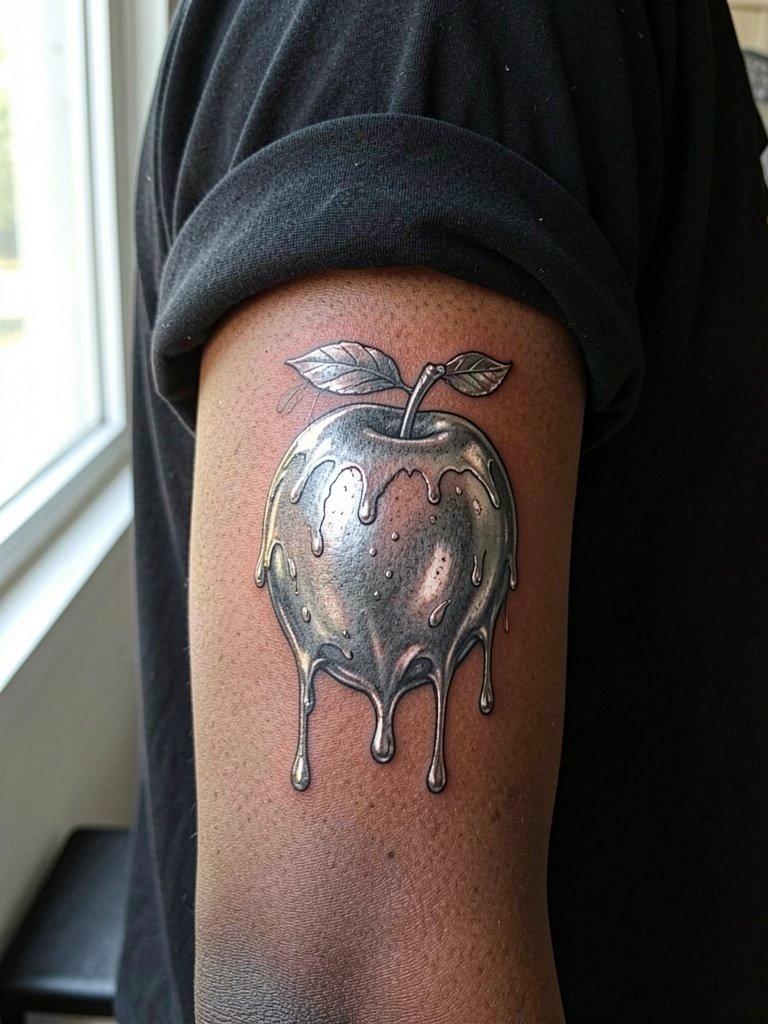
Liquid metal effects rely on crisp reflective edges. Specify to the artist how much highlight you want to depend on white ink because white often fades and can leave a dull impression. The debate over watercolor versus blackwork also affects this piece. One camp insists watercolor will not hold the crisp metallic edges and will fade into indistinct color. The other camp says watercolor can achieve a luminous metal feel if you accept periodic touch-ups. State your tolerance for future touch-ups and request a healed example that demonstrates reflectivity on similar skin tone. Two sessions are typical for metallic highlights and tonal building. Outer forearm displays metallic sheen well against dark tees.
14. Subconscious Object Juxtaposition, Inner Forearm
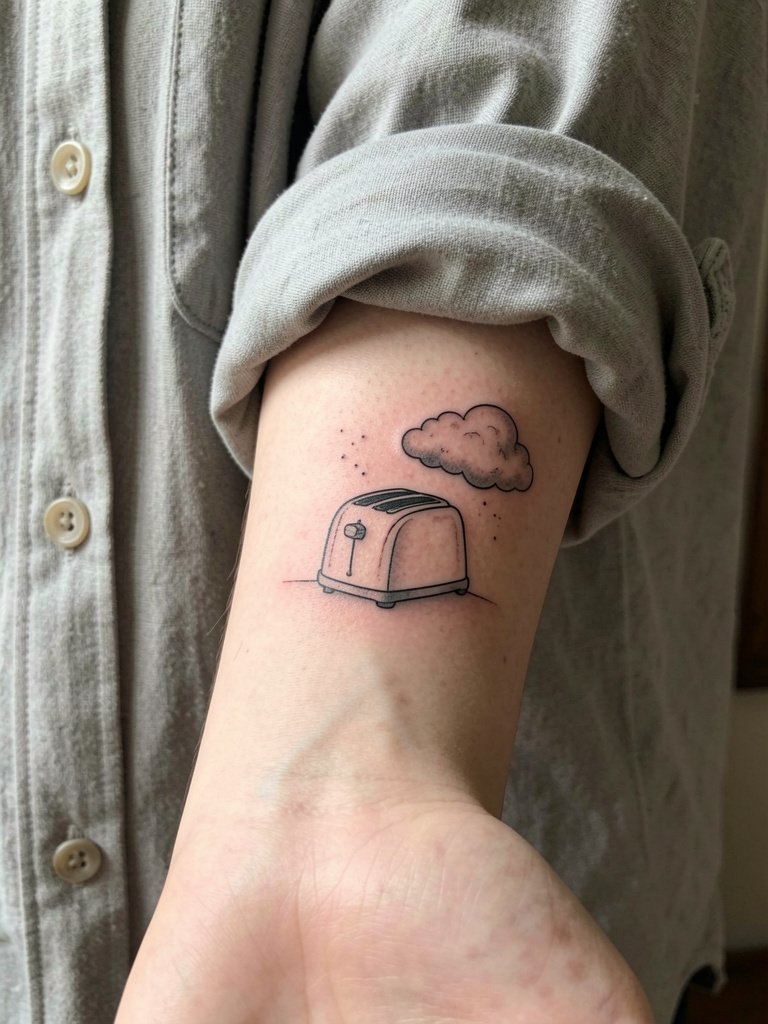
Juxtapositions are pure surrealism, so focus on composition and spacing rather than trying to force symbolic weight. Bring two reference items and explain which one should dominate visually. The aging mistake is placing too many tiny items without breathing room; the small silhouettes merge into one ambiguous shape over time. One session is usually enough for a minimalist pair. Inner forearm is forgiving for fine line juxtaposition if you and the artist agree on slightly bolder single-needle strokes. Session wear: loose shirt with cuff roll so the artist can work without cuff pressure.
15. Optical Vein-to-Wire Morph, Inner Forearm
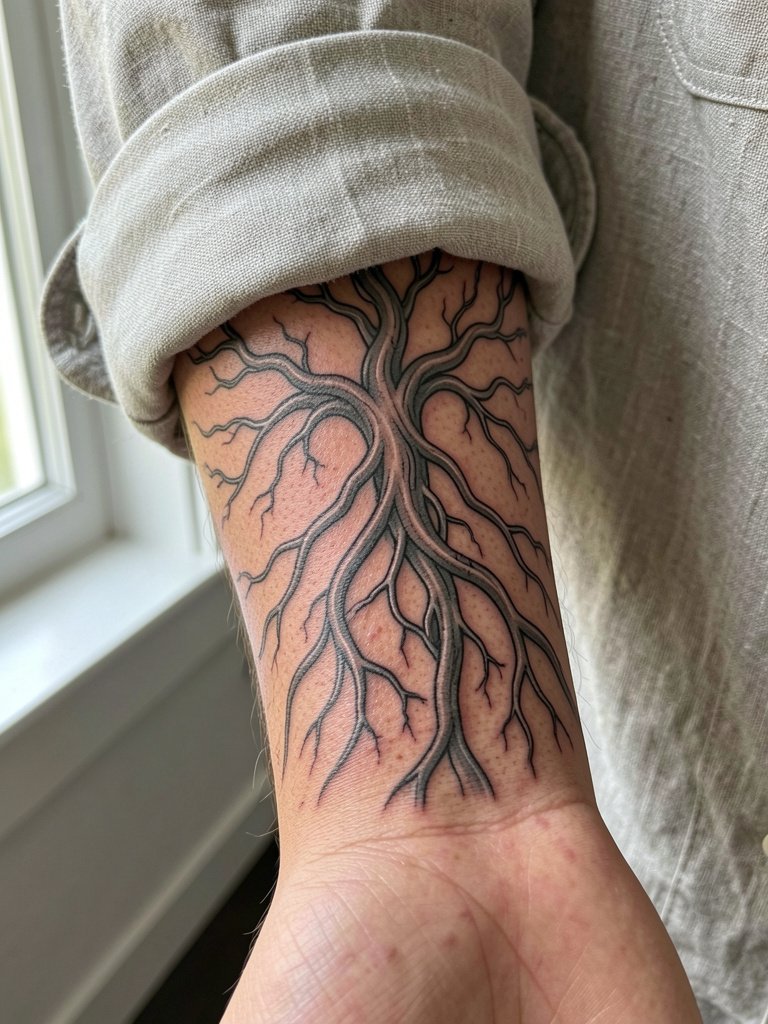
Vein-to-wire morphs are detail-heavy and reward careful flow planning along muscle lines. Request the artist show how each vein will align when your palm is up and when it is relaxed by your side. A mistake is keeping the veins uniform in thickness; give main roots stronger line weight so the thin connectors fade gracefully without losing intent. Expect two to three sessions for intricate line transitions and small stippling. For showing off, neutral linen cuffs and minimalist silver rings on the other hand frame the cyber-bio aesthetic. Wear a loose sleeve that can be rolled to avoid cuff pressure during healing.
16. Micro-Realism Mini Landscape, Inner Forearm
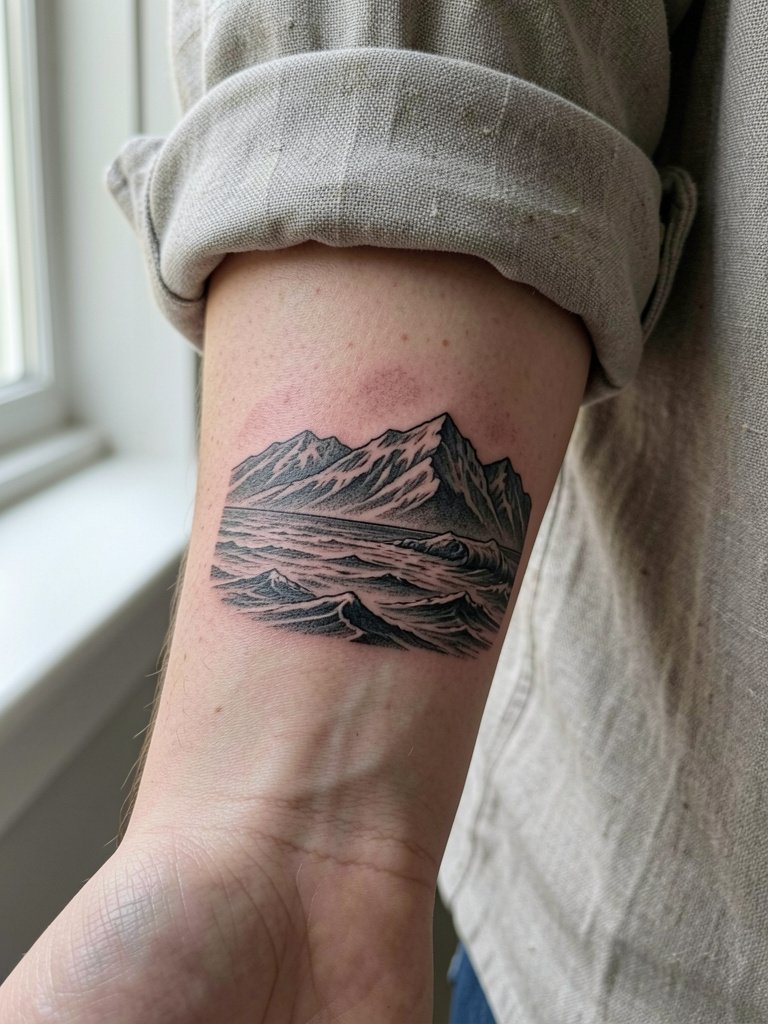
Micro-realism is tempting for forearms, but it depends on how long you want the detail to last. One camp argues micro-realism blurs within two to three years on forearm skin because of natural stretching and line spread. Another camp says careful needle depth and slightly wider spacing keep micro detail readable for longer and points to healed examples as proof. Be explicit about which approach you prefer and have the artist show healed photos on similar skin tones. Small micro landscapes often look great at six months but require a touch-up window around two years if you want to maintain tiny highlights. One session can do a small piece, but larger micro-realism needs layering.
17. Fragmented Clockwork Hand, Outer Forearm
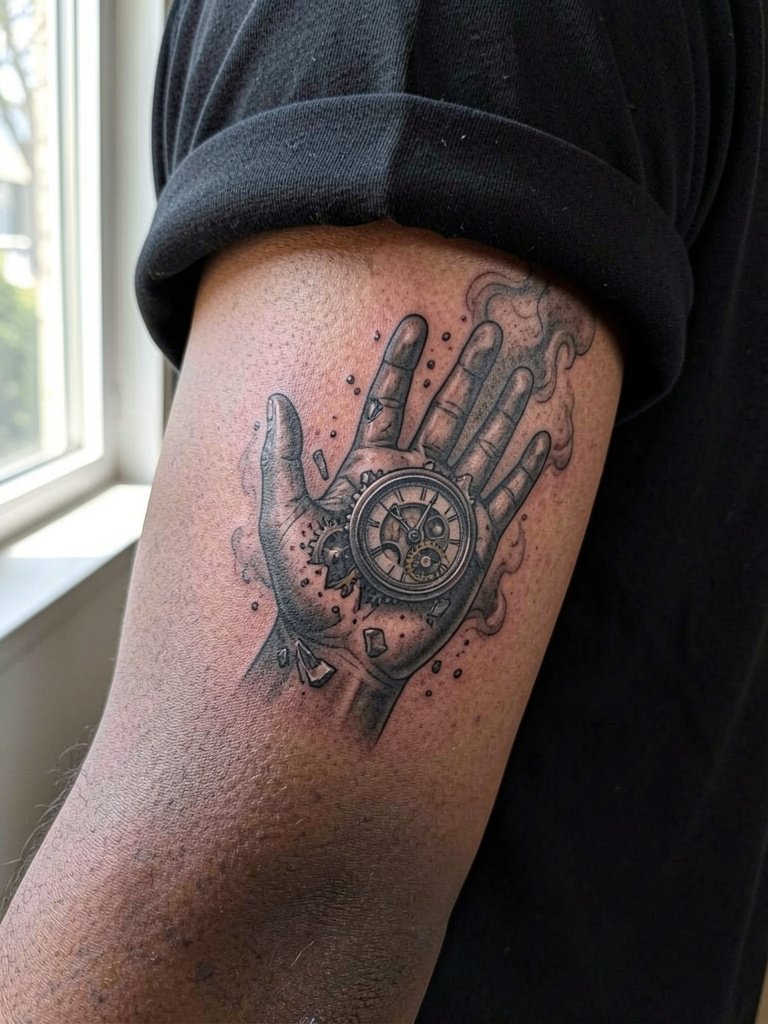
A clockwork hand merges anatomy with machinery; plan the breakpoints so the smoke transitions read instead of smudge. Ask the artist to show a stencil overlay of the clock gears against your arm curvature. The error I see is compressing too many tiny gears into a narrow palm; they become an indistinct gray texture after healing. Two sessions usually give the piece time to breathe and for metallic highlights to set. Outer forearm placement benefits from low-contrast clothing like dark tees which help the mechanical details stand out.
18. Negative Space Constellation, Inner Forearm
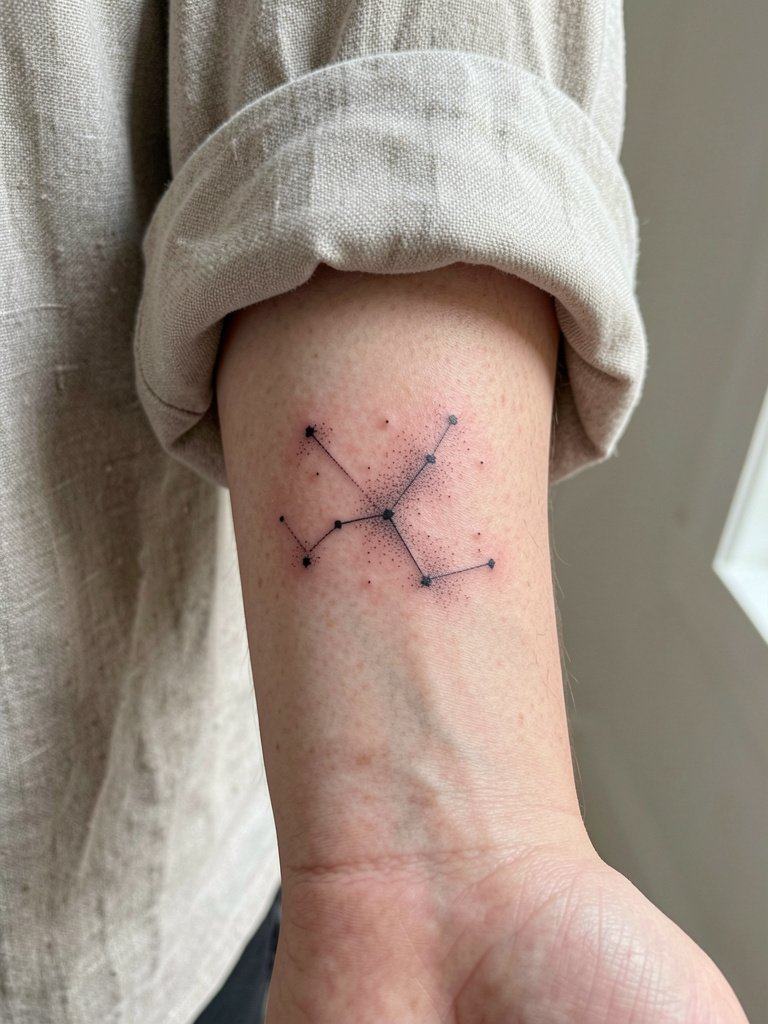
Negative space constellations rely on even dot spacing and careful contrast so the skin gaps remain readable. Tell the artist which stars must remain punctate so they can prioritize dot size and depth. Commonly, clients ask for micro dots that heal into a soft wash, so specify slightly larger dot size if you want longevity. One session often covers a simple constellation. For show-offs, rolled linen cuffs and dainty bracelets look editorial without obscuring the dots. Session wear: a loose button-down that lets the inner forearm rest flat.
19. Stippled Gravitational Ripple, Outer Forearm
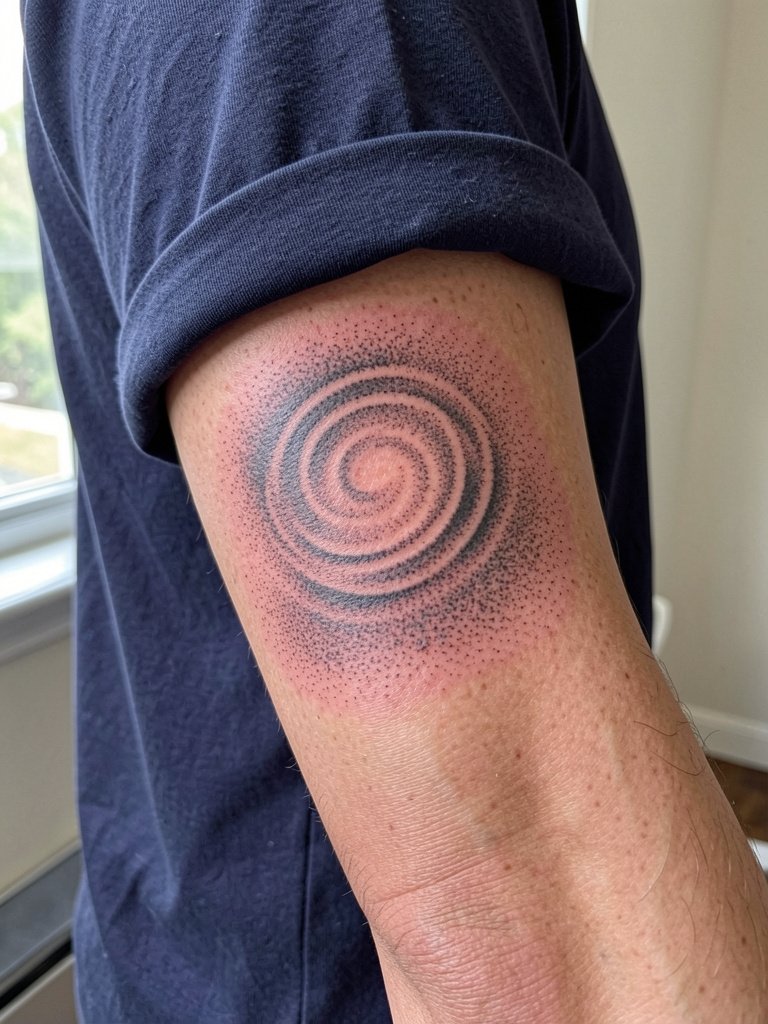
Stipple shading creates tactile depth without heavy linework, but it demands consistent dot density across the forearm. Ask the artist to mark the darkest and lightest points on your arm so the gradient aligns with your muscle tone. The usual mistake is uneven dot pressure that shows as blotches once healed. One to two sessions should cover a medium ripple. Outer forearm stippling reads well with rolled sleeves and simple silver rings. For the session wear a short-sleeve top you can easily roll and not tug at the inked area.
20. Fragmented Clock Portrait, Inner Forearm
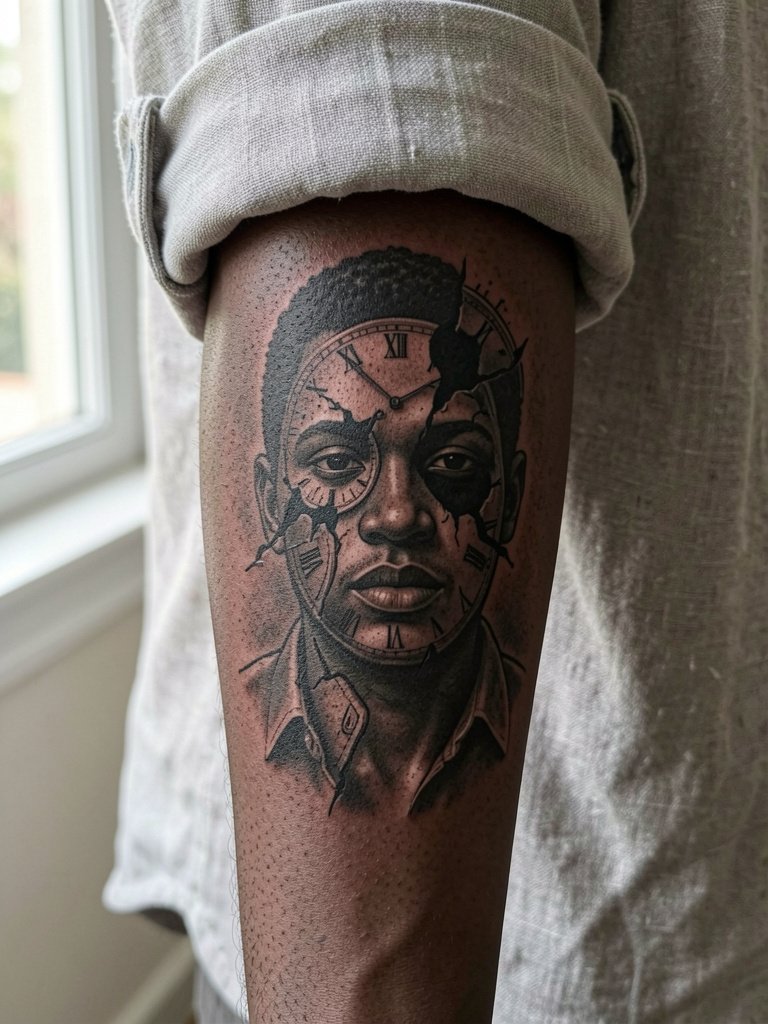
Combining portraiture and clockwork is high risk and high reward. Specify which facial features must remain sharp and which can fragment into gears so the artist knows where to place heavier linework. A common error is merging too many small mechanical details into the cheek area; they blend into an indistinct patch after a year. Expect three to four sessions for a complex piece with clean portrait tones. For showing off, neutral rolled-cuff linen and a dainty bracelet on the opposite wrist keep attention on the face-clock intersection. Wear a loose button-down for the session to protect the healing area from tight cuffs.
21. Minimalist Sphere with Warp Lines, Outer Forearm
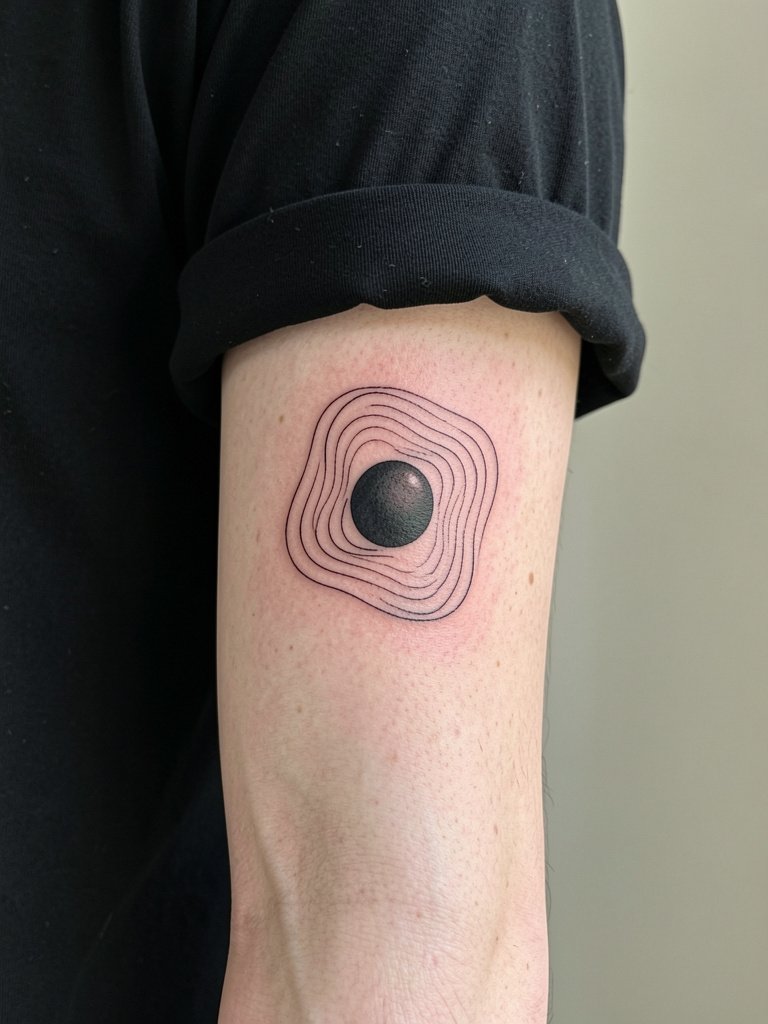
For a final low-maintenance surreal piece, a small sphere with warp lines reads clean and ages gracefully if the lines are spaced correctly. Ask the artist to stencil the warp lines over your muscle contour so they do not compress into the sphere when the arm moves. The mistake is packing lines too tightly; they coalesce into a gray band. One session covers most small versions, and touch-ups are rare if spacing is generous. Outer forearm placement lets you show the piece in dark tees and minimalist silver rings. For the appointment wear a t-shirt you can roll without tugging at the inked area.
Frequently Asked Questions
Q: How much should I budget for a forearm surreal tattoo and what influences the price?
A: Budget ranges vary by complexity. Small minimalist surreal pieces typically fall in the lower range because they can be done in a single session. Medium portrait or mash-up pieces need two to three sessions which raises the cost. Large, multi-session surreal work with full color and layered textures is the most expensive due to time and touch-up needs. Plan around session counts rather than a flat per-design price and ask the studio for their per-hour rate so you can estimate total cost.
Q: Which forearm surface is best for portraits versus geometric wraps?
A: Inner forearm is generally smoother and better for portrait detail because the skin surface is flatter. Outer forearm suits geometric wraps and optical illusions because the muscle curve helps the three-dimensional effect. If you want a portrait that keeps crisp edges pick the inner forearm. If you want a wrap that reads around the arm and from a distance choose the outer forearm.
Q: Where can I find artists who specialize in surreal tattoos without naming specific artists?
A: Search location filters plus style hashtags on social platforms. Try tags like #surrealismtattoo, #blackworksurreal, and #finelinesurreal on Instagram and TikTok and then filter by city. Use portfolio directories that let you search by keywords such as "surrealism blackwork" or "micro-realism surreal" and look specifically for healed photos. Reddit communities focused on tattoos also surface peer recommendations and healed examples across skin tones.
Q: How do I plan for long-term upkeep and touch-ups for surreal forearm pieces?
A: Expect some designs to need touch-ups depending on line weight and color saturation. Blackwork and neo-traditional color fields typically age with less frequent touch-ups. Fine-line micro-realism and white-ink highlights are more likely to need maintenance. Ask the artist to mark areas where future touch-ups will likely be needed and schedule a check-in around 12 to 18 months to see how the piece has settled.
Q: What should I wear to the studio for a forearm session and how do I show the tattoo afterward?
A: For inner forearm work choose a loose button-down or a linen shirt with sleeves that can be rolled higher than the elbow without constricting. For outer forearm pieces wear a short-sleeve t-shirt you can roll once. For showing the healed work, neutral tones like cream, olive, or black create clean contrast depending on whether the piece is fine line or blackwork. Include a link to a rolled-cuff linen shirt in your planning if you want the same look as the show-off examples: linen button down shirt.
Q: How do these surreal forearm styles behave on darker skin tones?
A: High-contrast blackwork is often the most reliable on darker skin tones because strong blacks and solid fills maintain legibility. Discuss contrast, saturation, and healed examples with the artist and ask to see healed photos on skin tones similar to yours. If you want color, lean toward saturated pigments and bold outlines to preserve the design's structure as it heals.
