
Fluid, strange, and often unexpected. Surreal tattoos for men work best when they balance an odd idea with clear structure on skin, so the image reads at a glance and still gains mystery over time. Below is a collection of designs and practical notes you can bring to a consultation, with placement tips, what ages well, and the wardrobe choices that actually make the ink sing.
1. Fluid Abstract Side-Body Flow (Ribcage to Hip)
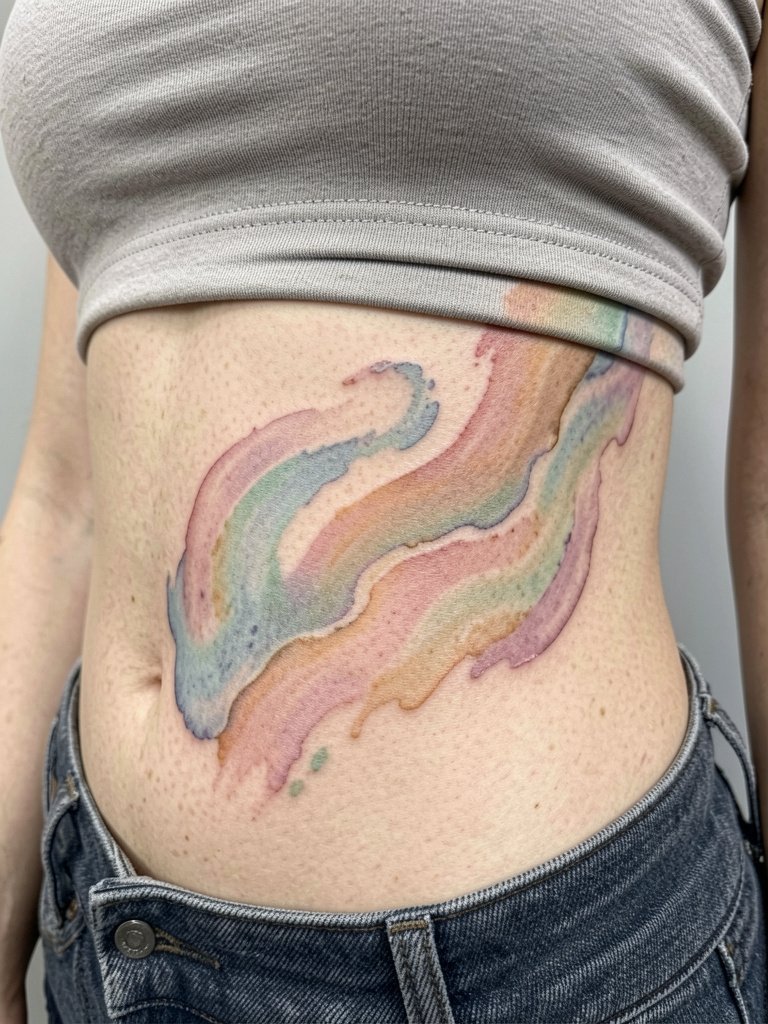
This style reads like movement on skin so I recommend it when you want a single piece that breathes with body motion. For a ribcage placement expect a moderate pain level and a 1–3 session plan depending on size. Fine single-needle watercolor variants often fade into mush on ribs after two years. A better route is slightly wider spacing and soft shading so the shapes keep separation at 6 months, two years, and five years healed. Common mistake is asking for tiny, intricate details that the rib skin will blur. For the appointment wear a loose, button-down top so the artist can access the side easily and nothing presses on fresh ink. loose linen high waist pants pair well with the exposed hip line for photos.
2. Biomechanical Surreal Arm Window (Upper Outer Arm)
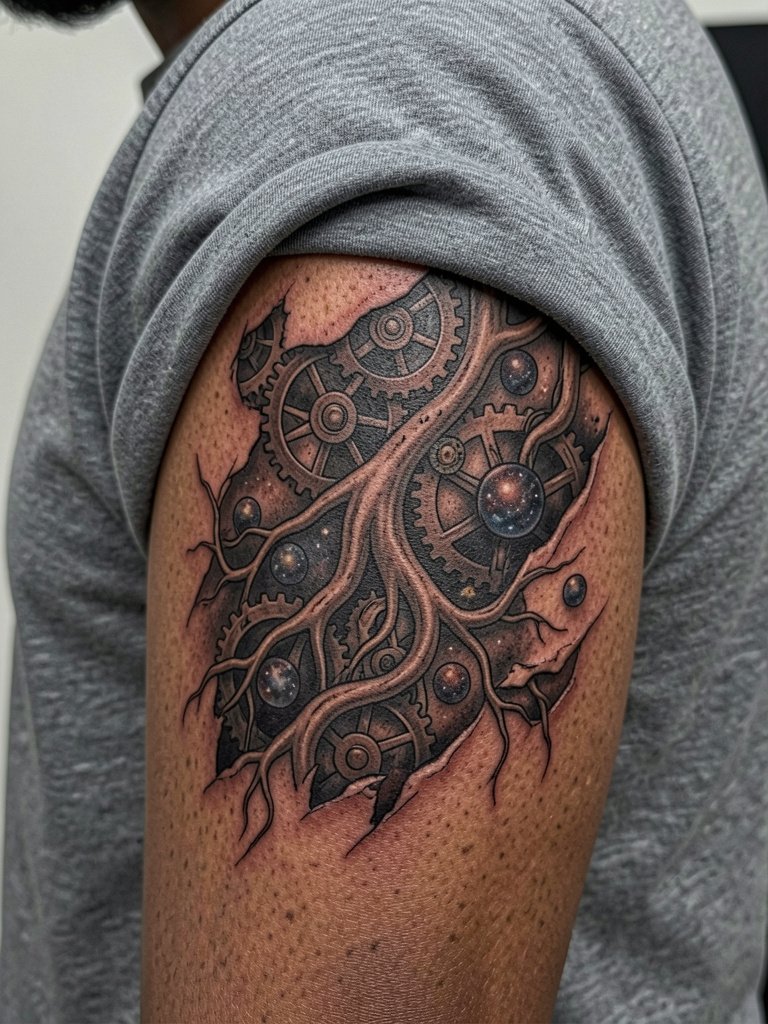
Choose this when you want illusion and depth without a full sleeve commitment. Expect higher contrast black and grey work and three to five sessions for layered depth. Talk with the artist about how to stagger layer edges so the "peel-back" reads even as skin stretches. A frequent error is overlapping too many tiny gears at small scale; the detail compresses into grey at year two. Session feel is steady but long, so plan breaks. This placement looks sharp with a sleeveless wide-cut top and thin silver bracelets for contrast, link for the top here: sleeveless wide cut top.
3. Neo-Renaissance Micro-Realism Forearm Portrait
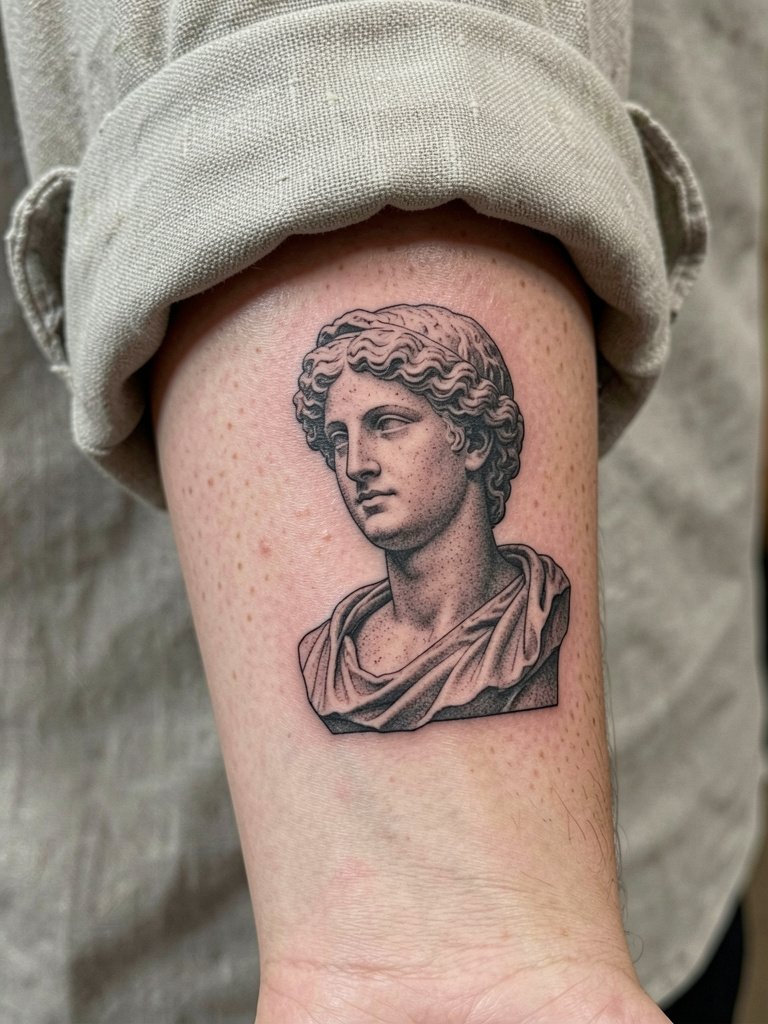
This tiny, high-density realism is for people who want photographic detail at a small scale. The inner forearm tolerates single-needle work better than ribs, but expect touch-ups around year two for extremely fine highlights. Be specific about needle size and reference scale. A common mistake is demanding a three-inch portrait at single-needle density without accepting periodic touch-ups. For session wear bring a loose button-down so the artist can roll the sleeve up easily. Showing it off works with a rolled-up linen shirt like this: rolled cuff linen shirt.
4. Ethereal Collarbone Watercolor Fade
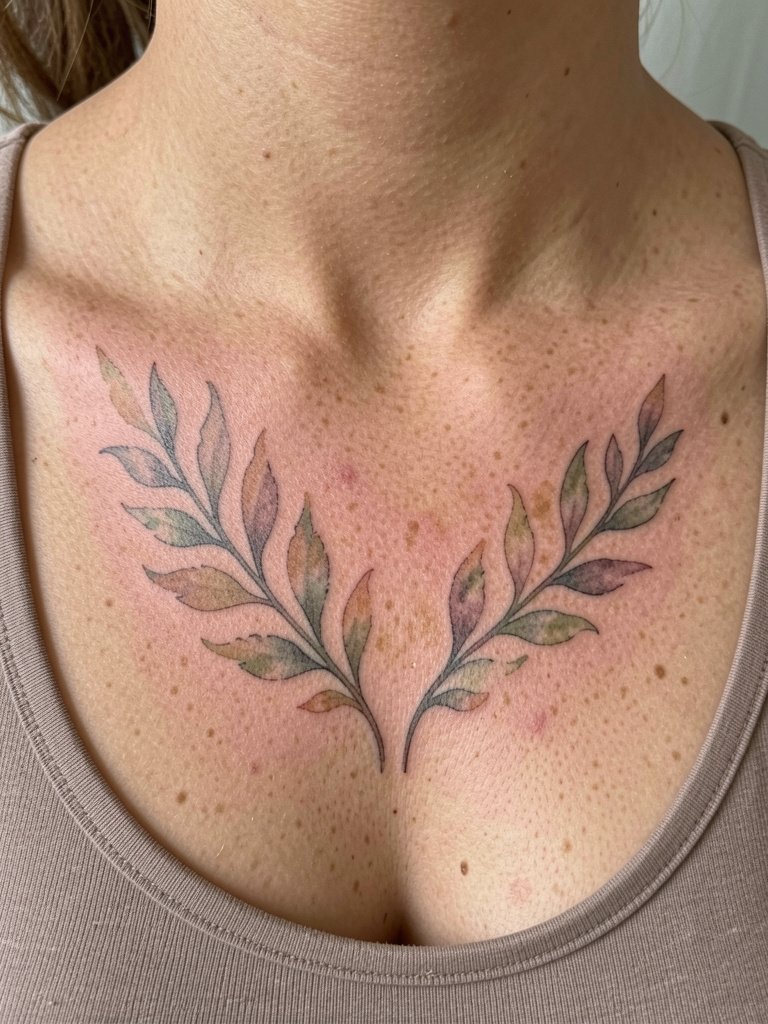
Soft, outline-free pieces here look like they emerge from skin. Expect one to two sessions for a medium collarbone wash and a low to moderate pain level. Watercolor techniques can fade faster on sun-exposed collarbones, so plan for yearly color refreshes if you want persistent vibrancy. Artists differ on technique choice, so bring examples showing healed results rather than fresh photos. For showing it off try a silk camisole in a soft pastel tone that sits above the ink, for example: silk camisole open neck.
5. Cyber-Sigil Forearm Circuit
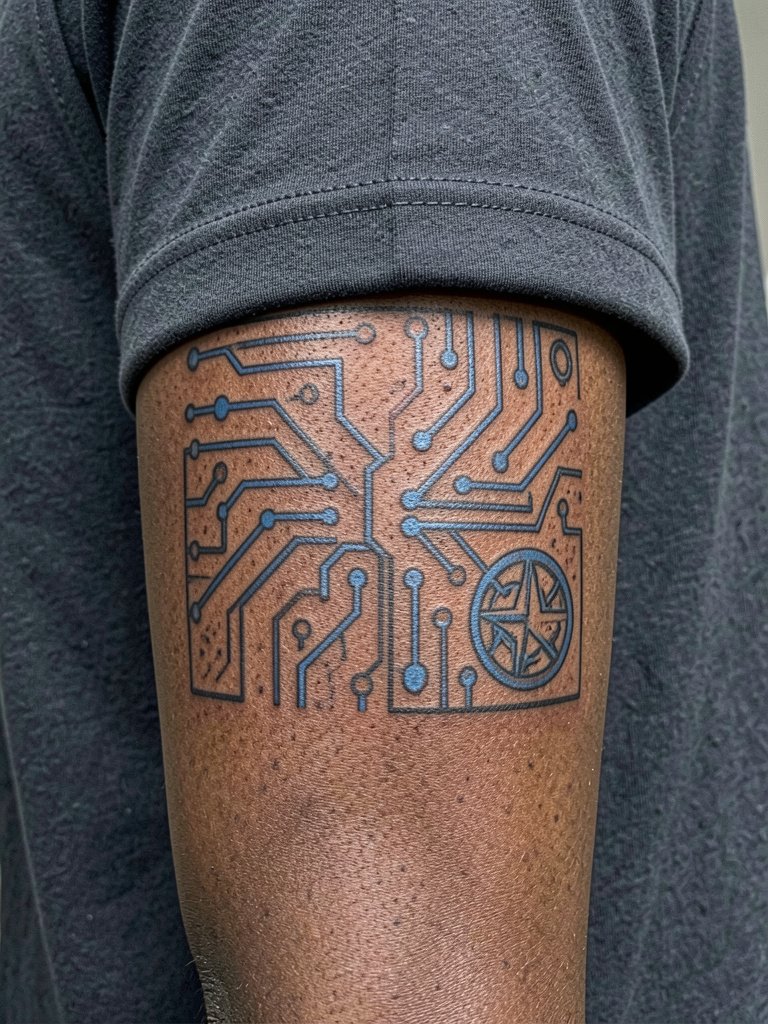
This precise, code-like panel reads as modern jewelry on the arm and works best when rendered slightly larger than an aesthetic mockup. Ask for test stencils at multiple scales so you can see how the glyphs hold up at three inches versus five. Small, dense circuits are a common aging mistake; they blur faster than open compositions. If you want the UV-reactive effect, specify the layer placement for neon pigments. Roll-up shirt sleeves show this off nicely. Try a short sleeve solid tee for casual wear.
6. Refined Ignorant Wrist Sketch
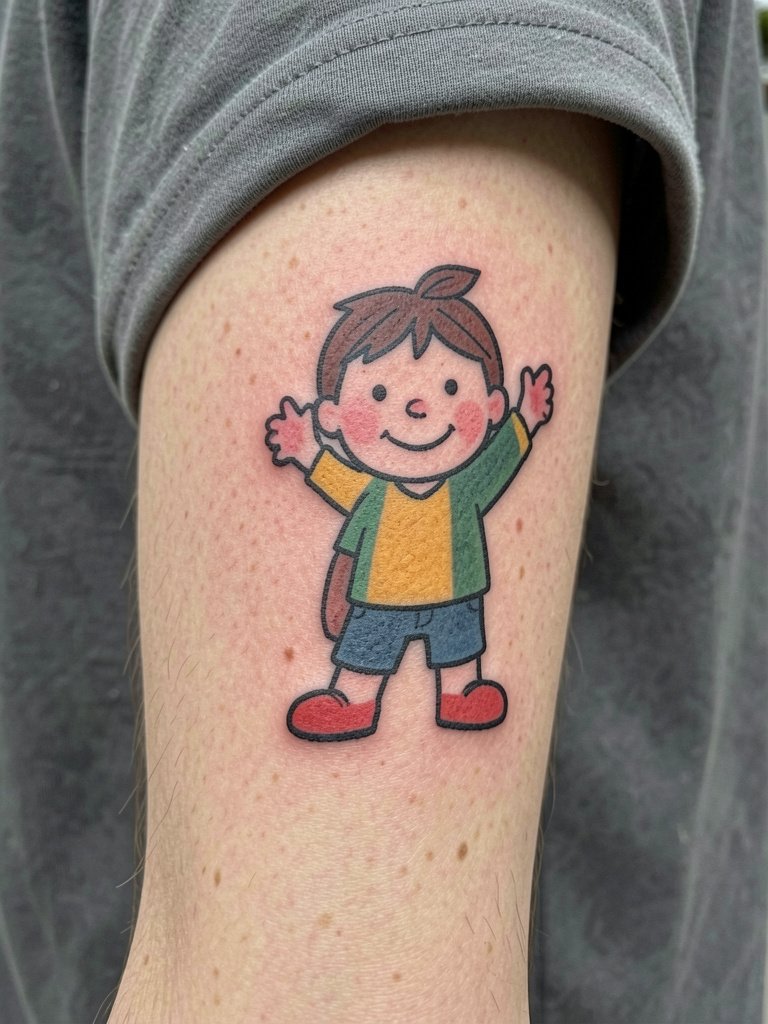
This small, ironic style keeps the DIY vibe while improving composition so it ages less like a doodle. For wrist pieces expect relatively quick sessions and a higher wash frequency from sun and hand use. A mistake is placing too much color in tiny fills, which fades and muddles after regular hand washing. For session day wear short sleeves and remove watches. Complement it with a thin chain bracelet on the opposite wrist like this: thin chain bracelet set.
Pack Smart
A few tools and supplies help with the first week and with planning the interactive and UV-reactive inks mentioned in ideas one through six.
- UV-reactive tattoo ink arteries. Useful if you plan cyber-sigil elements that glow under blacklight, mention this option during the layout discussion so the artist can map pigment placement.
- Medical-style botanical pigment set. Helps artists approximate muted earth tones for cross-section florals and keeps color consistency for multi-session botanical pieces.
- Retro-glitch chromatic accent kit. Selects neon accents for pixelation effects and chromatic bleed that hold up against regular washing.
- Solar-reactive tattoo ink. Try this for designs that shift under sunlight, and confirm placement on areas with good sun exposure for effect.
- Hustle Butter alternative balm. A thinner initial-healing balm recommended by many for breathability, especially on sensitive sternum and rib placements.
7. Neo-Traditional Futurism Shoulder Panel
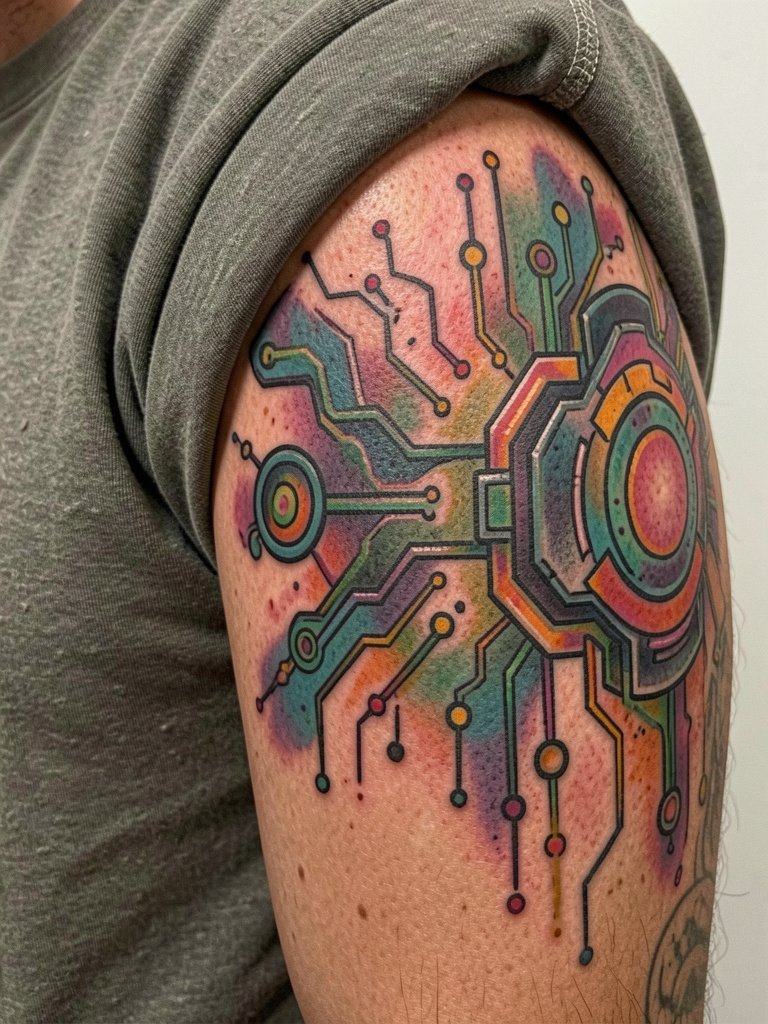
This is a great choice if you want strong readability from distance and futuristic motifs that still age like traditional flash. It works for a single-session panel or as a building block for a sleeve. Tell the artist which color should dominate so saturation and contrast are balanced from session one. A common error is overpacking tiny gradients in a saturated piece, which can muddy after multiple touch-ups. The shoulder tolerates bold lines well and looks clean with vintage-cut solid tees and a leather cuff on the opposite arm. vintage cut solid t shirt
8. Hyper-Detailed Sternum Micro-Realism
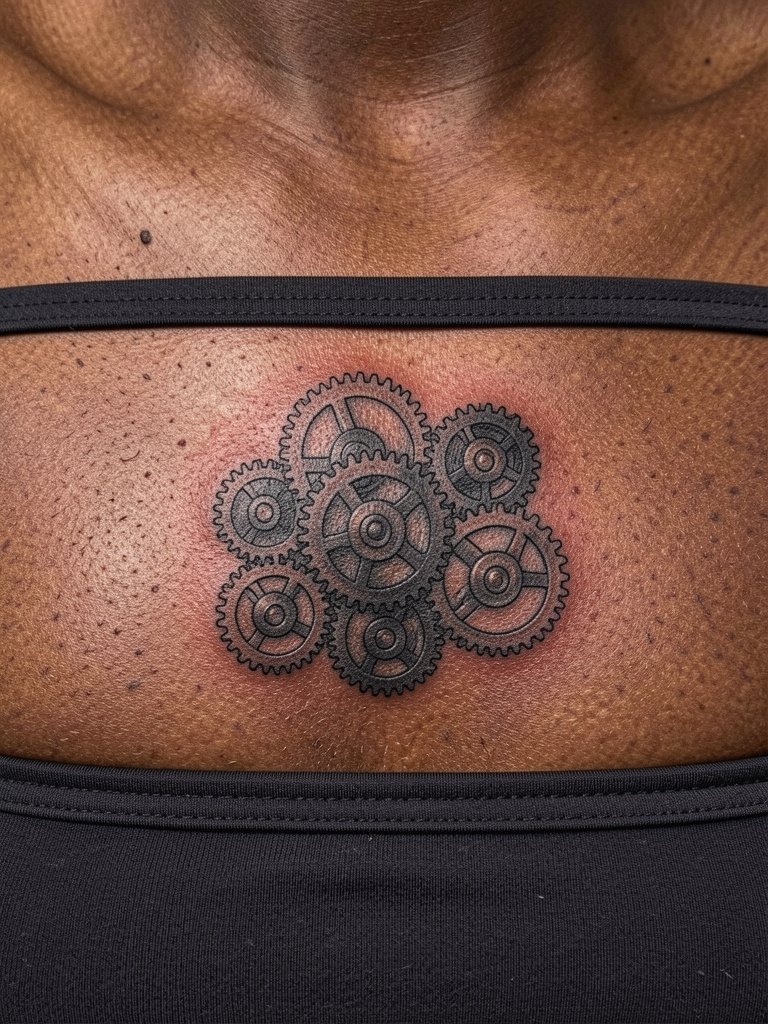
Sternum pieces demand a specialist who has experience with central chest curvature and breath-synced shading. Expect longer sessions and a higher pain rating. The common mistake is compressing photoreal detail into a small sternum canvas; that detail blurs by year two. Professional consideration: choose an artist used to sternum work because skin tension and healing differ from flat chest areas. For session wear pick a strapless or low-cut top so the artist can access the area easily.
9. Full-Color Graphic Panels on Outer Forearm
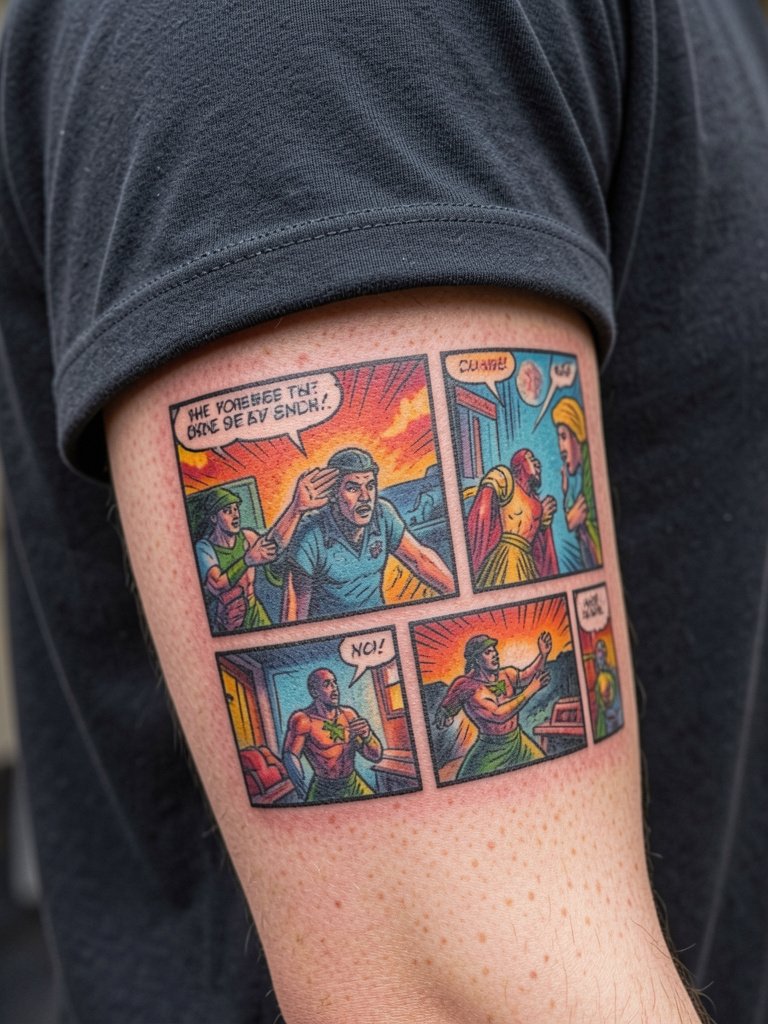
This layout treats skin like a comic page and works when composition is planned so each panel breathes. A common bad move is cramming six tiny panels into a narrow forearm. Discuss panel size and negative space with your artist and bring layout sketches. Expect three to five sessions for full saturation. Clean, solid tees showcase the panels best. Try short sleeve solid tee to keep the focus on the artwork.
10. Modern Ornamental Filigree Inner Bicep
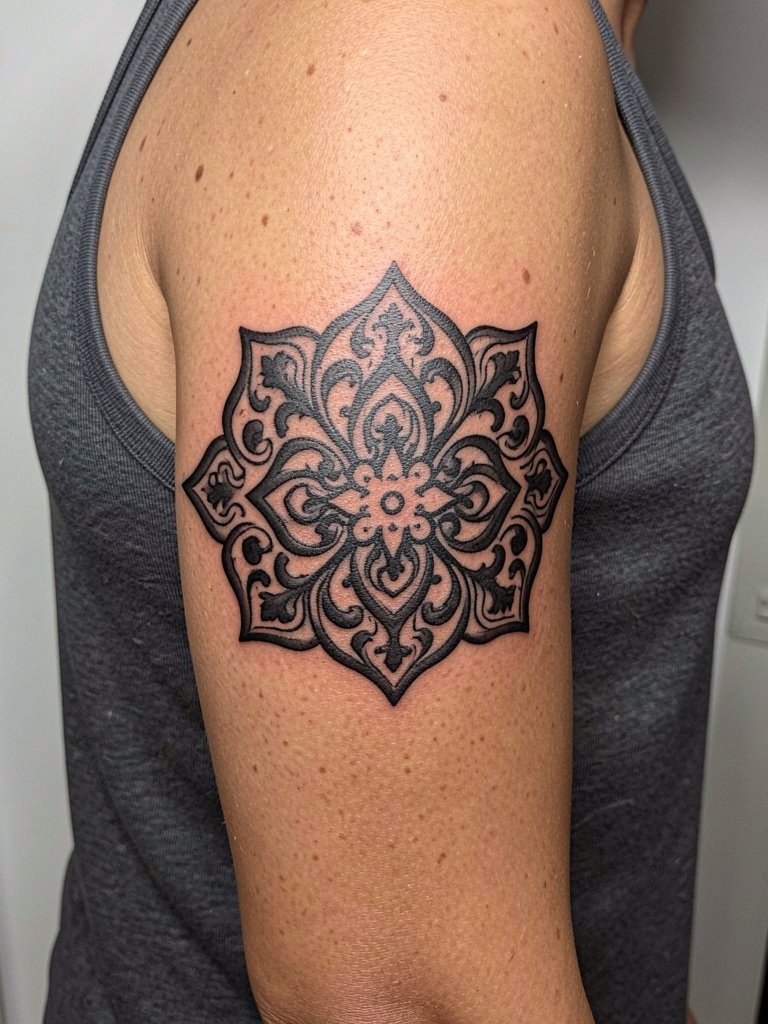
Inner biceps are smooth and hide well under sleeves, making them ideal for ornamental blackwork. Note that the inner bicep is not the armpit. Arm should be relaxed at the side during the stencil check. A common mistake is relying on ultra-thin lines that the inner arm will soften over time. Ask for thicker primary lines and stipple fills so the pattern keeps contrast at six months and beyond. For the session roll sleeves up and wear a black charcoal tank top.
11. AI-Melded Botanical Cross-Section Sleeve
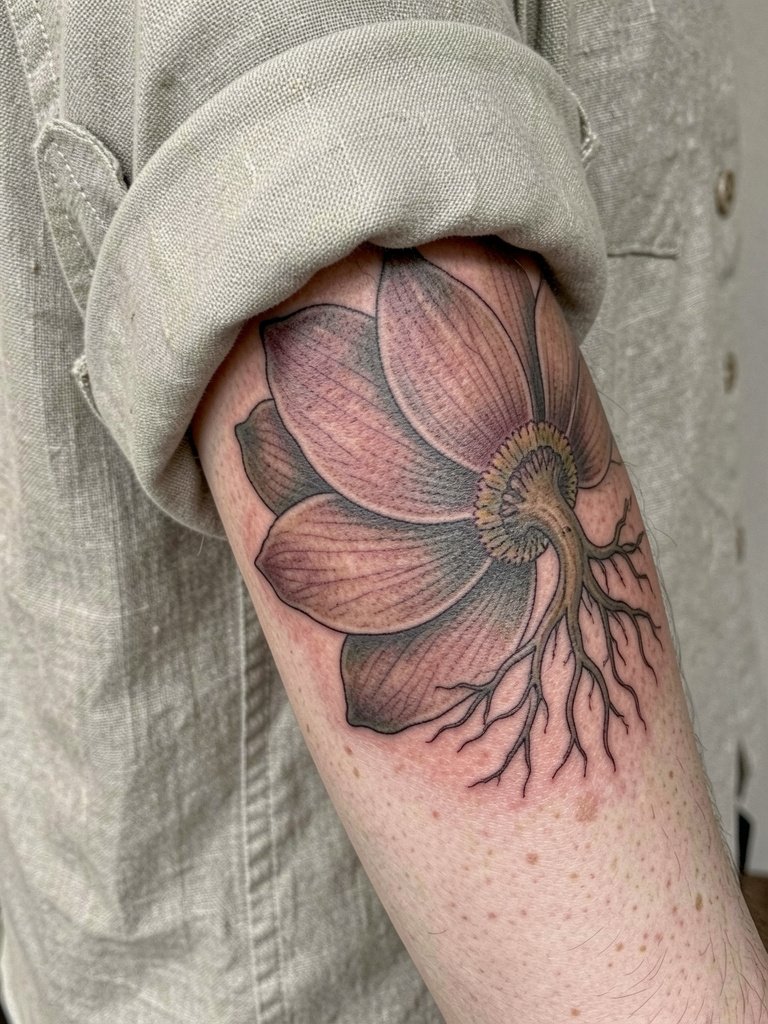
If you like algorithmic layouts, this blends AI-generated compositions with hand-finished shading. Ask for a staged mockup showing the piece at three scales so you can approve spacing. The inner forearm keeps cross-sections readable longer than high-stretch spots. A pitfall is allowing the AI output verbatim without human refinements; that can create repeating motifs that fatigue visually. Dainty stacked bracelets pair well when the piece sits on the palm-up surface, try dainty gold stacked bracelet set.
12. Retro-Glitch Hand Pixel Portrait
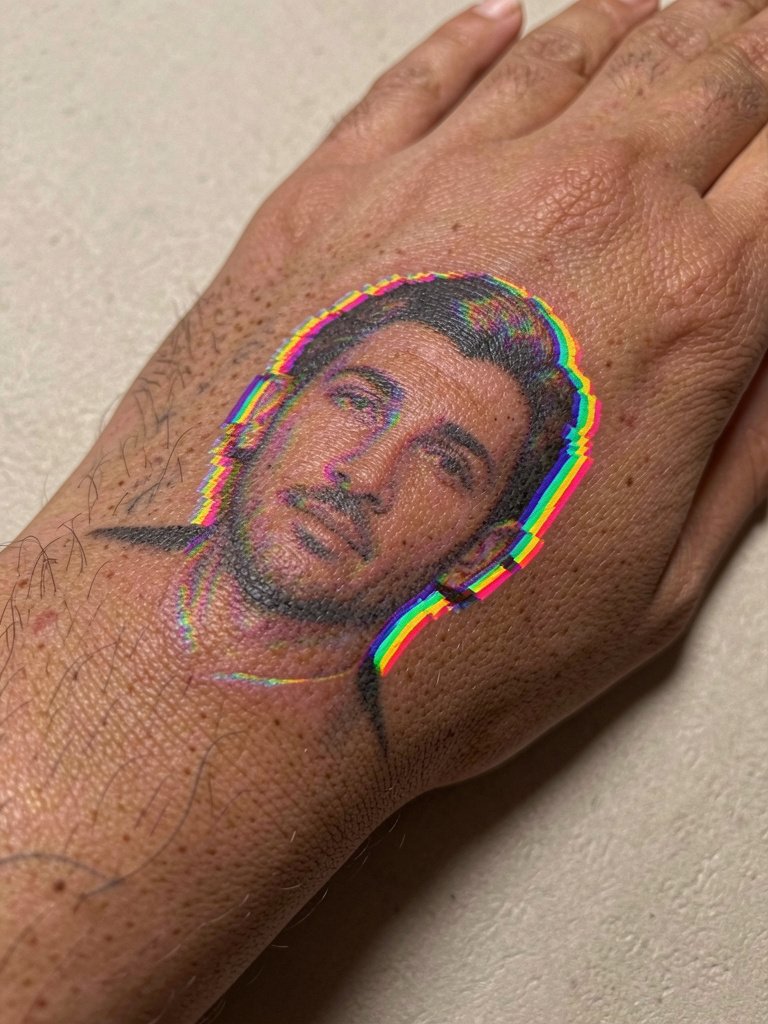
Hand tattoos face heavy wear from washing and abrasion, so designs need bold anchors. Retro-glitch effects are striking but small pixel blocks fade faster than solid black shapes. A frequent error is insisting on fine pixels across knuckles where blowout risk is higher. For session planning wear short sleeves and avoid rings during healing. Minimalist open-back gloves or rings in black complement the style when showing it off. minimalist ring set
13. Solar-Reactive Collarbone Accent
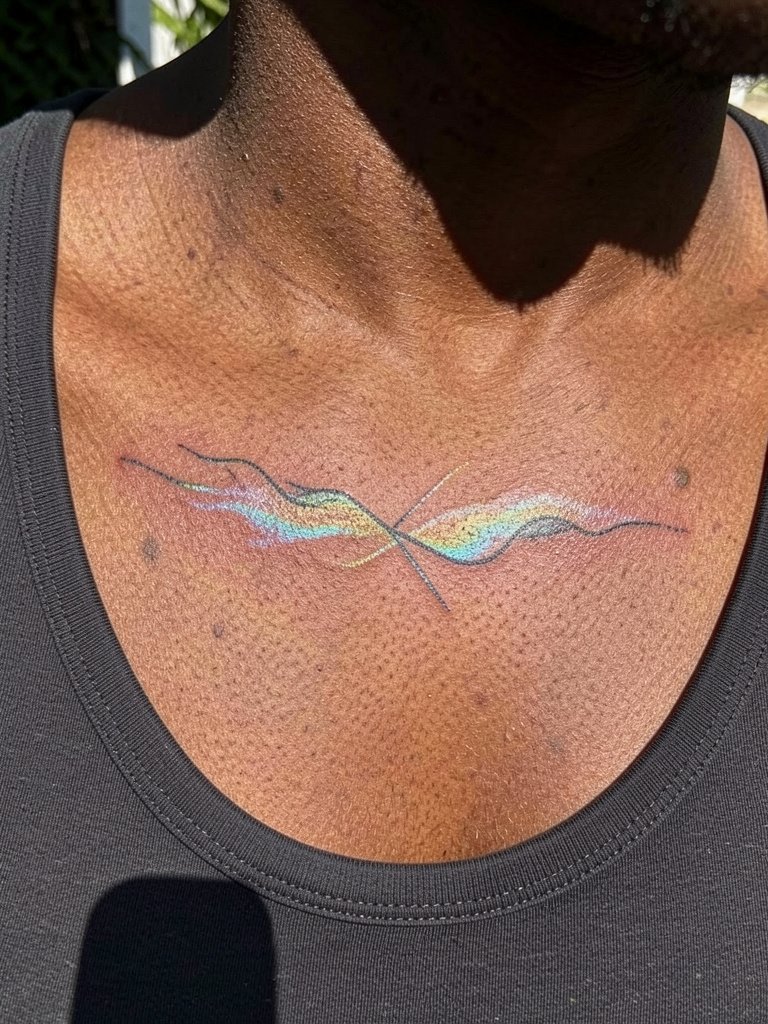
Solar-reactive ink gives a dynamic effect outdoors, but not every pigment behaves identically on different skin tones. Ask the artist to show healed samples on a range of tones before committing. A common mistake is placing solar-reactive elements where clothing constantly shades them; collarbone provides good light exposure. For evening wear a delicate pendant sits above the tattoo without covering it.
14. Patchwork Surreal Sleeve
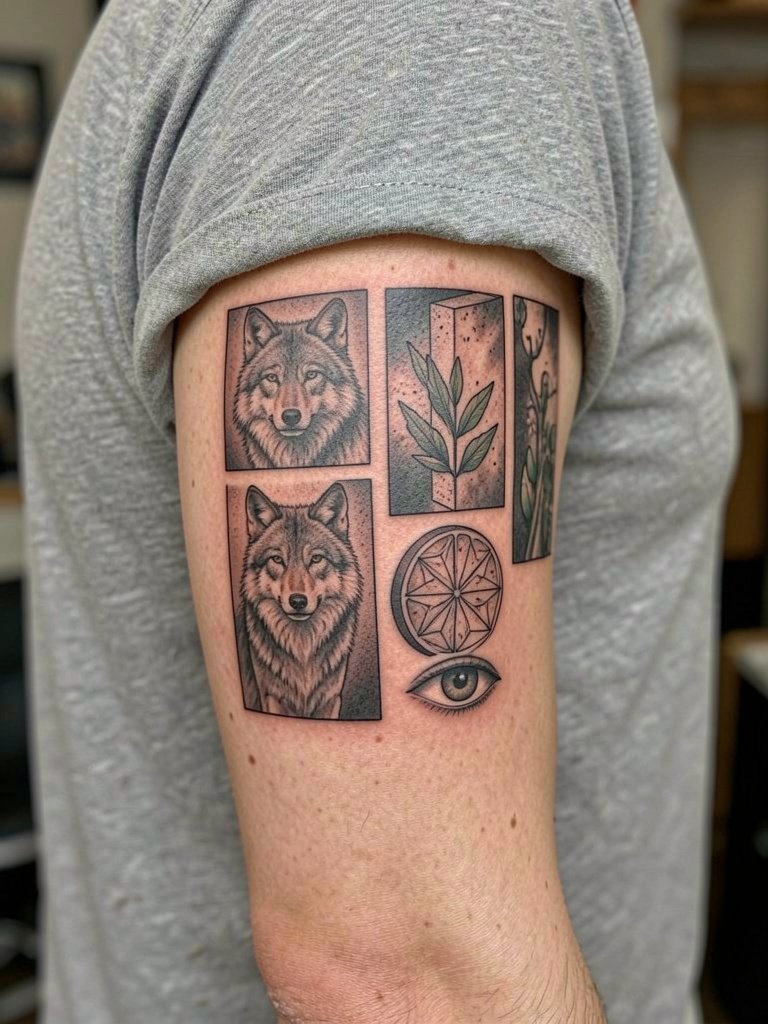
Patchwork sleeves let collectors curate over years. The risk is lack of cohesion if every piece uses a wildly different scale or line weight. When booking, request the artist plan a palette and a few repeating motifs for visual glue. Expect 10+ sessions over years and plan touch-ups to harmonize aging. For sessions wear short sleeves and for display solid-color tees help the sleeve read as one project. navy red t shirt
15. Data-Driven Inner Forearm Stream
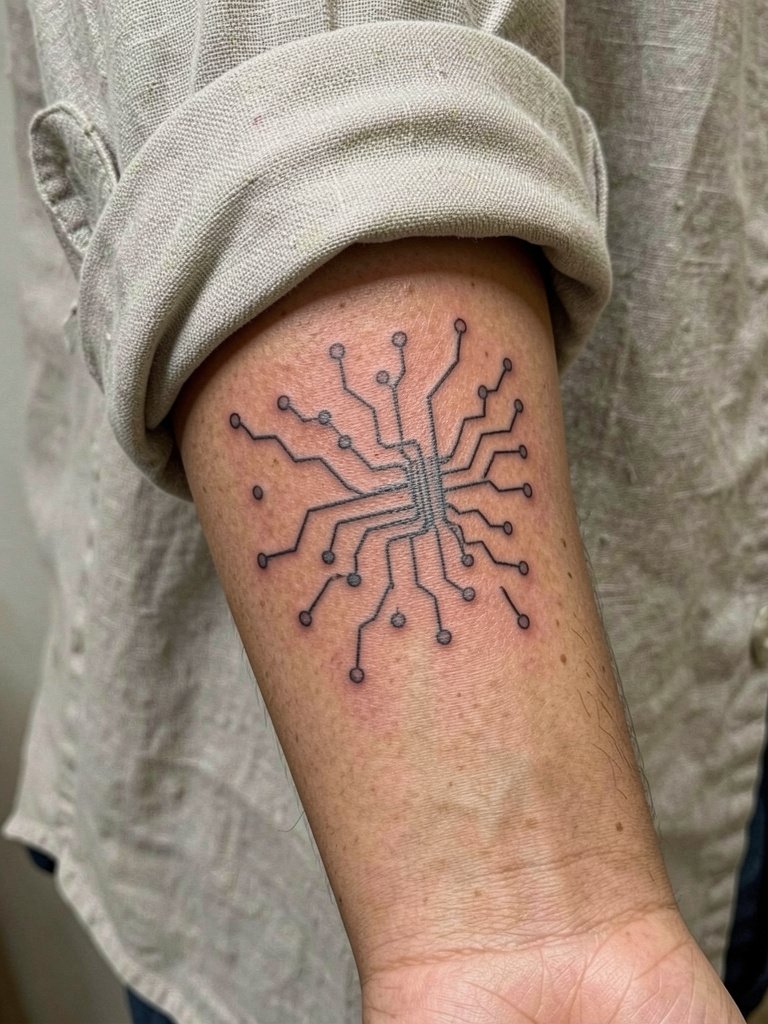
Data visualizations as tattoos read as both aesthetic and recorded information if planned well. Decide on scale and contrast early so lines do not compress. A common mistake is too many micro-nodes at tiny scale; they look busy after a year. For session wear keep cuffs loose. Rolled-up linen shirts frame inner-forearm details nicely, try linen button down shirt.
16. Minimalist Geometric Calf Piece
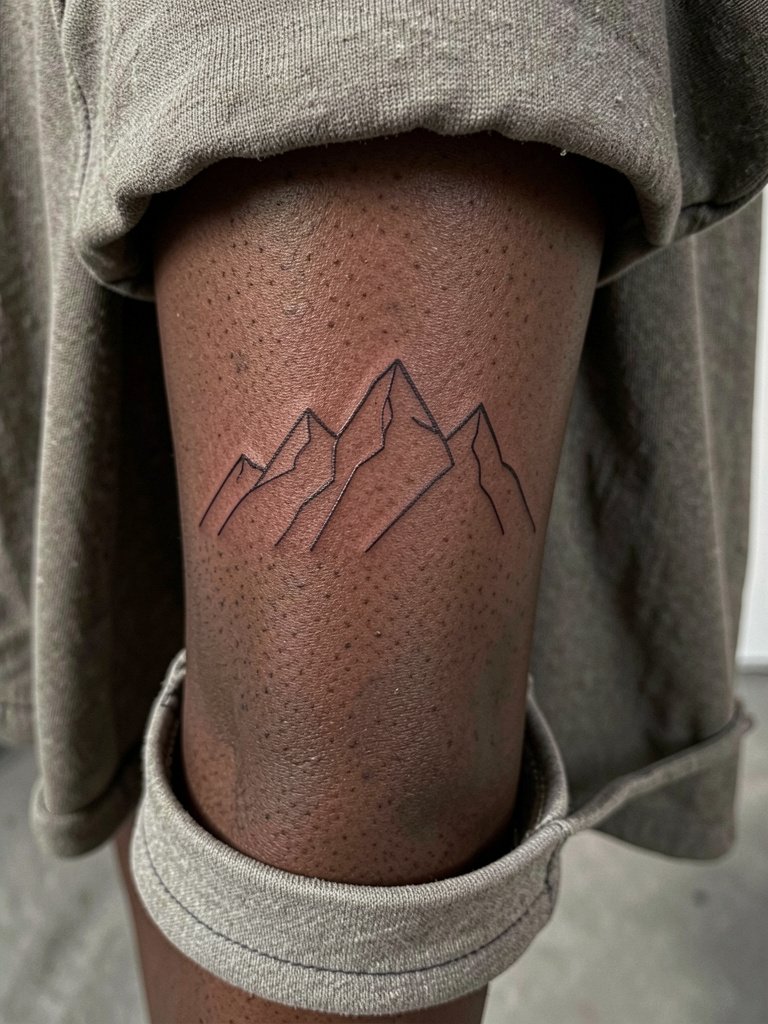
Calf tattoos tolerate thin linear work and show well in summer. Expect a low-to-moderate pain level and quick sessions. The usual mistake is overly complex negative-space patterns that flatten on the rounded calf. For show-off outfits cropped pants in neutral tones keep focus on the geometry. flowy cropped pants
17. Ornamental Hip Filigree
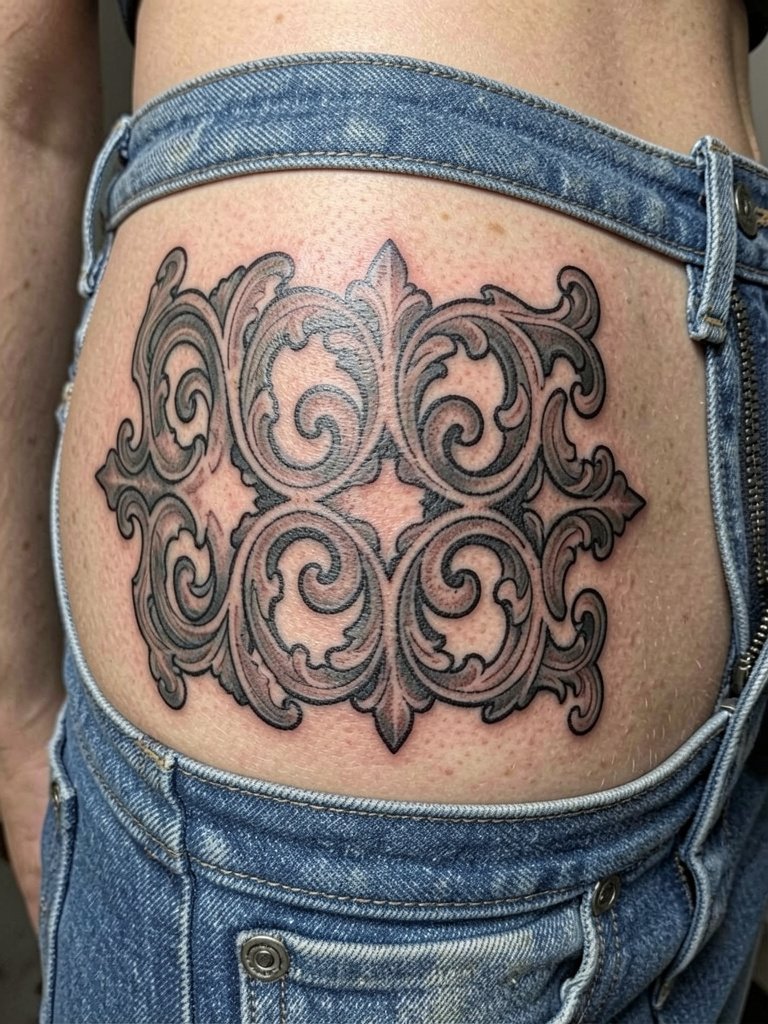
Hip work reads like a secret piece that appears with the right clothes. Because hips move with sitting and weight change, ask for bolder primary lines and slightly larger spacing. A common error is over-detailing the pattern in a way that becomes indiscernible after stretching. For sessions wear low-rise pants that can be lowered to the natural waistband for access. High-waisted, flowy skirts show the hip filigree elegantly, for example: high waist flowy skirt
18. Stipple-Shaded Thigh Botanical
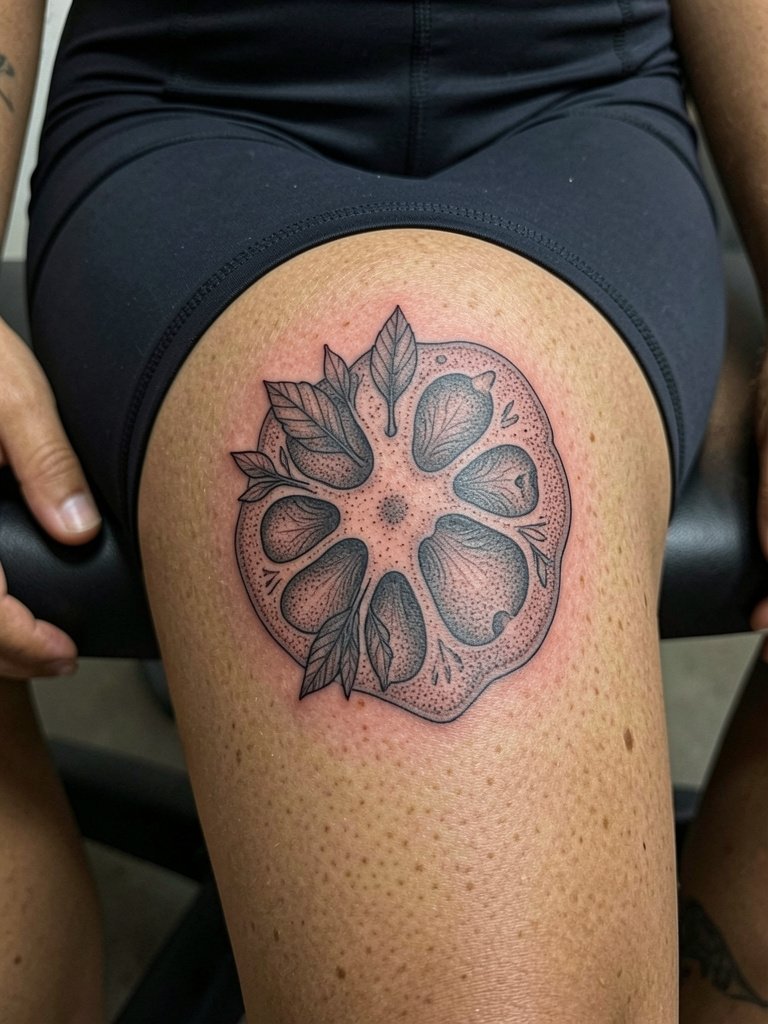
Inner-thigh botanicals can be very private pieces that age well due to lower sun exposure. They need careful placement away from the groin line. A mistake is requesting extremely fine stipple at a tiny scale; stipple needs breathing room to age best. For sessions wear modest shorts that allow access without shifting fabric. Expect moderate pain and a two to three session timeline depending on coverage.
19. Graphic Neck Band
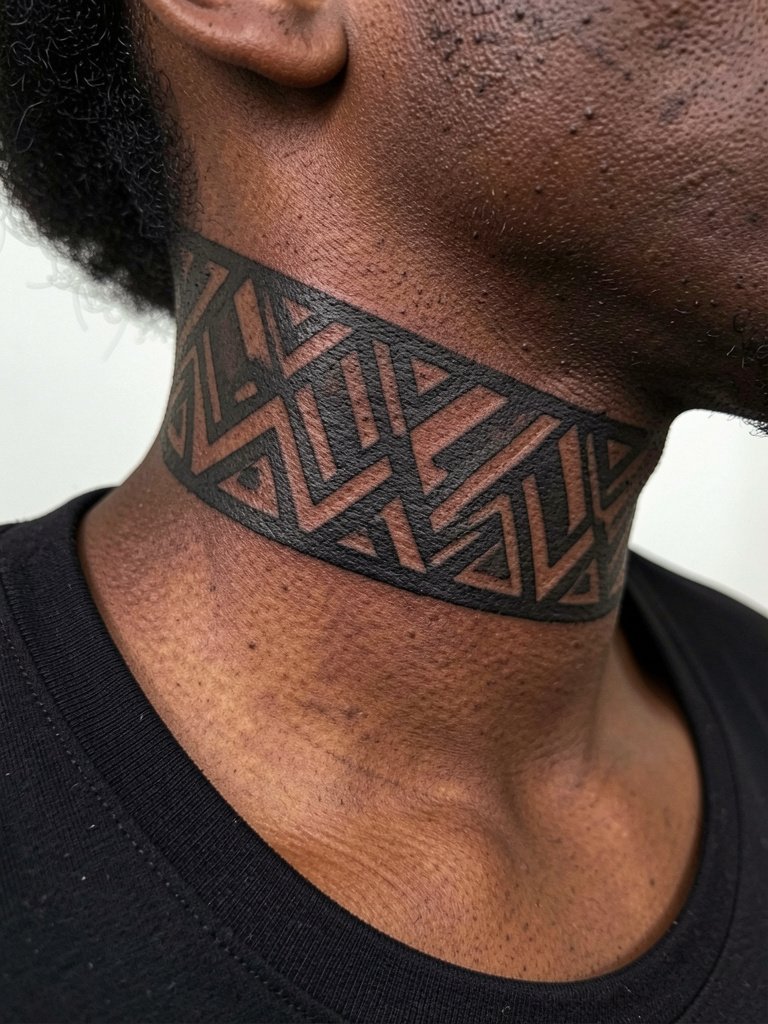
Neck tattoos require careful thinking about professional considerations since visibility affects some workplaces. This placement is sharp for bold black bands rather than thin script. A big mistake is assuming ultra-thin linework reads consistently on the neck; it often softens. Choose an artist experienced with lateral-neck tension. For showing off, pair with backless tops or open collars.
20. Macro-Realism Chest Panel
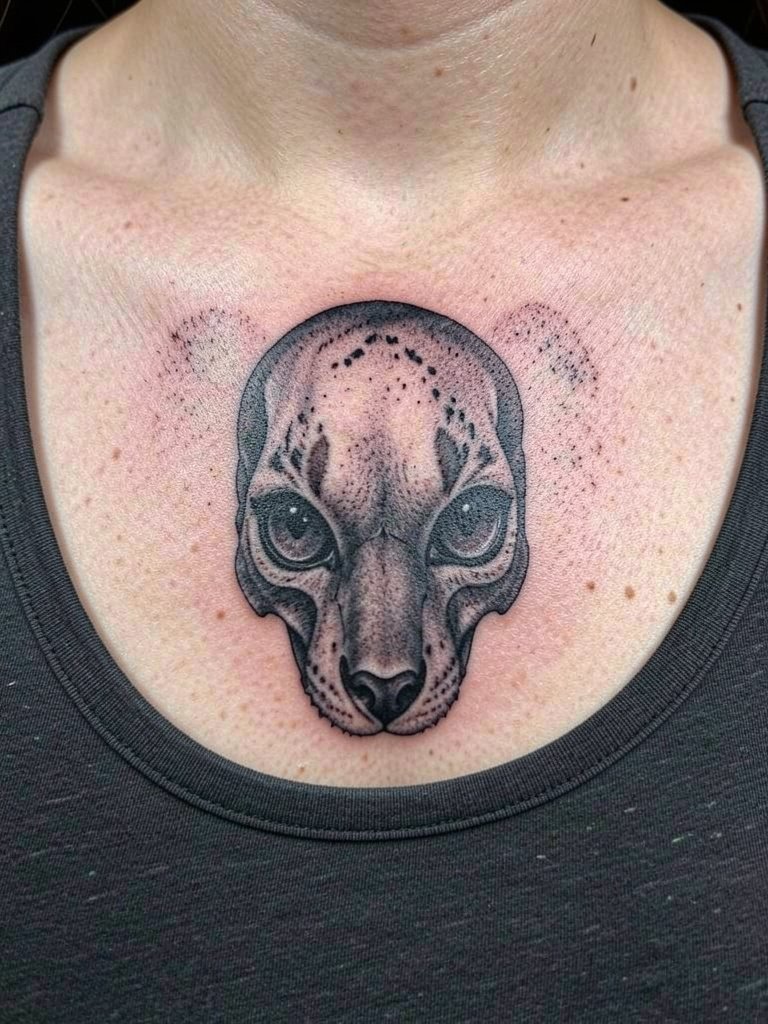
Large chest panels behave like canvases but require planning for movement and breath. Expect multi-session work and a touch-up timeline at around two to three years for high-contrast areas. A common error is placing extreme detail too close to the sternum center where healing differs. Wear a low-cut top for the session and plan layered chains to frame the artwork when dressed up.
21. Data-Mapped Spine Column
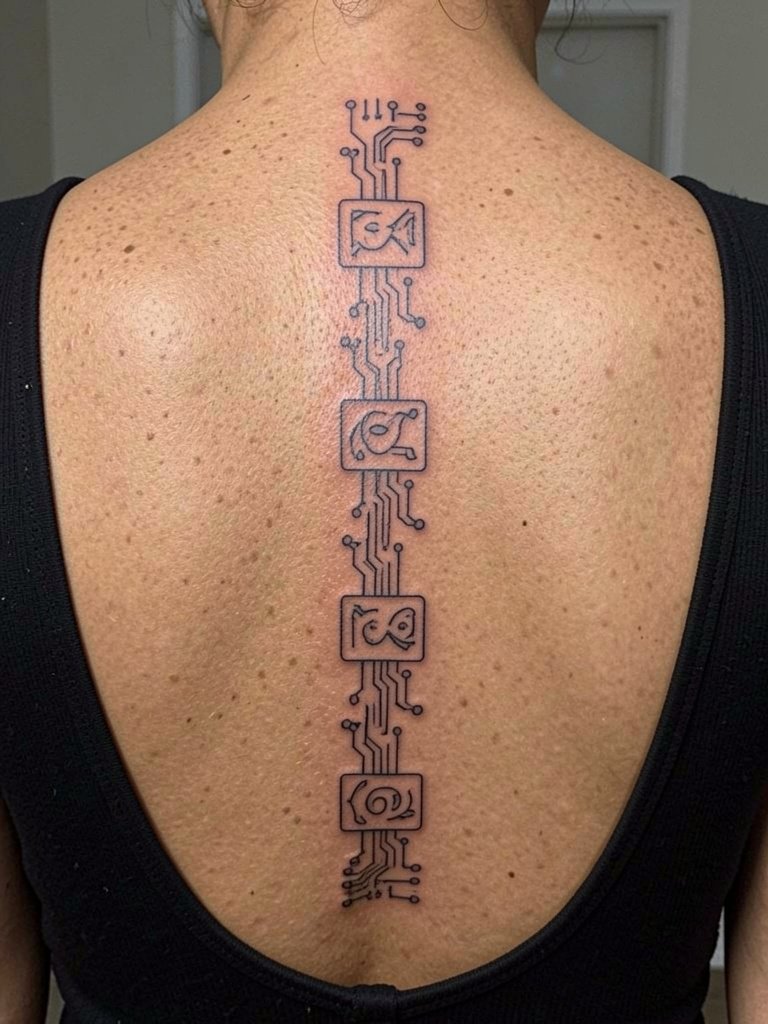
Spine work is dramatic but needs an artist comfortable with long vertical symmetry. The spine's healing is different near the vertebrae, so ask for shifted shading plans that account for movement. A common mistake is overloading tiny glyphs into a narrow strip; they become unreadable. For display a backless top works best; for sessions choose a drop-back garment for access.
22. Graphic Panel Upper Back
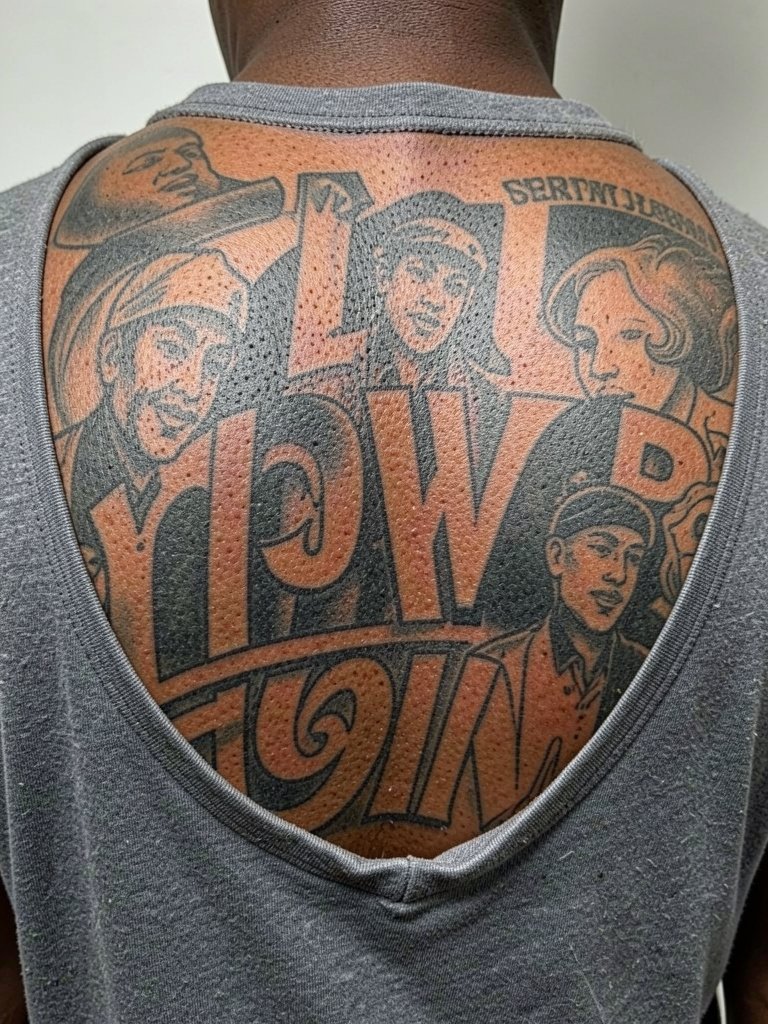
Upper-back panels allow for bigger scale and stronger storytelling through panels and negative space. Expect multiple sessions and plan for a unifying palette if combining different visual languages. Mistakes include mixing too many color temperatures without a unifying tone. Backless tops show off large panels best.
23. Tiny Knotwork Finger Piece
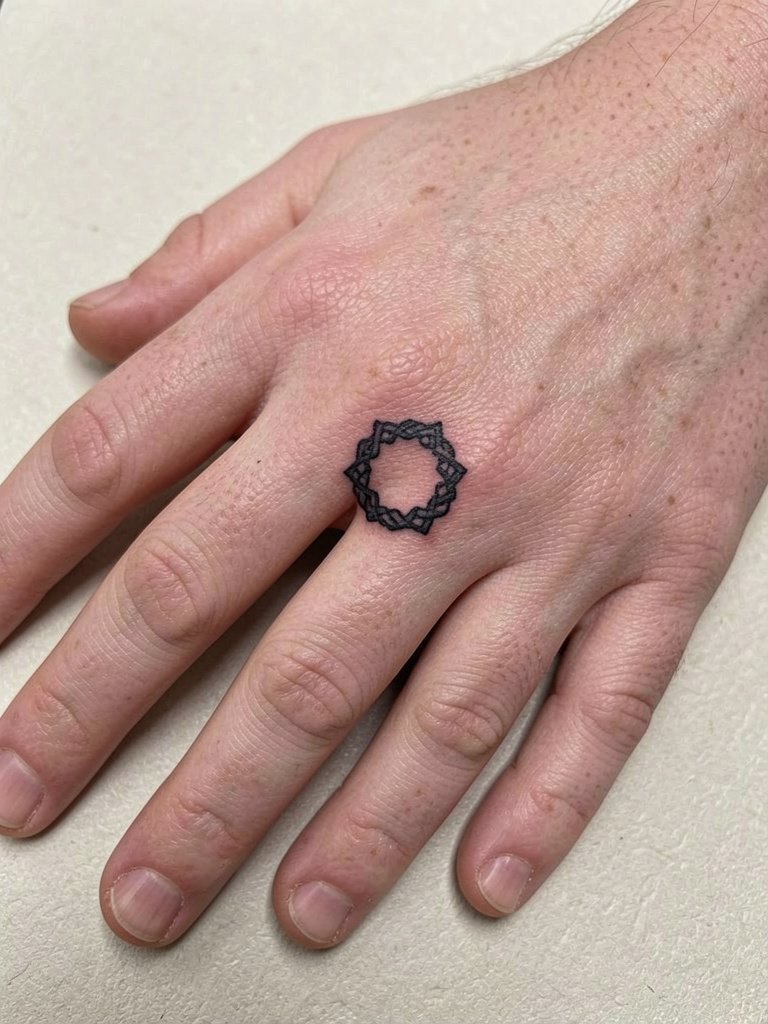
Finger tattoos take constant abrasion and hand washing into account. Tiny knotwork looks great at first but needs a thicker line weight than expected to last beyond a year. A common mistake is asking for single-needle filigree on fingers. For the session remove rings and avoid wearing them for several weeks after. A minimalist watch on the opposite wrist balances the look.
24. Botanical Calf Wrap
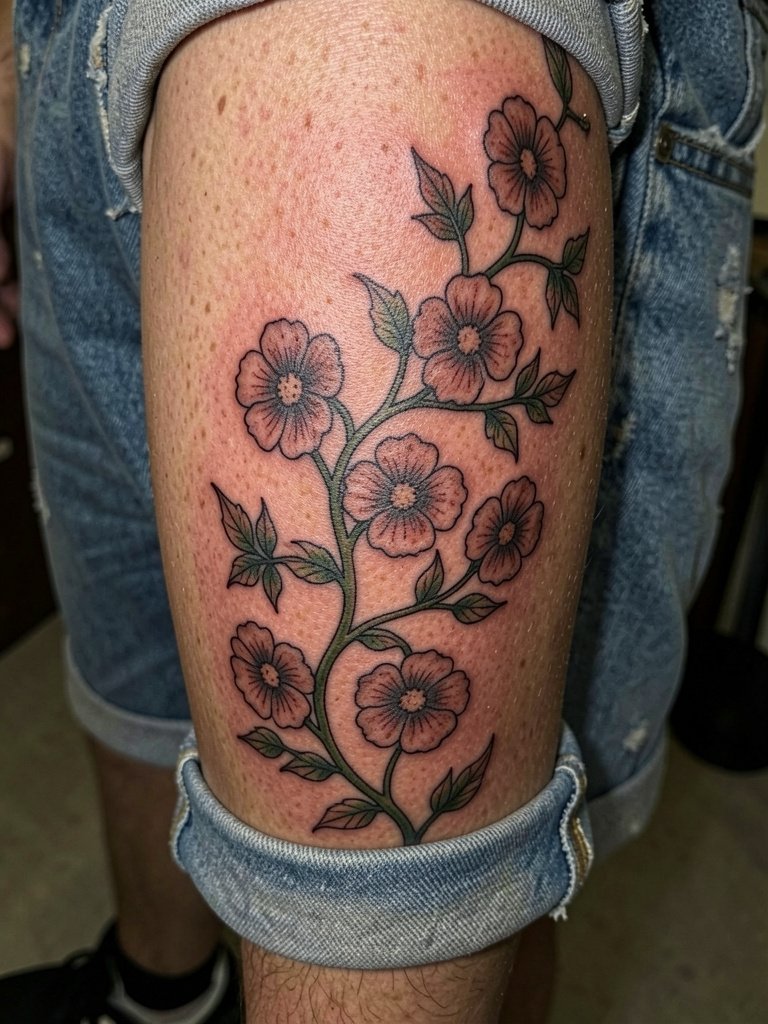
Calf wraps give a narrative flow and tolerate heavier shading. The outer calf holds up well and ages predictably. A mistake is placing too many overlapping dark fills that heat the area; spacing keeps the wrap readable over time. For display wear cropped, flowy pants and thin ankle bracelets on the opposite leg like thin ankle bracelet.
25. Retro-Glitch Sternum Accent
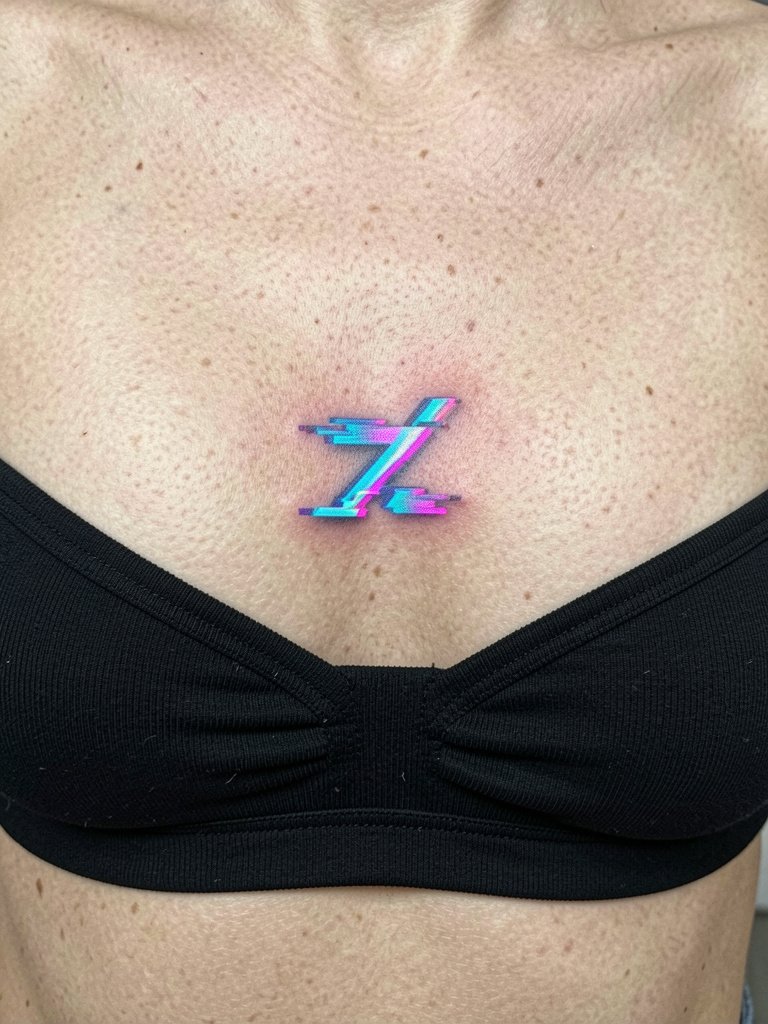
Sternum accents are intimate and visible with low-cut clothing. Chromatic aberration and neon accents are eye-catching but can require touch-ups earlier than blackwork. A typical mistake is expecting high neon pop without planning for sun exposure and pigment migration. For sessions bring strapless garments and expect a specialist who understands sternum anatomy.
Frequently Asked Questions
Q: How do I find artists and portfolios for surreal tattoos without naming artists directly?
A: Search hashtags like #surrealtattoo, #fluidtattoo, #biomechsurreal on Instagram and TikTok while filtering by location. Use Tattoodo, Booksy, or the Inked App to search keyword combinations such as "micro-realism surreal" and view healed portfolio examples. Reddit threads on r/tattoos and r/surrealart are useful for peer recommendations and healed shots across different skin tones.
Q: Will fine-line work on ribs blur quickly, and what's the debate about that?
A: Artists split into two camps about fine line on ribs. One camp says ribs stretch and move enough that ultra-fine single-needle work blurs into grey smudges within a couple of years. The other camp argues that with slightly wider spacing and correct depth the lines can settle clean, and they point to long-term healed examples to support that view. Decide based on how much maintenance you want and whether you prefer bolder spacing up front.
Q: Is numbing cream okay for long surreal sessions, or does it harm the final result?
A: Opinions divide clearly. Some providers say numbing cream is a legitimate comfort tool that lets clients finish lengthy sessions and reduces anxiety for complex surreal pieces. Others warn that numbing agents can alter skin texture and, if overused, might affect ink absorption and healing. If you expect a marathon session, ask for specific application timing and a minimal dose plan so the artist can adapt technique.
Q: How should I plan touch-ups for fine-line micro-realism and fluid watercolor styles?
A: Treat fine-line and watercolor-style pieces as candidates for touch-ups every 18 months to three years depending on placement and sun exposure. Fluid abstract pieces on ribs and hip often need re-saturation sooner than micro-realism on forearms. Discuss a realistic touch-up timeline with your artist and schedule a follow-up 12 months after the final session to assess retention.
Q: What should I wear to the studio for different placements like ribs, sternum, or inner thigh?
A: For ribs and hip wear loose, button-down tops or drawstring pants that you can lower without disrobing. For sternum bring a strapless or low-cut top that leaves the area exposed without needing fabric shifted. For inner thigh wear modest shorts that let the artist access the medial thigh without tugging. As an example, drawstring linen pants make rib access simple: loungewear drawstring pants.
Q: How do I make a surreal design read well on darker skin tones?
A: High-contrast blackwork and saturated colors like deep red, orange, and cobalt blue show best on melanated skin. Pastels and very thin single-needle grey washes often disappear in photos and in person. Ask for healed examples from the artist on a range of tones and plan bolder primary lines or denser saturation where needed.
The article ends here.
