
The smallest St Patrick's Day motifs are the ones that confuse beginners most, because tiny shamrocks and micro-lettering often look crisp in the chair and blurry a year later. Bold silhouettes, smart spacing, and slightly heavier linework tend to keep their shape through summer festivals and daily wear. These 23 lucky designs balance longevity and personality so you can celebrate green now and still enjoy the healed result years from today.
1. Minimalist Shamrock on Inner Wrist
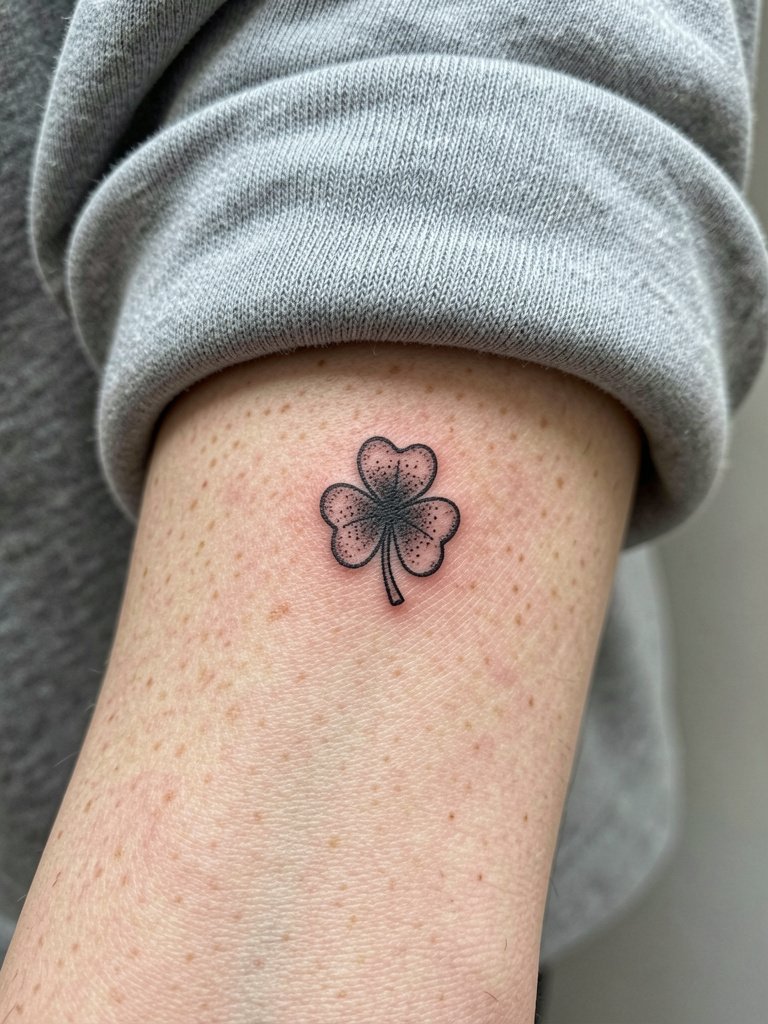
This tiny wrist shamrock is a classic for visibility and subtlety. I recommend making the leaves slightly larger than typical micro reference images so the three lobes keep separation as the skin moves over time. The session usually takes 20 to 35 minutes and feels like surface scratching rather than deep work. For a clean long-term result, ask for slightly heavier linework and stipple shading rather than micro-strokes that blur by year two. This piece pairs well with a slim rolling bracelet that sits above the tattoo without rubbing it. Expect a touch-up around year two for single-needle pieces on the wrist.
2. Four-Leaf Miniature Behind the Ear
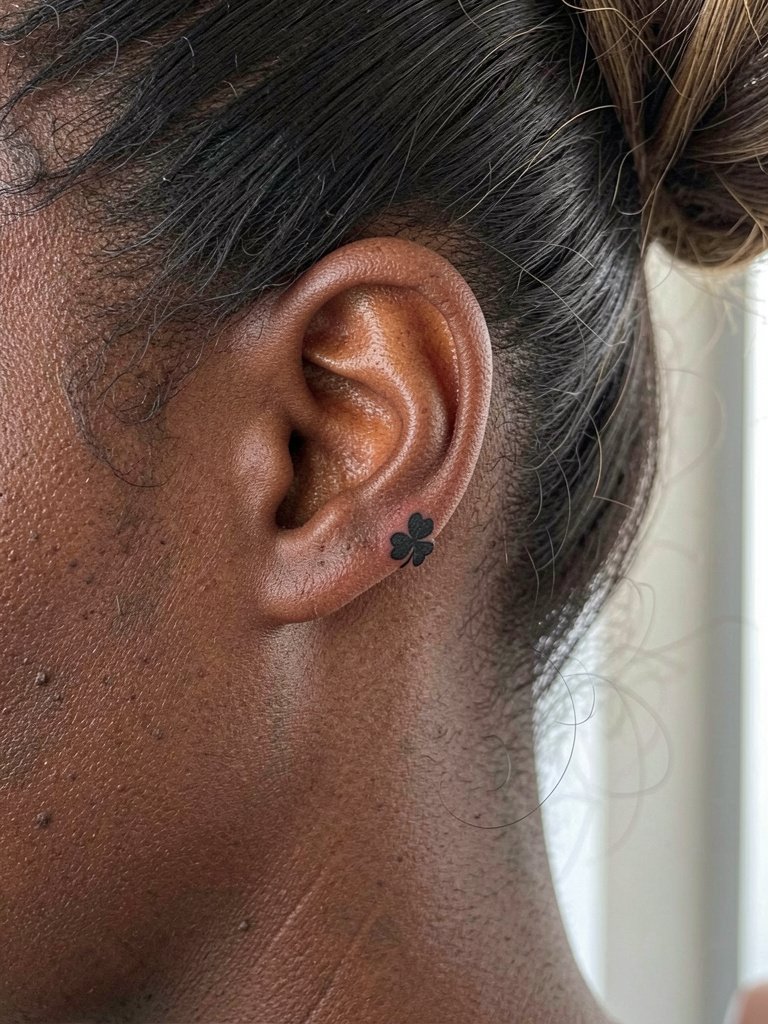
Tiny work behind the ear reads like a secret piece that only shows when hair is up. The area heals fast, but the skin is thin so single-needle detail will soften. I usually suggest a compact silhouette rather than tiny interior veins and shimmer because fewer interior lines mean less risk of smudging. Session time is short and the sensation is sharp but brief. Style this with small hoop earrings and a neat updo on show nights, and try a silk scrunchie to avoid friction while it settles. Pros who tattoo ears recommend precise spacing over micro-ornamentation.
3. Celtic Knot Micro on the Side of Finger
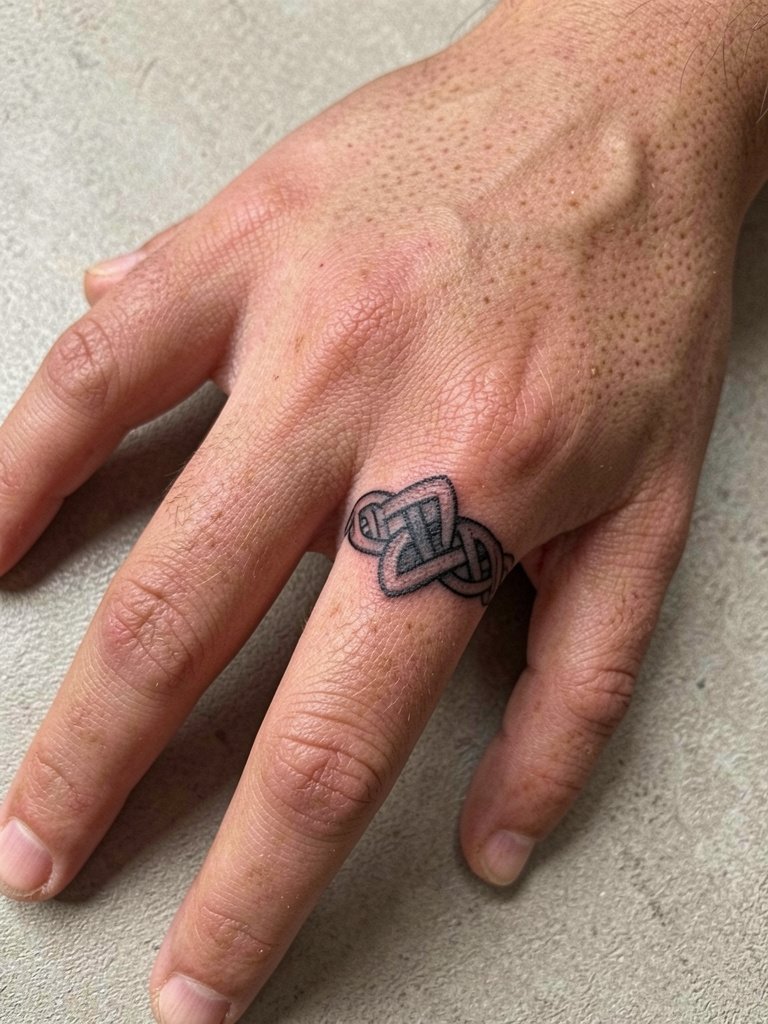
Finger pieces age differently than forearm work because skin on digits moves and gets washed constantly. For a knot on the side of a finger I suggest bold negative space and slightly thicker lines so the pattern keeps its contrast. The session is quick but painful in short bursts. A common mistake is insisting on hairline loops that disappear within months. If you want the design visible, plan on annual touch-ups for finger work. During the session wear a short-sleeve top so the artist has full access and bring a thin cotton glove for the ride home to avoid rubbing the fresh ink.
4. Lucky Horseshoe on Outer Calf
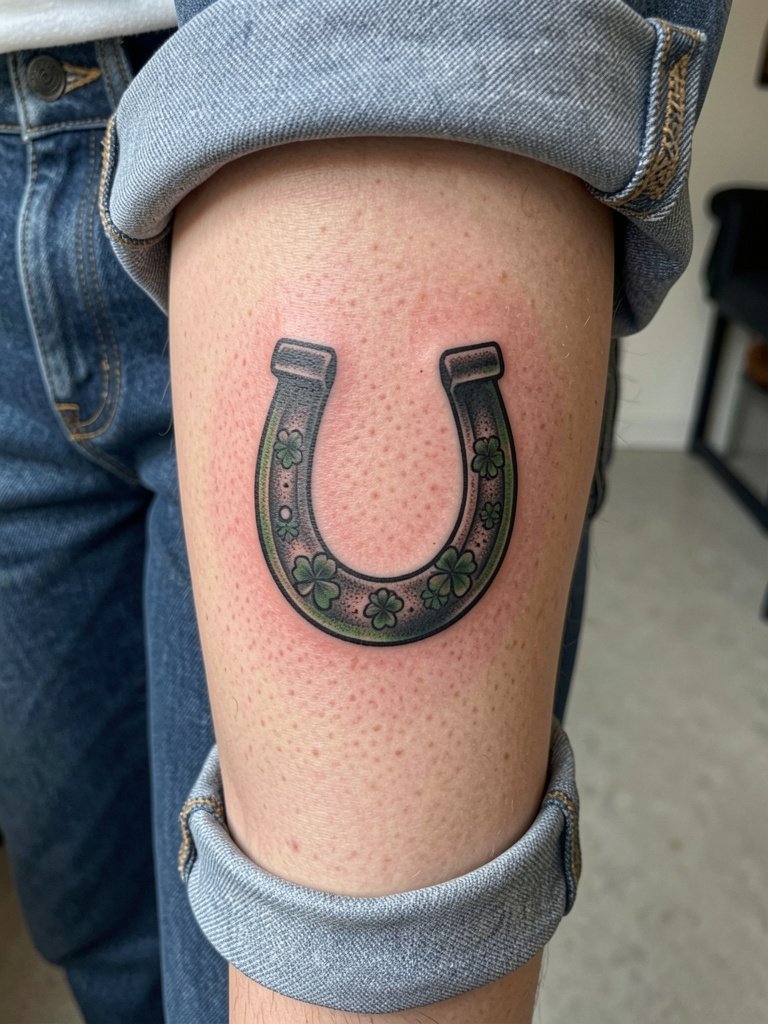
Outer calf is forgiving and great for bold lucky symbols that you want to show with shorts. The horseshoe reads from a distance because the outline is thick and the interior details are spaced. Sessions for this size run 45 to 90 minutes depending on fills. A mistake is adding tiny filigree inside the curve which looks muddy after a year. For show-off outfits pick cropped denim or midi skirts and pair the piece with mid-calf boots that frame the tattoo without covering it. Calf work tends to age well with only occasional touch-ups.
5. Dainty Pot of Gold on Ankle
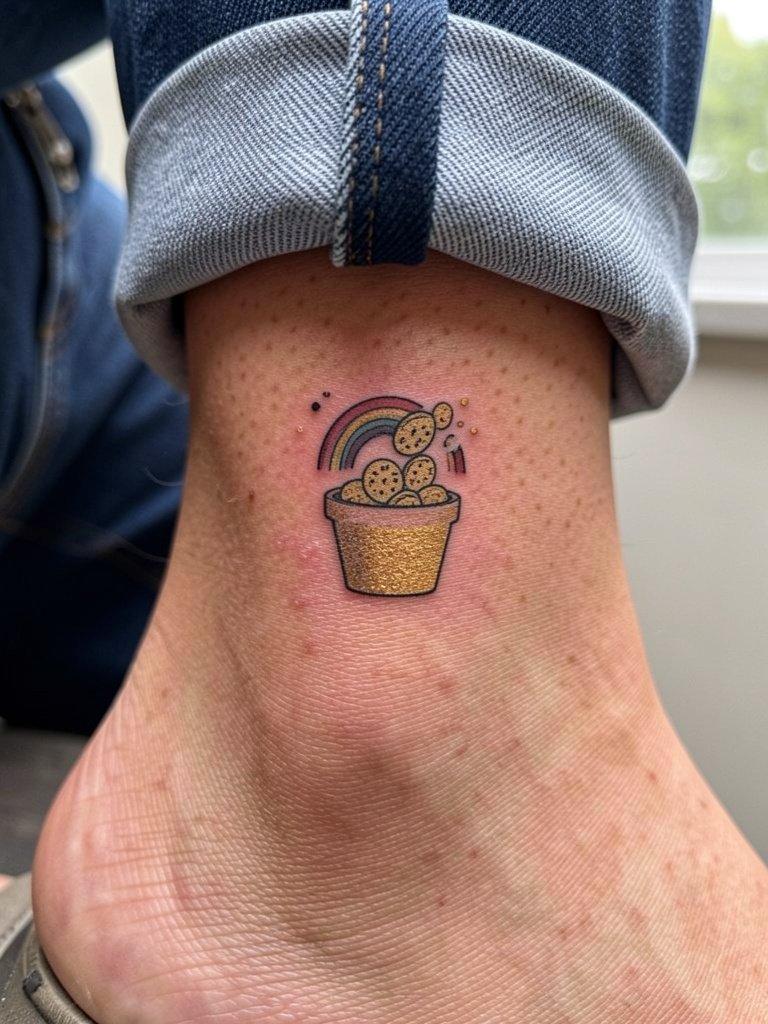
Ankle tattoos get a lot of friction from socks and shoes, so silhouettes beat tiny tonal detail here. I recommend a compact pot with bold rimlines and color blocks rather than micro coin engraving. Expect the session to be quick and mildly uncomfortable when the needle passes over bone. A common long-term issue is fading at the edges where shoe rubbing occurs. For weekend wear choose low-profile sneakers or sandals and consider a no-show sock pack to reduce churn during the first two weeks. Touch-ups at two years keep contrast bright on ankle placements.
6. Scripted “Luck” Along the Collarbone
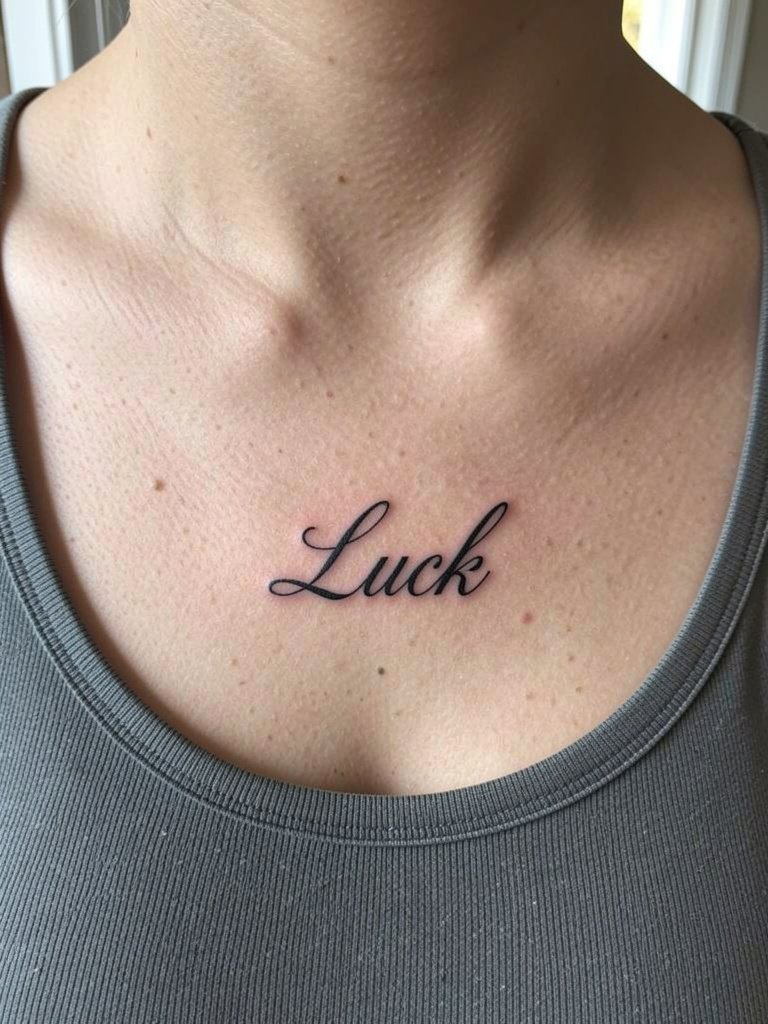
Collarbone script looks intimate and elegant, but fine single-needle letters need breathing room to avoid blurring into one another. I suggest spacing and slightly heavier downstrokes so the word keeps character after healing. The sternum area is more painful than the outer collarbone so expect a moderate pain level and a session of 30 to 50 minutes depending on size. A frequent error is trying to squeeze a long phrase into that narrow strip. For outfit pairing wear open-neck tops that show the line, like a v-neck linen blouse, which frames the word without rubbing it. If you plan layered necklaces, choose delicate chains that sit above the tattoo rather than across it.
Session Day Picks
The wrist, ankle, and collarbone pieces above have different access needs, so a few studio items cover the common placement challenges.
-
Disposable stencil transfer paper kit. Lets you preview placement on wrist and collarbone references before the first pass.
-
Silicone fingertip protectors. Useful when finger or ankle work risks excess rubbing during the first 48 hours.
-
Comfort neck pillow wrap. Supports the head and shoulders for collarbone sessions so you hold less tension.
-
Thin cotton travel towel. Soft barrier for chairs during longer calf or outer thigh sessions.
-
Aquaphor Healing Ointment. A mainstream option for early hydration that many people use for a short initial window after artists' first-day protocols.
7. Compact Claddagh on the Hand
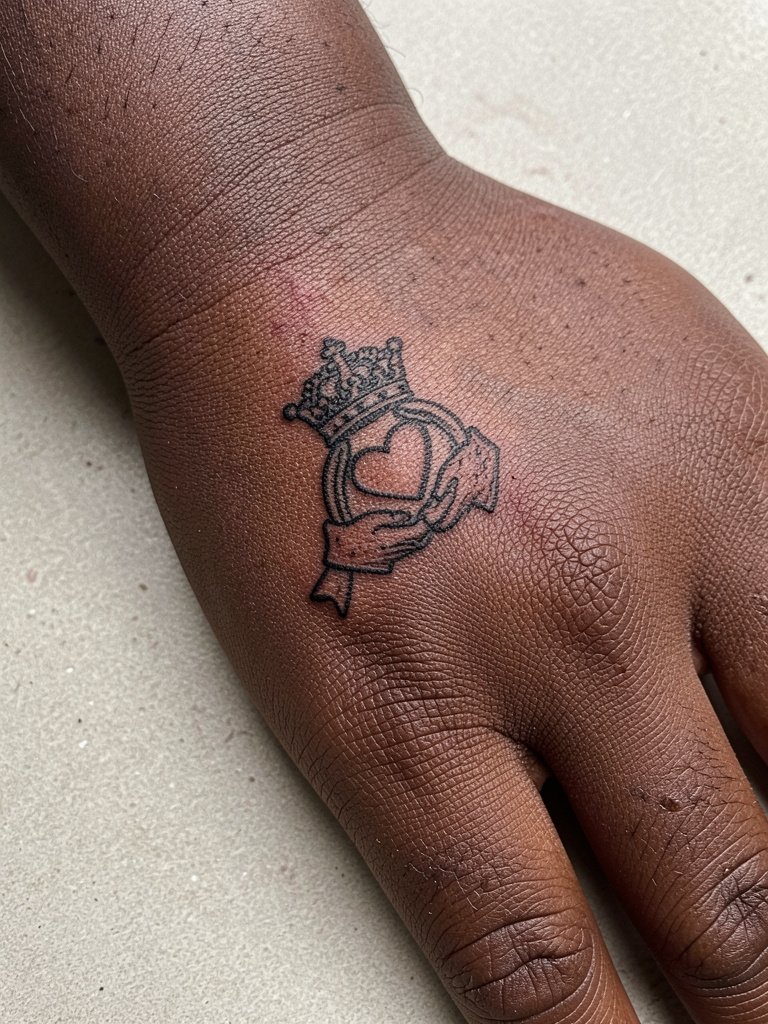
Hand tattoos are high maintenance because hands are washed and used constantly. For Claddagh work pick simplified shapes with negative space to keep the crown and heart readable over time. The session will be sharper on nerves, and healing needs careful protection to avoid ink loss. A common error is packing too many fine details that wash out after frequent handwashing. Wear a soft ring or bracelet that sits away from the design when it heals and consider a thin hand cream mitt to protect the area during the first week. Expect touch-ups sooner than on the torso.
8. Bold Celtic Cross on Upper Arm
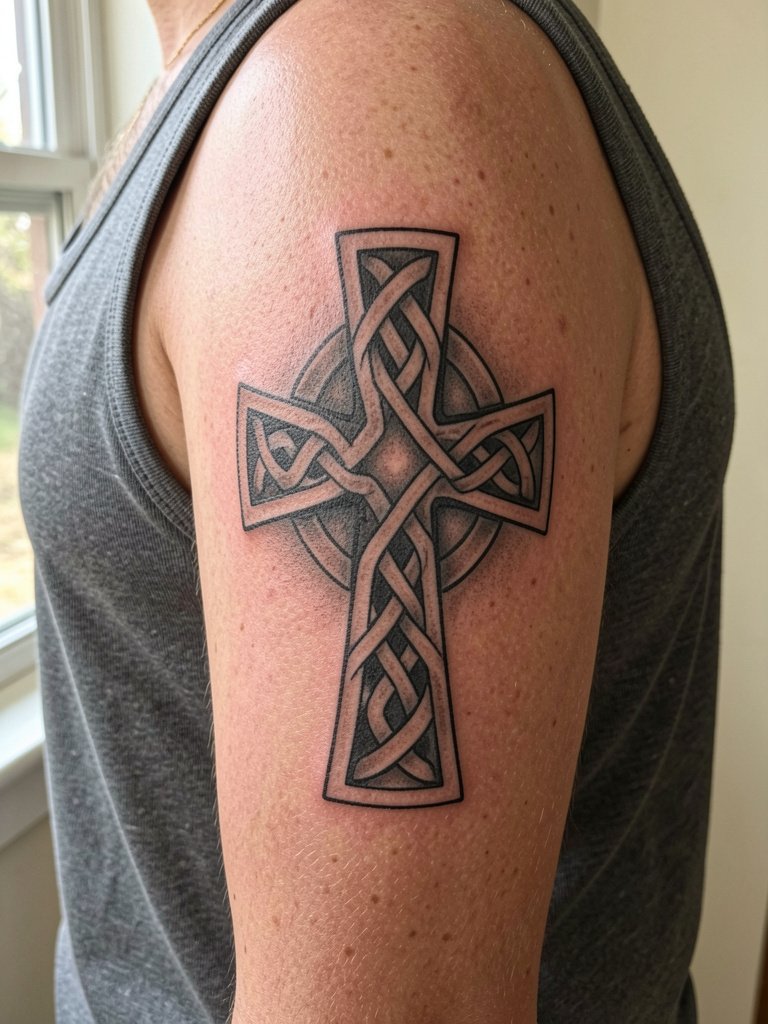
Outer upper arm is one of the most forgiving placements for detailed knotwork because there is space and less abrasion. For a cross keep the knot intersections bold and allow negative space to breathe. Sessions will run longer at this scale, often split into two visits for saturation. The typical mistake is underscaling the patterns, which causes lines to merge. For summer looks pair the arm work with a sleeveless linen shirt so the piece is visible without constant sun exposure. This placement ages well with minimal touch-up after good sunscreen use.
9. Rainbow Arc with Micro Dots on Inner Forearm
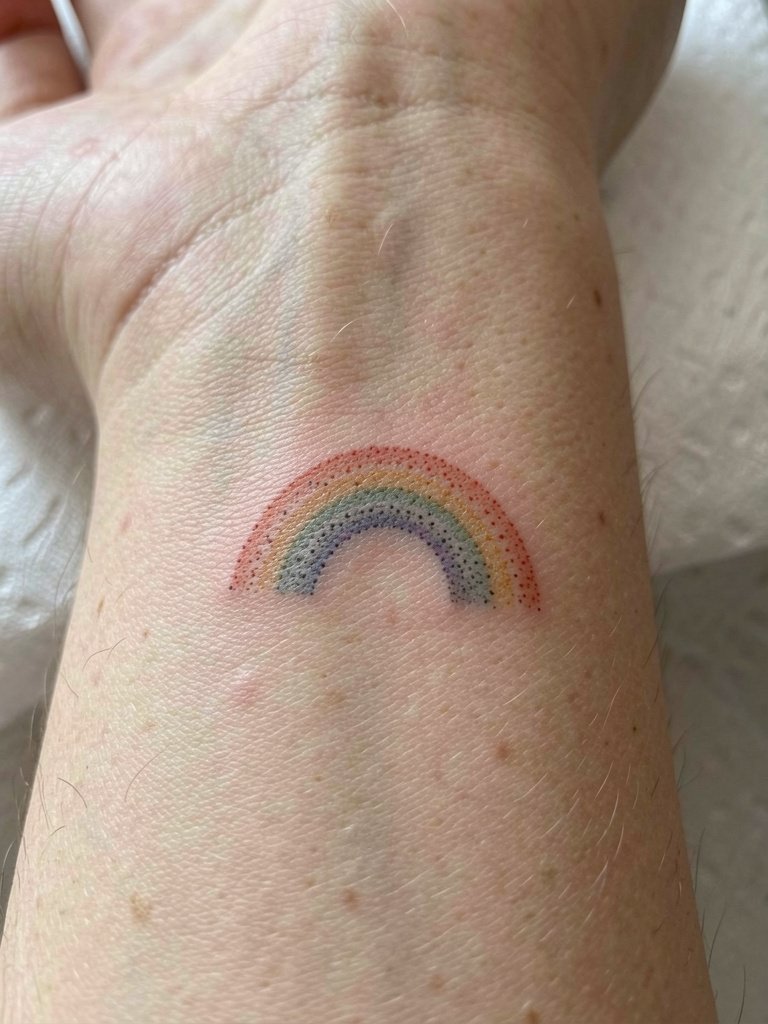
Inner forearm allows slightly more delicate work because the skin there holds fine detail better than fingers. Dotted rainbows in tiny stipple read well for a few years if the dots are not microscopic. I recommend spacing dots around the arc to create implied color rather than dense micro color fields that lose definition. Session time is moderate and tolerable for most clients. For outfits that show off the arc use short-sleeve tees or roll sleeves and try a lightweight denim jacket that frames rather than hides the design. Expect this kind of dot work to soften, and plan on a touch-up between years two and four.
10. Tiny Harp on the Upper Thigh
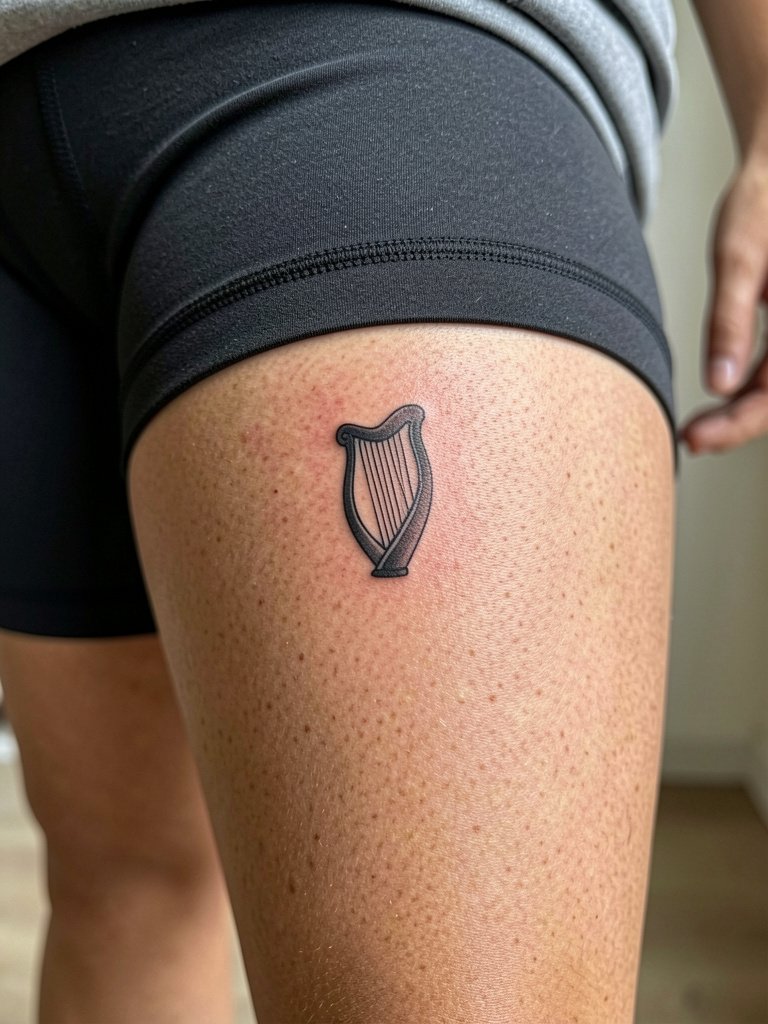
Upper thigh pieces are private and forgiving. The harp as a small banded motif benefits from slightly wider spacing between string lines so the design keeps clarity after movement. The session is comfortable because the muscle area is cushioned; expect 30 to 60 minutes. A common mistake is bringing micro-shading too close to the strings which leads to blur with time. For session wear pick loose shorts or skirts that allow the artist to work without stretching, and bring a high-waisted slip short for comfort after the session. Thigh tattoos usually require less frequent touch-ups.
11. Green Serpent Coil on the Side Torso
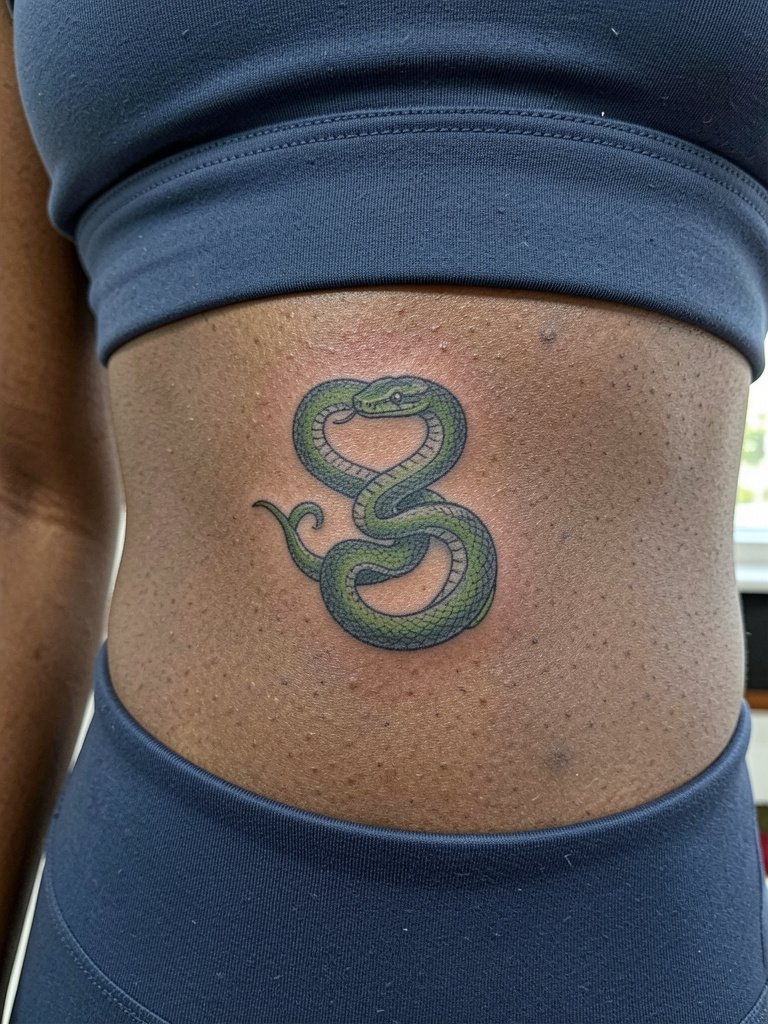
Ribcage pieces look dramatic but are among the more painful placements because the needle crosses thin tissue over bone. For a serpent, keep the coils bold with open negative space so the pattern reads even when the skin shifts. One camp argues fine line on ribs blurs quickly because of stretching and breathing motion. Another camp insists that with correct depth and slightly wider spacing, the lines can settle fine and show good three-year healed photos. Expect a longer session and plan for breaks. For show-off outfits pick cropped tops or wrap shirts; a scoop-front crop top works well and keeps fabric off the area while it heals.
12. Tiny Coin Stack at Inner Wrist
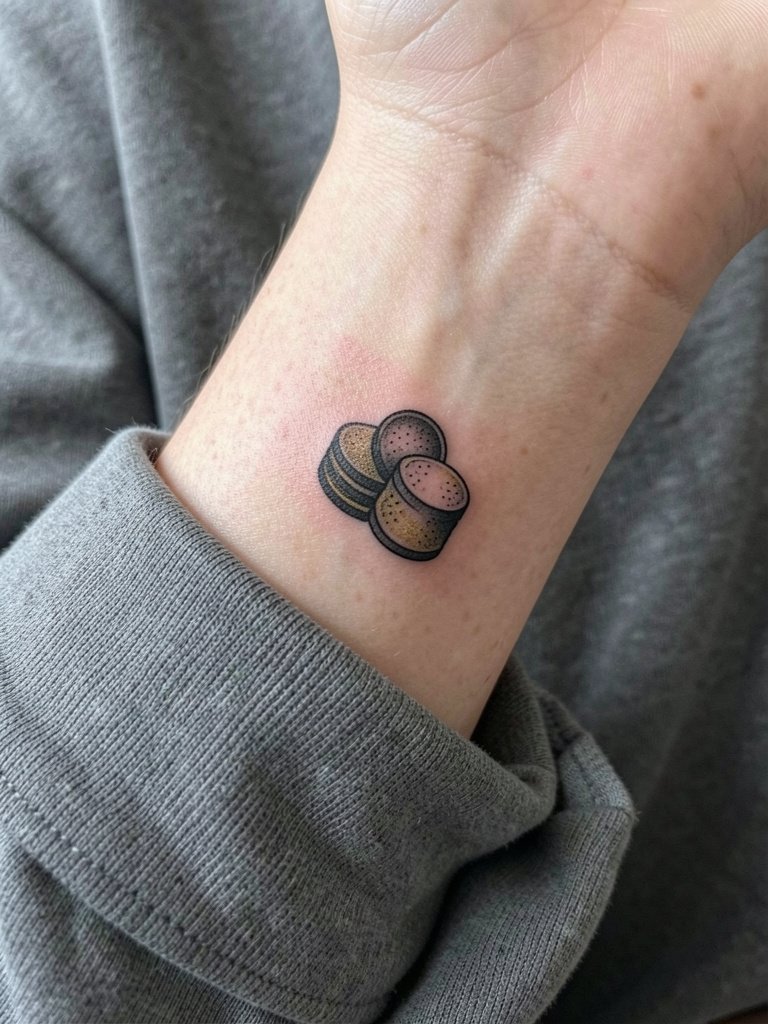
The inner wrist is visible but delicate, so coin stacks need clear edges and minimal internal embossing. I advise simple rims with one tiny highlight dot instead of detailed engravings. Sessions are quick but the area is sensitive. A common error is extensive shading which fades unevenly with wrist movement. For jewelry pairings choose thin watches or bracelets that sit above the ink and do not sit on top of it, such as a minimal leather watch strap. A touch-up at two years helps maintain edge clarity.
13. Small Lucky Charm Cluster on Shoulder Blade
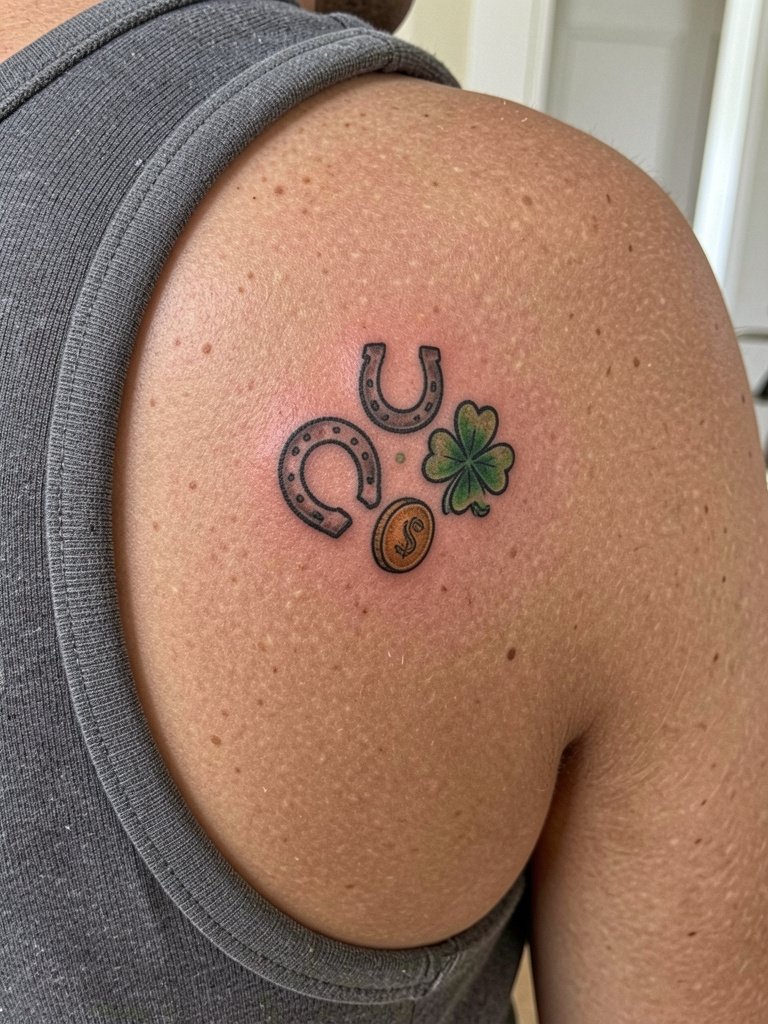
Shoulder blade clusters are ideal for mixing small lucky symbols without overcrowding. The flat back surface helps the pieces heal uniformly. I recommend spacing items with small negative gaps so each symbol reads on its own in five years. Sessions here are comfortable and you can usually complete a cluster in one visit. For wardrobe showing the piece use low-back tees or tank styles and choose a strappy bralette if you want a delicate frame that does not interfere with healing. This placement is low-risk for blowout.
14. Micro Shamrock Chain Around Ankle
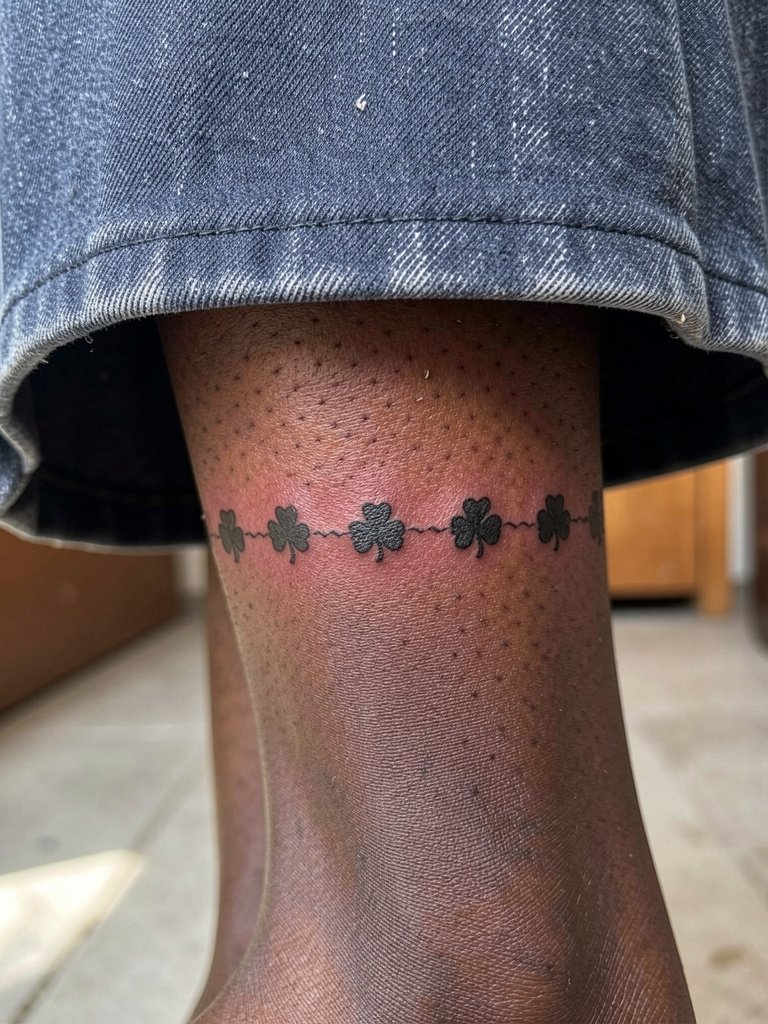
Ankle chainwork must account for frequent friction and washing. I suggest leaving slightly larger gaps between shamrocks and using modest line weight so the chain keeps its rhythm rather than merging. The session is short but sensitive over bone. Many people regret ultra-tiny motifs that vanish under socks and shoes. Style this with cropped pants or sandals and consider an adjustable anklet that sits above the line and does not rub the fresh ink. Plan for a touch-up if you wear closed shoes often.
15. Collared Clover Row on the Collarbone Ridge
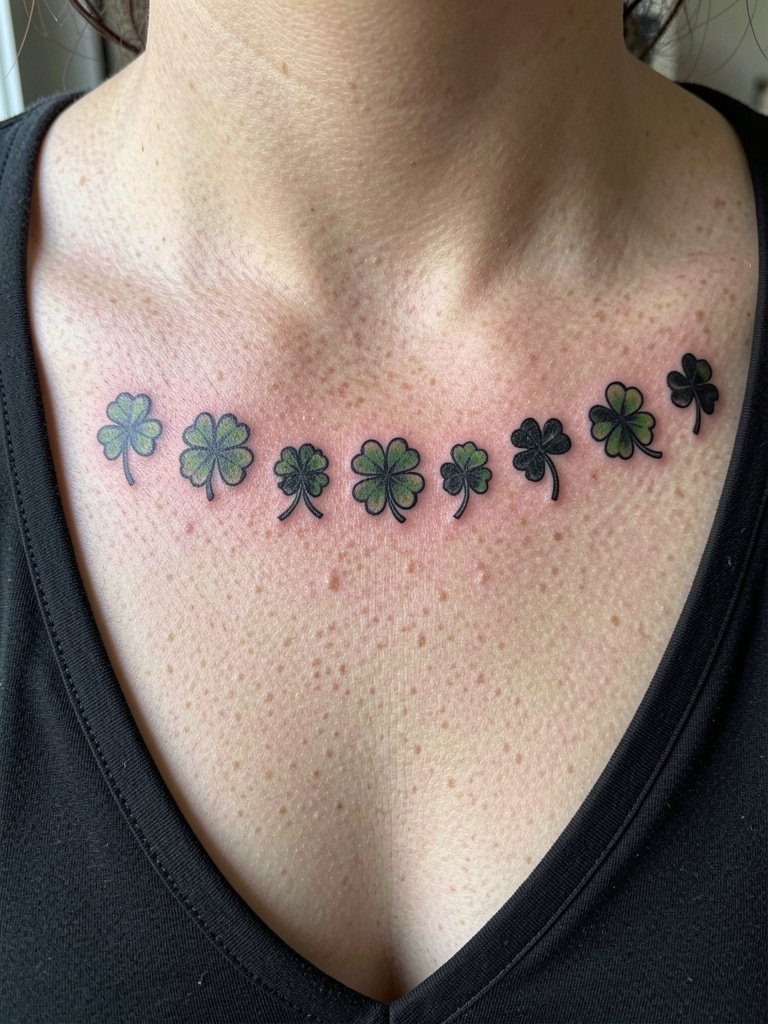
A linear row across the collarbone looks intentional when spacing is measured. Keep each clover slightly larger than micro size and allow gaps for breathability. Expect a moderate session and sensitivity when the needle passes the bone. The common mistake is compressing too many clovers into a short span, which causes blurring and loss of individuality. For evening outfits choose scoop or v-neck styles that frame the ridge and use a delicate choker that sits above the ink rather than across it. Collarbone tattoo longevity depends on sun protection.
16. Whip-Shaded Celtic Band on Upper Arm
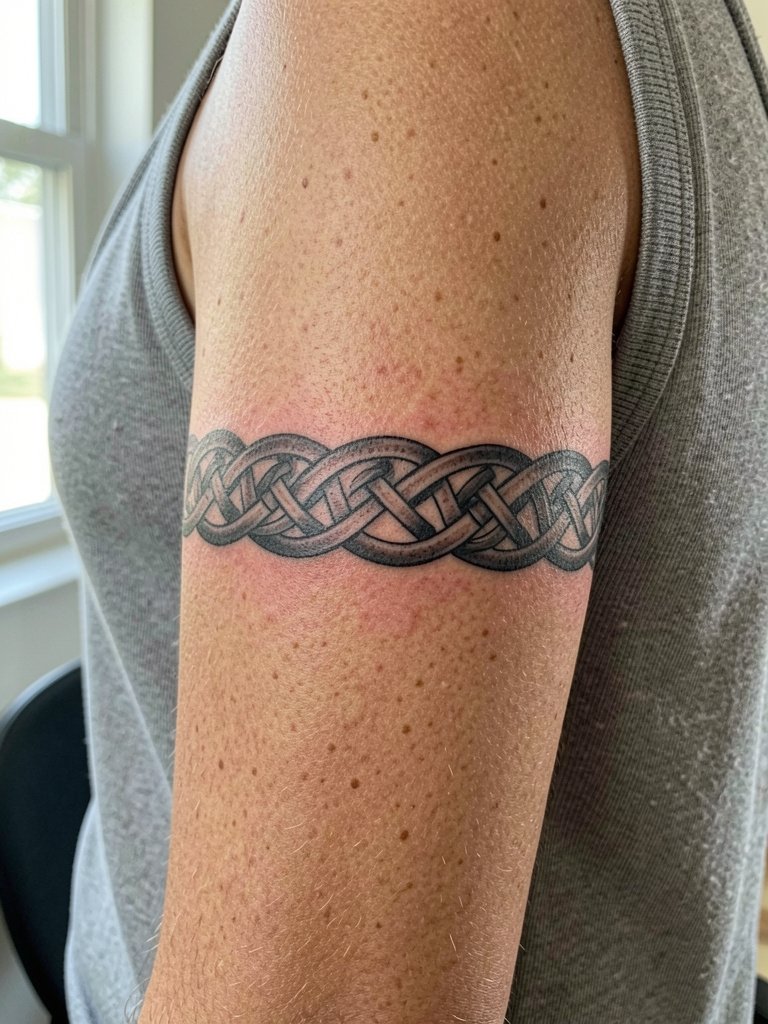
Band work benefits from consistent line weight and whip-shading that complements the roundness of the arm. I recommend moderate spacing inside the knot to avoid compression when the muscle flexes. These sessions can be done in one to two hours. A real mistake is forcing ultra-fine detail into a circumferential design which leads to early merging. For casual looks wear short sleeves or rolled cuffs and try a fitted jersey tee that lets the band show without stretching or pressing on it. Bands on the upper arm usually need touch-ups only after several years.
17. Petite Shamrock on the Thumb Web
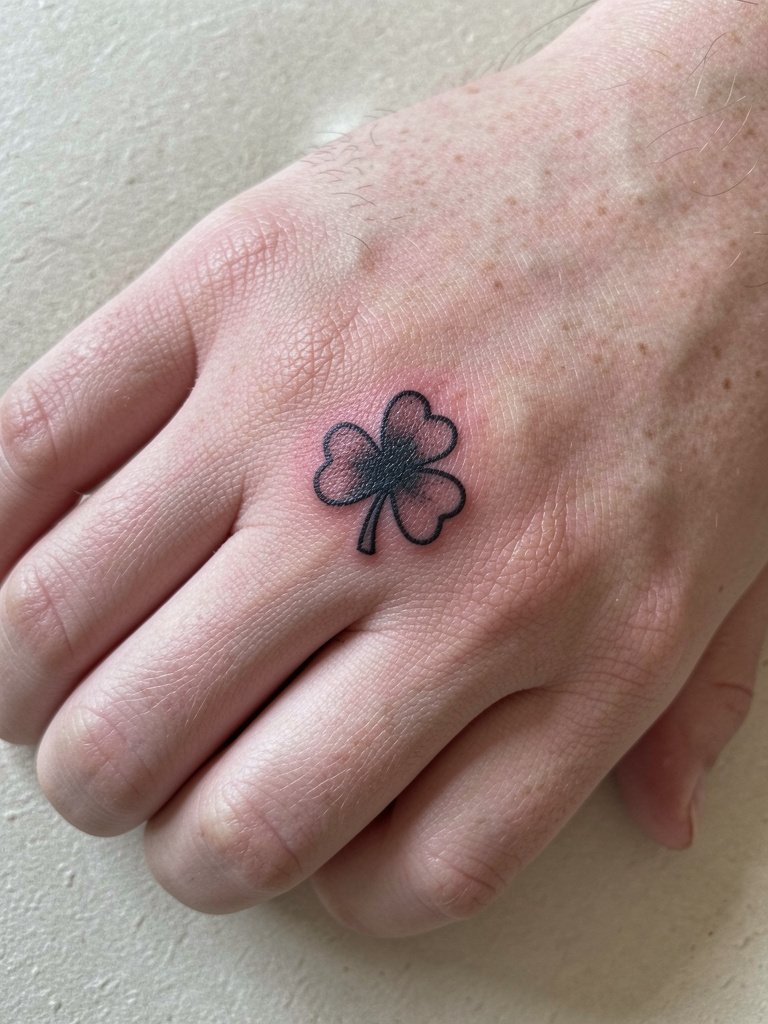
Thumb web tattoos are playful and discreet but subject to heavy friction from phone use and handwashing. Use bold simple shapes to maintain readability. The needleing feels sharp and the area swells quickly. People often request filigree here and then lose most detail within months. For showing the piece pick tops with short sleeves and consider a thin silicone hand band during the first week to reduce rubbing. Expect more frequent touch-ups than forearm pieces.
18. Ribcage Mosaic Knotwork Panel
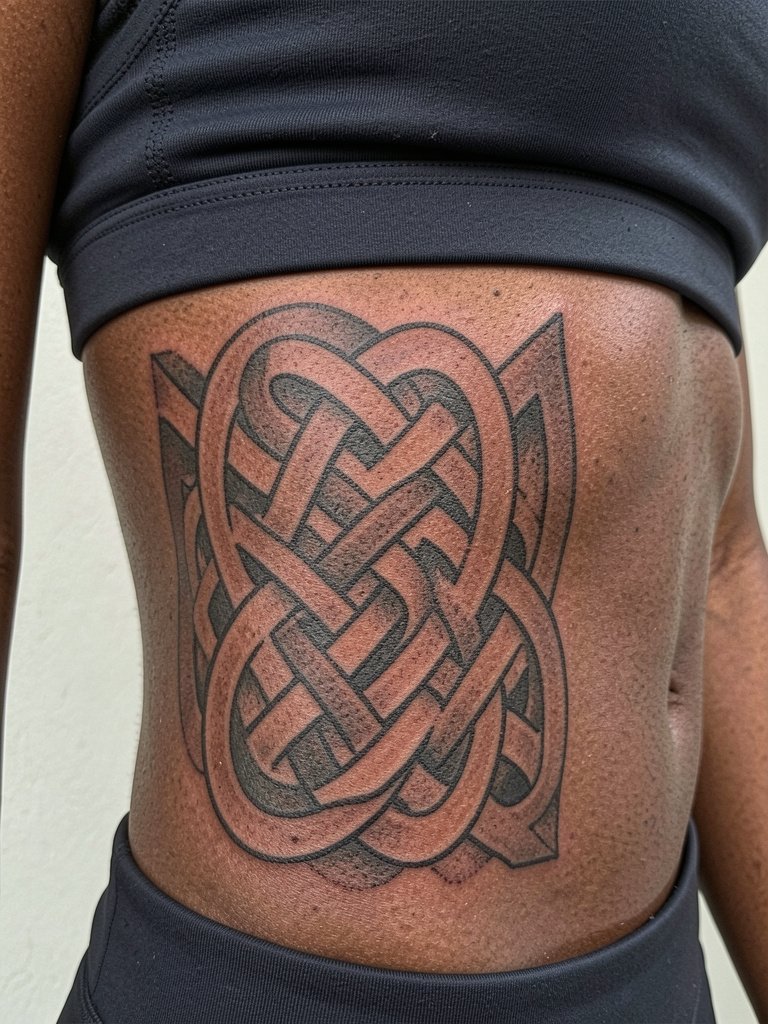
Large rib panels make a statement but require planning for breathing motion. One camp believes intricate fine line knotwork on ribs blurs because the skin expands and contracts with respiration. The opposing camp maintains that with slightly increased spacing between knots and depth control, the pattern can remain crisp for years. Both positions are valid and the safer path is to slightly upscale line weight and test a small section before committing to ultra-fine fill. Sessions are long and often split. Bring loose clothing for the ride home and wear a soft cropped tee so nothing rubs the area.
19. Micro Green Leaf Trio on the Nape
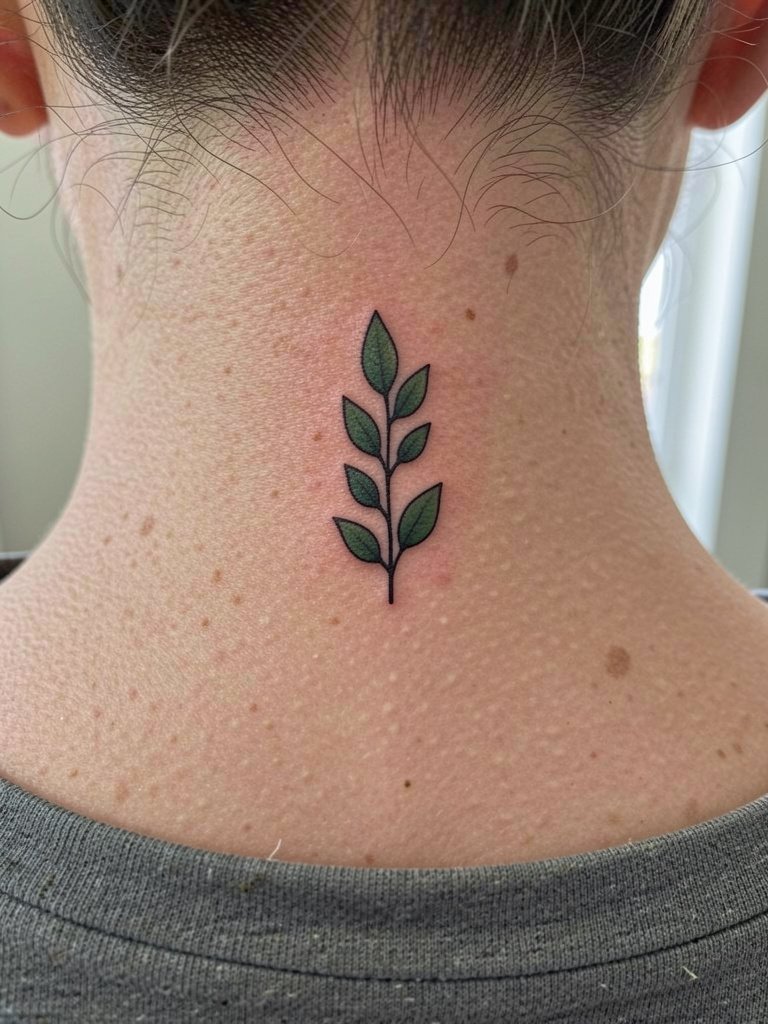
Nape tattoos hide well under hair but can be irritated by collars and hats. Keep leaf stems simple and avoid micro veins. The area is moderately sensitive and heals with little swelling when protected. A mistake is over-detailing in such a small vertical field which softens quickly. For styling choose updos or scoop-neck tops to reveal the nape when you want to show it, and consider a lightweight hair claw for clean exposure. Nape work benefits from periodic sun protection.
20. Coin Toss Minimalism on the Calf Outer Edge
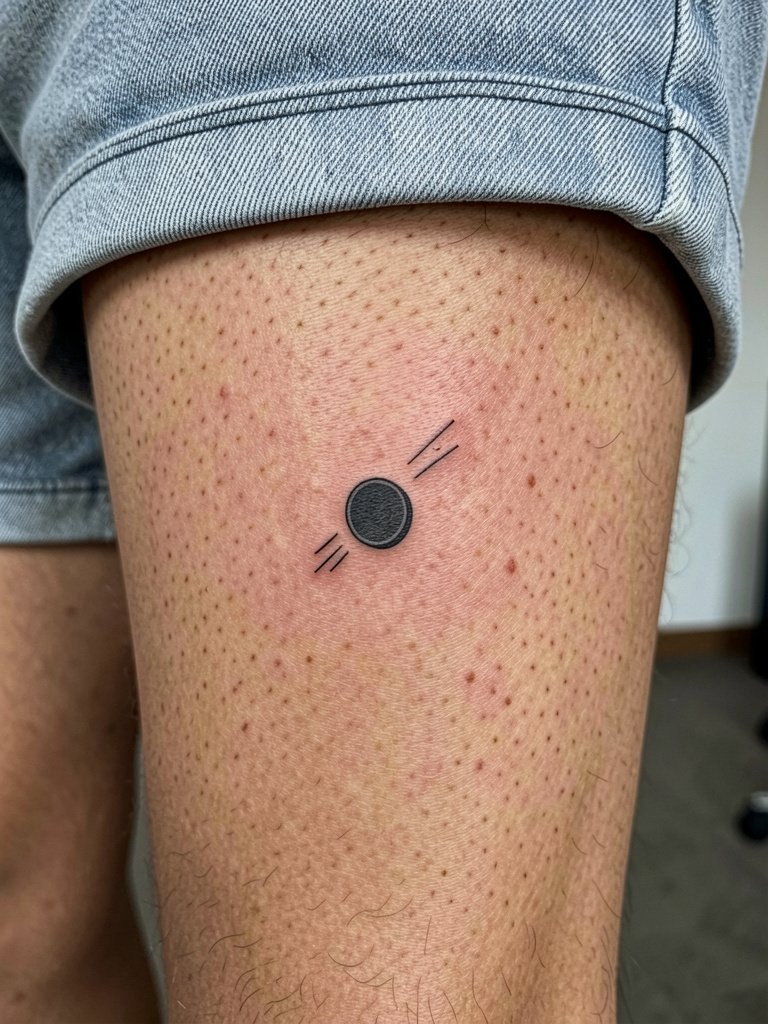
A single coin mid-toss reads as motion at a glance. Keep the coin outline solid and motion lines sparse so the piece remains legible after activity and sun exposure. Calf placement tolerates a range of sizes and is low-pain. The most common error is adding too many motion marks that blur into a smudge. For visible presentation wear shorts or cropped joggers and a pair of low-profile sneakers that do not rub the area. Calf pieces are among the easiest to maintain.
21. Small Harp Locket on the Sternum
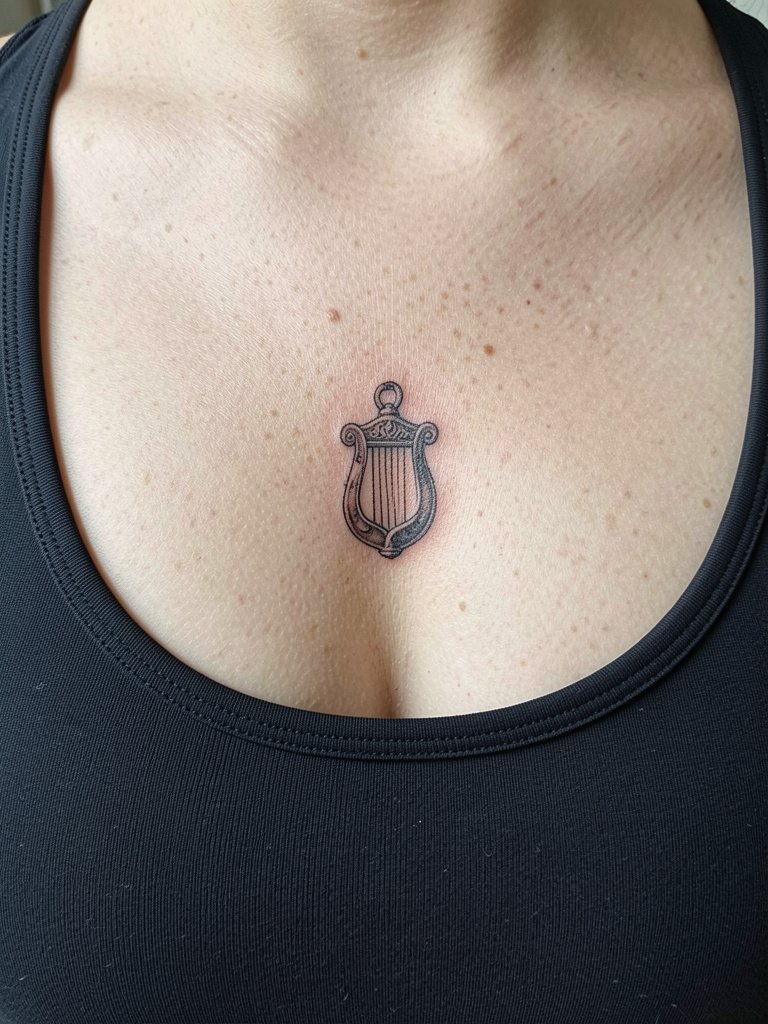
Sternum pieces are intimate and sensitive. The skin there moves with breathing and the area benefits from slightly bolder downstrokes to retain clarity. Sessions can be intense for some, so expect breaks and a slightly longer appointment. Many people ask for thin locket chains that later fade into fine lines; avoid tiny chain links across the sternum. For recovery wear supportive but non-binding tops, such as a soft bralette that does not press on the fresh ink. Sternum work requires experienced handling for even saturation.
22. Knotwork Pocket on the Hip Bone
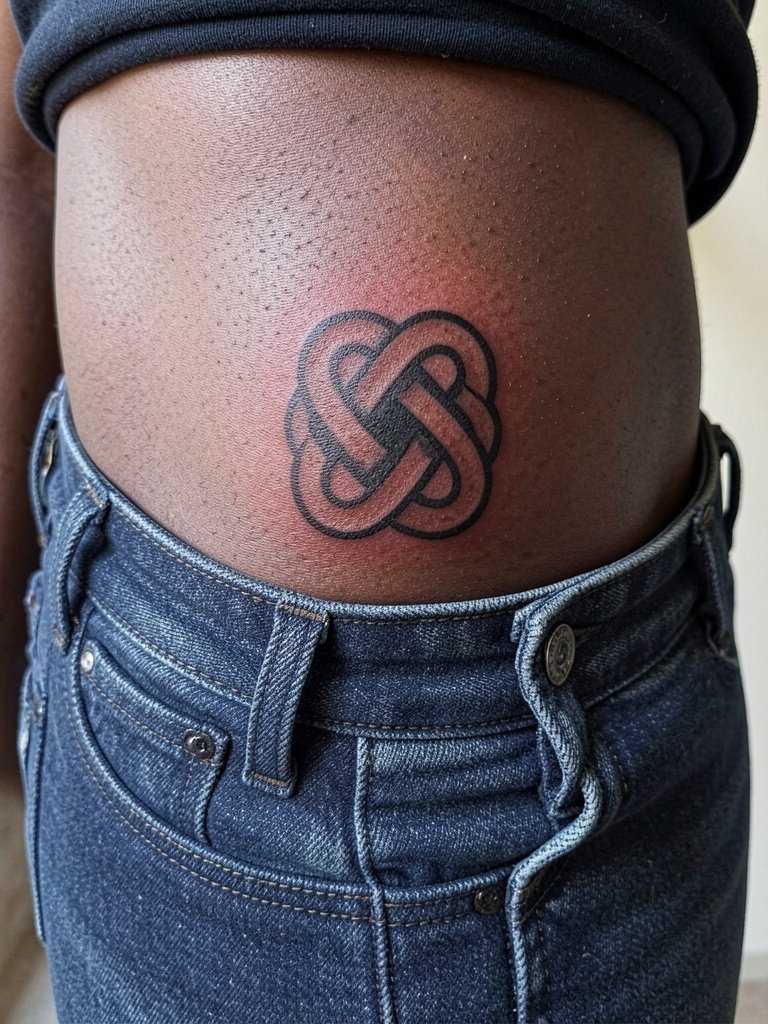
Hip pocket motifs can be sensual without being exposed constantly. The bone-proximate area tolerates bold lines better than filigree. A common mistake is placing too much tiny detail close to the waistband which gets rubbed by clothing. Sessions are comfortable for most and healing is usually uneventful if you avoid tight waistbands during the first week. For outfits that show the design, low-rise skirts or high-cut swim bottoms work well and you might bring a soft waist scarf to frame the area gently. Hip knotwork holds with sun protection.
23. Trio of Lucky Dots on Inner Arm
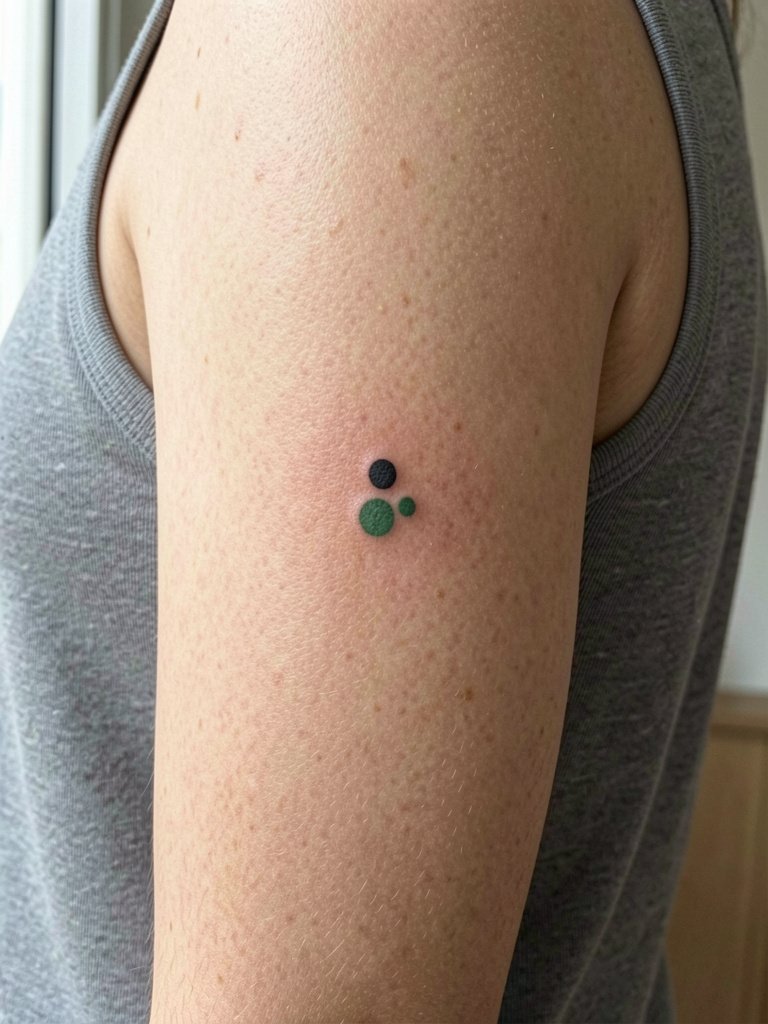
A simple dot trio is low-key and ages well because there is little detail to blur. Inner arm placement protects the motifs from sun and external abrasion. Sessions are quick and low to moderate in pain. People sometimes try to squeeze micro symbols next to the dots which defeats the minimal intention. For showing the trio wear rolled sleeves and choose a lightweight linen shirt that sits above the ink without rubbing it. Inner arm spots rarely need frequent touch-ups.
Frequently Asked Questions
Q: How do I find healed St Patrick's Day style portfolios without naming artists directly?
A: Search platform tags and portfolio sites using keywords like "Irish knotwork healed," "small shamrock healed," and "Celtic blackwork healed" with location filters. Use short-form video filters on social platforms to view time-lapse or healed shots and look for consistent photo lighting that shows skin texture. Reddit threads and community galleries often have cross-skin-tone examples that help you compare healed outcomes.
Q: Will fine-line shamrocks on fingers last, or should I choose bolder lines?
A: Fingers and digit skin move and face frequent washing, so very fine single-needle shamrocks will likely fade sooner and need touch-ups. If you want fewer visits, choose slightly thicker lineweight and negative space so the shape stays readable. Expect a possible touch-up within a year for finger placements.
Q: Are Celtic designs cultural appropriation, and how should I approach origin sensitivity?
A: There are two sides to this conversation. One camp says wearing Celtic knotwork without understanding its cultural history risks trivializing traditions and recommends learning the symbol meanings first. The other camp sees modern interpretation and personal connection as valid when you show respect through research and proper attribution. If the design has cultural origin, consider asking for simplified or abstracted elements and mention provenance in your consultation so the piece honors the source.
Q: What should I wear to a ribcage or sternum session to make things easier?
A: For ribcage work wear a fitted cropped top or sports bra that sits below the rib area and does not need adjusting during the session. For sternum pieces choose a soft bralette or cropped athletic top that the artist can work around without you moving or pulling fabric. Bring a loose hoodie to wear home so nothing rubs the fresh ink.
Q: How often will these lucky tattoos need touch-ups based on placement?
A: Touch-up cadence depends on placement and daily exposure. High-friction zones like fingers and hands often need annual or biennial top-ups. Forearm, calf, and upper arm work usually holds for several years before a touch-up. I have seen inner arm and shoulder blade pieces go five plus years with minimal attention when protected from the sun.
