
A lot of people chase the tiniest designs on Pinterest and then wonder why the lines blurred inside a year. Fine single-needle script and micro flowers look perfect up close the day you leave the shop, but they behave differently across placements and skin types. Read on for compact designs that keep their clarity, what to ask about line weight, and which wardrobe choices actually help the tattoo read in photos.
1. Fine Line Daisy on Inner Forearm
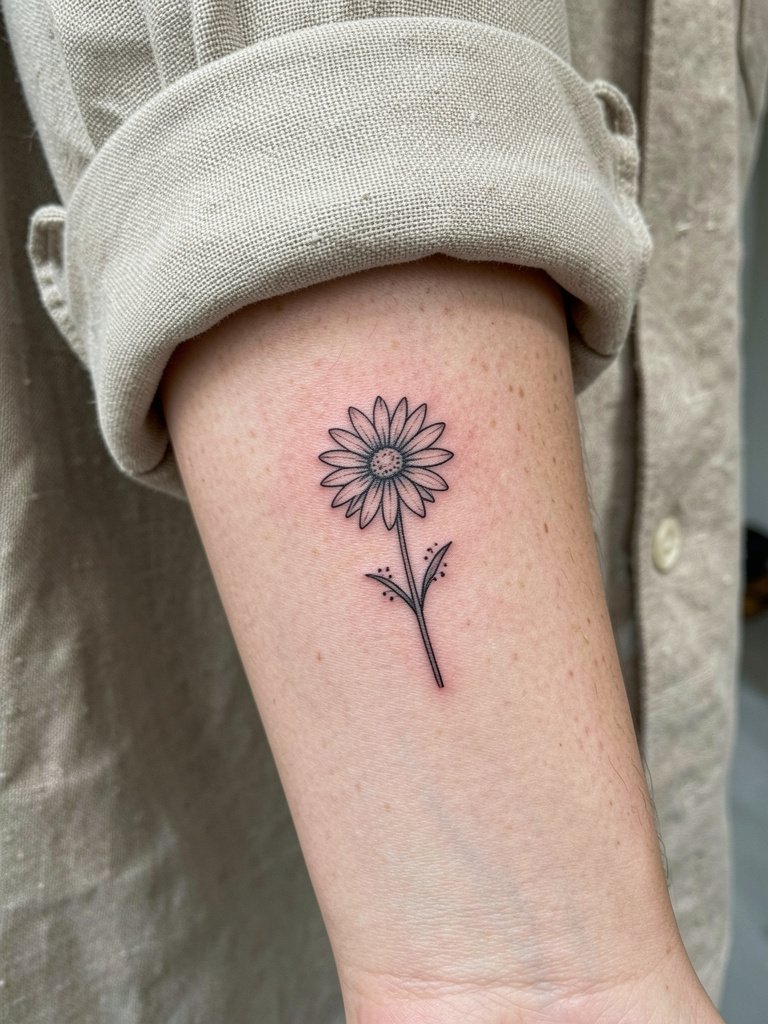
A tiny daisy reads like a calm accent on the inner forearm and works well for first-timers who want low commitment. For longevity pick slightly heavier single-needle spacing so the petals do not blend at year two. Discuss line weight and spacing with your artist by showing two reference photos at different scales so they can map out how the petals will read at 15 versus 25 millimeters. Expect low pain and a 20–30 minute session. Common mistake is asking for ultra-fine petals that the forearm's movement will blur. For showing it off, roll up a linen button-down in cream or olive.
2. Tiny Book Outline on the Wrist
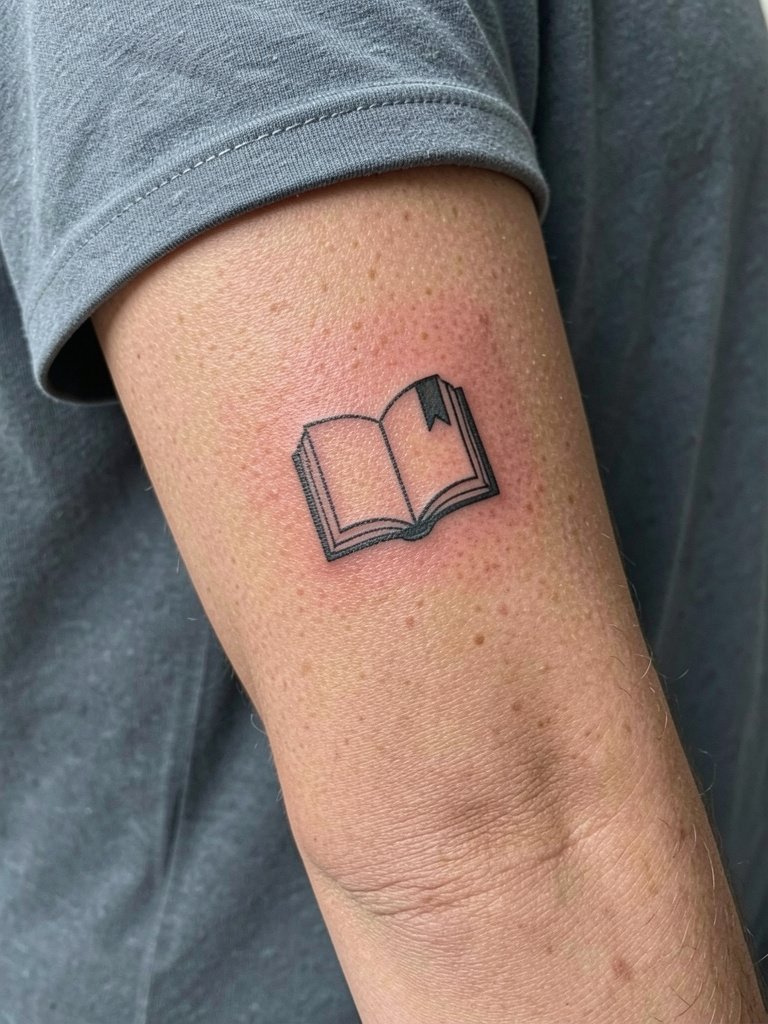
A tiny book outline is perfect for readers who want a discreet nod to literature without text. The wrist is a high-movement area so ask for a slightly bolder outline than the Pinterest reference so the covers stay crisp at two years. Bring a photo of the exact page shape and ask the artist to mock up how it reads at 12 millimeters and 20 millimeters. Expect a short 15–25 minute session and a likely touch-up window at 12–18 months for very thin inks. To frame the wrist, pair the piece with a thin chain bracelet set on the opposite hand.
3. “I Am Enough” Script on Inner Upper Arm
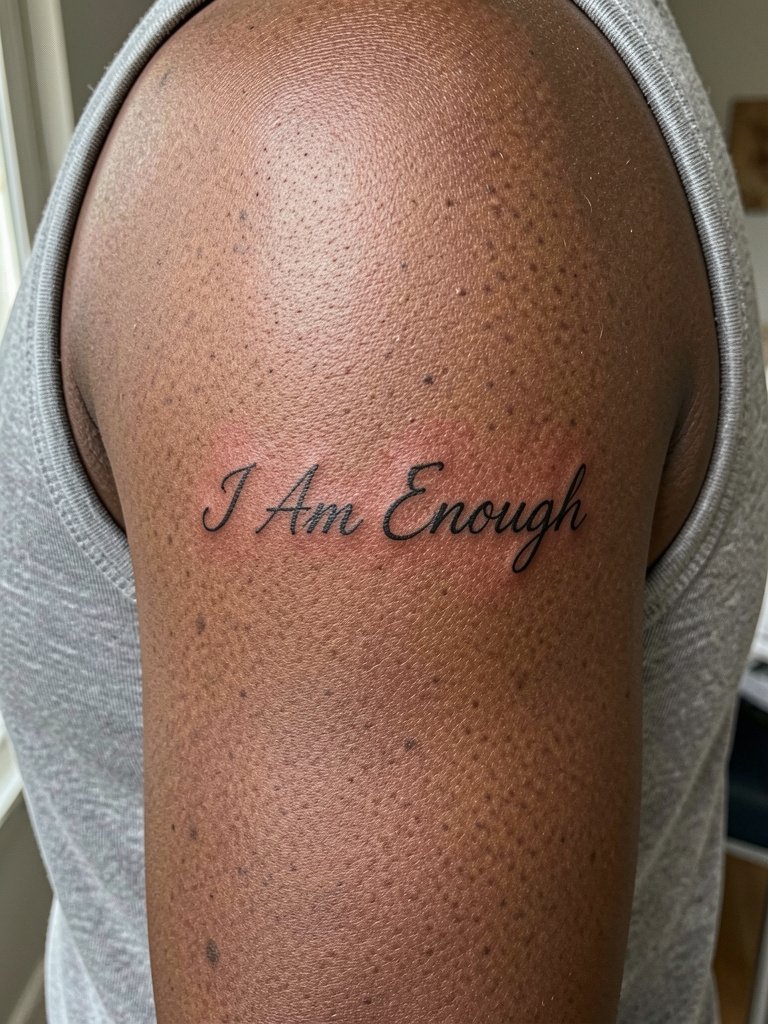
Short affirmations like this work as daily reminders and are discreet under sleeves. The inner bicep moves and stretches, so tell the artist the exact phrase length and ask for line weight marginally heavier than your sample script. One camp says fine-line script blurs on this placement within two years. The other camp says proper depth and spacing keep it sharp for three to five years. Expect medium pain and a 30–45 minute session for careful placement. Wear a loose tank to the appointment. For nights out, a thin gold pendant necklace frames the area without covering the text.
4. Single-Line Heart with Dot at the Collarbone
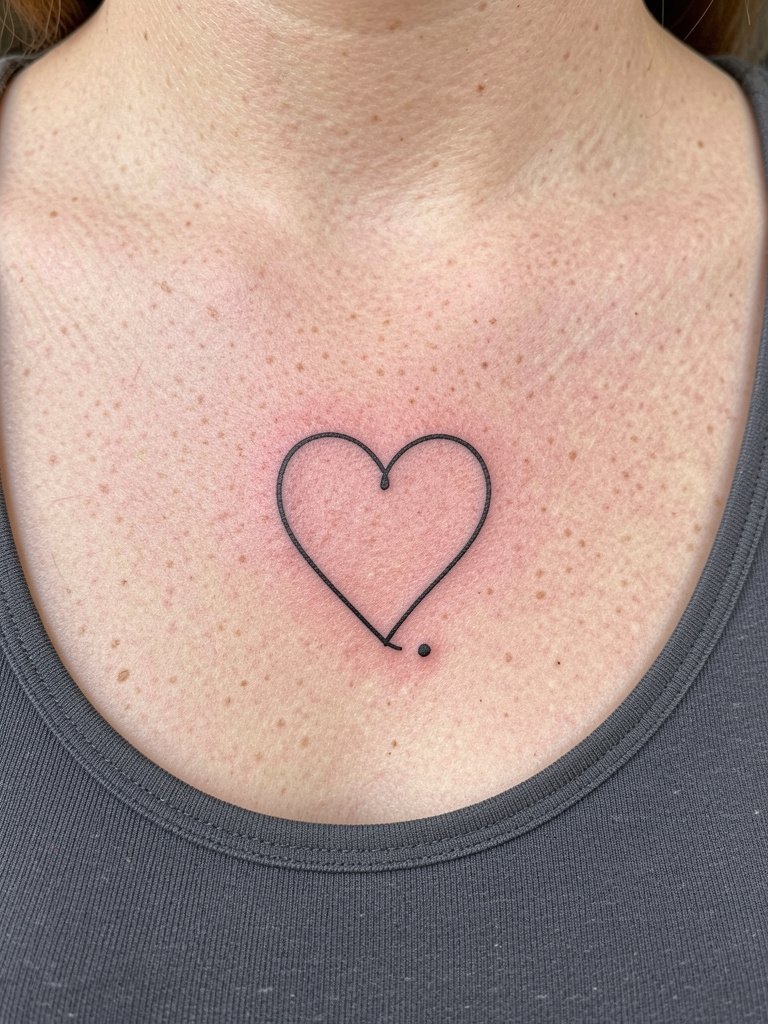
A single-line heart reads modern and neat on the collarbone because the area is relatively stable compared with the wrist. Ask the artist to draft the curve to follow the bone so it lies flat and does not migrate toward the neckline with movement. Common mistake is centering the heart too close to the sternum instead of on the lateral clavicle where it photographs cleanly. Pain is mild and session time is brief. Style-wise, pair the piece with a scoop-neck top that sits just above the tattoo for subtle framing.
5. Minimalist Phoenix Outline on Inner Forearm
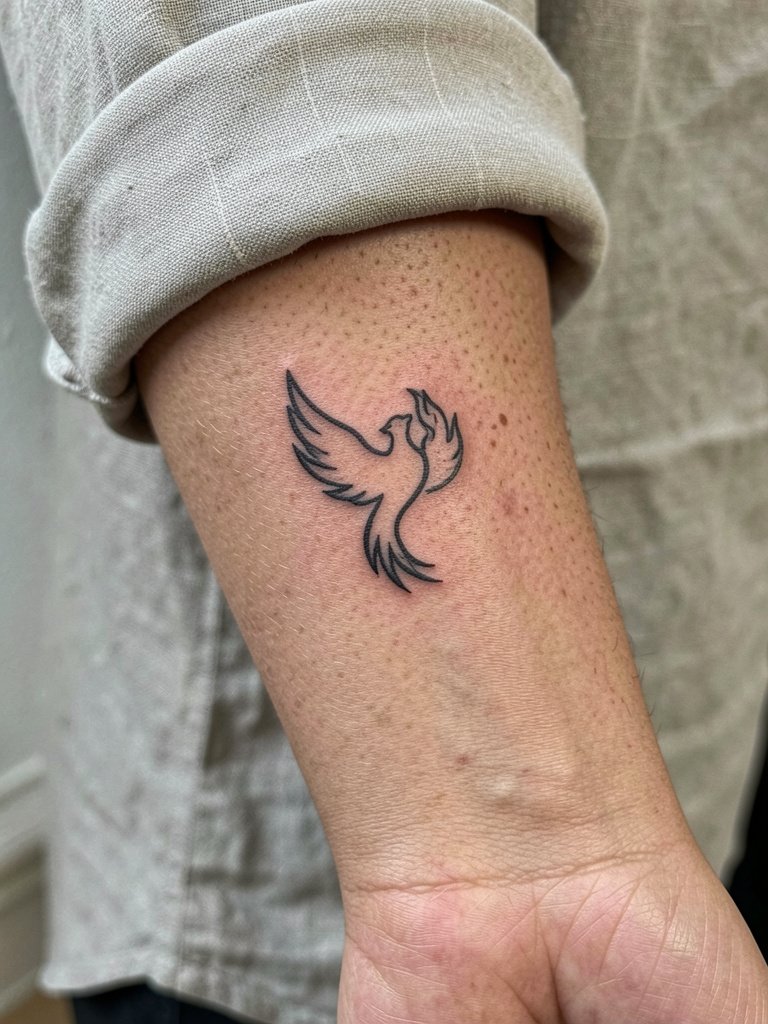
A simplified phoenix gives the rebirth metaphor without heavy shading that can age poorly. Recommend a single-needle outline that keeps negative space around the flames so the shapes do not merge. Tell the artist you want clear gaps between flame tips and body to preserve the silhouette at three years. Inner forearm is active, so expect a touch-up window at 18–24 months if lines are tiny. The session is moderate in time. To show it off, roll sleeves and wear dainty gold stacked bracelets on the opposite wrist.
6. Tiny Star Cluster Behind the Ear
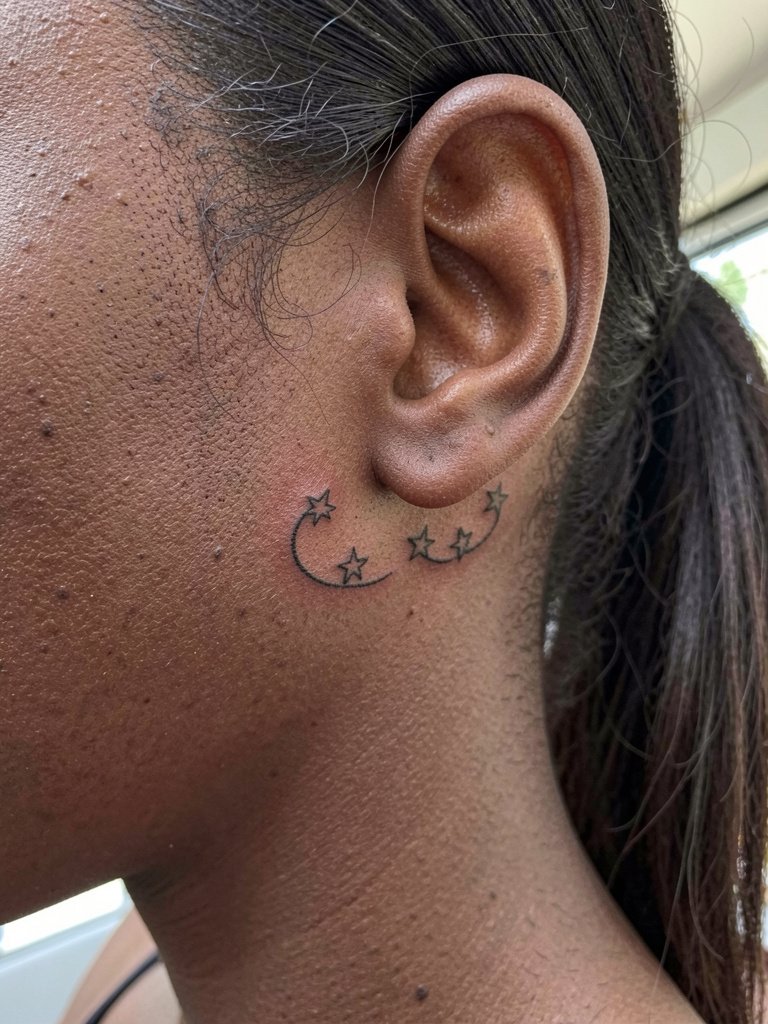
Tiny clusters behind the ear are almost private and photograph well when hair is up. The skin there is thin so ask for slightly bolder dots rather than hairline points to avoid them vanishing in photos. Expect a quick 10–20 minute session and low pain. Common mistake is requesting three pinprick stars that look like freckles once healed. For styling, pull hair into a low pony or half-up style to reveal the cluster when you want it to show.
Session Day Picks
These first forearm, collarbone and behind-ear ideas often need simple session and healing tweaks to look their best in photos.
- Hana tattoo aftercare balm. A lighter, non-greasy balm that some people prefer over thicker ointments when their skin is oily, which helps clean healing on the inner forearm pieces above.
- Gold Label tattoo balm UK-style. Less sticky alternatives work well for collarbone work because they reduce clogged pores and small bumps during the second week.
- Tattoo Kitchen aftercare balm. Thin, non-clogging balms help sensitive skin on the mastoid area heal without raised granulation.
- Single Needle aftercare oil. Marketed for fine line work, this kind of oil can keep line clarity while skin rebuilds, especially helpful for small script.
- Hardcore Aftercare thinner balm. A mainstream thinner balm for people who found Aquaphor too heavy, useful for the first week on small blackwork designs.
7. Micro Peony on the Inner Forearm
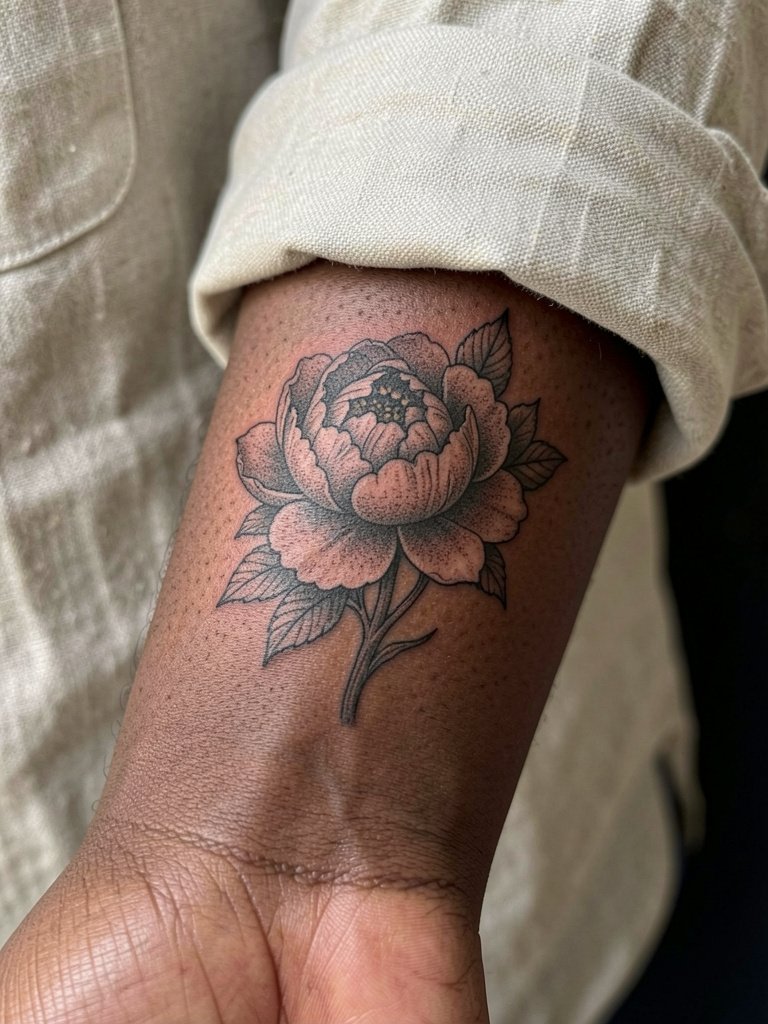
A micro peony gives floral detail but avoids the age issues of watercolor blooms. Ask for stipple shading rather than soft grey washes so the flower keeps definition after a year. Discuss how the center dotwork will hold up and request a slightly wider petal contour for the inner forearm. Expect moderate pain and a 30–45 minute session. Many people assume tiny shading reads the same on all skin tones but contrast testing is essential. Style it with rolled sleeves and a dainty gold stacked bracelet for balanced photos.
8. Minimalist Compass on the Inner Forearm
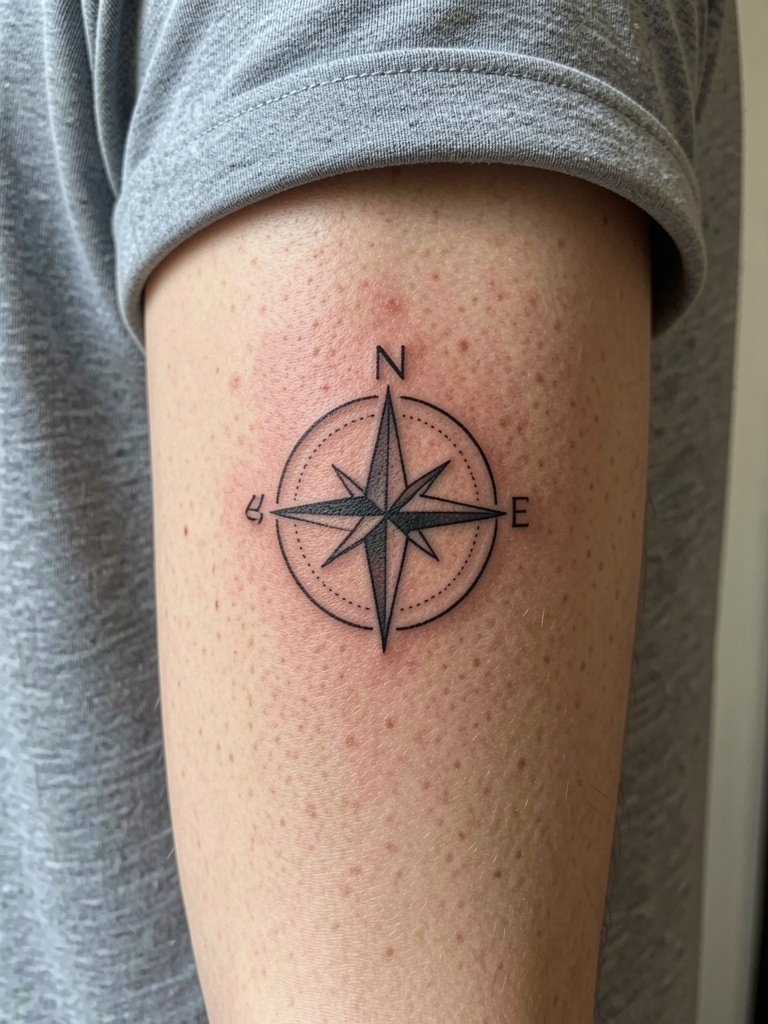
A compact compass acts as a directional symbol without heavy detail. For small scales, ask the artist to simplify cardinal marks so the circle maintains shape as the skin moves. Tell them you want the north arrow proportionally longer so the symbol still reads at arm distance. Expect a 25–35 minute session and plan for a possible touch-up at the two-year mark if the inner forearm sees lots of sun. Wear a minimalist watch on the opposite wrist when you want the compass to be a subtle focal point.
9. Tiny Leaf on the Wrist
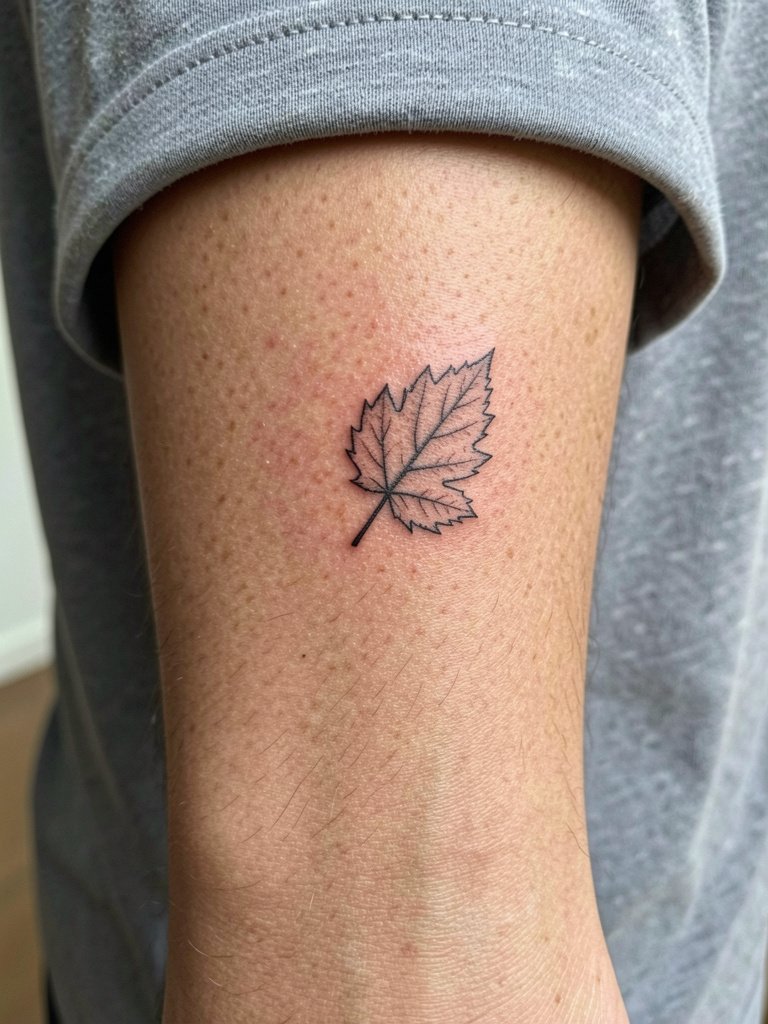
A single leaf is a quiet option for a wrist tattoo that ages more predictably than dense micro-realism. Ask for a distinct midrib line and slightly thicker outer contour so the vein does not disappear under daily movement. The wrist is prone to early fading so plan a gentle touch-up after the first year if needed. Pain is mild and session time is short. To keep it visible in photos, swap heavy bracelets for a thin chain bracelet on the other wrist.
10. Minimalist Boat on Inner Forearm
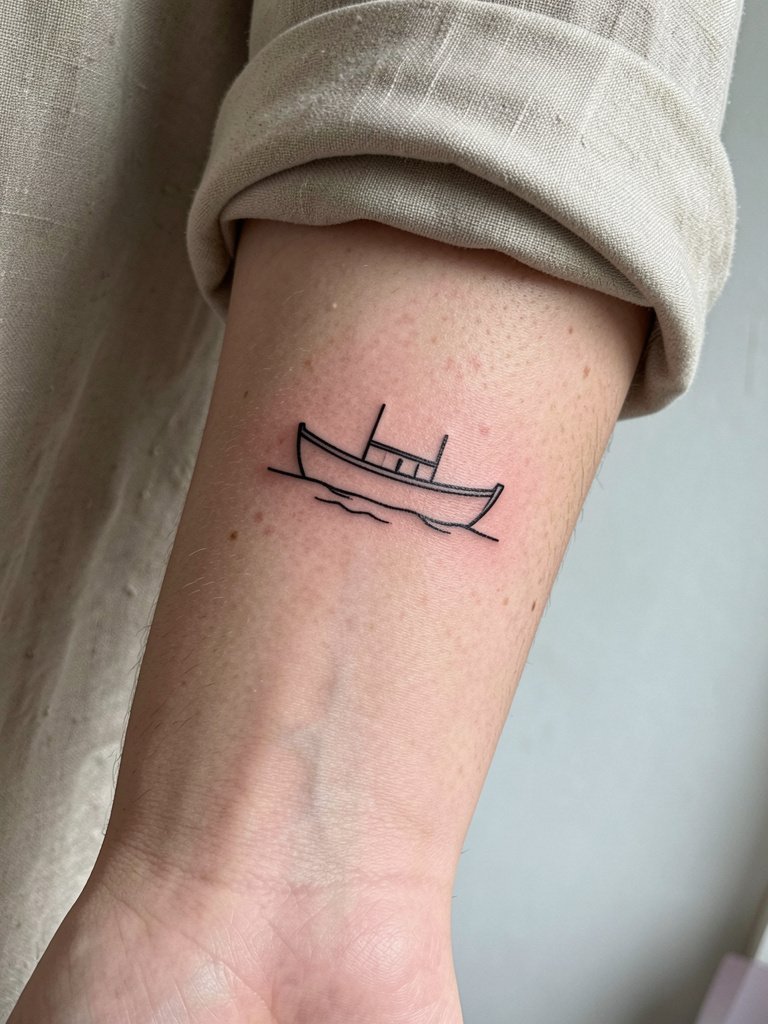
A tiny boat symbolizes journeys without being literal. For crisp longevity request that the water line be negative space rather than faint grey shading. That approach prevents a smudge effect by year three. The inner forearm placement is forgiving for outlines, but avoid ultra-thin water lines. Session time is brief. Mistake to avoid is stacking too many tiny elements inside the hull which can merge. Show it off with rolled cuffs and a rolled cuff linen shirt in neutral tones.
11. Anchor with Bow on Inner Forearm
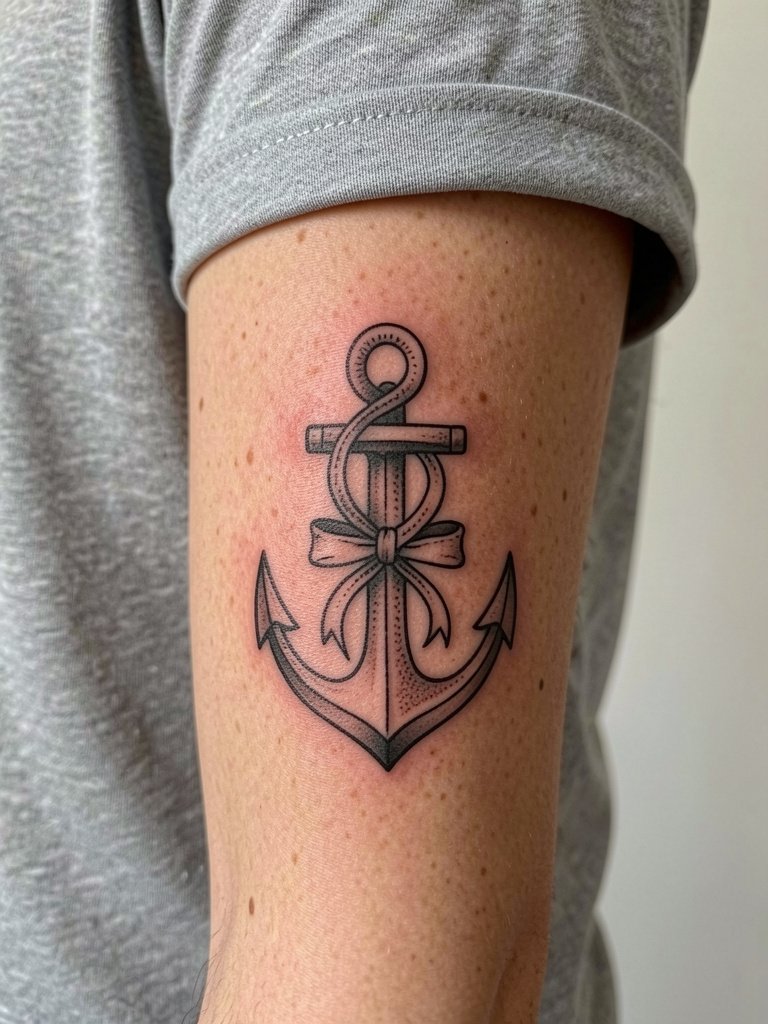
Anchors read well when the negative space around the bow is preserved. Ask the artist to keep the bow loops distinct and to avoid dense filling within the knot. The inner forearm tolerates bolder lines so you can retain an element of neo-traditional weight without losing the dainty feel. Expect moderate session time and medium pain. A common error is over-detailing the anchor flukes which age into a dark patch. For casual shows, roll up a sleeve and wear a minimalist watch on the opposite wrist.
12. Tiny Star Cluster on Ankle
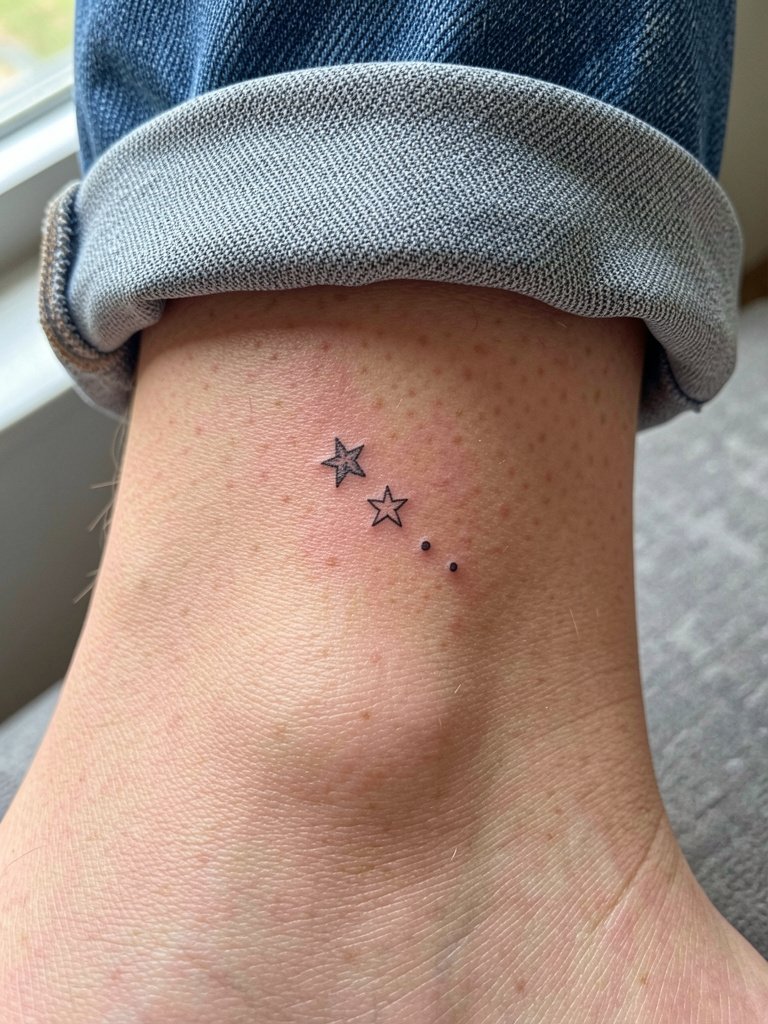
Ankle clusters are low-key and photograph nicely when paired with sandals or rolled cuffs. The ankle sees abrasion from socks and shoes so request clean silhouette stars without tiny filigree that will rub away. Expect low to moderate pain and a short session. Mistakes include placing stars too close to the shoe line where friction accelerates fading. For showing the tattoo, cuff jeans or wear low-profile sandals so the cluster is visible.
13. Minimalist Moon on the Sternum
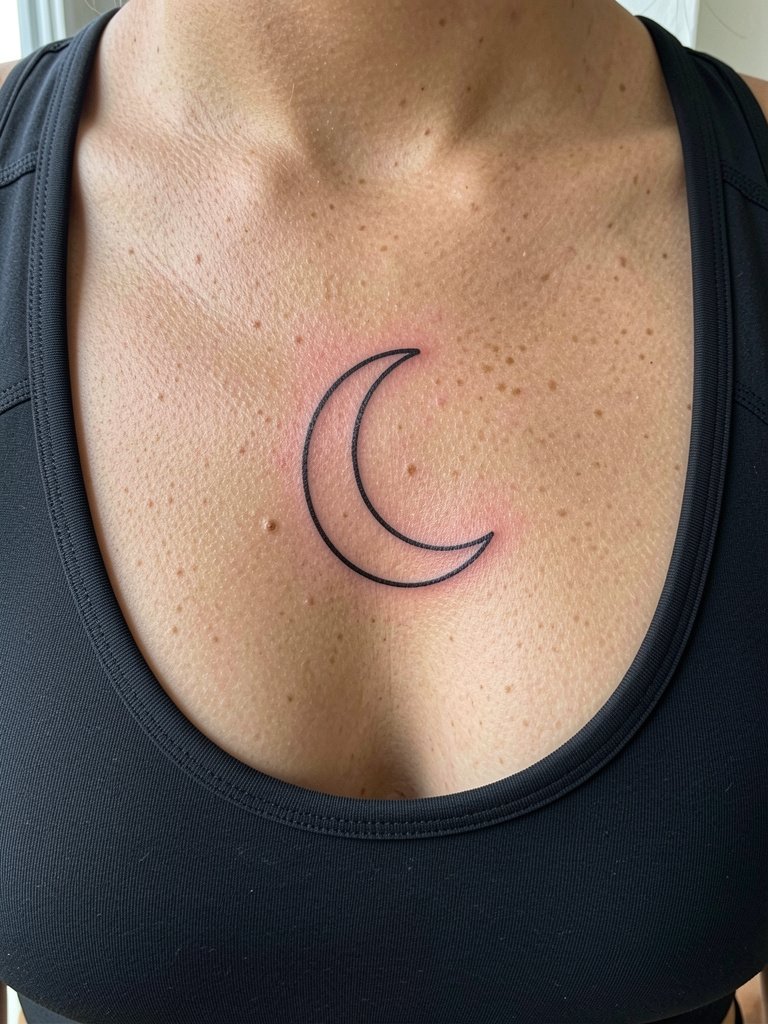
A single-line moon on the sternum is subtle and intimate. This area can be tricky for fine line because pressure from bras can affect healing. Mention fabric pressure and ask for placement a few millimeters away from the bra edge. Expect higher pain and a slightly longer session because the skin there is sensitive. Common mistake is requesting very thin curves that fade under compression. For nights out consider strapless or open-front styles that expose the sternum without rubbing.
14. Tiny Flame on Inner Forearm
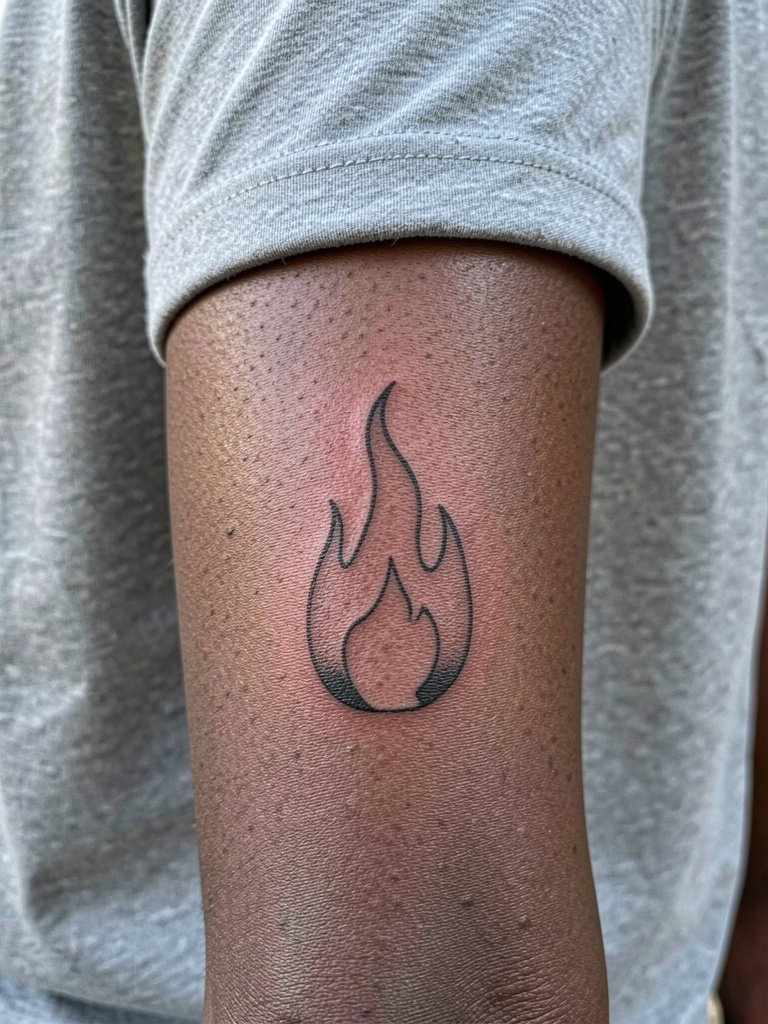
The tiny flame is a compact memorial or passion symbol. Ask the artist to keep the base fill small and the outer curves spaced so the tips remain defined as the ink settles. This prevents a single dark blob from forming in the center by year three. Inner forearm sessions are straightforward and typically under 30 minutes. Mistakes include heavy base fills that absorb into surrounding lines. Style it with rolled sleeves and a dainty bracelet stack on the opposite wrist.
15. Tiny Script Date on the Ribcage
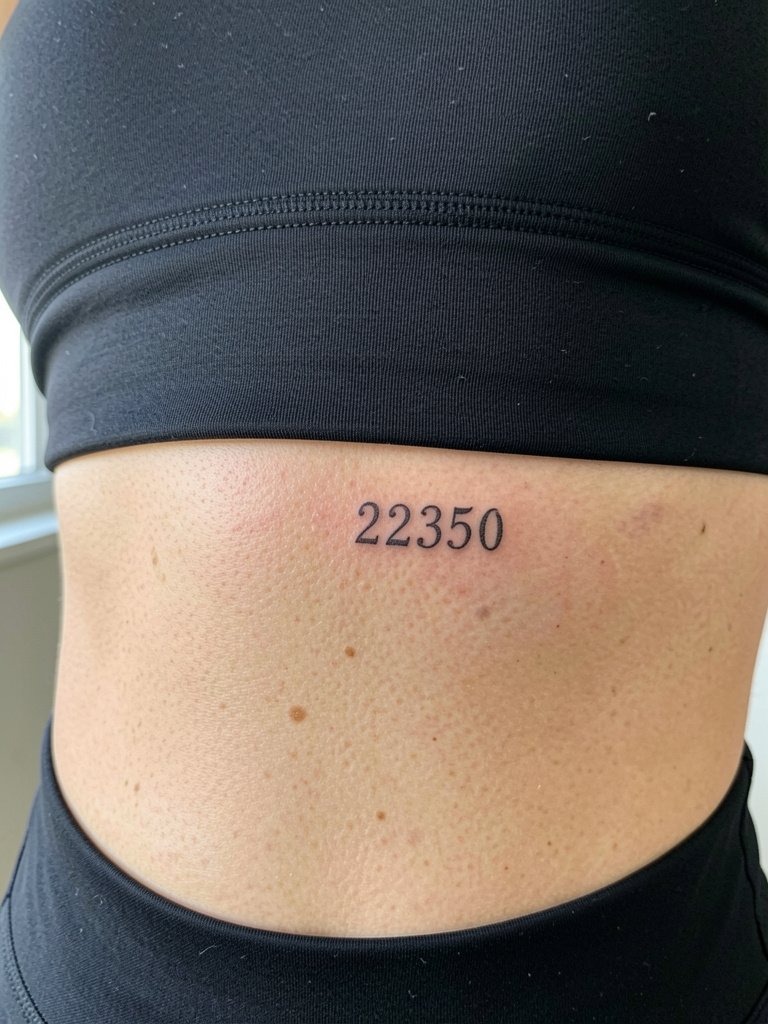
Ribcage script is intimate and can be meaningful for dates. This placement stretches and compresses with breathing and weight changes so request slightly thicker numerals and a test stencil while breathing normally. Artists are split on fine line here. One group says ribs blur within two years because of constant flex. The other group says correct needle depth and subtle spacing let fine numerals remain legible for years. Expect higher pain and a careful 20–40 minute session window. Wear a fitted cropped top for the appointment so the artist has clear access without lifting fabric.
16. Minimalist Mountain Range on Collarbone
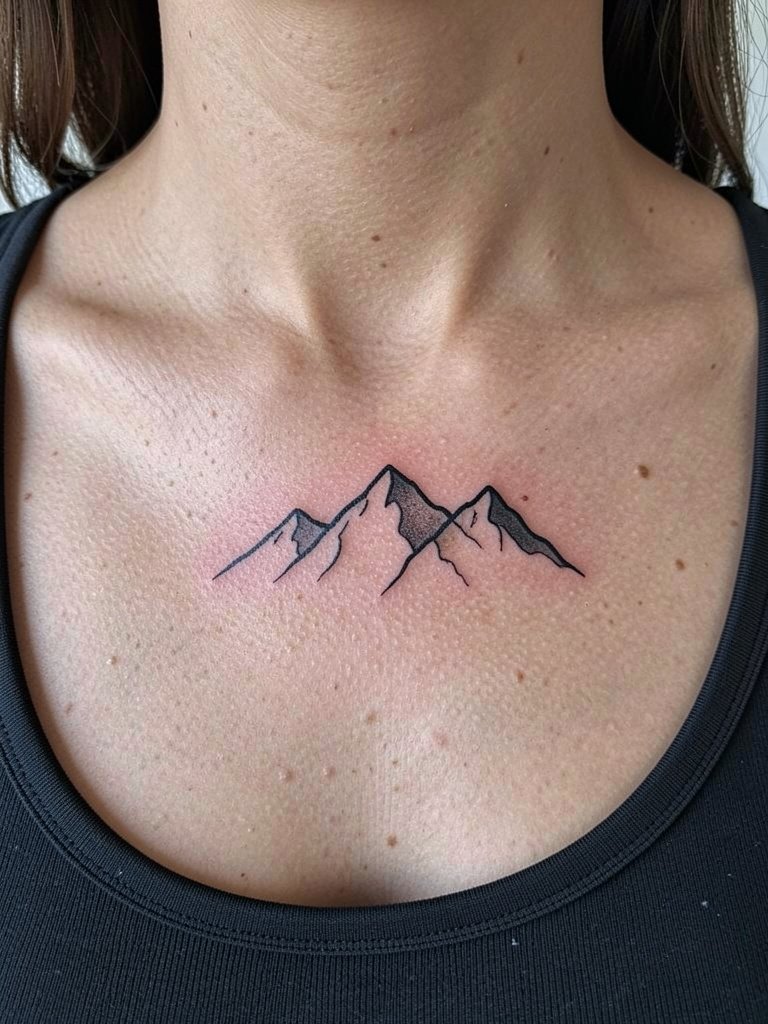
A miniature mountain line across the collarbone reads nicely because the bone gives a natural guide for the peaks. Tell the artist you want the peaks aligned to the clavicle so a sweater or necklace does not cover them. The collarbone is low on pain and the session is short. A common oversight is crowding peaks too close together which loses the silhouette at two years. Pair with a delicate pendant necklace that sits above the peaks for a composed look.
17. Single-Needle Crescent Moon on the Back of the Neck
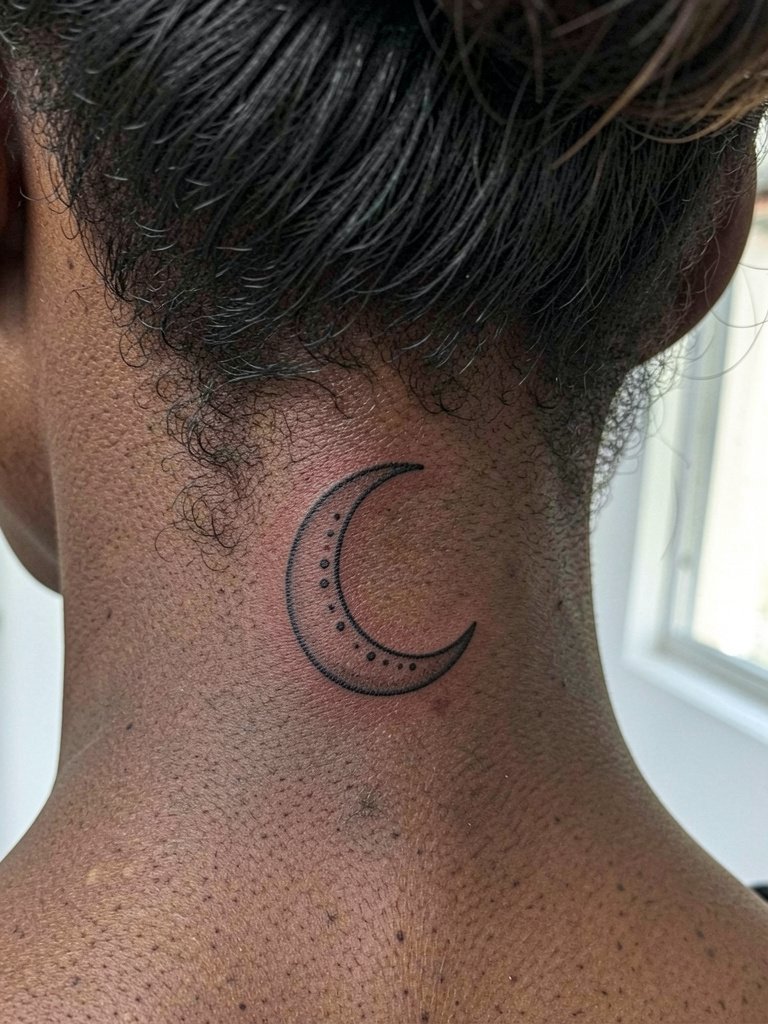
The nape accepts single-needle crescents beautifully but needs careful aftercare because shirts and collars can rub. Ask how they recommend sleeping positions for the first week and whether a lightweight bandage would prevent friction. Expect a medium pain level and a short session. The usual mistake is using hair oils right away which can change healing. For subtle reveal, wear hair up in a loose updo when you want the moon exposed.
18. Tiny Botanical on the Lateral Hip Bone
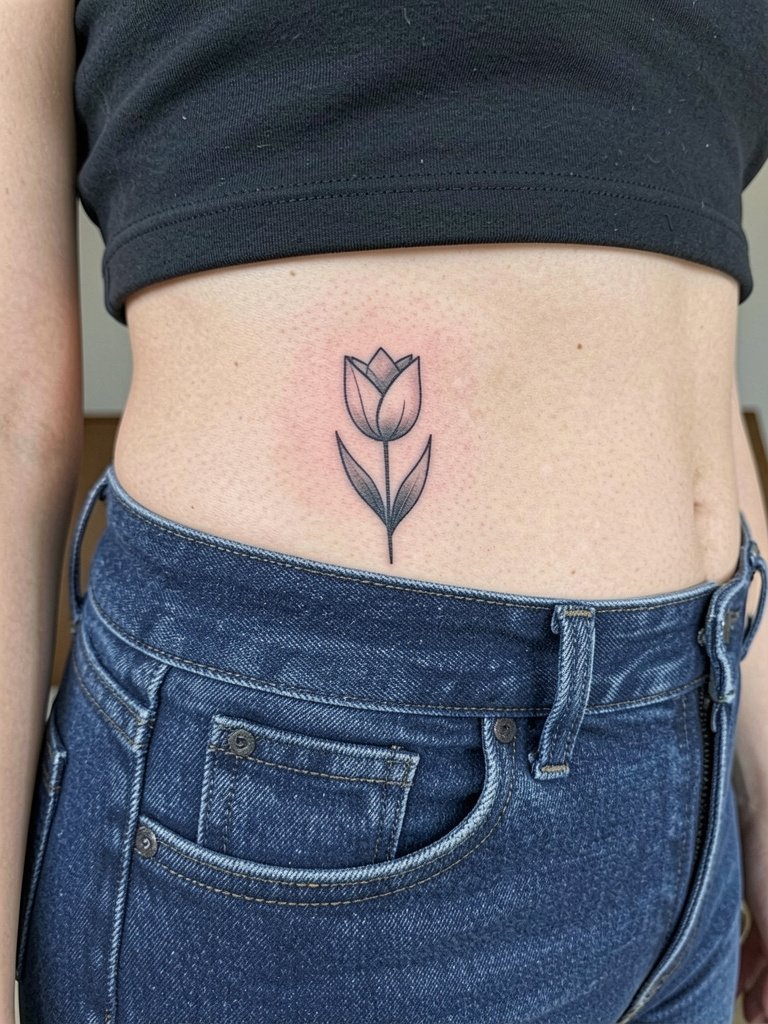
Hip tattoos are great for people who want private placement that peeks out in swimwear. Because hips move with weight changes, ask the artist how the design will scale if you want it a touch larger to avoid distortion. The lateral hip has low day-to-day friction when clothes fit properly, but tight waistbands can rub during healing. Plan session wear like low-rise shorts and expect a 30–45 minute session. To show the area, choose high-waisted shorts or a thin chain belt that sits below the tattoo.
19. Micro Constellation on the Upper Thigh
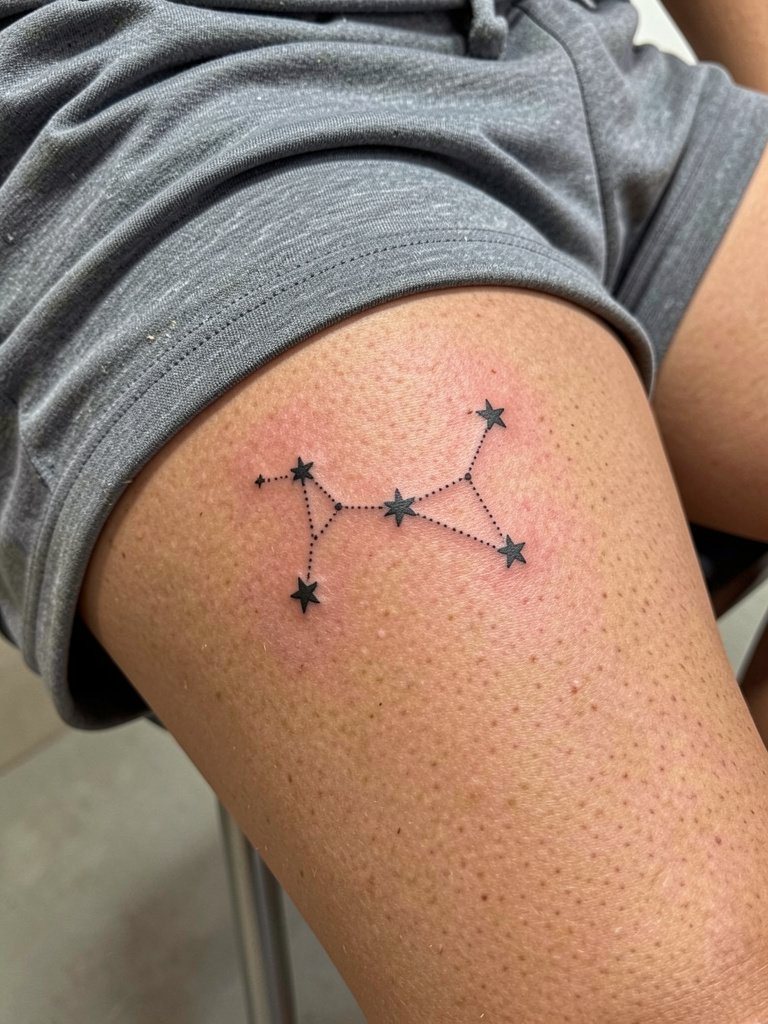
Upper-thigh constellations are private and photograph well in shorts. This area handles micro dotwork nicely because it is less exposed to sun than forearms. Ask for slightly more contrast between star dots and connector lines so the pattern stays legible at six months and two years. Sessions are comfortable for most people and can run 30–50 minutes depending on dotwork. Avoid placing the design too close to the underwear line. For summer looks, pair with high-waisted shorts that reveal the constellation when you want it to show.
20. Single-Word Script on the Ribcage
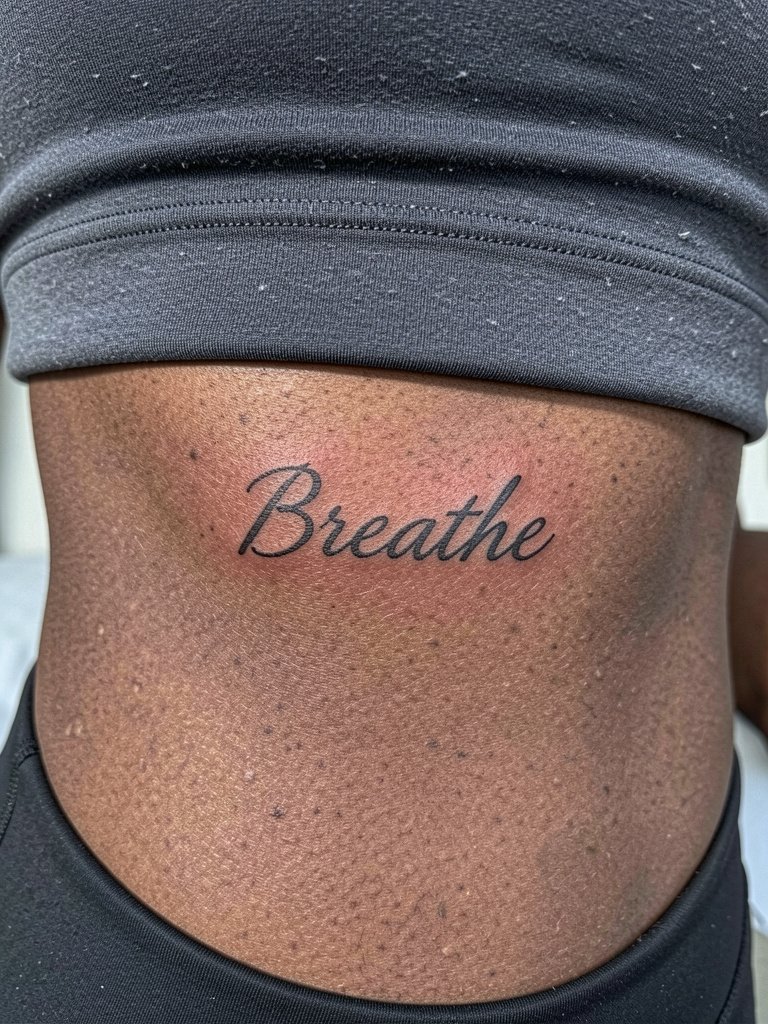
Single-word scripts on ribs are meaningful and intimate but the area stretches with breathing. Ask for a mockup while taking deep and shallow breaths so you see how the letters distort. Artists debate fine-line ribs. One camp says thin script blurs quickly from constant movement. The other camp says correct depth and slightly heavier spacing hold the lettering for years. Expect higher pain and a careful session. Avoid long phrases in this spot. For appointments wear a fitted cropped top so the artist has full access without fabric tugging.
21. Minimalist Wave on the Ankle
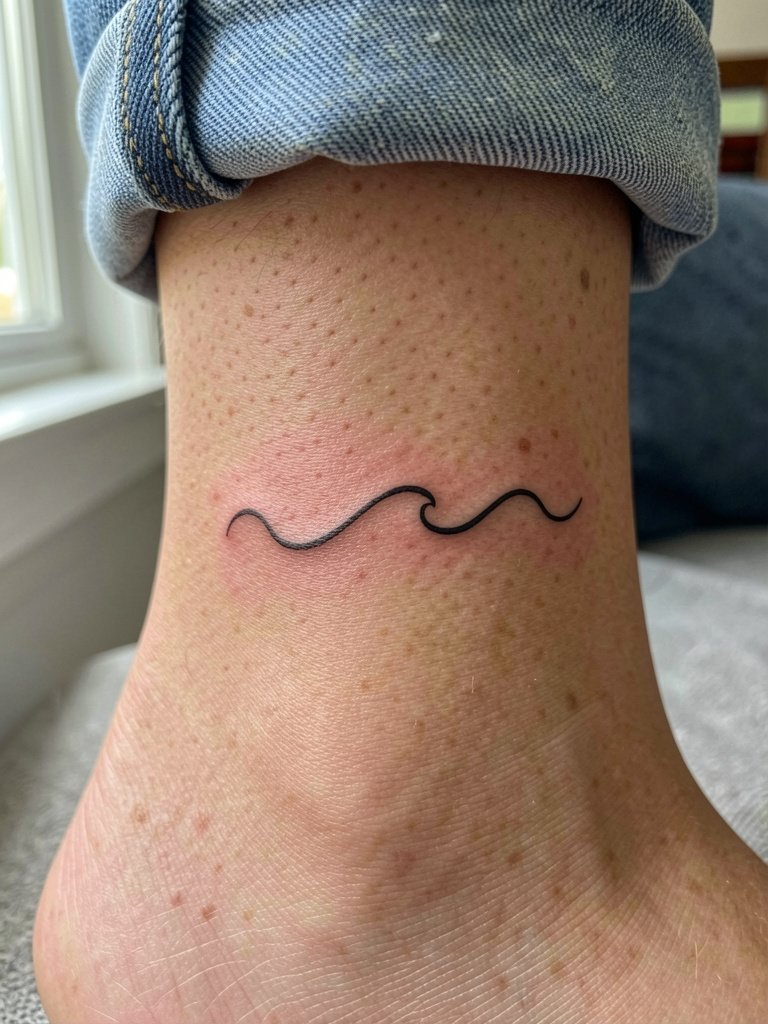
Ankle waves are casual and photograph well with sandals. Because shoe friction affects ankles, ask for a clean continuous line with a slightly thicker crest so the wave shape remains crisp. Sessions are quick and pain is low to moderate. A common mistake is placing it too close to where socks rub. For beach days pair the piece with low-profile sandals that reveal the ankle.
22. Tiny Geometric Arrow on the Finger Side
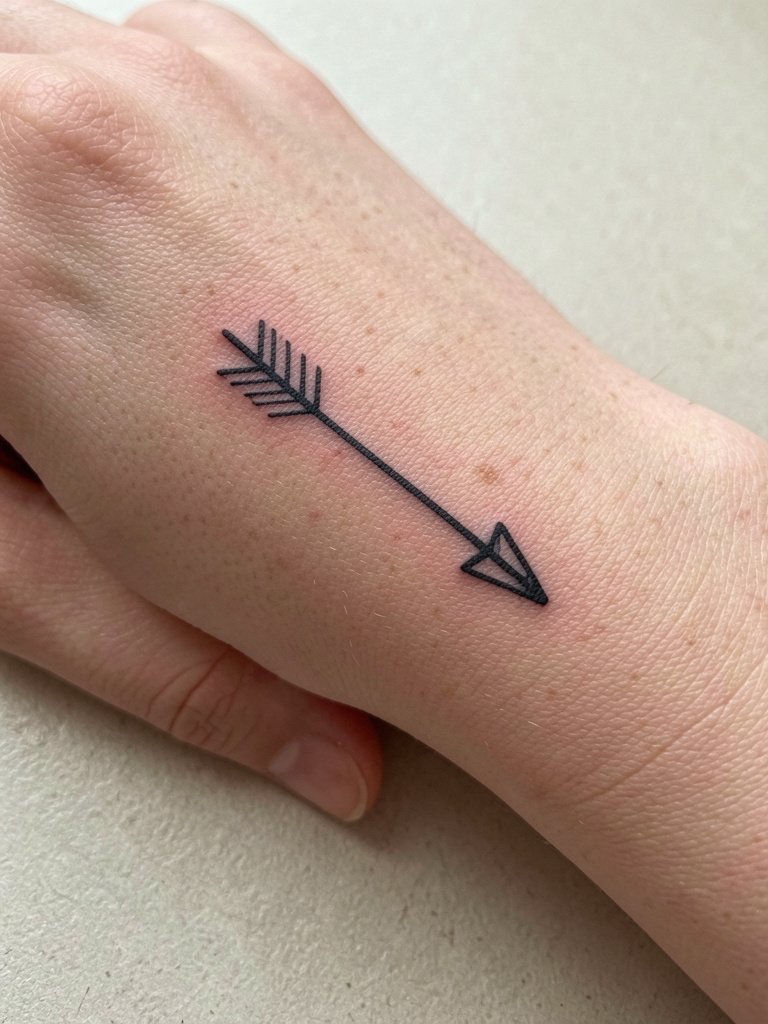
Side-finger arrows are ultra-discreet but prone to fast fading from hand use. Request slightly bolder strokes than the reference and accept that a touch-up within a year is common. Discuss expected lifestyle wear so the artist can adjust depth accordingly. Finger sessions are quick but can feel sharp. Avoid full-wrap finger lines that tend to spread. For showing a side arrow, wear rings on the opposite hand or choose minimal bracelets to keep focus.
23. Tiny Botanical Ankle Sprig
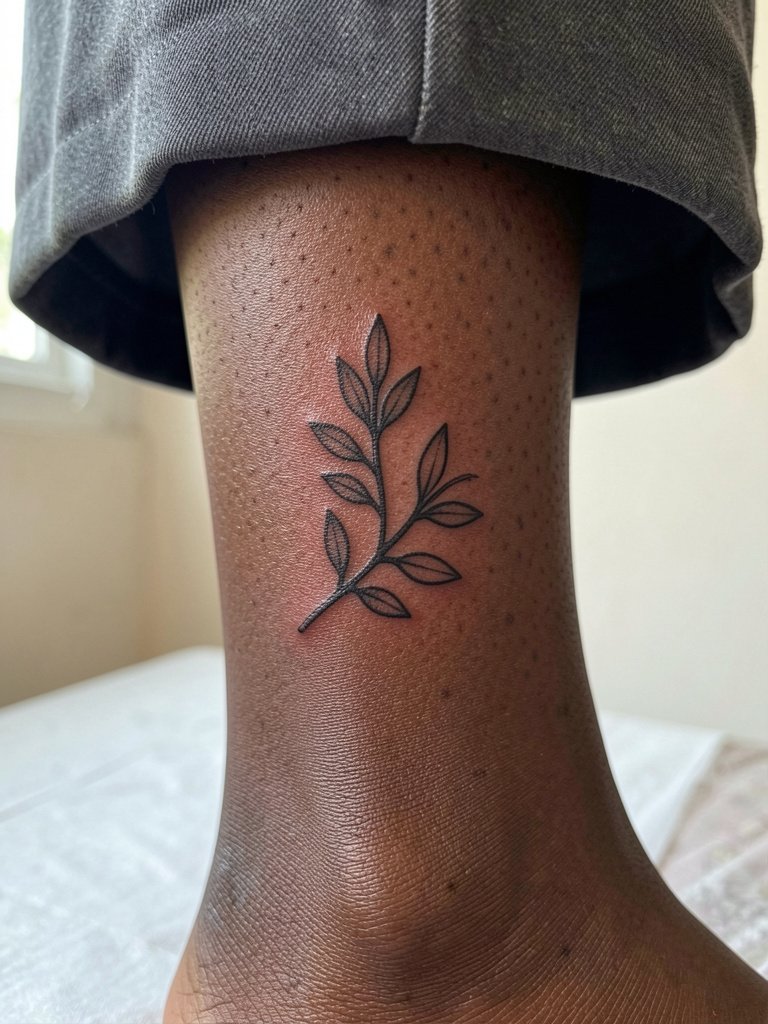
A sprig at the ankle gives a natural accent that ages gently. Ask for clear leaf outlines and discrete vein dots so the sprig keeps form after friction. Ankle skin heals differently across skin types so request a healed mockup if possible. Sessions are short and pain is low. For daytime styling choose sandals or cuffed pants to reveal the sprig when you want it to be seen.
24. Minimalist Lock-and-Key on the Wrist
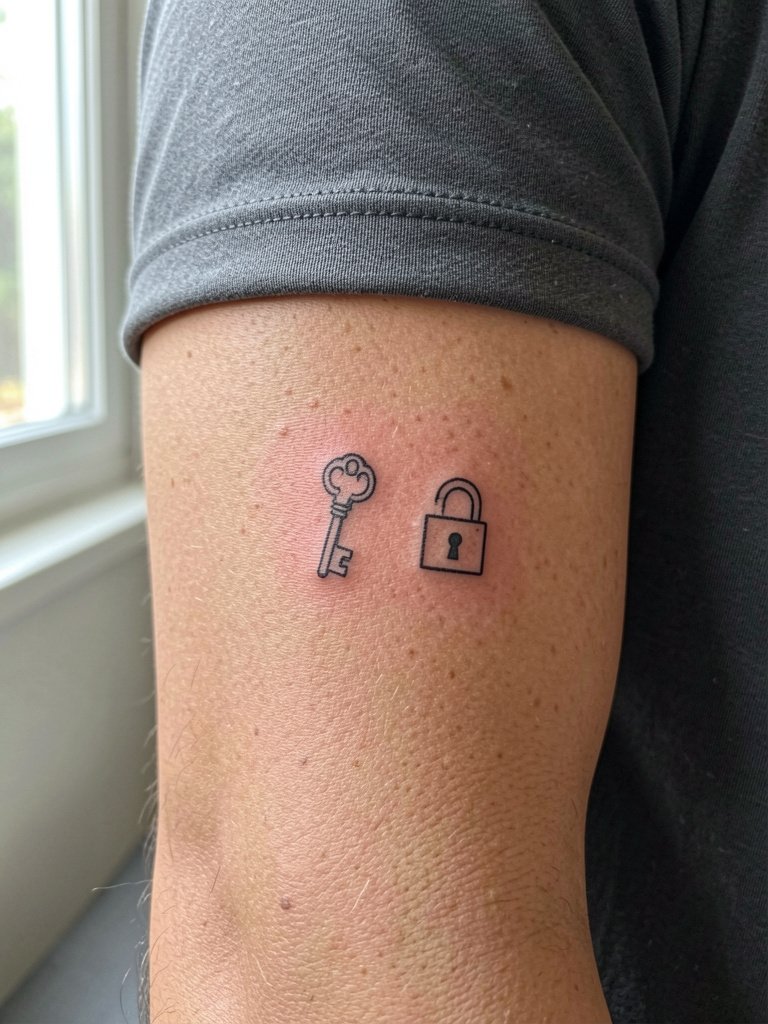
Tiny lock-and-key pairs let you split a symbol across wrists or keep both on one wrist. For small hardware, tell the artist which element should be the focal point so one does not overpower the other. Wrist movement can soften tiny key teeth so request slightly bolder outlines for those details. Sessions are short. Avoid too many tiny internal notches that blur into a solid shape. Style with a thin chain bracelet on the opposite wrist.
25. Minimalist Bird Silhouette on Upper Back
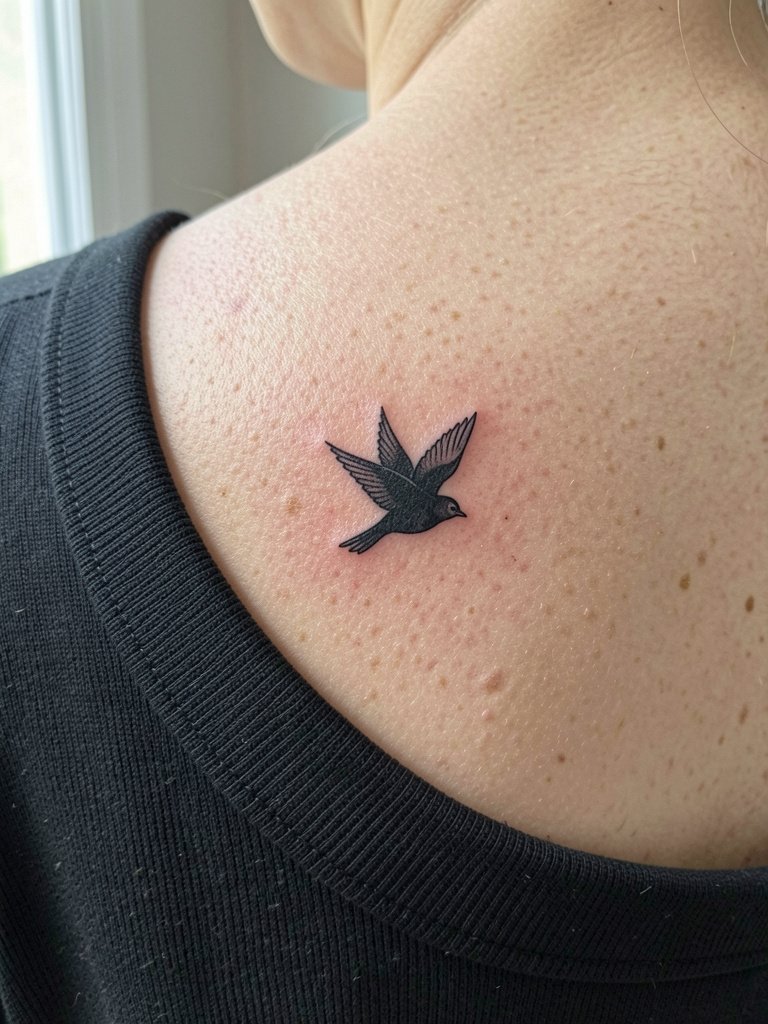
A tiny bird silhouette on the upper back is discreet and flat. Ask for the wing angles to be clear with negative space between feathers so the shape does not become a blob as the years pass. The upper back heals well with minimal sun exposure if you avoid strappy bags during the first two weeks. Session time is moderate and pain is low to moderate. To reveal the bird, wear a wide-neck top that sits naturally on the shoulders.
26. Minimalist Knot on the Collarbone
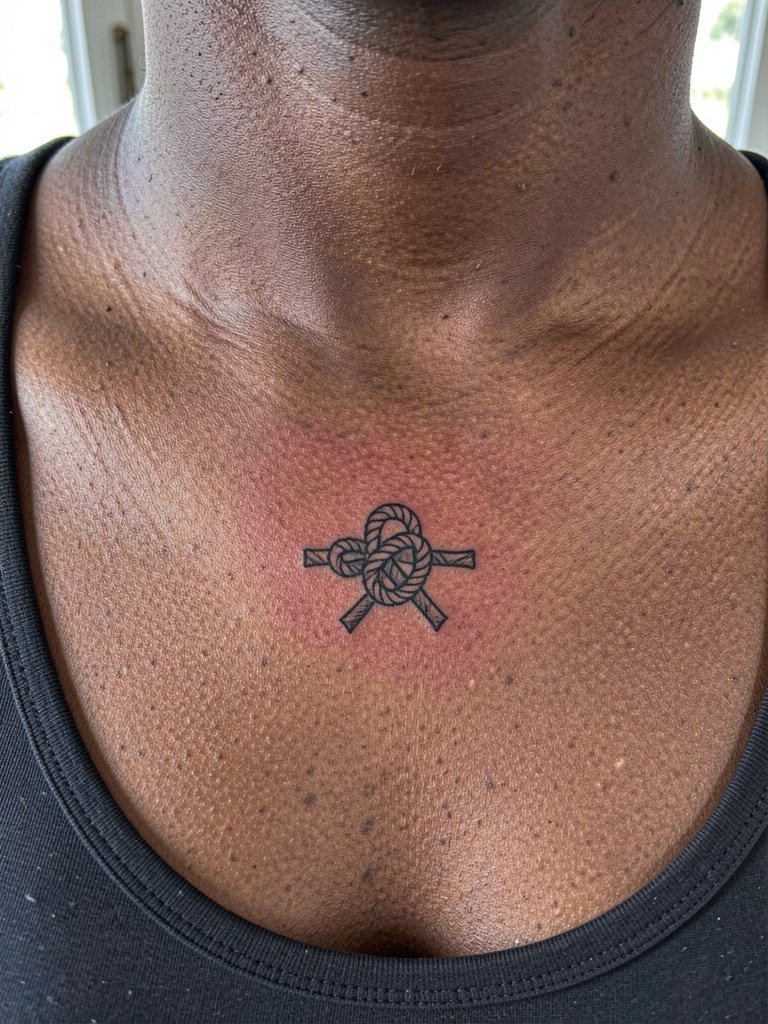
A tiny knot symbolizes connection with a neat graphic. Because intersections can merge, ask the artist to keep crossing points open and to test a slightly thicker route through the center. This keeps the knot readable at a glance. Collarbone placement is visible and low on friction, so healing is usually clean if you avoid tight straps. Session time is brief. Pair with a crew-neck or scoop-neck top that frames the knot.
27. Single-Line Mountain on the Side Neck
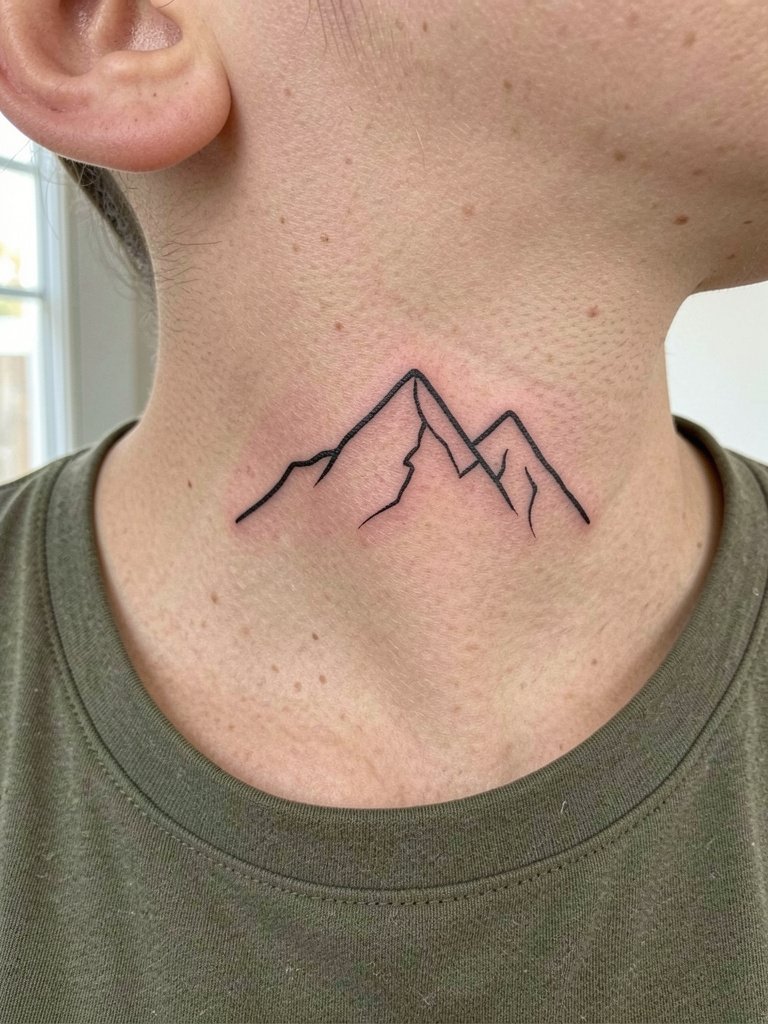
Side-neck pieces are discreet when hidden by hair and visible when you tuck it back. This skin is fairly stable so single-line silhouettes hold well. Ask the artist for a placement diagram so the peak aligns with the jawline for optimal balance. Expect a short session and mild to moderate sensitivity. Mistakes include placing the peak too close to the ear where visibility becomes awkward. Reveal with a wide-neck top or by tucking hair behind the ear.
28. Minimalist Wave on the Side Torso
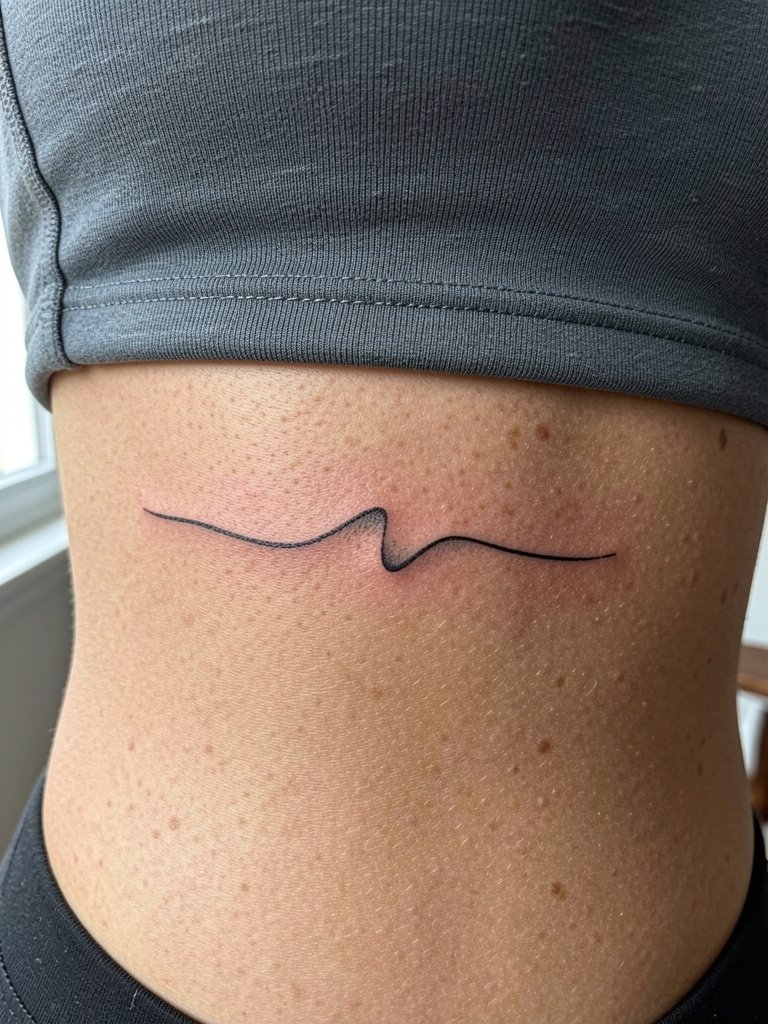
Side-torso waves are moveable and intimate. Because ribs flex with breathing, ask the artist to place the curve where it looks continuous at normal inhale and exhale. Some artists avoid single-needle here, citing movement; others say careful depth works fine. Expect higher pain and a slower session. Avoid very thin connectors or you may need a touch-up after the first year. For session wear choose a fitted cropped top so the artist can reach the area without fabric shifting.
29. Tiny Coordinate Tattoo on the Sternum
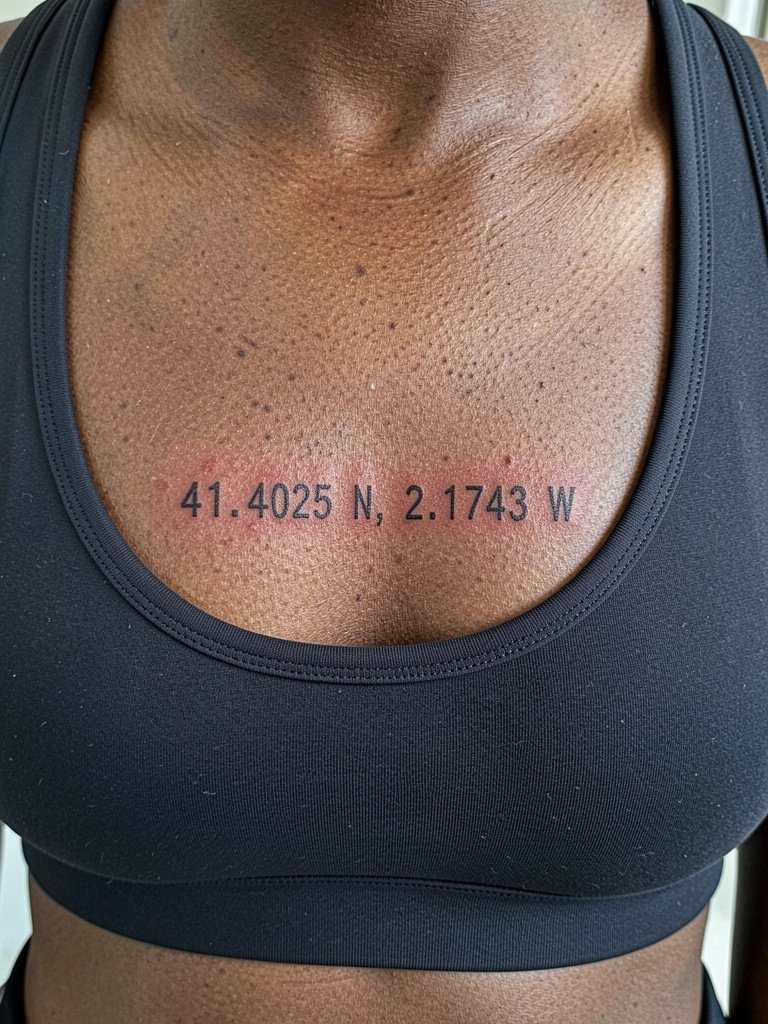
Coordinates are a terse, precise way to mark a place. For sternum coordinates choose a legible monospace font and ask the artist to space numbers generously so numerals remain distinct as the area heals. The sternum can be sensitive so expect a higher pain rating and a focused session. Avoid over-condensing digits into a single line if you want readability past year one. For appointment wear a strapless or sports bra to give the artist full access without fabric pressure.
Frequently Asked Questions
Q: How do I find artists who actually post healed small tattoos across skin tones?
A: Search hashtags and platforms while filtering for location and healed shots. Tattoodo and Inked App let you add keywords like "fine line script" or "micro-realism healed" and show portfolios. Reddit threads in r/tattooss and r/tattooadvice surface peer recommendations and healed photos from diverse skin tones. Use those places to compare multiple healed examples before you book.
Q: How long do tiny single-needle scripts typically last before needing a touch-up?
A: Expect most fine single-needle scripts in high-movement areas to need a touch-up between 12 and 24 months, depending on sun exposure and skin type. If you plan lots of sun or the wrist and fingers are involved, budget for a touch-up sooner. Keep consistent, oil-free moisturization during healing to support line clarity.
Q: Will a small tattoo show well on medium or dark skin?
A: Yes when contrast is prioritized. On medium and dark skin, bold black outlines and slightly thicker line weight read better in photos and at a distance. Ask for a test stencil or a healed example from the artist on similar skin tones so you can see real outcomes before committing.
Q: Are there special clothes I should wear to a session for inner thigh or hip pieces?
A: Yes. For lateral hip work wear low-rise shorts or a skirt that lifts easily and keeps the waistband below the tattoo area. For inner thigh pieces wear fitted bike shorts or modest athletic shorts so the artist can access the medial thigh without fabric tugging. Try a fitted bike short for comfort during the session.
Q: Should I use Aquaphor or a tattoo-specific balm during the first few days?
A: People split on this. One camp finds Aquaphor locks in moisture and prevents scabbing for the first two or three days. The other camp reports Aquaphor can clog pores on oily or acne-prone skin and prefers thinner, non-greasy balms. If you are acne-prone, test a lighter balm and monitor the area closely during healing.
