
A friend spent months scrolling portfolios before booking anything, then realized the real problem was knowing which tiny lunar shape would still read as a crisp tattoo after a year. I have sat in five shops across Brooklyn and seen the same handful of small approaches recommended again and again. Read on for compact designs that work now and age predictably, plus what to ask your artist at consult.
1. Curved Crescent with Tiny Stars on the Wrist
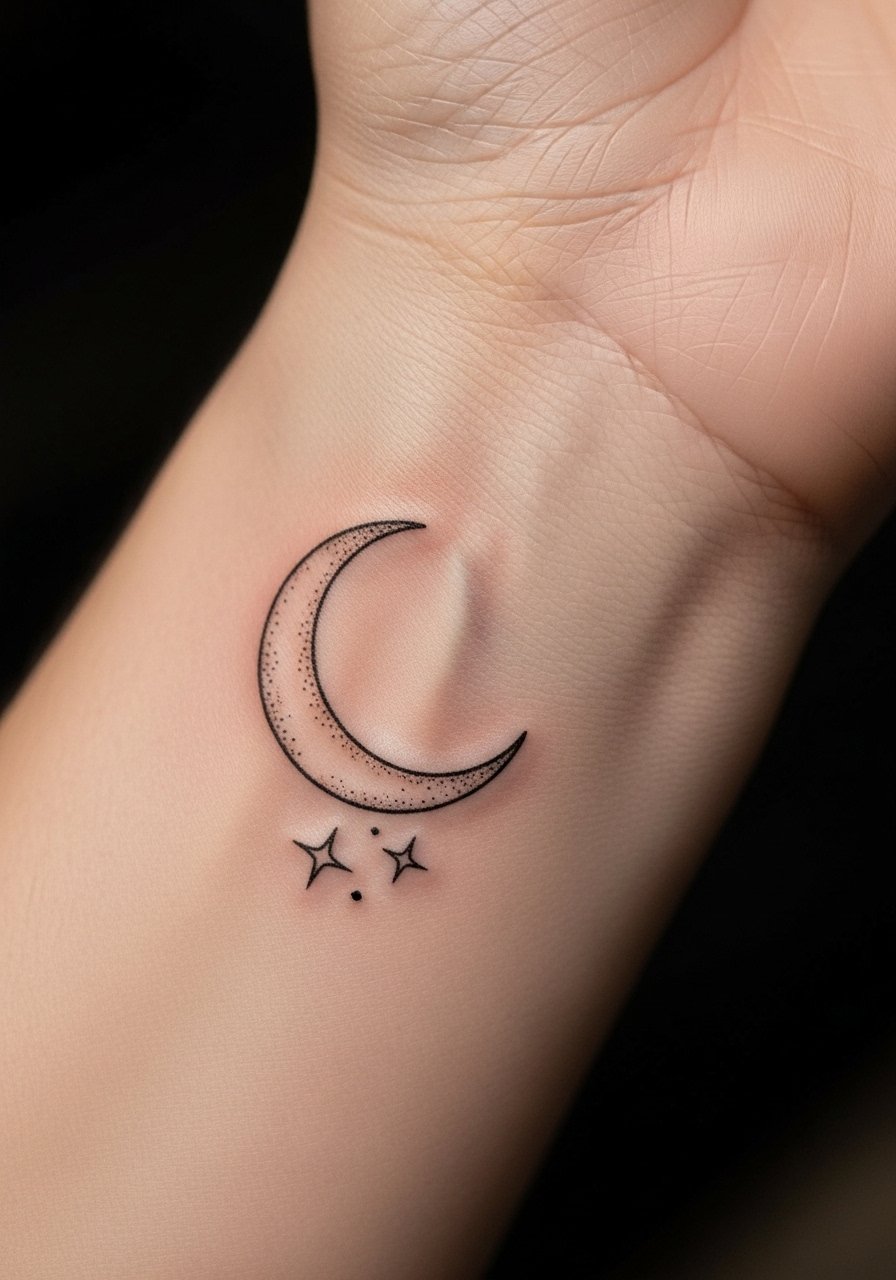
Someone I know first saw this on a friend and picked the same placement because the wrist reads well for delicate linework. Tell your artist you want a slightly thicker outer contour so the curve reads at a distance, and ask for spaced stars rather than clustered ones. Common mistake is asking for ultra-thin lines that merge after a year. Expect a 30 to 45 minute session and light to moderate pain. On the wrist the blowout risk is low if the lines are given breathing room. Touch-ups are common at year two for very fine work.
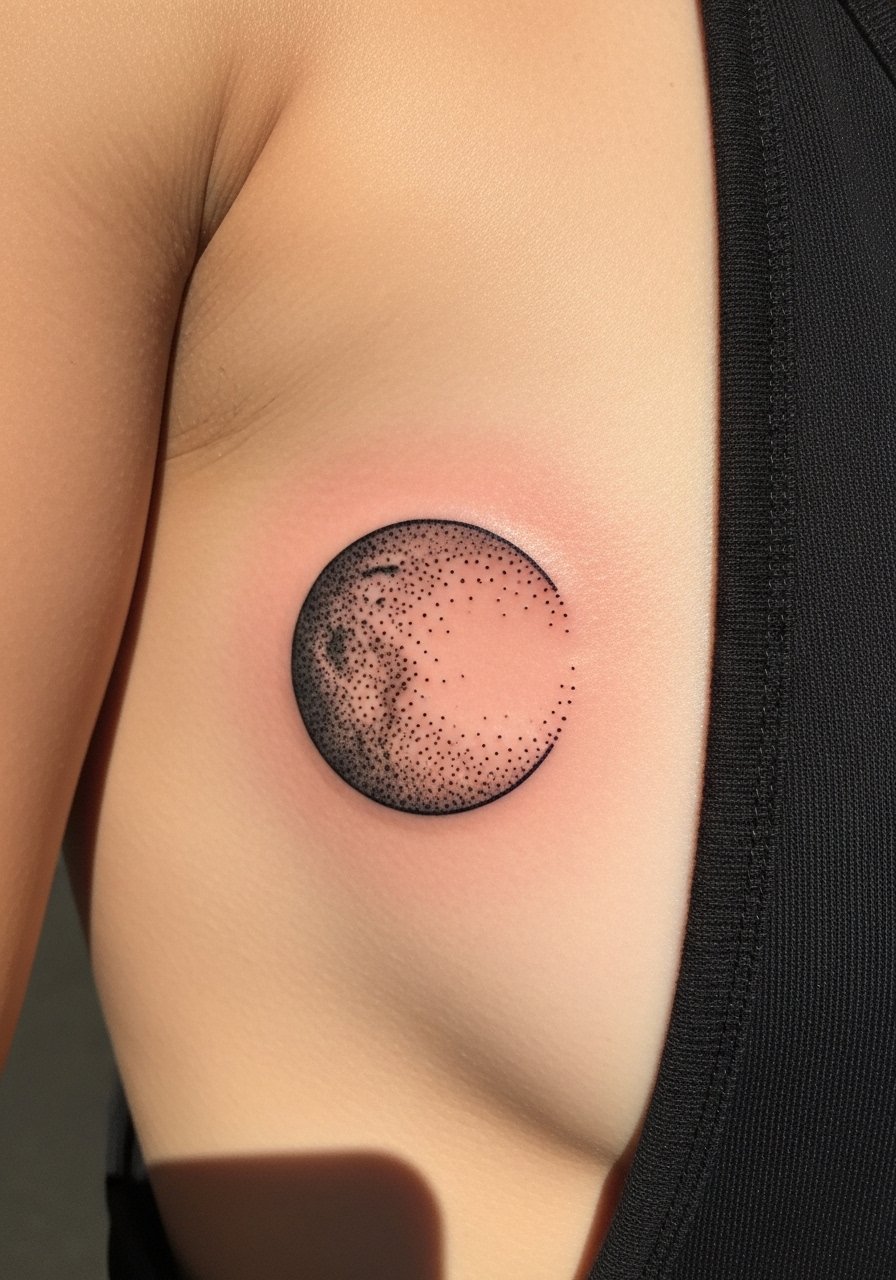
2. Textured Lunar Disc with Craters on the Collarbone
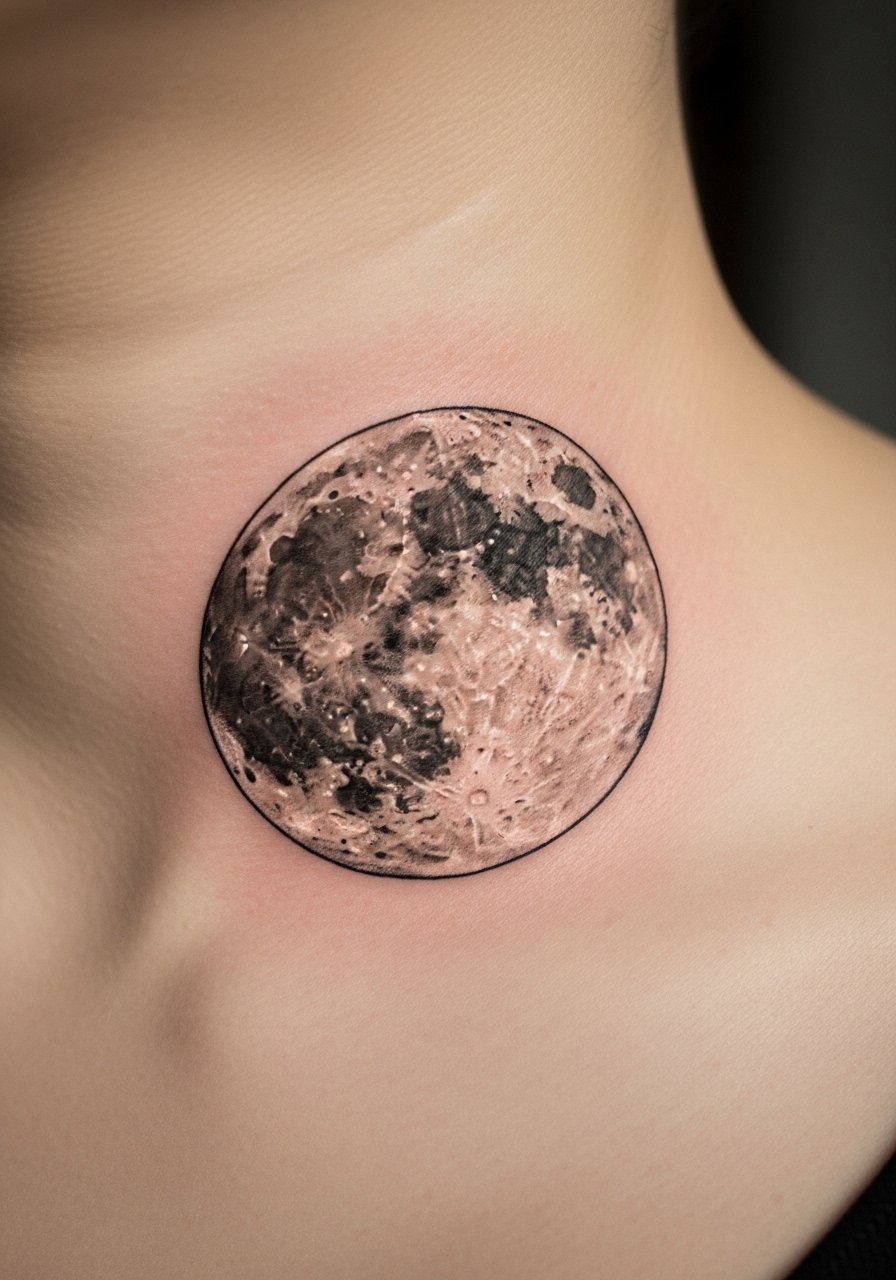
Fair warning, collarbone work can feel sharp but it heals into a dramatic little piece. Ask for dot work and stipple shading that creates crater texture rather than heavy solid fills. The mistake I see most is asking for a full black circle which looks flat as it fades. A textured approach keeps contrast longer because saturation is distributed. Session time is usually under an hour. Expect touch-up around year two if you wear a lot of sun on that area. Mention you want minimal saturation toward the edges so the shape ages with soft borders.
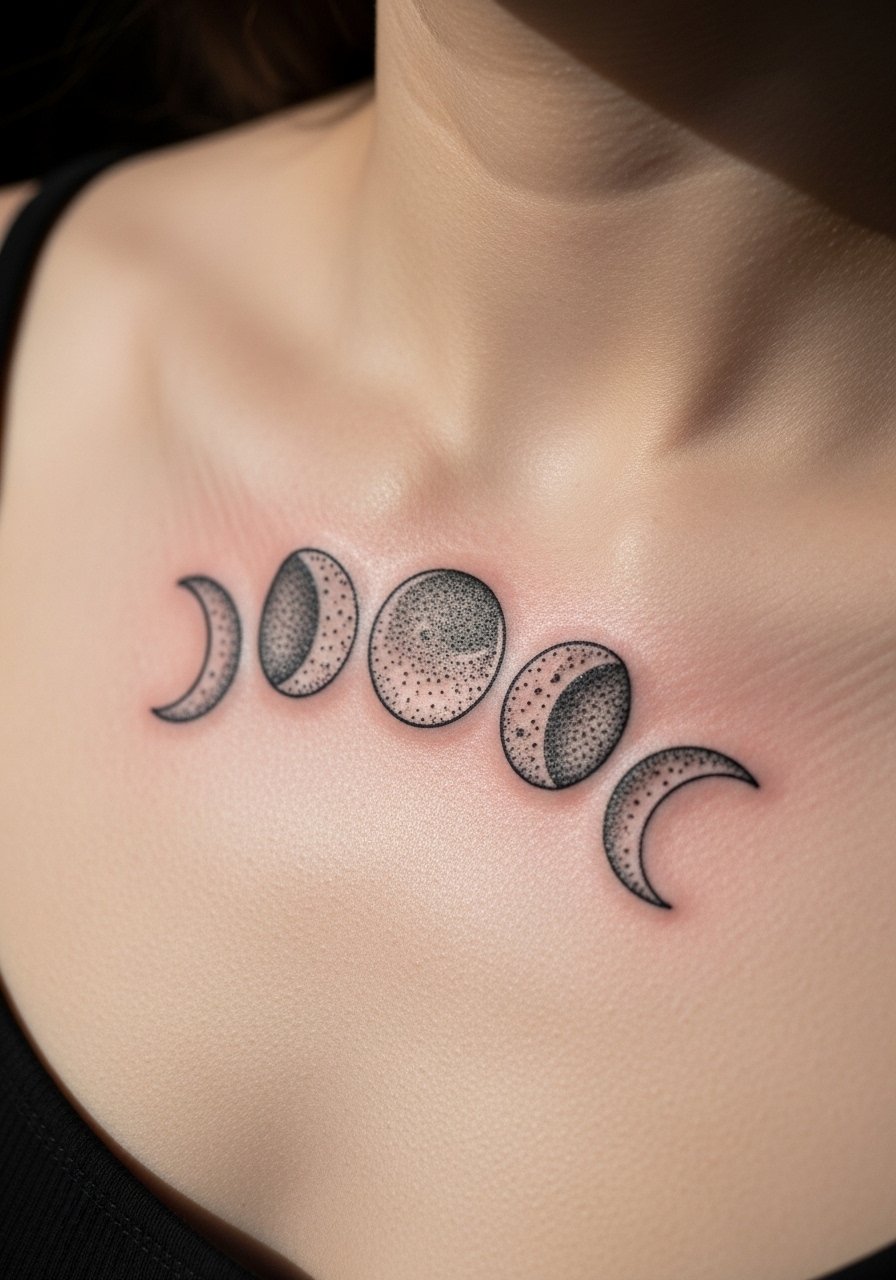
3. Sequence of Lunar Phases Along the Inner Arm
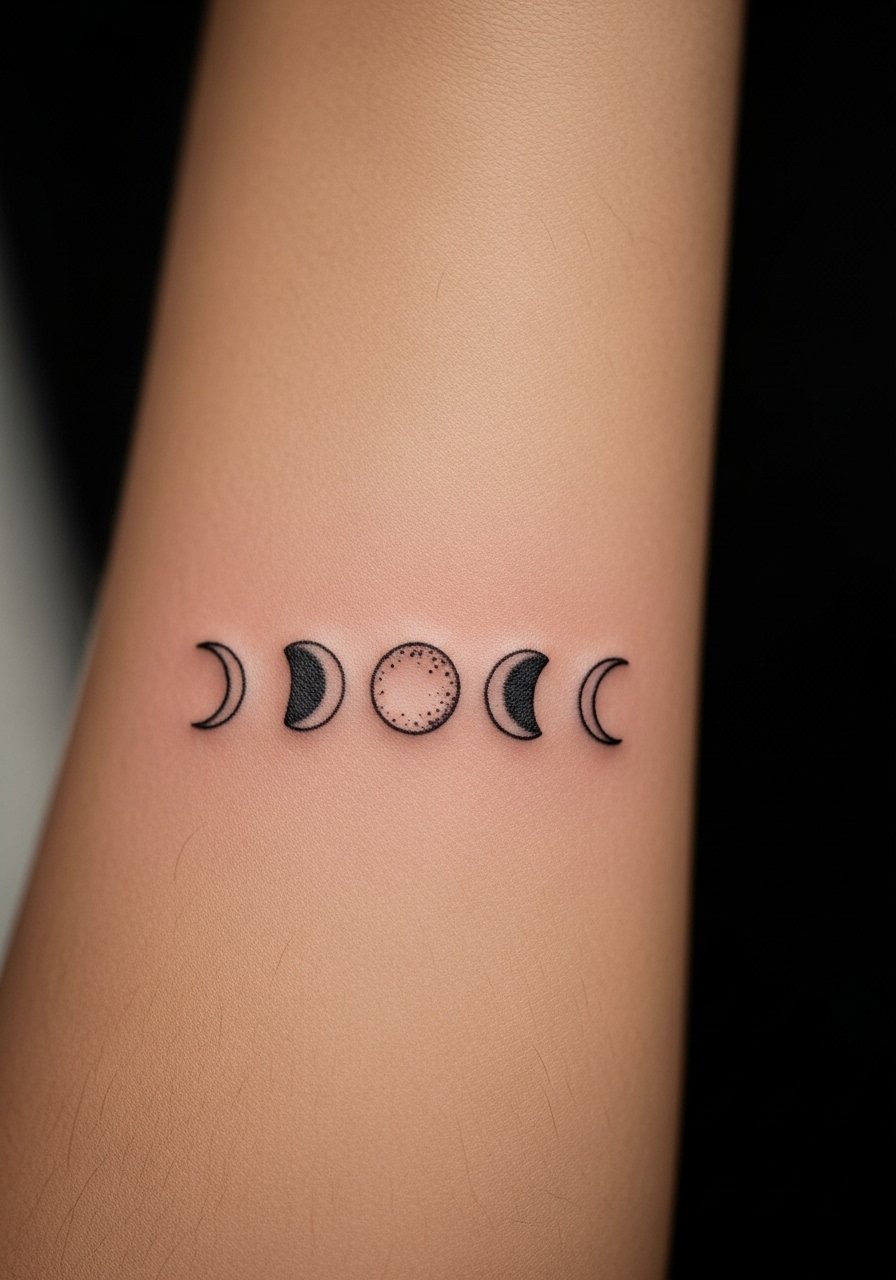
When you sit with your artist for this one, bring timeline photos that show exact spacing. The inner arm is forgiving for linear flow and lets each stage breathe visually. A common error is compressing too many tiny stages into a short span which causes early merging. Expect two short sessions if you want crisp contrast between stages. Pain is moderate. For people tracking personal milestones this placement works because it reads while you move your arm. Plan for a touch-up at year three if the lines soften.
4. Watercolor Crescent Shape at the Ankle
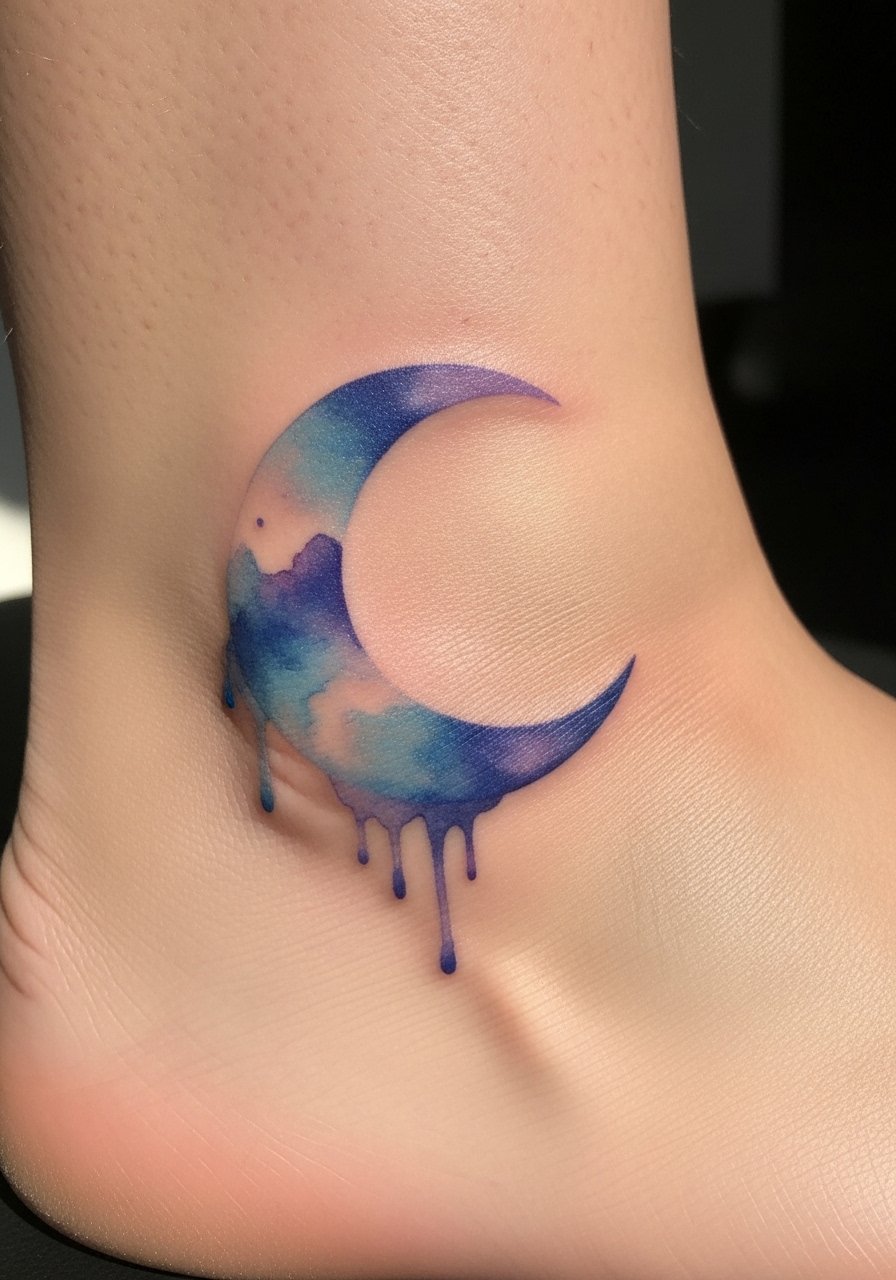
Most watercolor work from years back faded into muddy color because saturation was too shallow. This version asks for layered washes with small solid anchor points so the shape holds. Tell the artist you want soft edges and an anchor dot of deeper color to prevent early loss. The ankle can be painful because of thin skin and bone, but the small size keeps session time short. Expect more maintenance than black ink and plan for touch-ups at year two to keep the washes lively. Avoid heavy outlines if you want the watercolor look.
5. Blood Eclipse Outline for Thigh Placement
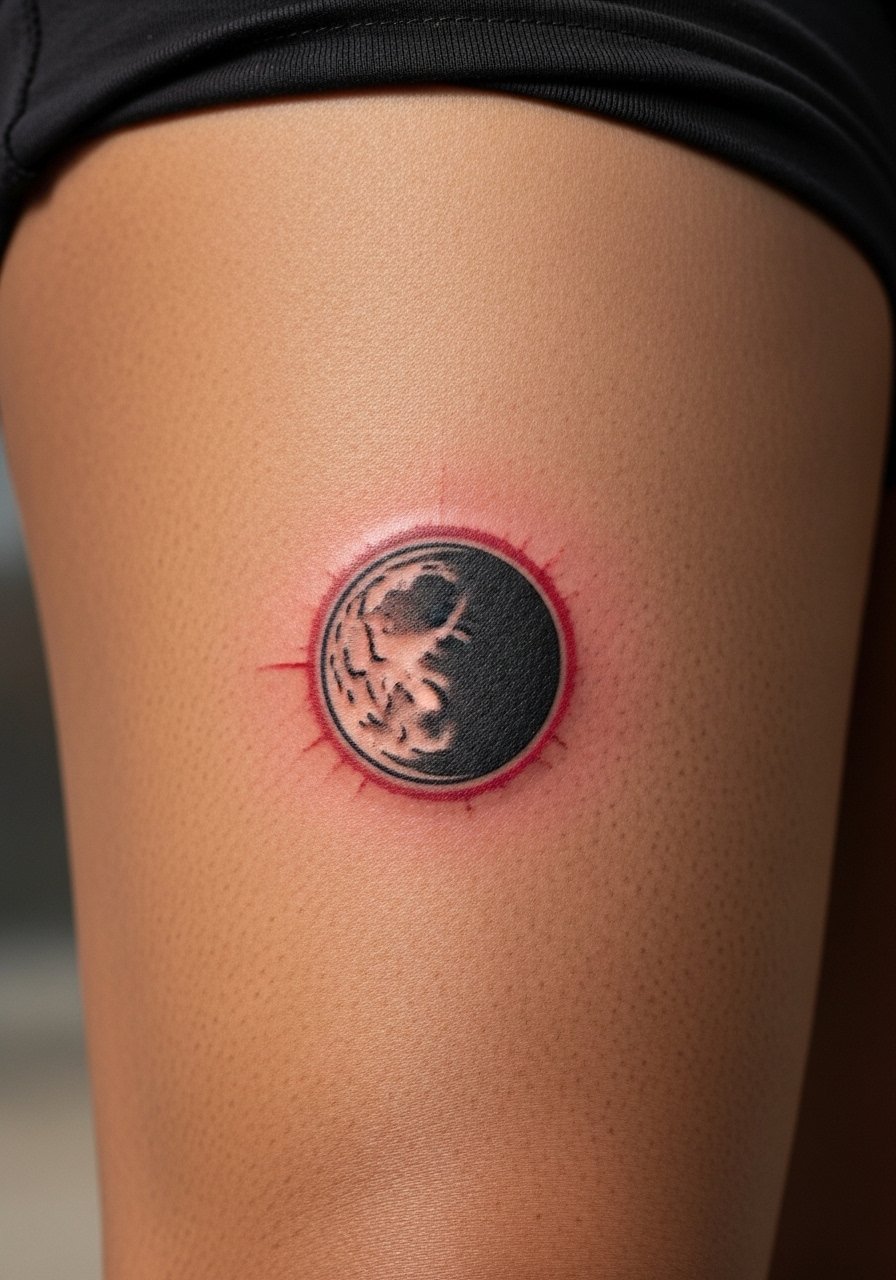
Artists split on red accents. One camp avoids reds near black because red can fade into pink quickly. The other camp says carefully saturated red paired with proper aftercare stays striking. If you want the red to last, ask for a small, concentrated accent and plan a follow-up session. Thigh placement feels moderate in pain and gives artists room for texture. This outline version keeps the design small but impactful. Expect session time around 45 minutes. Keep the area out of tight clothing during healing to avoid scabbing.
6. Tiny Curved Solo on the Finger
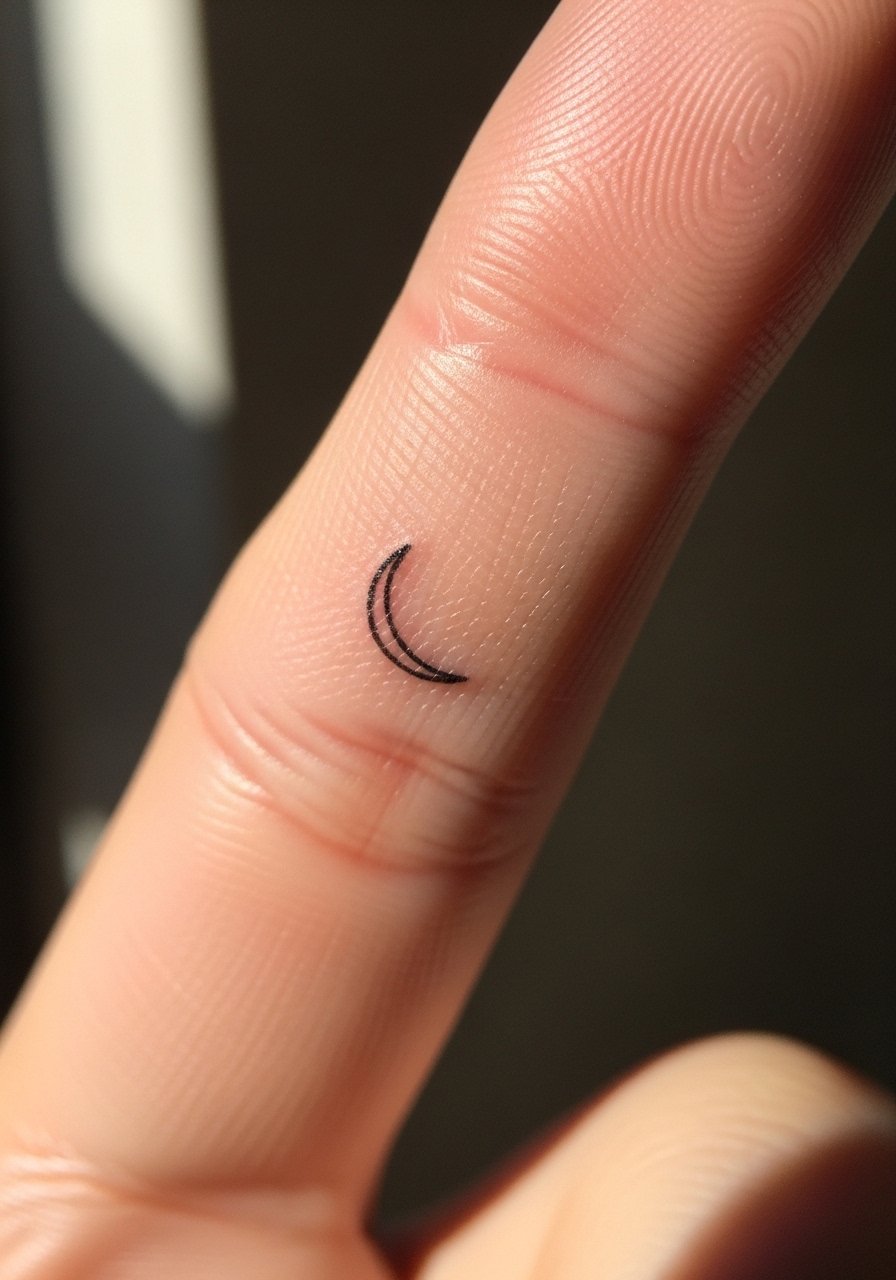
Fair warning about fingers. They fade faster and often need touch-ups because of constant movement and thin skin. The biggest mistake is asking for hairline detail there. Ask for slightly bolder linework and expect touch-ups every 12 to 18 months. Session time is usually under 20 minutes but healing requires careful aftercare. This is best for people who want a low-commitment visible mark and understand the maintenance cycle. If you work with your hands a lot, consider a less exposed spot.
7. Linear Phase Sequence Wrap for the Forearm
When you describe this to an artist, show how you want the sequence to wrap with consistent spacing. The common error is uneven spacing which makes the wrap look lopsided as it heals. Pain is mild to moderate and sessions run about an hour for crisp spacing. Forearm skin holds fine line better than softer areas, but expect a subtle blur after a few years. Plan a touch-up at year three if you want tight separation between each stage. Consider how the wrap interacts with sleeve shirts for daily visibility.
8. Lunar Disc Partly Obscured by Clouds on Upper Back
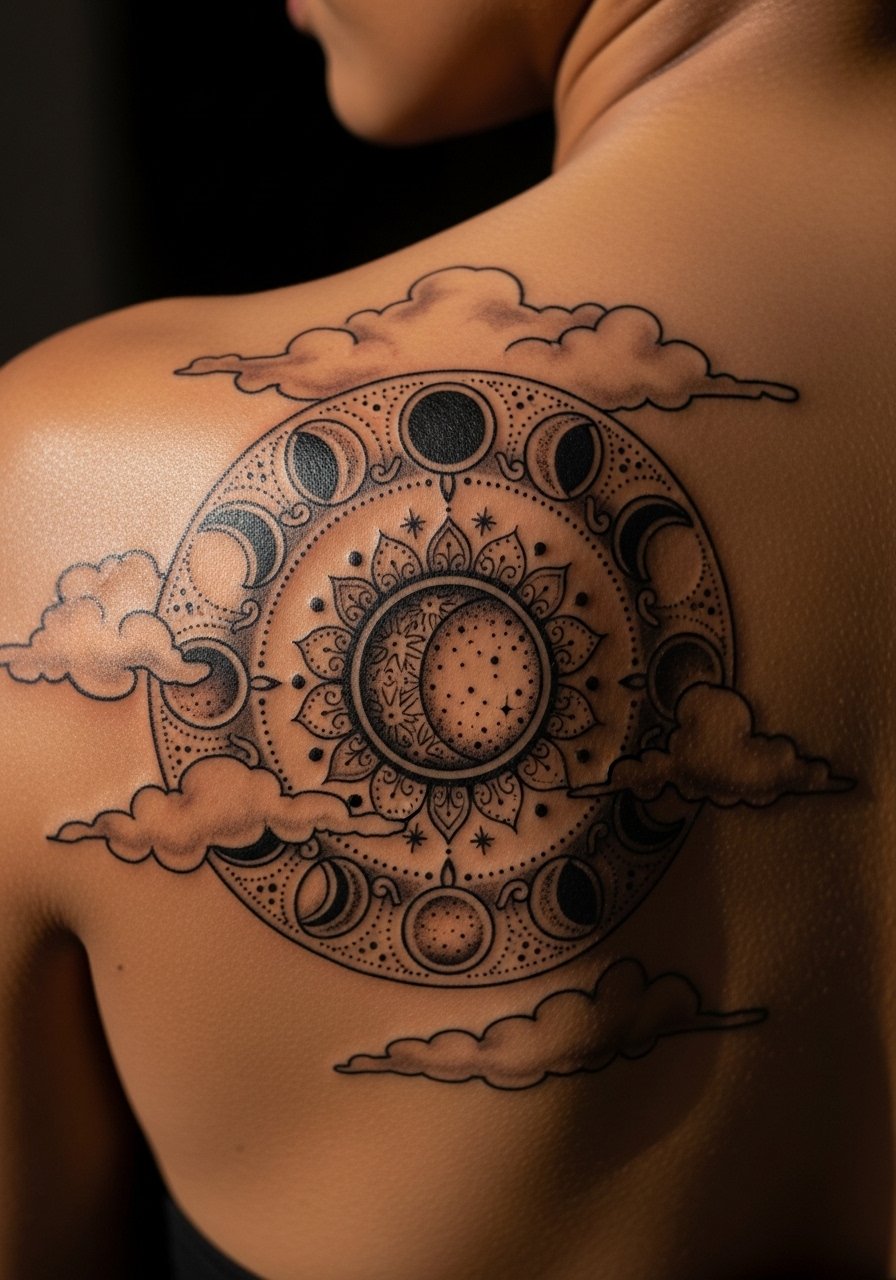
Most clouded designs work best with soft gray washes and tiny highlights to suggest depth. Tell your artist you want the clouds to sit lightly over the disc rather than heavy black blocking. Upper back placement is less painful and heals well under clothing if you avoid friction. A typical session is under 90 minutes. The common mistake is over-detailing the clouds at small scale which breaks down as the skin moves. Plan for a touch-up between years two and four if you spend a lot of time in the sun.
9. Cluster of Crescent Shapes and Stars Behind the Ear

Hairline detail behind the ear can be deceptive because the area shifts under hair. Ask your artist for slightly bolder anchors so the cluster keeps shape. Session time is brief and pain is low to moderate. A common mistake is packing too many tiny elements into a tiny area. Keep the cluster sparse so it ages with clarity. If you have long hair plan placement so the design gets occasional sun exposure without daily friction. Touch-ups are likely at year two for delicate detailing.
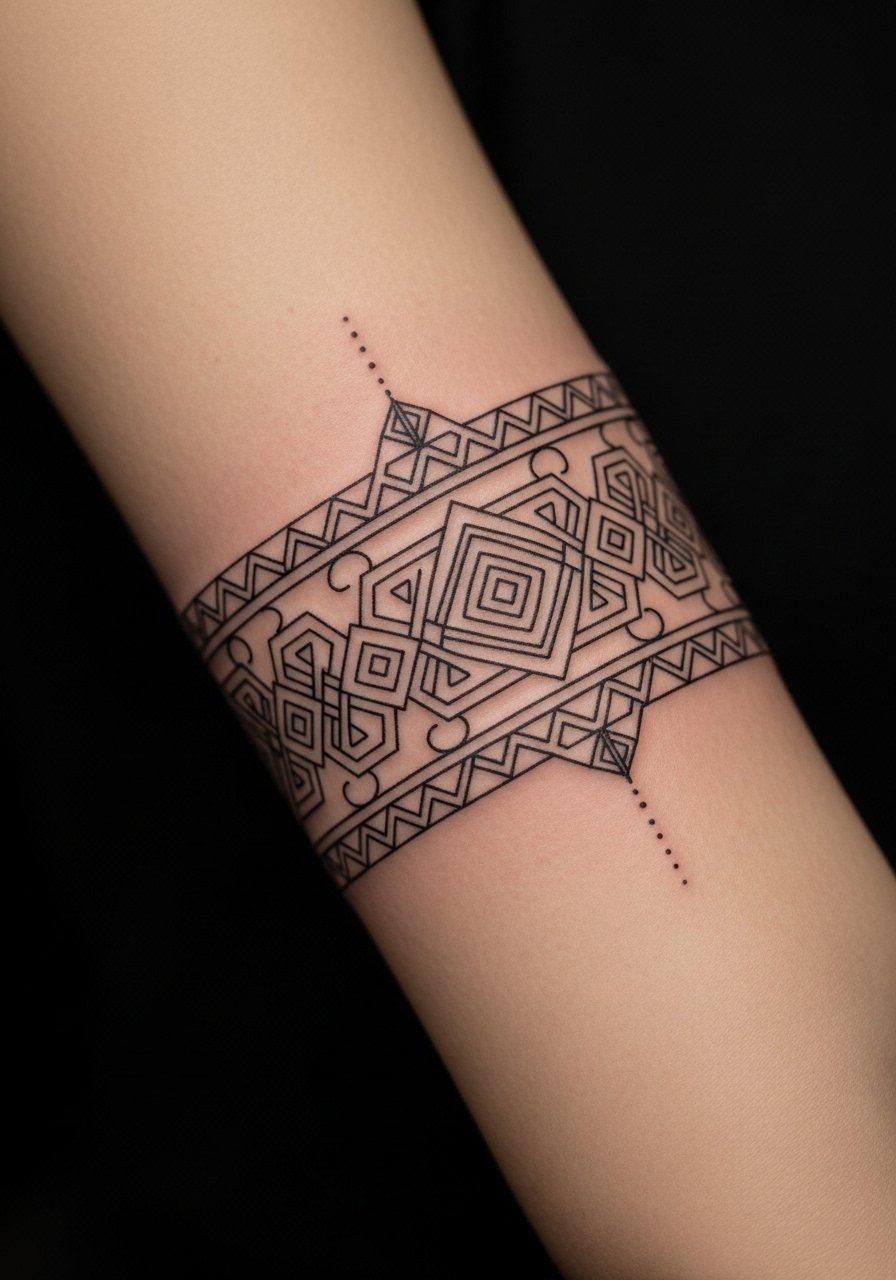
10. Geometric Lunar Disc on the Ankle
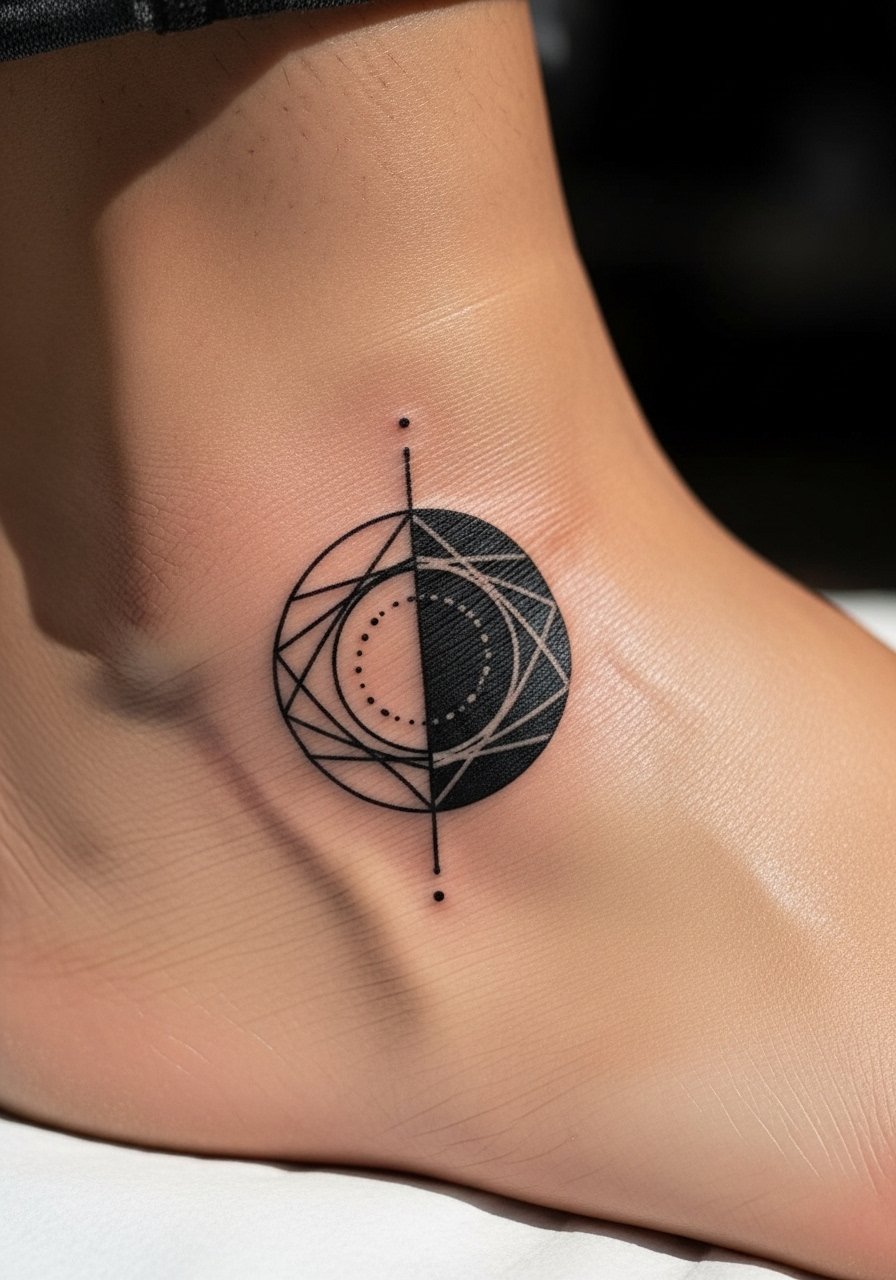
The biggest mistake with geometry is going too small. Lines need room to stay parallel over time. Tell your artist you want consistent line spacing and slightly thicker endpoints. Ankle bone work can be painful but the session is short. Geometric shapes hold well when artists keep fills minimal and rely on negative space. Expect a touch-up at year three if you often wear sandals and expose the area. This suits people who like symmetry and clear contrast in tiny formats.
11. Arc of Phases with Dot Work Along the Collarbone Curve
When you request dot work, specify stipple density so the artist knows how compact to make the dots. The collarbone curve gives this arc graceful movement, but over-concentration of dots causes a muddy look later. Pain is moderate due to bone proximity and session time can be up to an hour. Artists divide into two camps on dot work density. One camp prefers sparser dots for longevity. The other likes rich density for bold texture. Ask which approach they favor and why. Plan for a touch-up at year two if dots coalesce.
12. Watercolor Phase Sequence on the Ribcage

Most watercolor on ribs fades faster because the area moves when you breathe. One practical approach is to anchor each wash with a tiny black outline so the shape remains readable. The ribcage hurts more than many spots, expect a higher pain score and longer healing. Session time may be longer if you want multiple colors. The mistake is picking broad washes without anchor points. Ask the artist about layering and how many sessions they recommend. Expect touch-ups at year two for color refresh.
13. Minimal Orbit Ring Tattoo Behind the Ear
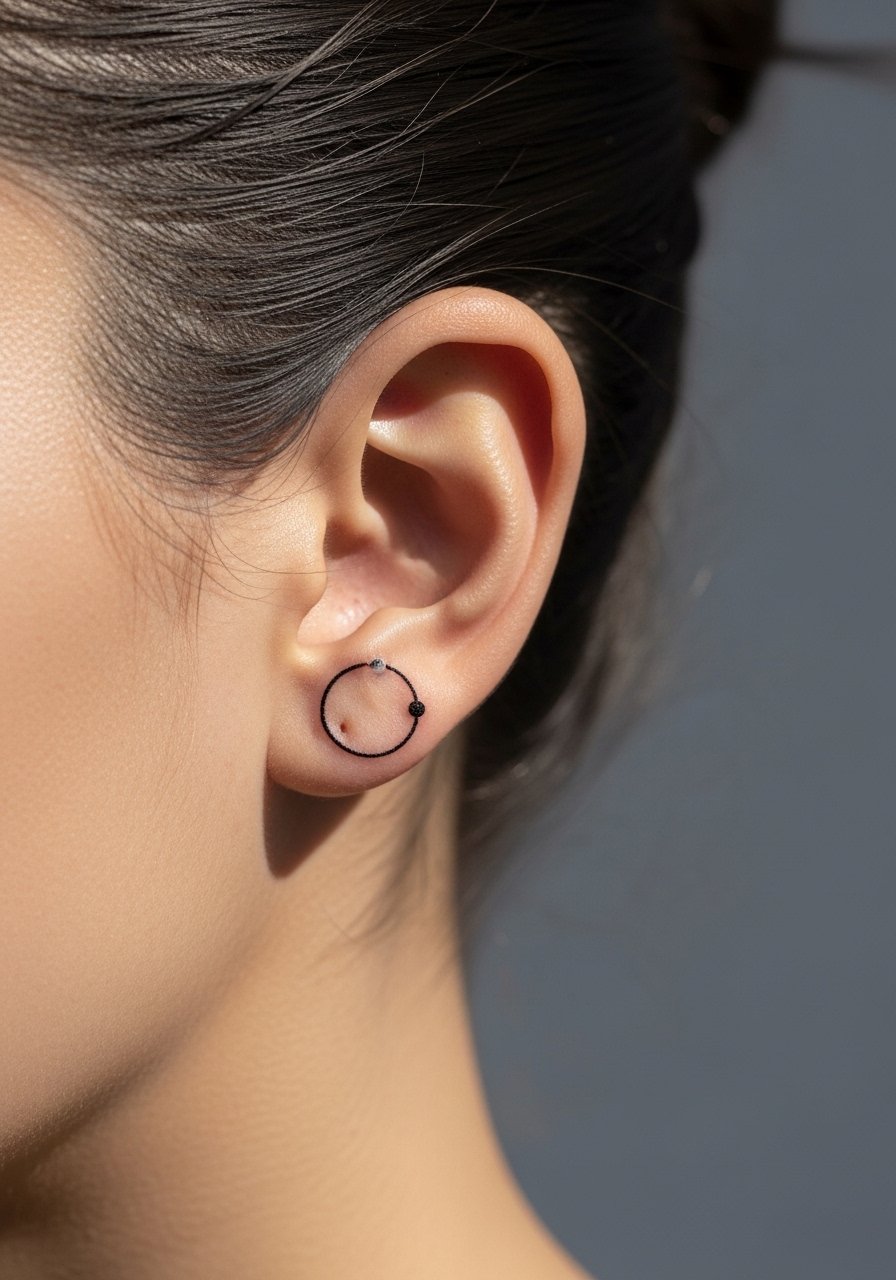
Consultation tip, show exact scale so the ring is not too thin. Tiny rings can disappear if the line sits too shallow. This placement is discreet and heals quickly, with low pain and short sessions. Common error is requesting micro lettering with such a ring, which adds complexity. If you want an even subtler option, choose a single dot orbiting the ring for longevity. Touch-ups are typically only needed if the line softens significantly after a couple of years.
14. Sobriety Tracker Sequence on the Inner Wrist
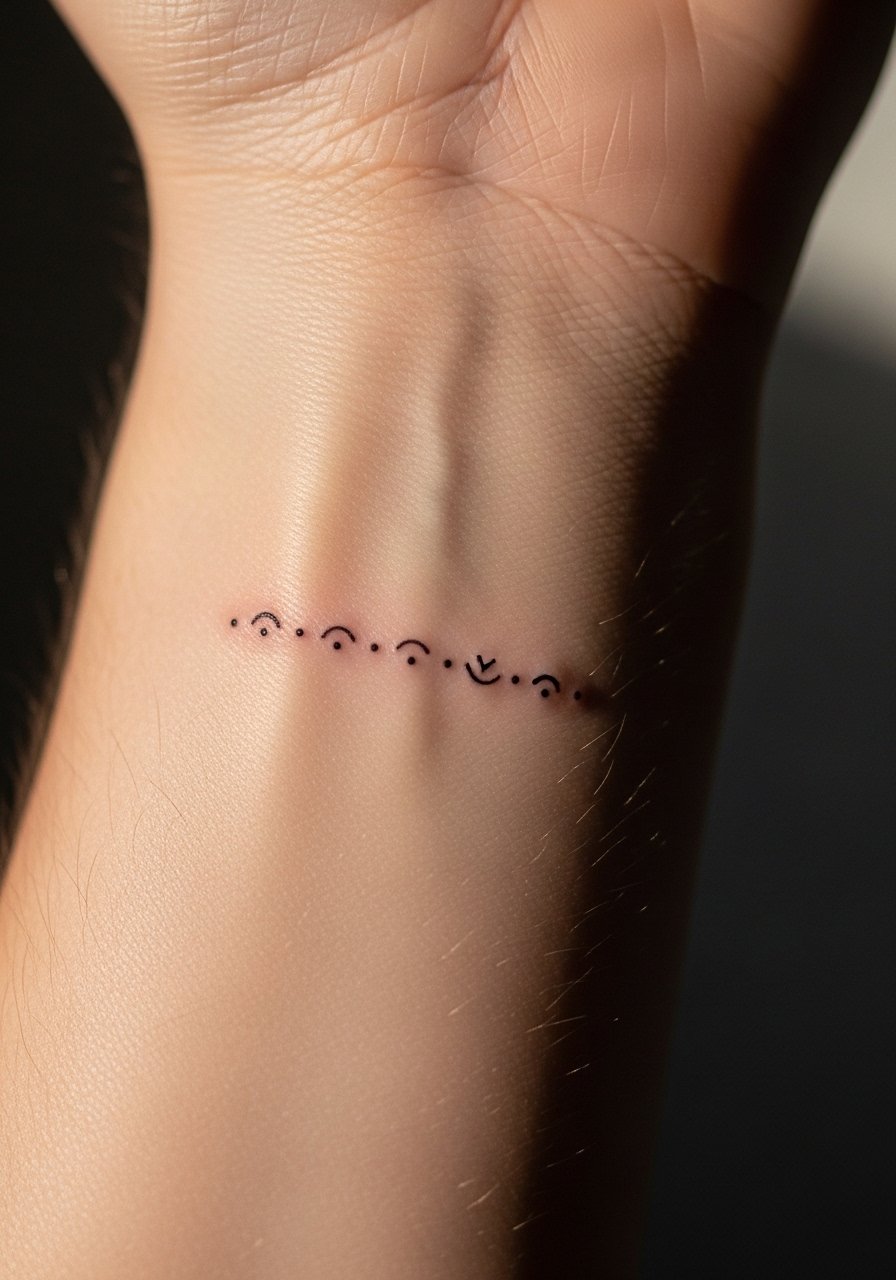
Someone I know used a linear sequence on their inner wrist to mark milestones and said visibility helped with accountability. Tell your artist you want even spacing and avoid tiny mixed symbols that blur. The wrist holds fine line reasonably well but expect touch-ups sooner than forearm work. The common mistake is mixing too many marks of different sizes which ages inconsistently. Session time is short and pain is mild to moderate. This placement reads well and can be covered with a watch if needed.
15. Stipple-Shaded Lunar Slice on the Side Rib
Fair warning, ribs are a sensitive spot and some artists argue fine line does not hold there. One group says skin stretch blurs fine detail within two years. The other group says with proper depth and spacing stipple work settles well. Ask your artist where they stand and whether they recommend stippling versus whisper lines. Expect higher pain and a session that may take longer due to careful placement. Stipple shading can age gracefully if dots are spaced intentionally and not packed too tightly. Plan a touch-up at year two to refresh contrast.
Tattoo Prep and Aftercare Essentials
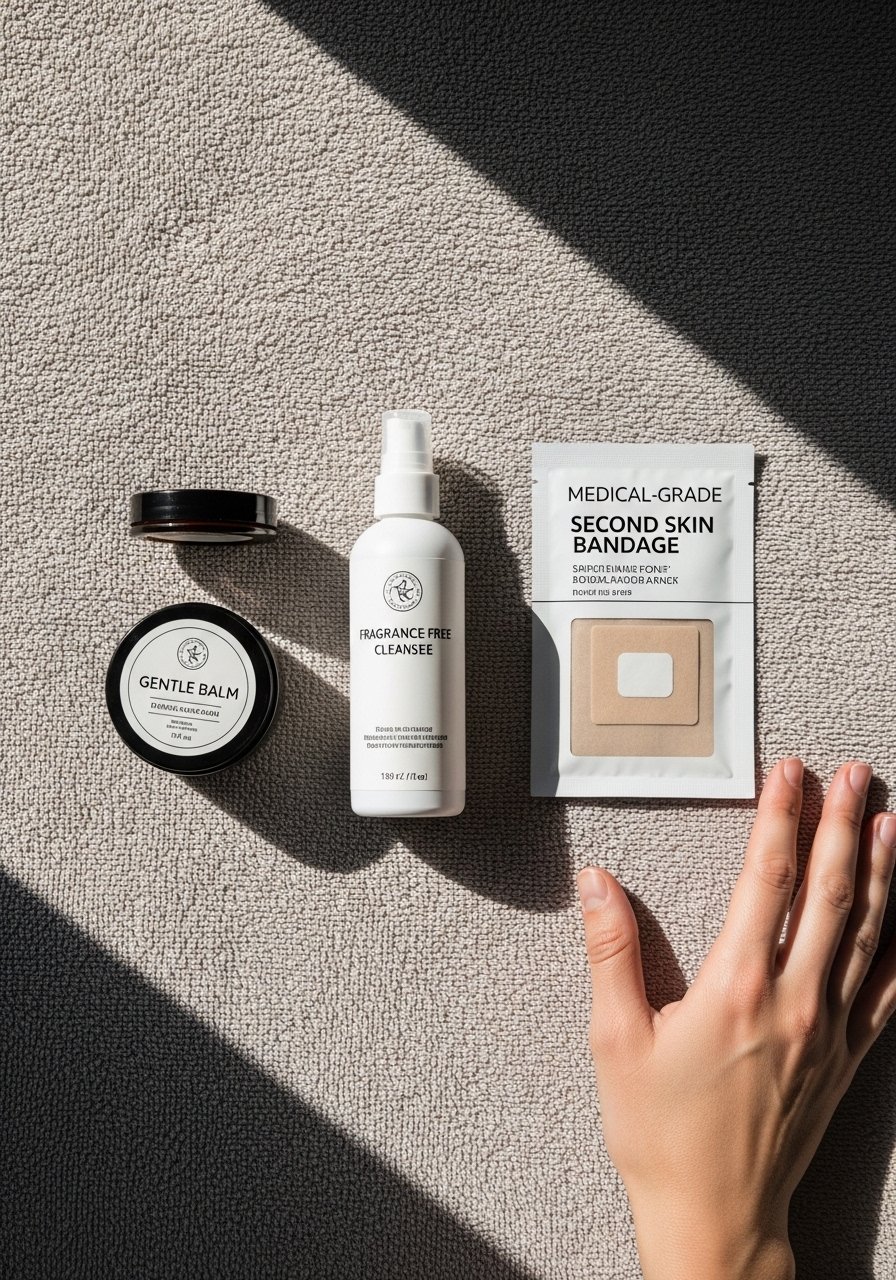
Fragrance-free gentle foaming cleanser for healed and fresh skin. Use this during the first few days to remove debris without stripping moisture. It cuts soap residue without adding fragrance that can irritate healing skin.
Lightweight fragrance-free balm for daily moisture. Apply thin layers after the initial healing window to keep saturation and prevent scab hardening.
Medical-grade second skin bandage, 6-inch roll. Useful for the first 24 to 48 hours on higher-friction spots like hands or ribs. It reduces rubbing and speeds surface healing.
Breathable tattoo aftercare ointment with fast absorption. Use sparingly during the scab stage to avoid clogging pores.
Aquaphor Healing Ointment. One mainstream option for the first two days if your artist recommends it. Apply a very thin layer only and stop once the surface begins to dry.
Silicone-based scar sheet strips, small size. For raised spots or touch-up scars later, these help flatten and smooth over months.
SPF 50 mineral sunscreen stick for healed tattoos. Use daily on exposed pieces to protect pigment once the tattoo is fully healed. Sunscreen is the single most important thing for color retention.
Fragrance-free hydrating lotion for long-term care. Keep skin supple to prevent premature fading and flaking over time.
Every tattoo is different. Always follow your artist's specific aftercare instructions. Consult a dermatologist if you have skin concerns or unusual healing issues.
Frequently Asked Questions
Q: Will fine line work on the ribcage blur faster than dot work for small lunar slices?
A: It depends on the artist technique and your skin. From what I've gathered, ribs move a lot and thin continuous lines can soften sooner. Stipple or dot work spaced intentionally tends to hold contrast longer in that spot. Ask your artist which approach they prefer for ribs and whether they recommend a touch-up timeline.
Q: How do watercolor washes compare to black texture in terms of long-term maintenance?
A: Watercolor needs more upkeep because pigments sit differently in the skin and can fade unevenly. Black texture or stipple shading usually holds contrast longer. If you want watercolor, plan on a refresh at year two to keep colors bright and ask for anchoring points in black for longevity.
Q: Can a sequence used as a sobriety tracker be modified later if I want to add more milestones?
A: Yes, tracks can be extended if you allowed spacing when first tattooed. I advise planning the layout with your artist so future additions match scale and spacing. If it sits tightly now, adding later may require creative bridging or a small touch-up to blend new marks.
Q: Are there special career considerations for visible spots like fingers or the wrist?
A: Visible placements can still affect hiring in some fields. Think about your career path before committing to hands or face. If you need discretion, choose behind-the-ear or inner forearm locations that are easier to cover.
Q: What should I specifically ask my artist during consult to prevent early blowout on a small curved wrist piece?
A: Ask about line depth and needle grouping, request slightly thicker outer contour lines, and ask for spacing between elements. Request to see healed photos of similar wrist pieces in their portfolio. Trust your artist but be specific about longevity concerns.
