
Fine-line butterflies are all over saved boards, but the tiny single-needle pieces that look delicate on a phone often lose definition after a year. Placement, line weight, and how much negative space you allow determine whether a small butterfly stays crisp or becomes a blurred shape. Read these options with an eye for aging, touch-up needs, and wardrobe pairings so the design still reads the way you want after the first healing window.
1. Tiny Fine-Line Butterfly on Inner Wrist
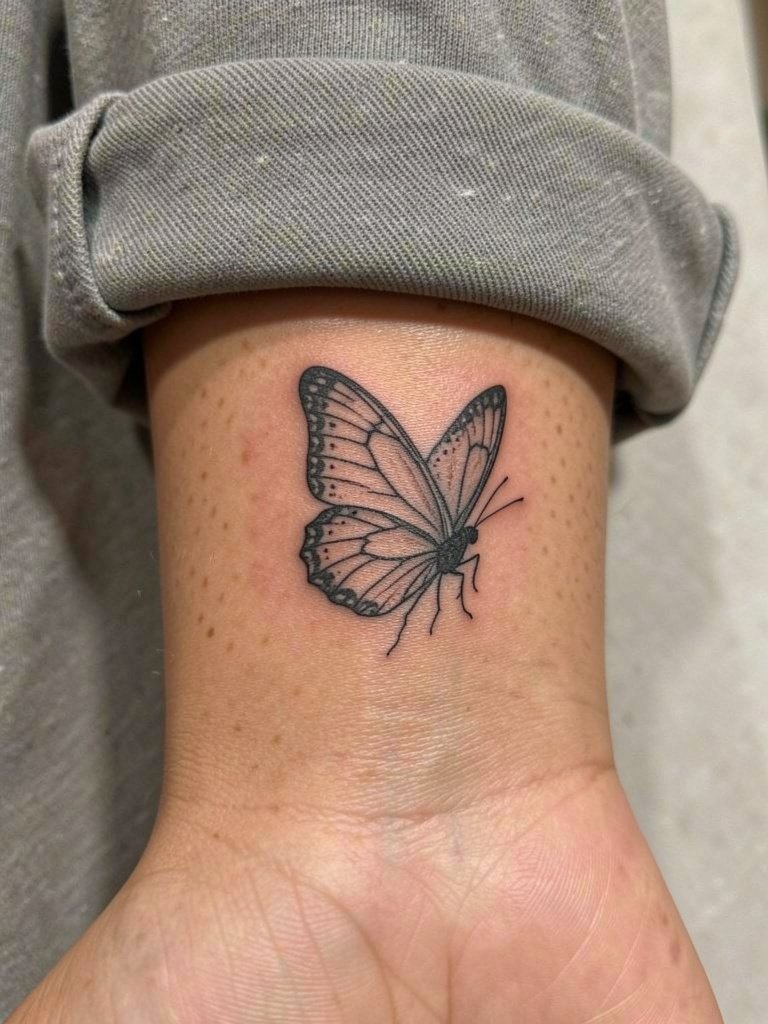
A single-needle butterfly on the inner wrist reads as jewelry and can be done in one short session, typically 20 to 40 minutes. Expect tenderness during the session because the wrist has thin skin and many nerves, but most people tolerate it with short breaks. The common mistake is going too tiny with almost invisible veins in the wings, which the wrist will eat over time and make look smudged at year two. For longevity use slightly bolder linework in the wing outlines and ask for a touch-up plan at nine to twelve months. This placement looks elegant with rolled linen shirts where cuffing the sleeve shows the piece.
2. Micro-Realism Butterfly on the Side of the Neck
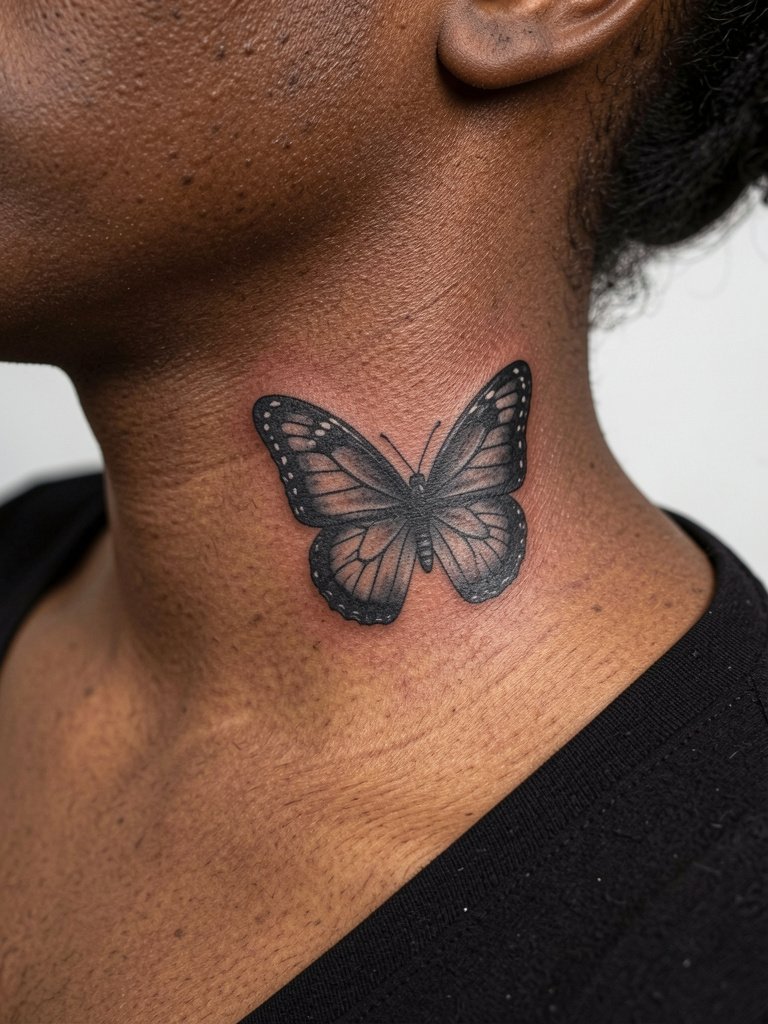
The side neck is a visible spot that reads like an accessory. Sessions tend to be short but more uncomfortable than the arm because the skin is thin and the nerves are sensitive. A common version that ages poorly uses ultra-fine stippling and tiny veins without enough contrast, which can wash out on darker skin tones. For a micro-realism approach, plan for slightly deeper saturation in the darks and a follow-up touch-up at six months to restore contrast. If you want to show it off, pair with wide-neck tops that slot the tattoo into the neckline.
3. Minimalist Geometric Butterfly on the Inner Ankle
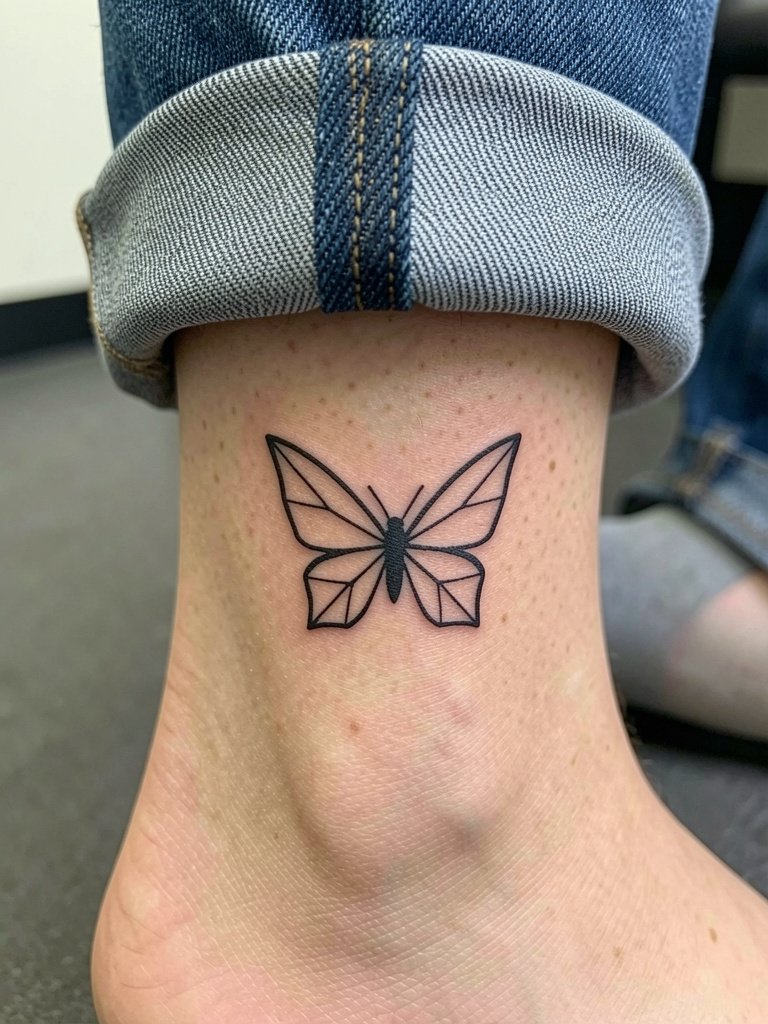
An inner ankle butterfly makes for a subtle seasonal reveal. Bring reference photos that show the exact scale you want so the artist can map how the geometric angles read against the ankle bone. A misstep is placing ultra-thin intersecting lines too close together, which increases blowout risk where the skin flexes against socks and shoe edges. Expect the first two weeks to need careful protection from friction, then a check-in at the three-month mark for density. For outfits, small ankle pieces pair well with low-rise sandals that keep the ankle visible.
4. Watercolor Butterfly on the Side Rib

Rib tattoos often stir debate about fine line and color. One camp argues that the stretch and movement of rib skin make fine-line watercolor blur and fade within a few years. The other camp contends that with slightly increased spacing and careful saturation the style can hold up, and they point to three-year healed examples to demonstrate. Pain on the ribs is higher than the arm and sessions can require breaks, so plan for shorter passes and an explicit touch-up window at six to twelve months. Wear a fitted cropped top to the appointment so the artist can access the area without fabric being moved.
5. Blackwork Silhouette Butterfly Behind the Ear
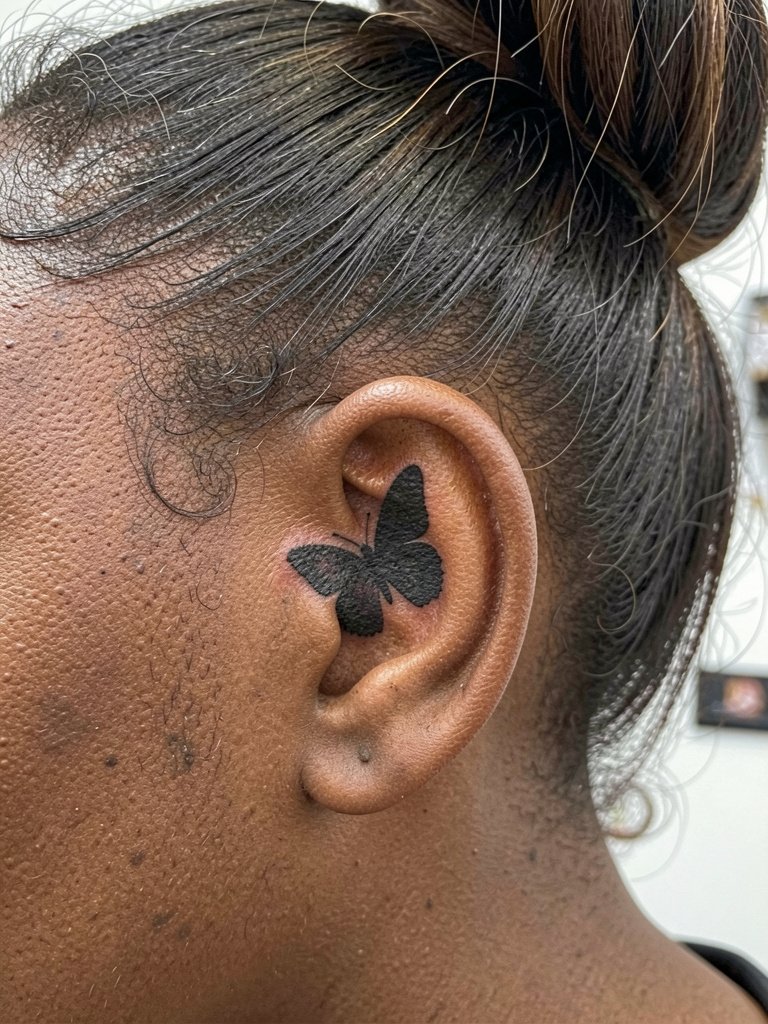
Behind the ear is a small canvas that benefits from bold shapes rather than fragile linework. A common mistake is asking for filigree detail there, which can become indistinct once hair grows in and the skin texture shows. Sessions are short, often under 30 minutes, but require a steady hand because the skin is thin. For show-off styling, a neat updo or hair clip keeps the area visible, and a sleek hair claw can frame the piece when you want it on display. Professional considerations include finding an artist experienced with small placement work and sterile ear-area technique.
6. Tiny Dotwork Butterfly on the Side of the Finger
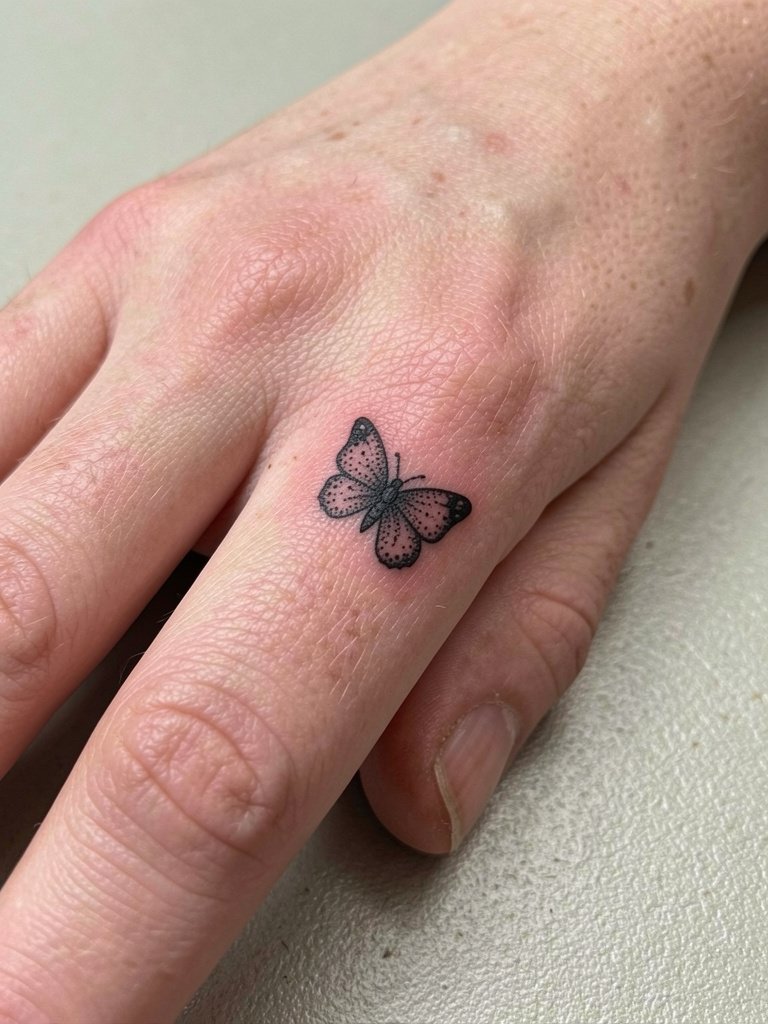
Finger tattoos are notorious for faster fading and loss of detail. One art community camp says fingers rarely keep single-needle detail because of constant washing and skin regeneration. The opposing camp argues that bold simplified silhouettes and heavy saturation can last if you accept periodic touch-ups. For a butterfly here keep the design simplified to reduce blowout risk. Expect the session to be quick and the recovery to require gentle hand care for two weeks. Protect the area during the first week and plan a touch-up inside six months.
Before You Book
The small placements above need slightly different prep than larger pieces, especially when wrists, fingers, and ribs are involved.
-
Stencil transfer paper kit. Lets you preview the linework on skin before committing, which is helpful for inner wrist and finger placements in ideas above.
-
Topical numbing cream. Applied as directed before chair time it can ease rib or neck sensitivity without affecting the ink if you follow your artist's timing.
-
Thin protective film roll. Keeps ankle and finger tattoos clean during the first week of friction from shoes and daily washing.
-
Fragrance-free gentle body wash. Cleanses the healing area without dyes or fragrances that irritate delicate linework.
-
Aquaphor healing ointment. A mainstream option for the initial thin-moisture layer in tight linework areas while allowing the skin to breathe.
7. Stipple-Shaded Butterfly on the Outer Shoulder
The outer shoulder is forgiving for detail and scales well if you want to expand into a larger shoulder piece later. If you are choosing between stipple shading and soft wash, stipple holds better over time because it avoids rapid saturation loss. Talk with the artist about wing spacing and contrast rather than saying "make it faded." Expect mild soreness and a session length around 60 minutes. For outfits try tank tops with thin straps that let the tattoo sit in the shoulder window.
8. Tiny Color Butterfly on the Collarbone

Collarbone placements are visible and photograph well. Colors can look different depending on skin tone, so bring healed shots on similar skin tones and specify the final vibrancy you want. The most common mistake is overloading the tiny wings with multiple pigment tones, which can read muddy after healing. Expect moderate discomfort during the session and plan for a touch-up at three to six months to restore saturation. Showing this piece off works nicely with open-collar blouses that frame the collarbone.
9. Micro-Traditional Butterfly on the Back of the Hand
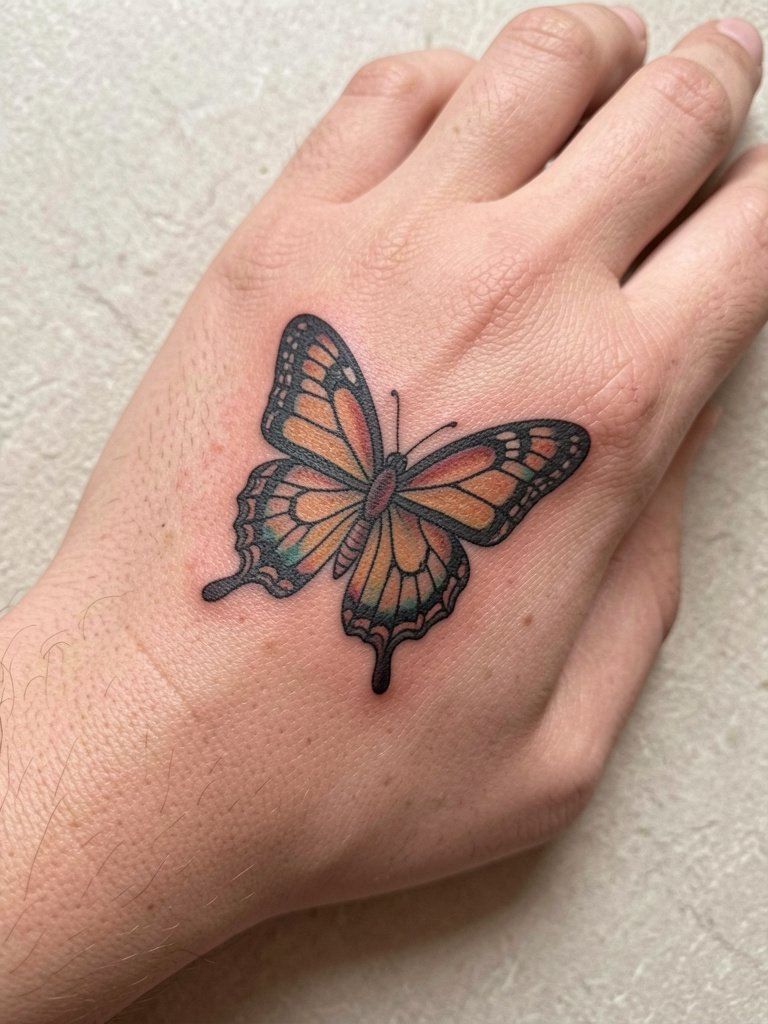
Hand tattoos carry both practical and cultural considerations, and opinions split in the community. One group argues hands should be reserved for bold simplified work because constant washing and sun exposure break down tiny details quickly. Another group believes carefully placed small designs with strong linework can last if you accept periodic touch-ups. If you opt for a back-of-hand butterfly keep the design strong and the detail minimal. Session time is short but healing involves careful protection. This placement requires an artist experienced with hand anatomy and sterile technique.
10. Linework Butterfly on the Collar of the Foot

The top of the foot is attractive for small statement pieces but it is prone to fading and scabbing. The wrong approach is ultra-fine single-needle veins across the wings, which the foot will wear away first. For a small butterfly here add slightly thicker outer lines and expect light touch-ups within a year. The session feels sharp for most people because of thin tissue over bone. For shoes, pair the piece with low-profile strappy sandals that reveal the top of the foot.
11. Minimal White Ink Accent Butterfly on the Sternum

Sternum work can be striking but needs technical care. The common aging issue is white ink fading faster than black and leaving an uneven appearance, so discuss the expected lifespan of white accents in advance and plan for selective touch-ups. Pain on the sternum can be intense for some people and sessions may need to be split. Because this placement sits near the bust, a specialized artist who understands pressure on the skin is recommended. The piece pairs with fitted bandeau tops for nights out.
12. Micro-Surreal Butterfly on the Upper Thigh
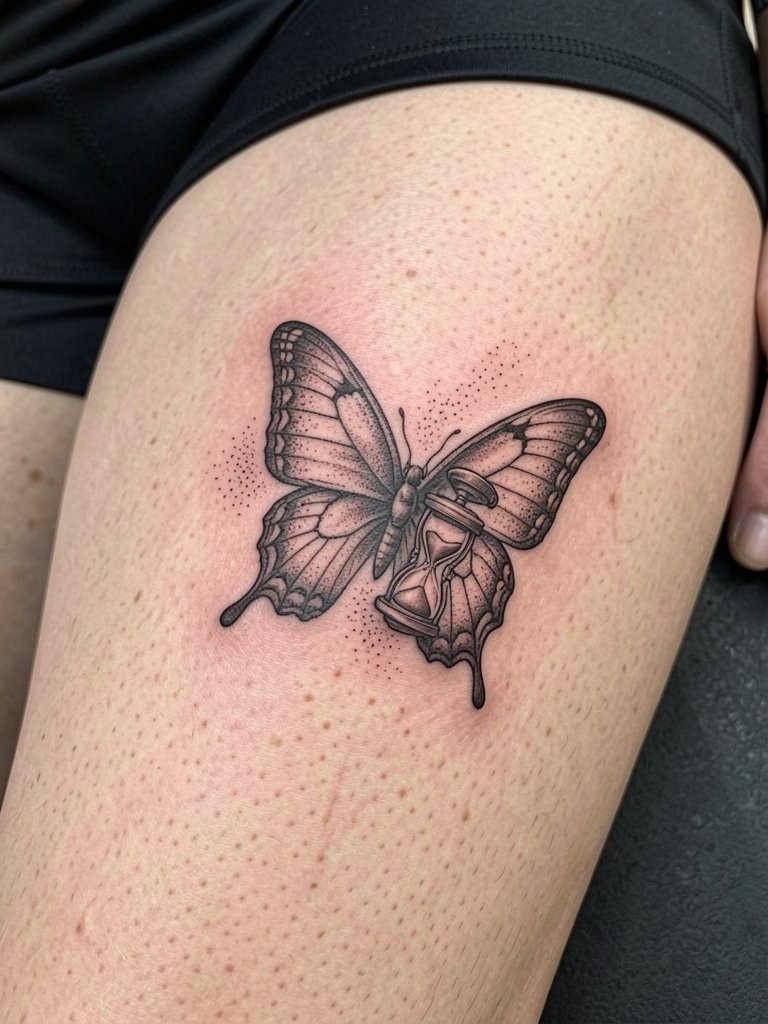
The inner upper thigh is an intimate spot that allows for more intricate compositions because the skin is stable and less exposed to sun. Session feel is comparatively mild but privacy during the session matters, so choose a studio that offers comfortable draping. A common mistake is requesting extremely dense detail in a very small area, which can cause irregular healing. Expect a touch-up at three to six months to refine any lost stippling. For reveal styling, this area works well with high-cut swimwear or modest athletic shorts that keep the piece private or show it selectively.
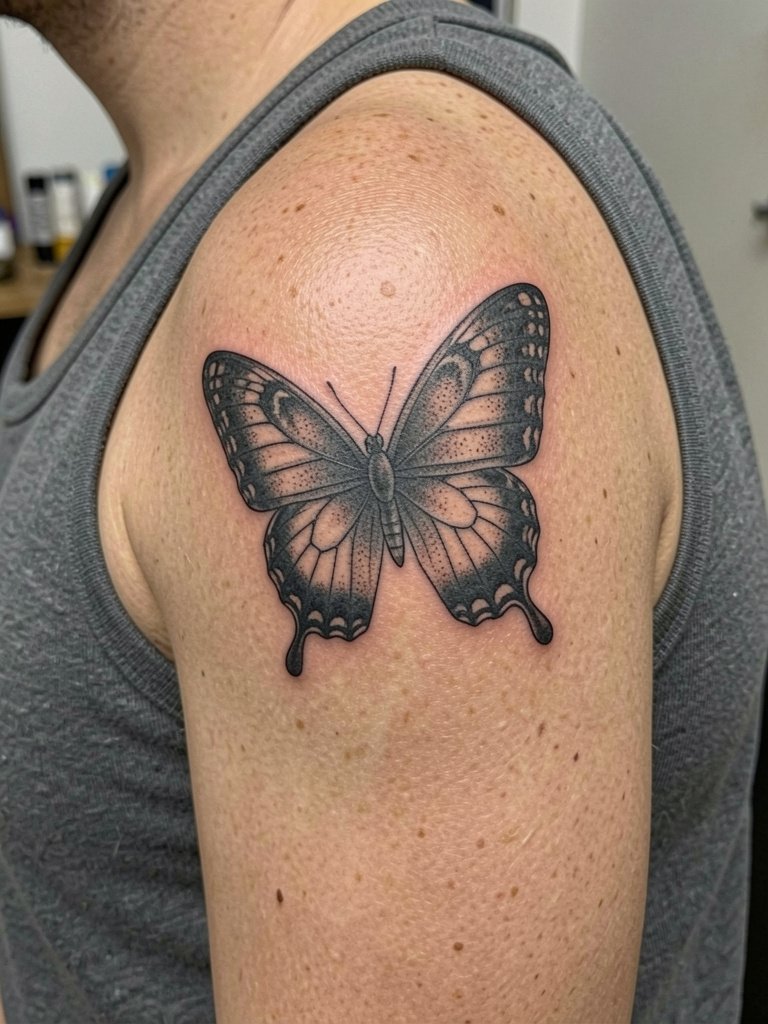
13. Tiny Neo-Traditional Butterfly on the Upper Arm

The upper arm is forgiving for small neo-traditional pieces and photos well at a distance. If you want the design to remain bold, ask for slightly stronger contour lines than the reference image and plan for a one-hour session. A common error is choosing overly saturated tiny color blocks that bleed together during healing. The piece ages well when outlines carry the composition and color serves as accent. For outfits, short-sleeve shirts and rolled-up sleeves show the work without exposing too much.
14. Single-Line Continuous-Form Butterfly on the Collarbone Tip

Continuous-line designs look elegant but they require exact spacing so the line does not look like a single scribble after healing. The usual mistake is making the loop too tight near the clavicle where skin tension can pull the ink. For this placement the session time is short and the pain level moderate. Ask for the line weight to be mapped on the skin before inking so you can confirm scale. For evenings out try open-neck garments that put the collarbone on display and consider a delicate pendant necklace that frames the piece.
15. Small Symmetrical Butterfly at the Nape

The nape is a discreet placement that works well for symmetrical designs. The main risk is asking for ultra-fine interior detail that disappears as hair grows back or the skin texture shifts. Sessions are quick and healing is straightforward when you avoid friction from collars. Ask for slightly bolder rim lines and a follow-up at six months for any softening. This area looks polished with updos and pairs with simple hair accessories like a minimal claw clip when you want to reveal the tattoo.
Frequently Asked Questions
Q: How much will a small butterfly tattoo hurt on different placements?
A: Pain varies by placement. Fingers, ribs, and sternum are typically more sensitive because the skin is thin and sits over bone or nerves. Outer arm, shoulder, and thigh are less painful and better for longer sessions. Plan short breaks if you have low tolerance and consider topical numbing for ribs after confirming timing with the studio.
Q: How long before a tiny butterfly needs a touch-up?
A: It depends on placement and line weight. Fingers and tops of feet often need touch-ups inside a year. Inner arm, shoulder, and thigh can go much longer if the outlines are slightly bolder. Expect at least one touch-up within the first year for single-needle pieces to restore saturation.
Q: Where can I find healed example portfolios and community feedback without naming artists directly?
A: Search platform hashtags and keyword phrases on Instagram and TikTok while filtering for recent posts and location tags. Look for healed photos in community threads on Reddit and in tattoo-dedicated galleries that let you filter by placement and skin tone. That approach surfaces varied healed examples and helps you compare how fine line versus bold work ages.
Q: Can small colorful butterflies look good on darker skin tones?
A: Yes but color choices and saturation matter. Muted pastels can disappear, while deeper pigments hold better. Bring healed color photos on similar skin tones and request slightly stronger saturation in the darker tones of the wings so the contrast remains after healing.
Q: What should I wear to a session depending on placement?
A: Wear clothing that gives the artist clear access without you having to pull fabric during the session. For collarbone pieces choose a wide-neck top. For inner thigh wear bike shorts. For shoulder or upper arm pick a tank top. A quick styling option search for session-ready clothing can help, for example wide-neck tops.
Q: Are there controversies about small butterfly techniques I should know about?
A: Yes. One debate centers on single-needle fine line versus slightly heavier linework for durability. One camp insists tiny single-needle work is authentic and delicate but may blur sooner. The other camp recommends modestly heavier outlines and controlled negative space to ensure the motif holds up longer, and those artists point to healed examples to justify the method.
