
The wispiest sleeve ideas on Pinterest can look gorgeous the day you get them and ghost into a soft blur two years later. I say that because I sit through consultations where clients show the same single-needle references and expect identical longevity. What actually matters is placement, spacing, and honest planning with healed photos in hand. Below you will find sleeve directions that balance style with how the skin actually behaves so you can show precise notes to your artist.
1. Fine Line Botanical Sleeve, Inner Forearm
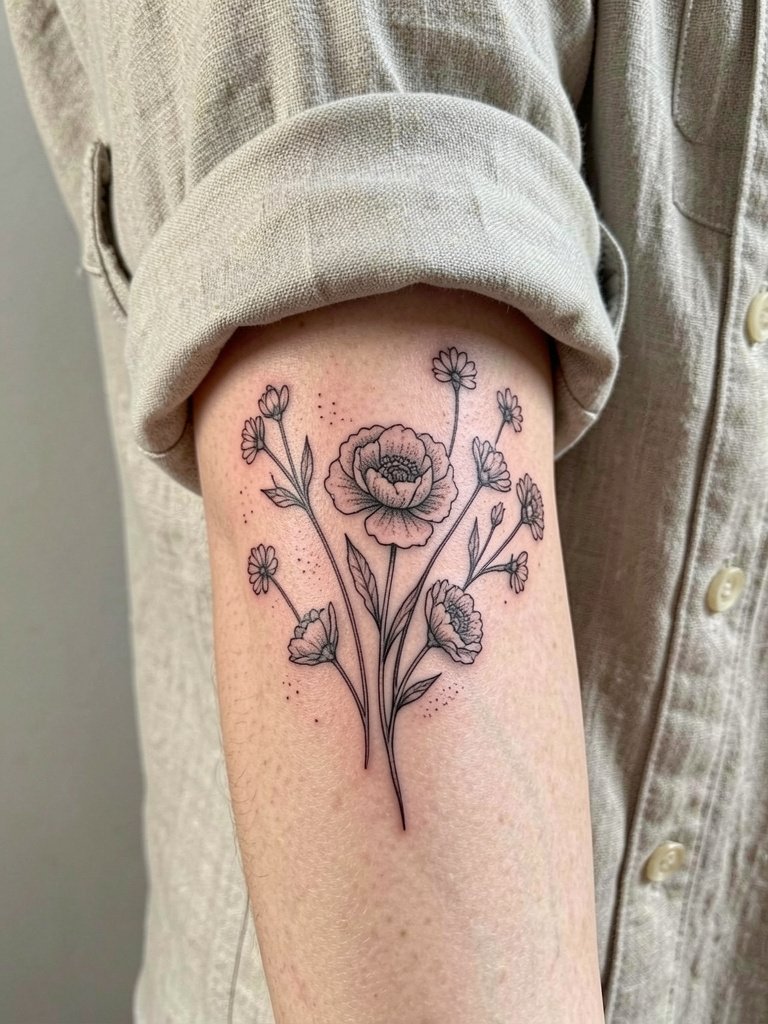
Fine line botanicals read as airier than bold work, but the inner forearm eats less detail over time than wrists or ribs. Expect a two to three hour session per pass for moderate coverage and a typical touch-up window around year two to three for single-needle stems. Bring healed examples that show the exact line weight you want and ask the artist for slightly heavier hairlines where the forearm creases. The common mistake is copying a three-inch Pinterest sprig verbatim then placing it on textured skin. For show-off days, pair this with a rolled cuff linen shirt in cream or olive so the linework sits cleanly against a neutral backdrop.
2. Neo-Organic Realism Botanical Sleeve, Outer + Inner Forearm
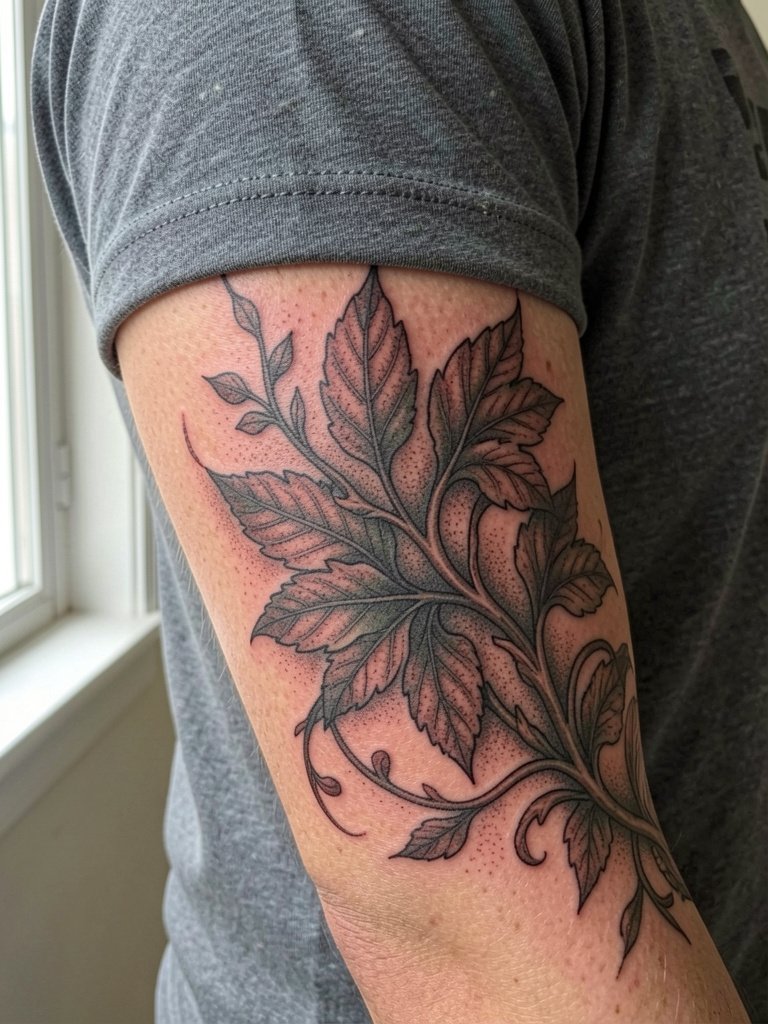
Neo-organic realism works when the plant veins follow the arm's natural contours so the piece moves with you instead of fighting the anatomy. In consultations, provide reference shots of your veins and ask the artist to map a main vine to a visible landmark like the cephalic vein. This style often needs four to six sessions for layered depth and benefits from stipple shading to keep the transitions soft. Watch for heavy saturation near joints because repeated bending can push ink laterally and cause slight blurring if lines are too tight. If you want this to read outdoors, balance the dark leaf cores with mid-tones rather than tiny pastel highlights which fade faster.
3. Watercolor Rose Garden Sleeve, Full Arm
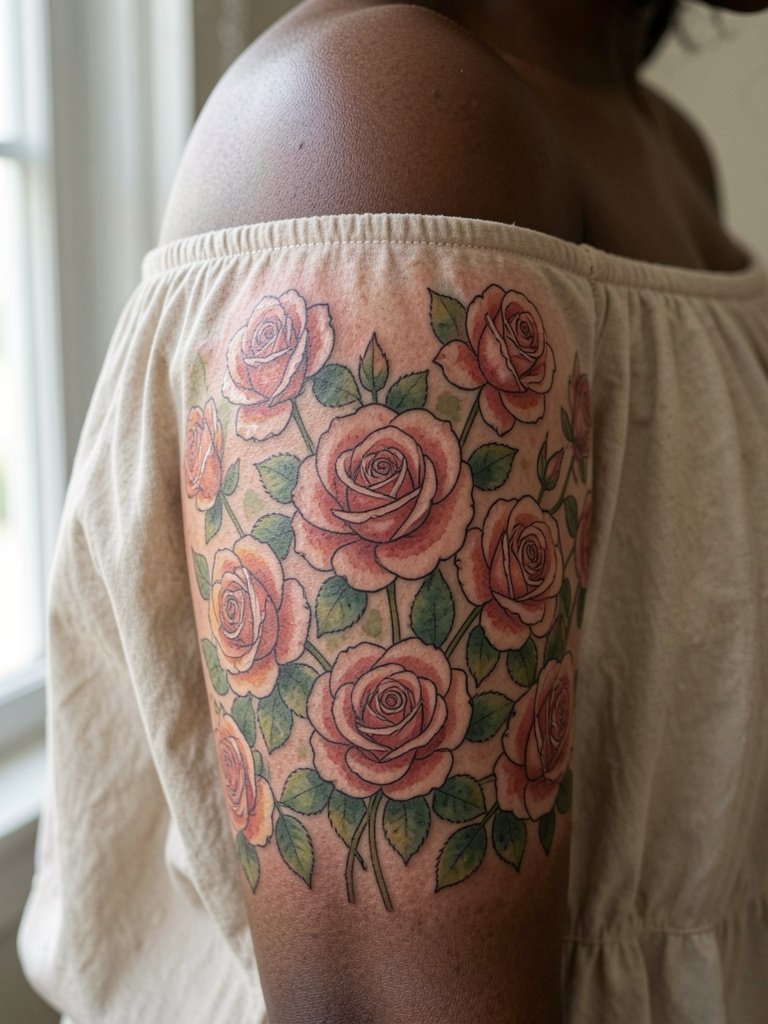
Watercolor roses look breathtaking fresh but tend to require more maintenance than layer-focused color work. The watercolor wash approach usually calls for 3 to 4 sessions and a realistic plan for saturation boosts at the two-year mark. A frequent error is packing pastels too close to one another on medium and dark skin where contrast is needed. For editorial wear, show this off with an off-shoulder blouse in blush or cream that reveals both shoulder and forearm transitions. For sessions that span the shoulder, bring a wrap top so the artist can access the whole arm without fabric tugging on the shoulder cap.
4. Blackwork Ornamental Mandala Sleeve, Upper Arm and Shoulder
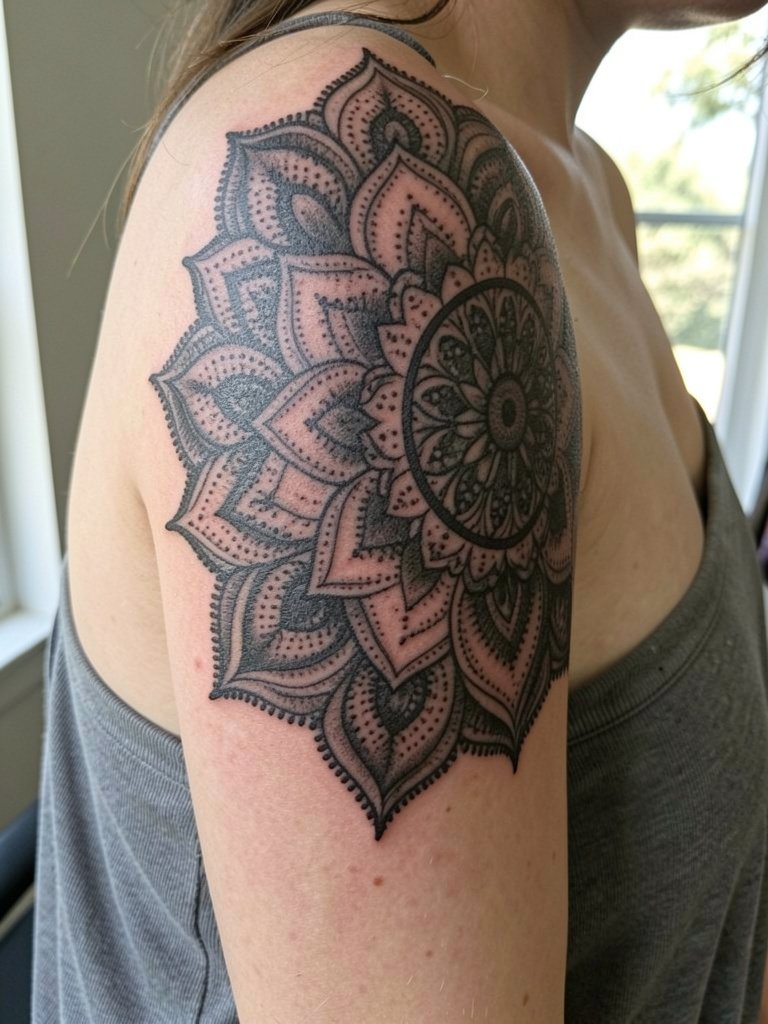
High-contrast blackwork holds up well on the upper arm because the skin there sees less stretch than ribcage or belly areas. Expect three to five sessions for dense fills and allow time for the artist to scumble in texture so the surface reads intentional rather than patchy. A common misstep is shrinking mandalas to a size where the negative space collapses after healing. For showing it off, a simple black tank top provides clean framing and keeps attention on the radial pattern. If you are prone to bold contrast, discuss spacing for negative zones so the black masses get room to age without pooling.
5. Cherry Blossom Neo-Traditional Sleeve, Outer Forearm + Shoulder
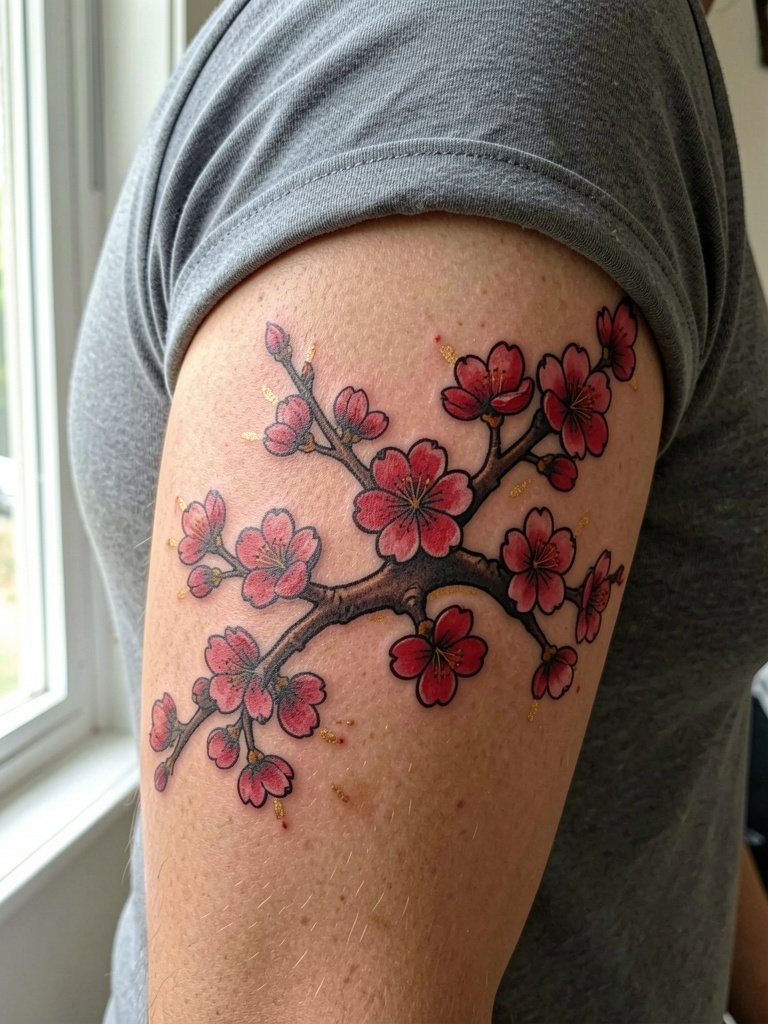
Neo-traditional cherry blossoms read well at a mid-arm scale because the bold outlines preserve silhouette as color fades. Plan for three to four sessions and ask your artist to use flatter pigment masses in the blossoms rather than feathered fills so the red keeps definition on darker backgrounds. The mistake I see is layering tiny petals without strong outlines, which turns into a soft pink haze at year two. For a contrast-forward outfit, wear a fitted solid-color tee in burgundy or black so the reds pop against the shirt. During the appointment, choose short sleeves for easy access.
6. Biomechanical Abstraction Sleeve, Full Arm
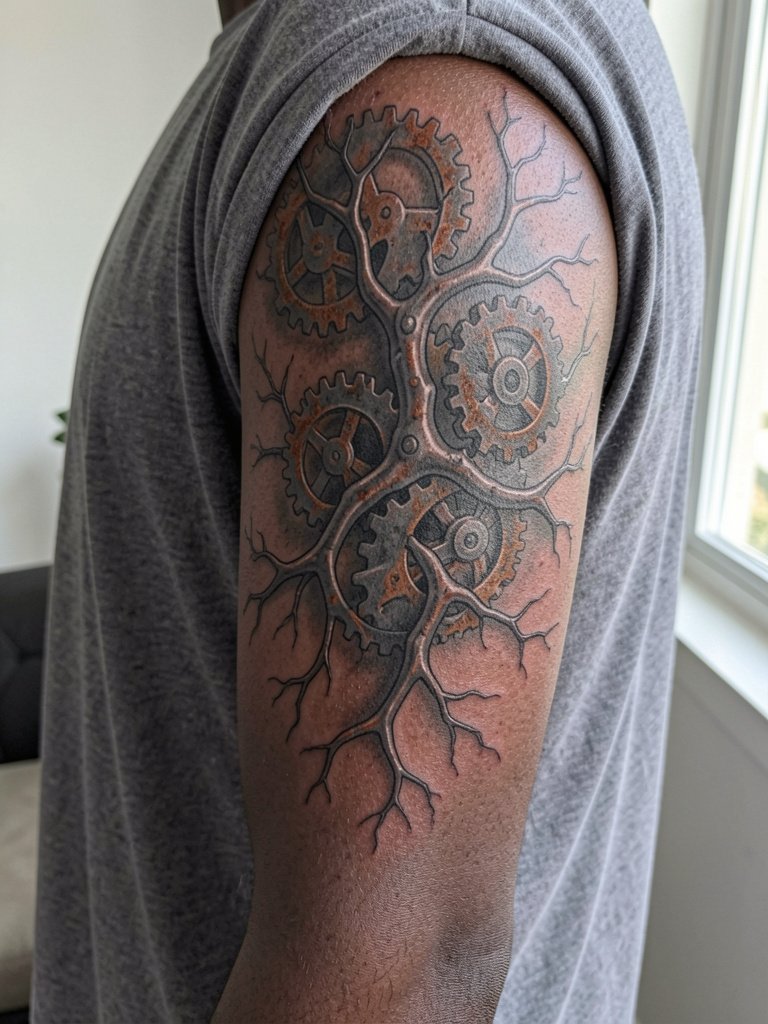
Biomechanical sleeves are marathon sessions that prioritize consistent hand speed and patience more than color tweaks. These designs often need five to seven passes and can trigger the numbing cream debate in long sittings. One camp argues that numbing creams are a legitimate tool for multi-hour sessions because they reduce pain fatigue and improve client cooperation. The other camp says numbing alters skin response during ink deposition and can increase the chance of uneven saturation. If you plan to use numbing, request a clear protocol from your artist about timing and reapplication so the session runs predictably.
Session Day Picks
The first six ideas cover everything from delicate forearm vines to full biomechanical sleeves, so these items smooth session logistics and the first healing window.
-
Hawaiian Tui Tattoo Balm. A thinner balm some people prefer for a matte healed finish on darker skin tones where heavy occlusion shows as shine.
-
Biorepe Aftercare Mist. An alcohol-free mist that helps with saltwater and ocean trips after the initial closed-healing phase.
-
Oral Biotène Gel. Small comfort item for long sessions when dry mouth is an issue during numbed procedures.
-
Anessa Korean SPF 50+ Sunblock. High-SPF sunscreen that helps preserve color on exposed forearms during summer months.
-
Saniderm Second Skin. A sealed barrier used by some clients for seven-day closed healing to reduce scabbing and early friction.
7. Minimalist Line-Art Vine Sleeve, Inner Forearm + Inner Upper Arm
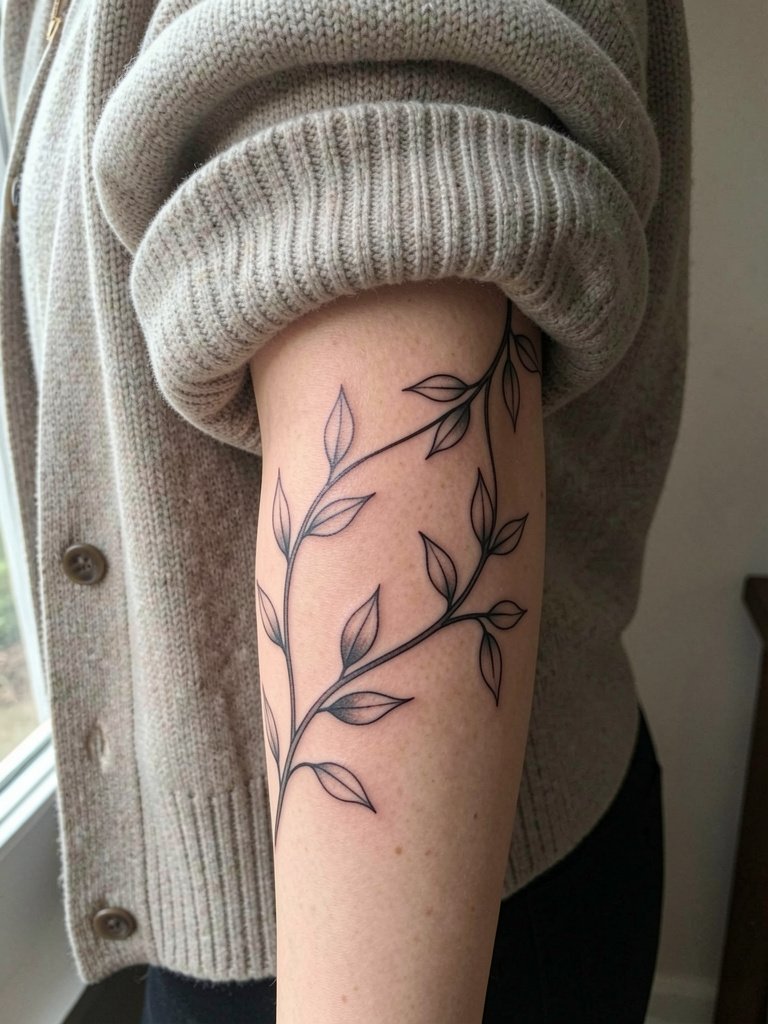
Ultra-thin vines read as refined when the lines have deliberate pauses and breathing room. On inner forearm placement, a two to three session plan usually suffices, but expect touch-ups sooner if you skimp on spacing. The common error is running one continuous line too small around the wrist where motion causes frequent micro-trauma. For a simple capsule wardrobe look, this pairs with a cropped cardigan in olive or sand that lets the inner arm peek through. During booking, note you prefer slightly heavier hairlines at joints to prevent five-year softening.
8. Celestial Moon & Star Sleeve, Shoulder + Outer Upper Arm
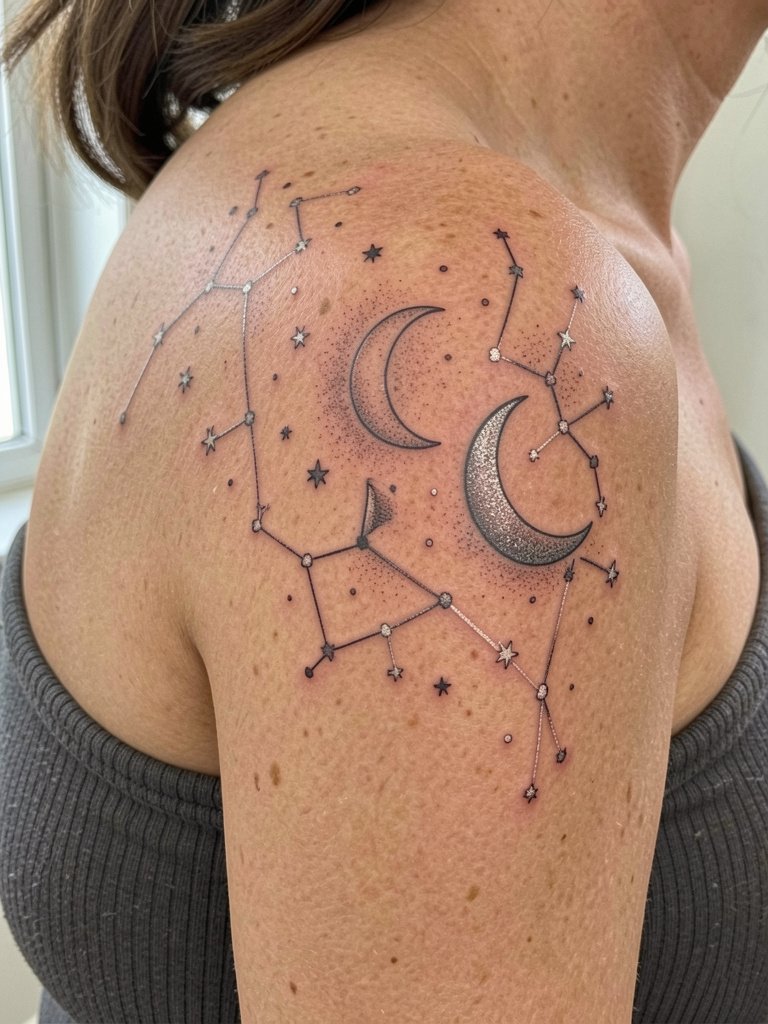
Celestial sleeves are forgiving when spaced and use dot work to create fade-friendly gradients. Three sessions typically lock down composition and stippling. A version that ages poorly is one where tiny stars are crowded with zero negative space. For evenings out, a strapless top in navy or black frames the shoulder cap and keeps the moon and star cluster visible. If you want subtle metallic hints, discuss pigment choices because metallics can behave differently under sun exposure.
9. Wildflower Meadow Patchwork Sleeve, Full Arm
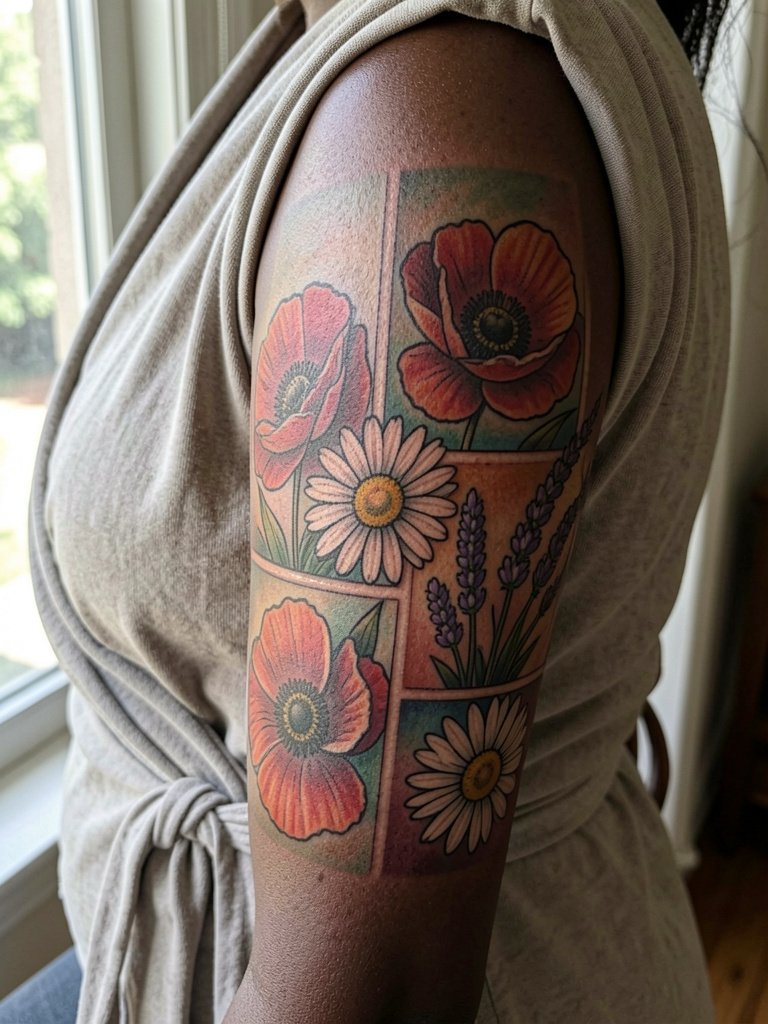
Patchwork sleeves let you build a full arm across 3 to 4 smaller sessions and can cost notably less per sitting than a single continuous project. The main advantage is flexibility. One common misstep is mixing too many scale ranges so small flowers vanish next to larger patch pieces. Ask for a mockup that shows each patch at actual scale and request mapped negative spaces that will age into intentional gaps. For people who travel to guest spots, this approach allows you to book short visits with different artists without losing continuity.
10. Dark Skin Botanical Contrast Sleeve, Inner Forearm + Hip
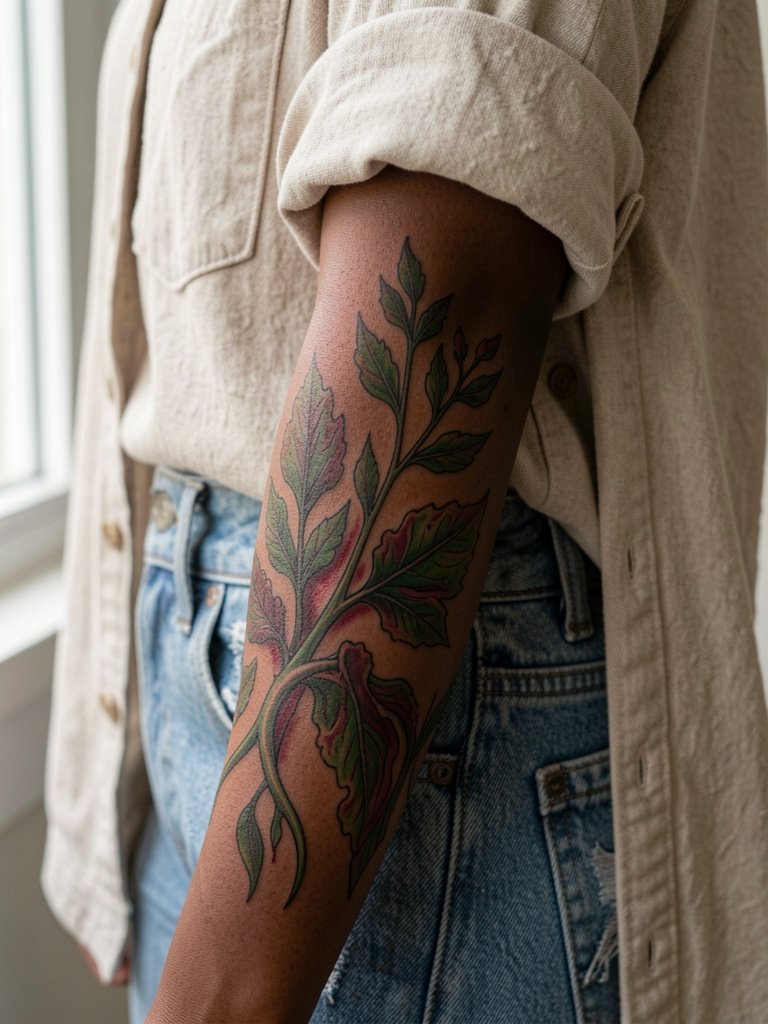
Work tailored to darker skin often hinges on contrast and matte saturation rather than pastel highlights. Request pigment swatches from the artist and ask them to use deep chroma greens and crimson rather than pale washes. A frequent regret I see is copying pale palettes that look washed on darker tones. For daytime wear, a clean white tee keeps focus on saturated botanicals. If you plan to extend a sleeve toward the hip, discuss how the line width transitions across the elbow so the composition reads fluently when you sit or move.
11. Ornamental Feather & Vine Sleeve, Outer Forearm + Inner Upper Arm
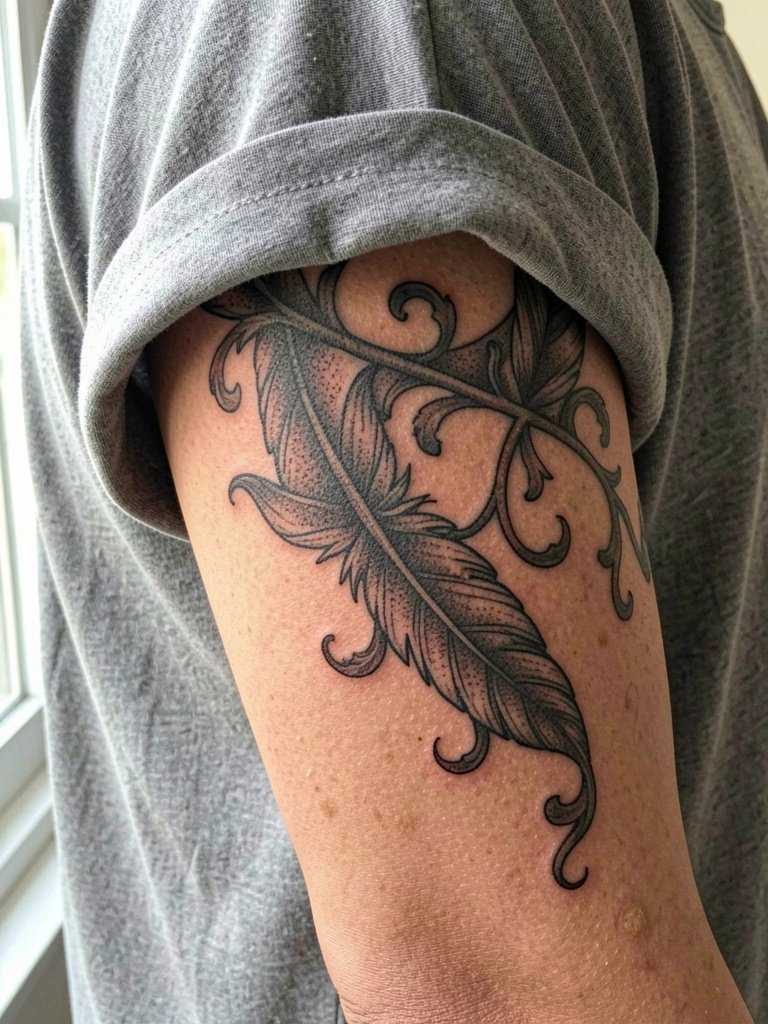
Feather and vine combinations read aerated when the feather spine is given negative space and the vines wrap without crossing fine barbs. Expect three short sessions for a clean black-and-grey finish and plan a touch-up at the two-year mark for any stipple that softens. A common mistake is compressing the feather into a narrow wrist band where the quill detail cannot hold. For styling, a dainty chain bracelet set on the opposite wrist balances the visual weight without crowding the design. If the inner upper arm version faces the torso, ask the artist to preview how the pattern reads when your arm is at rest.
12. Micro-Realism Animal Portrait Sleeve, Outer Upper Arm + Shoulder
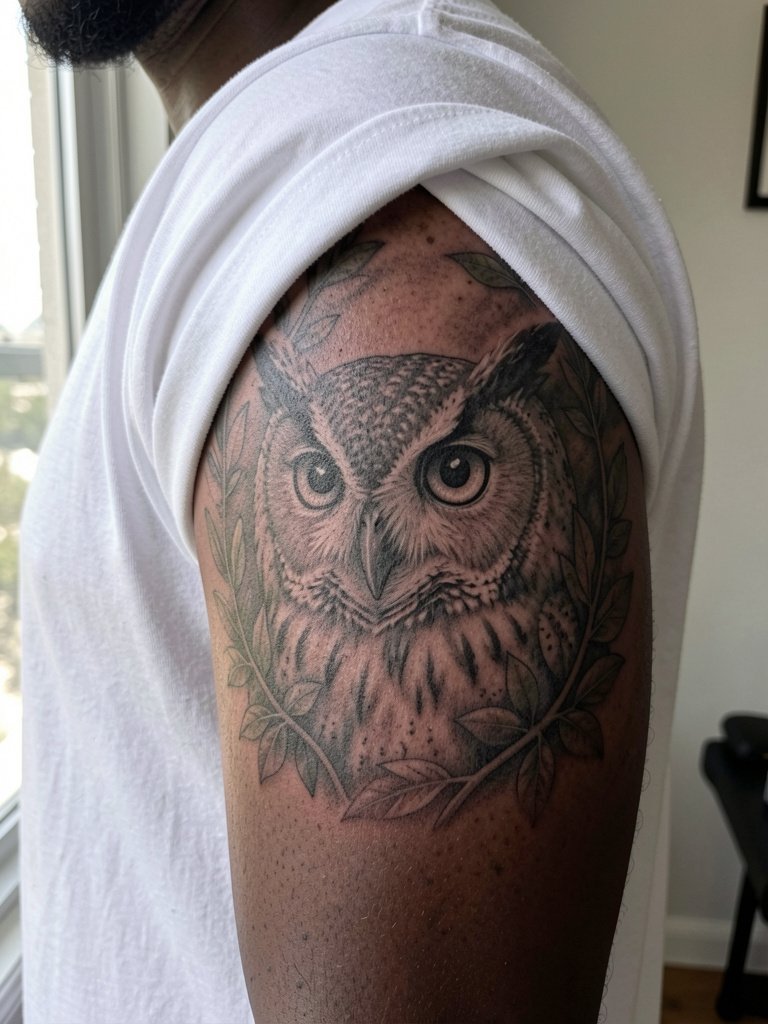
Micro-realism portraits require extreme precision and patience because minute shifts in needle depth change how a beak or fur texture reads after healing. These pieces often take four to five sessions for consistent detail and create the numbing cream debate again in long sittings. One group supports numbing cream for client comfort during marathon sessions because it keeps clients relaxed and still. The opposing group warns that numbed skin can respond unpredictably and raise the chance of patchy deposition. If you plan a micro-portrait, ask for healed close-ups from the artist that match your skin tone to judge long-term fidelity.
13. Ignorant Style Sailor Sleeve, Inner Forearm + Wrist
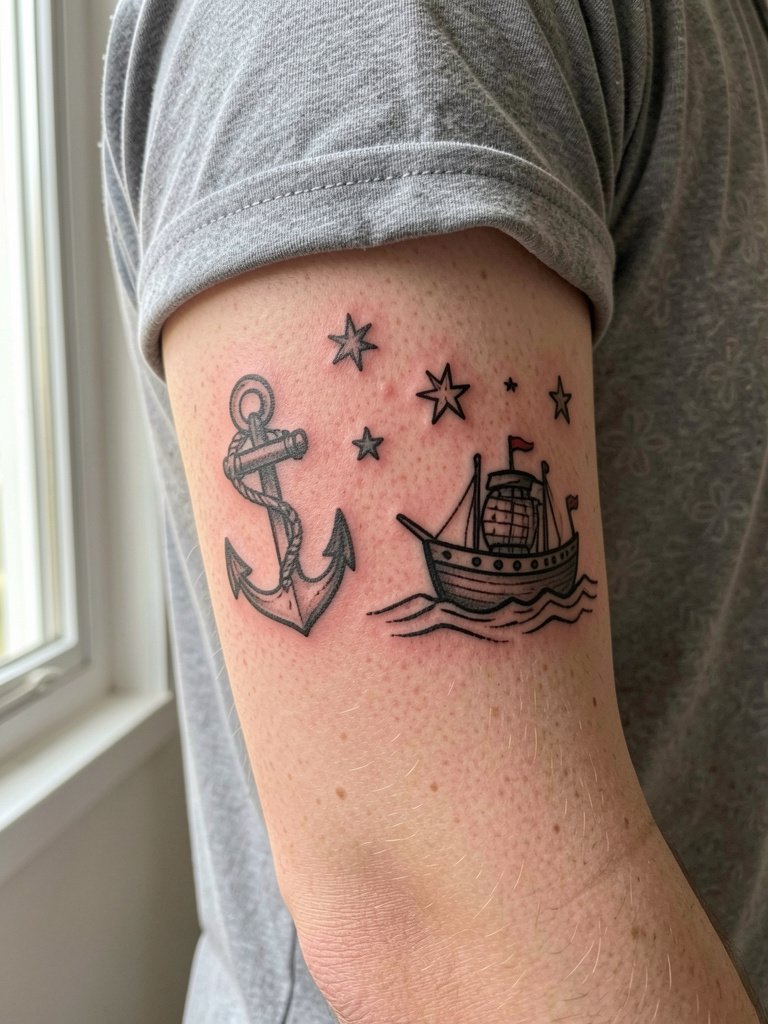
Ignorant style celebrates a rough, hand-made look so some softening over time is part of the aesthetic rather than a flaw. These pieces work well in two to three sessions and are forgiving of slightly uneven linework. The usual mistake is asking for micro-details in a style meant to feel raw, which defeats the point. For low-effort styling, keep wrist accessories minimal and consider a thin chain bracelet on the opposite wrist. If you want the authentic sailor vibe, ask your artist for heavier black anchors and deliberately irregular outlines rather than cleaner traditional fills.
Frequently Asked Questions
Q: How much does a full sleeve usually cost and how can I budget for patchwork instead of one big session?
A: Full sleeves widely vary but planning by session helps. Many people break a sleeve into three to five focused sessions and save by booking patchwork pieces instead of a single continuous block. Work out a session budget with the studio by asking for typical hourly rates and an estimate of session counts for the specific style you chose.
Q: Which placements age best for fine line work and which should I avoid for single-needle detail?
A: Inner forearm and outer upper arm generally hold fine line detail best because they see less daily stretch. Avoid single-needle work on ribs and the lower abdomen if you expect weight or shape changes. If you must choose a sensitive area, ask the artist to test a slightly heavier hairline so the design reads after healing.
Q: Where can I find healed portfolio examples and local artists without asking for names directly?
A: Search hashtags like #finelinetattoo, #botanytattoo, and #neoorganicrealism on Instagram and TikTok and filter by location. Tattoodo lets you search by keyword pairs such as "fine line botanical sleeve" and shows portfolio shots. Reddit communities like r/tattoos and r/finelinetattoos often post healed photos across skin tones and are a good place for peer recommendations.
Q: Do women with darker skin need different ink choices for botanical sleeves?
A: Yes. I recommend asking for higher contrast palettes, deep greens, and crimsons instead of pastel washes so the composition reads clearly on camera and in person. Also request healed photos from the artist on similar skin tones to confirm the pigment choices.
Q: What should I wear to a shoulder-to-wrist session that includes shoulder and forearm work?
A: Choose a loose tank or an off-shoulder blouse in normal worn state so the artist can access shoulder and full arm without tugging fabric. A loose drawstring linen pant makes sitting for long sessions comfortable while keeping the torso free for movement.
