
Delicate single-needle sacred geometry photos get huge online attention, but the pieces that still read clearly after five years are the ones that balance crisp linework with a touch of saturation and breathing room. Sacred patterns need spacing built in, not just thinner lines. Keep that in mind before you pin your reference image and sit down with a stencil on skin.
1. Fine Line Mandala on the Inner Forearm

A fine line mandala on the inner forearm reads like jewelry when the linework is crisp and the spacing is generous. Pick this if you want a visible piece that layers well with bracelets. On the consult, bring two photos that show the exact line weight you like and ask for slightly heavier linework than the photo so the spokes do not soften into a blur at year two. Tiny single-needle spokes arranged too close is the common mistake here and it leads to early blurring. Expect a one to two hour session depending on diameter. Light stipple shading holds longer than very thin parallel lines. For showing it off, a rolled linen shirt pairs well and keeps the area accessible during touch-up, try loose linen shirt.
2. Collarbone Flower of Life Cluster

A compact Flower of Life below the collarbone works for someone who wants geometry that sits well with necklaces. Choose this when you want clear overlapping circles that read at arm's length. During the consultation request slightly bolder outer rings and ask the artist to map the design to the bone landmarks so the pattern does not warp with movement. A common aging issue is under-saturated overlaps that disappear first in the center. Expect moderate soreness during the session and a touch-up needed in the first year if the faint overlaps start to soften. For outfits, scoop-neck tops frame the design, try scoop neck tops for evenings out.
3. Metatron’s Cube on the Shoulder Blade
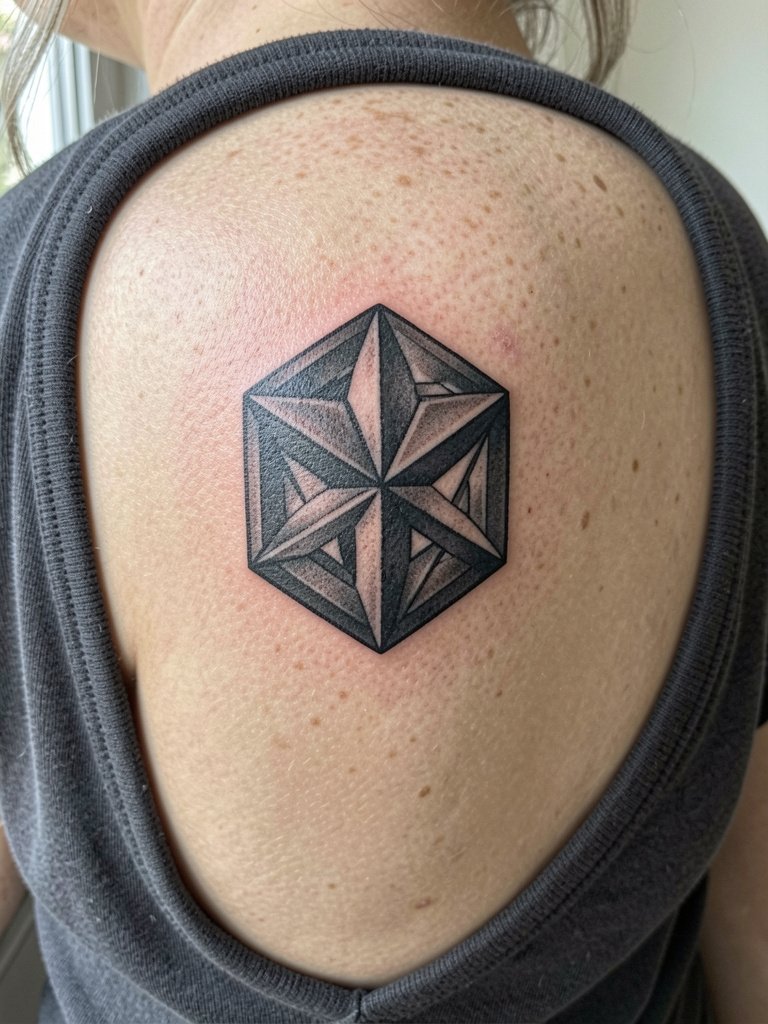
Metatron-style cubes demand clean intersections and consistent linework to keep that 3D illusion alive over time. Pick this placement if you want a piece that can grow into a larger back composition later. Ask the artist to stencil the cube at full size and check the grid alignment while you move your shoulder; the wrong angle makes the whole thing feel crooked after healing. This style tends to age well with medium saturation because the shading holds contrast. Sessions run one to three hours depending on shading. For showing the piece, an open-back top highlights the shoulder blade lines and pairs neatly with delicate chains. Find an open-back dress in this search open back dress.
4. Mini Seed of Life Behind the Ear
*

*
Behind the ear works when you want geometry that is private and easy to conceal with hair. The main risk here is choosing detail too small for the mastoid skin, which can blur within two years. On the consult specify minimum circle diameter and ask the artist to show you the stencil at actual size behind your ear because that spot alters scale. Sessions are short and feel like light tapping; pain is generally low but the area is sensitive. Expect a touch-up window at three to six months more often than with limb placements. This is an intimate location that may require a specialist who has experience with tiny dot work in delicate skin.
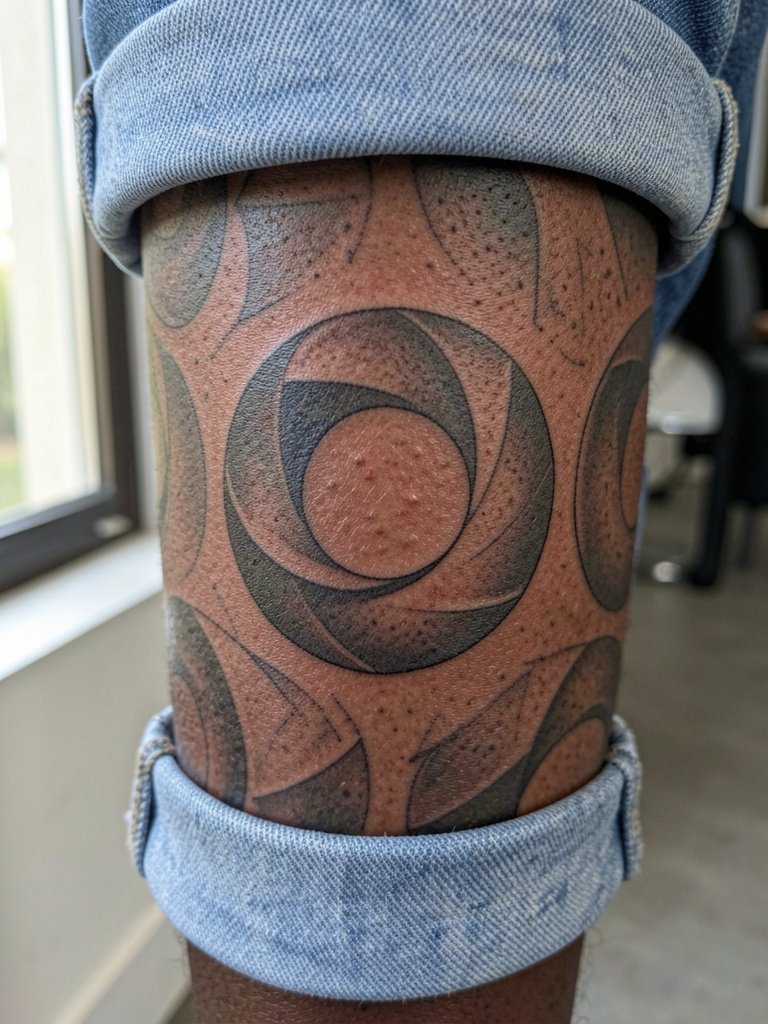
5. 3D Torus Ring on the Calf
*
*
A torus ring around the calf reads like a band and looks great on runners or anyone who wears shorts. The vertical movement of calf muscle can warp thin cross-hatching, so ask for stipple shading and slightly wider gaps between lines to keep the ring legible when muscles contract. People sometimes pick hyper-fine cross-hatching to show depth and then see the hatch blur after months. The session can run two hours and feels like continuous machine motion over a compact area. For showing the piece in summer, cropped jeans highlight the ring, try cropped jeans women for a clean daytime look.
6. Clustered Platonic Solids on the Wrist
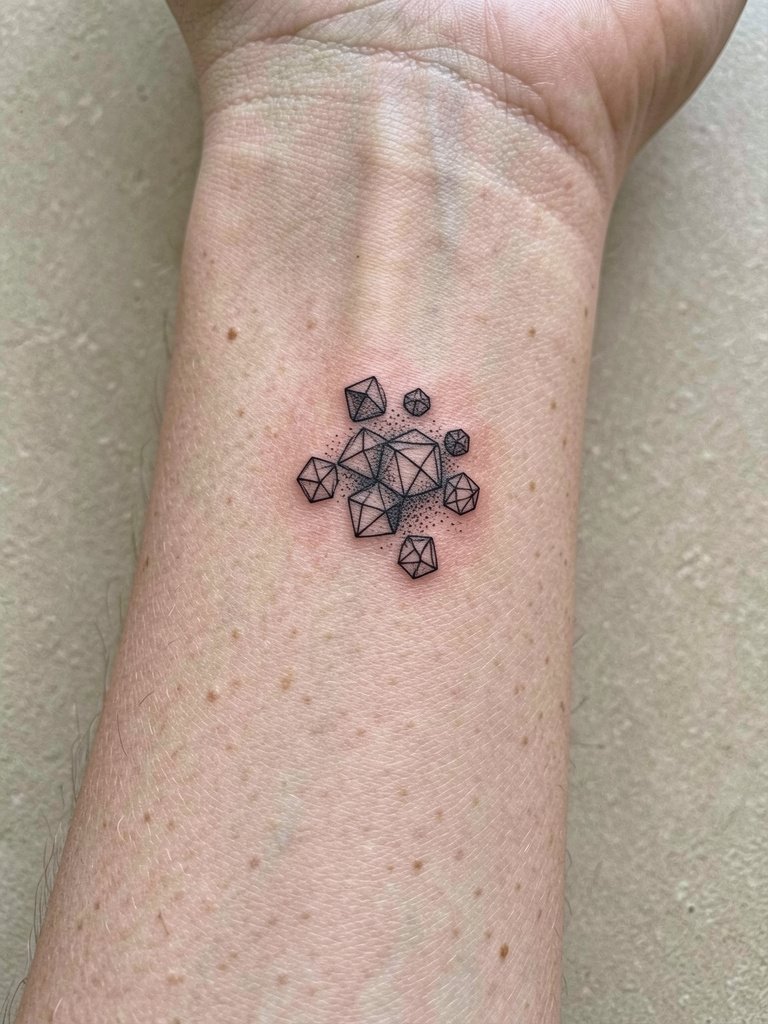
Wrist clusters lend themselves to a small grouping that still reads at a glance. Opt for slightly bolder outlines for the solids and reserve dot work for interior planes to avoid early loss of contrast. A frequent error is packing too many solids into a two inch band which causes muddiness as the skin stretches. The wrist is a high-movement zone and prone to blowout if needles go too deep, so specify surface depth control and expect a touch-up within the first year. Sessions are short and the area feels sharper than forearms. For the appointment, wear a sleeve you can push up easily and try stretchy cuff shirts so the artist has clean access.
Session Day Picks
These first six placements include small, exposed areas that benefit from a few focused items for the appointment and the first week.
-
Stencil transfer paper kit. Lets you preview placement on curved skin, which is especially helpful for the wrist cluster and inner forearm mandala above.
-
Topical numbing cream. A fast-acting formula applied 30 to 45 minutes before can ease shoulder blade and sternum sessions without affecting linework.
-
Thin protective film roll. Useful for ankle and hand pieces to minimize friction from socks and daily washing during the first days.
-
Fragrance-free gentle body wash. Cleans the healing area without stripping saturation from dot work and fine shading.
-
Aquaphor healing ointment. A widely used option for the first few days to lock in moisture around single-needle work while still allowing the skin to breathe.
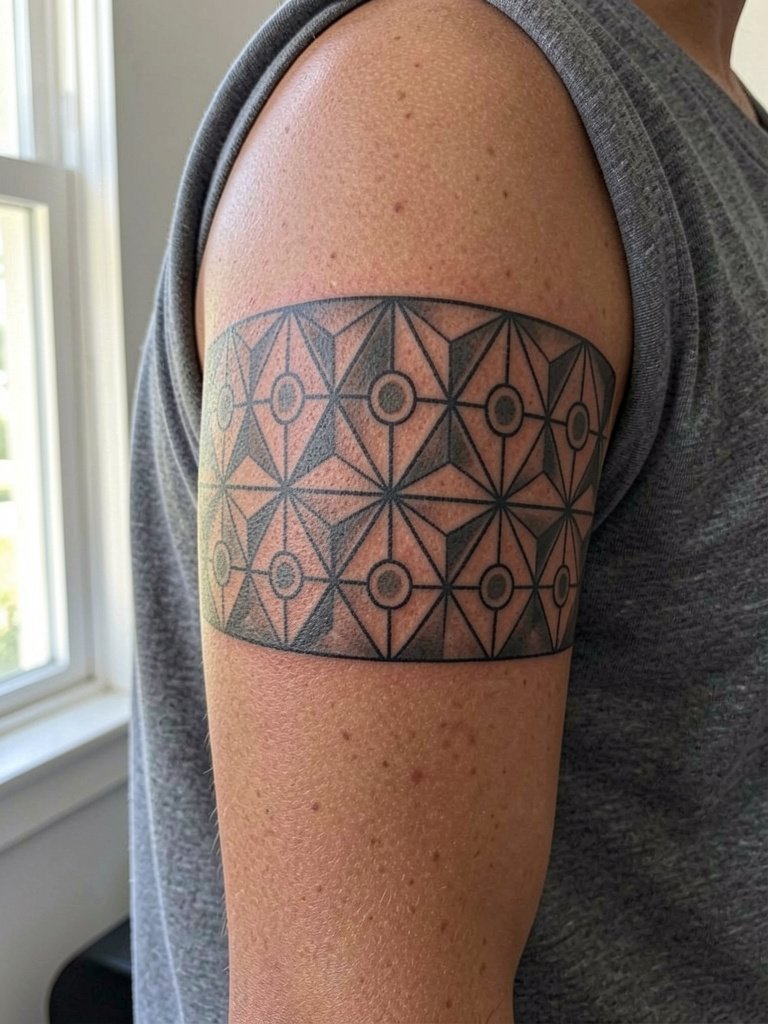
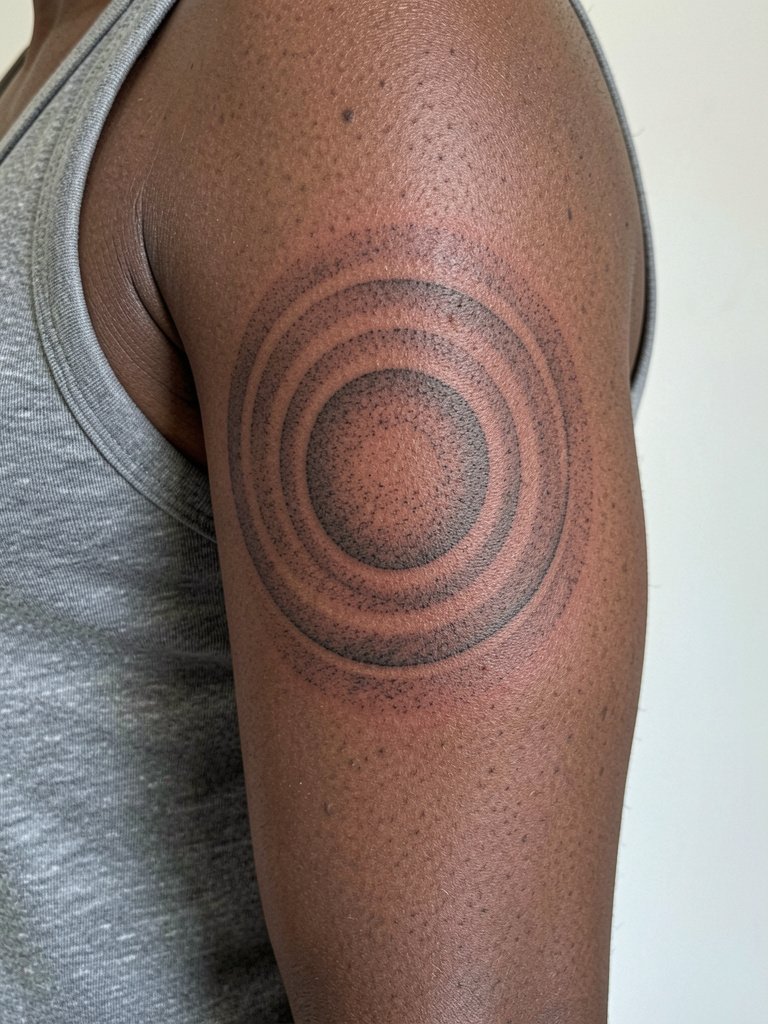
7. Sacred Geometry Sleeve Accent on the Upper Arm
*
*
A sleeve accent gives you room to play with scale and flow toward the shoulder or elbow. Choose this when you plan to expand into color or botanical elements later. During the consult bring full arm poses so the artist can map flow lines and avoid seams that land on flex points. One error is starting a repeat pattern without enough negative space which causes the texture to read like a block after a few years. Expect multi-session work with each pass lasting two to four hours. For showing off at events, sleeveless tops keep transitions visible and comfortable. Consider sleeveless tees that complement the geometrical repeat.
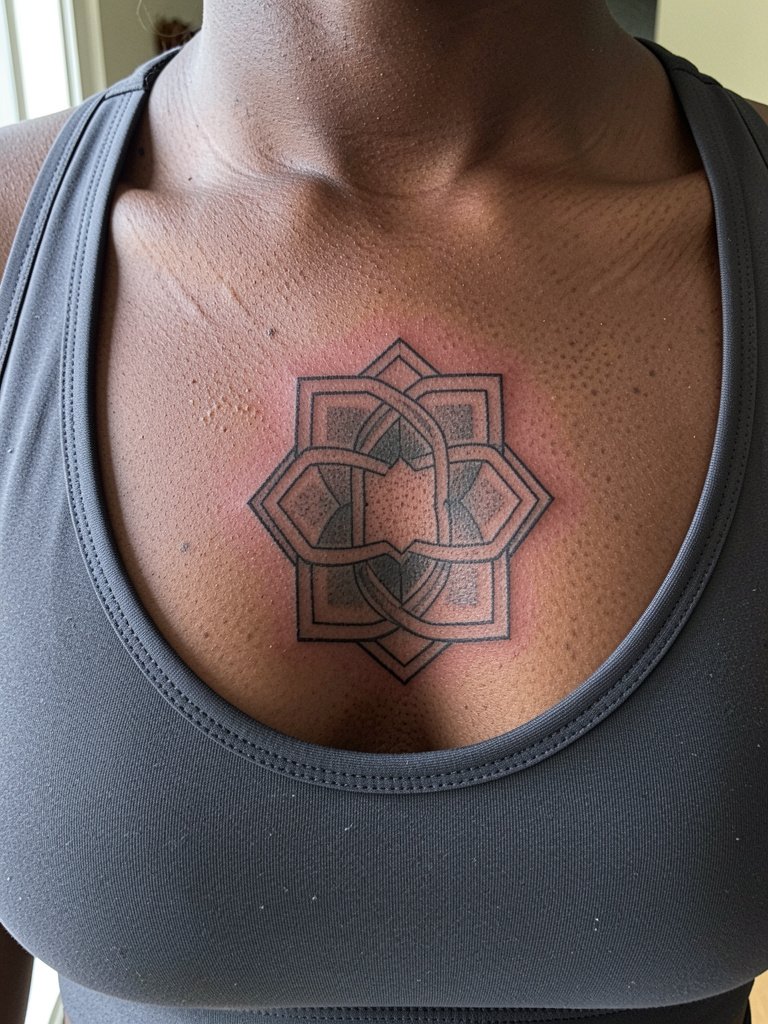
8. Interlocking Hex Mandala on the Sternum
*
*
Sternum geometry reads boldly if scaled to the chest anatomy. This placement is sensitive and tends to ache more than limbs. Artists split on fine line here. One camp argues that the sternum and nearby stretch make ultra-fine work blur within two years. The other camp says with slightly heavier line weight and careful depth control it will stay crisp, and they will point to healed photos for proof. On the consult be explicit about the pain tolerance and ask for a staged plan with breaks. Expect at least one touch-up six to twelve months in because chest skin is prone to minor pigment loss.
9. Fractal Spiral Along the Ribcage
*

*
Ribcage geometry looks dramatic but is one of the higher pain zones. If you want a long spiral that follows the rib curve, have the artist map it while you breathe so the shape flows naturally with inhalation and exhalation. The frequent mistake is scaling the spiral too tightly which makes the inner triangles merge after healing. Sessions can be split into shorter appointments to manage discomfort and to let the skin settle between passes. For clothing after healing, cropped tops or swimwear reveal the cascade. For the session wear a loose tank so the artist can access the rib area without fabric tension.
10. Sacred Compass on the Back of the Hand
*

*
Hand placements show immediately but age faster because of constant washing and friction. Choose the back of the hand only if you accept likely faster fading and a higher chance of touch-ups. Ask the artist to avoid extremely thin radial lines and to plan for slightly bolder outer rings so the compass still reads after repeated handwashing. Expect a higher touch-up frequency; many people book a touch-up around the six month mark for hand ink. Sessions are quick but feel sharper on the knuckle and back of hand. This placement benefits from routine sunscreen once healed to slow fading under daily use.
11. Nested Circles Sleeve Transition on the Inner Bicep
*
*
Inner bicep geometry looks intimate and lets you carry a sleeve flow without exposing the whole arm. The inner bicep skin is softer and can eat fine detail, so specify slightly wider spacing between circles. A common mistake is expecting single-needle concentric rings to behave like outer-arm linework; the inner arm needs heavier spacing. Sessions usually run one to two hours and the area rates medium on most pain scales. For the session wear a sleeveless top so the artist has full access. For nights out, a short-sleeve shirt rolled up frames this sweet spot well, consider sleeveless tops.
12. Seed of Life Thigh Band
*

*
A Seed of Life band on the thigh gives you a canvas that hides well and ages gracefully. This placement has less surface friction than ankles and hands, so you can opt for more intricate dot work. There is a debate among artists about cultural usage of sacred symbols and how they are presented. One camp argues that many sacred geometry patterns are universal mathematical forms and can be respectfully used as decorative or personal motifs. The other camp stresses context and intent and encourages seeking permission or understanding when using certain culturally framed symbols. For the session, choose a modest short that exposes the mid-thigh and avoids the groin line. Expect lower blowout risk than hands and wrists.
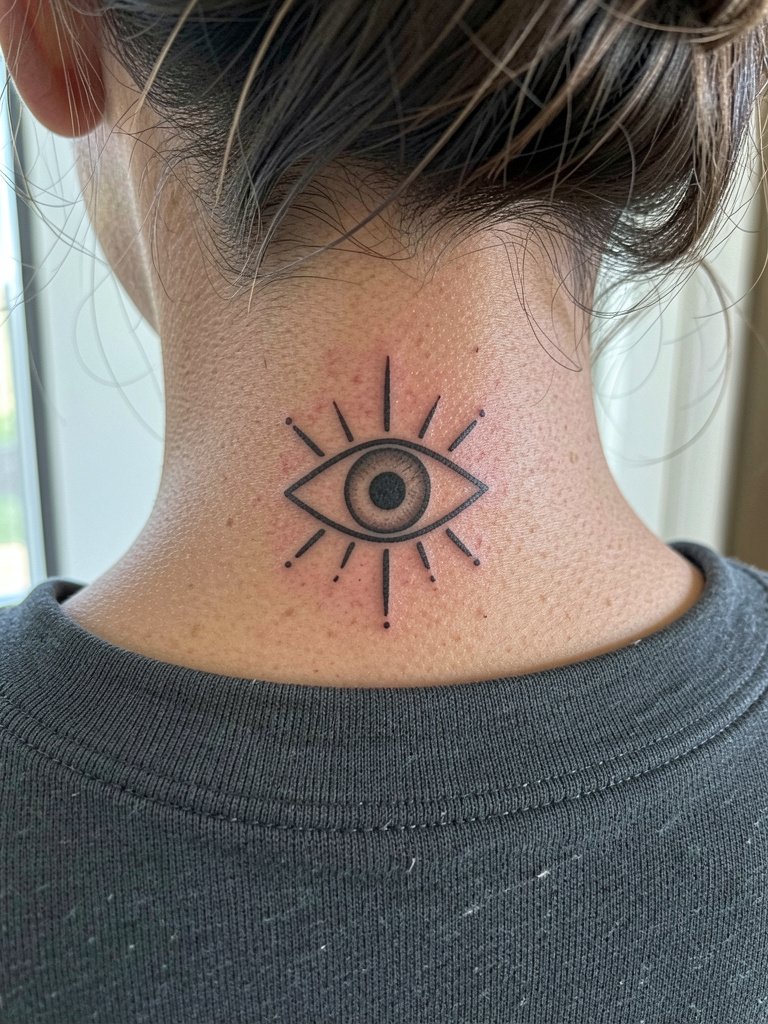
13. Geometric Eye on the Nape
*
*
Nape placements look hidden until you pull your hair up and then become a reveal. The nape is low on blowout risk but tends to suffer from hair follicle irritation if not healed carefully. Ask for a shallow pass on the first session and a mapped stencil under the hairline to ensure symmetry. The mistake people make is choosing too many micro details that the nape cannot hold over time. Sessions are short and the pain is moderate. For after the session, avoid tight collars and choose wide-neck shirts that will not rub the area, try wide neck tops for comfort.
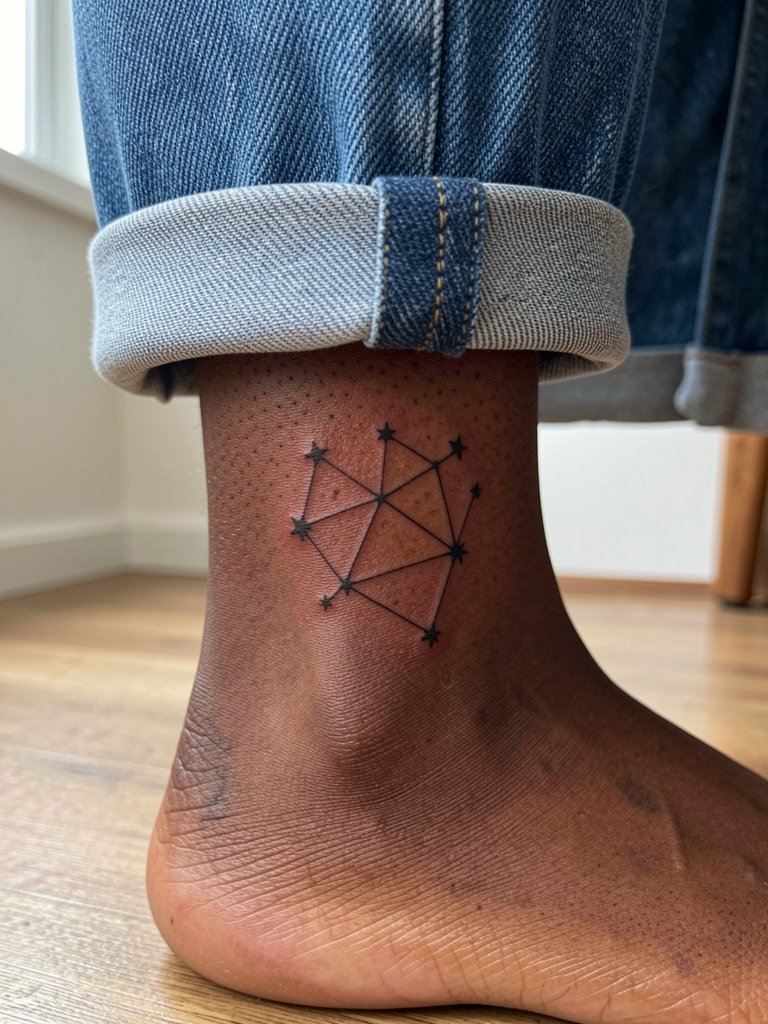
14. Constellation Grid on the Ankle
*
*
Ankle geometry can be very delicate visually but the area has high friction from socks and shoes. If you want delicate star links, plan for bolder anchors where lines meet to reduce early loss of connection. Many people pick micro-link work and then need a touch-up because the thin connecting lines fade first. Expect low session time but frequent touch-ups during the first two years. For the appointment, wear pants you can roll and shoes that are easy to slip off so the ankle remains undisturbed after inking.
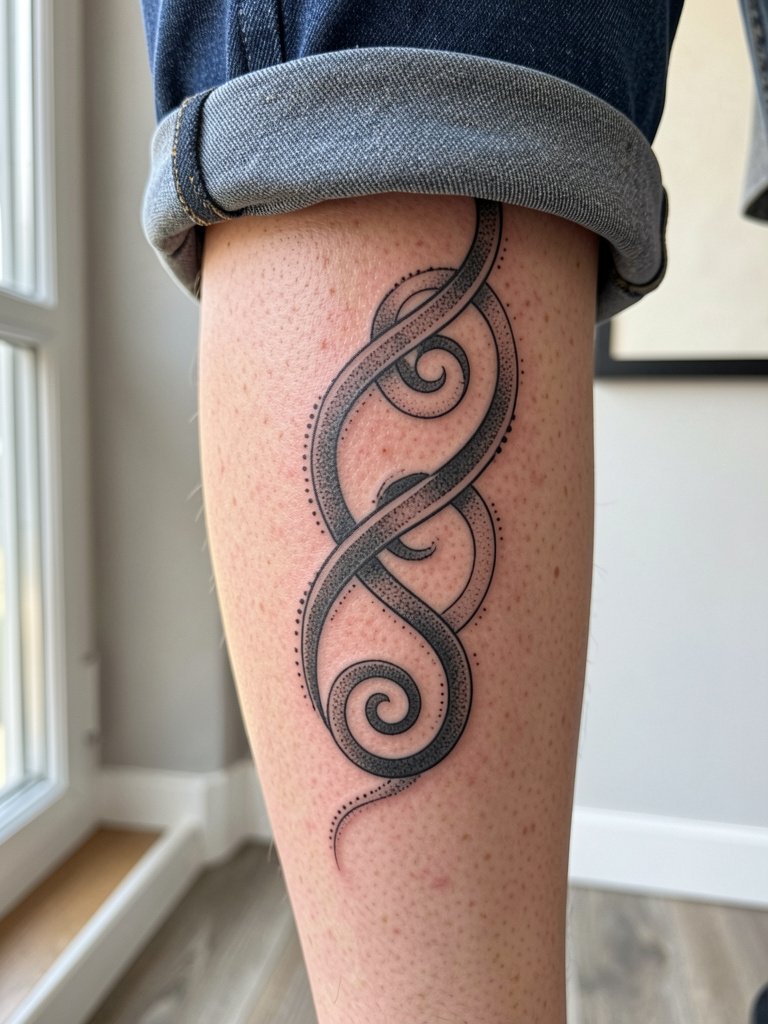
15. Sacred Helix Along the Outer Calf
*
*
A helix that winds down the calf suits someone who wants motion in a geometric piece. The outer calf holds detail well and is lower on the blowout chart than inner limbs. On the consult ask for a mapping session while you flex and point so the helix sits correctly across muscle contours. A common error is expecting too many thin alternating bands which can break up after seasonal swelling. Sessions vary from one to three hours. For showing it off in summer, cropped pants highlight the flow and give you room for larger echoes later.
Frequently Asked Questions
Q: How do I decide between single-needle fine line and bolder blackwork for sacred geometry?
A: Look at how the design will live in motion and on your skin tone. Single-needle work keeps a delicate look but needs spacing and careful placement to avoid early loss of detail. Bolder blackwork sacrifices fragile detail for longevity and high contrast. My observation is that pieces on high-friction spots do better with modestly heavier line weight.
Q: What should I bring to my consultation for a sacred geometry piece?
A: Bring at least two reference images showing the scale you want and one photo of the exact placement area on your body. Ask the artist to show the stencil at actual size and to explain the spacing plan so you know where fine lines might need to be widened. Also show movement poses if the placement crosses joints.
Q: Are there cultural concerns with sacred geometry designs?
A: Yes, context matters. One viewpoint says many sacred geometry patterns are shared mathematical or cosmological forms and can be used thoughtfully across cultures. The opposing viewpoint urges research and respect for symbols tied to living spiritual traditions and suggests seeking guidance when a design is clearly tied to a specific culture. If in doubt, opt for abstraction that honors the form without direct appropriation.
Q: Where can I find healed examples and portfolios without naming specific artists?
A: Search platform tags and keywords that point to healed work and vary skin tone filters to see how linework ages. Try Instagram location filters, TikTok tags for healed geometry photos, and platform portfolio sites using keywords like "sacred geometry healed" to compare line weight and spacing. Reddit threads often have user-shared healed timelines that are helpful.
Q: What clothing should I wear to the session and for the first week of healing?
A: Wear loose, breathable clothing that gives the artist access without rubbing the fresh tattoo. For collarbone and chest pieces pick a scoop-neck or wide-neck top. For limb placements choose items you can roll or pull aside without pulling at the area. For showing the healed geometry, fitted or cropped pieces highlight the composition, try open back dress for back placements.
