
A lot of rib tattoos look great in a mirror but fall apart with normal movement. Fine single-needle scripts and tiny botanical packs often blur because the ribs stretch and a bra or waistband presses them daily. I picked designs that follow the curve, give ink room to breathe, and suit either a hidden placement or a peekaboo reveal so you get a tattoo that still reads well after a few years.
1. Fine-Line Singular Butterfly (High Rib)
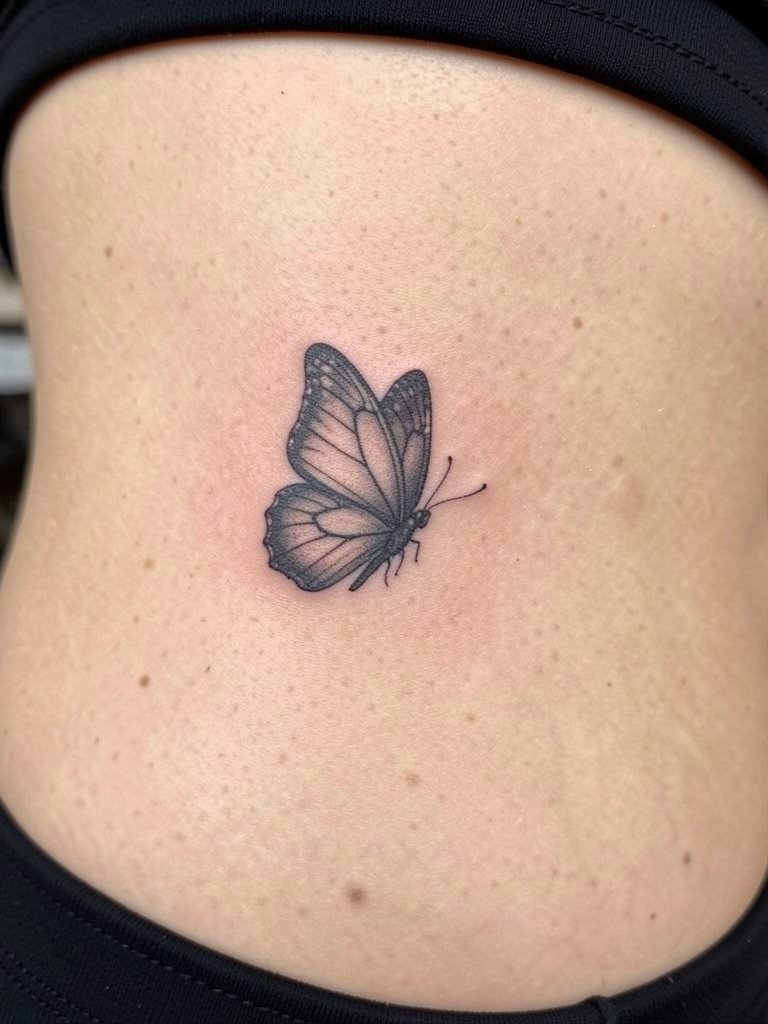
A tiny butterfly under the bra line reads intimate and becomes a private flourish when you want it to be. Fine line on the ribs is a polarizing choice. One camp says single-needle work blurs inside two years because the rib skin stretches and clothing presses the area daily. The other camp says with slightly wider spacing and careful needle depth, fine line settles fine and can look delicate for years. When you plan this one, bring scaled reference photos so the artist can show how it reads at two versus five inches. Expect a one-hour session and a higher sensitivity than the arm. For the appointment wear, choose a loose cotton tank top so the artist can access the upper rib without underwire getting in the way.
2. Vertical Sanskrit or Arabic Calligraphy
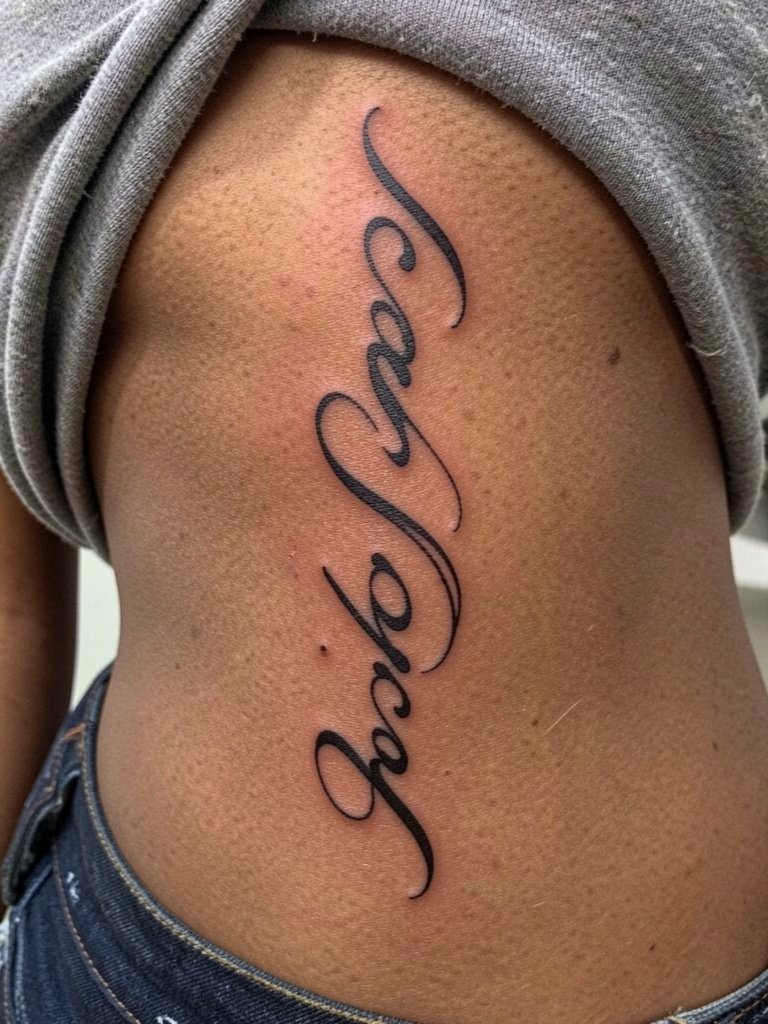
Curved script that hugs the rib curve reads more intentional than straight horizontal text sitting against the bones. Fine script on ribs triggers the same debate among artists. One group insists tiny letters blur as the ribs move and suggest bold or spaced lettering. The other group will accept delicate curves if the letters have breathing room and slightly heavier initial strokes. A practical consultation point is exact letter size. Ask to see the stencil on your body while you stand, sit, and twist so you can judge the flow. Expect one session and a 6–10 inch vertical scale for a visible mid-rib script. For showing it off, a side-tie dress creates flattering peekaboo moments.
3. Cascading Floral Vine with 3–5 Blooms
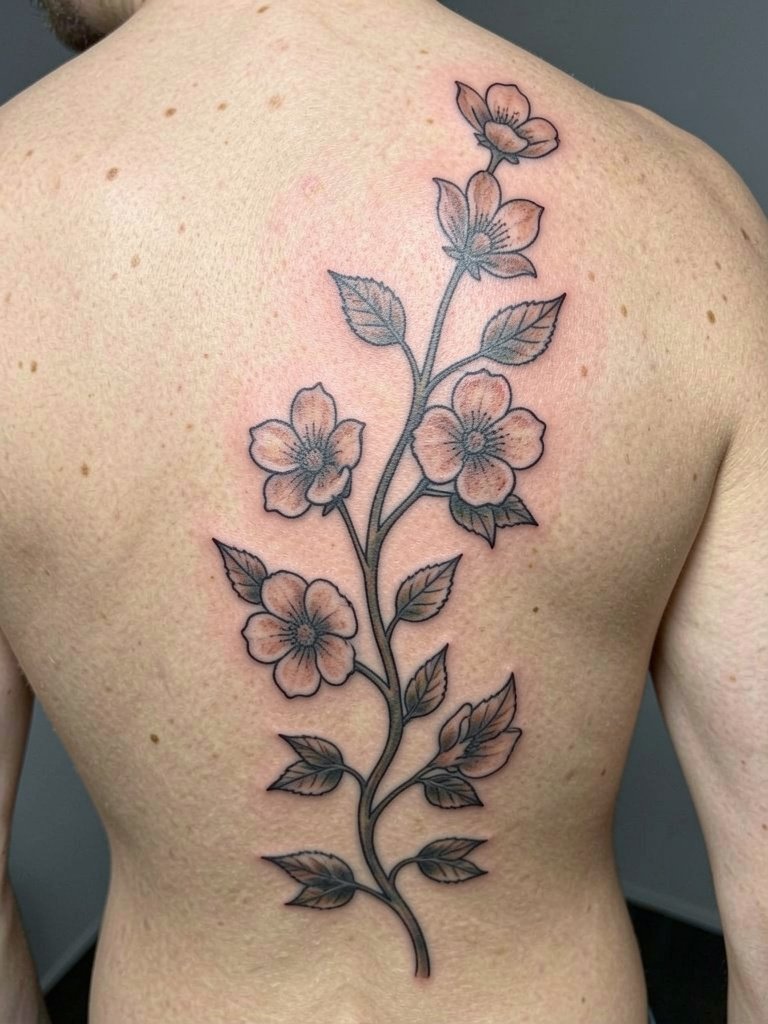
A vertical vine that follows the torso curve is a classic way to fit florals to ribs without crowding detail. The rule of thumb is fewer blooms with more negative space for longevity. Discuss with the artist which blooms represent people or months so they can size each flower for legibility at two years. A common mistake is packing tiny petals tightly together, which looks muddled after healing. This design typically takes two sessions for color and layering, and it tugs more near the lower ribs. Wear a strapless top for photos later and a loose short-sleeve shirt on session day.
4. Koi Fish Wrapper (Lower Ribs)
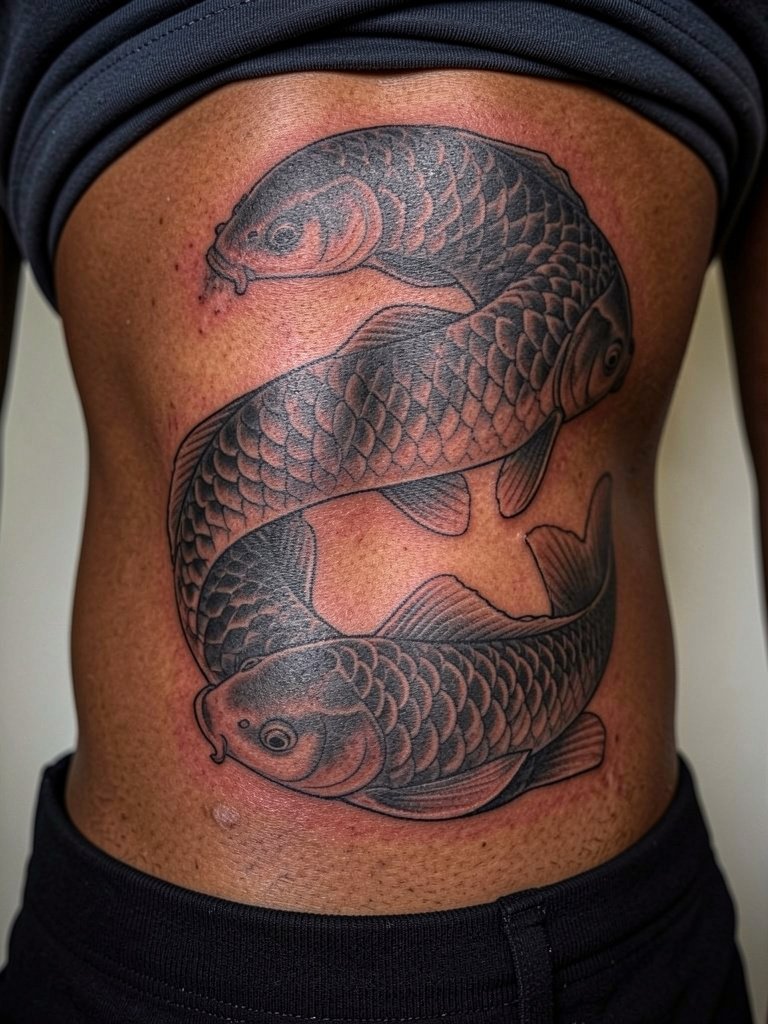
A wrap-around koi on the lower ribs plays with movement and body shape, so composition matters more than detail. Tell the artist exactly where you want the wrap to start and stop relative to your waistband so the fish read as a single piece when you bend. A typical mistake is forcing too much scale detail into a narrow wrap, which loses definition once the body moves. Expect multiple long sessions for color saturation and shading. For show-off outfits, low-rise jeans or skirts create the intended peekaboo effect. During the appointment, wear drawstring linen pants so the artist can access the lower rib comfortably.
5. Minimalist Wing Pair (Angled, High Rib)
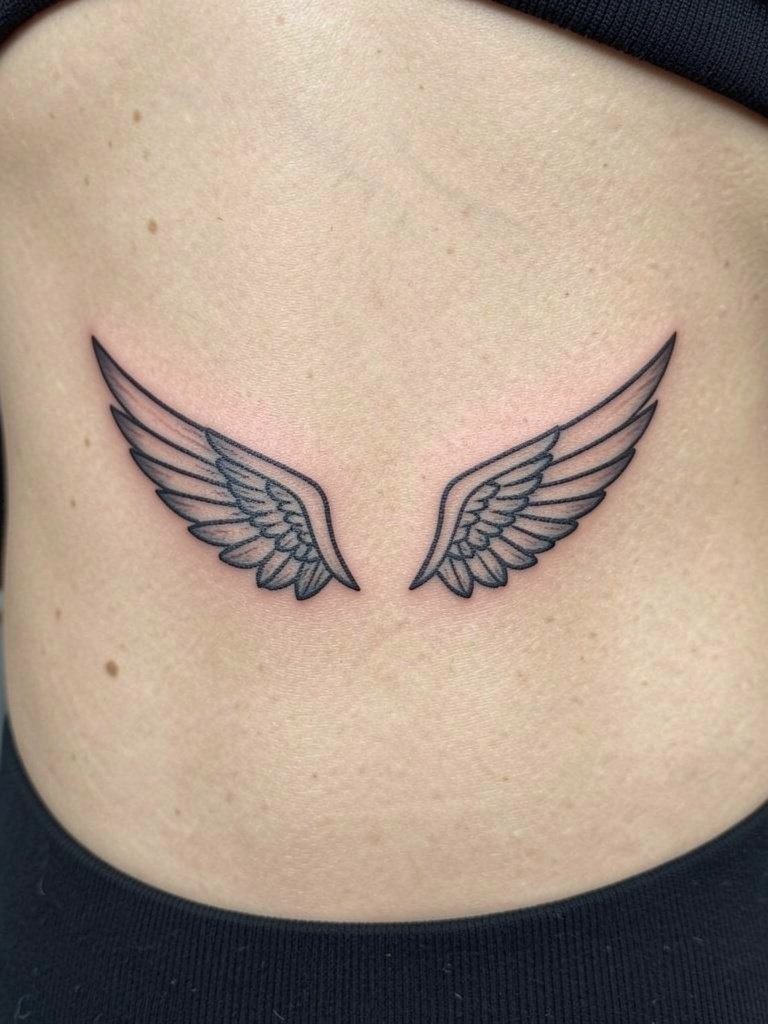
Twin wings placed high on the ribs work well when you want matched symmetry that stays mostly private. One real mistake is asking for ultra-thin lines without leaving room for small touch-ups, which makes the wings vanish over time. Request slightly thicker base lines so the wings keep their shape through the first touch-up window. Expect a single short session and a higher pain score than the arm. For styling, pair with high-cut tank tops or crop tops and a delicate gold pendant to draw the eye upward.
6. "I Am Enough" Curved Script
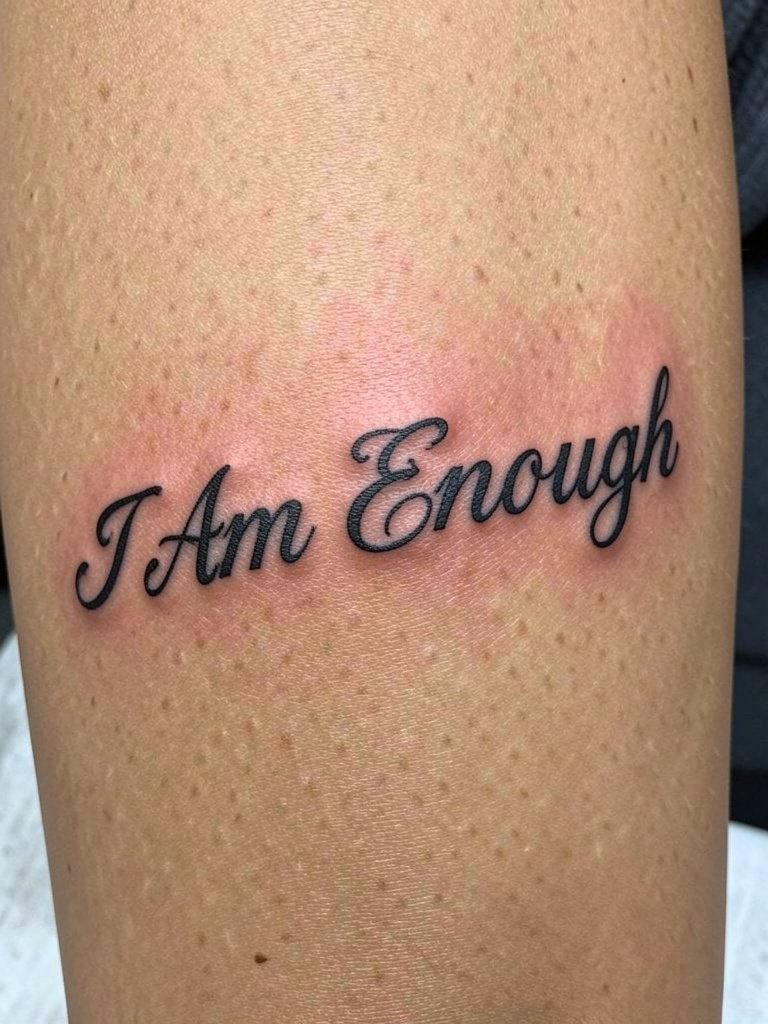
Short affirmations on the ribs must respect scale. Tiny packed lettering is the common error for scripts on this placement. Ask for letters sized so the counters and spacing stay open after a year. The fine-line longevity debate applies here as well. One camp says these phrases blur on the ribs within two years due to skin movement and daily compression. The other camp says with slightly heavier initial strokes and extra negative space the line can read clean for several years. Bring examples at actual scale so you see how the phrase reads at six inches versus eight inches. Wear a button-down shirt to the session so you can expose the side torso easily without tugging fabric.
Session Essentials
These picks help the rib placements above survive the chair and the first two weeks.
- Temporary tattoo marker or makeup pencil. Sketching the rough size and tracing the stencil on skin beforehand helps you test posture and movement with the exact line weight.
- Soft bralette. Replace underwire during the first two weeks to avoid constant rubbing across high-rib work.
- Loose cotton tank top. Easy to put on and take off for upper-rib access without compressing the healing skin.
- Fragrance-free gentle body wash. A mild wash reduces irritation during nightly rinses without stripping moisture.
- Aquaphor Healing Ointment. A thin layer during the earliest days seals in moisture for fine line work without clogging the area.
7. Pet Memorial Tiny Symbol (Upper Rib)
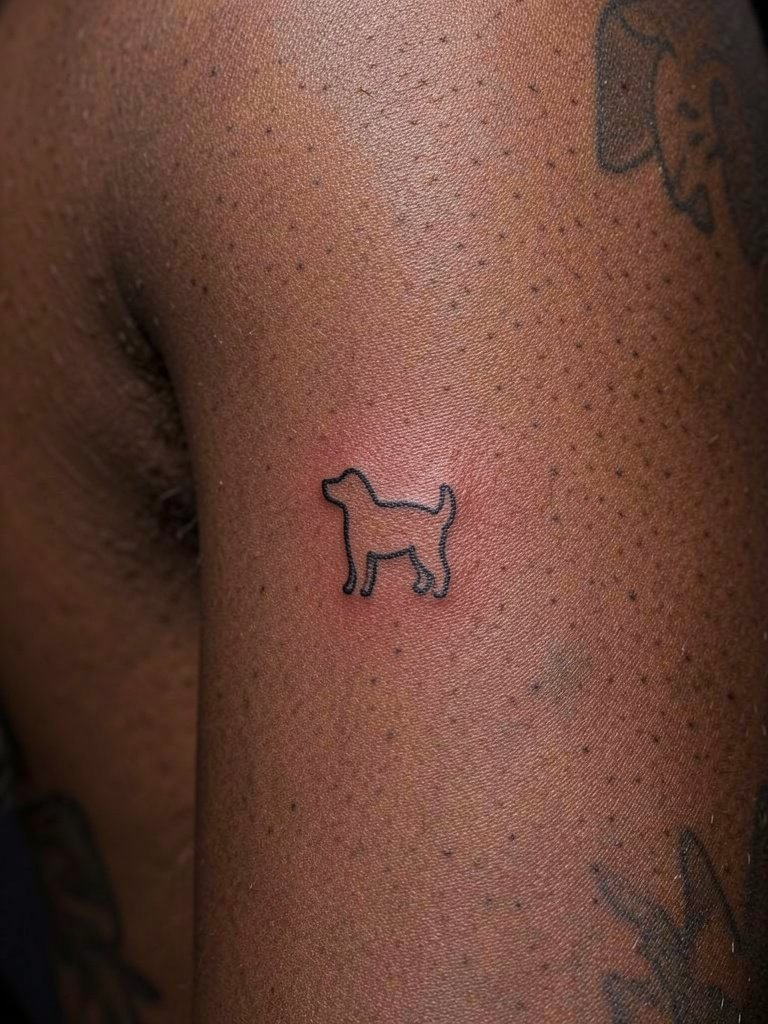
A tiny mark can carry a lot of meaning when it is private and discreet. The main technical risk is making the symbol so small that the negative space closes up during healing. Ask the artist to render the icon slightly larger than you think necessary so the essence remains identifiable after a year. This piece is quick and low-cost and takes under an hour. For session comfort, wear a sleeveless top for easy access to the upper rib. If you plan photos later, chokers or collarbone necklaces frame the area nicely.
8. Branch Silhouette Extending to Back
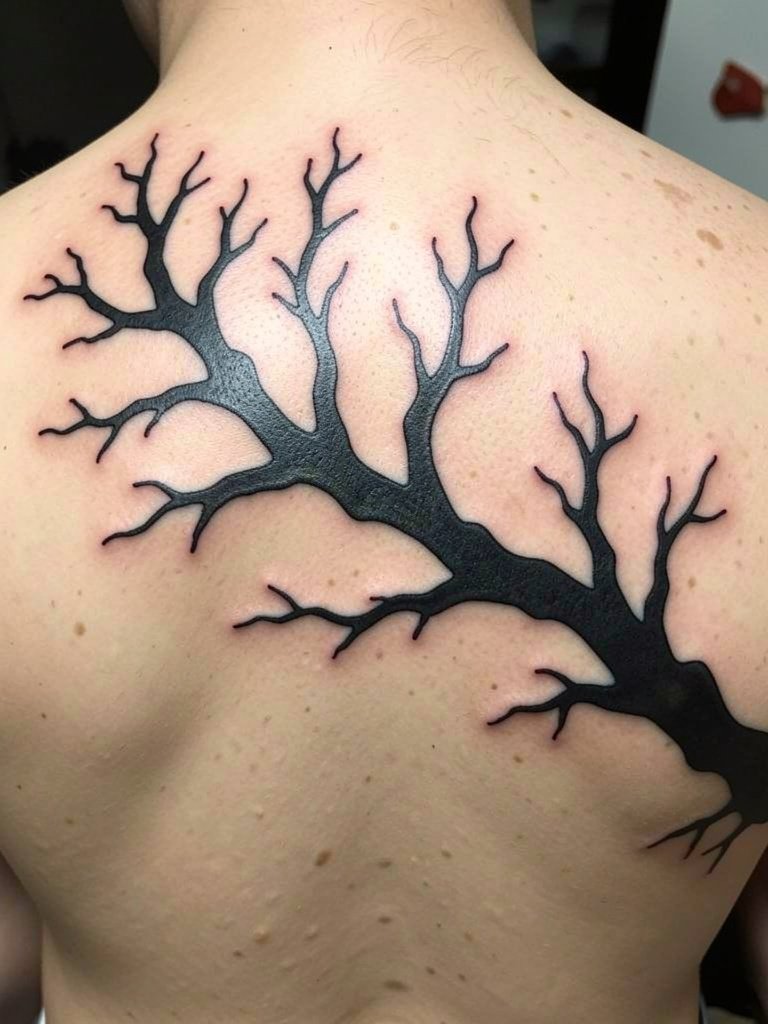
A heavy black silhouette reads well on ribs where delicate detail tends to fade. One benefit is graphic clarity, which resists blowout better than crowded dot work on moving skin. A common mistake is trying to cram too many fine twigs into the design. Ask the artist to simplify small offshoots into negative shapes so the branch looks intentional at three years. This design often needs two sessions for a clean transition across the torso. For evening wear, strapless tops or off-the-shoulder dresses show the upper rib-to-shoulder flow.
9. Geometric Warrior Shield (Mid-Rib, Men)
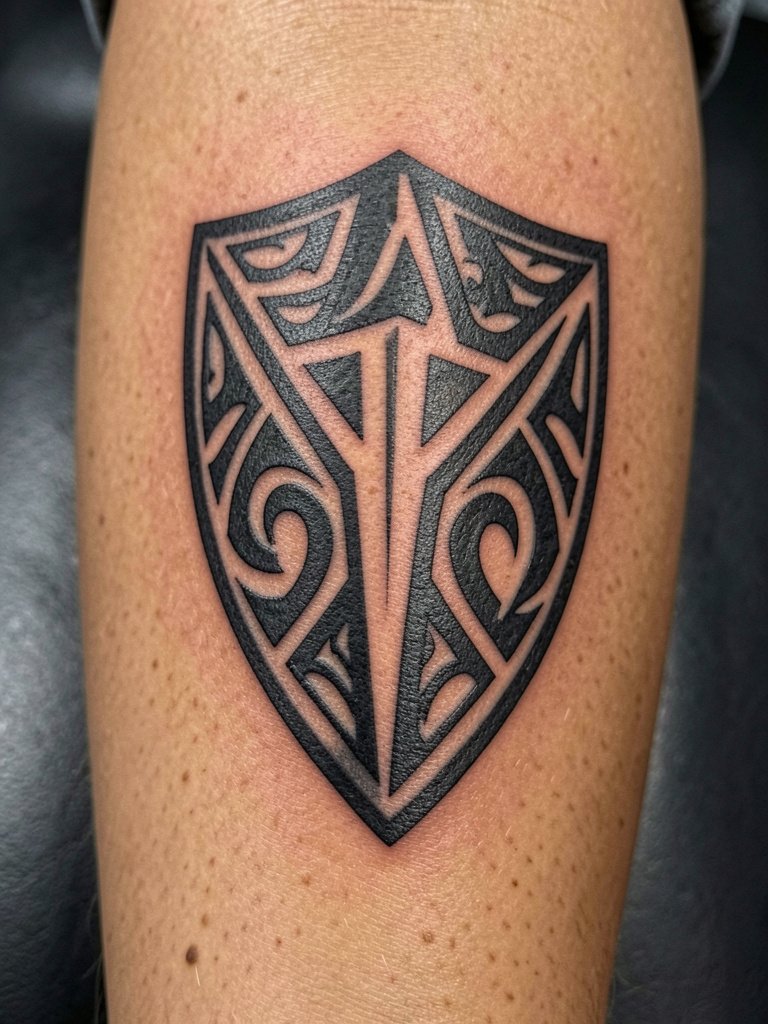
Men often pick geometric or tribal shields for a graphic, resilient look that ages predictably. Thick lines reduce blowout risk and keep the motif legible even if tiny details soften. Discuss ideal scale so the shield does not wrap awkwardly when you twist. A session usually runs one to two hours because of the bold linework. Pair this piece with a fitted scoop-neck or rolled sleeves for photos. During the session wear a loose cotton tee you can remove without tugging.
10. Wave Design to Spine (Lower Ribs)
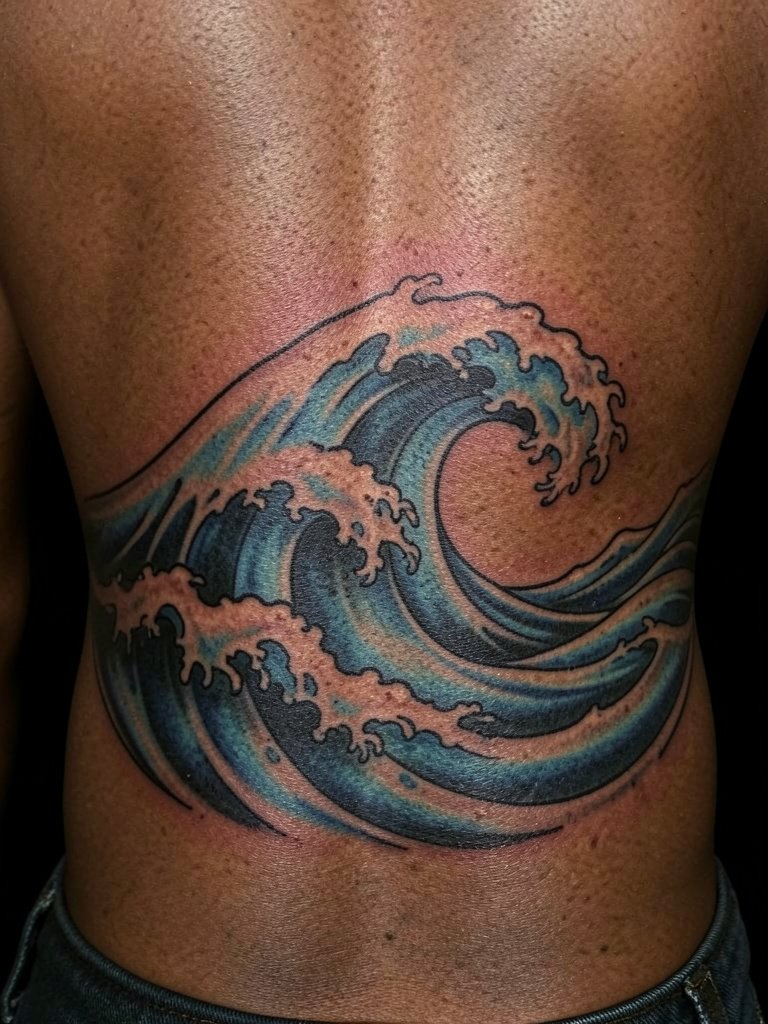
A water motif that tucks toward the spine plays with the natural flow of the torso. The artist needs to map how the curve looks when you bend forward and when you stand, so request a stencil check in both positions. Overworking small strokes into the wave edges is a common error. A two-session plan gives time for shading and saturation. For outfit pairing, low-rise jeans and a cropped top create the desired peekaboo line. On the day, wear drawstring pants that slip on and off without pressure on the lower rib.
11. Birth Month Flower Cluster (High or Mid-Rib)
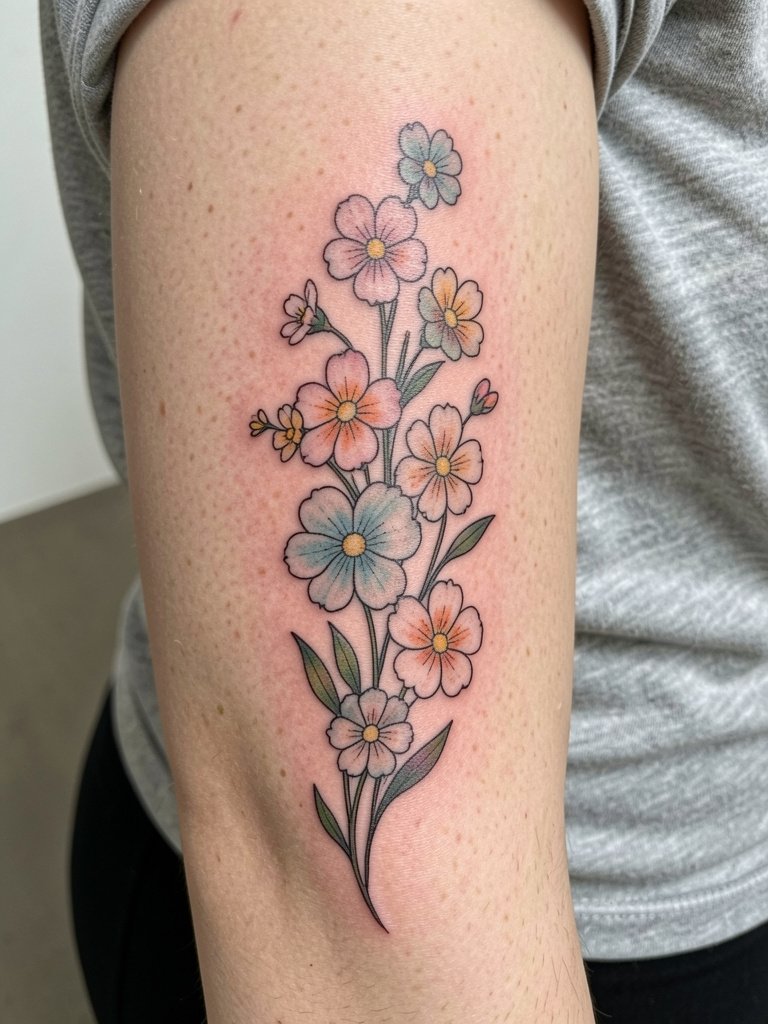
A floral cluster that encodes birth months is a clear way to represent family without a cliché label. The key is sizing each bloom so petals remain readable after a year. Ask for slightly larger petals for months with more detail. If you squeeze too many flowers into a slim column, the composition blurs over time. Expect a single to two-session job depending on color. To show it off, layer with an open kimono or mesh top and use delicate layered chains.
12. Western-Inspired Minimal Icon
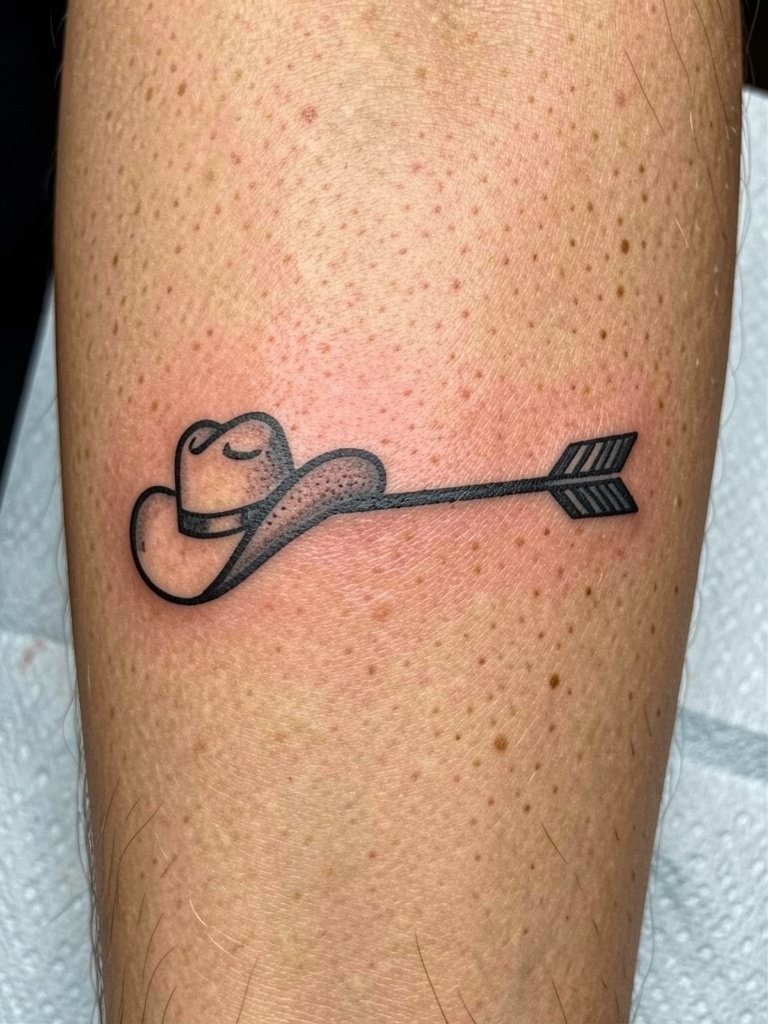
Simple icons with thick outlines are a practical route if you want longevity on the ribs. The ignorant-style plain fills age more predictably than tiny script or dense dot shading. A frequent mistake is asking for hairline strokes in an icon meant to last. If durability is the goal, pick bold silhouette shapes and discuss line thickness relative to your skin texture. These pieces are quick and cost-effective. Session wear like a loose short-sleeve top helps access the side torso without fuss.
13. Phoenix Spanning Mid-Rib
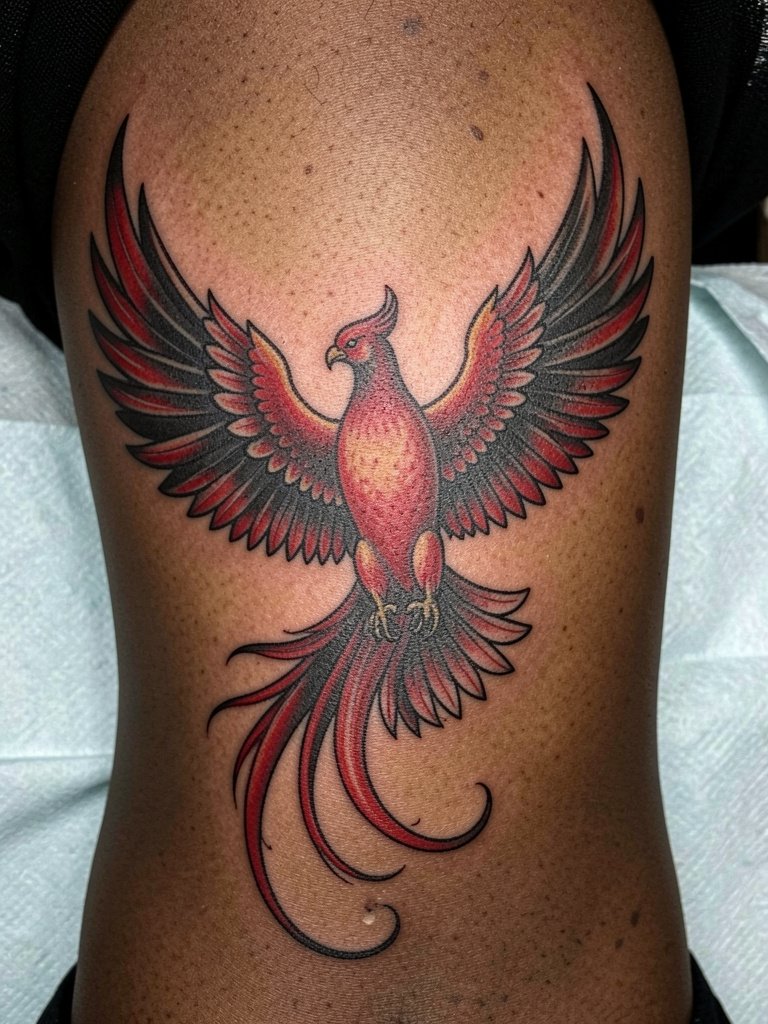
A phoenix centered on the ribs reads like transformation when the wings are designed to follow the curve. Ask the artist to emphasize negative space between feathers so the wing detail stays legible in motion. A typical mistake is packing tiny feather filigree that loses shape after healing. This one needs a two-session plan for color and feather texture. For outfits that frame the wings, off-the-shoulder or strapless dresses work well. Bring snacks and water because the mid-rib can be a higher-pain session.
14. Single Rose Stem with Light Shading
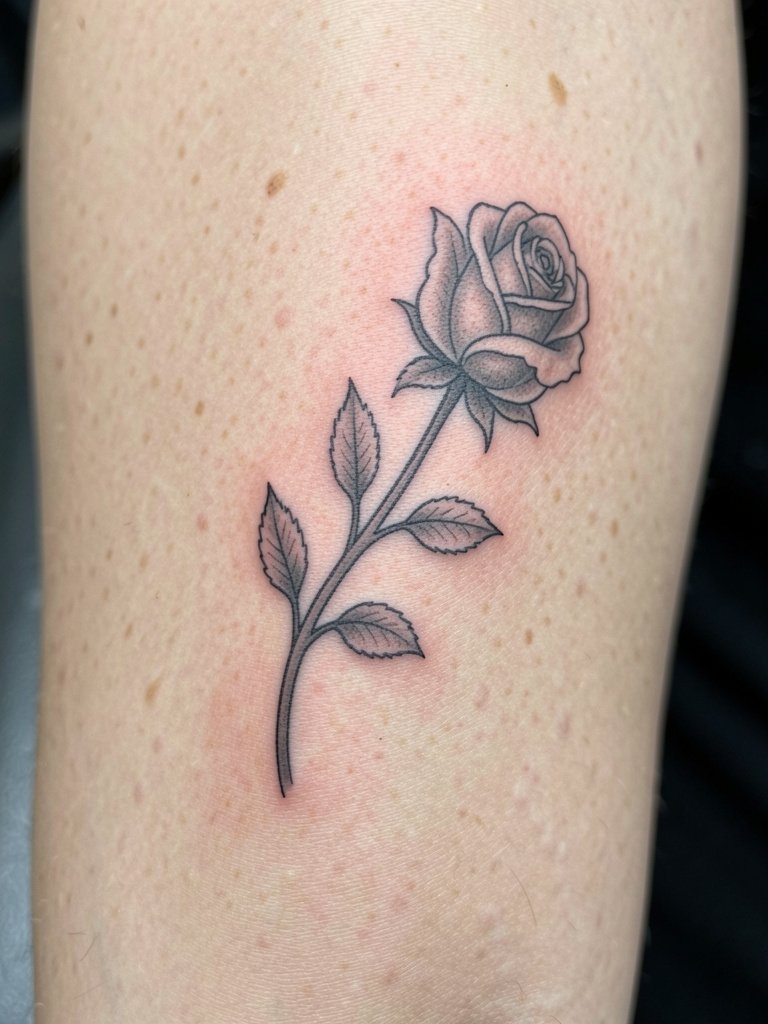
A single rose stem is a classic that ages well when the shading is restrained and the stem has clear negative space. The most common error is over-detailing the petals so the subtle values wash out once healed. Ask the artist to keep shading soft and focus on silhouette contrast. This design usually fits into a one-session appointment. For photos, wear a button-down or an open kimono to let the stem peek through.
15. Minimalist Arc and Crescent Moon
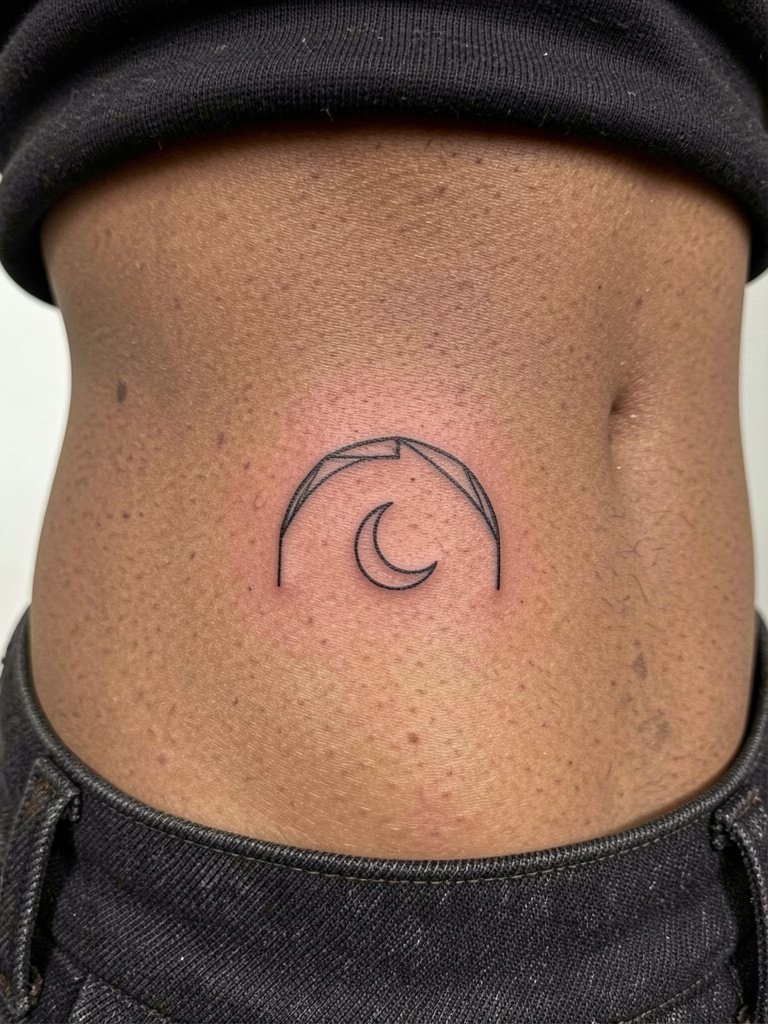
A small crescent with an arc reads graphic and quiet on the lower ribs. Minimal shapes must be sized to resist softening into a blob when the area stretches. A useful consultation detail is to ask to preview the arc at both three and five inches to judge curvature. This one is quick and low-detail. Style it with low-rise jeans and a cropped top for a casual reveal. Wear drawstring pants for the session so the artist can access the waist without pressure.
16. Coordinate Line (Map Coordinates)
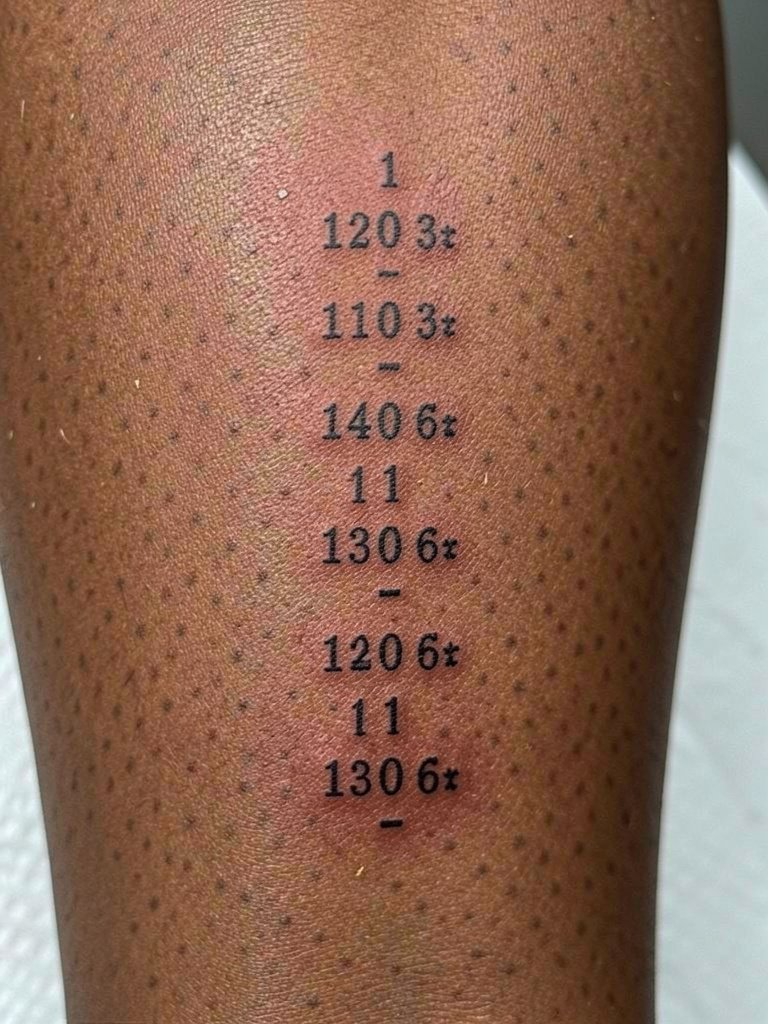
Coordinates and dates work as discreet memorial markers when the typography is sized deliberately. The main failure mode is choosing a font that is too thin, which tends to blur on ribs. Ask for a monospaced or thin serif that is a hair bolder than what you see in photos. Expect a short session and a touch-up timeline around six to twelve months for crisp lines. For session wear, a loose button-down gives easy mid-torso access without tugging.
17. Small Constellation Cluster
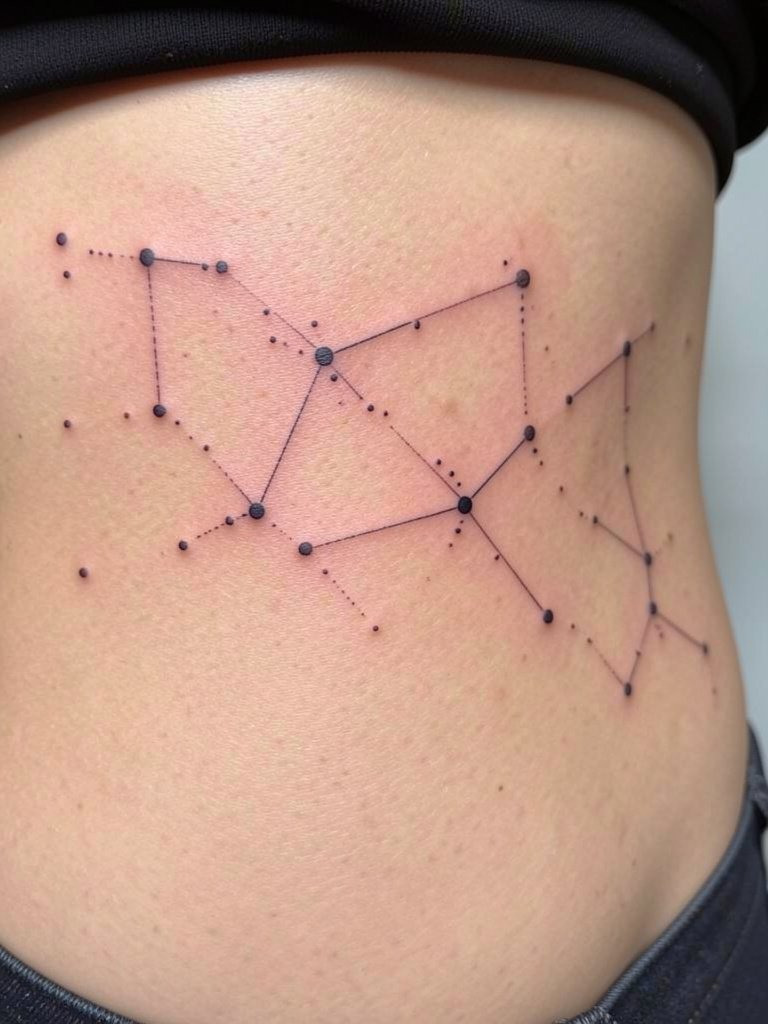
Tiny star clusters look delicate but need spacing so dots do not merge. Specify dot size and gap distance so the artist scales the cluster for your skin. The session is fast but sensitive where it sits under the bra. A practical tip is to wear a soft bralette on the ride home. For wearing out, a high-cut tank or crop top shows the cluster without overexposing the area.
18. Heartbeat Line with Small Initial
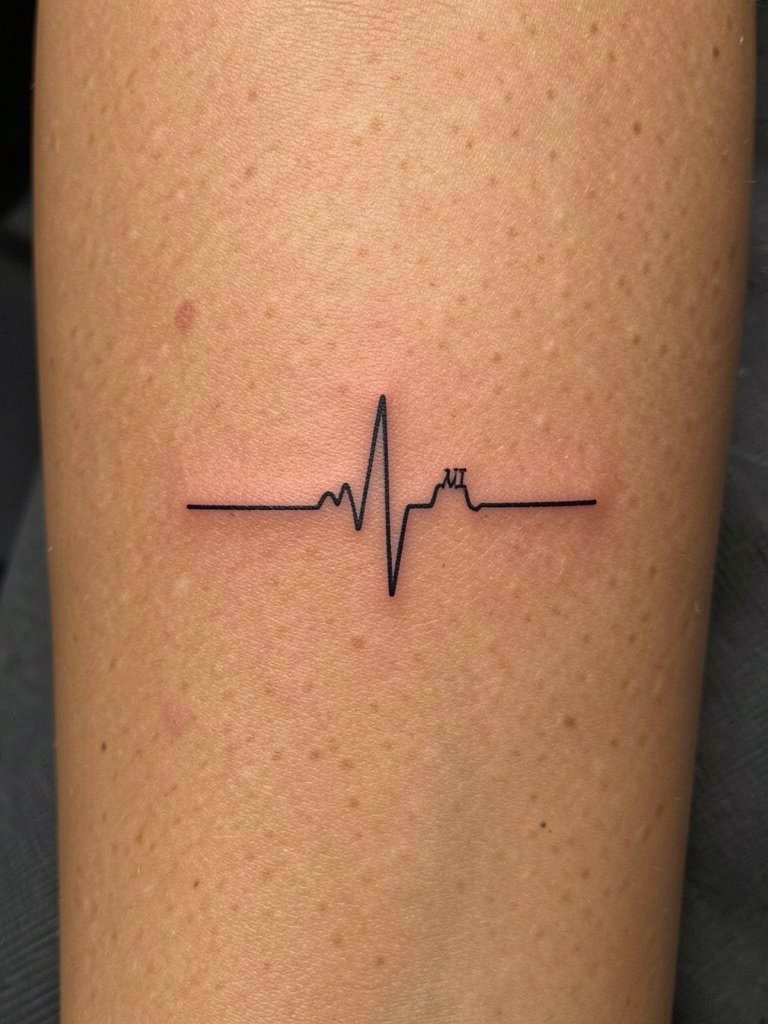
A heartbeat with an initial reads like a private nod to someone important. Small integrated letters must be sized so the counters and strokes remain distinct after healing. Ask the artist to preview the initial at final scale rather than guessing. Avoid packing extra flourishes that none of the negative space can hold. One quick session typically covers this. A loose tank top is the best session wear.
19. Matchstick Arrow That Ages Well
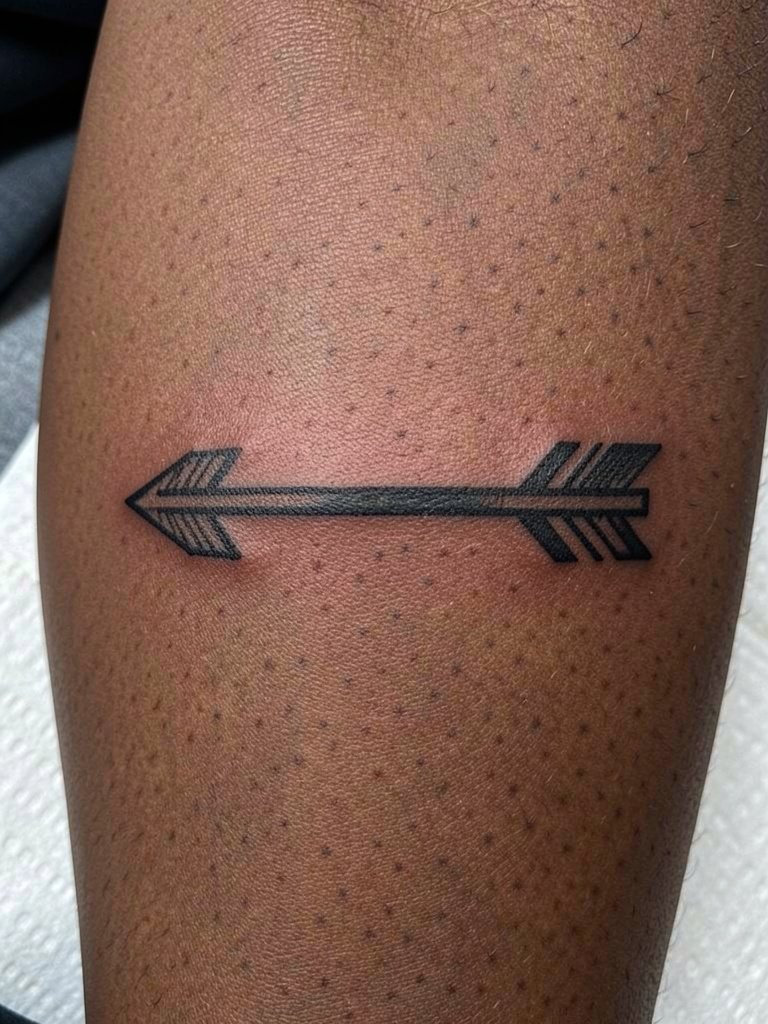
Arrows can blur if the shaft is hairline thin. Choose a simplified head and a shaft that is a touch thicker than your reference so the geometry keeps reading. This is the durable minimal option for an active lifestyle. The session is short and the sensation is higher near bone. Show it off with rolled-up linen shirts and a delicate chain necklace.
20. Lotus with Open Negative Space
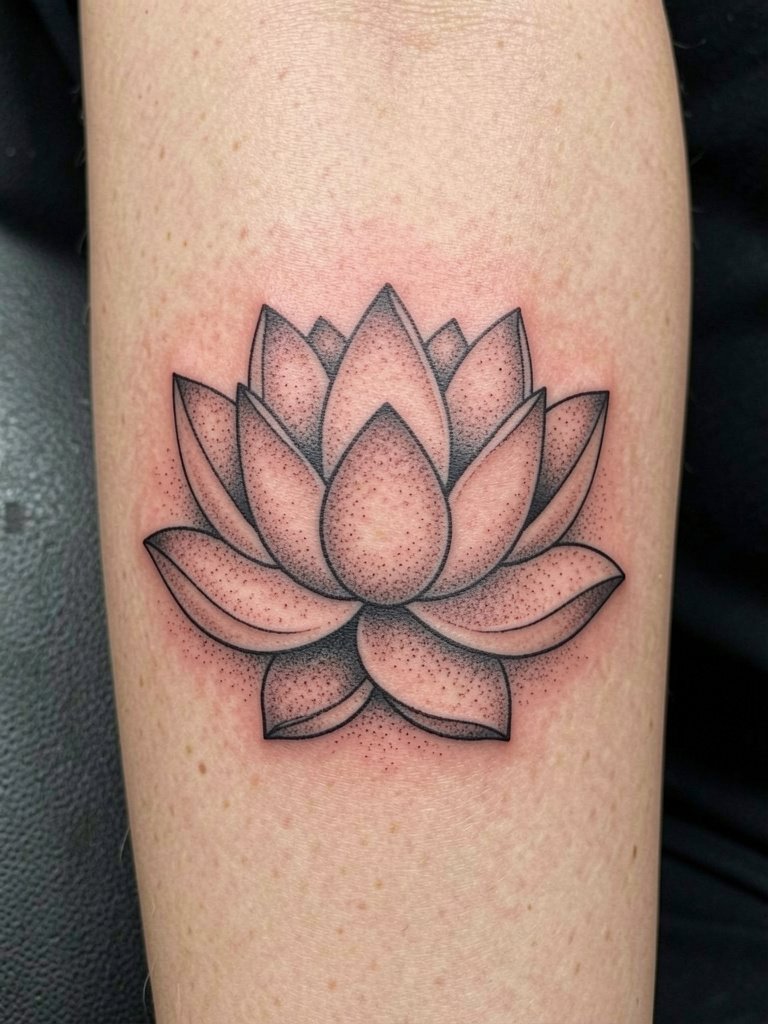
Lotus petals that breathe visually are a smart way to keep floral detail readable on flexible ribs. The mistake people make is stuffing internal petal veins into a tiny bloom. Ask for larger petal separations and stipple at the base rather than heavy inner lines. This approach preserves the blossom through touch-ups and normal movement. For ceremony looks, an off-the-shoulder dress frames the upper rib-to-shoulder flow.
21. Small Anchor with Rope Accent
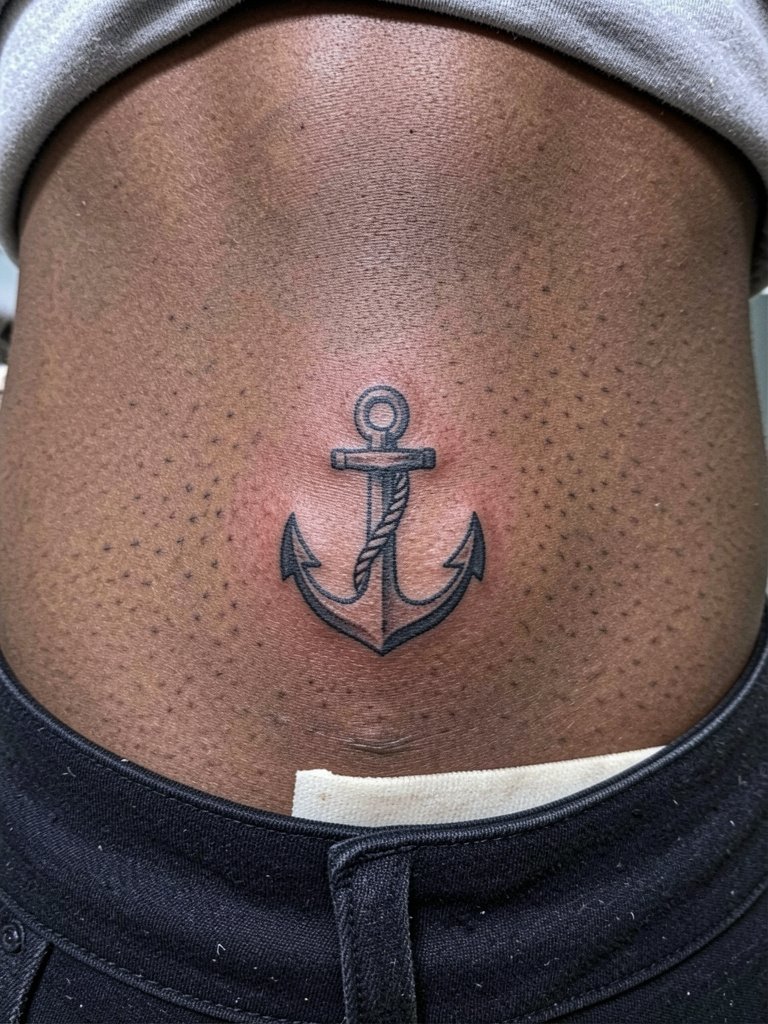
A nautical anchor with a little rope accent is a durable choice that resists smudging because the shapes are bold. Avoid micro-ropes that look great initially but fill in later. Ask for simplified rope loops that suggest texture without fine interlines. This is a one-session piece and looks sharp with low-rise bottoms. Wear drawstring pants to the appointment.
22. Partial Mandala Edge Toward the Back
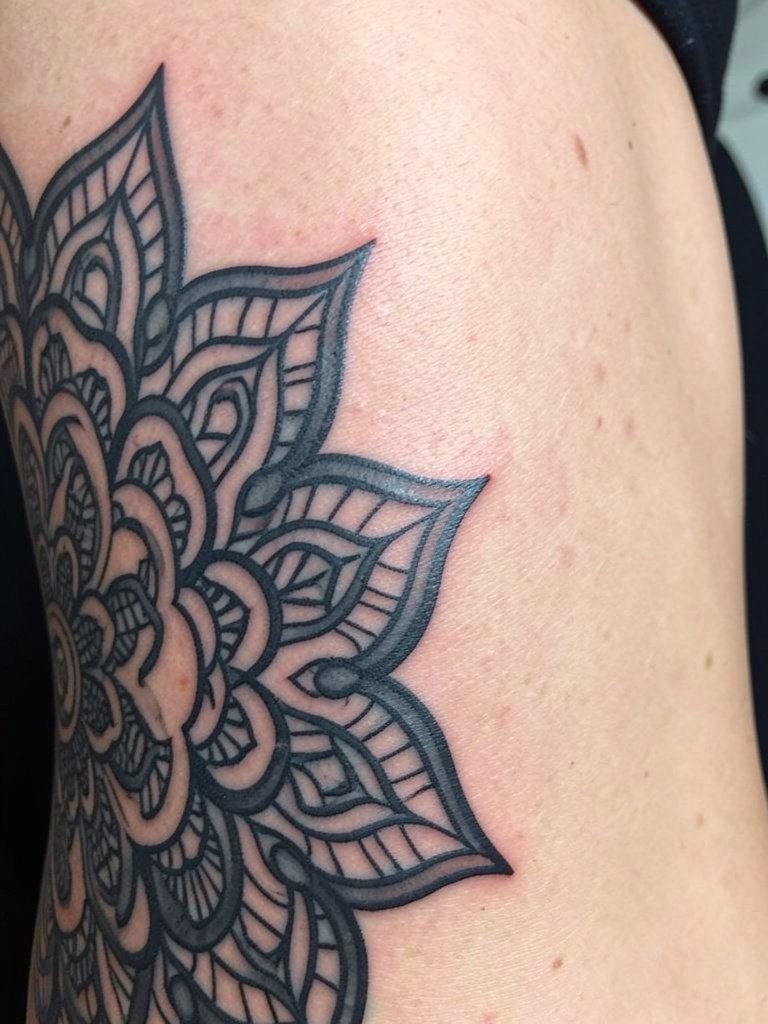
A mandala fragment plays to the ribcurve while avoiding overworking the area with full circular density. The main consideration is scale. A cramped mandala loses its lacework. Ask the artist to scale the pattern so the open lace reads as negative space at a glance. This design often takes two sessions for layered linework. For showing it off, a backless dress or strapless top works well.
23. Tiny Portrait Silhouette in Profile
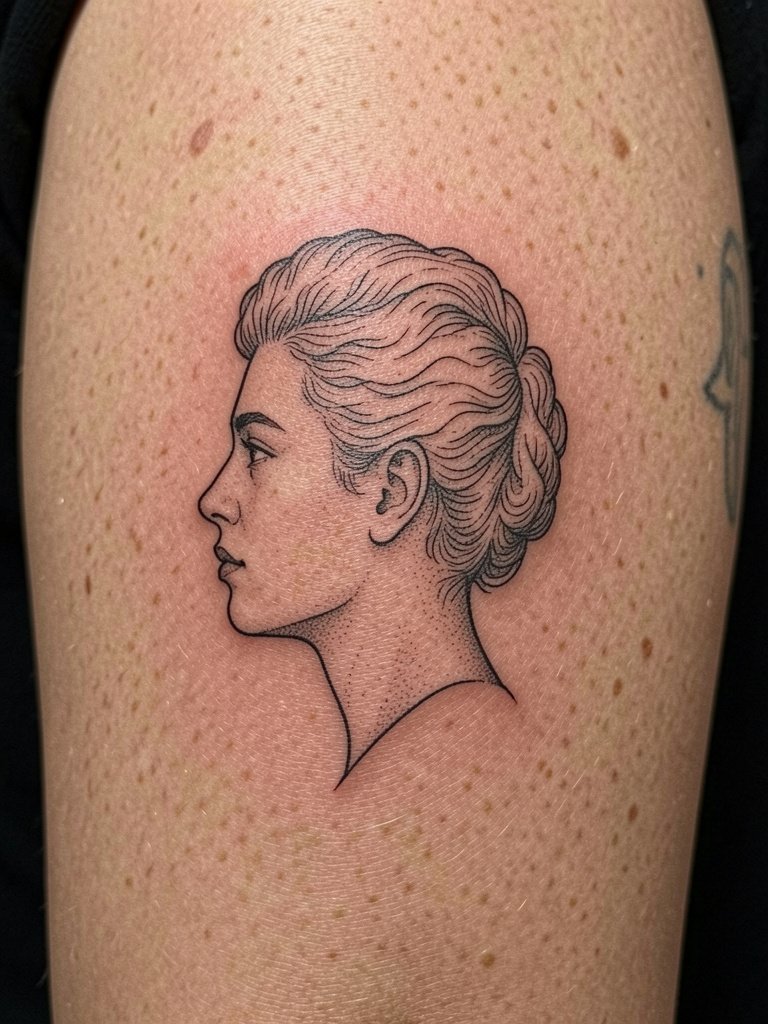
Silhouette portraits can be elegant if they remain graphic rather than photo-real. The usual mistake is requesting tiny facial detail that the skin cannot hold. Ask the artist to reduce the face to a contour and a key hairline so the profile reads at a distance. Sessions are brief. Wear a button-down to the chair to allow easy side access.
24. Ivy Wrap with Negative Space
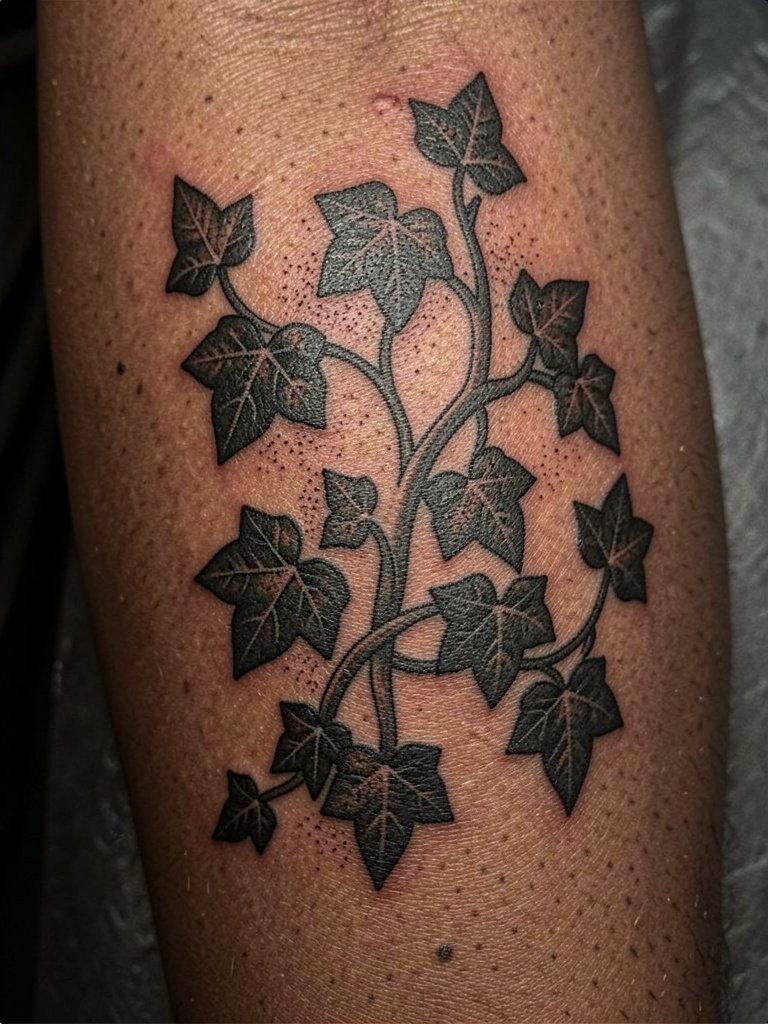
Ivy that wraps should emphasize leaf spacing to avoid becoming a dark wash. Request intentional gaps between leaves so the pattern keeps definition. Overly dense vine work makes touch-ups constant. Two shorter sessions are better than one long attempt. Pair with off-shoulder pieces or strapless silhouettes to highlight the curve.
25. Soundwave of a Loved One’s Voice
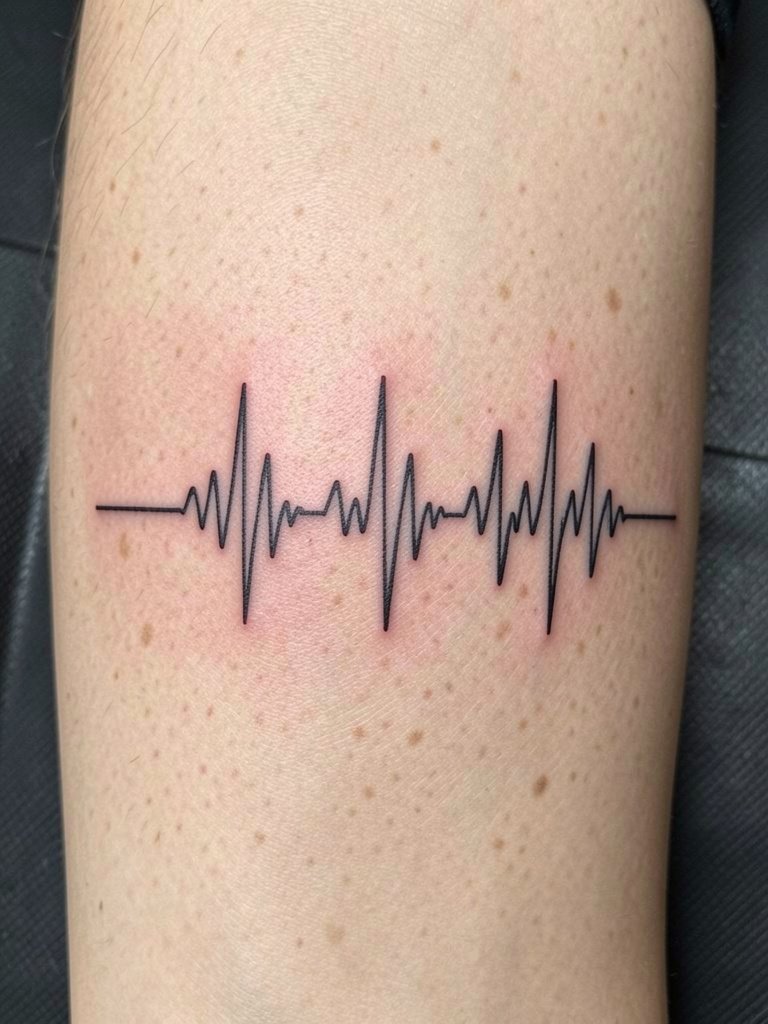
Soundwave tattoos need precise scaling. Ask the artist to trace the waveform and print it at different widths so you can listen visually to which one is still recognizable at year two. Tiny reproductions often smear. Expect a short session and plan a touch-up at the six- to twelve-month mark if lines soften. For photos, a cropped tank keeps the mid-torso visible.
26. Small Matching Piece for Two People
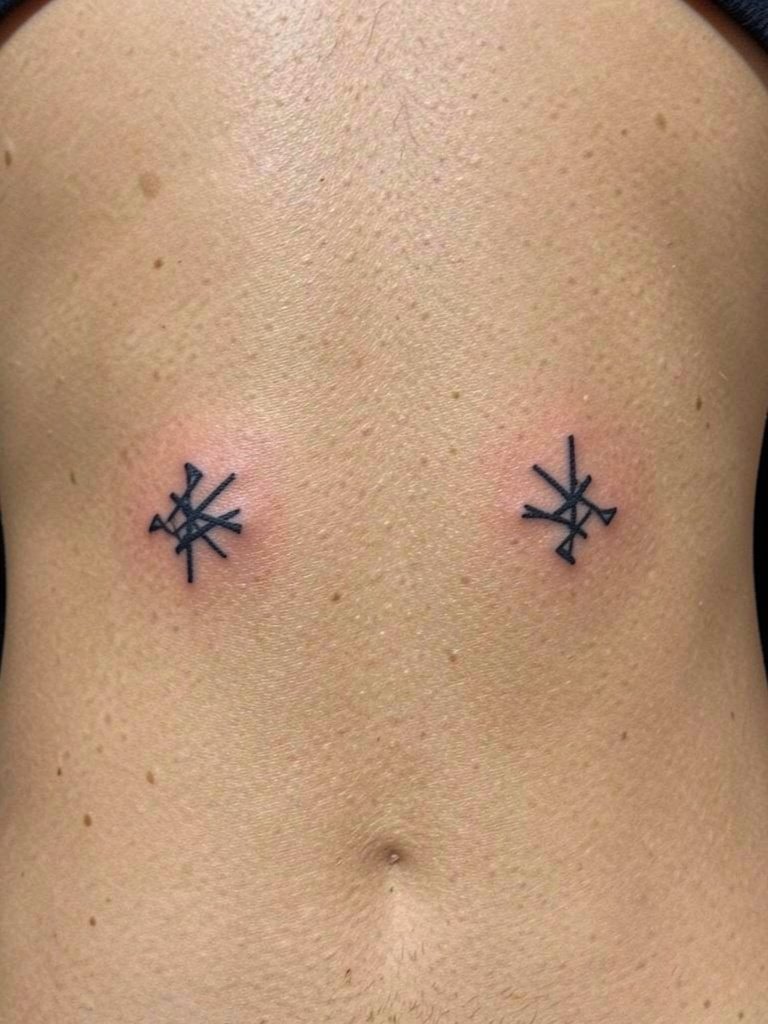
Matching rib tattoos for partners or family members work best when each piece is simple enough to hold up on its own. A common error is choosing mirror-image scripts that end up reading like smudges when they heal. Pick symbols with open shapes and ask the artist to size them for each body so they remain proportional over time. Coordinate appointment days if you want to heal together. For session wear, choose loose comfortable tops that both people can change easily.
27. Mountain Range Silhouette Along the Curve
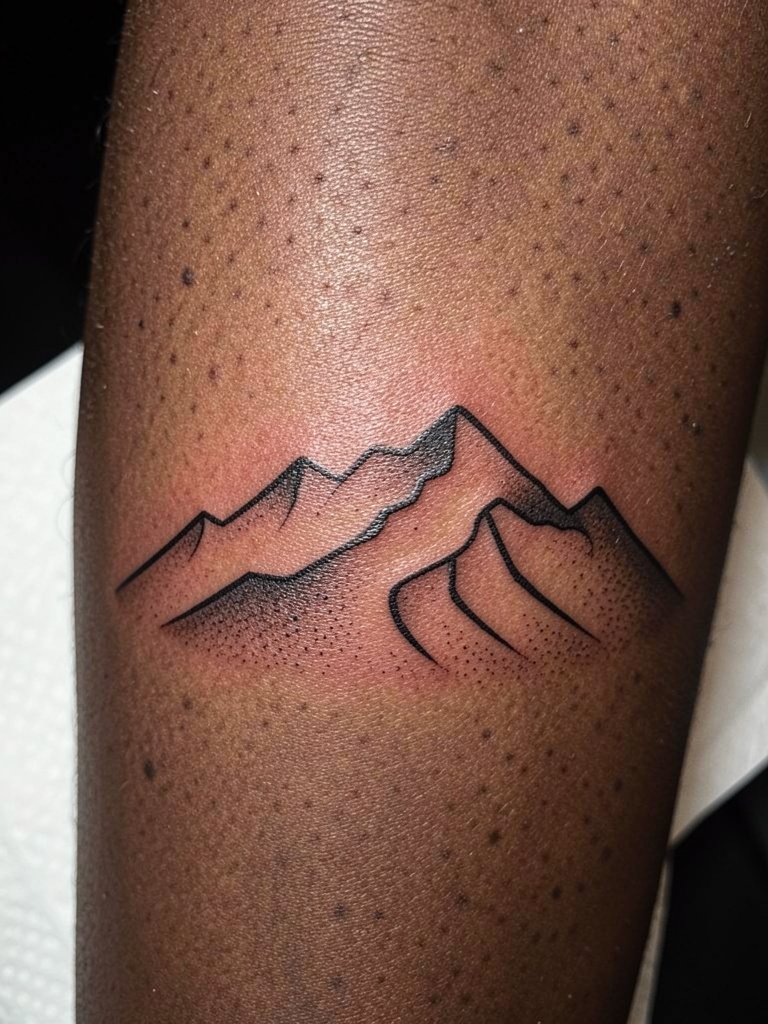
A simplified mountain line is a strong graphic solution that resists aging issues because the silhouette stays legible. The biggest mistake is adding too much interior texture. Ask for a plain silhouette with a couple of negative valleys and light stipple to suggest depth. One session usually suffices. Pair with high-waisted wide-leg pants and a cropped top for a balanced reveal.
28. Small Nautical Compass Rose
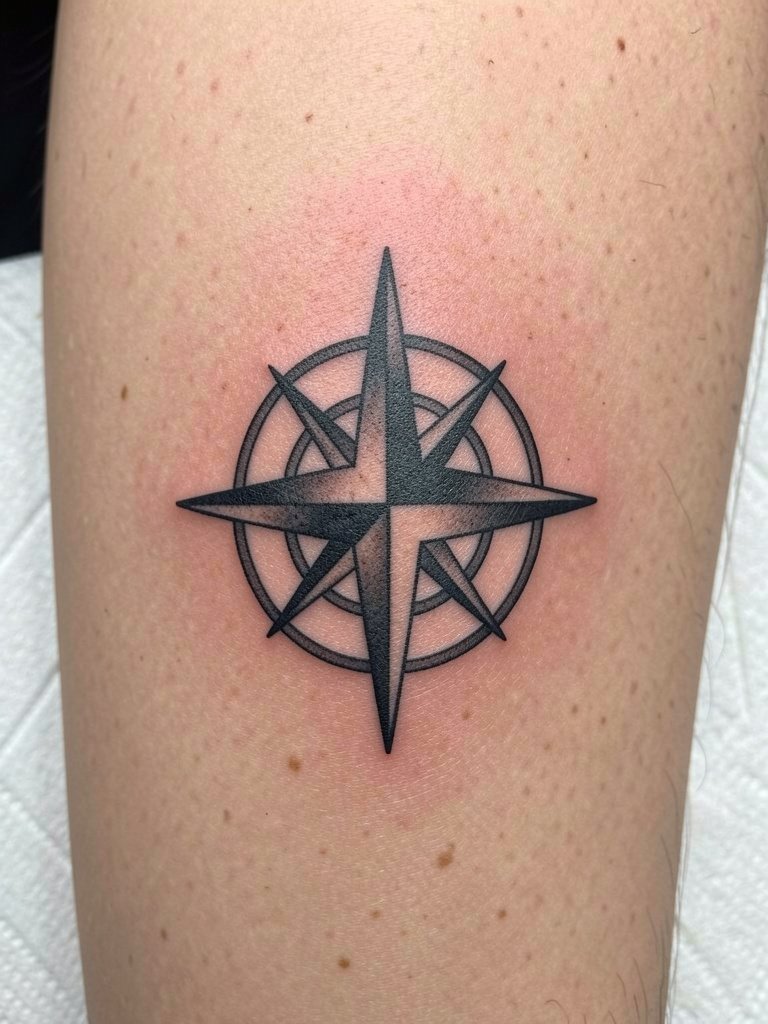
Compass roses are durable when simplified. Tiny compass teeth packed tightly become unreadable. Request the cardinal points be slightly longer than the internal flourishes so direction reads from a distance. This one-hour piece is a dependable choice if you want symbolism without constant touch-ups. For outfit ideas, a scoop-neck or open shirt frames the mid-torso.
29. Single Rose Stem with Light Shading Variant
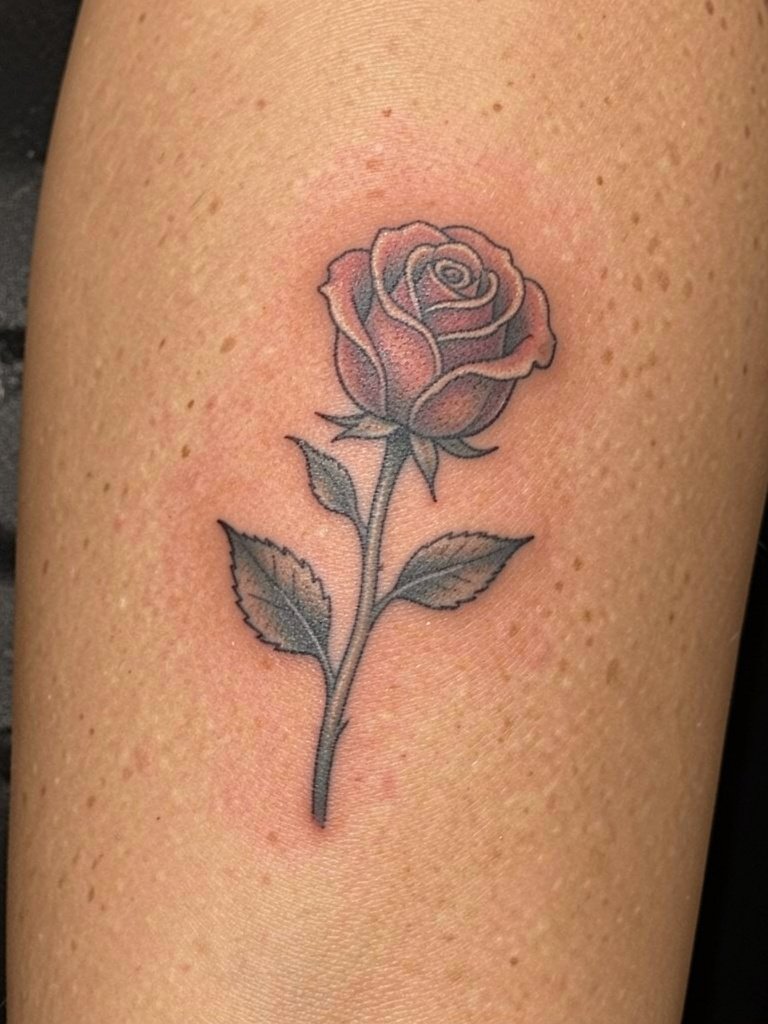
A variant of the classic rose stem that leans on stylized petal edges and restrained shading holds up nicely on ribs. Ask for the shading to be low contrast and for the stem to include clear negative space. The common mistake is heavy inner shading that blurs into the stem over time. Expect a single session with moderate discomfort near the bone. For revealing outfits, a strapless dress highlights the placement.
Frequently Asked Questions
Q: How painful are rib tattoos and how should I prepare?
A: Ribs rank high on the pain scale because the skin is thin and sits above bone. Hydrate well, eat a full meal before the session, and bring snacks for multi-hour appointments. Plan shorter sessions or breaks so you can manage stamina. Numbing options exist, but mention timing and your tolerance when you book.
Q: How do I make fine-line ribs last longer?
A: Prioritize spacing and slightly heavier initial strokes rather than ultra-fine hairlines. Ask the artist to show the stencil while you stand, sit, and twist so placement and scale are tested. Expect a possible touch-up within a year for the thinnest details.
Q: Where can I find healed photos and artists who specialize in rib work without naming specific people?
A: Search hashtags like #ribtattoo, #finelineribtattoo, and #ribcagescript on Instagram and TikTok and use location filters to find portfolios near you. Tattoodo and Inked App let you search by style keywords, and Reddit communities such as r/tattoos and r/tattooadvice surface peer recommendations and healed examples across skin tones.
Q: What should I wear to the appointment for different rib placements?
A: Match your outfit to the placement. For upper ribs wear a loose cotton tank or sleeveless top to avoid underwire. For lower ribs pick drawstring pants and a cropped top for access. For mid-rib or side-torso pieces a button-down is useful. A soft bralette is a comfortable post-session swap for underwire.
Q: Can color on ribs hold up as well as black?
A: Color can look vibrant initially but may require more touch-up than solid black, especially with subtle gradients. If you want color, plan for staged sessions to let earlier layers settle before adding saturation. For long-term readability, combine color with bold outlines and negative space.
Q: How long does a rib tattoo take to heal and when can I resume normal activities?
A: Most rib tattoos form a stable surface in two to three weeks, with deeper settling over several months. Avoid tight clothing, underwires, and heavy exercise that compresses the area during the first two weeks. Gentle walks and light movement are fine, but skip intense contact sports until fully healed.
Q: Are there design choices I should avoid for ribs to reduce blowout risk?
A: Avoid ultra-fine parallel lines packed close together and tiny dense dotwork columns. Prefer simplified silhouettes, spaced lettering, and intentional negative space. Ask to preview the stencil at final scale and request slightly thicker linework where the skin is most mobile.
