
Rib tattoos look private and poetic, but the reality is surprising: the ribcage is one of the placements where the most-liked, ultra-fine stuff often loses crispness fastest. Thicker line weight and designs that follow the torso curve tend to read cleaner after two to three years. Read these ideas with that aging reality in mind and pick the version that keeps its shape, not the Instagram snapshot that won the day.
1. Fine-Line Butterfly (High rib)
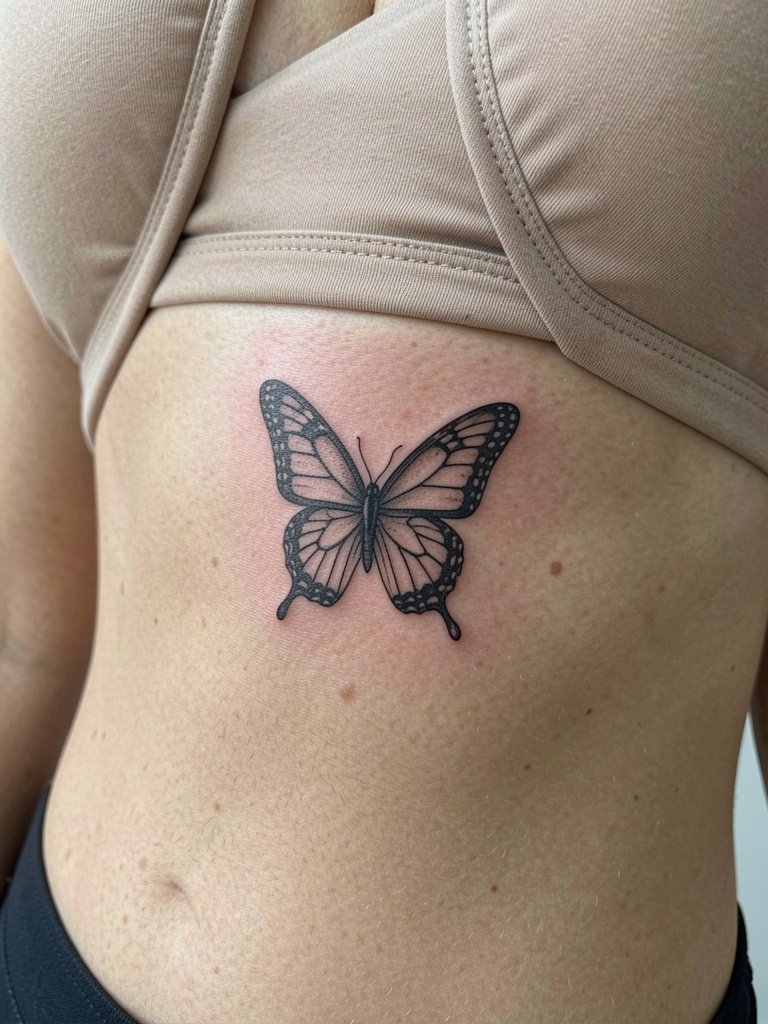
A single fine-line butterfly reads intimate and sits neatly under the bra line where it stays private. Artists split into two camps on fine line here. One camp argues fine line blurs within two years because rib skin stretches and moves under clothing, especially under the breast crease. The other camp says fine line settles fine when the artist uses slightly wider spacing and precise needle depth, and they point to multi-year healed photos to back that claim. If you want the look but longer life, ask for a hair-thicker line than the Pinterest reference and aim for a single-session size that gives the wings room to breathe. This placement pairs well with soft bralettes that frame the top edge without rubbing the stitches during healing.
2. Minimalist Wing Set (High rib)
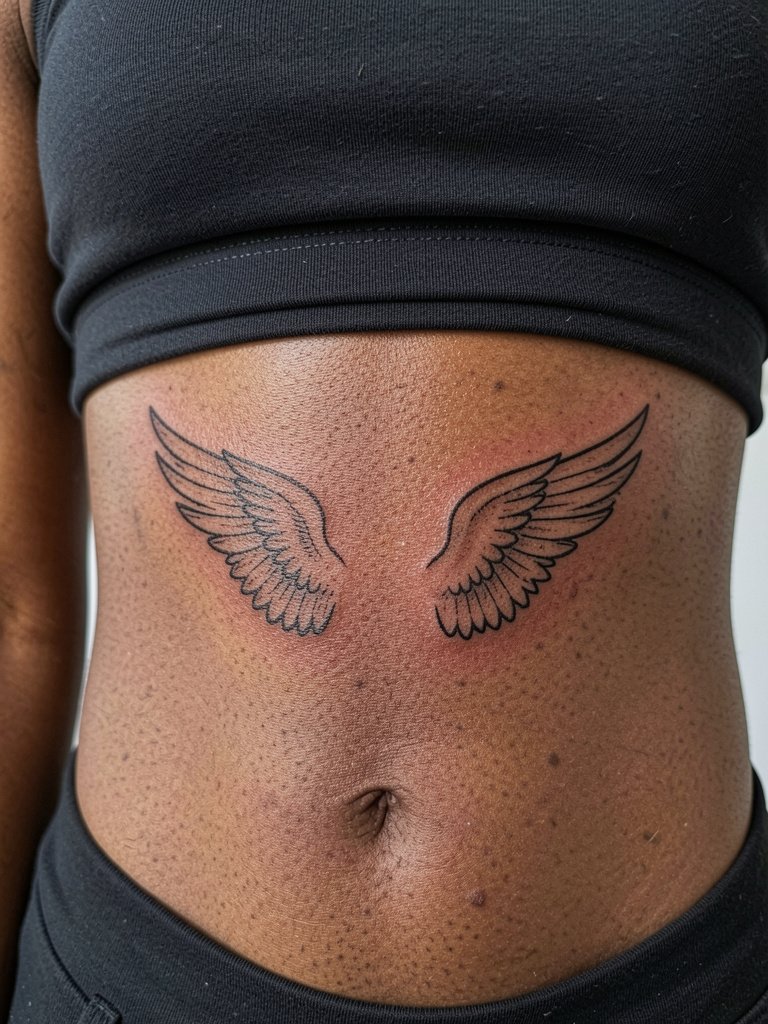
Tiny wing pairs work because the composition reads like an accent rather than a full illustration. Pick the wing angle to follow the natural slope of your ribcage so the wings do not appear to flatten when you move. A common mistake is requesting hairline strokes exactly like a reference and ending up with a faint, patchy look after healing. Ask for single-needle outlines with slightly more saturation and for the artist to show you a healed example at the same size. For showing the piece off, cropped tank tops or crop tops women frame both sides cleanly; for the session wear loose, drawstring linen pants so nothing presses on the rib area.
3. Vertical Floral Stem (Mid rib)
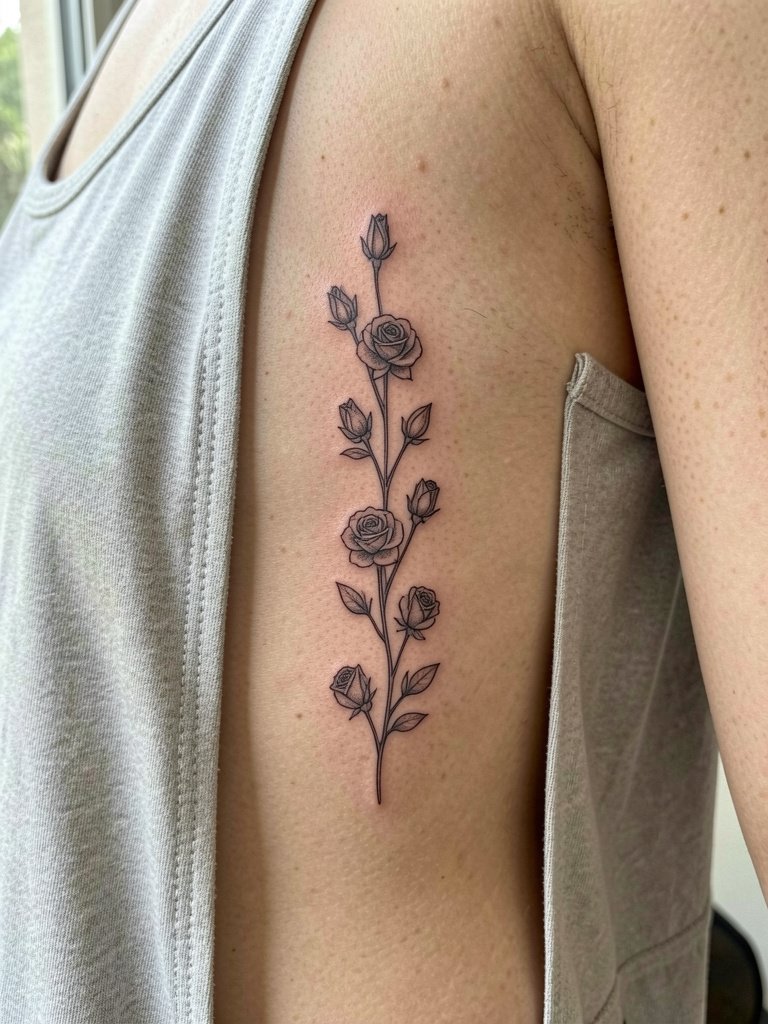
Vertical stems are a practical way to use ribs: they follow curvature and lengthen the torso visually while breathing with movement. For mid rib placement, request slight negative space between petals so shading does not merge over time. A frequent misstep is insisting on ultra-fine veining that eats into the petal shapes after a year. During the consult bring photos showing where you want highlights and where you want shadow, and ask the artist to map the stem across your oblique so it rests naturally as you breathe. When you want to show it, a loose cotton tank top keeps the silhouette visible while staying comfortable during healing.
4. Birth Month Flower Cluster (Mid rib)
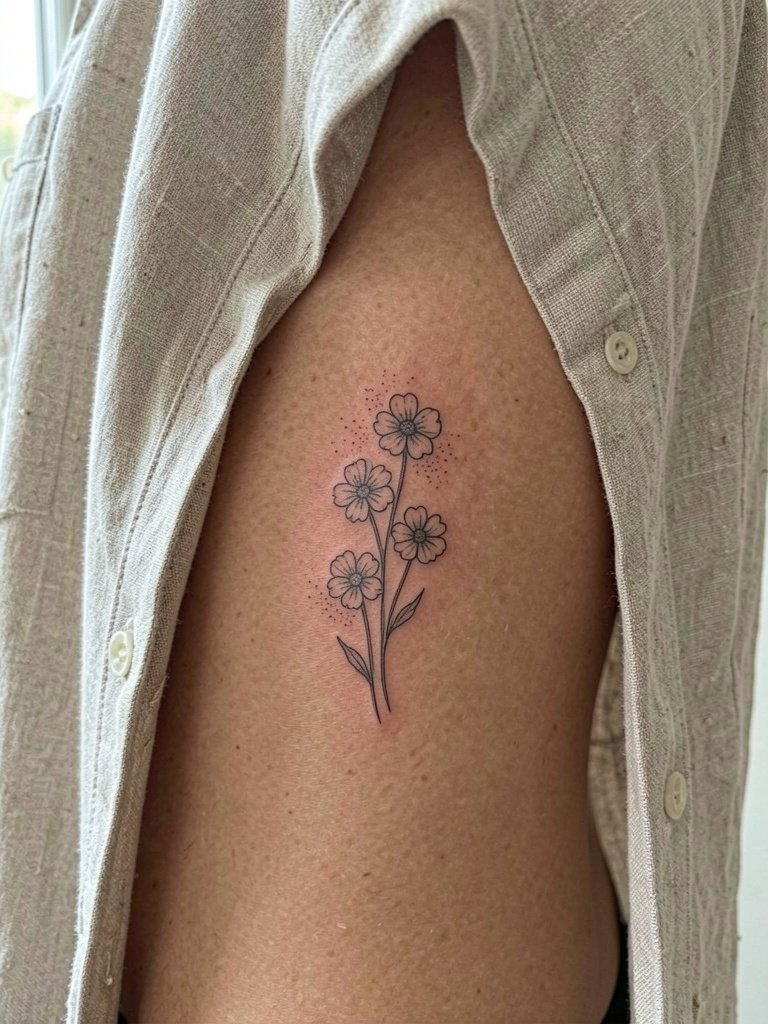
Clustered birth flowers are a neat way to carry several small symbols without a patchwork look. The main risk is packing too many tiny blooms into a tight area. That creates blotchy healed texture after a couple of years. Instead, space each bloom 1–1.5cm apart and let stems or negative space connect them. When you book, bring a list of birth months and one clear reference image so the artist can scale each bloom proportionally. To highlight the cluster casually, pair it with short sleeve linen shirts or soft bralettes that reveal the flank without rubbing the edges.
5. Self-Worth Script ("I Am Enough") (Mid rib)
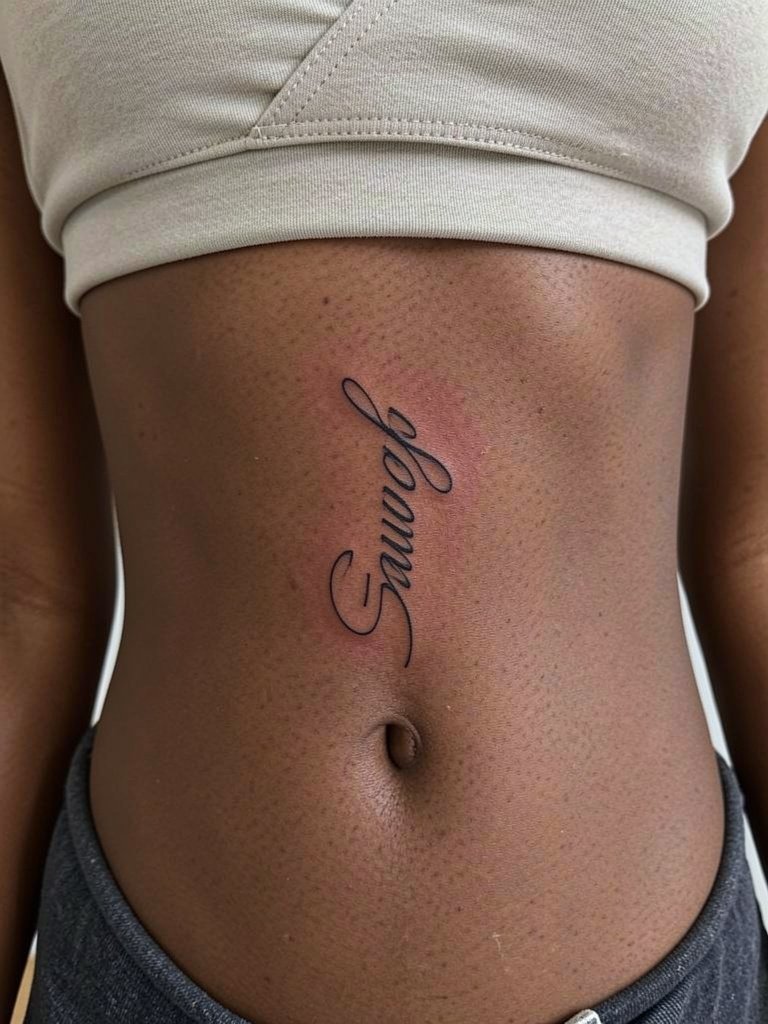
Vertical script fits the rib like a private line you read in the mirror. Pick a font with open counters and slightly thicker downstrokes so letters do not fill in as the skin settles. The common regret is selecting a tiny, flourished cursive that looks gorgeous in a mockup and unreadable by year two. Bring two scale references so the artist can show how the script reads at four inches versus six inches. For revealing the line with clothes, a soft bralette no underwire or a loose tank will display it without pressure during healing.
6. Tiny Pet Memorial Symbol (Lower rib)
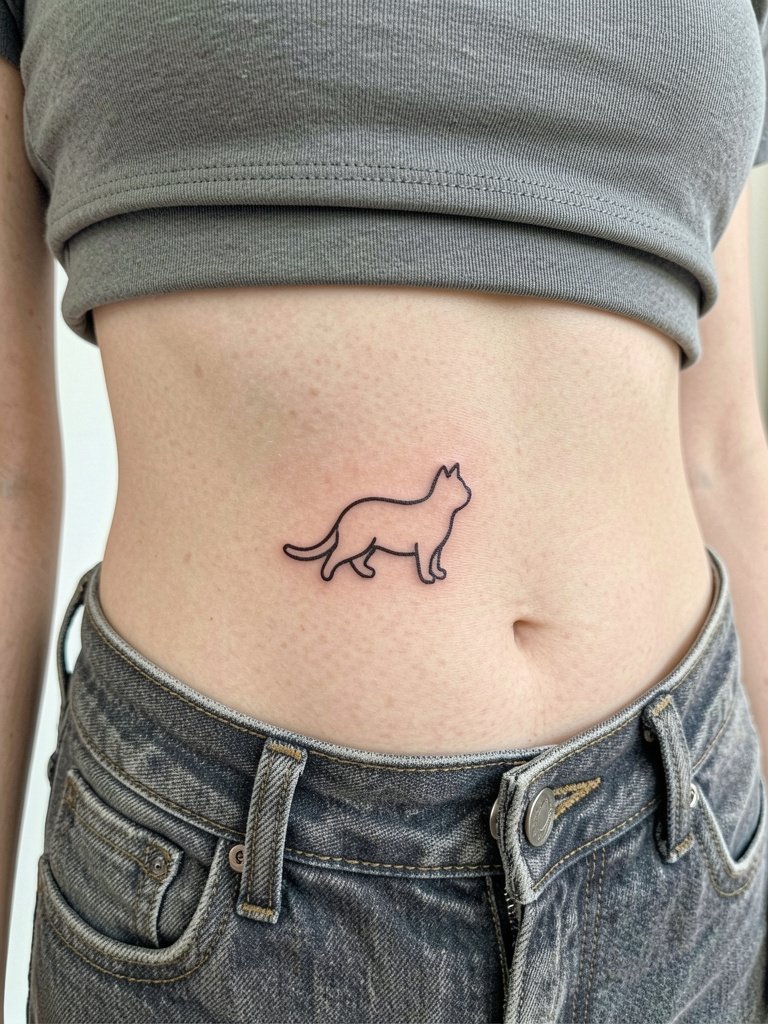
Small memorial icons work well low on the rib where they can remain private or peek out over a waistband. Because the area gets friction from waistbands, choose a placement slightly above or below your usual belt line. The mistake is requesting an ultra-minimal outline that becomes faint from rubbing; instead ask for a slightly more saturated silhouette and position it where fabric does not press repeatedly. Wear low-rise jeans during the session so the artist can map the icon relative to your waist. Keep in mind touch-ups are more common here if the tattoo sits under a tight waistband.
Heal Smart
This short kit helps with the small, detailed pieces above, especially the fine-line and low-waist designs.
- Shiseido Tattoo Care balm. A thinner, less greasy balm option reported to reduce clogged pores for sensitive skin; useful when you have tight single-needle work near the waist.
- Tattoo Wax Co solid aftercare wax. A small solid wax forms a protective layer that users say lasts longer than creams around waistbands.
- TattooGoo healing gel. A non-greasy gel some people prefer for its texture on sensitive rib skin and for avoiding heavy residue.
- Black Sheep Dotwork Ink (sample pack). Indie pigment options like this one are sometimes recommended for dotwork that needs to retain contrast on stretchy areas.
- Aquaphor Healing Ointment. A lightweight occlusive that a number of clients use in the initial days to keep fine-line work from scabbing heavily, while they wait for the scab stage to pass.
7. Western-Inspired Minimal Icon (High rib)
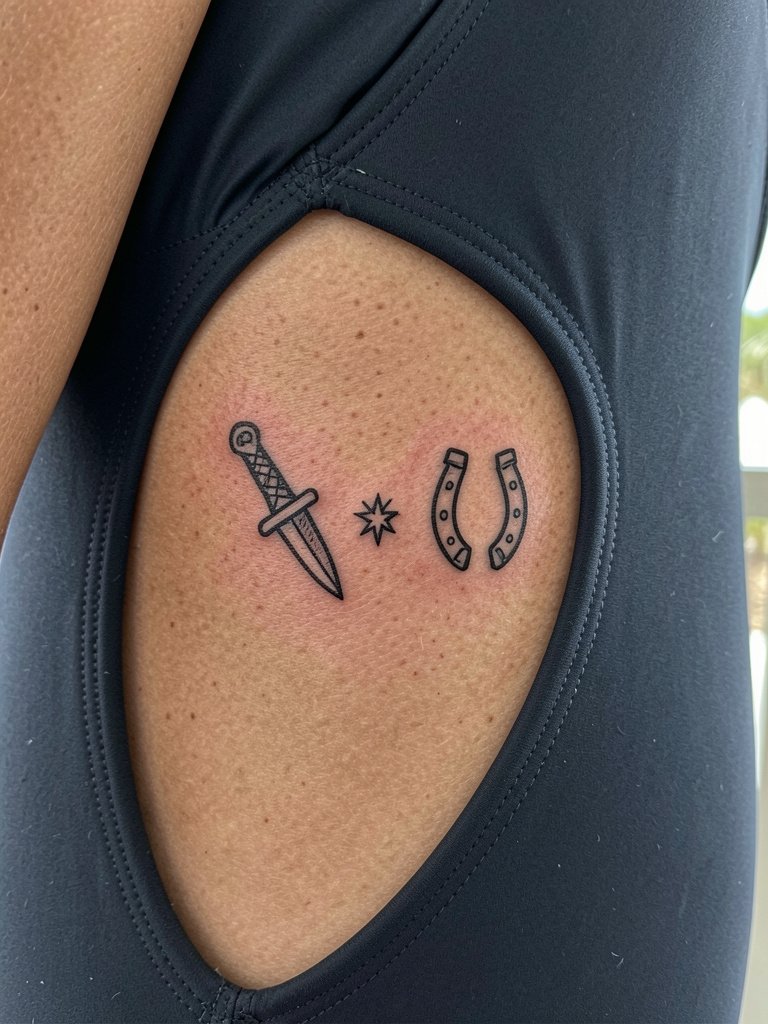
Western minimal icons read boldly and age predictably because the shapes use closed contours and heavier line weight. The trap is asking for the same icon at too small a scale, which reduces clarity with natural skin movement. Request slightly thicker outlines and flat negative-space fills so the horseshoe or dagger still reads after two years. For an outfit pairing that shows the aesthetic, try a high cut swimsuit or a crop top with clean edges. During the session wear a soft, non-underwire bralette to avoid pressure on fresh lines.
8. Geometric Mandala (Center Ribcage)
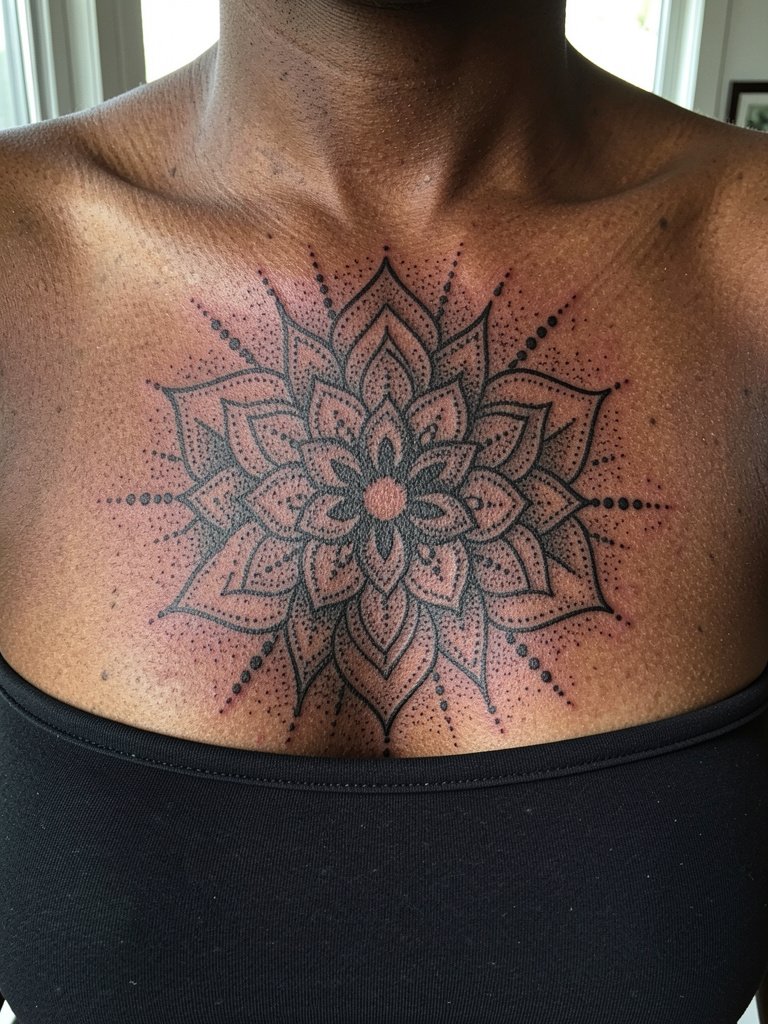
Centered mandalas leverage the flat sternum canvas for precise symmetry. The key is scale. Too small a mandala turns into a gray blob; too large risks wrapping where curves distort geometry. Ask your artist to map the radius on your sternum with a temporary marker so you can see the negative space at session size. This design looks striking with strapless tops and layered pendant necklaces that frame the central motif without crowding it. Note that dotwork demands time, so plan for a longer session with short breaks.
9. Watercolor Floral Splash (Mid rib)
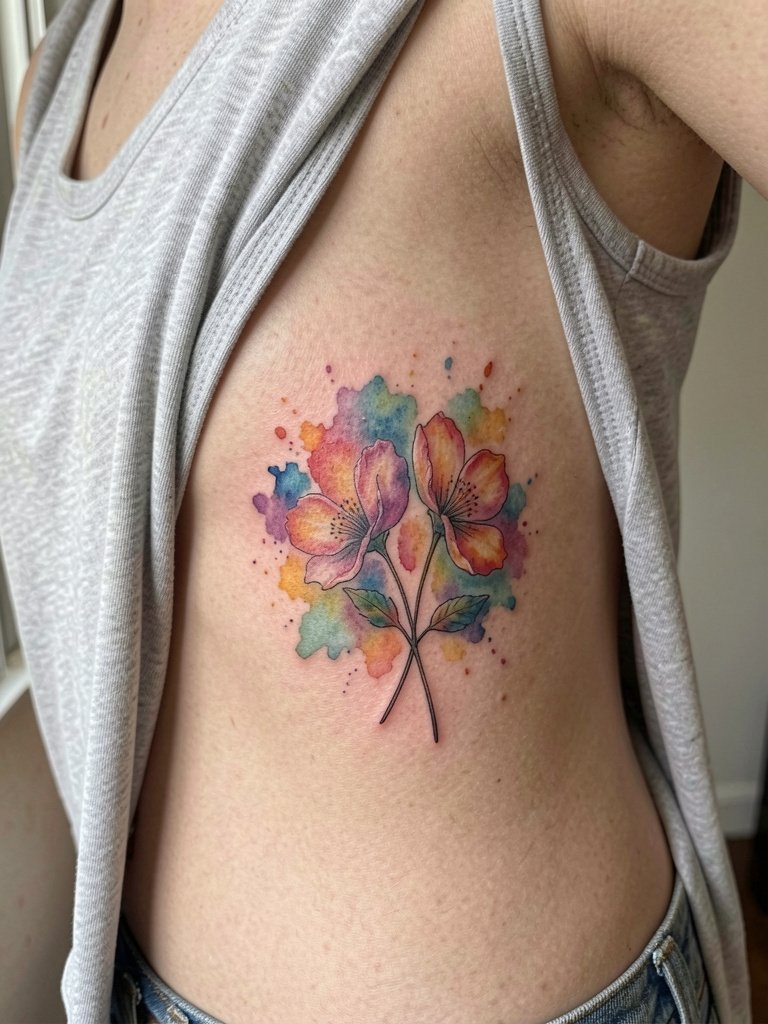
Watercolor ribs read like a painterly accent, but edges need intentional placement. The common issue is overly diffuse color that fades into bruised tones once healed. Request a composition that uses color as backdrop to a stronger black outline element so the composition still reads when pigments soften. This style usually needs 1–2 sessions and more sun protection during heal. For showing it off, a loose cotton tank top will reveal the color while reducing friction.
10. Realistic Bird or Portrait (Small Scale, Center Ribcage)
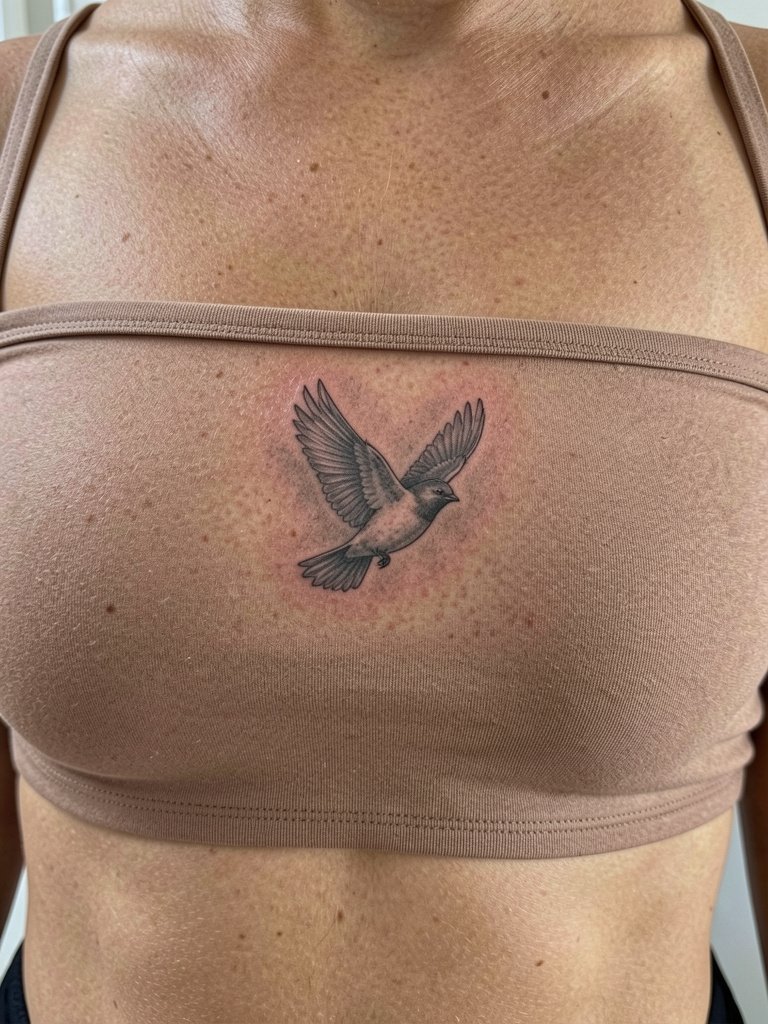
Realism on the sternum can be stunning but it is time and skill intensive. Numbing cream is a live debate for long realism sessions. One camp says numbing cream is a legitimate tool that makes high-pain areas tolerable and gets clients through multi-hour sessions. The other camp warns numbing creams can cause skin reactions and may affect ink absorption, and some artists refuse to work on numbed skin. If you consider realism here, plan a staged session and ask the studio how they handle numbing and how they test for reactions. Larger realism pieces often need two sessions and a slightly bolder blocking pass to keep contrast over time.
11. Dotwork Nature Panel (Mid rib)
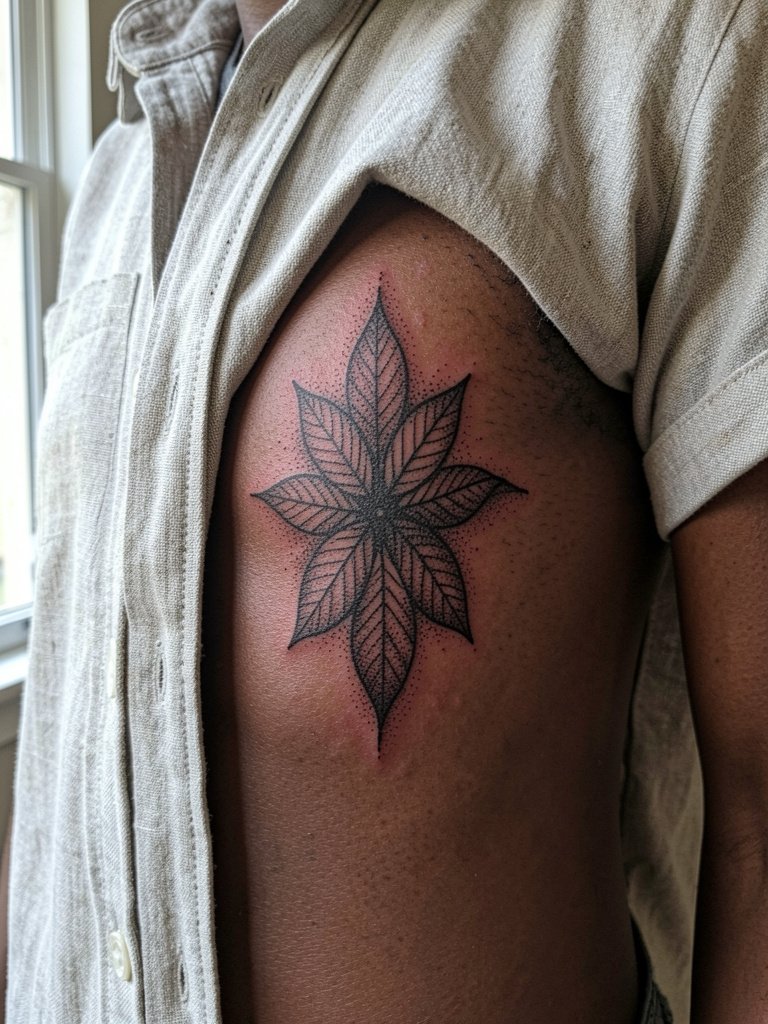
Dotwork uses texture to create depth without heavy outlines, which suits the ribs when scaled correctly. The common error is cramming tiny stipple into a small area, which loses the gradient after a couple of years. Instead, plan for wider spacing in areas expected to stretch and ask for a contrast test patch at the session edge to see how the dots settle. Dotwork shines with neutral outfits; a short sleeve linen shirt will frame the panel while you recover.
12. Surrealist Abstract Composition (Center Ribcage)
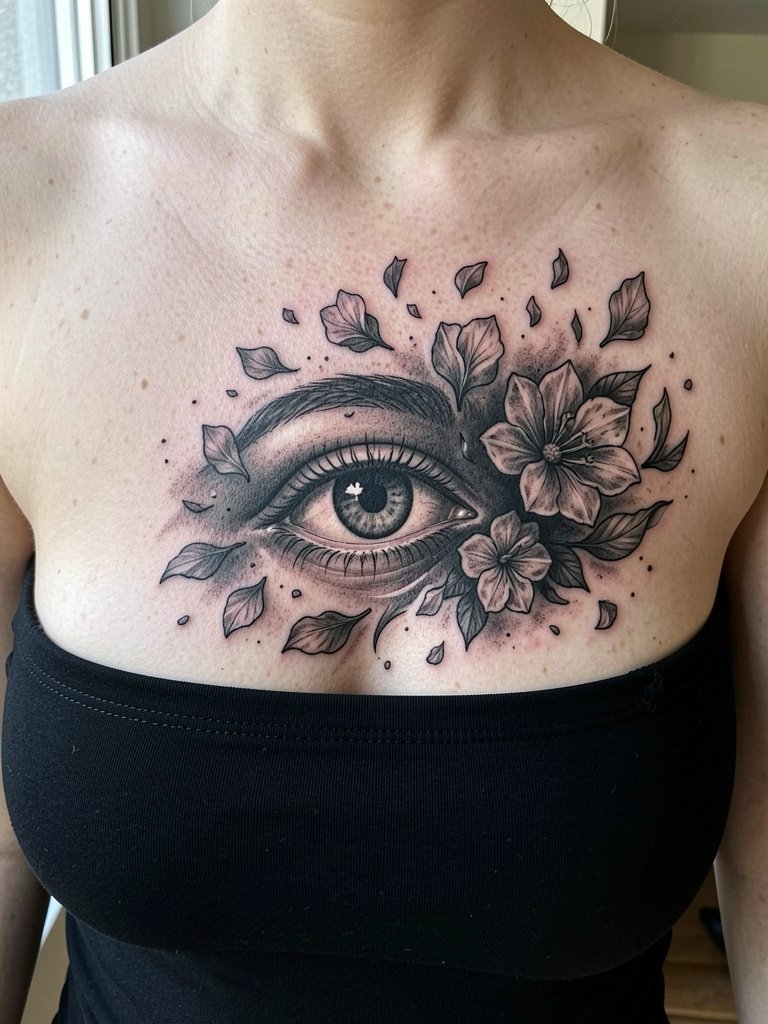
Complex surreal pieces make the rib a dramatic canvas, but composition planning is critical. The mistake is overloading detail in a narrow vertical band where breathing will slightly distort elements. Have the artist create a layered mockup and mark key anchor points on your body so the composition keeps its intended focal points as you move. These projects almost always need multiple sessions and careful photos to track healing stages. Because of session length, plan clothing that gives full access and comfort between passes.
13. Blackwork Tribal/Abstract (Side Torso Wrap)
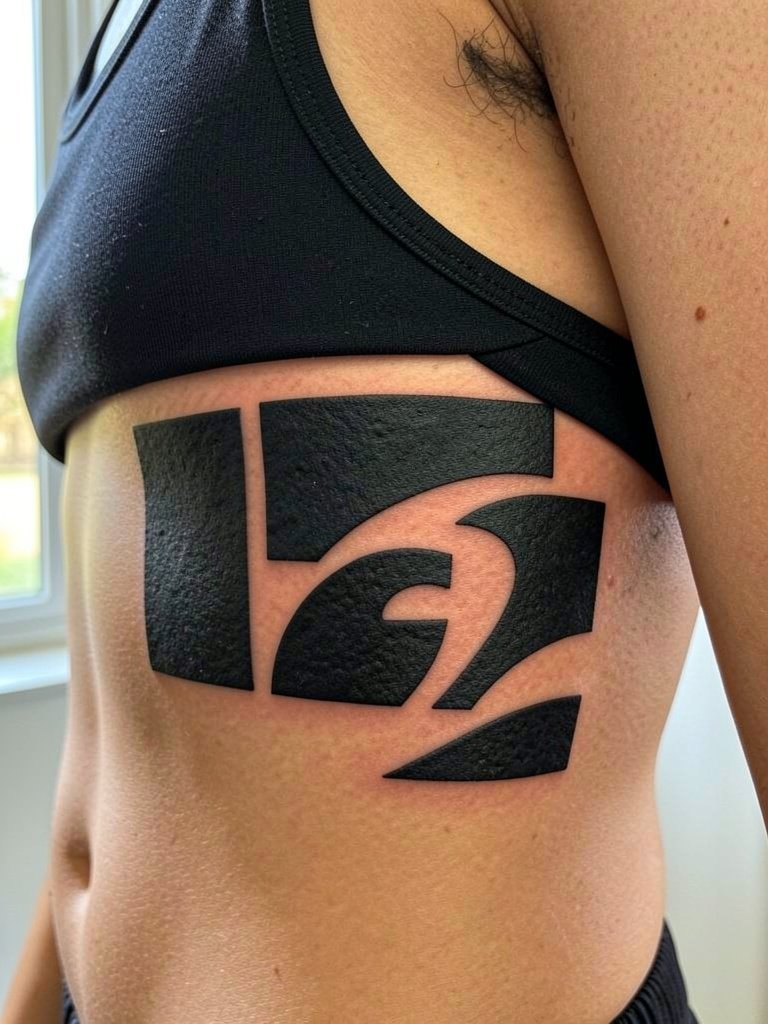
Blackwork thrives on the rib because the skin takes large fills well if the design respects curves. A common mistake is trying to cram too many thin black sections in close proximity, creating a heavy healed block that hides negative space. Ask the artist to plan breathing room and vector lines that follow musculature so the pattern reads when you twist. This style pairs naturally with athletic wear; try an athletic tank top women for gym looks that show off the wrap without chafing.
14. Vertical Vine or Delicate Vines (Mid rib)
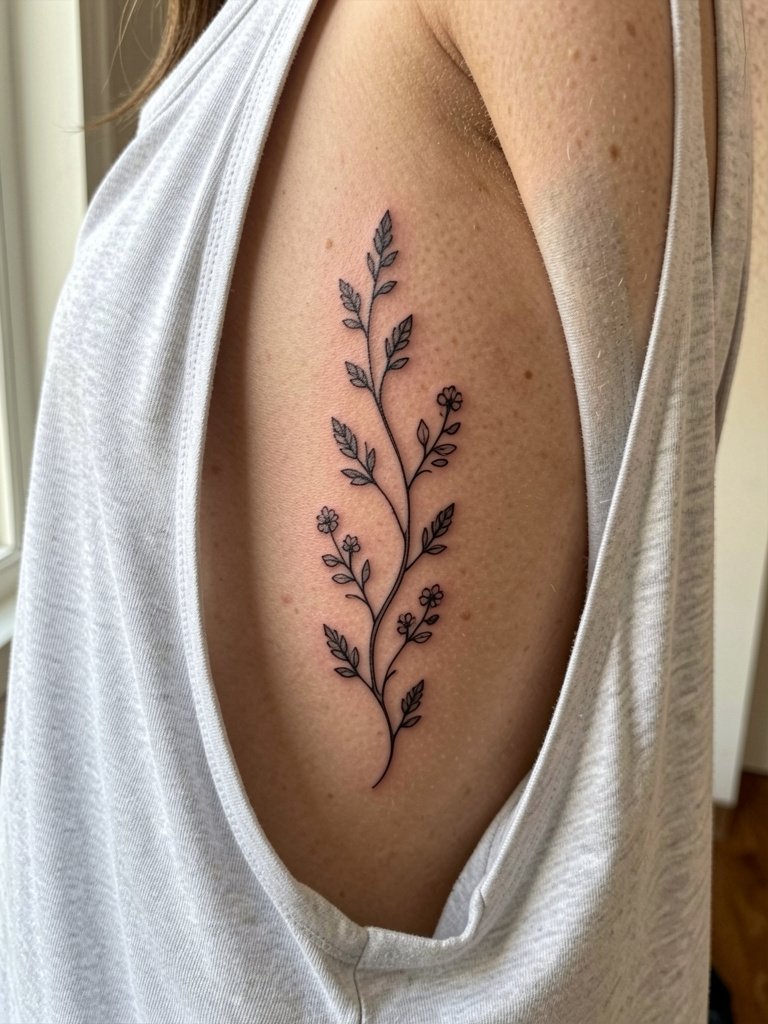
Vines are forgiving because their flow complements the rib's motion. The slip-up is insisting on razor-fine connectors between leaves that vanish as skin stretches. Request slightly thicker stem lines and spaced leaf clusters so the composition keeps rhythm after healing. Vines look good with layered casualwear; a loose cotton tank top reveals the line without adding edge pressure while it heals.
15. Small Feather or Bird Silhouette (High rib)
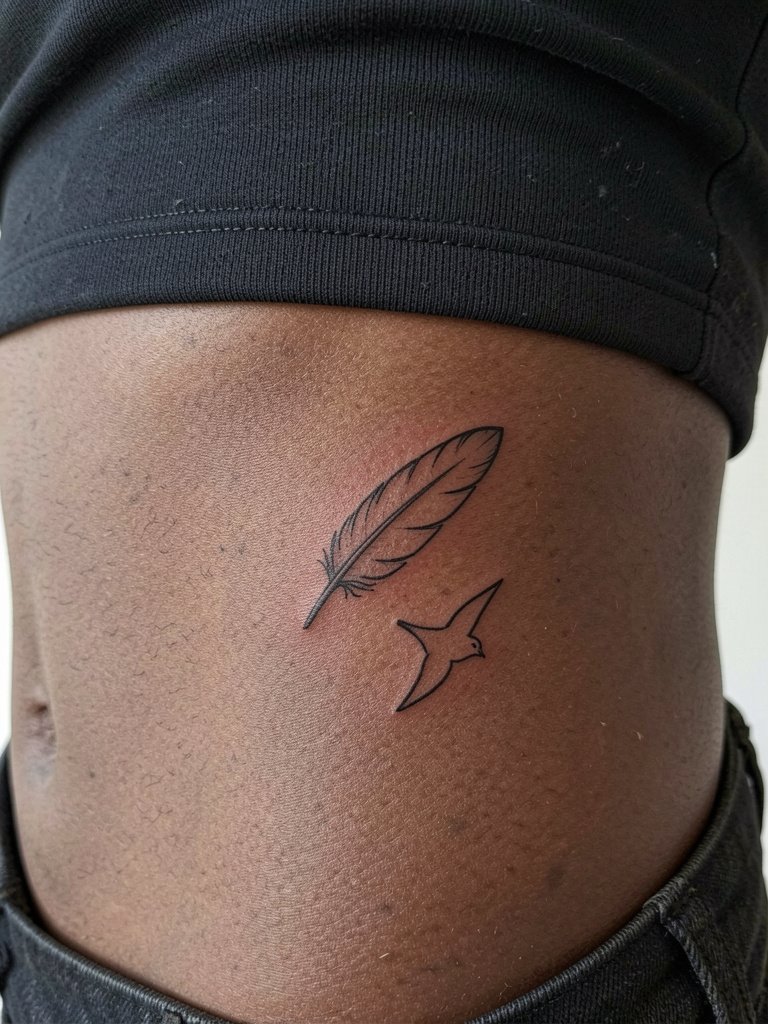
Feathers and tiny bird silhouettes are classic because they read at a small scale. The common error is adding too many interior barbs as micro detail; these often blur. Instead, favor a clean outer contour with a hint of internal linework for texture. For easy display, choose high-cut tops or crop tops women that show the upper rib area while minimizing friction during the first week.
16. Minimalist Constellation (High to Mid Rib)
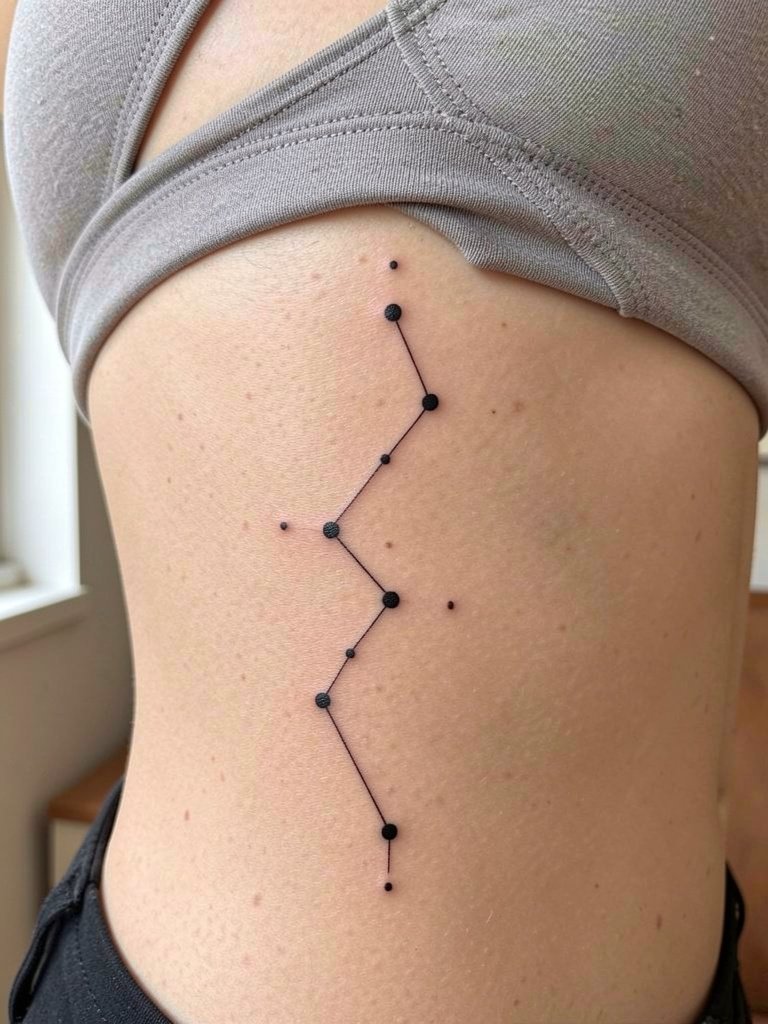
Constellations are tidy and personal, but tiny dot spacing is crucial. If the dots are too small or too close, they will merge into a gray wash. Request robust dot sizes for high-motion areas and lines drawn with slightly heavier weight. For session wear, choose a loose top so the artist can place multiple stars without fabric interference.
17. Micro-Realism Shell or Sea Motif (Lower rib)
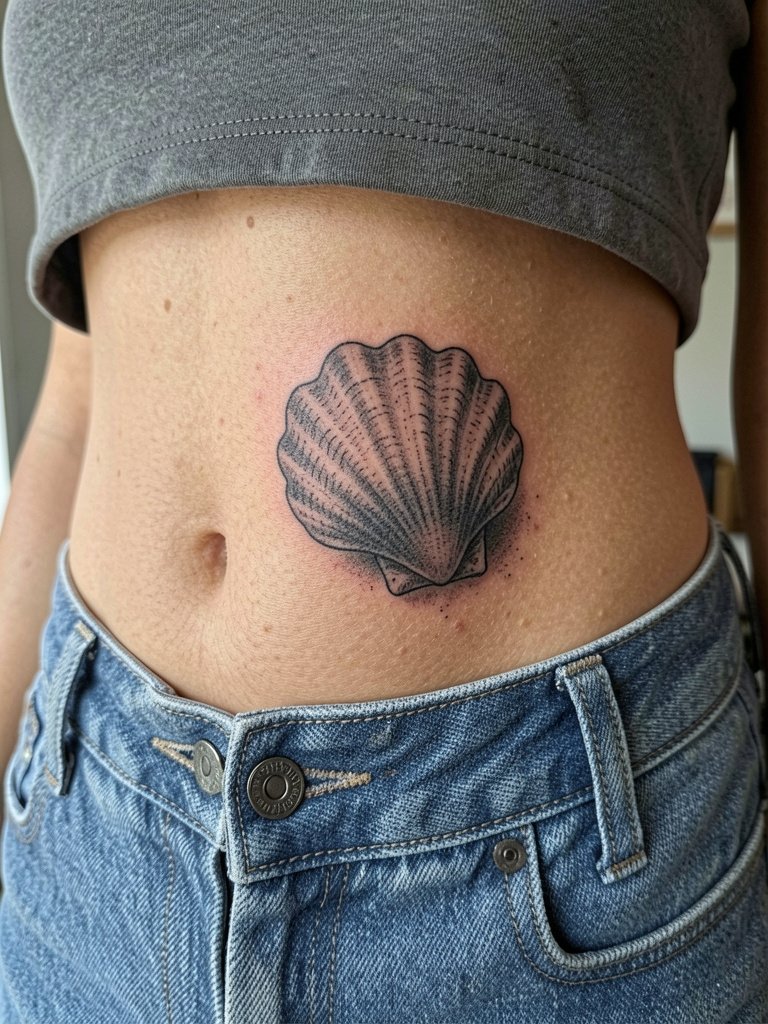
Micro-realism near the waist reads intimate and photographic when done by someone who scales detail for that canvas. The usual mistake is copying a tiny photo reference without scaling up line weight for skin. Ask the artist to lay out the piece at actual final size and to point out which small textures will be simplified so the shell still reads after healing. Wear loose drawstring pants to the session so nothing rubs against the area while you recover.
18. Stacked Roman Numerals (Memorial) (Mid rib)
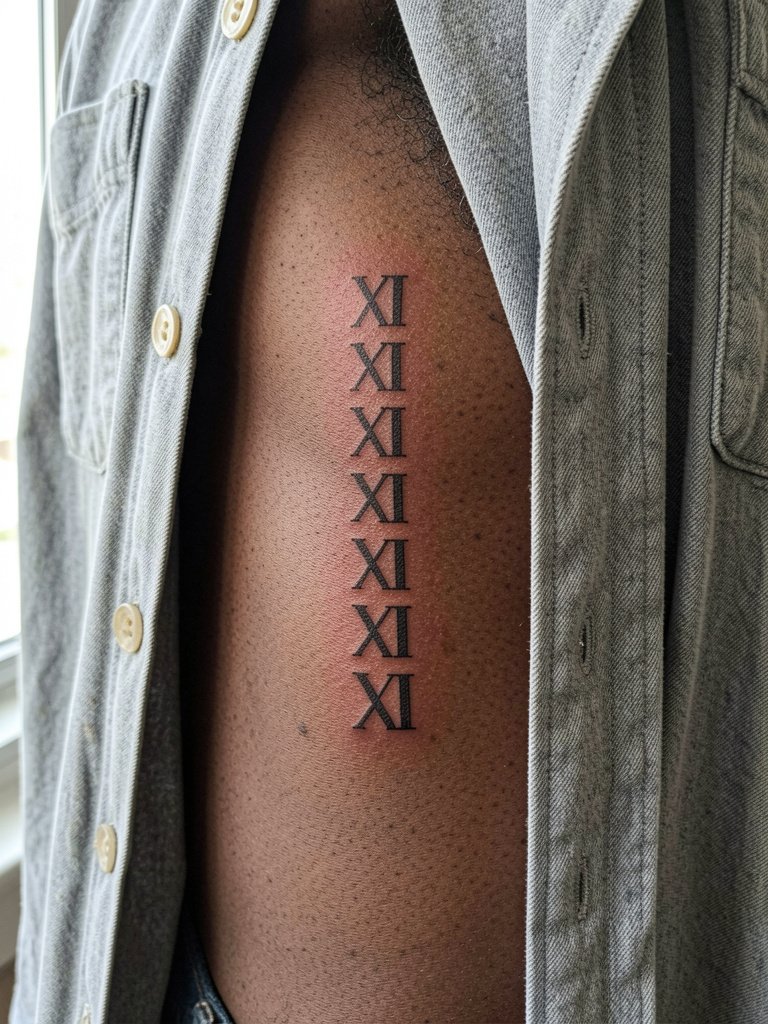
Numeral stacks are simple but scale and weight matter. Thin serif strokes can blur; choose a slightly bolder serif or small caps to retain legibility. Verify spacing so each numeral keeps its counter space. For the session wear a loose button-down shirt so the artist can access the mid rib without tugging at fabric. Consider a small touch-up after a year if you want the crisp edges preserved.
19. Celestial Crescent with Stars (High rib)
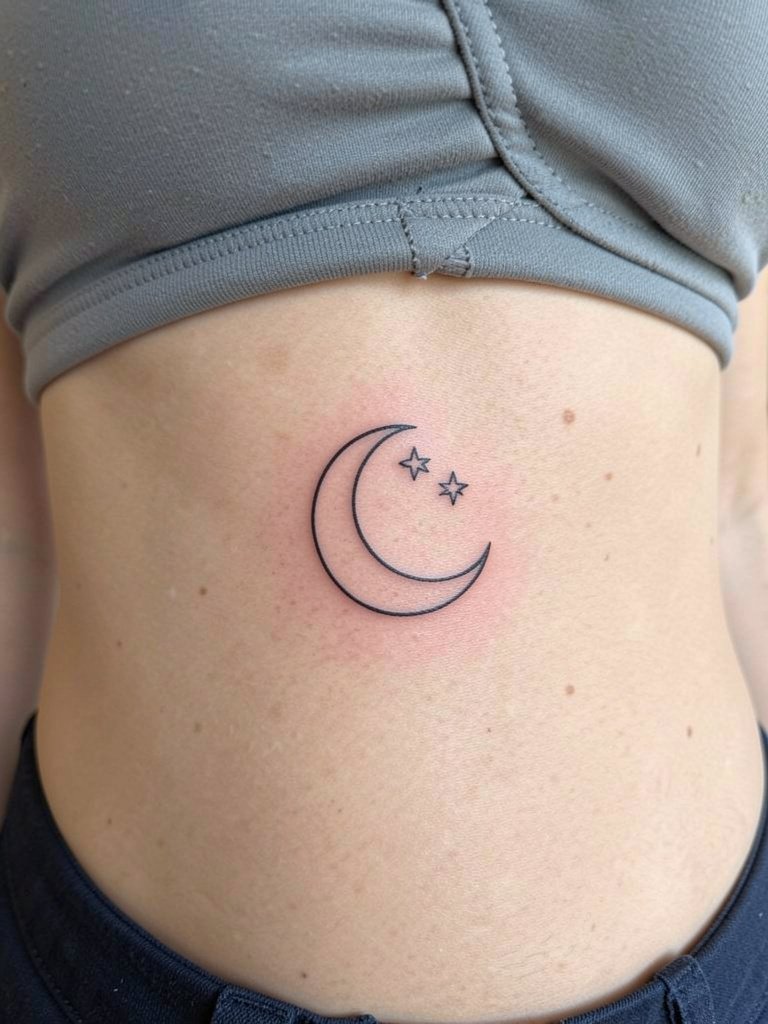
Simple celestial motifs age well when drawn with confident line weight. Avoid ultra-thin crescents with tiny stars placed too close together; they often soften into a smudge. Instead, allow a few millimeters between elements and ask the artist to darken the moon's rim slightly. For evening looks, a scoop or open-back top will frame the motif; for care, avoid compressive bras in the first week.
20. Single-Line Continuous Wave (Side Torso)
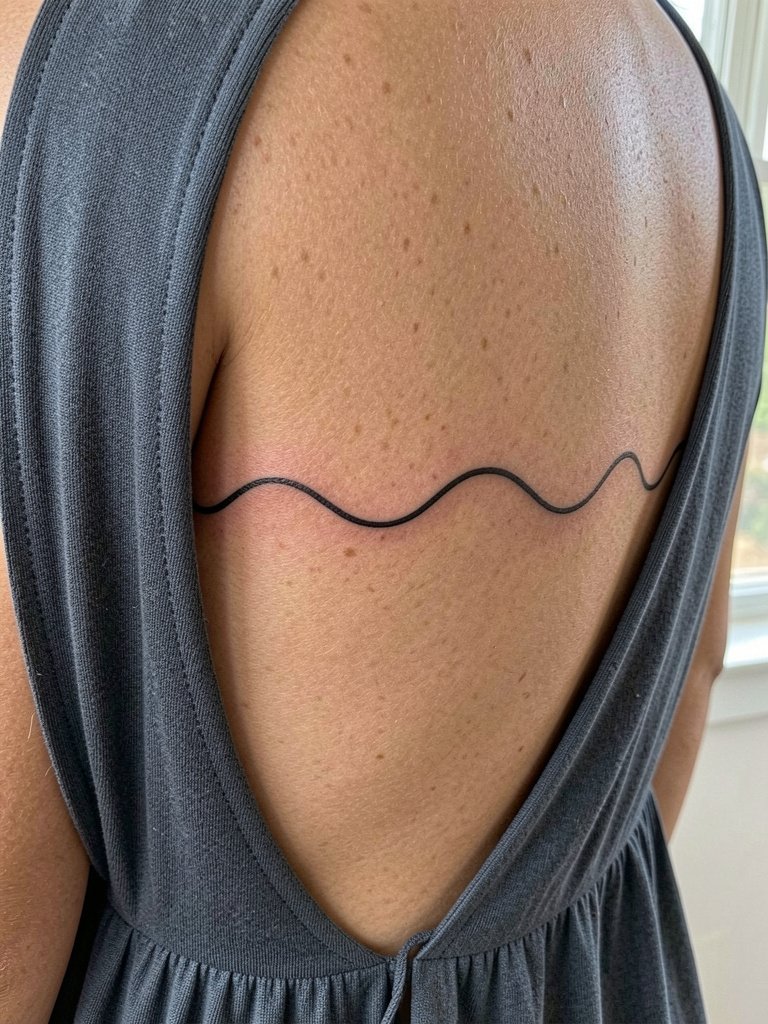
A continuous-line wave is graphic and modern, but continuity demands consistent depth. If the artist varies depth too much the line can look patchy. Tell them you want a single pass that establishes a stable channel for ink, and confirm how the line reads at the exact scale on your body. This design pairs with wrap tops or open-back dresses that let the lateral line flow visually.
21. Anchor-Dagger Hybrid Western (High rib)
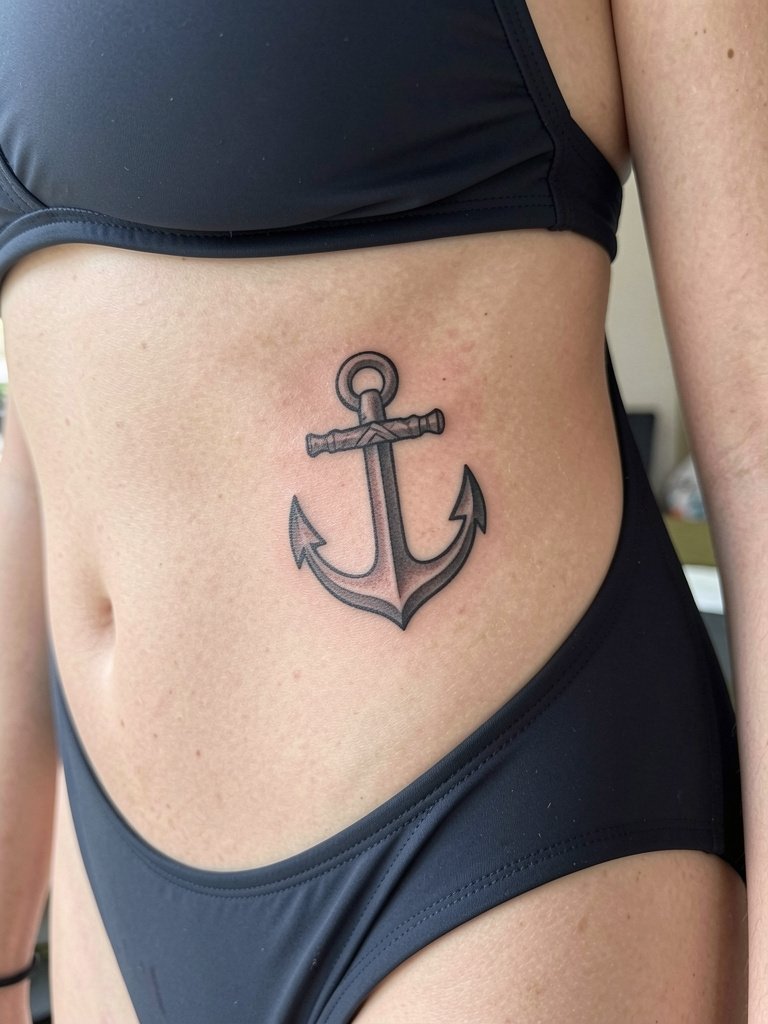
Combining two icon families yields a badge-style compact piece that ages well because of clear borders. The pitfall is asking for tiny internal details that clog. Prioritize bold outer lines and simplified interior motifs. For the session pick clothing that grants clean access and avoids underbust pressure during the early healing days.
22. Script Wrap (Vertical Mantra or Name) (Mid rib)
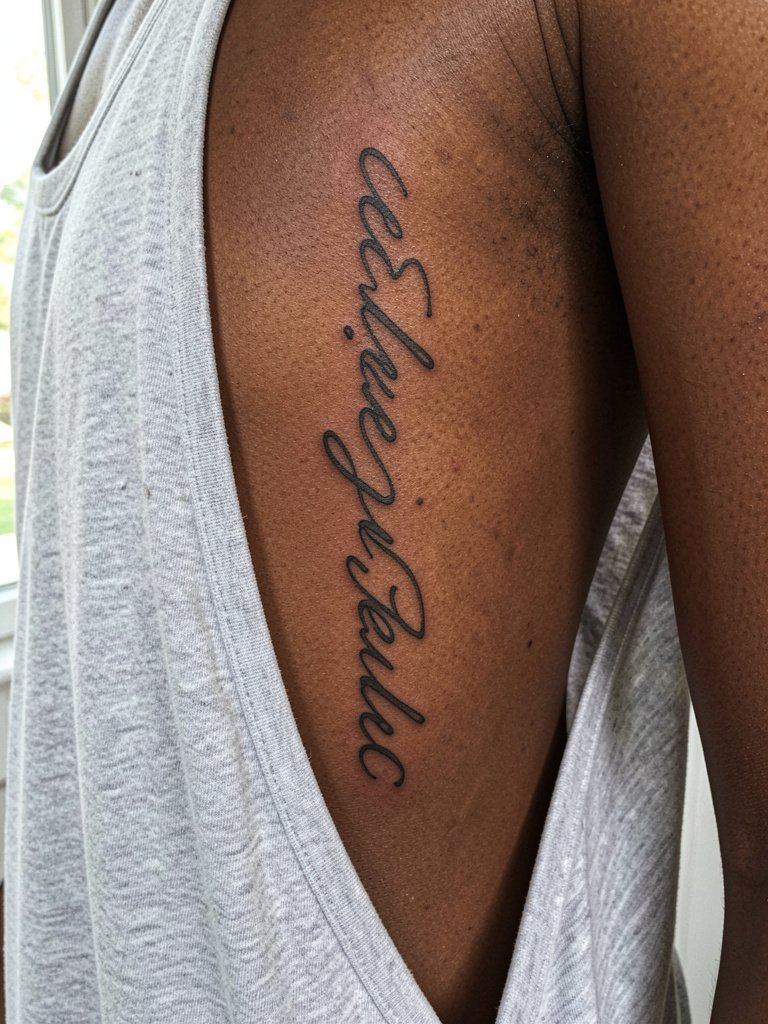
Vertical script can be a quietly visible line, but thin flourishes often fade into a gray blur. Choose a lettering style with open counters and slight weight so letters retain shape. Instead of a generic "ask your artist," tell them you want the downstrokes increased by one notch compared with the reference so the script reads at three years. A loose tank or soft bralette will show the wrap while minimizing friction.
23. Tiny Geometric Arrow Set (High rib)
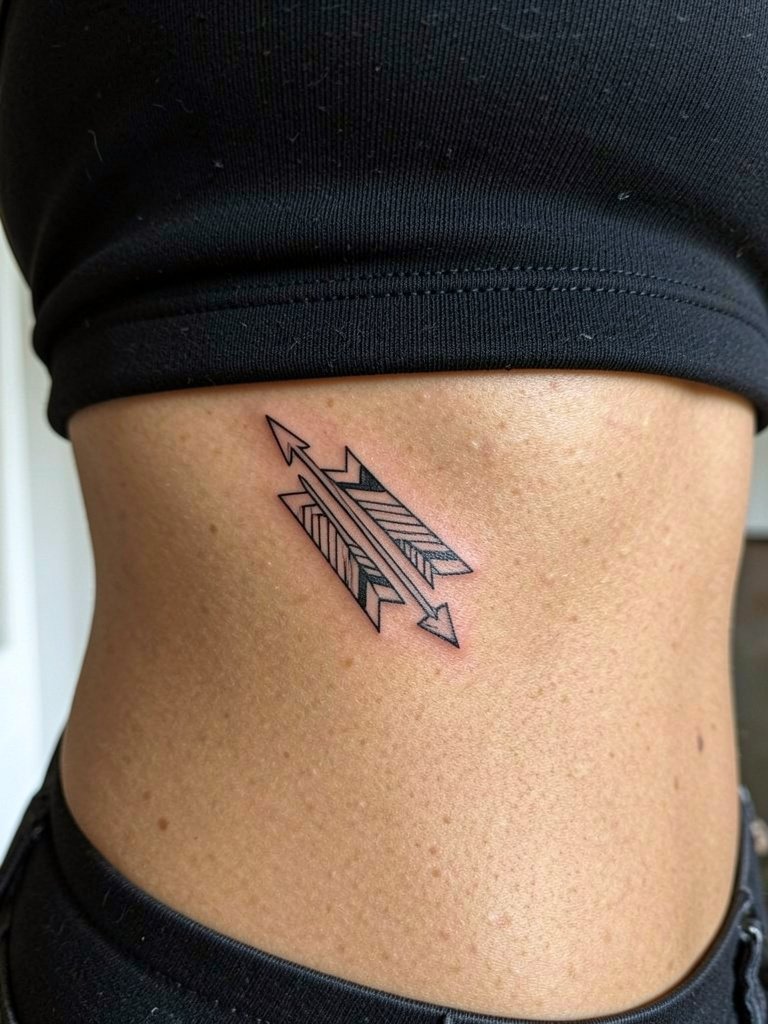
Small geometric arrows offer tidy visual rhythm. The main misstep is putting them too close so the chevrons bleed together as the skin moves. Ask the artist to keep 1–1.5cm spacing and to render the arrowheads with bold tips. For styling that shows off the diagonal stack, pair it with crop tops women or bralettes with higher sides.
24. Botanical Pocket (Lower rib near waist)
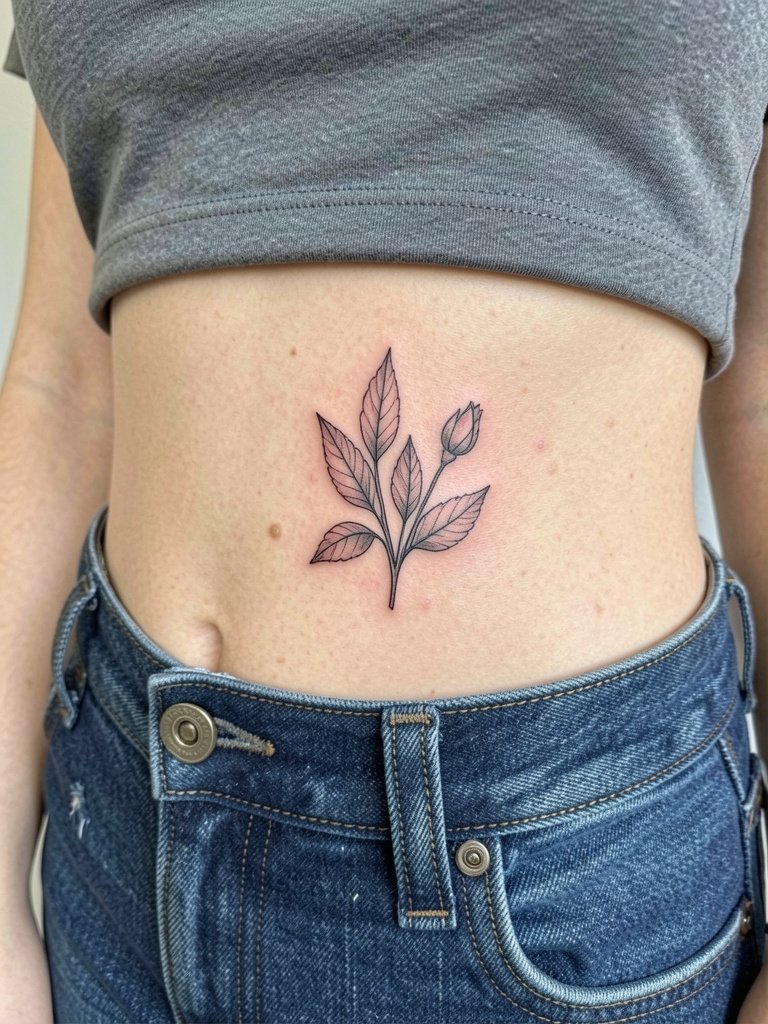
A botanical pocket sits right where clothes and skin meet, so placement must be precise. Avoid placing it directly under a tight waistband. The fix is to test the tattoo position with the clothing you wear most and slide the mockup until it clears seams. Low-rise jeans are a natural reveal if you want it to peek; wear drawstring or low-pressure pants for the session.
25. Minimal Heart Outline With Initials (Lower rib)
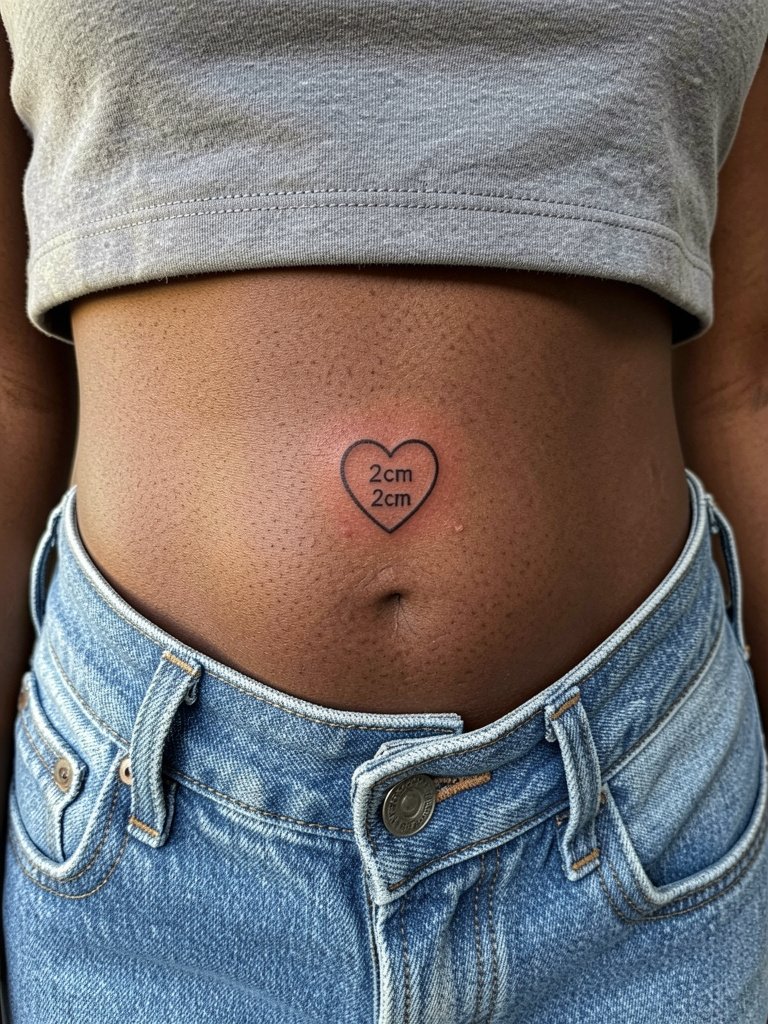
Tiny emblem tattoos with initials are sweetly private, but interior lettering must be large enough to stay legible. Avoid tiny script inside a small heart. Instead pick initials in small caps or a monospace style so counters remain visible. For the session wear low-rise jeans and a cropped tee so the artist can map the heart relative to your waistband.
26. Abstract Brushstroke Color Band (Mid rib)
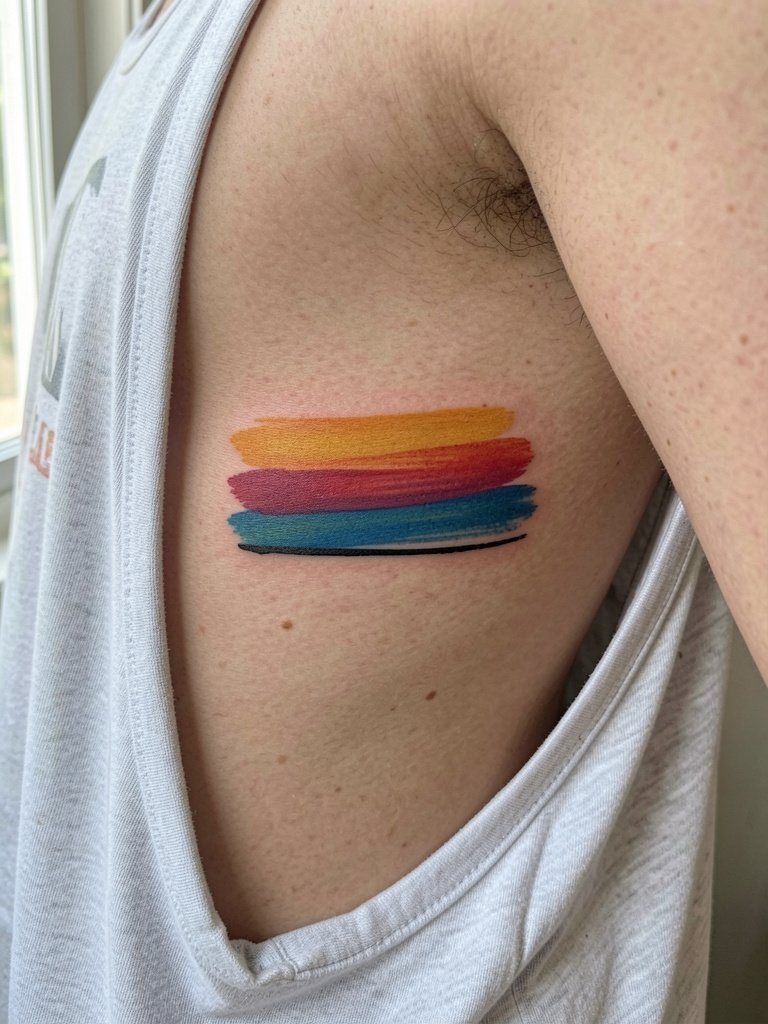
Abstract bands of color make the ribs a wearable art stripe. Keep in mind that lighter pigments can fade faster on stretchy skin. One side argues black and grey holds longer on ribs, while another side says with proper depth modern pigments can last. If you choose color, ask the artist about pigment saturation strategy and plan a follow-up for a color-boost touch-up if you want longevity. Loose tanks are a good everyday reveal while you monitor early fade.
27. Lace-Inspired Band (Underbust / Lower Rib Band)
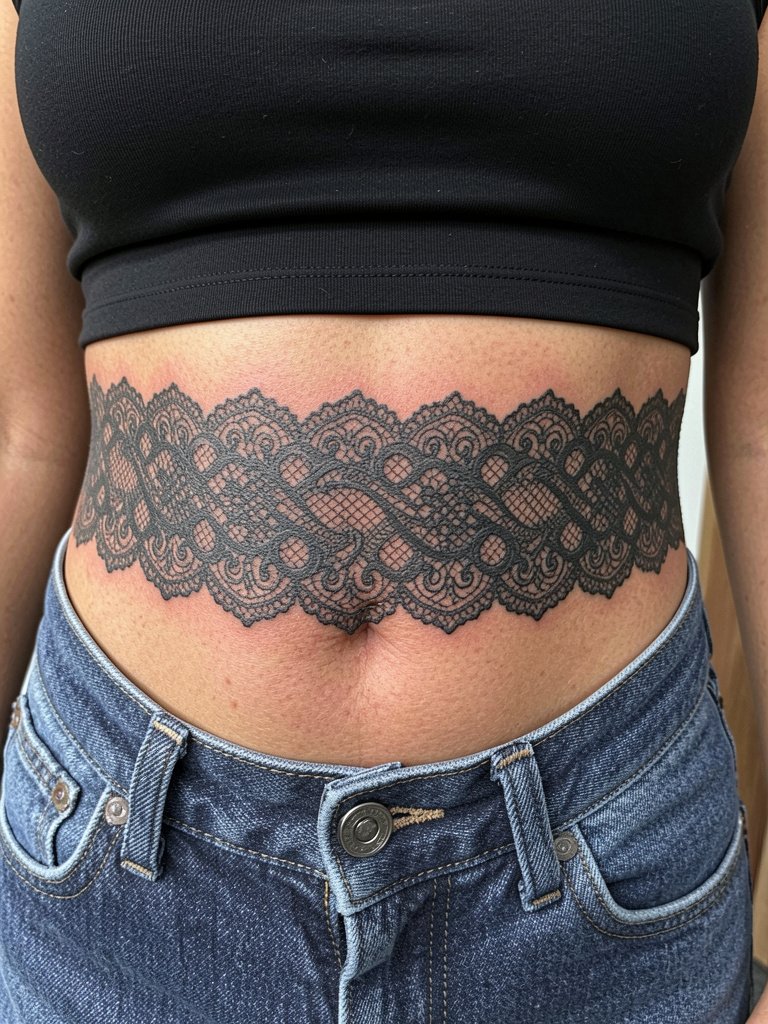
Lace bands are ornamental and sit where fabric often meets skin, so the pattern must factor in waistband pressure. The frequent issue is overly fine filigree that blurs; choose a design that trades a little filigree for stronger secondary shapes so the band reads at a distance. For wear, snug but non-binding bandeaus or strapless tops let the lace breathe without rubbing, and low-rise jeans avoid constant compression over the band.
Frequently Asked Questions
Q: How much does a rib tattoo typically cost?
A: Prices vary with size, style, and studio minimums. For very small minimalist pieces expect ranges around $120–$350. Fine-line vertical stems and small scripts commonly land in the $150–$500 range. More involved dotwork, mandalas, or realism pieces on the ribs can range from $300 up to $1,500 or more depending on session count and artist experience. Always confirm any studio minimum and whether the quote includes touch-ups.
Q: How painful are rib tattoos and what helps during the session?
A: The ribcage is among the higher-sensitivity areas because of bone proximity and thin skin. Breathing, pacing, and short breaks help a lot. Some clients use topical numbing; one group says numbing creams make long sessions tolerable. Another group warns that numbing creams can cause reactions and may affect ink behavior, and some artists will not work on heavily numbed skin. If you plan to use numbing, check the studio policy, test a small patch beforehand, and plan a staged session rather than a single marathon.
Q: When will I need a touch-up on a fine-line rib piece?
A: Fine-line pieces on the ribs commonly need a touch-up in the two- to three-year window because of natural skin movement and occasional shallow initial placement. Heavier line weights and slightly wider spacing can push that out, but expect a follow-up conversation at the one- to two-year mark for any areas that have softened.
Q: Where can I find healed rib tattoo portfolios and artists without naming specific people?
A: Search hashtags like #ribtattoo, #finelinerib, and #ribtattoowomen on Instagram and TikTok and filter by location to find nearby examples. Tattoodo and Booksy let you search by keyword combinations such as "fineline butterfly rib" and often include healed shots. Reddit communities like r/tattoos and r/finelinetattoos surface peer recommendations and healed photos across skin tones. Use a studio directory plus location filters to shortlist artists and look for healed images at the scale you want.
Q: If I'm planning pregnancy in the future, where should I place a rib tattoo?
A: Skin expansion matters. Mid rib placements that follow vertical curves tolerate pregnancy changes better than pieces directly under the breast crease. If pregnancy is a future plan, consider designs that use flowing stems or vertical elements and avoid tight horizontal bands across areas likely to stretch. Discuss placement relative to your waistline and typical undergarment fit so the piece sits where it will be least affected.
Q: How do I make a color rib tattoo show up well on darker skin tones?
A: On darker skin, bold lines and higher contrast work best. Strong black outlines, deeper pigments, and slightly larger scale can help color read in photos without relying on flash. Some clients also use subtle white highlights sparingly to lift certain areas. Ask to see healed examples on similar skin tones and request a test placement visualization during consultation.
