
Fine blackwork reads longer than fragile script for many Christian pieces, especially where skin moves. Tiny single-needle crosses and one-word verses can blur into a shadow over a few years. Choosing heavier linework, thoughtful spacing, and placements that avoid constant friction keeps the symbolism legible and meaningful for a decade or more. The first idea shows a small, durable cross that translates into multiple placements.
1. Solid Latin Cross on Upper Chest
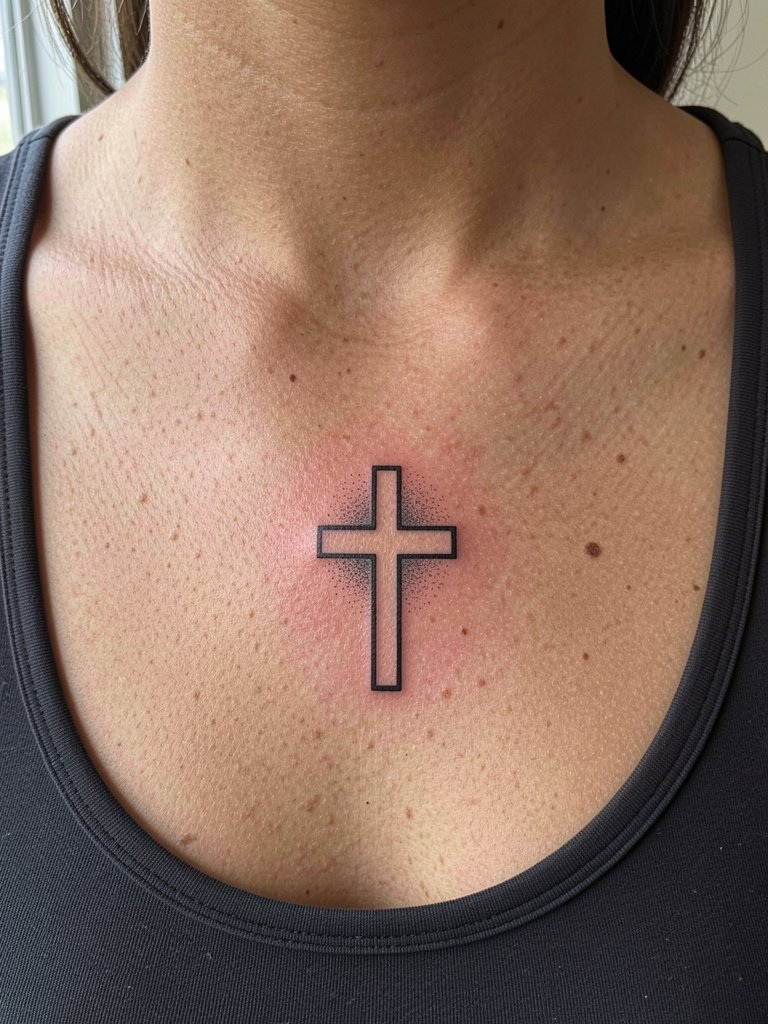
A bold Latin cross in solid black keeps the shape readable even as fine detail softens. I recommend slightly heavier linework than a script piece for this site because the collarbone shifts and clothes rub there. During consultation bring a photo that shows exact scale on a collarbone so the artist can map negative space around the clavicle. Common mistake is asking for a two-millimeter stroke that looks great at first and becomes a blur by year three. Expect a 30 to 60 minute session for a three-inch piece, moderate pain from the collarbone contact, and a likely single touch-up after the first year. For show-off outfits try a wide V-neck blouse in neutral tones to frame the cross.
2. Small Cross on Inner Wrist
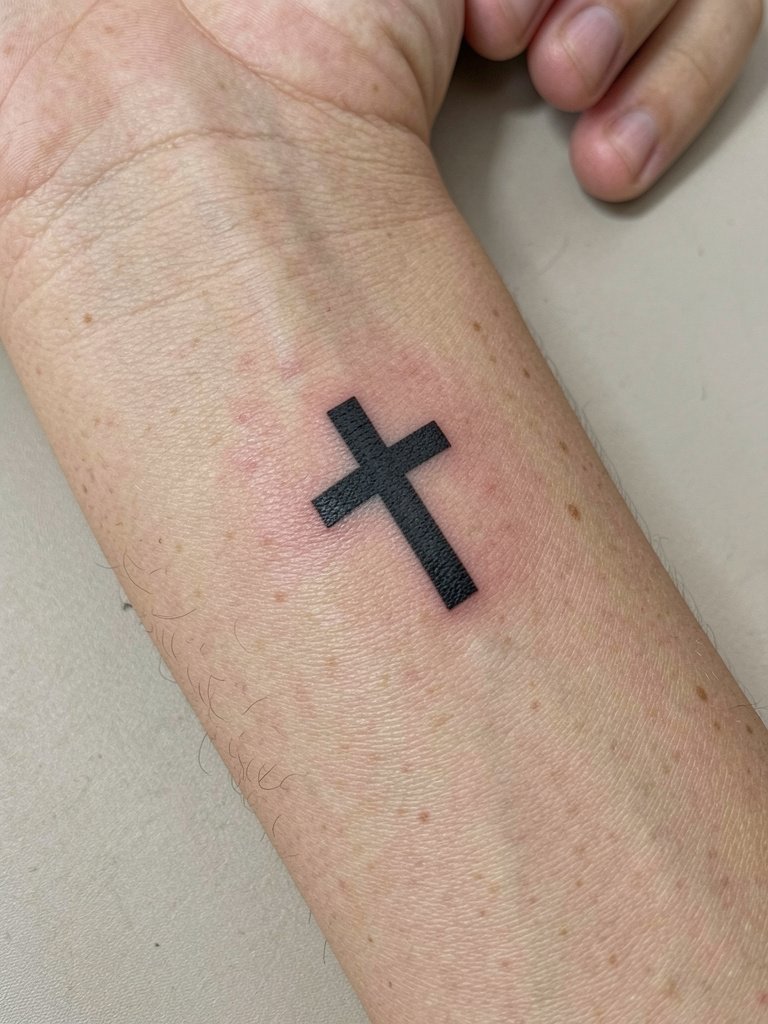
The inner wrist is visible daily but it eats ultra-fine detail. For a Christian symbol like a cross, favor slightly increased stroke width so the silhouette remains crisp after frequent washing and sun exposure. Tell the artist you want the line weight bumped by about 10 to 20 percent compared with your reference, and have them show a stencil wrap around the wrist so the lines do not vanish on the edge. Typical session time is 20 to 40 minutes with low to moderate pain. A common aging problem is placing the cross too close to the crease where motion blurs the work. For styling, this spot pops with a slim leather bracelet worn above the tattoo to create contrast.
3. Scripted Bible Verse Along the Ribcage
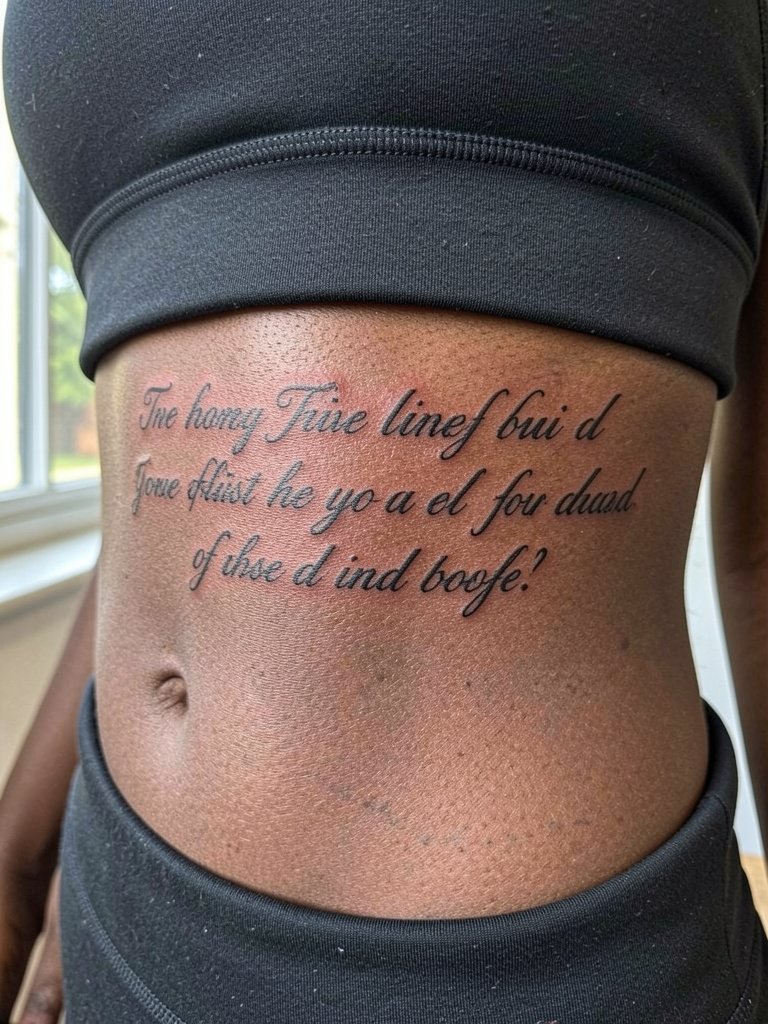
Script along the ribs can look intimate and elegant, but this placement moves a lot. One camp of artists warns that single-needle script blurs on the ribcage within two years because of stretch and breath motion. The other camp says slightly wider, well-spaced lettering with deeper placement will settle clean and can be seen healed examples to support that view. Bring a reference showing the exact word spacing you want and ask for the stencil on the body in both inhale and exhale positions so the flow reads at rest. Expect higher pain and a longer session, possibly split into two sittings. For session wear choose a fitted sports bra so the artist has clear access without fabric shifting.
4. Tiny Ichthys Fish Behind the Ear
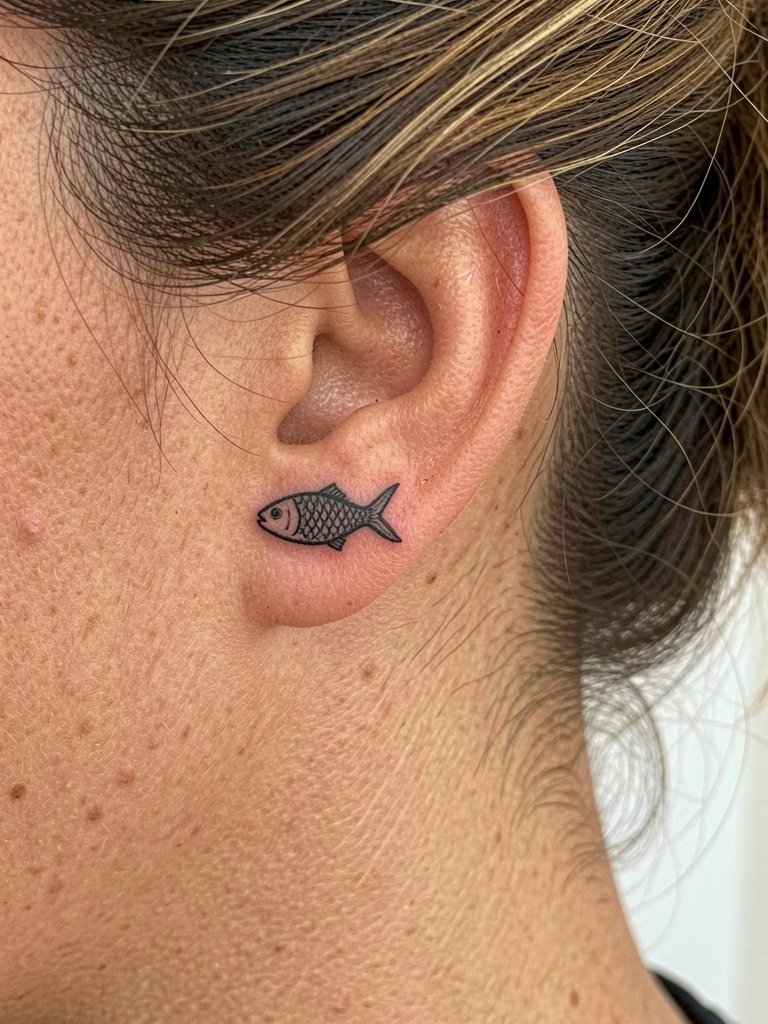
Behind-ear tattoos are tiny but high-visibility for certain hairstyles. Pain is usually sharp and brief because of thin skin and proximity to bone. A common mistake is pushing the scale too small; tiny single-stroke marks can fade into a gray blur. Ask the artist to place a slightly thicker contour and to show healed examples on similar skin thickness. Session time is short, often under 20 minutes, but healing requires care because hair and oils can irritate. For evenings out let the piece peek from an updo and pair with understated stud earrings to draw gentle attention.
5. Rosary Beads Wrapping the Forearm
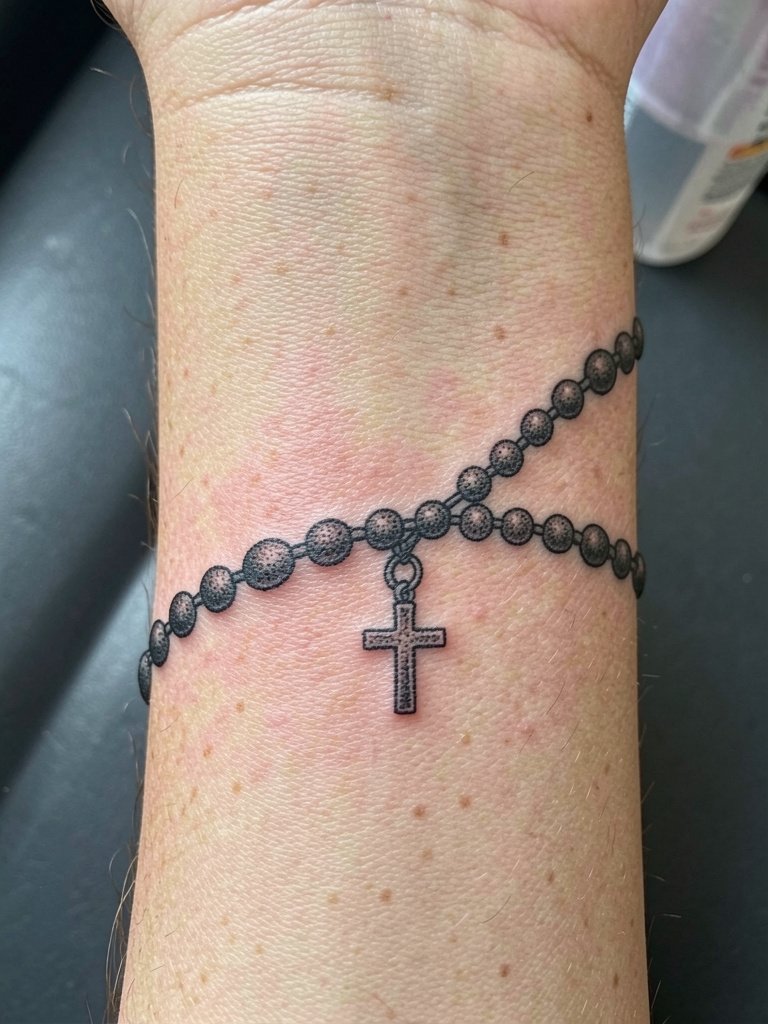
A rosary wrap reads as a continuous design and adapts well to different forearm sizes. Recommend requesting bead spacing that keeps each bead distinct at three to four millimeters across, because tighter beads merge over time. Discuss with the artist how the strand will sit when the wrist flexes so the pendant does not tuck into wrist creases. Expect moderate pain and a session lasting one to two hours depending on length. For showing the piece, roll sleeves up to reveal the inner forearm and add a linen cuff shirt in summer to frame the beads.
6. Sacred Heart on Sternum
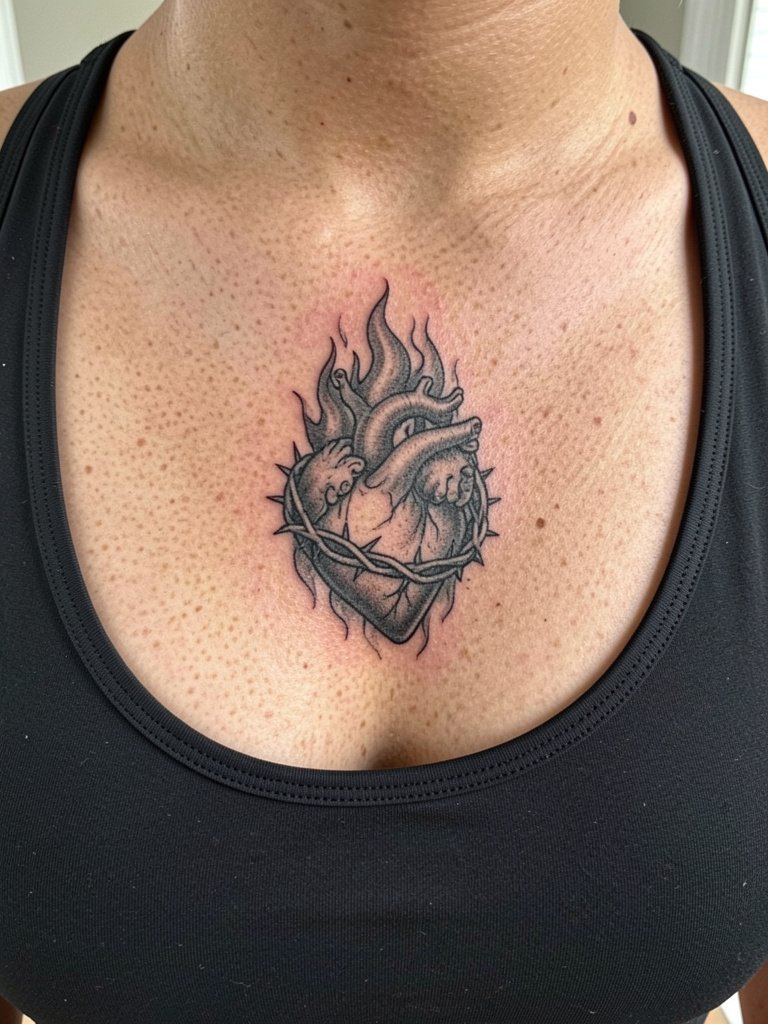
Sternum work carries a unique silhouette but also more pain. Placement here means the skin moves with breathing and undergarments, so request slightly more spacing in the thorn details to avoid early softening. Some artists prefer very saturated black and bold outlines for this area so the image keeps contrast over time. Expect a longer, potentially two-hour session and plan wardrobe that avoids tight bands against the sternum while healing. Because this is a high-contact spot for some bras, wear a soft sports bra on the ride home and during the first week to reduce friction.
Session Day Picks
The small-scale pieces above often need precise stencils and gentle first-week care, so a few items smooth the session and early healing.
-
Stencil transfer paper kit. Lets the artist preview placement on curved areas like the wrist and sternum so the rosary and cross options sit correctly before needle hits skin.
-
Topical numbing cream. Applied according to the product directions takes the edge off behind-ear and rib sessions without impacting linework.
-
Thin protective film roll. Useful for small wrist and finger locations where washing and friction are unavoidable during the first days.
-
Fragrance-free gentle body wash. Mild cleansers reduce irritation for chest and sternum tattoos while keeping the area hygienic.
-
Aquaphor healing ointment. A mainstream, commonly used ointment for early scab management on fine-line and blackwork pieces.
7. Small Celtic Cross on Upper Arm
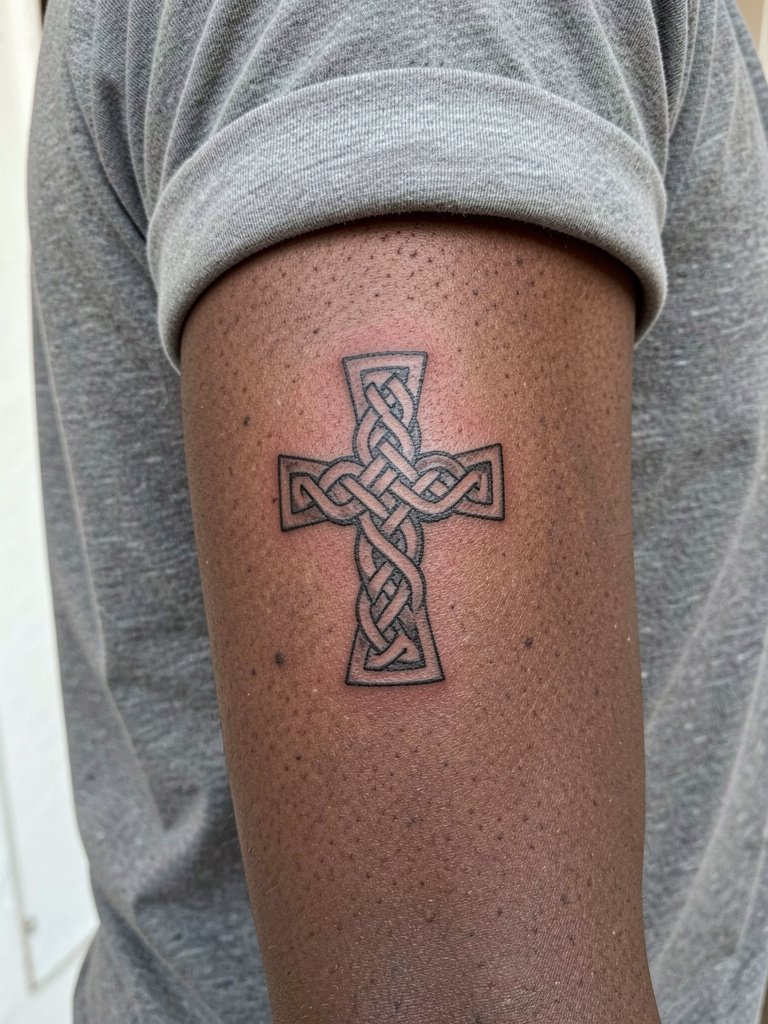
Celtic crosses require clear negative space so the knotwork reads over time. On the upper arm the skin is thicker and tolerates tighter detail than the wrist, so you can keep some interlace but avoid hairline strokes. Discuss the knot scale with the artist and ask to see healed photos of similar-sized knotwork on arms. Expect low to moderate pain and a session of 45 to 90 minutes. A frequent error is shrinking the knotwork to a pendant size where the interlace turns into a smudge. For outfits, short sleeves and a rolled cuff linen shirt show the design without crowding it.
8. Dove in Flight on Shoulder Blade
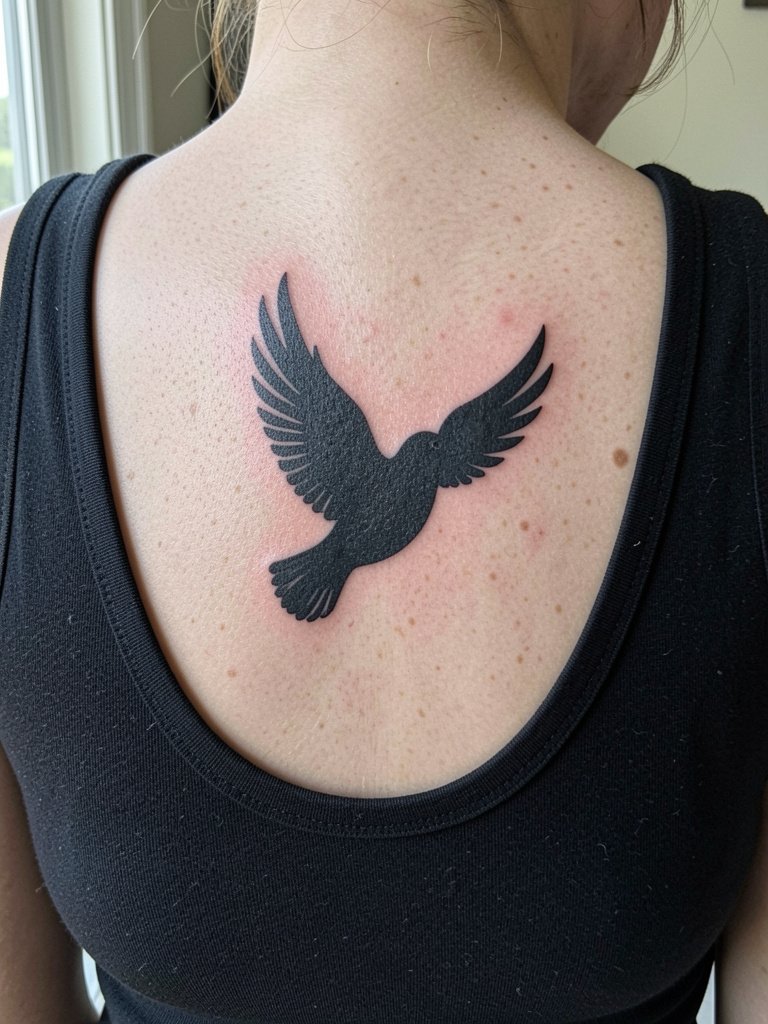
A shoulder-blade dove works well as a medium-sized piece because that canvas resists blowout. For a Christian symbol choose bold contours and subtle stippling to suggest feather texture without relying on tiny strokes. Have the artist sketch how the wing sits with shoulder movement so the silhouette reads when you reach or stretch. A session here is usually one to two hours with moderate pain. For evenings out, scoop-back tops pair naturally; try a scoop-back dress to let the dove breathe.
9. Microscopic Verse on Ring Finger
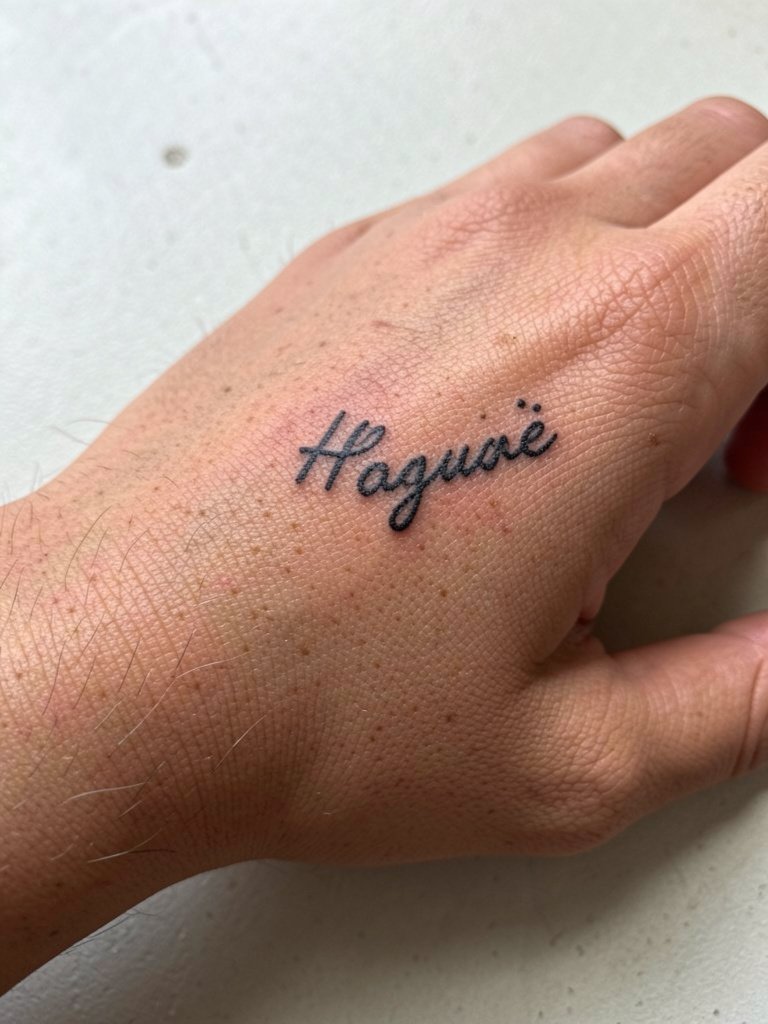
Finger tattoos are exposed to constant washing and friction so they fade faster than other spots. For a Christian micro-verse or single-word consider placing the script on the side of the finger where skin wears differently and the letters can be slightly bolder. Request the artist to preview how the letters sit with clenched and relaxed hands to avoid distortion. Sessions are brief but expect more frequent touch-ups—often within 12 to 18 months. A common mistake is assuming finger work will stay crisp without maintenance. Minimal accessories like a thin stacking ring worn above the tattoo can help frame it.
10. Saint Icon Line Portrait on Upper Thigh
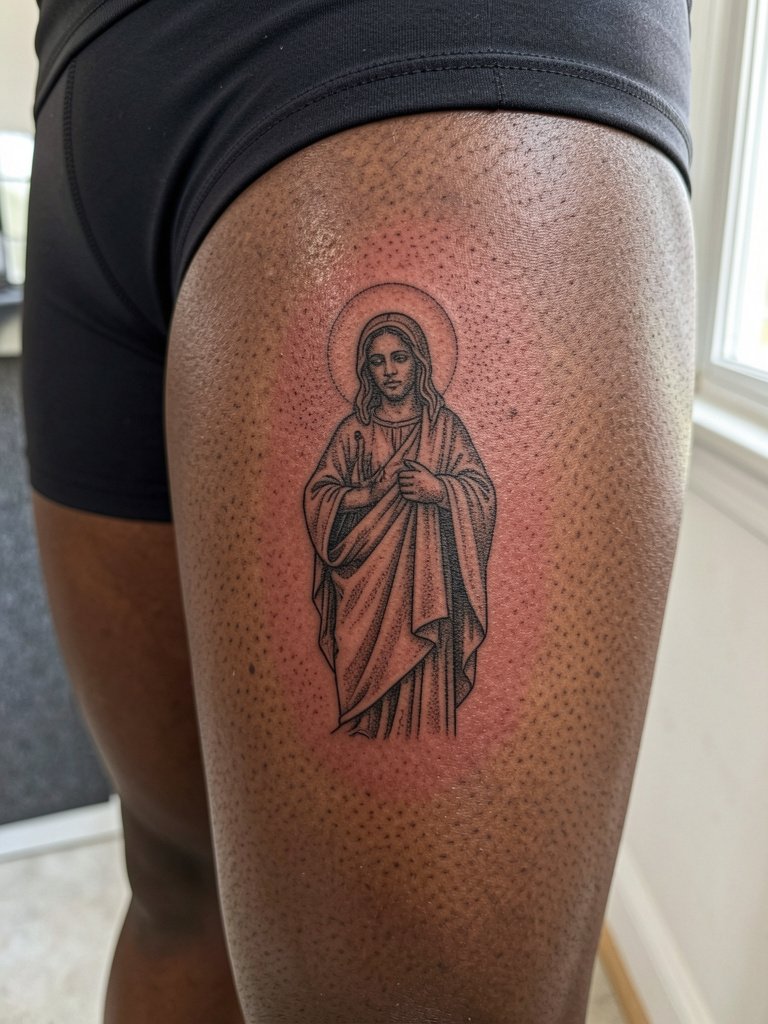
Portrait-style saint imagery borrows from icon traditions, so note cultural origin and treat it respectfully. The upper thigh provides a forgiving canvas for delicate linework and stipple shading. Clarify whether you want a stylized icon or a literal portrait and show multiple references for facial proportions and halo size. Sessions vary by complexity and could require two sittings. Thigh scars and stretch marks change how lines settle, so ask the artist to test contrast on the area. For revealing but tasteful looks try pairing with a midi slip skirt that brushes the thigh.
11. Rosette Mandala at Nape
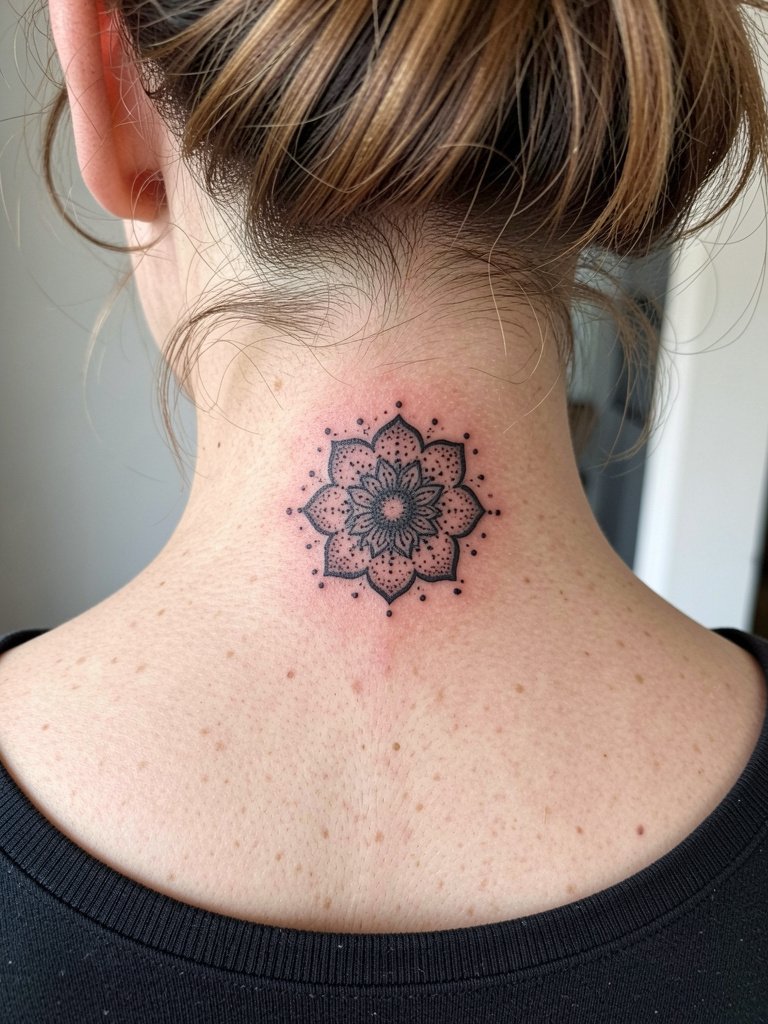
A precise rosette with stipple and dot work is striking on the nape because hair covers or reveals it on demand. Because the area is thin-skinned, request the dot sizes and spacing be mapped in a stencil so the pattern does not blur. Pain is moderate and sessions are often under two hours for small mandalas. If you want it to peek from pulled-up hair, plan for regular touch-ups to maintain crisp dots. To show it off, pair with a casual updo and a wide-neck tee.
12. Anchor Cross on Calf
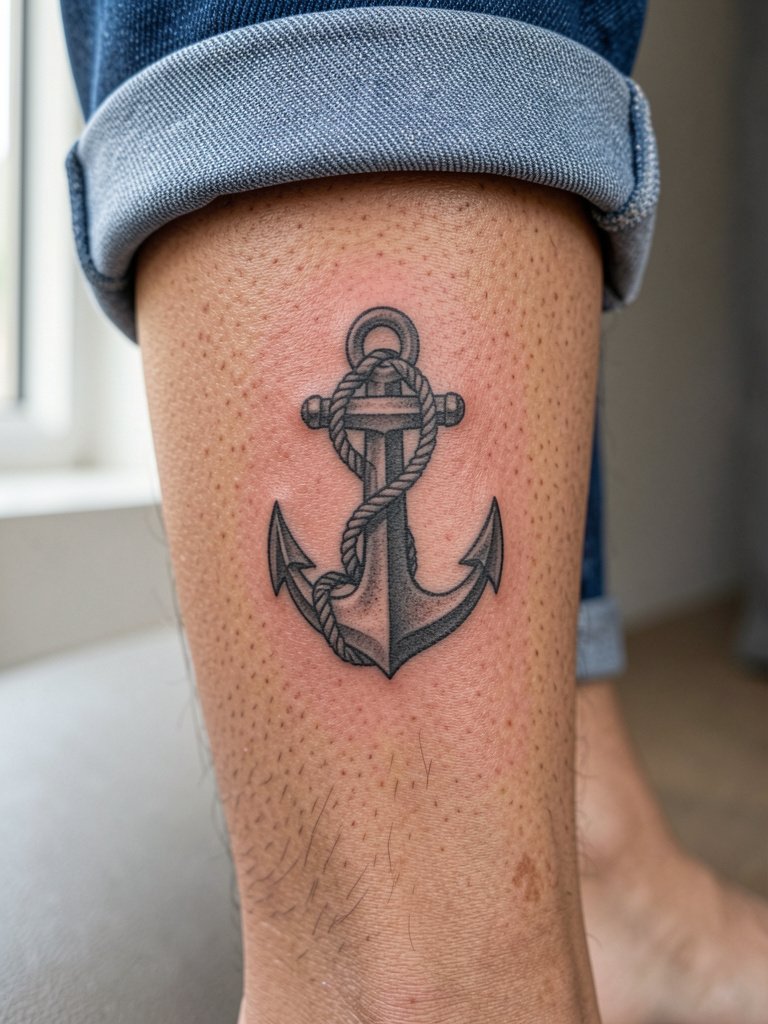
The calf tolerates bold black and shading well, making it a durable site for symbol-driven designs. Ask the artist how the rope detail will read at different distances, and request a mid-session check for saturation. Sessions are typically comfortable, with low to moderate pain and a one- to two-hour window depending on size. A common mistake is over-detailing small rope twists that later soften. For summer looks, cuffed jeans and a casual ankle boot frame calf work.
13. Minimalist Crown of Thorns on Forearm
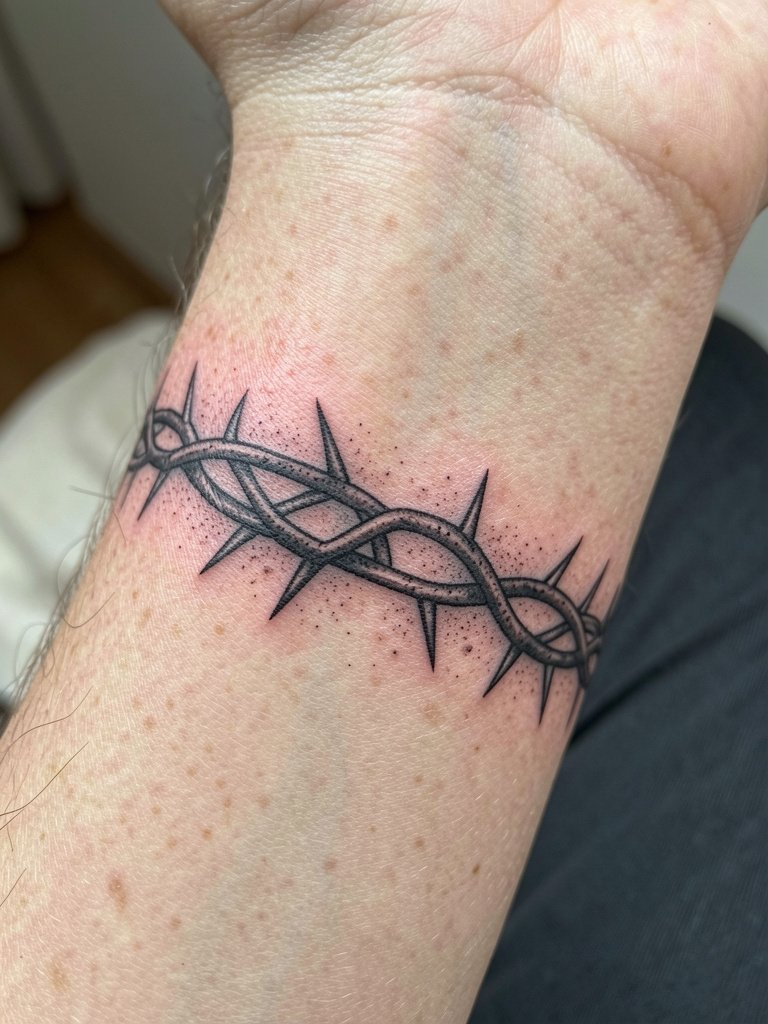
A crown of thorns band is symbolic and sits well on the inner forearm where it is visible and not constantly abraded. Recommend bead-like gaps and slightly bolder barbs so the negative space holds. Ask the artist to mock up the band in two widths to compare how it reads from arm length. Sessions are short and pain is moderate. Avoid making the band too tight around the forearm circumference as that creates distortion when muscles flex. For casual showing, roll up a linen sleeve shirt to keep focus on the band.
14. Blackwork Chalice on Inner Bicep
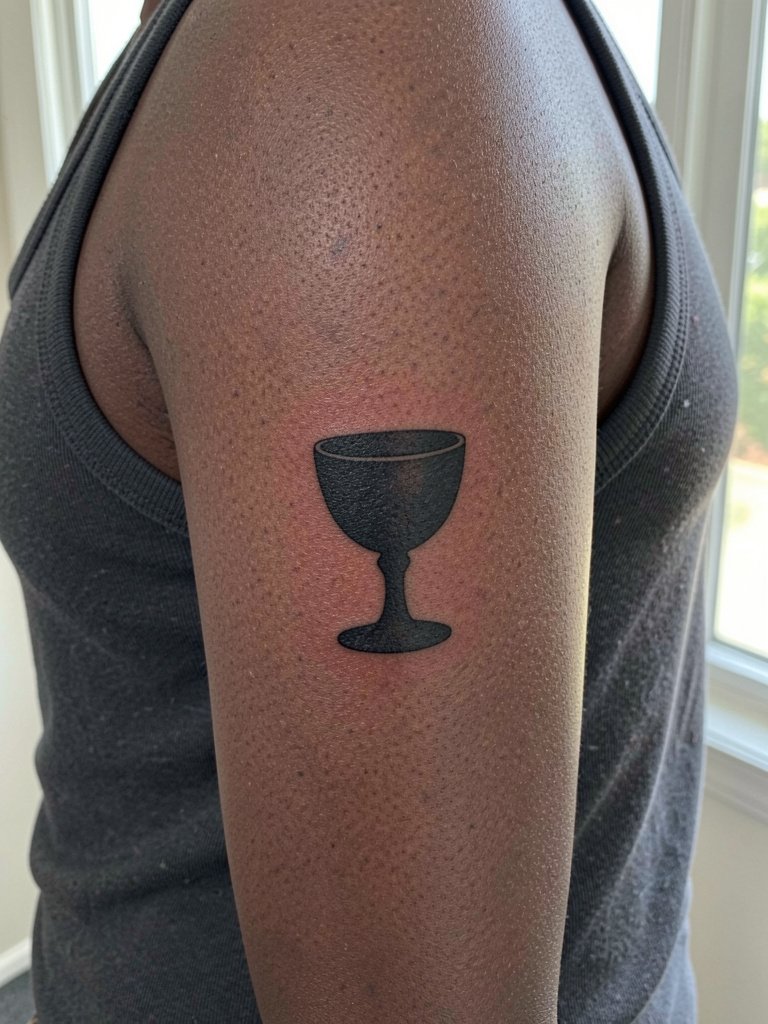
Inner bicep is forgiving and keeps saturated shapes well if spaced correctly. For a chalice, pick bold silhouette over intricate filigree so the image lasts through the years. Clarify with the artist whether the piece should face inward toward the body or outward for visibility because placement changes how viewers perceive the symbol. Session time is moderate and pain is medium because of nearby soft tissue. A mistake is requesting fine interior filigree that the inner bicep texture does not hold. For comfort during the session wear a loose tank top so the arm remains accessible.
15. Byzantine-Style Halo on Shoulder Cap
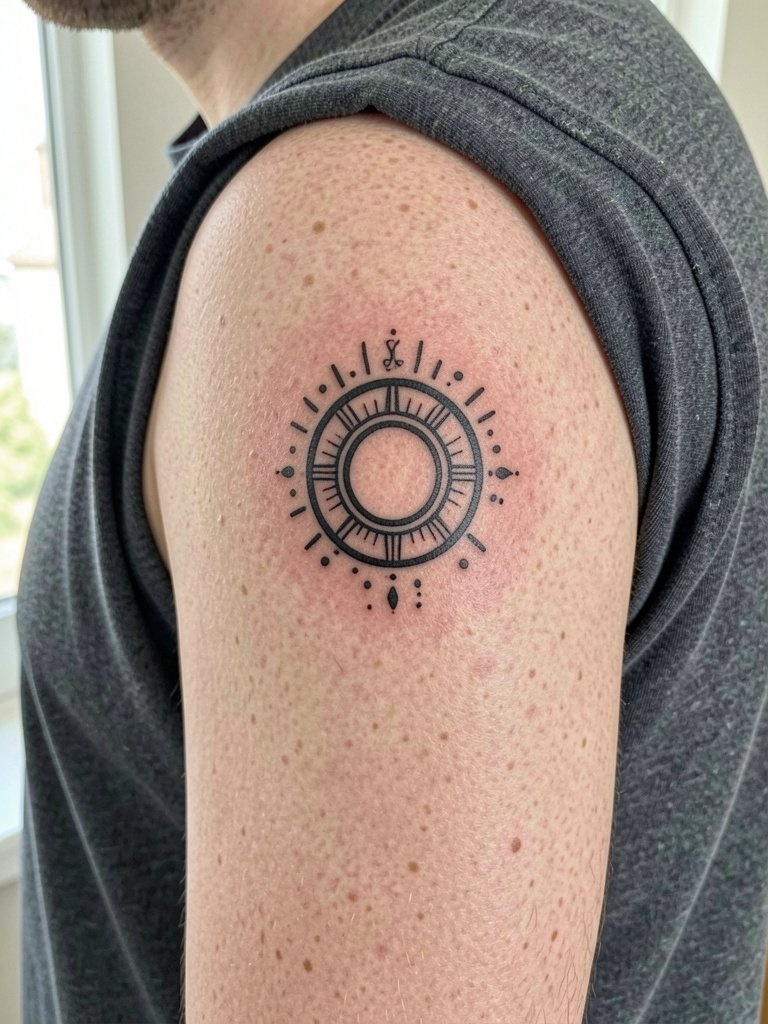
Byzantine-inspired halos reference a visual tradition, so approach with awareness of origin and avoid copying sacred art without adaptation. Shoulder cap skin handles radial patterns well, but over-detailing causes the rays to merge as the piece ages. Ask the artist to simplify the ornament into bold rays and dot shading for long-term clarity. Sessions are relatively quick and pain is low to moderate. For beach or sun-exposed looks a muscle tank displays the halo cleanly.
16. Tiny Alpha and Omega on Ankle
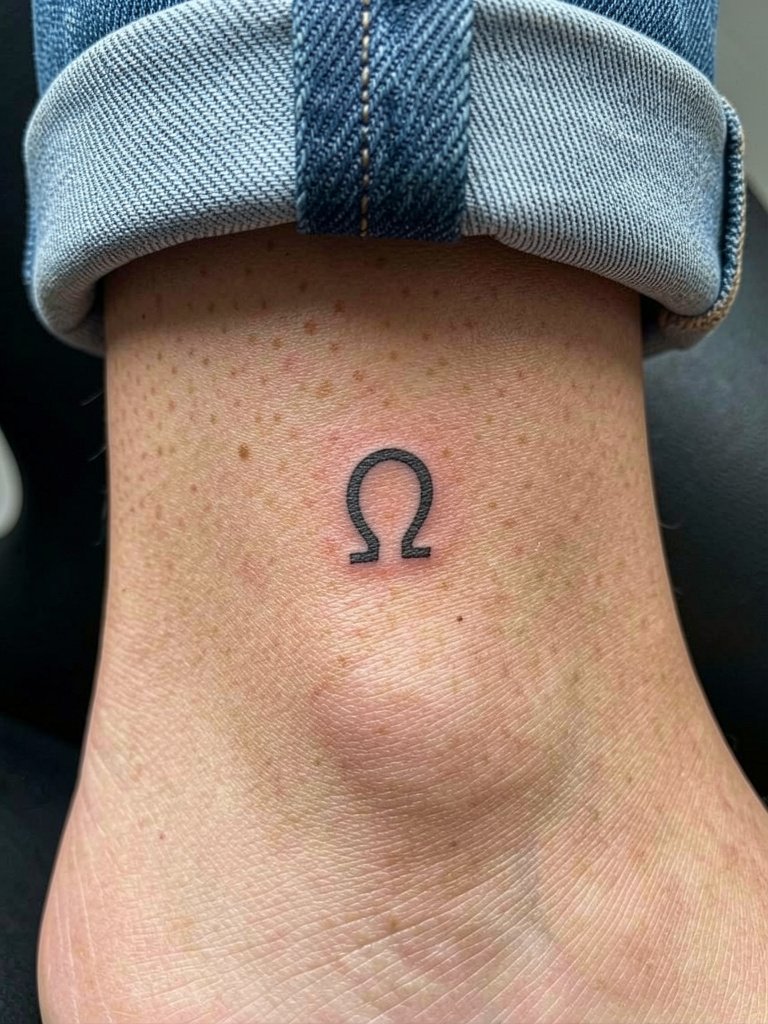
Ankle placements see frequent rubbing but tolerate compact bold symbols. For Alpha and Omega choose a compact, slightly thicker letterform so curvature does not soften into a blob. Ask the artist to demonstrate how the letters sit when the foot is flexed because the ankle changes shape. Pain is moderate and sessions are short. A common error is placing the symbol too close to the shoe line. To show the symbol try cuffed jeans and a minimal ankle chain.
17. Linework Crossbow-style Shield on Back
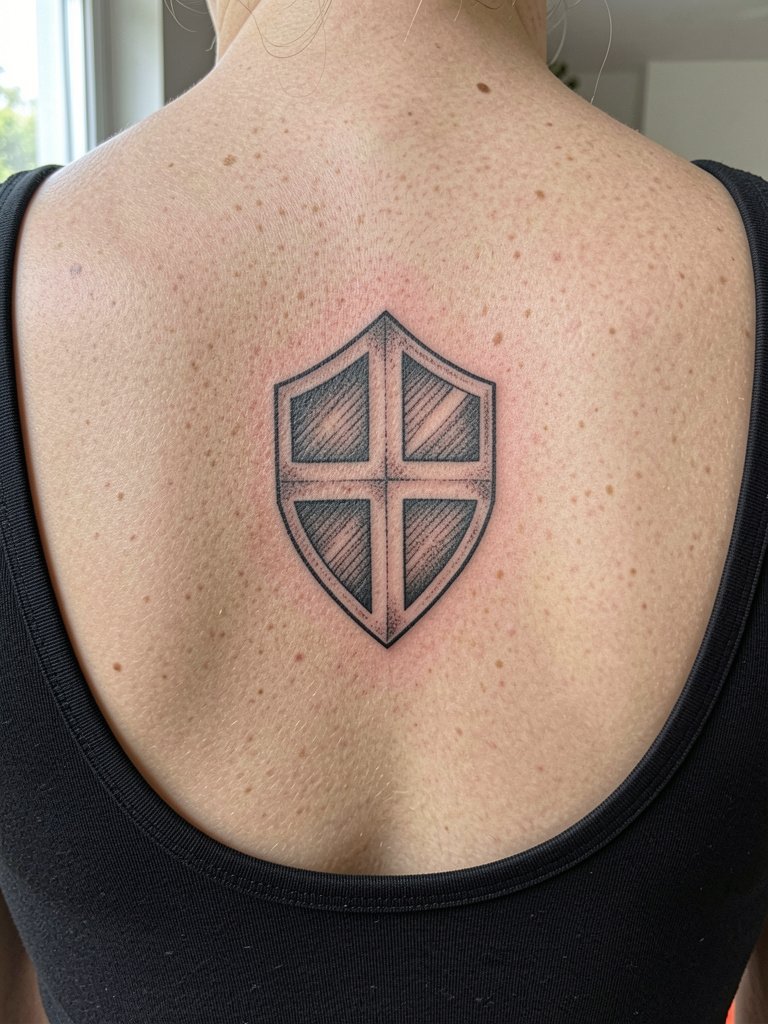
Upper back shields hold crisp geometry well because the skin is broad and stable. Specify that you want the cross centered on the spine or offset to the left so the artist can map symmetry. Sessions vary with size but are generally longer and may require a second session for heavier saturation. A mistake is assuming fine angular details on curved back planes will stay sharp without extra spacing. For clothing, a scoop-back top reveals the design elegantly.
18. Psalm Number in Roman Numerals on Rib Side
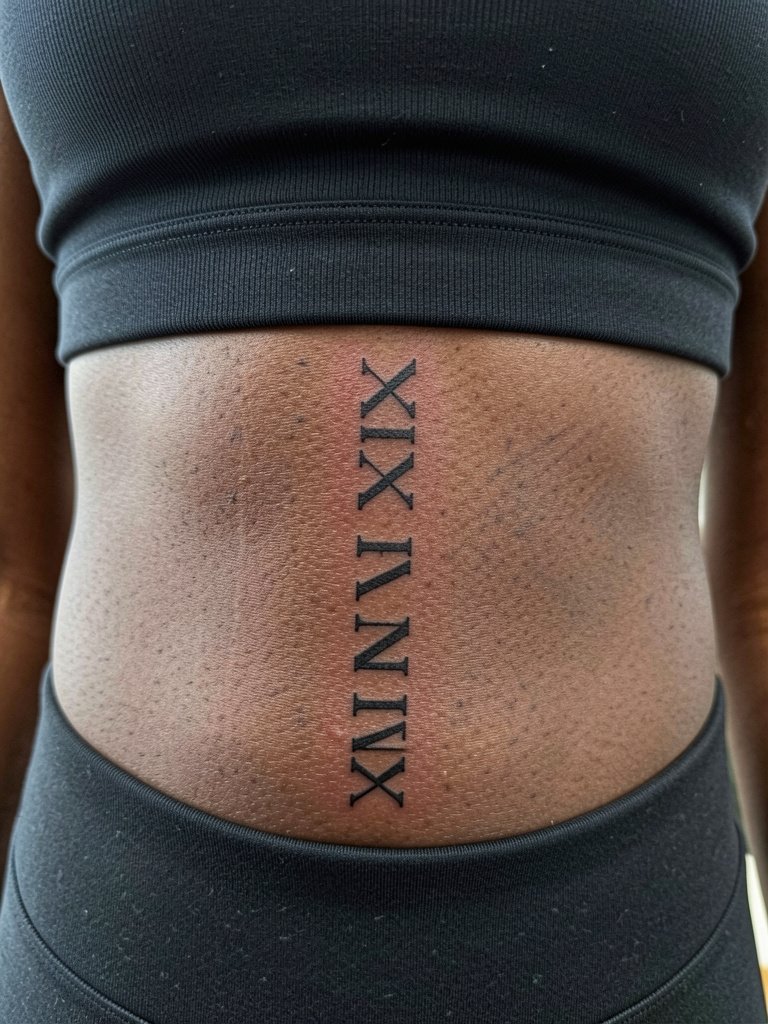
Roman numerals look tidy when spacing prevents the digits from merging. Because ribs expand and contract, choose a slightly bolder serif and request the stencil be aligned with breath to keep vertical rhythm. One artist camp cautions that any vertical script on ribs can distort quickly from movement and recommends larger spacing. Another camp says with appropriate depth and transit spacing, numerals can remain crisp. Expect higher pain and plan a two-hour window for placement accuracy. For session comfort wear a fitted cropped top.
19. Anchor Cross on Foot Top
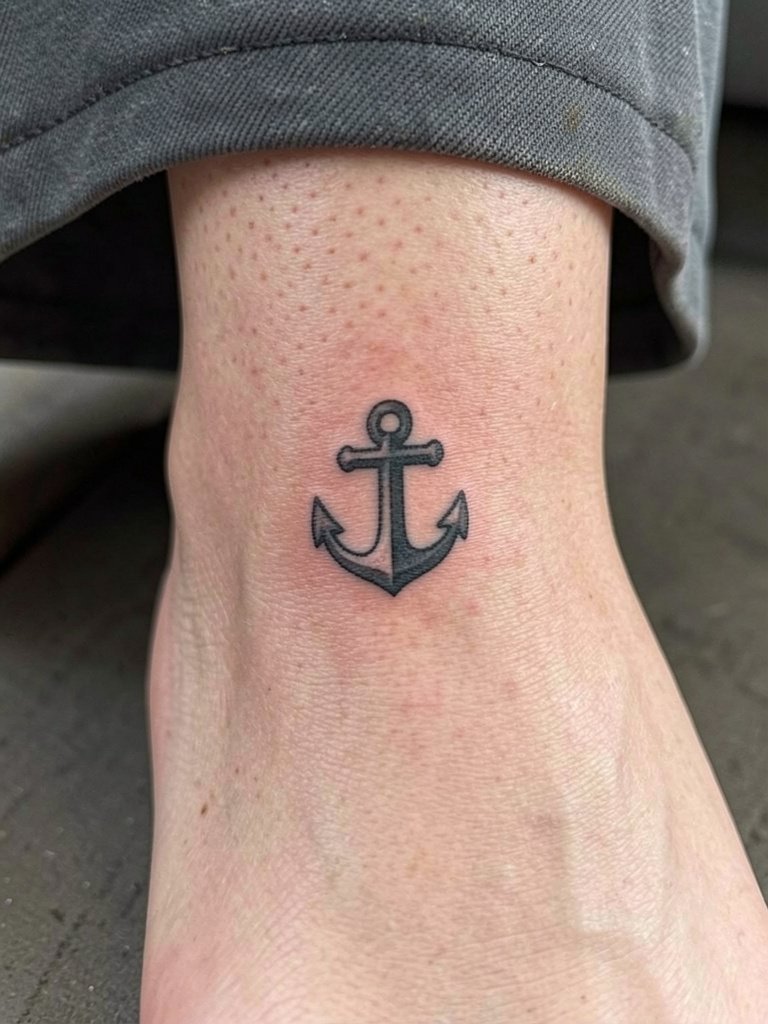
Top-of-foot tattoos face heavy abrasion from shoes and frequent sun exposure. Favor bold outlines and simple fills so the cross-anchor reads through that wear. Ask the artist about anticipated fading and realistic touch-up schedules, because foot tattoos often require a refresh in the first two years. The session is brief but healing can be slower; avoid closed shoes for at least a week. For summer wear minimalist sandals and a padded foot sleeve in transit to reduce friction.
20. Stained-Glass Window Fragment on Shoulder
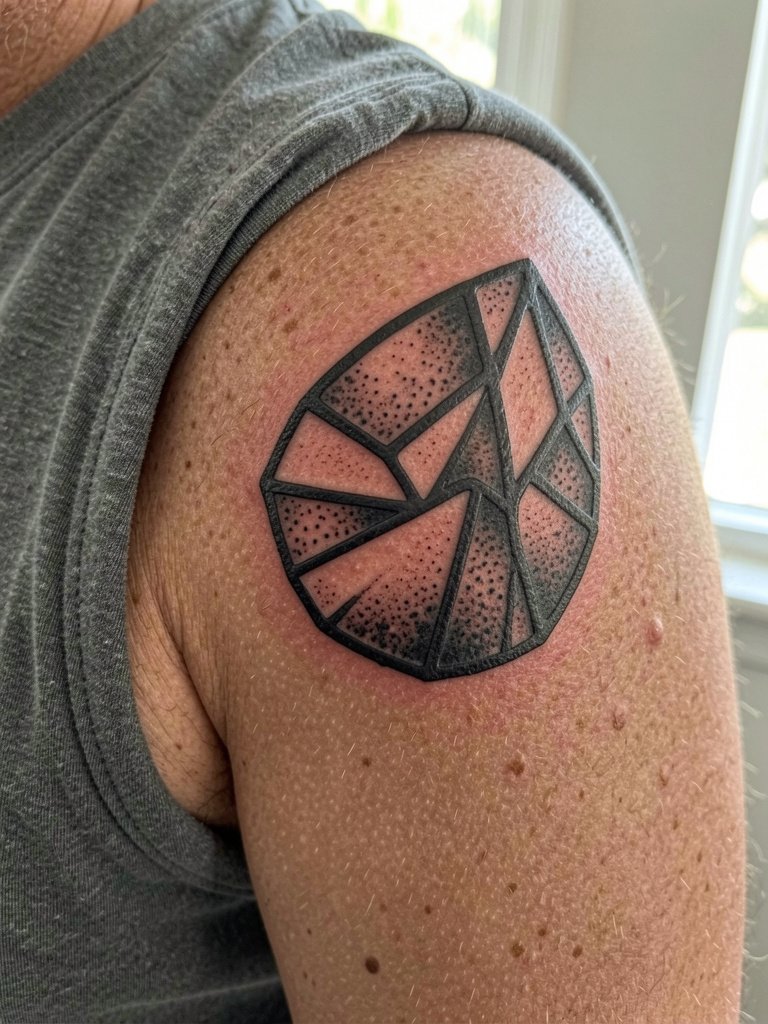
Stained-glass fragments read well when the panel borders are slightly heavier than the internal motifs. For Christian themes, simplify color ideas into tonal blackwork to avoid early color fade. Tell the artist which panel shape you prefer and ask for mockups at multiple scales so the fragment reads from a distance. Sessions are moderate and may take one sitting. For summer framing try a cap sleeve top.
21. Palm-Sized Prayer Hands on Back of Hand
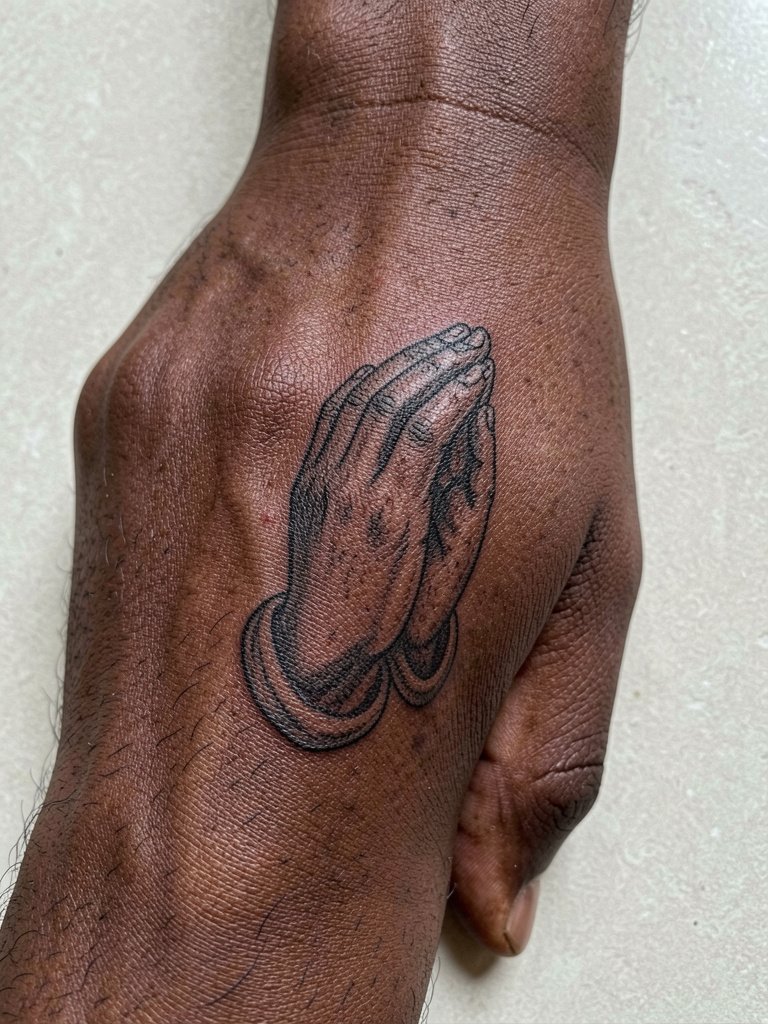
Hand tattoos are high-risk for fading and blowout due to thin skin and constant use. When considering prayer hands, choose bold linework and limited tiny shading. Ask for a mockup in the actual hand pose you use most so the artist can adapt line flow. Expect sharp pain and a piece that will likely need touch-up within 12 months. Many artists decline detailed hand work for longevity reasons, so seek a portfolio that shows healed hand examples before booking.
22. Small Latin Phrase Along Collarbone
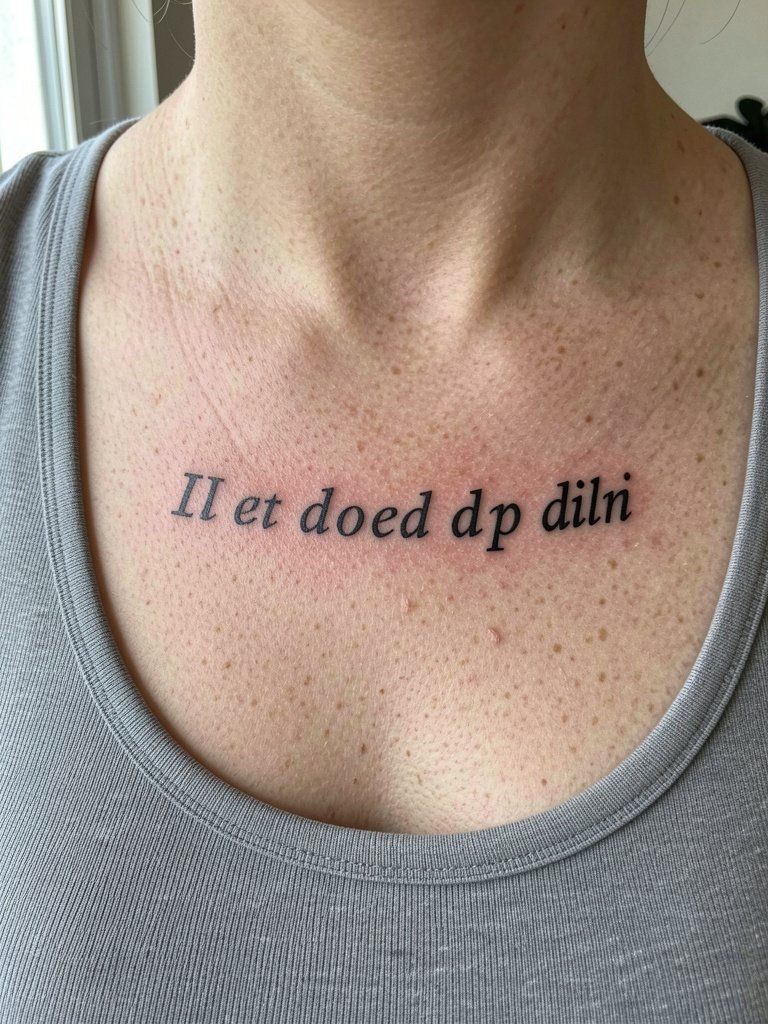
Short phrases across the collarbone read beautifully if letter spacing is generous and stroke weight is not razor-thin. Request that the artist lay out the phrase along your collarbone curve and check it while you sit and stand. The biggest problem is tight kerning in an attempt to keep the phrase tiny. Sessions are brief and pain is moderate. For wardrobe pairing, choose a wide V-neck sweater to display the line.
23. Small Lantern with Flame on Forearm
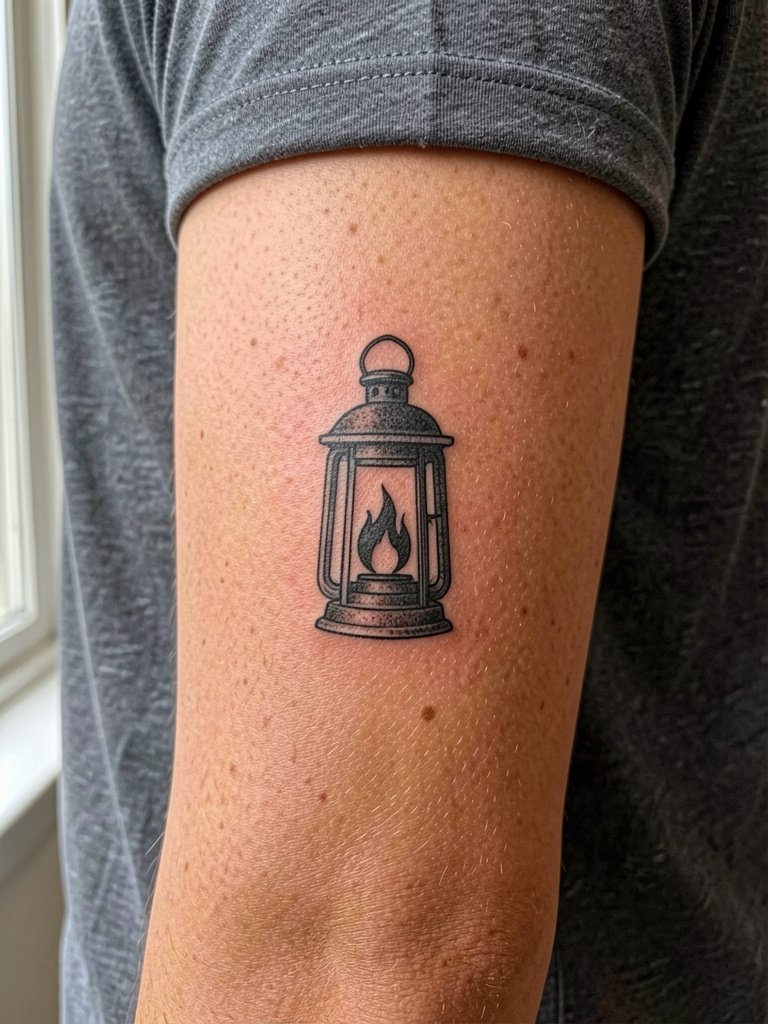
A lantern motif symbolizes guidance and pairs well with forearm visibility. Opt for solid outline and limited interior texture so the flame and glass shapes remain clear over time. Clarify with the artist how the light will be suggested, and ask to preview the piece in motion so it reads with arm rotation. Sessions are moderate length and pain is low to moderate. For showing, short sleeves and a rolled cuff tee provide a clean frame.
24. Geometric Trinity Knot on Chest
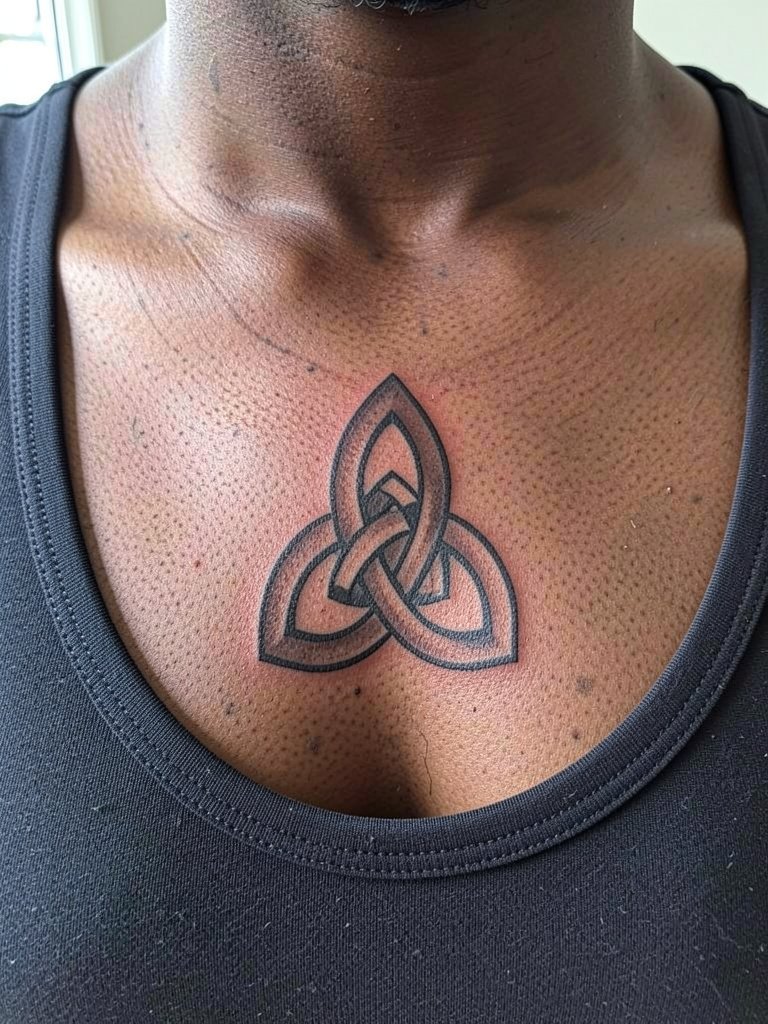
Trinity knots can be modernized with geometric bands that read well on chest planes. Because chest skin can be stretched, pick broader bands rather than hairline filigree. Ask the artist to show how the interlace looks with arm motion and breathing so the knot stays visually coherent. Sessions can range from one to two hours. For evenings, a open-neck shirt showcases the knot.
25. Baptismal Water Drop on Inner Wrist
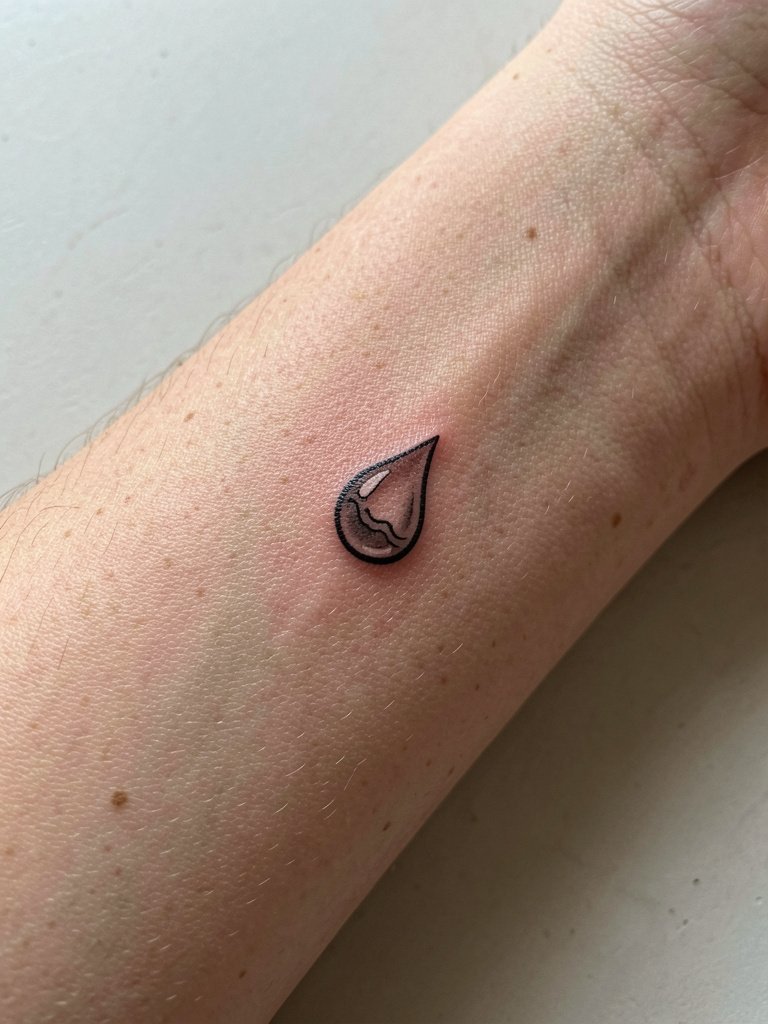
A baptismal droplet is a subtle symbol best done with a clear silhouette. Because the wrist moves, request a slightly thicker outline and ask the artist to center the droplet away from creases. Sessions are quick and pain is moderate. A common mistake is underestimating how much wrist motion can smear tiny interior waves. For discreet display, wear a thin chain bracelet positioned above the droplet.
26. Anchor with Crossbar on Bicep Outer
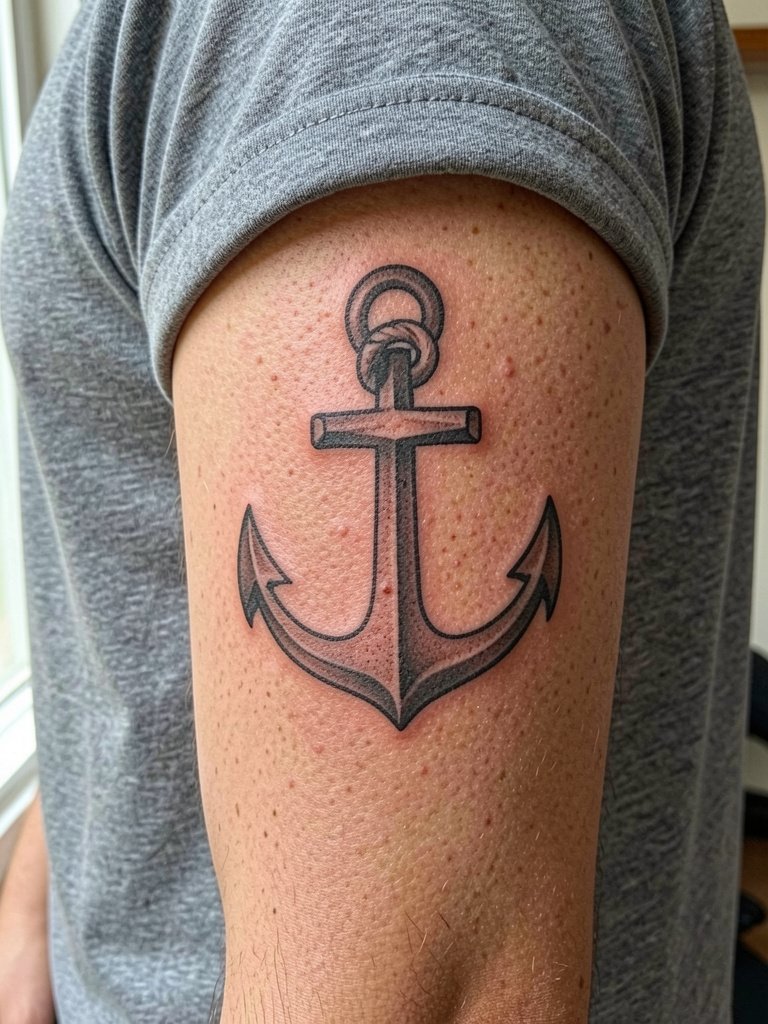
Outer bicep is forgiving and holds bold shapes. An anchor with a crossbar creates explicit Christian resonance and ages well when outlines are solid. Ask for a scaled stencil so the anchor width feels balanced with your bicep muscle at rest. Sessions here are comfortable and usually completed in one sitting. For gym or casual looks, a muscle tee will show the design while reducing friction.
27. Bold Blackwork Cross Sleeve Accent
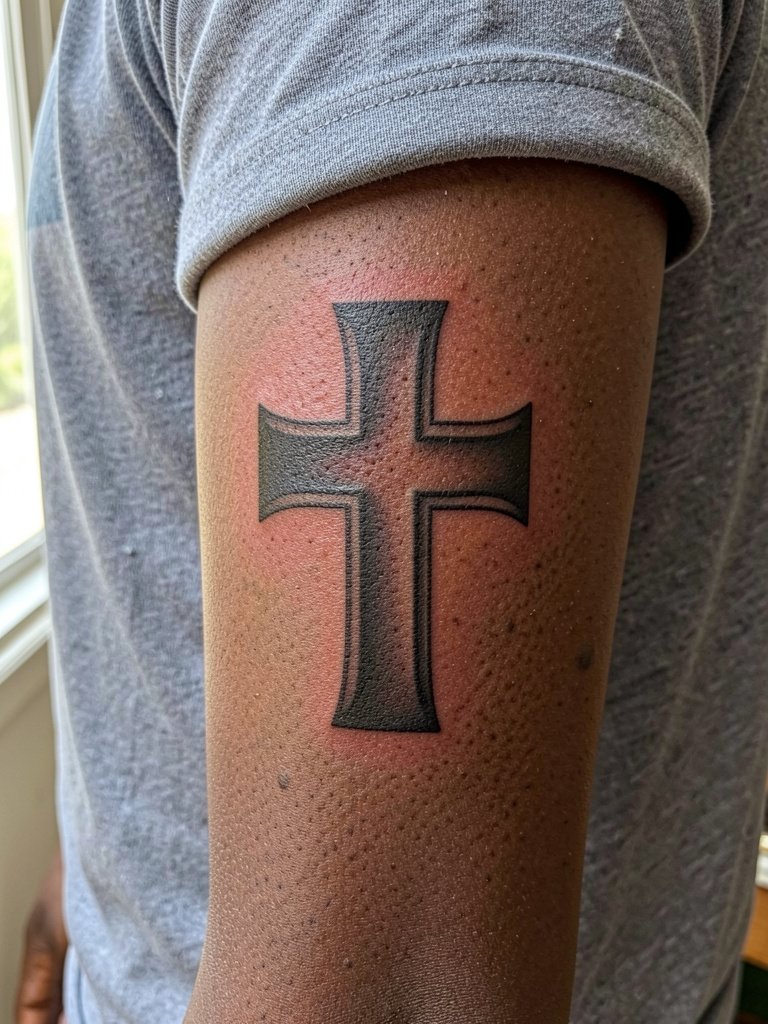
A bold, saturated cross as a sleeve anchor resists blur and provides a reliable visual center for additional work. For longevity choose solid fills and clear negative borders, and have the artist map future pieces around the anchor to avoid crowded edges. Sessions for saturated blackwork can be longer and sometimes split so healing is consistent. A typical touch-up is sometimes needed at the first-year mark to restore edge crispness. For layering with other sleeve elements, plan clothing that shows the forearm with rolled sleeves and consider an overshirt for transitional looks.
Frequently Asked Questions
Q: How do I find portfolios of healed Christian tattoo work without naming specific artists?
A: Search social platforms with keywords and hashtags like "healed Christian tattoo," "blackwork cross healed," and "script rib healed." Use location filters on Instagram and TikTok to find nearby portfolios and read community threads for healed photos in varied skin tones. Reddit tattoo communities often host albums tagged by placement and can point to shops with consistent healed results.
Q: Will fine-line script last on my ribs or chest?
A: It depends on spacing and stroke weight. Fine single-needle script tends to blur faster on high-motion areas like the ribs and sternum unless the lettering is slightly bolder and spaced generously. Ask for a staged stencil that shows how the words sit while breathing so you can compare options at scale.
Q: How often do small wrist, finger, and hand Christian tattoos need touch-ups?
A: In my observation these spots often need touch-ups within 12 to 24 months because of daily abrasion and washing. Expect that finger and hand pieces are the highest maintenance, followed by the wrist. Choosing slightly heavier linework and planning for a one-year check-in keeps the design legible.
Q: Are there ethical concerns around religious iconography in tattoos?
A: Yes. Some people view sacred images as deeply personal and expect respectful adaptation, while others see stylized or modern interpretations as appropriate. If you are using imagery rooted in a specific tradition, acknowledge the origin and avoid direct replication of sacred art without adaptation.
Q: What should I wear to my appointment for chest, sternum, or inner thigh placements?
A: For chest or sternum wear a fitted sports bra or a scoop-neck top that the artist can move aside without creating fabric folds. For inner thigh choose modest athletic shorts so the area is accessible but covered in transit. Bringing a loose button-up or zip hoodie can also keep you comfortable before and after the session.
