
The thin, angular pine that looks incredible the day after your session often blurs into a soft gray smudge within a few years. Bold silhouettes and slightly wider linework hold detail longer, especially on parts of the body that take friction. This list balances clean, modern pine motifs with versions that resist age, and it gives practical notes on placement, session feel, and what to wear the day of your appointment.
1. Fine-Line Single Pine on Inner Forearm
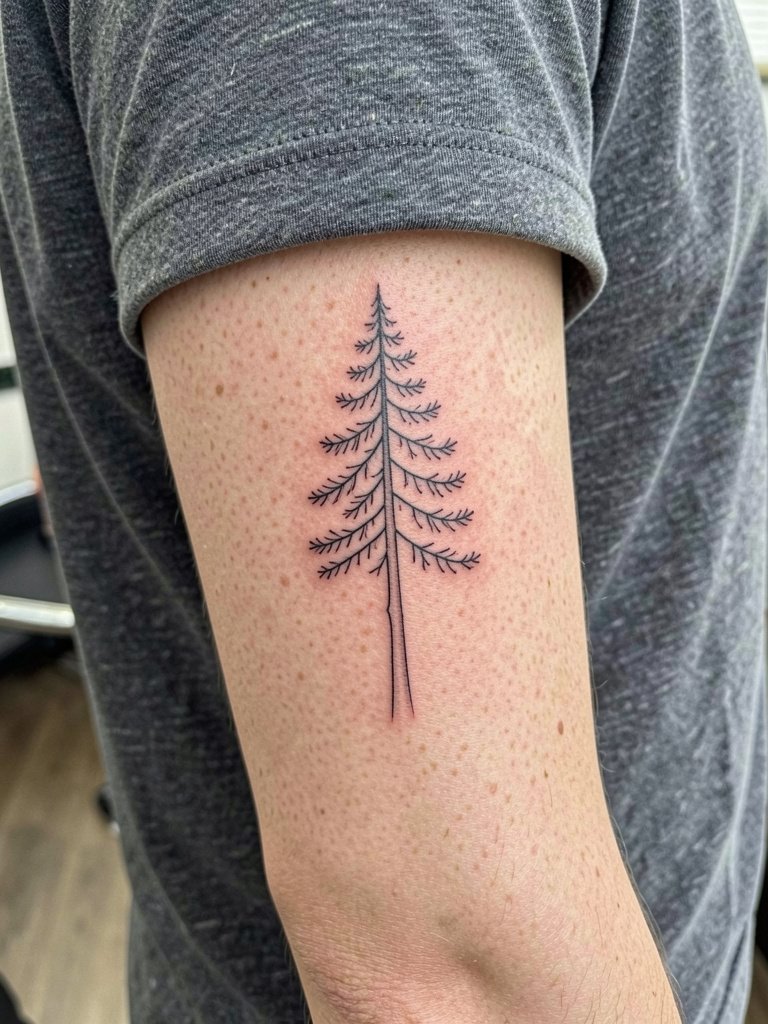
A single-needle pine on the inner forearm reads very elegant at first. I recommend this when you want a low-profile piece that tucks under sleeves but still lifts a sleeve cuff. Discuss line weight specifically, asking for a hair heavier single-needle stroke so the trunk does not blur into a soft line by year three. The inner forearm is moderate on pain and often finishes in one brief session under ninety minutes. Common mistake is asking for a three-inch height with ultra-fine branches, which the skin texture will eat. For the session wear, bring a loose short-sleeve tee so the artist can roll the sleeve without pressure, and consider the show-off look with rolled-up linen shirts that reveal the forearm.
2. Stippled Mini Forest on the Ankle
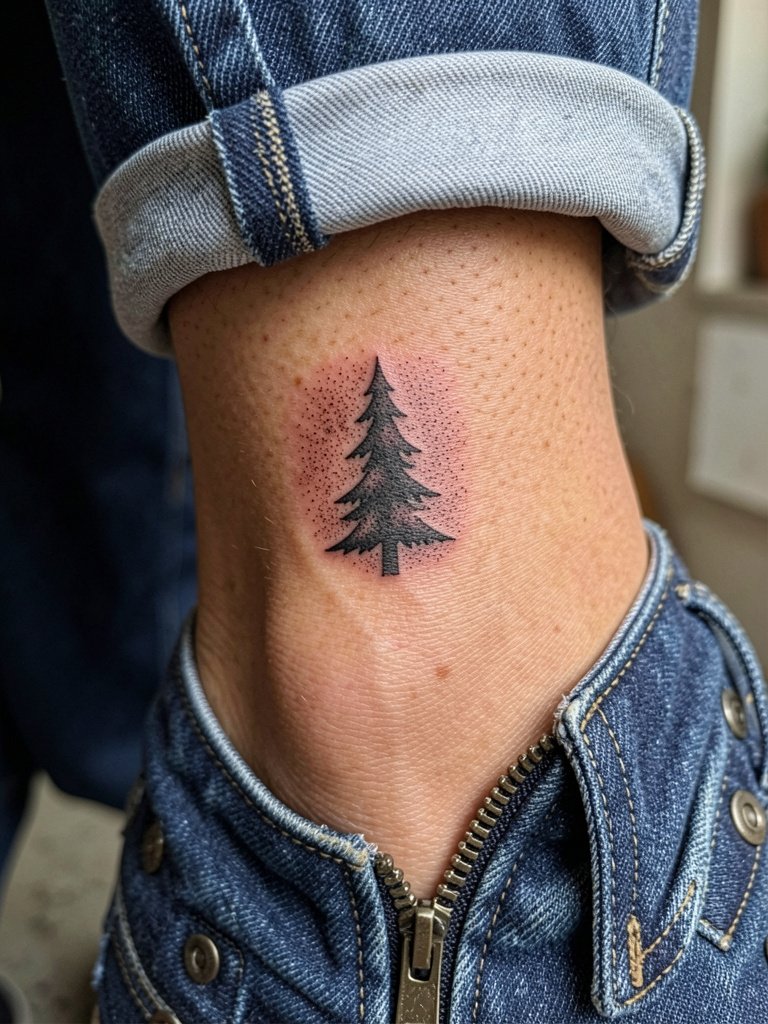
Ankle pines suit small, stippled clusters that read like a motif near footwear. Recommend this when you want seasonal visibility and low commitment, since touch-ups are common after a year due to friction from socks and shoes. Tell the artist to leave crisp negative space between trees to prevent the dots from merging as the skin softens. Expect more sensitivity here than the forearm and a short session under an hour. For outfits that show them off, pair with low-profile canvas sneakers and cropped denim hems to keep the area visible without rubbing.
3. Geometric Pine Cluster on Upper Back
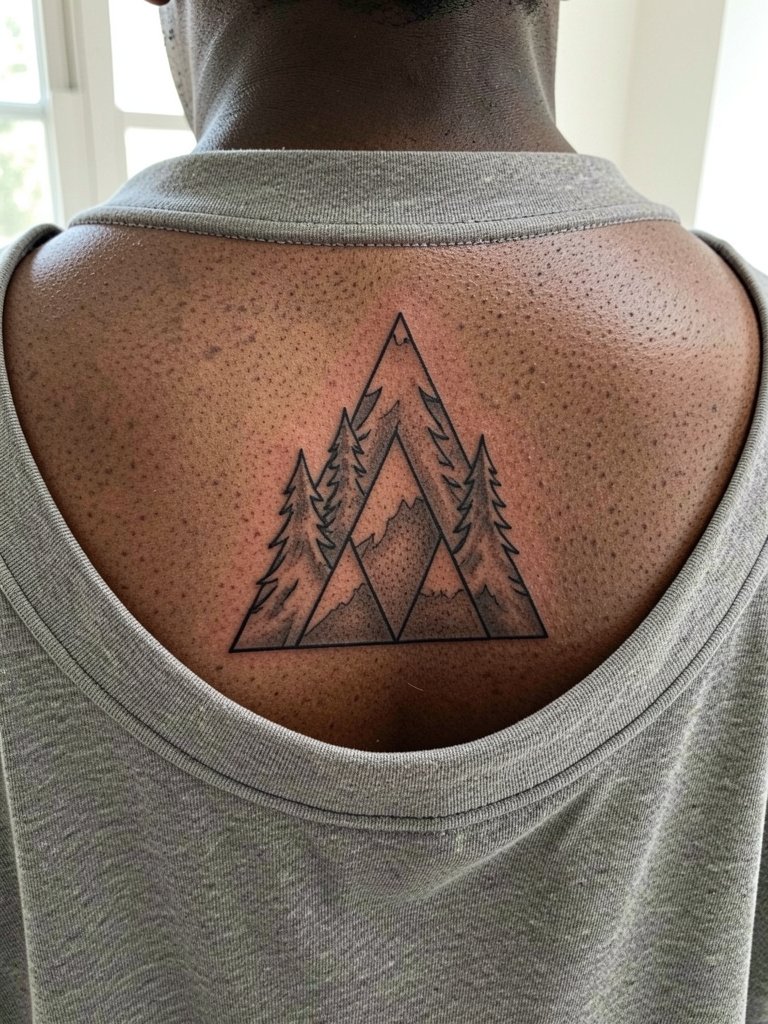
Upper back clusters let the design breathe at a larger scale and age nicely when given space. I suggest this if you want a pine motif that can expand into a larger back piece later. Ask the artist to map the negative-space triangles on your back curvature so the tree spacing follows muscle movement. Healed appearance at six months versus two years will show some softening in the thinnest intersections, so plan for a light touch-up around year two. Session time is often two hours depending on scale. For nights out, this placement pairs well with open-back midi dresses that let the geometric composition sit under fabric lines.
4. Traditional Pine with Sunrise on Outer Thigh
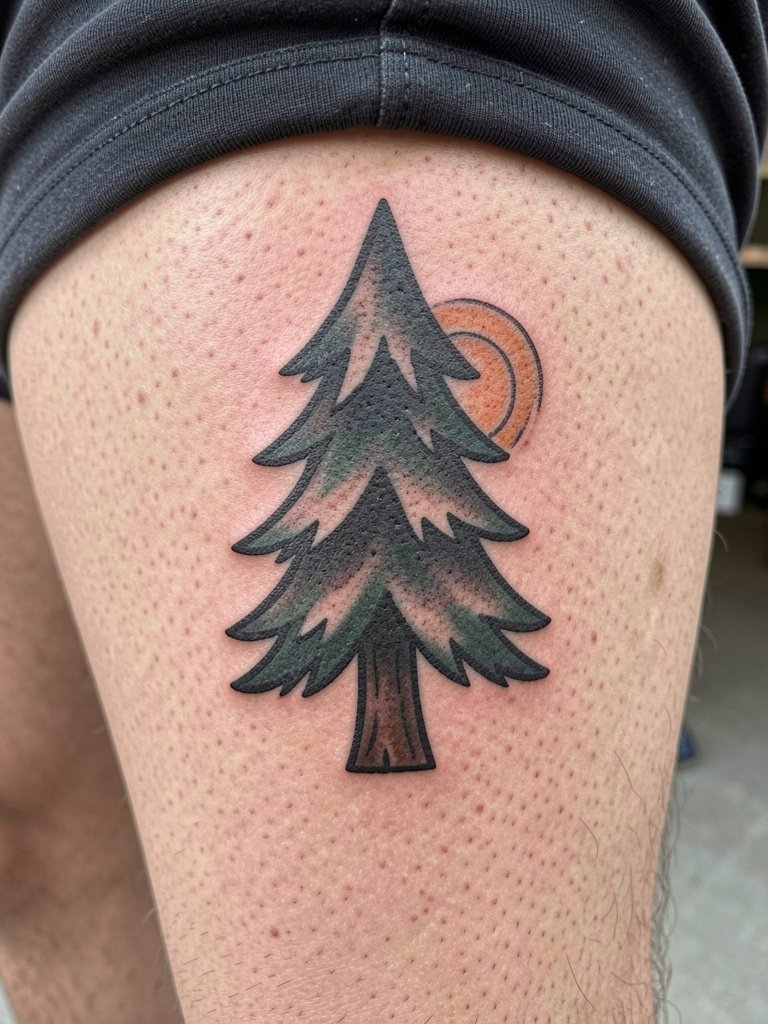
The outer thigh is forgiving for saturated traditional pine motifs that want to remain bold. This is a strong pick when you value longevity over delicate detail. Tell the artist to favor thicker outlines and saturated fills so the tree keeps its silhouette through seasonal fading. The thigh is low on pain and sessions can run from ninety minutes to three hours depending on color. Avoid requesting tiny color gradients inside a one-inch tree, that is a common aging mistake. For showing the piece, wear high-waisted denim shorts that frame the thigh area without rubbing the tattoo.
5. Pine Branch Wrap Around Wrist
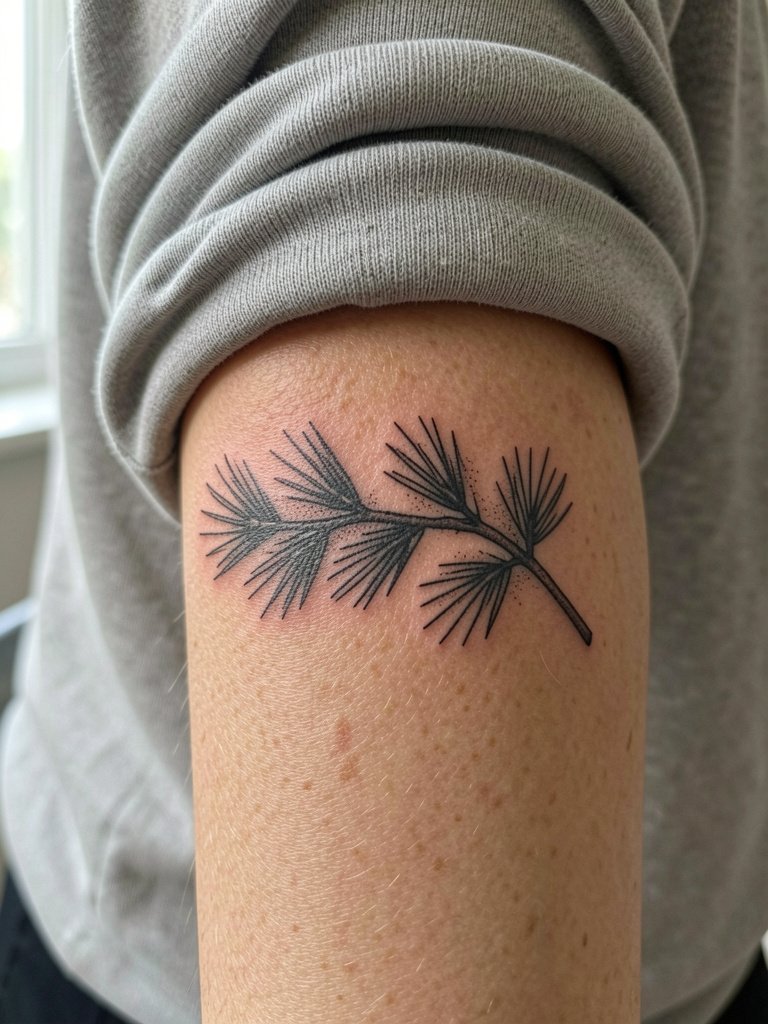
Wrist wraps read beautifully when designed with the joint motion in mind. I recommend this style for people who want something visible yet easily covered with a watch. Discuss leaf spacing so the wrap does not blur where the wrist flexes, and ask for slightly bolder stems than the reference you bring. The wrist can be sensitive, expect a shorter but sharper session under an hour. Blowout risk is higher here because the skin is thin, and a touch-up at six to twelve months is common for fine detail. For display, this piece looks great with a slim leather band or a simple bracelet, try pairing with a minimal leather cuff when you want a layered look.
6. Blackwork Pine Silhouette on Calf
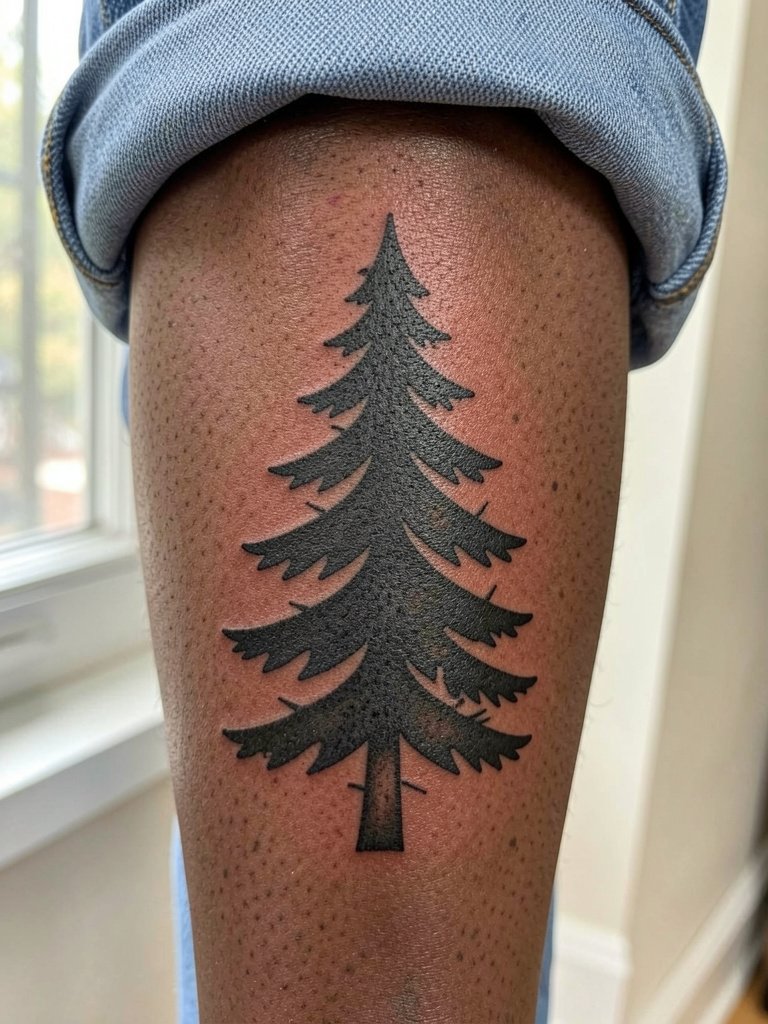
A blackwork pine silhouette resists blur and shows from a distance. Choose this when you want a low-maintenance, high-contrast statement that survives frequent sun exposure. Ask for solid saturation and ask the artist to leave micro negative spaces where the foot rubs the sock line, that preserves shape over time. Calf sessions are medium pain and usually finish in a single two-hour sitting. The common mistake is trying to add too much interior detail into a silhouette, which defeats the longevity benefit. For footwear-friendly looks, roll your jeans and pair with ankle boots that keep the calf visible.
Pre-Session Essentials
The pine pieces above include delicate forearm and ankle work, so a few low-effort items smooth the session and the first week.
-
Stencil transfer paper kit. Lets you preview placement and scale directly on the skin for the inner forearm and wrist wraps before the needle touches down.
-
Topical numbing cream. Applied forty-five minutes before and rechecked at the chair helps with ankle and rib sensitivity without altering linework readability.
-
Thin protective film roll. Keeps small ankle and wrist tattoos clean during the first week of washing and movement.
-
Fragrance-free body wash. Gentle cleansing supports the healing window for stipple and fine-line pieces.
-
Aquaphor healing ointment. Thin application in the first few days helps retain moisture for fine work without clogging pores.
7. Minimalist Pine Skyline on Collarbone
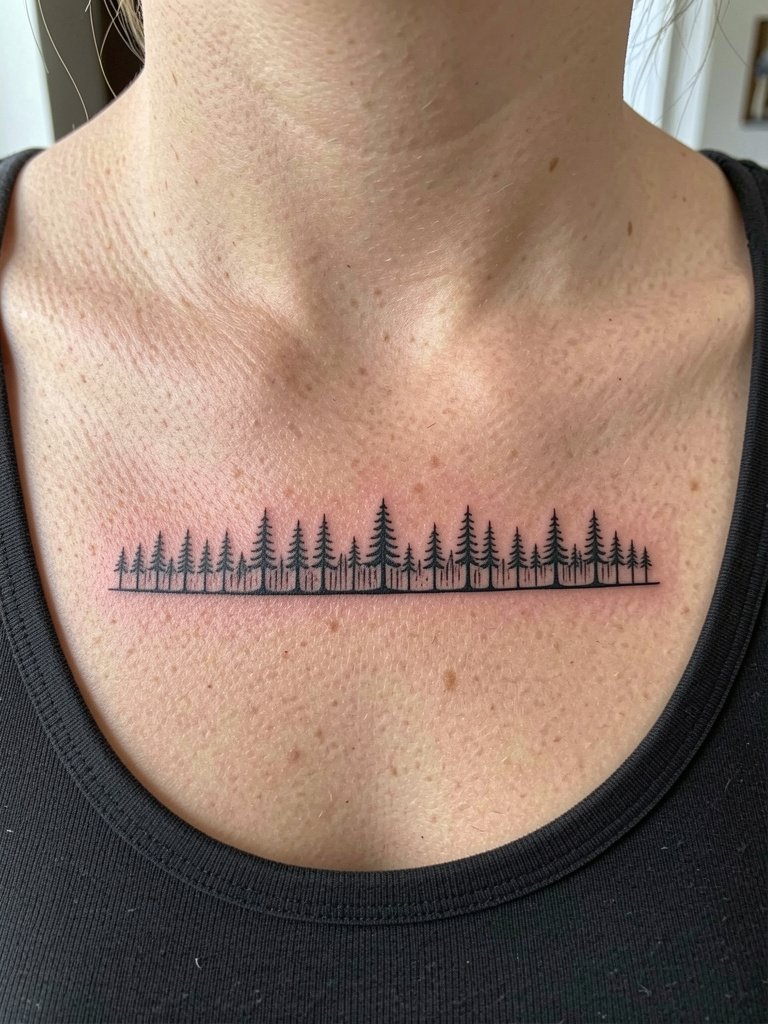
Collarbone skylines are modern and photograph well, but they face friction from necklaces and shirt collars. Choose this if you want a piece that sits horizontally across a visible band. Specify exact spacing between vertical strokes and request slightly heavier strokes than your reference so the pattern does not vanish in five years. The collarbone can be bony and sensitive, expect a one-hour session for a thin band. A typical mistake is making the skyline too high on the clavicle, where it scuffs against jewelry. For outfits, a wide-neck top accentuates the horizontal line and pairs cleanly with a delicate chain necklace.
8. Negative-Space Pine Crescent on Sternum
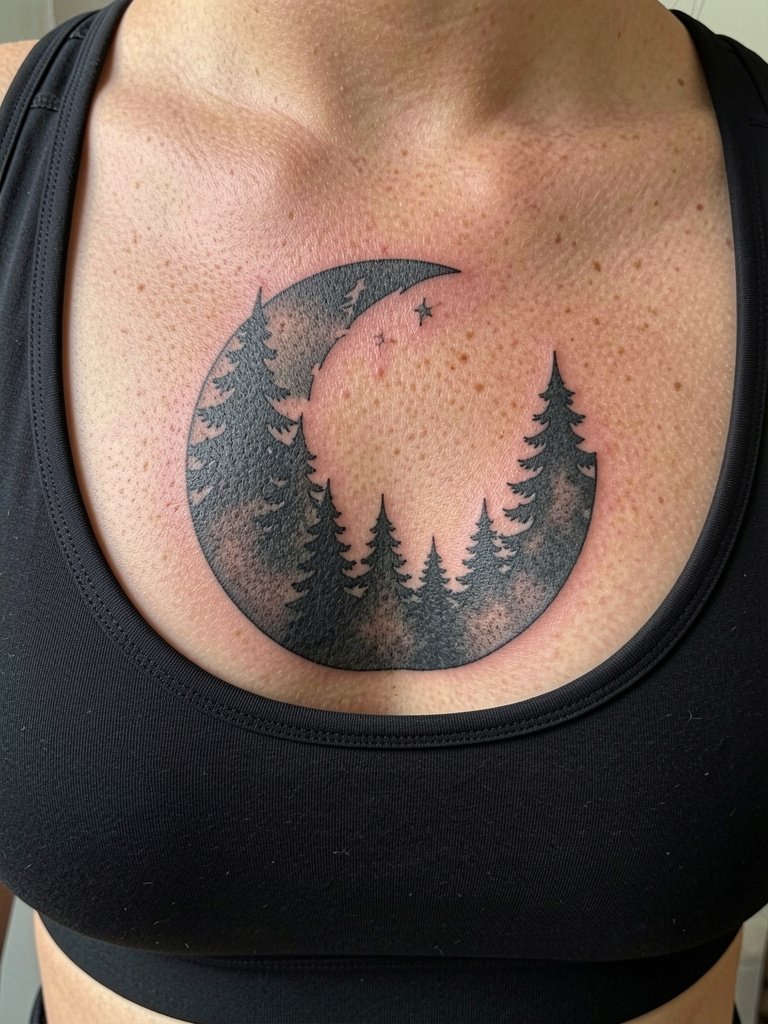
Sternum negative-space work reads bold because it uses the body as contrast. This is a good choice if you want central chest presence without tiny filigree. For this placement, name exact arc radius and depth of surrounding fill so the positive and negative shapes stay legible as the skin settles. Pain is higher, and you should plan for breaks during a single longer session. Artists split on fine-line sternum pieces. One camp argues skin movement and creasing under the breast will blur thin detail within two years. The other camp says increased spacing and controlled depth allow fine-line to settle fine and they will point to healed photos as examples. Because this is a sensitive spot, confirm the studio has experience with sternum symmetry and compressed skin mapping.
9. Pine and Crescent Moon on Side Ribcage
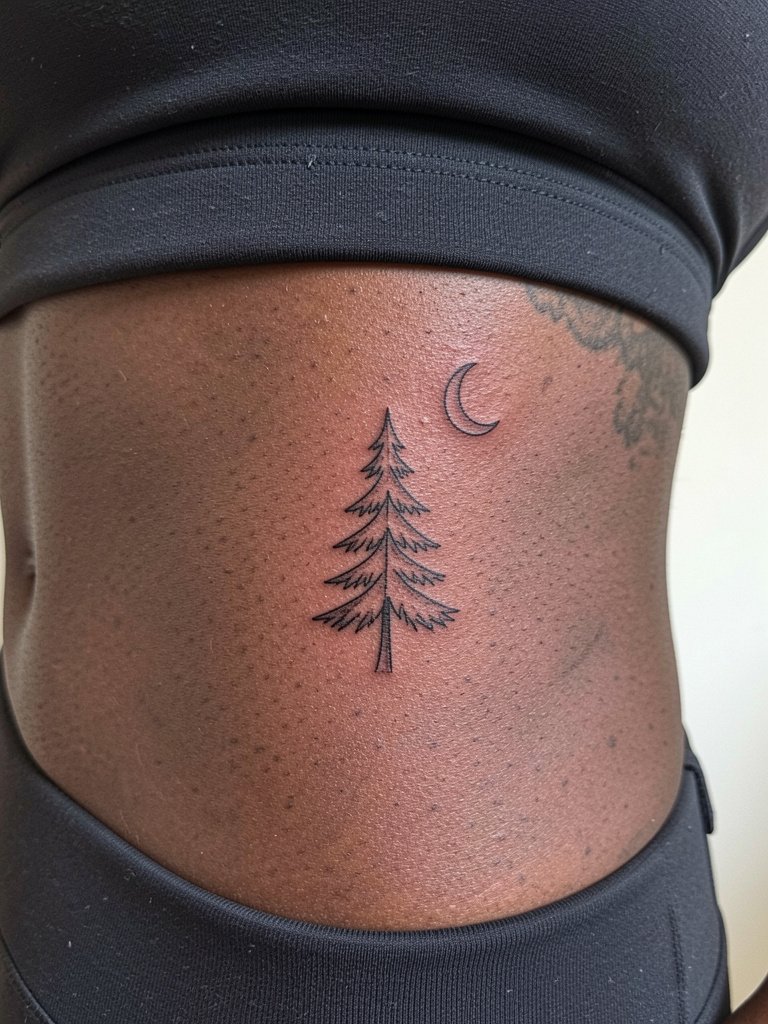
Ribcage pine motifs look intimate and photograph well when given breathing room. I recommend a slightly larger scale here than a wrist piece so the fine lines do not spread into one another. Discuss breathing room and needle depth explicitly, and plan for a two-part session if the artist suggests it. Pain is high on the ribs, expect several breaks and a session that can run two to three hours. There is an ongoing debate about fine line on ribs. One camp says the constant expansion and contraction of the area blurs thin lines within a couple of years. The other camp argues that with a bit more spacing and correct depth, the lines can remain crisp for much longer. If you choose ribs, factor in a likely touch-up window at year two.
10. Micro-Realism Pinecone on Thumb Side
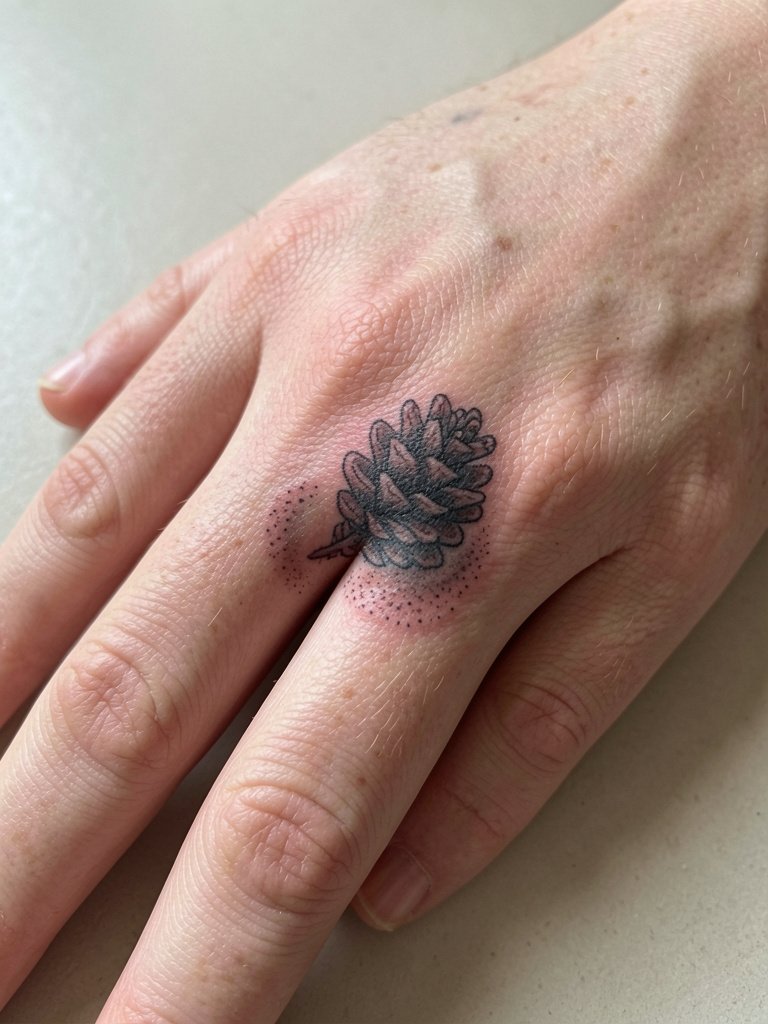
Finger-side micro realism is striking but high-maintenance. Choose this only if you accept that frequent touch-ups are common because hands take water and abrasion daily. Ask for slightly bolder internal contrast than the reference so small shadows stay visible after washing. Sessions are short but sharp, and healing glasslike scabs mean careful washing for the first week. A common mistake is scaling micro-realism too small; bump the size up by 20 percent from your reference if you want it to survive past twelve months. For accessorizing, a slim ring on the adjacent finger can frame the pinecone without rubbing the area.
11. Bonsai-Style Pine on Inner Bicep
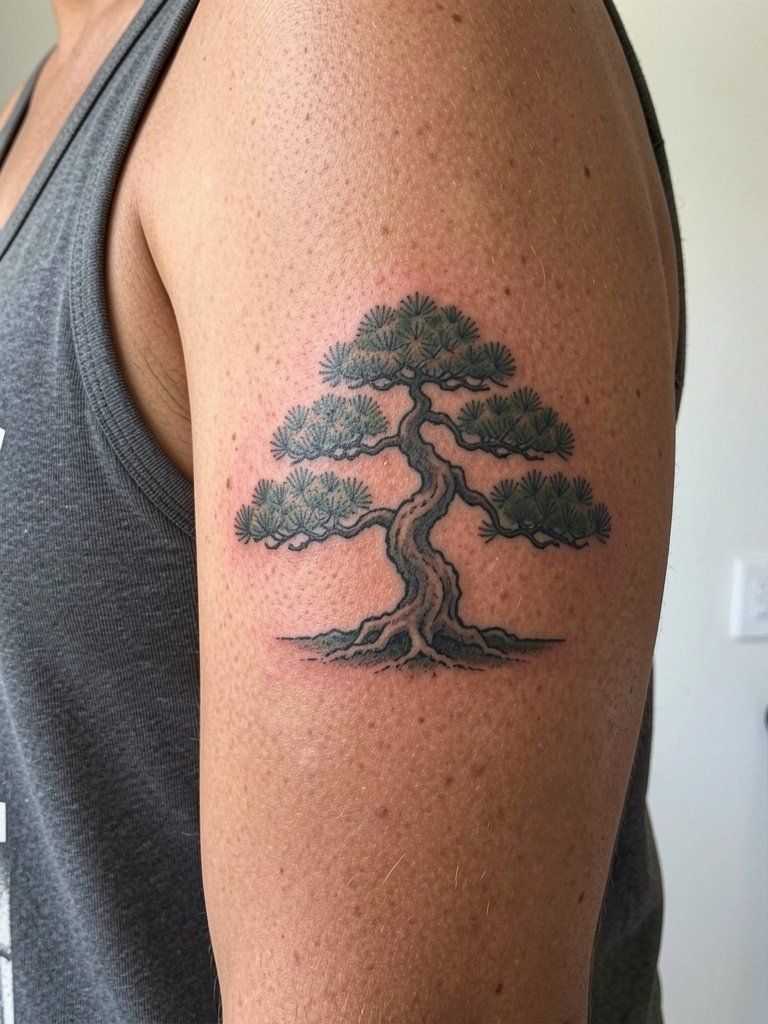
The inner bicep is a sheltered canvas for sculptural bonsai pines. I recommend this when you want a private piece that can be revealed selectively. Discuss density of foliage and trunk curvature with the artist so the tree follows the arm's natural line. Expect a moderate pain level and a session around ninety minutes. A mistake many make is shrinking the composition too small, which loses the bonsai character after healing. For session comfort, wear a loose tank so the artist can access the area easily, and consider pairing the reveal with a short-sleeve linen shirt for photos.
12. Pine with Bird Perched on Shoulder Blade
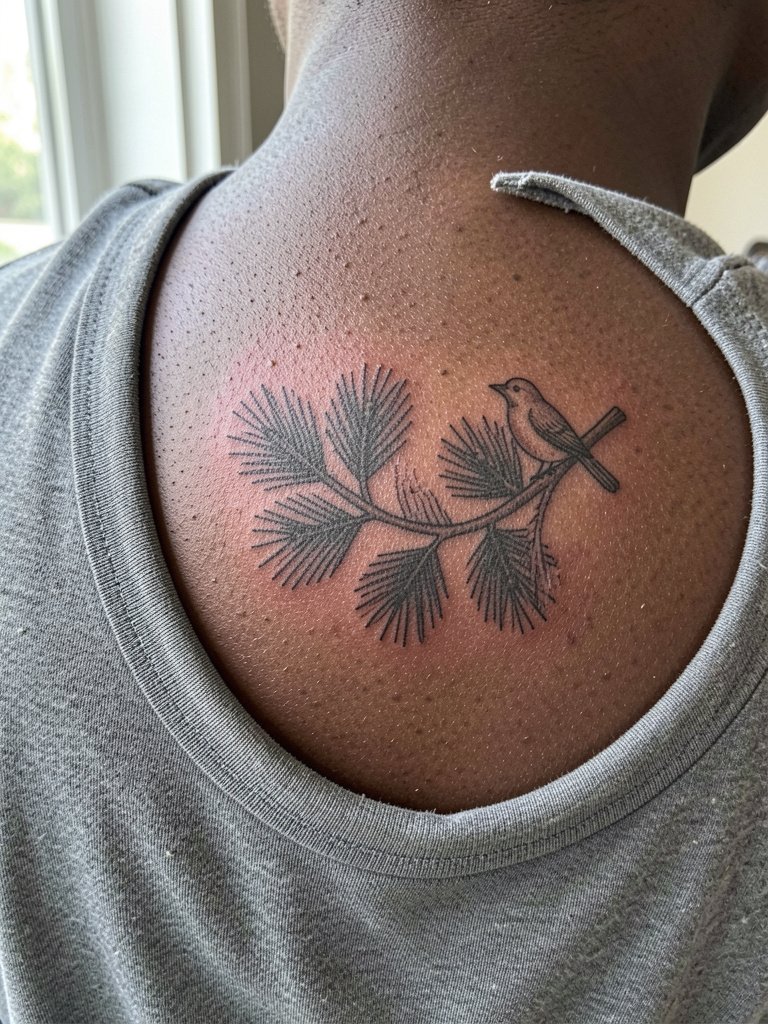
A shoulder blade pine with a bird adds narrative without cluttering the back. Choose this if you want a piece that looks balanced on the upper posterior torso. Ask the artist to orient the branch so it flows with scapular movement and to place the bird where negative space will remain crisp. Shoulder blade sessions are usually low to moderate pain and often finish in one sitting. People sometimes put the branch too close to the spine which leads to distortion when the back moves. For clothing, wide-neck tops frame the shoulder blade and let the composition read, pair with a flowy scoop-neck blouse.
13. Knotwork Pine Crest for Chest
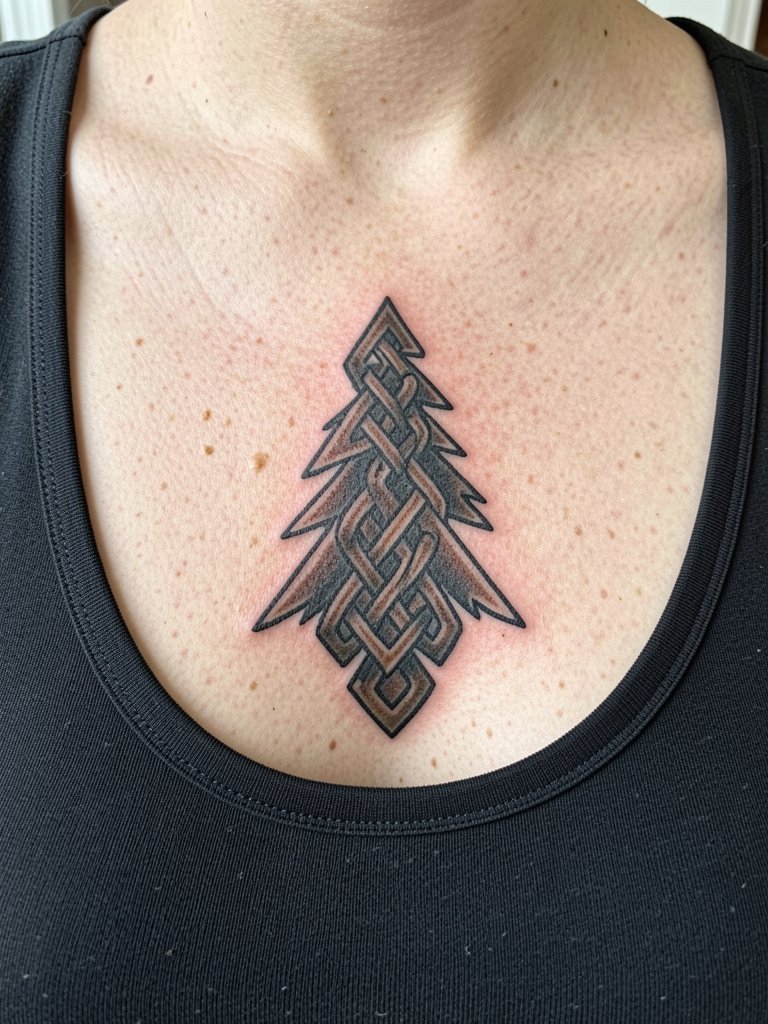
Knotwork pine crests borrow from historical visual languages and demand cultural sensitivity. One group argues these geometric motifs are a valid contemporary reinterpretation when the artist acknowledges the origin. Another group cautions that borrowing specific indigenous knot forms without permission or context can strip meaning and harm communities. If you pursue this look, request a consultation that covers the source imagery, and ask the artist to explain how their design references or departs from traditional patterns. Chest placement is medium pain and sessions vary with scale. For a show-off outfit, a low-cut shirt will keep the crest visible.
14. Micro-Graphic Pine Row Along Collar of Shirt
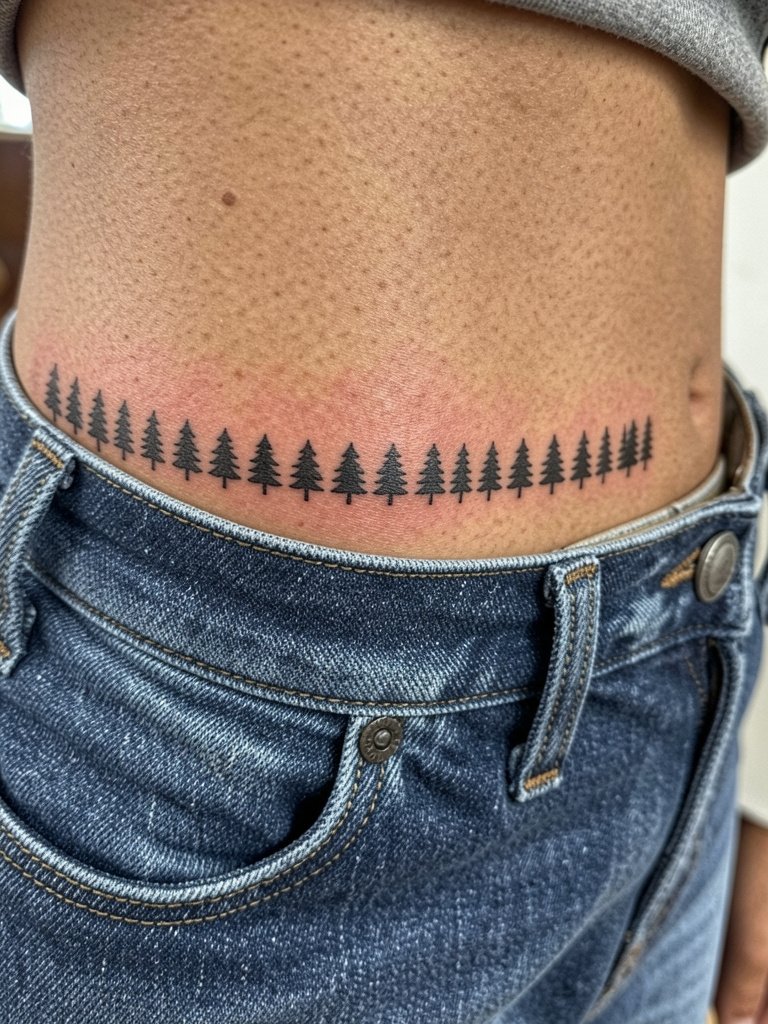
A micro-graphic row works on the hip as a subtly placed motif with low visibility day to day. Opt for slightly larger icons than you think you need because the hip moves with sitting and fabric contact. Specify exact spacing and alignment with your waistband so the row does not get obscured by clothing. Pain is low to moderate and sessions are brief. The most frequent error is sitting for too-small icons that need early touch-up. For outfits that highlight the hip, low-rise jeans with a cropped top frame the row; try pairing with low-rise fitted jeans.
15. Tiny Pine Sprig Behind the Ear
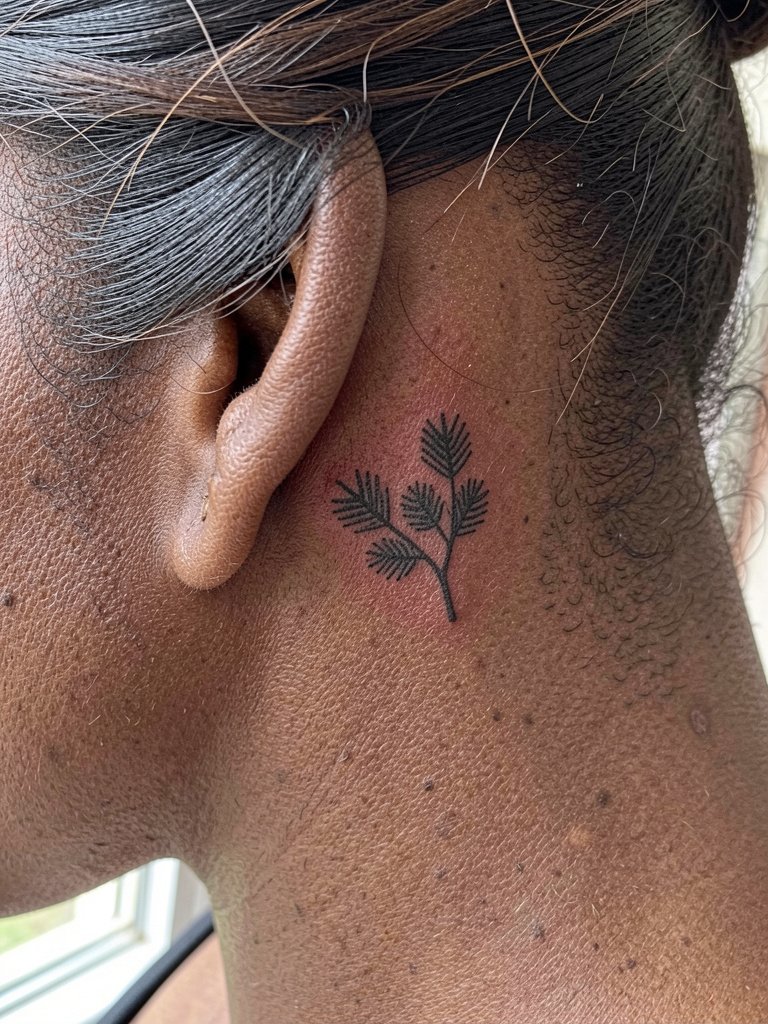
Behind-the-ear sprigs are discreet and photograph as a surprise detail. Choose this when you want minimal visibility and a quick session. Tell the artist exact placement relative to the hairline and request slightly heavier stem work for longevity because the skin here is thin. Sessions are short and may sting more than expected. A common mistake is assuming single-needle detail will last without touch-ups; plan to reassess at the one-year mark. Because this area is small and visible with short hair, consider styling that keeps hair up for a week after the session for cleaner healing.
Frequently Asked Questions
Q: How do pine tree designs age differently by style and placement?
A: Fine-line pines on thin skin like the wrist or ribs soften faster than bold silhouettes. Blackwork and slightly wider linework retain shape longer, and sheltered spots like the inner bicep age more predictably than high-friction zones such as ankles.
Q: Is there a placement where fine-line pine reliably holds up long term?
A: The inner forearm and upper back tend to be more forgiving because the skin is steadier and less rubbed daily. Ask for slightly heavier single-needle weight and planned negative space so the piece keeps contrast after two to five years.
Q: Where should I look for healed examples without naming specific artists?
A: Search platform tags on Instagram and TikTok like #PineTattooHealed, #FineLineForest, and #BlackworkTrees while filtering by location to find nearby portfolios. Reddit tattoo communities and curated portfolio sites give threaded galleries that include healed shots across skin tones.
Q: Are there special studio requirements for sensitive placements like sternum or ribs?
A: Yes, pick a studio with clear lighting and experience with symmetry across the sternum and compressed skin mapping for ribs. Confirm they offer breaks and have a chair setup that reduces pressure on your back during long sessions.
Q: How can I style a pine tattoo for photos without risking early wear?
A: Lightweight tops that do not rub the tattoo are best in the first two weeks, and for long-term display choose garments that frame rather than compress the design. For example, a scoop-neck or open-back piece shows off collarbone and upper back work and layers well with a delicate pendant necklace if you want subtle framing.
Q: Do I need permission to use cultural knotwork or traditional motifs in a pine design?
A: If the design explicitly borrows from a living cultural tradition, it is responsible to research and seek context. One position supports respectful reinterpretation when credit and context are given. The opposing position insists on avoiding specific sacred motifs unless you have direct guidance or permission from the community.
Q: How often should I expect touch-ups for small pine elements like finger or ankle icons?
A: Fingers and ankles typically need touch-ups within one to two years because of daily abrasion and washing. Plan for a short follow-up session rather than a full redo, and keep expectations realistic about ongoing maintenance.
