
The neck will show a tattoo every time you look up in a mirror or leave the collar open. Some designs hold crisp linework for years, while others soften into a smudge if you pick the wrong style or placement. Read these options with an eye on how they heal, what they need from your wardrobe, and what to tell the artist about spacing so the piece still reads at year two.
1. Fine Line Spider on Nape
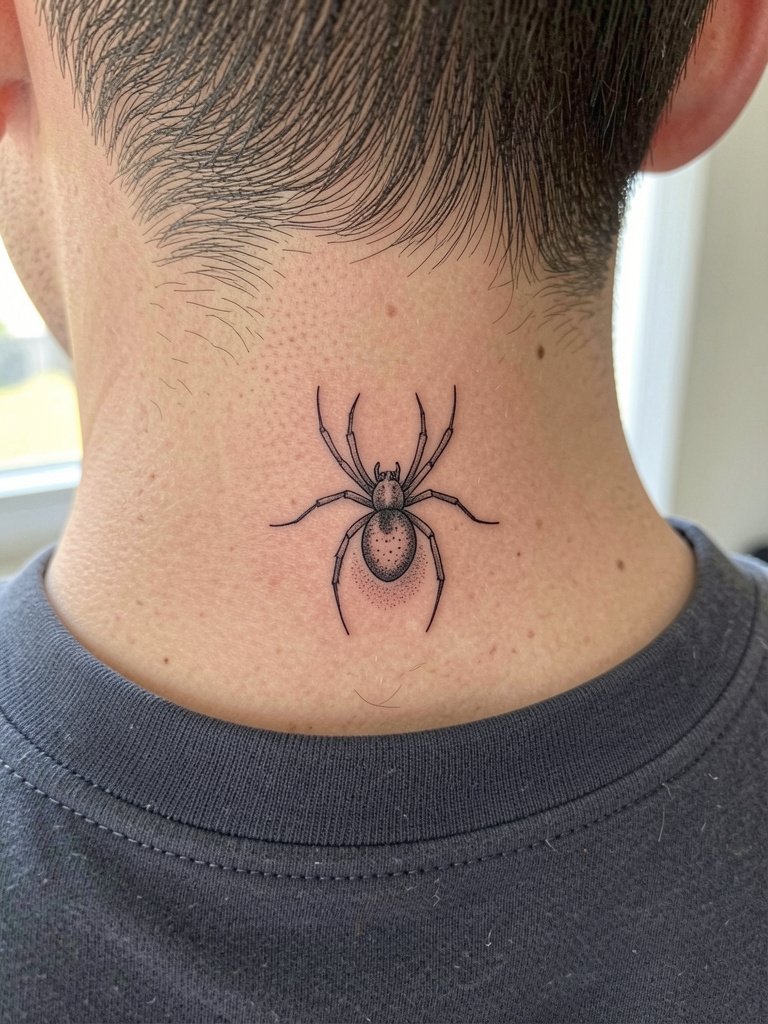
Placement: nape. Pain: low to moderate. Session time: 30–60 minutes. Best for someone who wants a small, concealable mark that peeks out with short collars. The linework should be drawn slightly heavier than pin-thin flash to allow the legs to keep separation as the skin moves. Common mistake: requesting single-needle spider legs at 1 mm spacing, which often blurs into a gray mass by year two. Controversy about fine line on the neck splits into two camps. One camp says thin lines on neck skin blur within 1–2 years because the area is mobile and the ink spreads. The other camp says fine line can hold if the artist spaces lines wider, adjusts needle depth, and favors nape over throat for stability. Note: nape work still needs an artist experienced with hairline placement and sitting posture.
2. Geometric Triangles Down the Throat
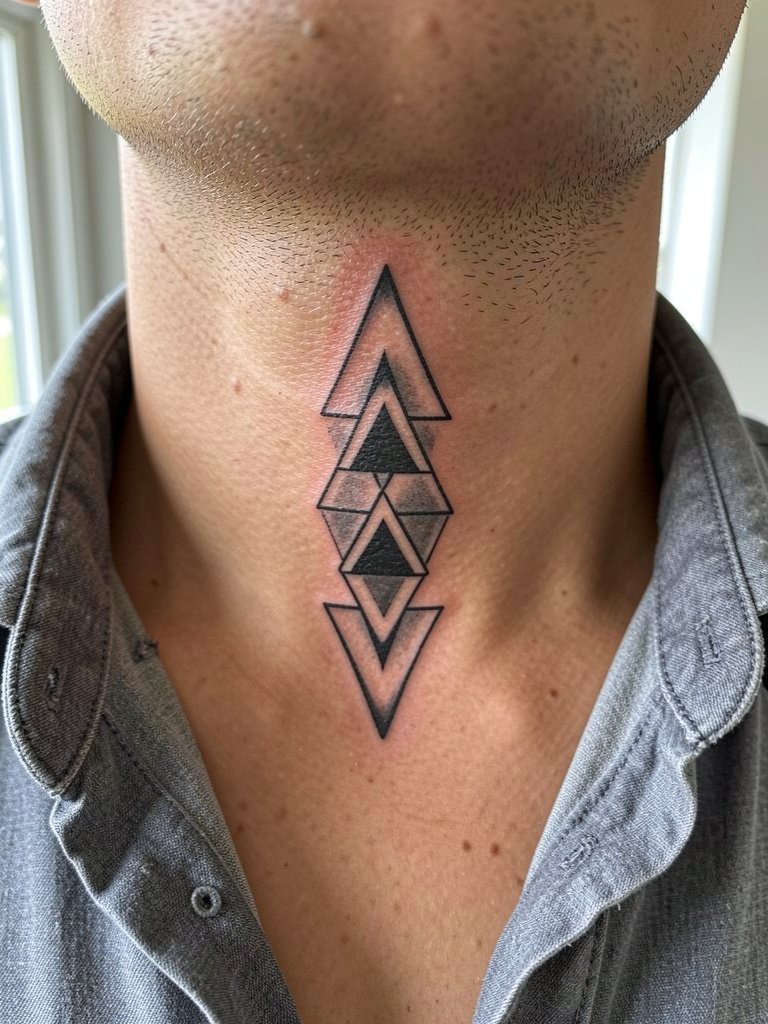
Placement: front throat. Pain: high. Session time: 60–90 minutes. This vertical geometric stack works when shapes have breathing room. Tell your artist the exact height you want and that you prefer slightly thicker primary outlines to resist early spreading. A frequent aging issue is packing several tiny triangles too close together, which causes merging where movement is greatest. Artists disagree on numbing cream for throat work. One group recommends topical numbing to get through longer throat sessions cleanly and with less flinching. Another group warns that numbing creams can change skin texture and sometimes lead to patchy healing or refusal from certain shops. Note: throat pieces require an artist comfortable with working on high-movement anatomy and with client breathing control.
3. Skull Facing Front on Throat
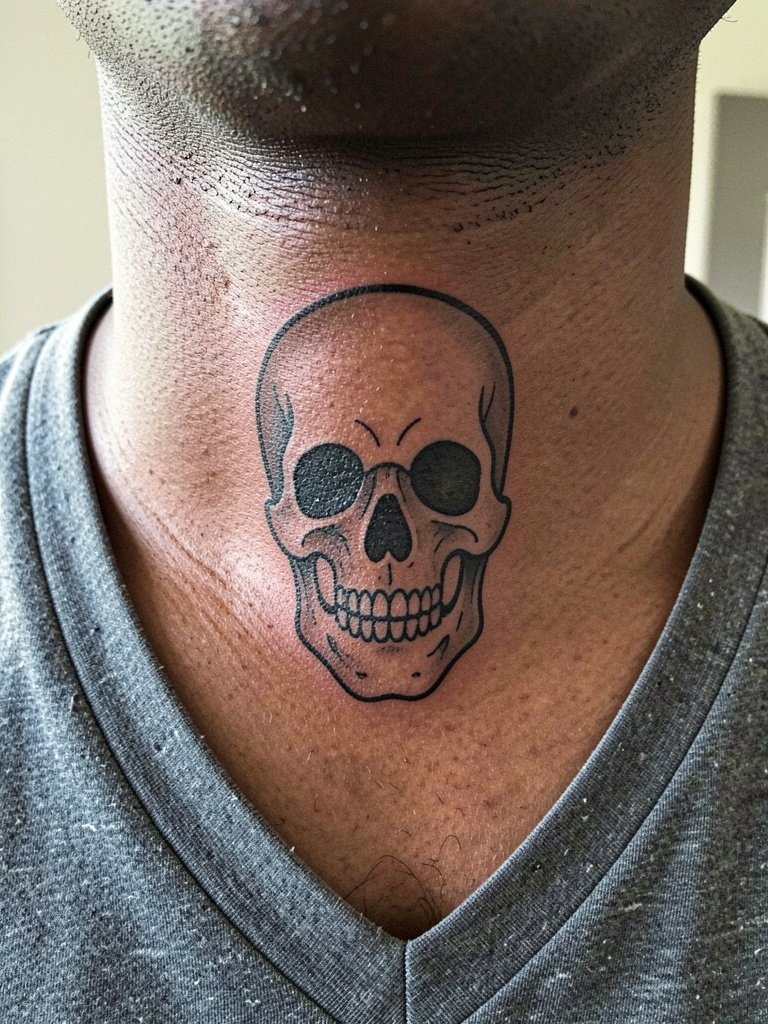
Placement: front throat. Pain: high. Session time: 60–120 minutes depending on size. Who it fits: someone ready for visible work that reads from a distance. Choose bold outlines and saturated black for the brow and jaw to keep contrast as the tattoo ages. A common mistake is asking for tiny interior details inside eye sockets that vanish after healing. Longevity note: black and grey fills retain shape better than wash-style shading on the throat. Note: front throat work benefits from staggered sessions so the artist can focus on linework first, then shading.
4. Lotus Flower Framing the Neck
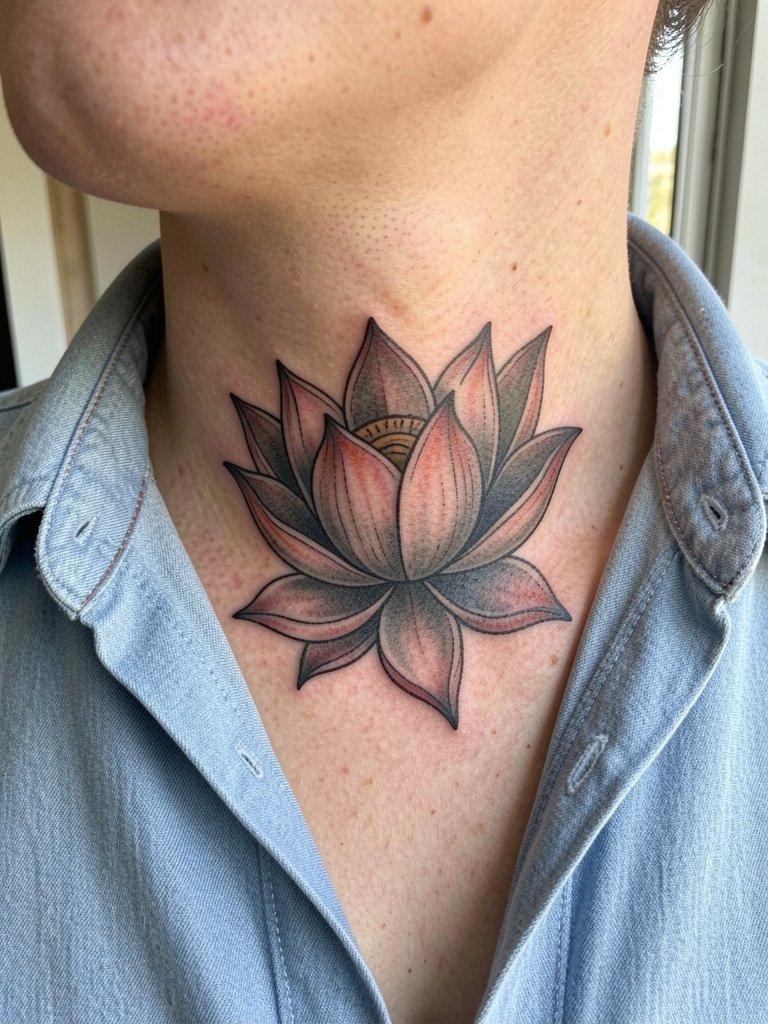
Placement: front to lateral neck. Pain: moderate to high. Session time: 90–150 minutes across 1–2 sessions. This silhouette looks best when petals are spaced so that edges rarely touch in motion. What to discuss with your artist: petal scale and how the design tapers near the jaw so it does not bunch when you turn your head. Aging tip: avoid micro-dot color fills along petal ridges if you want steadier saturation at year three. Styling: pairs cleanly with open-collar shirts or minimal pendant necklaces that sit just below the design. Try this open collar shirt to show the piece without covering it. Note: framing the neck requires planning for how the piece moves with swallowing and neck extension.
5. Bird Silhouette Along Side Neck
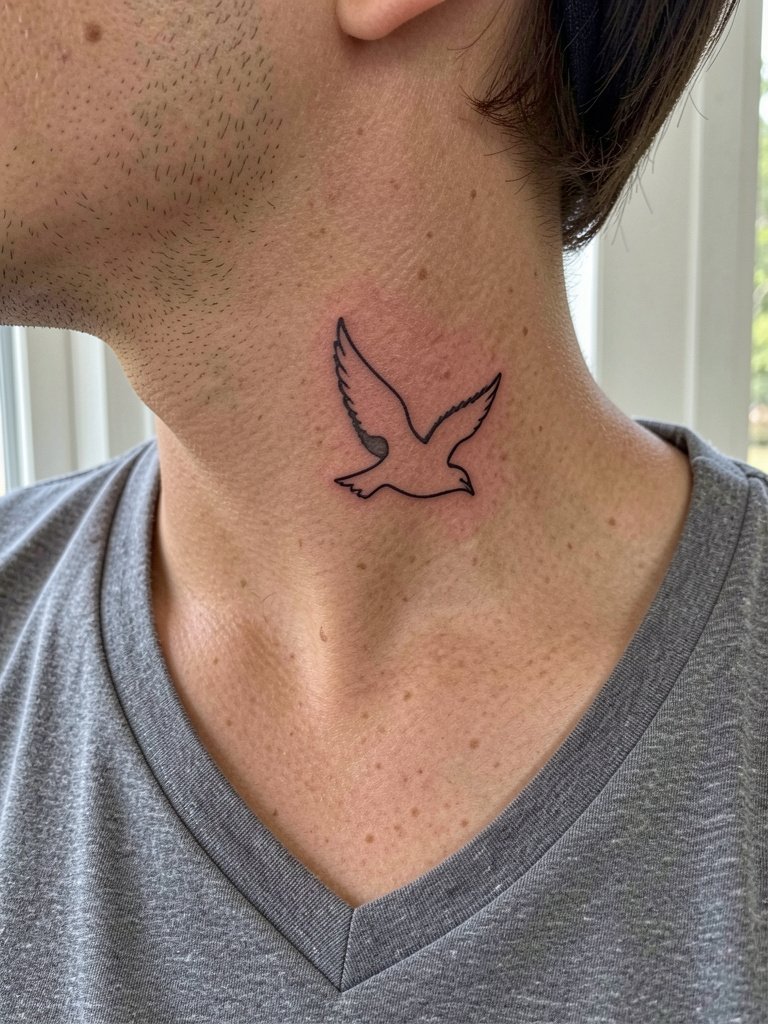
Placement: lateral neck. Pain: moderate. Session time: 30–60 minutes. Best for those who want a visible side mark without heavy commitment. The main mistake is scaling the silhouette too tiny, which reduces visual impact and speeds fading into a faint line. Touch-up timeline: expect a one-year check and possible refresh at 2–3 years for thin edges. Styling: wear V-neck tees or open collars to frame the silhouette. Note: side neck work sits on softer tissue so artists often sketch movement tests while you turn your head.
6. Wings Flanking the Throat
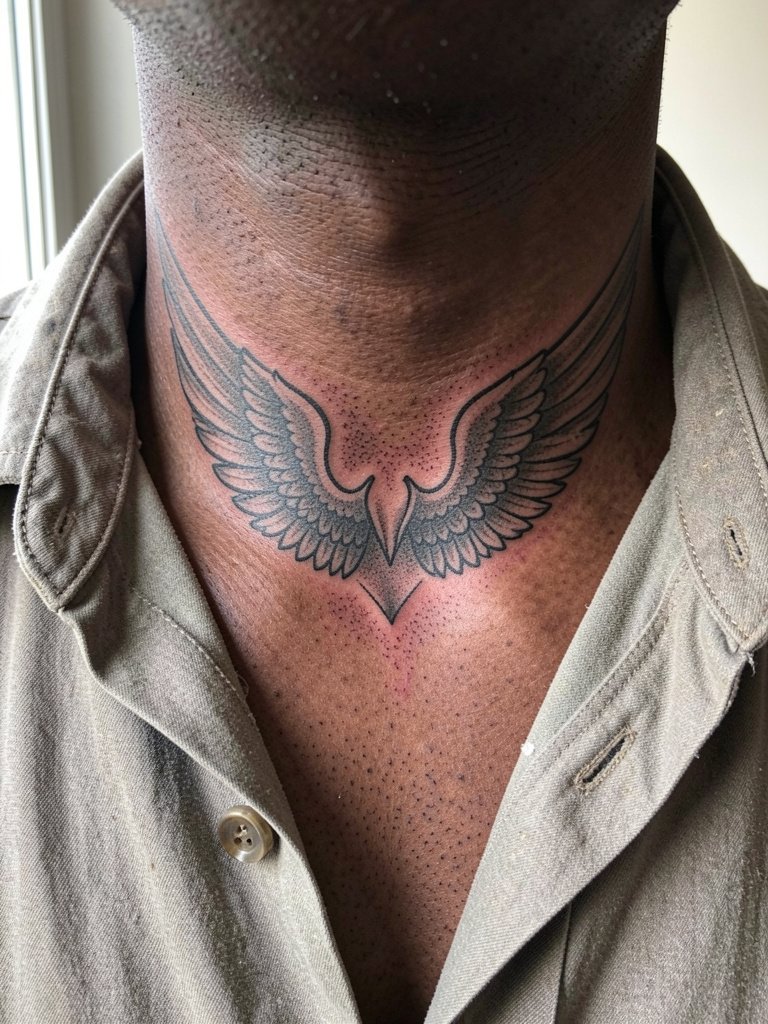
Placement: front throat extending laterally. Pain: high. Session time: 90–180 minutes, may require two sessions. Who it suits: people wanting balanced symmetry across the throat. Common error: asking for ultra-fine feather tips that disappear when the skin stretches. Ask for slightly bolder primary feather spines so the wings retain their outline through healing. Styling: looks striking with open-collar layered shirts and minimal pendant necklaces worn below the lower feather tips. For showing off, try an open jacket. Note: symmetric throat pieces demand precise stencil placement and a steady breathing rhythm from the client.
Pack Smart
The first six neck designs above cover small nape marks and visible throat pieces, so pack a few items that smooth session day and the initial healing window.
- Honey + Shea Aftercare Balm. A thinner indie balm many people report works on neck skin without clogging pores, helpful for nape and lateral neck spots.
- Japanese Tattoo Care Gel. Fast-drying, low-residue gel that users say avoids the heavy film that can pill on the throat.
- Australian Neck-Safe Balm. Marketed for thin, mobile areas, it stays put on the collar and nape without rubbing off on collars.
- Organic Calendula Tattoo Oil. Use a drop or two for dry spots rather than thick ointment to avoid clogged pores on the neck.
- Hustle Butter. A widely used balm many people switch to after the initial occlusive days to keep neck ink hydrated without heavy residue.
7. Roman Numerals on Back of Neck
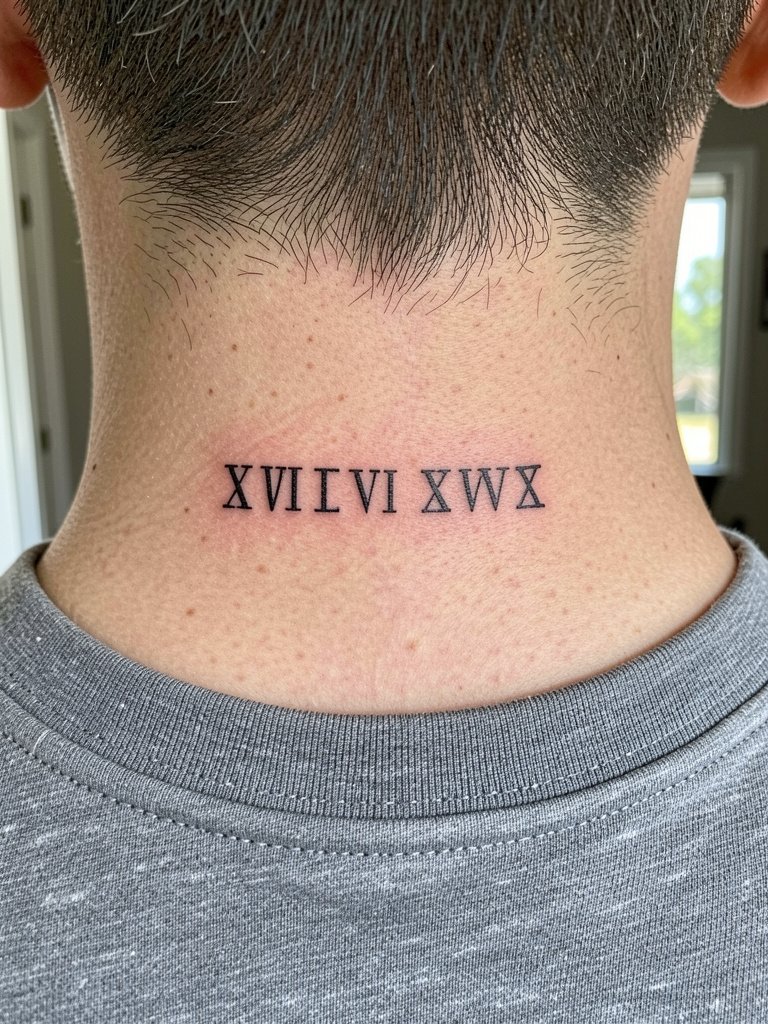
Placement: nape. Pain: low. Session time: 20–45 minutes. Best for first-timers who want something discreet that hides under collars. Avoid micro-caps and ultra-condensed numerals. A common mistake is requesting script-style numerals at 0.5 inches tall which lose clarity when healed. Talk specifics: request numeral height in millimeters so the artist can show you how it reads at actual size. Styling: crew-neck tees and layered thin chains frame nape numerals nicely. Try a crew neck t-shirt for session day. Note: the artist will check your hairline and natural folds to center the numerals correctly.
8. Mandala Centered on Throat
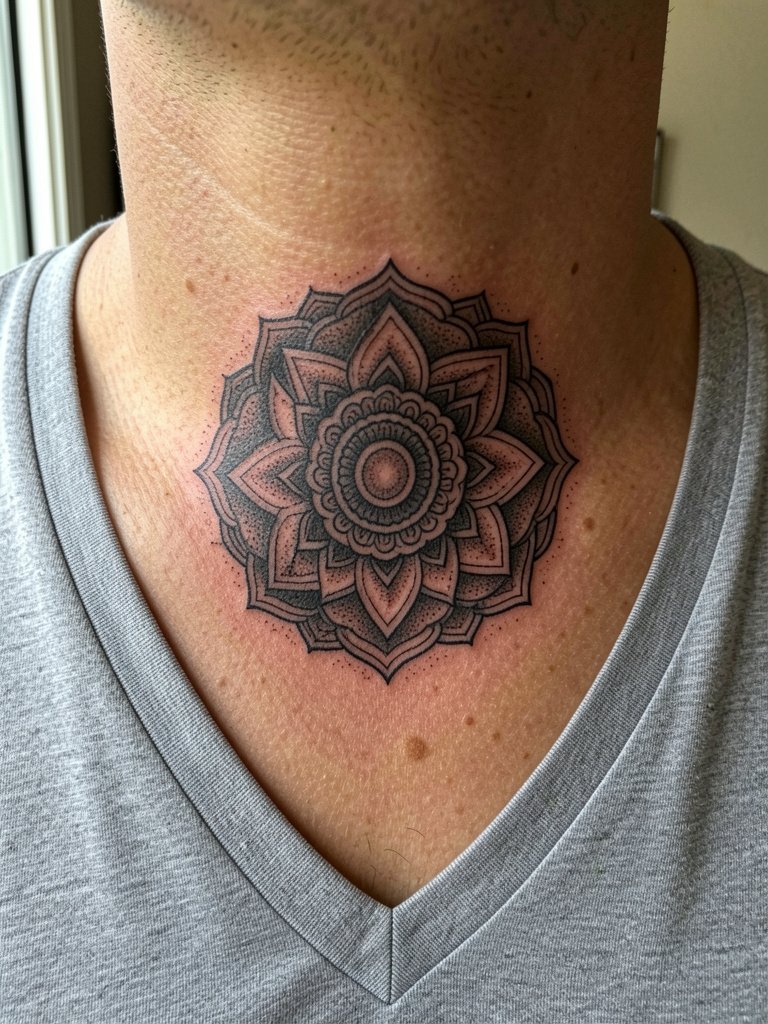
Placement: front throat. Pain: high. Session time: 90–180 minutes split into passes. The main technical call is spacing between rings. Too-tight mandala rings blur into each other with movement. Ask for more negative space between key rings and for stipple shading rather than wash shading for longer readability. Styling: mandalas pop with unbuttoned shirts and minimal pendants that sit below the piece. Consider an open collar shirt when you want it visible. Note: throat-centered mandalas require precise centering and symmetry checks while you tilt the head.
9. Rose on Center of Throat (Traditional)
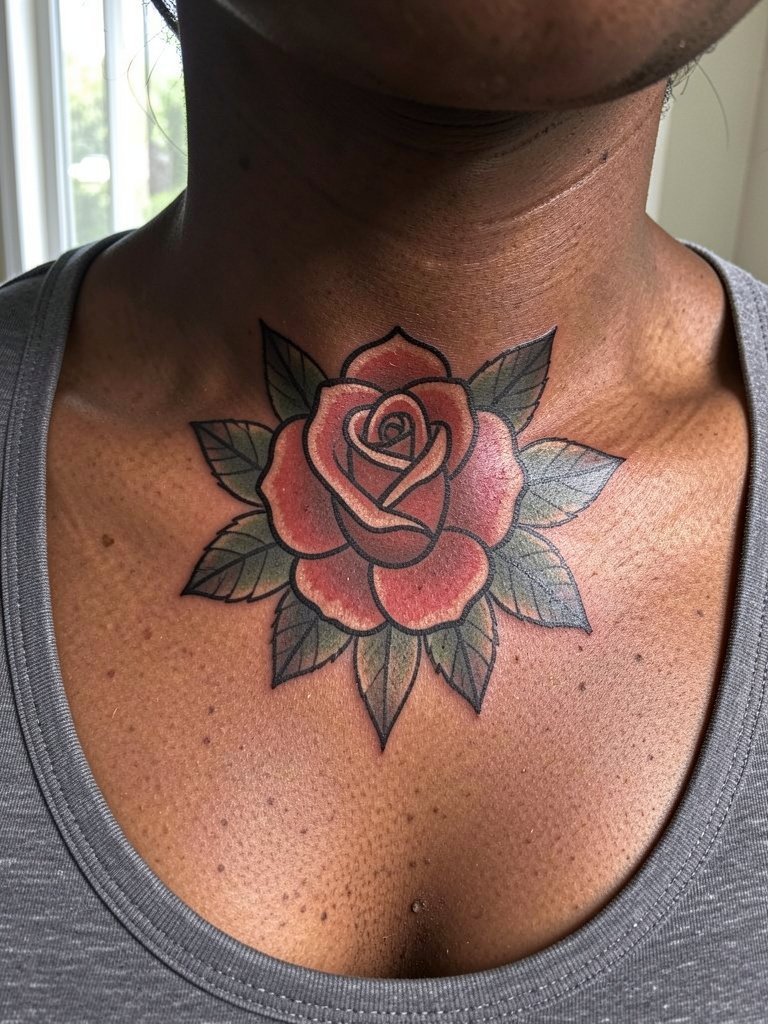
Placement: front throat. Pain: high. Session time: 60–120 minutes. Classic traditional palettes age predictably because the bold outlines and saturated fills resist early blurring. A common error is asking for tiny petal linework inside the bloom, which loses crispness. Touch-up plan: expect a check at 6–12 months. Styling: open-collar shirts and simple chains frame the rose without covering it. Try a minimal pendant necklace to sit just below the bloom. Note: color saturation on darker skin benefits from slightly larger flat color areas for legibility.
10. Wolf Silhouette on Side or Back Neck
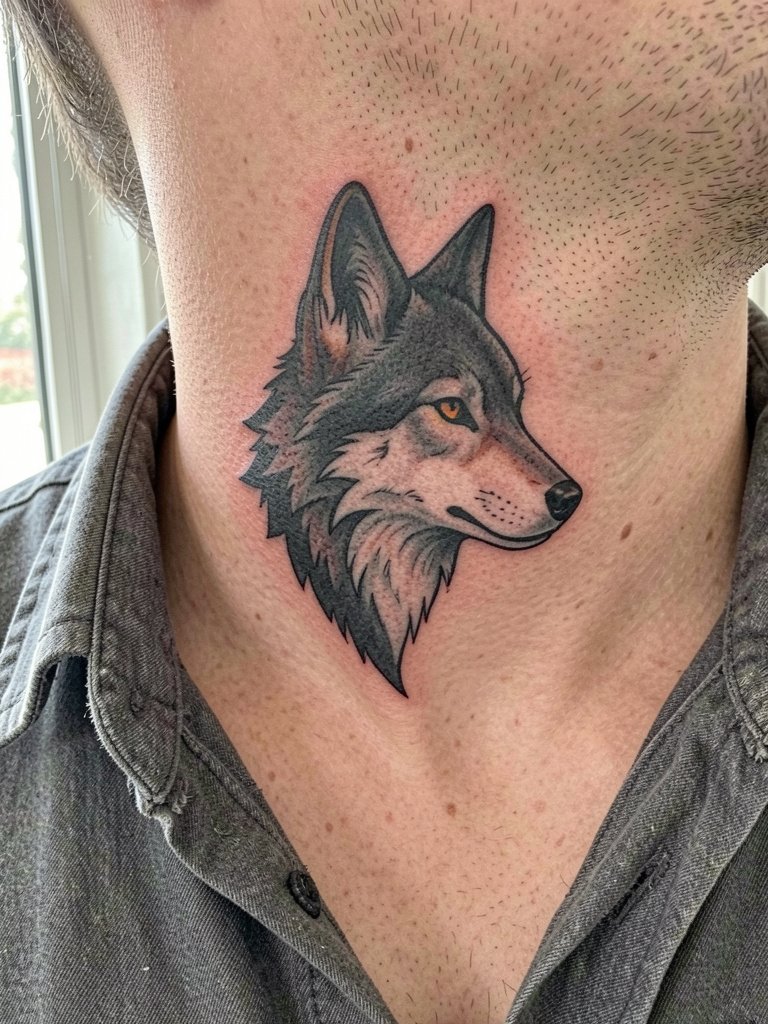
Placement: lateral neck or nape. Pain: moderate to high. Session time: 60–120 minutes depending on detail. The strong silhouette approach keeps the image readable as edges blur slightly with time. Mistake to avoid: asking for tiny fur detail along jawline where skin movement will soften texture. Styling: open collars and V-neck shirts help the jawline composition stand out. Try a v-neck t-shirt to show the piece. Note: side-neck wolves may interact with jaw movement so plan how the snout sits when you open your mouth.
11. Blackwork Coverage on Entire Neck
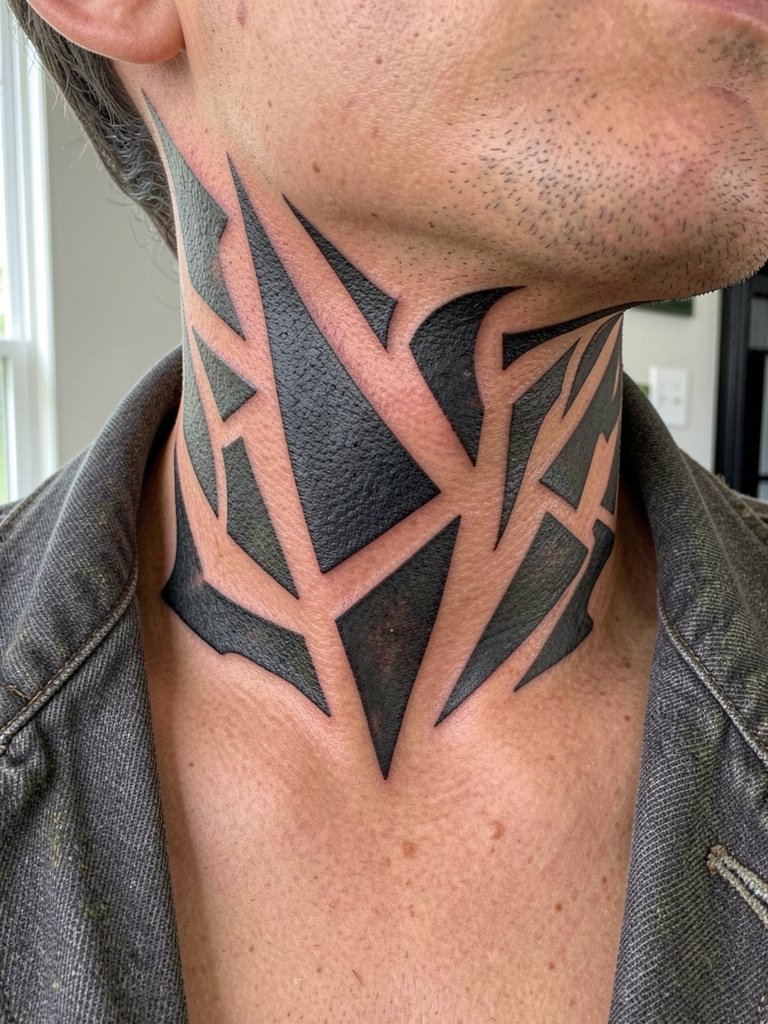
Placement: entire neck. Pain: high and cumulative. Session time: multiple long sessions over weeks. Who it fits: someone committed to heavy coverage and prepared for long chair time and multiple touch sessions. Common mistake: attempting full-saturation in one marathon session which increases scabbing and uneven saturation. Planning tip: stage blackwork into blocks and allow full healing between passes. Styling: full-neck coverage pairs with open collars and layered jackets. For showing off, try an open jacket. Note: full neck blackwork is a multi-appointment commitment and may require specialized shading techniques to get even saturation.
12. Patternwork on Back of Neck
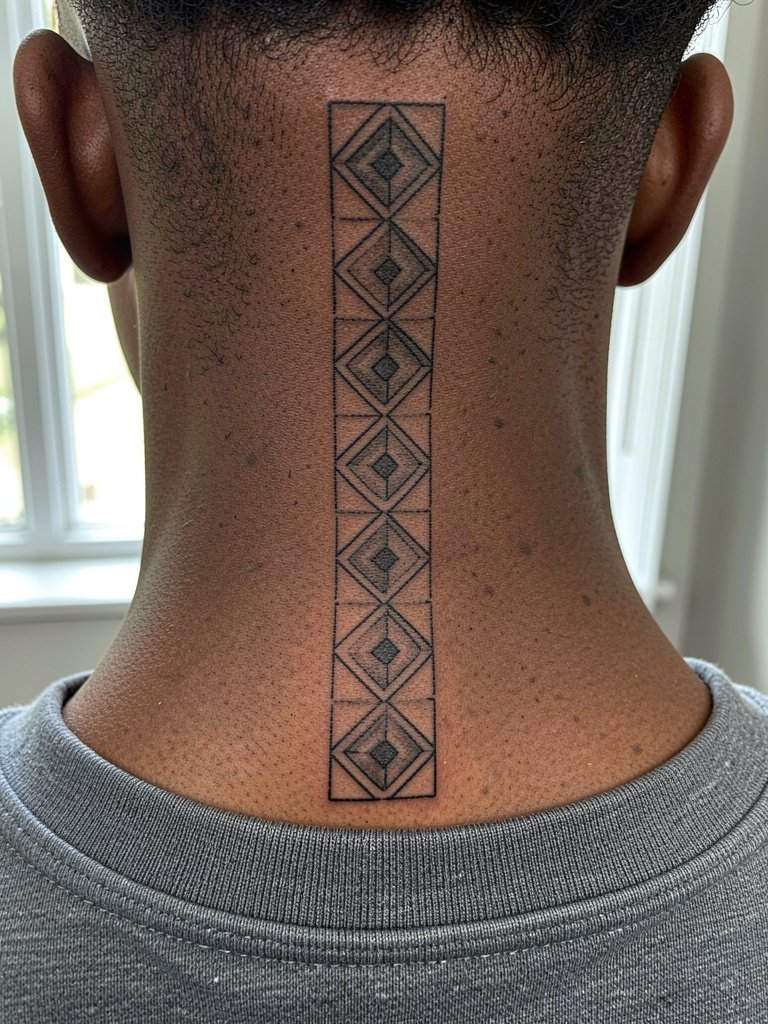
Placement: nape along spine. Pain: low to moderate. Session time: 45–90 minutes. Patternwork needs scale. A common error is making the tiles too small for the skin texture, which means lines bleed and the pattern loses crispness. Ask the artist to stencil a single tile at full scale on your skin so you can see spacing in motion. Styling: pair with crew-neck shirts and layered thin chains to frame the pattern. Consider a thin layered chain as a complementary accessory. Note: centered spine patterns must avoid mismatch at the hairline where curvature changes.
13. Minimalist Lucky Number on Nape
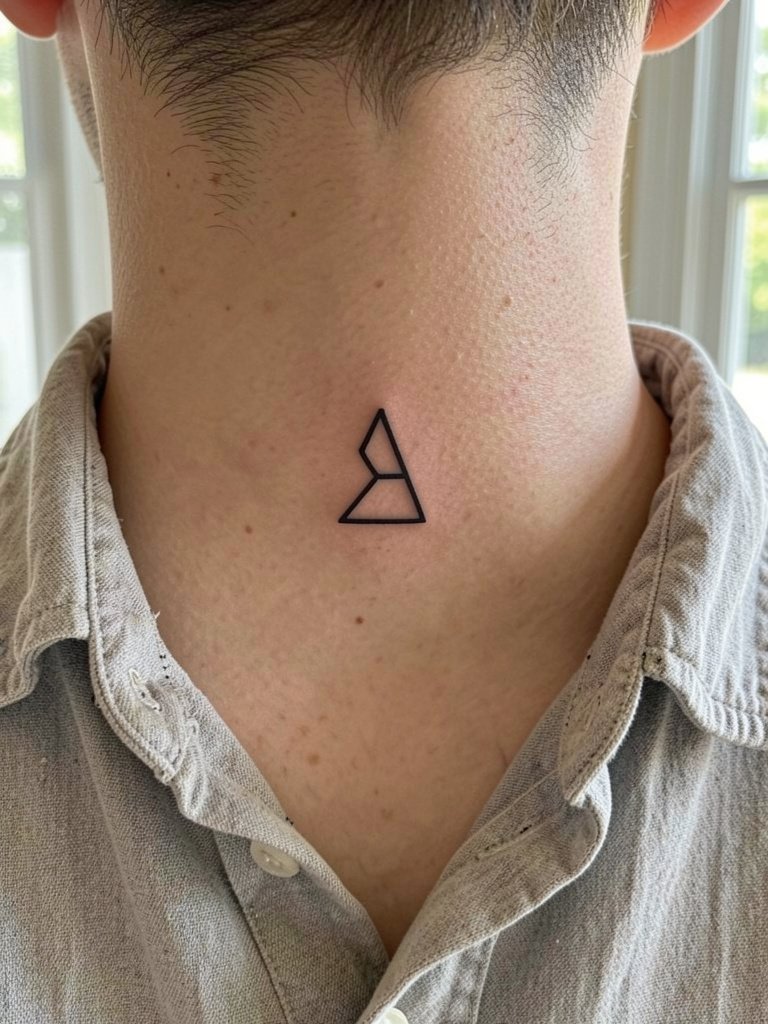
Placement: nape. Pain: low. Session time: 15–30 minutes. Who it fits: first-timers who need a low-visibility option. The fine-line numeral works if the stroke weight is set to a size that will survive neck movement. Controversy about fine-line durability appears here too. One side says single-needle numerals blur fast on neck skin because of constant motion and thin tissue. The other side argues that with slightly larger stroke width and careful site choice at the nape, small numerals can remain legible for years. Styling: crew-neck shirts and short haircuts keep the mark discreet or reveal it when you want. Note: nape numerals should be previewed in a mirror with your normal collars on before tattooing.
14. Cross Centered on Throat
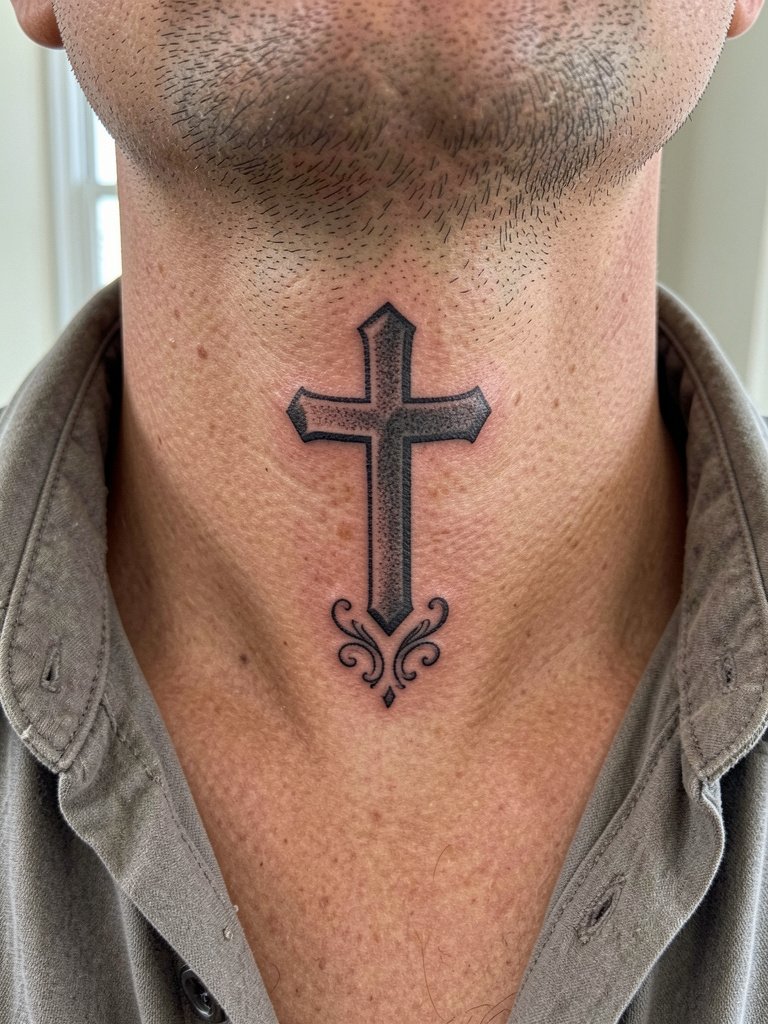
Placement: front throat. Pain: high. Session time: 30–60 minutes. Choose bold primary strokes rather than hairline crosses so the vertical reads at a glance. A typical mistake is asking for ornate filigree at a very small scale, which grays out with movement. Styling: a minimal pendant sits nicely below the lower arm of the cross when your shirt is unbuttoned. Try a minimal pendant necklace to pair. Note: throat-centered religious symbols can prompt conversations at workplaces so plan placement if concealability matters.
15. Full Side Neck Design, Jawline to Collarbone
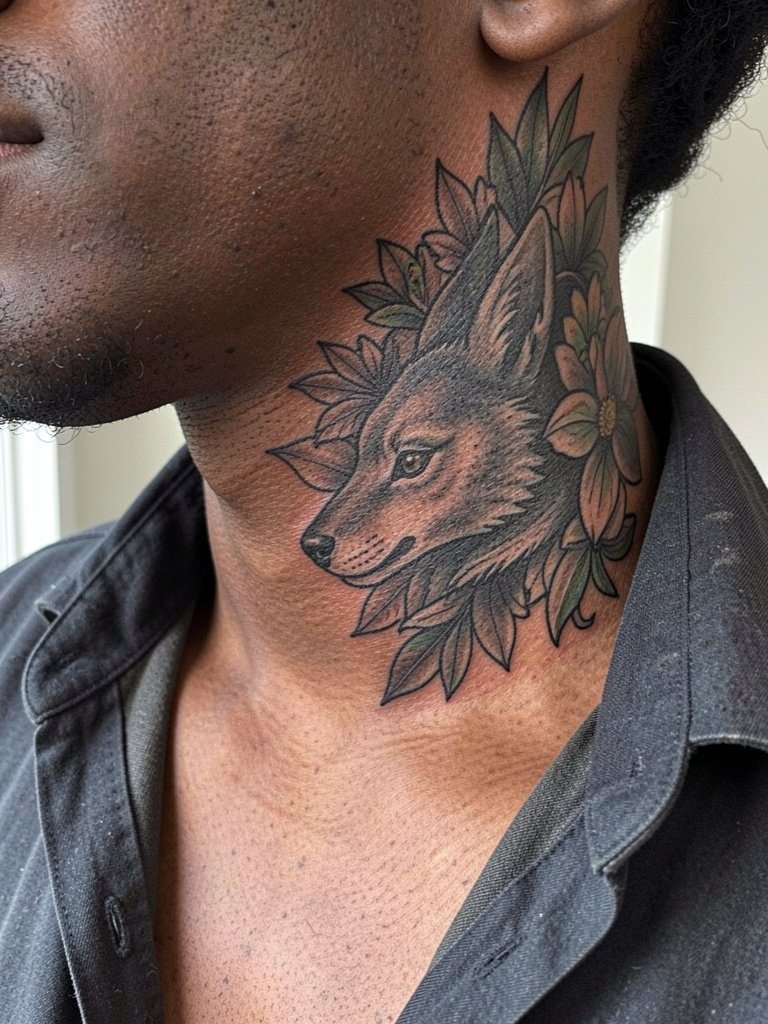
Placement: lateral neck from jawline to collarbone. Pain: high. Session time: 2–3 sessions. This is a statement piece that should be planned with negative spaces so the design breathes across the curve of the neck. A common mistake is compressing too many elements into one panel which reads cluttered once healed. Ask the artist to map the flow while you move your head so the jawline elements do not kink with every turn. Styling: when you want it visible, wear open-collar shirts and short-sleeve layers. For showing off, try an open collar shirt. Note: large lateral panels can affect dress shirts and button-up collars so consider wardrobe impact before you commit.
Frequently Asked Questions
Q: How long before a neck tattoo needs a touch-up?
A: Expect a touch-up window between 6 and 18 months depending on line weight and placement. Fine-line work on the throat often needs a refresh sooner than bold traditional pieces. Plan for at least one touch-up in the first two years for most neck placements.
Q: Which neck spots hurt least and which heal fastest?
A: The nape back-of-neck is typically the least painful and heals faster because the tissue is thicker and less mobile. The throat is the most painful and often takes longer to settle because of constant movement from swallowing and turning the head.
Q: Where can I find local artists who show healed neck portfolios without naming them directly?
A: Search hashtags like #necktattoo, #necktattoomen, and #finelinetattoo on Instagram and TikTok and then apply the location filter for your city. Use Tattoodo to search keywords like "neck geometric" or "neck blackwork" to see healed portfolio examples. Reddit threads on r/tattoos and r/tattooadvice also surface peer recommendations and healed shots across skin tones.
Q: What should I wear to the appointment for throat, lateral neck, or nape work?
A: For throat and lateral neck, wear an open-collar shirt or a loose button-down that the artist can fully open. For nape work wear a crew-neck or a top that can be removed without pulling over the head. Bringing loose, collarless clothing reduces friction on the fresh ink.
Q: Does color hold on neck tattoos or should I stick to black and grey?
A: Black and grey ages more predictably on the neck because saturation shows up better across skin tones and movement. Muted color accents can work if the artist uses larger flat fills instead of small peppered color dots. Expect more frequent touch-ups for vivid color on the throat.
Q: How do I protect a healed neck tattoo from fading?
A: Keep sunscreen on fully healed neck tattoos when you are in the sun. Covering up in peak daylight and using a dedicated tattoo SPF on exposed neck skin limits UV-driven fading. For daily wear, light collars or scarves in cooler months also help preserve saturation.
Q: Are there designs more likely to be accepted in conservative workplaces?
A: Small nape pieces and single numerals tend to be more concealable under collars and are therefore easier to keep private. Large front or side neck panels are highly visible and may create barriers in some industries, so test with small nape work first if concealability matters.
