
Neck tattoos look bold on feed but they age based on spacing, contrast, and how your wardrobe frames them. A design that reads crisp at year one can soften if the lines are too close or the ink sits too shallow. Read these ideas with notes on placement, pain, and what to bring to the consultation so the piece still reads clearly after a few seasons of sun and collars.
1. Fine-Needle Script at the Nape
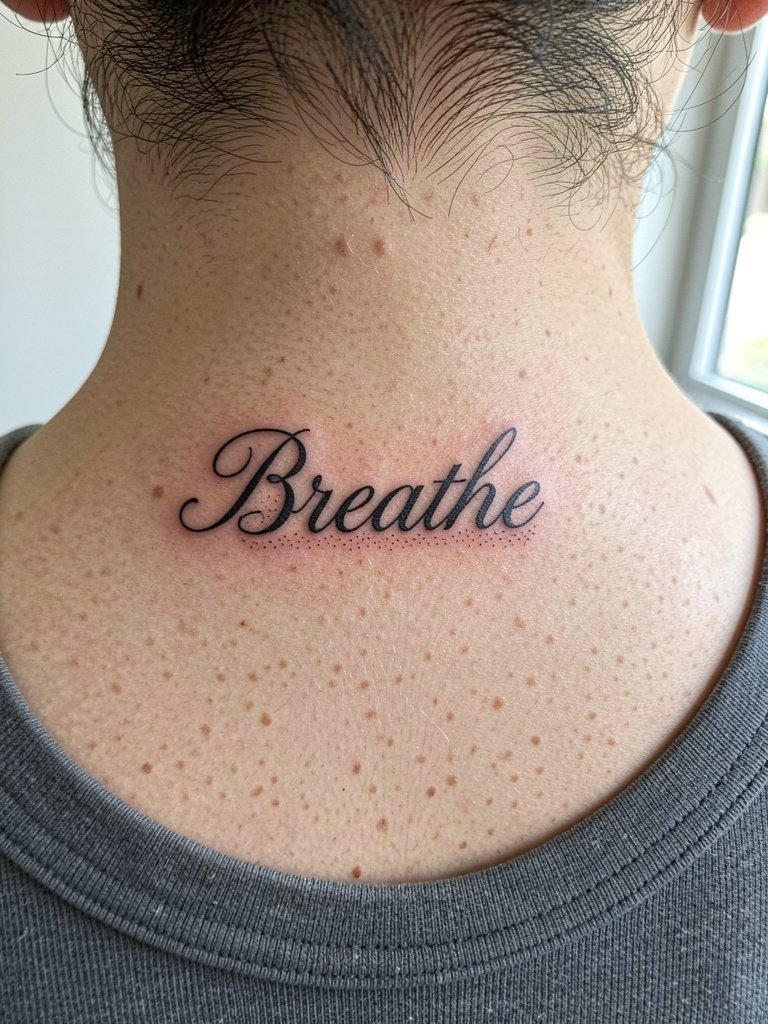
Fine single-needle scripts are elegant on the nape because hair can hide faded lines between touch-ups. Recommend this when you want subtlety rather than headline visibility. Specify slightly heavier line weight than your saved photo so the letters do not bleed into one another by year three. Expect a short session under an hour and a low pain score for the nape. Common mistake is asking for ultra-tiny lettering without reference for scale, which accelerates smudging. For the session, wear a top with an open back or scoop neck so the artist can access the area without you moving around.
2. Bold Blackwork Collar Rose
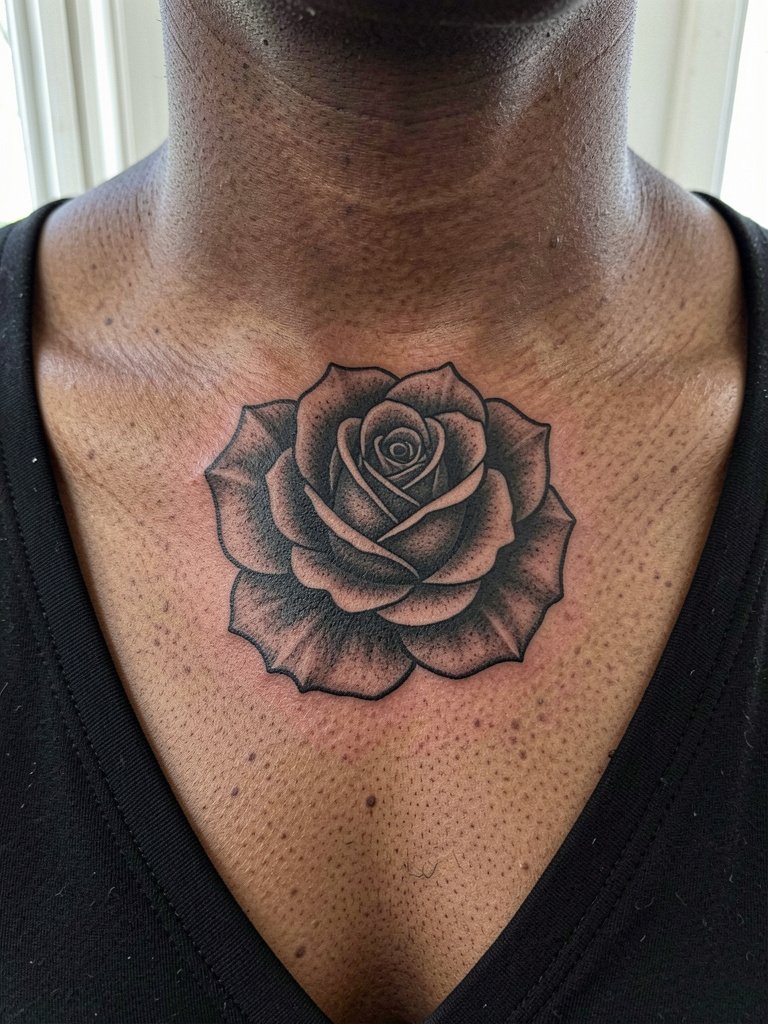
Blackwork ages well on the lower neck because saturation creates a strong silhouette as lines soften. I recommend this when you want an anchor piece that still reads from across a room. During consultation bring an 8-inch reference shot so the artist can scale spacing and plan saturation. Expect one longer session of two to three hours and a possible touch-up at six months for even saturation. Pair this with open-neck tops like a wide V-neck or boat-neck sweater and a simple pendant to frame the design, for evening wear try an open-back midi dress to show the upper neck and shoulders.
3. Minimal Crescent Behind the Ear
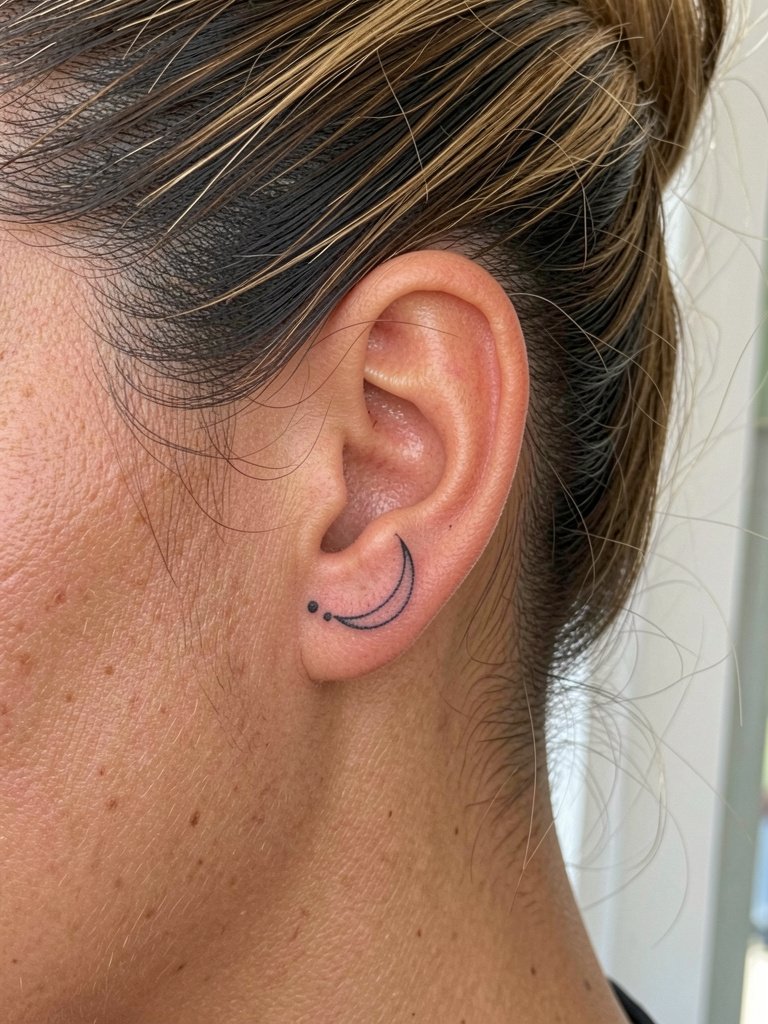
Behind-the-ear placements read delicate and stay discreet with a tiny crescent. Recommend this for people wanting an almost-hidden accent that shows when hair is up. The area is shallow so ask for compact, slightly bolder single lines to reduce early blurring. Session time is short and pain is low to moderate. The most common mistake is choosing a script or complex detail here. For styling, use simple hair clips or a high bun and pair with small hoop earrings, try a set of decorative hairpins to keep hair off the area during healing and when showing the piece.
4. Ornamental Filigree at the Center Nape
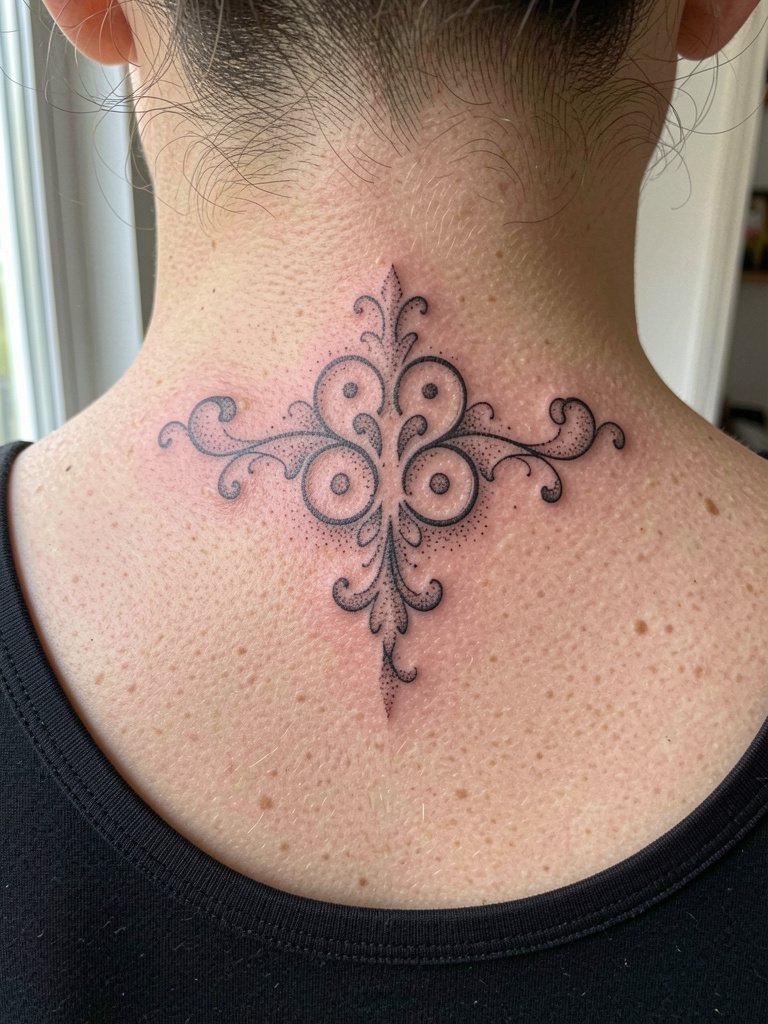
Center-nape filigree reads like a natural extension of a necklace when scaled correctly. I like this for people who want symmetry without the permanence of a metal accessory. Tell the artist the maximum width you want across the nape so the scrolls do not creep toward the hairline. Expect one to two hours and a light touch-up after a year. A common mistake is filling tiny gaps with dot shading that looks muddy later. When showing it off, wear open-back or off-shoulder tops and a thin choker for contrast, for evenings consider a simple velvet choker.
5. Vertical Word Along the Throat
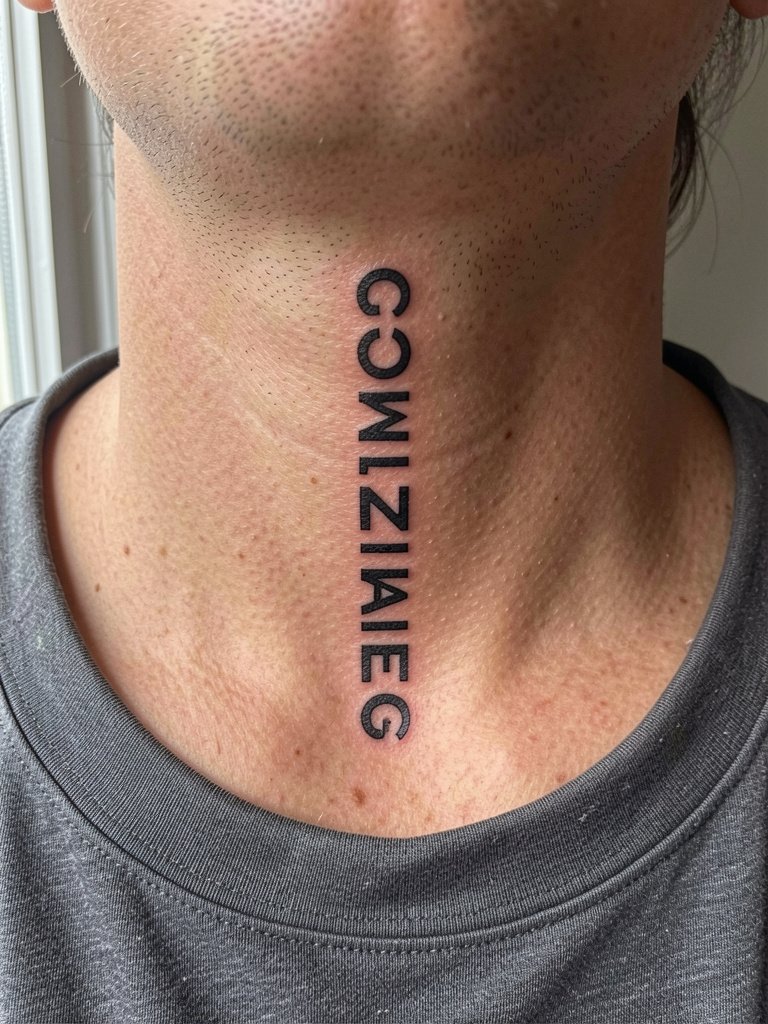
A vertical throat word is bold and demands planning because the skin there is highly visible and moves with swallowing. Choose a slightly condensed type that has room between letters so aging preserves legibility. Specify measured spacing and bring a mockup that shows the word at three sizes. Pain is higher for front-of-neck pieces and sessions range from one to two hours. The mistake I see is picking fine single-needle script for that site, which loses clarity quickly. Styling pairs well with deep V or scoop tops and layered thin chains to balance the vertical line.
6. Geometric Mandala Nape Disk
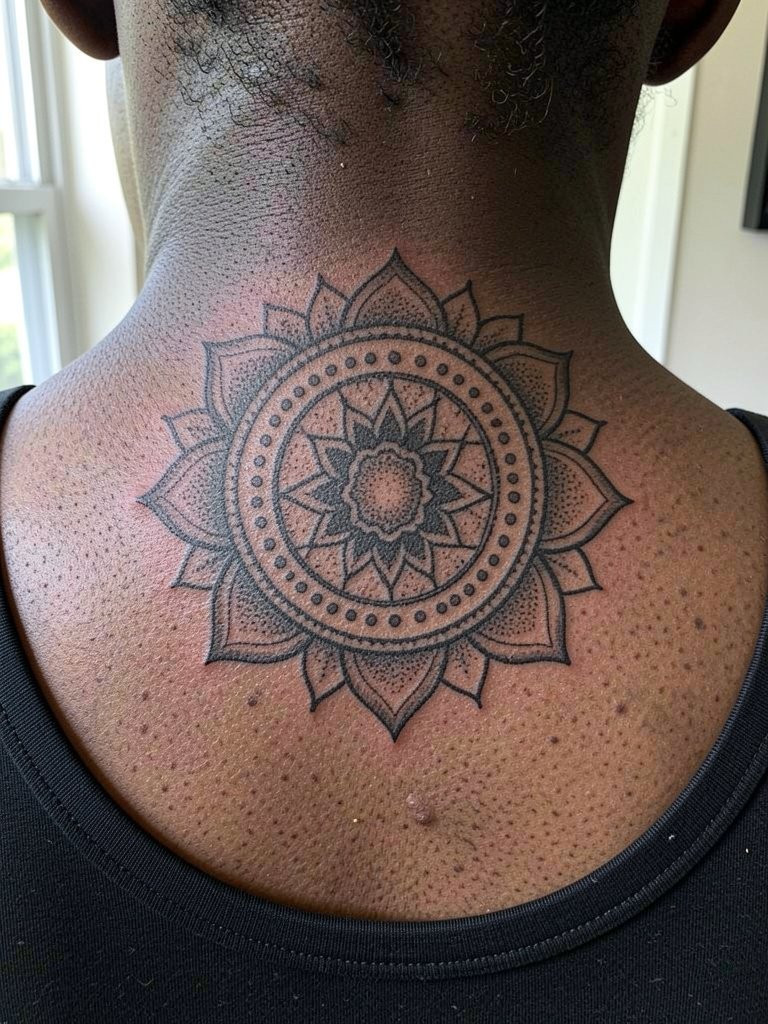
A compact mandala at the nape creates a medallion effect that shows when hair is up. This is a good alternative to a necklace. Discuss symmetry tolerance and midline placement so the center aligns with your spine. Dot-work holds up if spaced correctly, but overly tight stippling can fuzz over time. Expect two-hour sessions and possibly a touch-up at six to twelve months. Cultural origin sensitivity matters with mandalas, so mention you want respectful geometric motifs rather than sacred symbols treated casually. For show-off looks wear a high ponytail and try a silk scrunchie to keep hair away from the area.
Pre-Session Essentials
These neck placements in the first six ideas need easy access and minimal movement. A few small items smooth the session and first week.
-
Stencil transfer paper kit. Lets you preview placement on the curve of the neck before needle touches skin which is helpful for vertical throat and nape mandala layouts.
-
Topical numbing cream. Applied about 45 minutes before can reduce front-of-neck sensitivity so a longer session stays bearable.
-
Thin protective film roll. Keeps the area clean during the first week of contact with shirt collars and hair.
-
Fragrance-free gentle body wash. Cleanses the neck without irritating tender linework.
-
Aquaphor healing ointment. A mainstream go-to to keep fine-line work moist in the first days without heavy occlusion.
7. Tiny Constellation Along the Side Neck

Constellation clusters are forgiving because tiny dots and short connecting lines can be spaced to age cleanly. Choose spacing larger than the reference so the stars do not merge into a smudge. For a natural look ask the artist to plan three different dot sizes to create depth. Session time is short and pain low. Mistakes to avoid include asking for too many stars in a tight area. Pair this with low-neck tops and delicate chain necklaces such as a thin gold pendant when you want the cluster to read as jewelry.
8. Stippled Botanical Vine Up the Side Neck

Botanical vines are flattering because they follow anatomy and can be lengthened for visibility or shortened for discretion. Ask the artist how the vine flows with your natural muscle lines so it reads organic as you turn your head. Fine stipple holds if the artist spaces dots for future skin settling. Expect a one to two hour session and a likely six-month touch-up for grey wash areas. The usual mistake is trying to compress too much leaf detail into a narrow neck strip. For outfits try off-shoulder tops and pair with a delicate chain bracelet for balance.
9. Tiny Key at the Nape
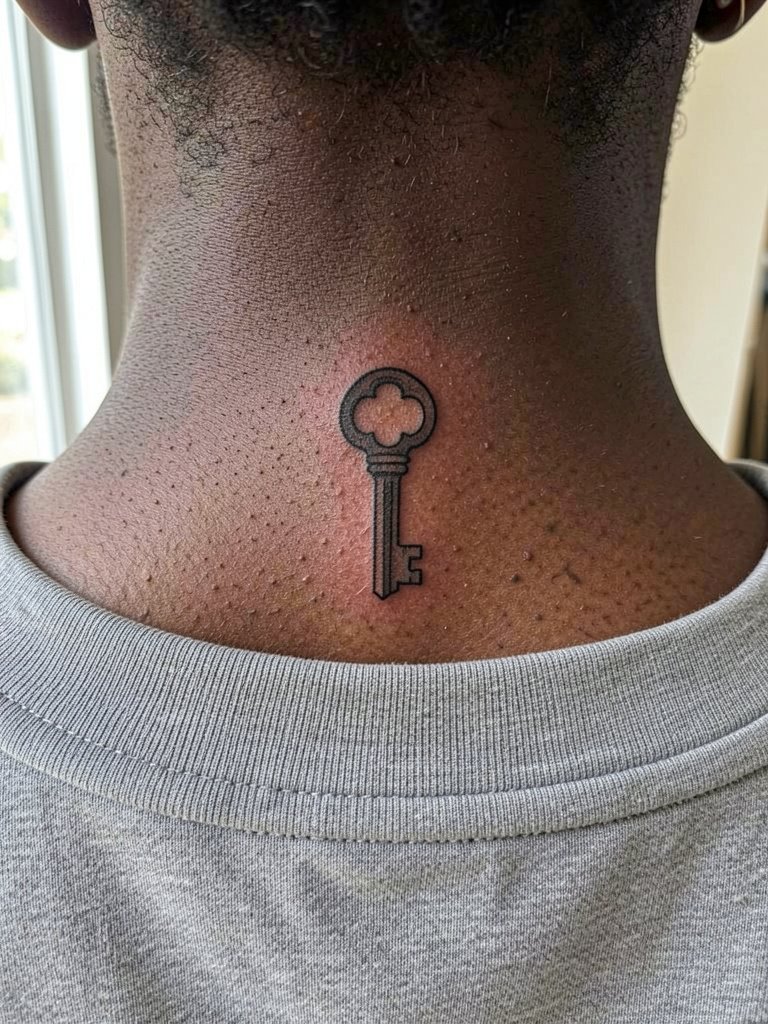
A tiny key makes a neat necklace alternative and is low-maintenance. Recommend this for first-time neck tattoos because it is small, quick, and easy to conceal with collar height. Ask the artist to keep shaft lines slightly thicker than the reference to resist blurring. Session time is short and pain is minimal. The common error is adding tiny ornamental holes that blur into the key body. For showing the piece, a collared shirt left slightly open or a scooped tank works well and a slim layered necklace can echo the key shape.
10. Micro-Realism Moon Face on the Side Neck
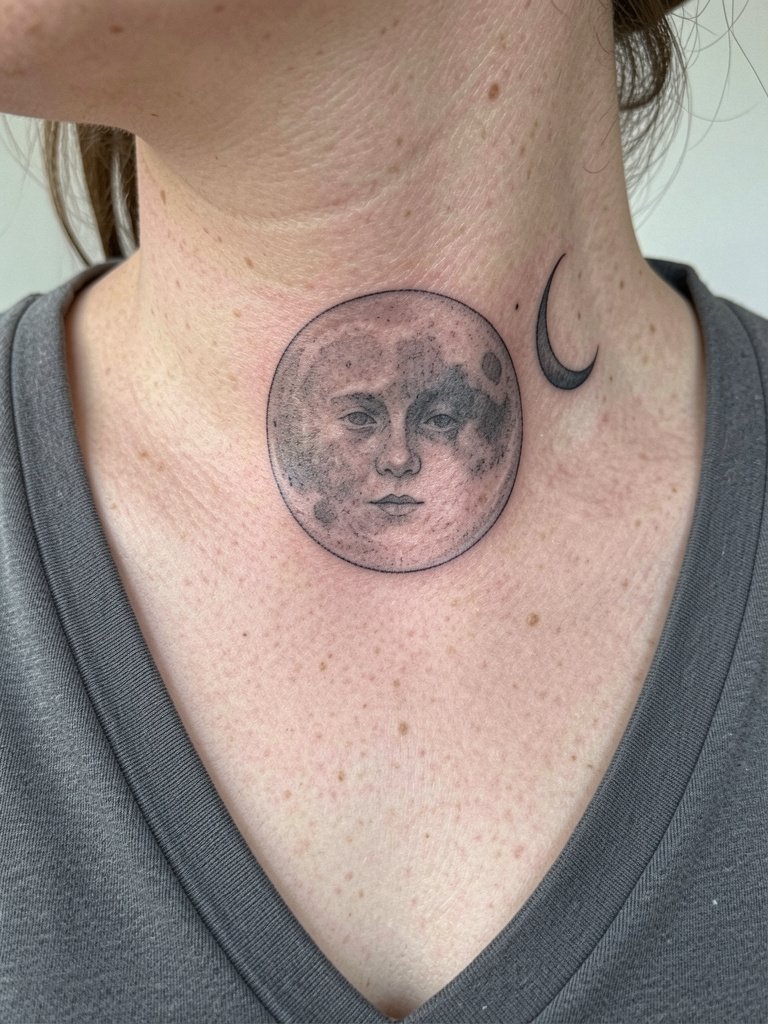
Micro-realism on the neck needs careful grading of grey to avoid a muddy result over time. Ask for a close-up healed reference from the artist showing three-year pieces so you understand how grey settles. This style spends more time in the chair and can be sensitive, plan for two-hour sessions. A common mistake is pushing too many tiny details into a thumbnail-size area. Pair it with cropped shirts and a thin silk scarf for a retro framed look.
11. Dot-Work Mandala Behind the Ear

A small dot-work mandala behind the ear reads like a tiny seal and is ideal for clients who rotate hair styles. Because of the curvature, ask the artist to mock up the stencil on your skull shape to check symmetry. The area takes very little time but can be slightly more sensitive. Tight dots packed too densely tend to blur, so ask for wider dot spacing than your photo. Wear your hair up during healing and consider small stud earrings to complement the spot.
12. Single-Needle Snake Along Side Neck

A slender snake emphasizes neck curvature, but single-needle snakes can lose edge if lines are too thin. For longevity, request slightly heavier core lines and stipple shading for depth. The area is moderately sensitive and a single pass session usually works. Common mistakes include trying to cram scales into a thin coil. Show-off pairing: off-shoulder tops and layered short chains, try a delicate layered necklace set to echo the snake's flow.
13. Art Deco Barbed Necklace Across the Lower Neck
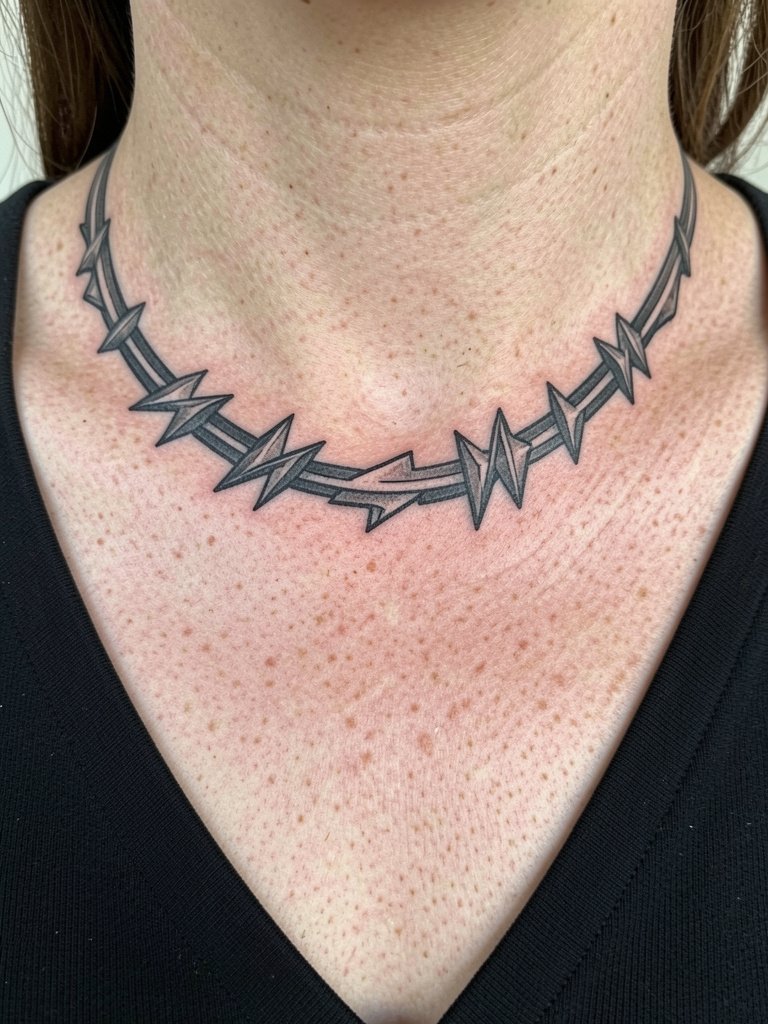
Necklace bands work like permanent jewelry and are best when the width respects collarbone curves. Ask for a full-size stencil so you can check how it sits while standing. These read strongly as you move and require bold lines to avoid blurring into the clavicle shadows. Sessions vary with width but usually finish in under two hours. A common error is wrapping too tightly around the throat which can look off-center with posture changes. Pair with open-neck dresses and a minimal ring stack for evenings.
14. Tiny Portrait Silhouette at the Nape
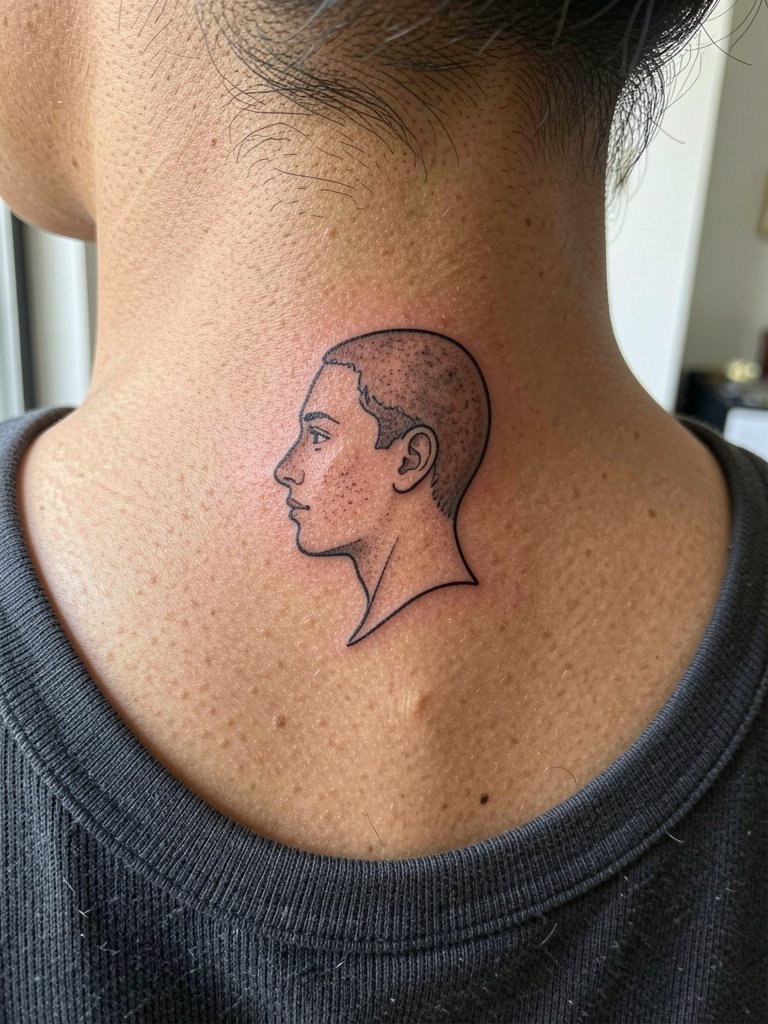
Portrait silhouettes are a subtle way to carry a face without heavy detail. Ask for the profile to be scaled to at least an inch so facial features read as a silhouette after healing. Short sessions and low pain make this a good personal token piece. The mistake is demanding too much tiny facial detail which becomes indistinct. Show it with hair updos and a thin scarf or choker when you want it visible.
15. Neo-Traditional Mini Dagger Along Jawline

A small neo-traditional dagger packs graphic contrast and reads well near the jaw because the bone gives a clean plane. Plan the blade length so it mirrors your jawline rather than cutting across it. Neo-traditional color holds if the artist saturates pigment evenly, expect one two-hour session. Beware of placing it so close to facial hair patterns which can distract. For styling, short hair or tucked hairstyles make this feel intentional and edgy, pair with small huggie hoops.
16. Micro-Lettering Behind the Ear Row
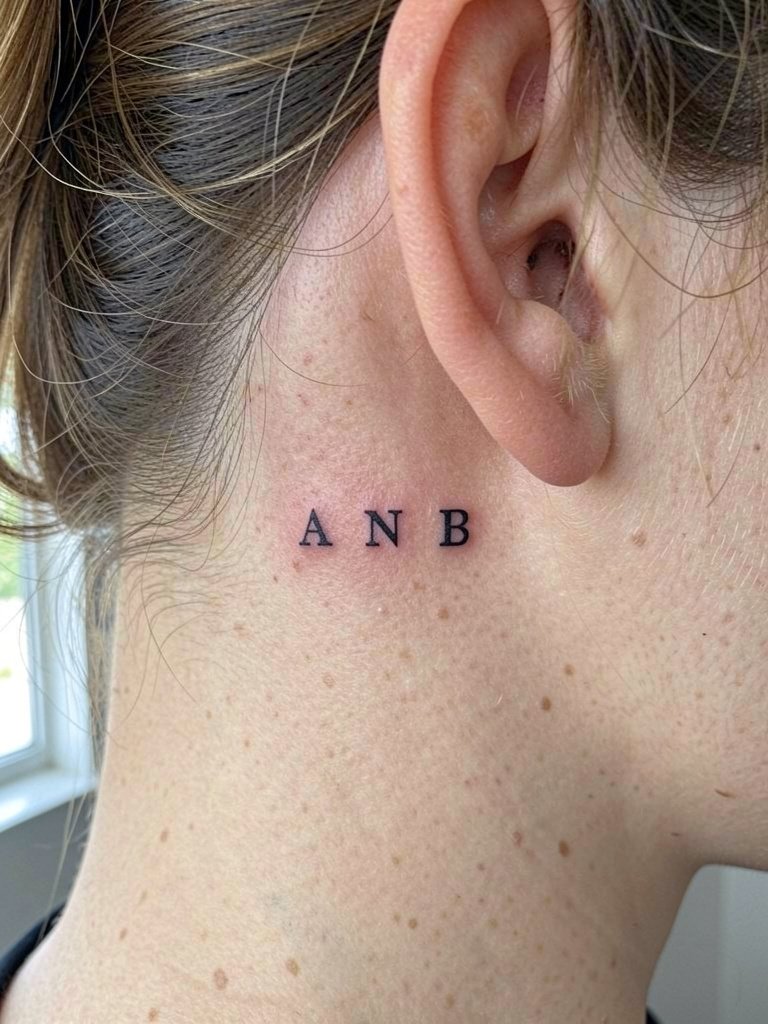
Initial rows behind the ear are intimate and easy to conceal. Ask for measured spacing and a proof stencil front to back so the letters do not look uneven once healed. This is a short session and fairly low pain. Small lettering there can blur if letters are too thin. For sessions, pull hair into a simple clip and bring a soft travel pillow for neck support during the short appointment.
17. Bold Linework Anchor on Side Neck

Bold, simple icons like an anchor hold better than fine filigree on the moving neck surface. If you want longevity pick solid fills and confident outlines rather than micro detail. Discuss scale with the artist because anchors need space to maintain shape. This placement is moderate on pain and can be done in under two hours. Mistakes include adding tiny rope details that vanish later. For wardrobe, a cropped tee or open collar frames the anchor, and a simple pendant necklace works well.
18. Small Skull Under the Jaw
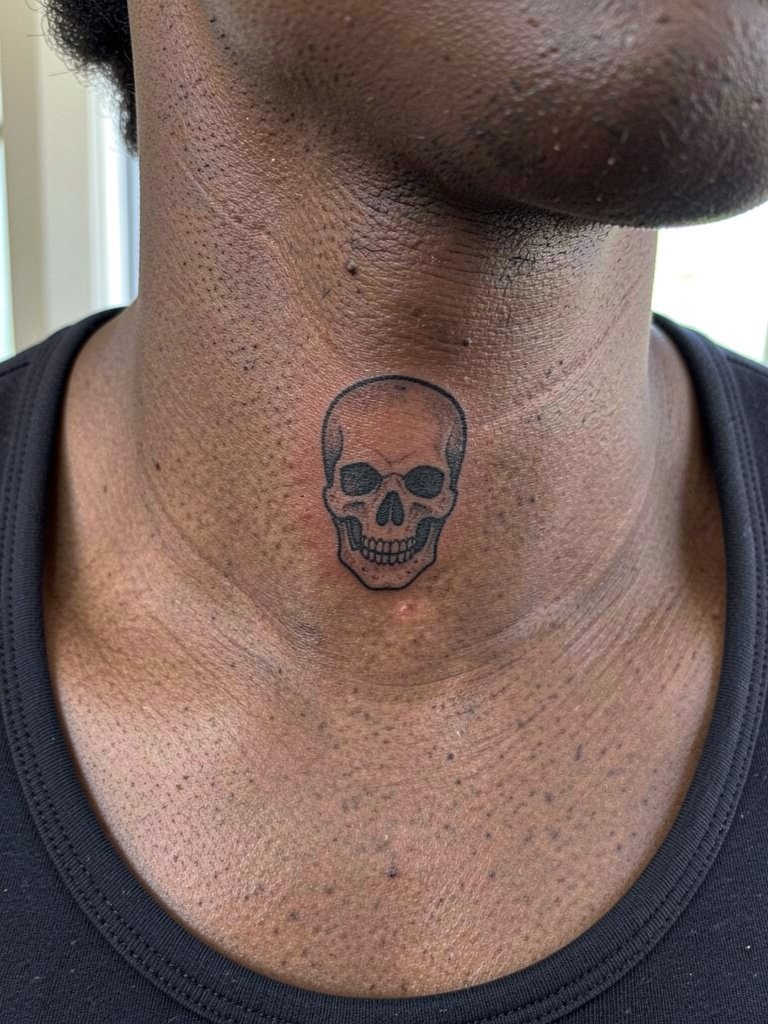
Under-jaw tattoos are visible with short hair and high collars, so consider how often you want it seen. Choose a stylized approach rather than tiny realism for better aging. The area is moderate on pain and sessions are short. A typical mistake is packing too much shading into a small skull which can read muddy later. When dressing for reveal, try crew necks or turtlenecks that you can lower briefly and coordinate with layered necklaces.
19. Thin Arrow Pointing Up the Neck

An upward arrow is simple and symbolic, but slim arrows need enough shaft width to survive skin movement. Ask for the shaft to be a touch thicker than your image so the point stays sharp after some settling. Sessions are quick and discomfort mild to moderate. The mistake is choosing a very long, skinny arrow that loses proportion on the neck. Styling tip: pair with a collared shirt left slightly undone and a thin necklace layered at different lengths.
20. Crescent Moon and Tiny Stars Centered Low on the Nape
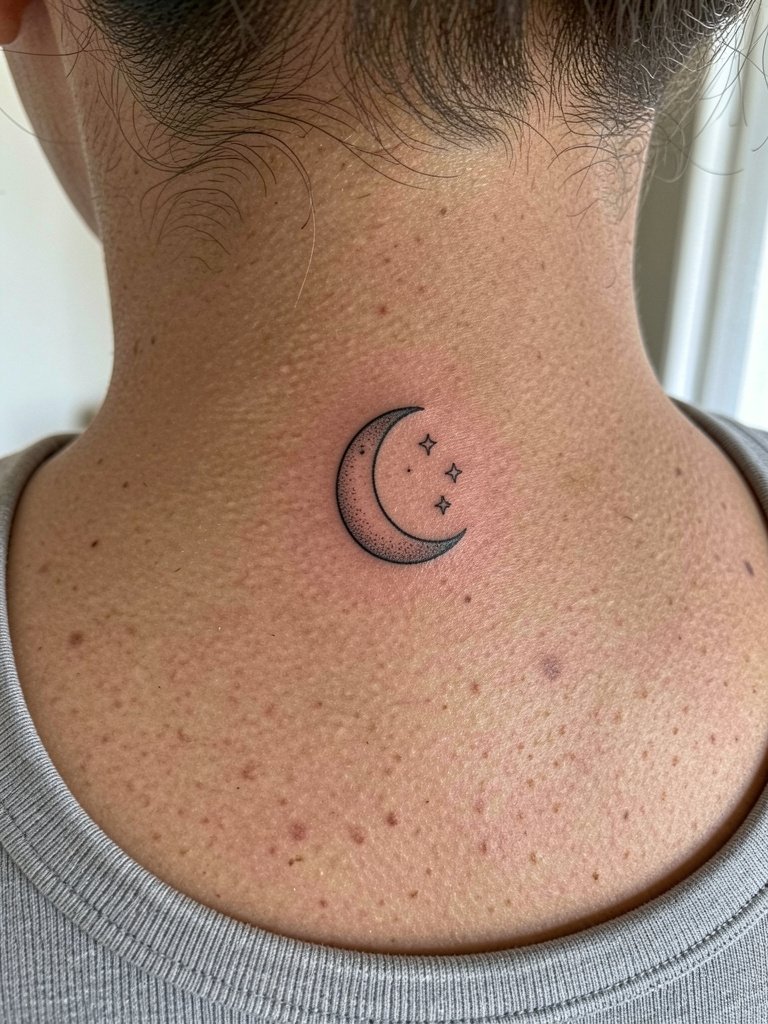
Centered moon-and-stars is emblematic and compact. Recommend this when you want a focal medallion at the lower nape that pairs with necklaces. Ask the artist how the negative space will hold up against skin creases. It's a short session and heals predictably when kept out of sun. Common mistake is insisting on ultra-thin crescents that soften quickly. For evening looks, try an open-back dress or a halter top that frames the nape.
21. Geometric Line Cluster Along the Side Neck
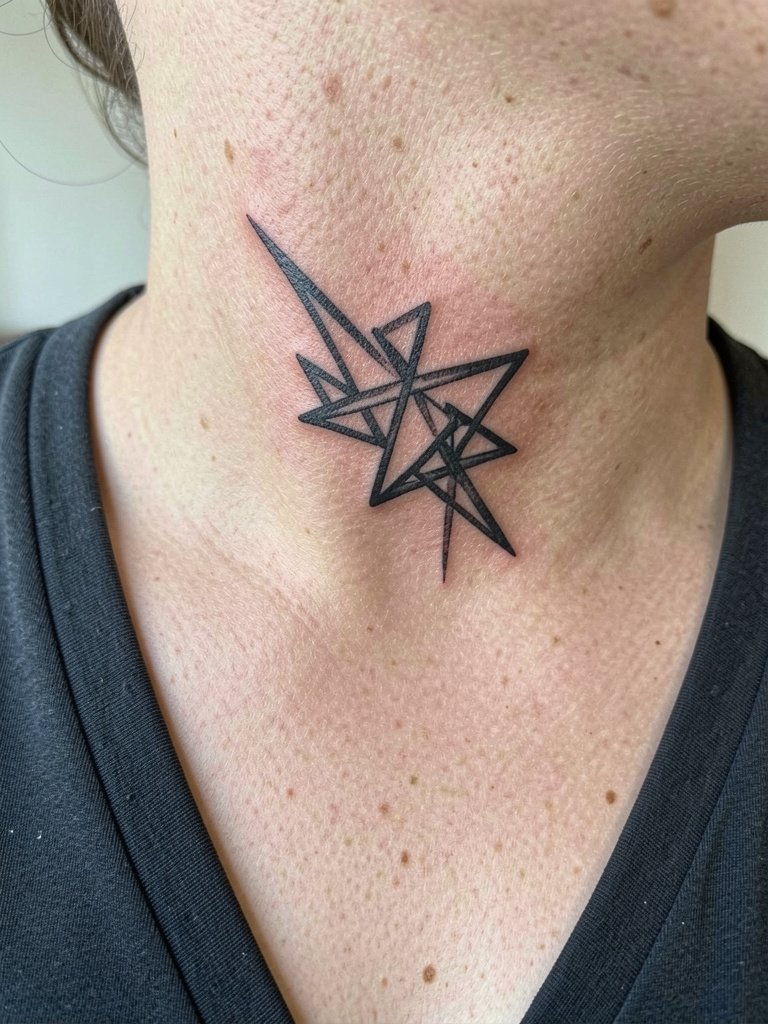
Geometric clusters are modern and can emphasize neck length when placed diagonally. Request designs where intersecting points have clear gaps so lines remain distinct after settling. Expect a one-hour session and discuss how each angle reads from left and right profiles. The typical error is packing too many intersecting lines into a small plane. Pair with slim boat-neck tops or minimalist chokers to reinforce the clean geometry.
22. Small Lotus Nape Badge

Lotus imagery carries cultural and spiritual associations. If you choose a lotus, be clear whether you want traditional symbolic elements or a simplified aesthetic. Discuss symbolism respectfully and avoid appropriating sacred motifs without context. Small lotus badges heal well with precise dot shading, but crowded petal detail can blur, so choose an open composition. For showing the piece, try a halter or backless top.
23. Tiny Compass on the Side Neck

Compasses need clear negative space between points to stay legible. Ask the artist to map the needle orientation so it reads correctly with your posture. These are short sessions with moderate sensitivity. A common mistake is overloading the center with micro-detail. Pair with open-neck shirts and layered necklaces when you want the piece visible.
24. Tiny Chain-Link Collar Tattoo
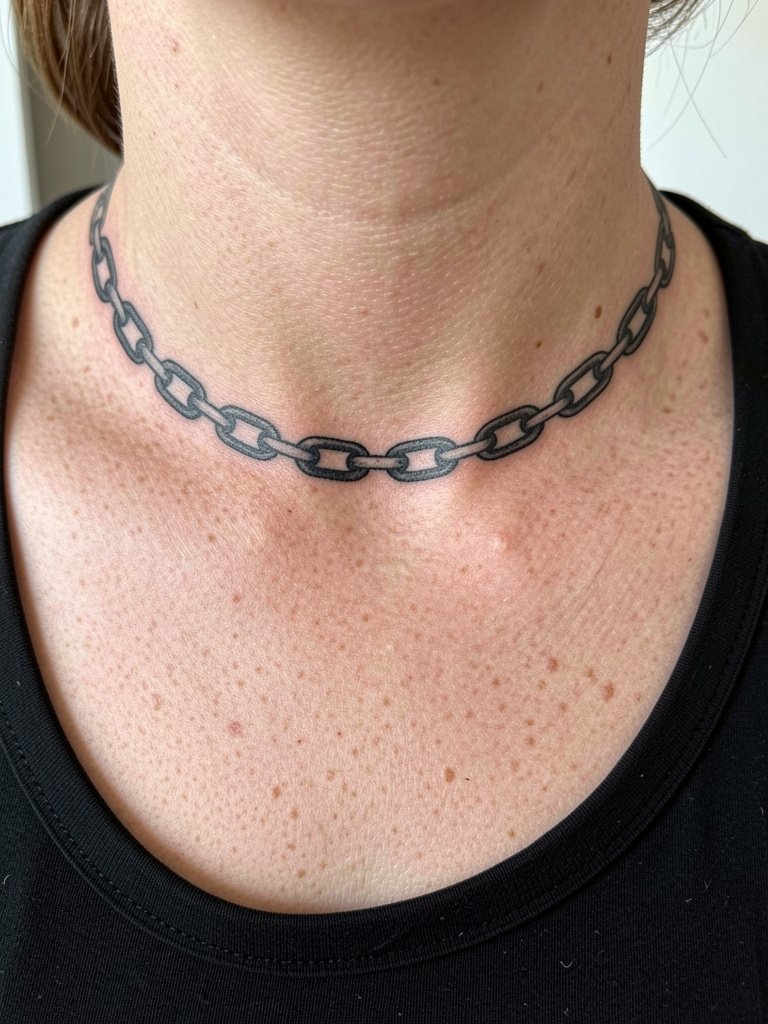
Chain bands read as permanent jewelry and need consistent link spacing to avoid looking twisted. Ask for a full 360-degree mockup so you can evaluate symmetry. These look bold at first and may need a touch-up to smooth fill, expect a two-hour session for a full band. The typical mistake is too-thin links which break apart visually as skin shifts. Style with scoop-neck garments or a layered chain stack for an intentional jewelry look.
25. Stylized Moth Center Nape
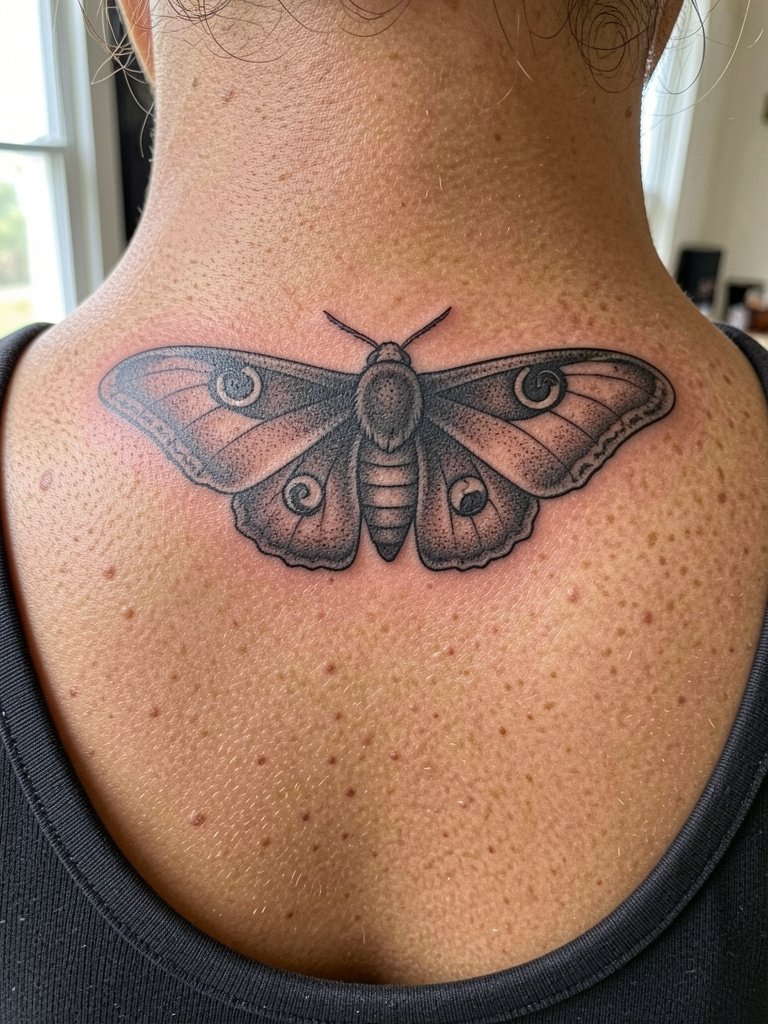
A moth motif centered on the nape creates a balanced focal point and works with hair that is often worn up. Ask the artist to space wing veins so they do not blur together over time. Expect a one to two hour session and consider a light touch-up after the first year for detailed wings. Avoid asking for hyper-real wing texture in a very small size. Show it off with an updo and a delicate neck chain.
26. Roman Numeral Line at the Nape

Roman numerals look graphic and are easy to read when sized correctly. Insist the artist prints the exact numeral spacing on paper and then transfers it so you can check symmetry across the nape. This is a quick session and pain lower than front neck. The common error is choosing a type so small that serifs bleed. Pair the numerals with simple collars or crew necks for a subtle reveal.
27. Fine-Outline Necklace With Tiny Pendant
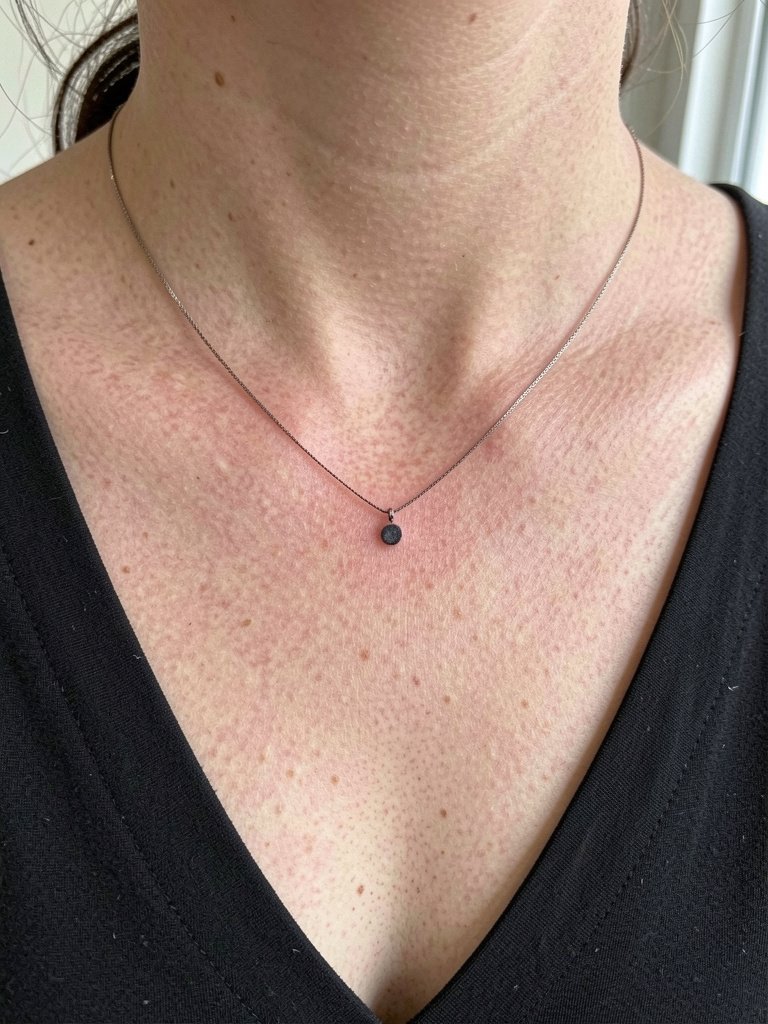
A fine-outline necklace with a tiny pendant mimics jewelry and can be layered with real chains. Because fine single-needle bands can soften, ask for a slightly stronger main line and a small pendant that carries weight visually. Short session, low pain. A key mistake is making the band too tight to the throat which looks constricting; let the band sit along the upper chest curve. Style with low-neck blouses or V-necks and a thin metal chain to match the tattoo's placement.
Frequently Asked Questions
Q: Will a fine-line neck tattoo blur faster than bold blackwork?
A: Fine-line pieces are at higher risk of softening on the neck because the skin moves and stretches. One camp argues that single-needle scripts and micro detail blur within a few years on neck skin, especially on the front throat. The opposing camp says that with slightly heavier spacing and precise needle depth, fine-line neck work settles cleanly, and they point to their healed photos as proof. In practice choose scale and spacing based on how visible you want the piece to remain.
Q: Are neck tattoos risky for work and social settings?
A: Some people and employers still view visible neck tattoos as unprofessional and may react negatively. Another group sees them as acceptable self-expression and points to industries where visible tattoos are common. If workplace perception matters to you, pick a nape or behind-the-ear placement that can be covered by hair or collars while you build a portfolio for future employers.
Q: How often will a neck tattoo need touch-ups compared with a forearm piece?
A: Neck tattoos generally need touch-ups sooner because the skin there sees sun exposure and friction from collars and hair. Expect a possible touch-up at six to twelve months for delicate pieces and every few years for heavier work. Blackwork bands and bold symbols usually hold longer than single-needle scripts.
Q: What should I wear to my neck tattoo session to make access easier?
A: Wear a wide-neck or scoop-neck top so the artist can access the nape and collarbone without you removing clothing. For behind-the-ear or side-neck work, put hair up in a simple clip. If you need shopping ideas, a comfortable wide V-neck tee in a neutral color is practical and keeps the area free for the artist.
Q: How do I find healed neck tattoo examples and portfolios without naming artists?
A: Search social platforms with targeted hashtags and location filters to find healed neck work, then use the portfolios you like to message shops about similar styles. Try tags that combine the motif and placement for visibility, use platform filters to sort by recent healed photos, and check community threads for first-hand reports on longevity and touch-up frequency.
