
Fine line nature pieces look delicate on a scrolling feed, but they are a design choice that lives on skin for years. The versions that still read crisp after five years usually have a touch more spacing, slightly heavier single-needle weight, and placement choices that avoid constant friction. Read these ideas with that reality in mind so you can pick a motif that keeps its shape beyond the first touch-up.
1. Mini Laurel Sprig on Inner Forearm
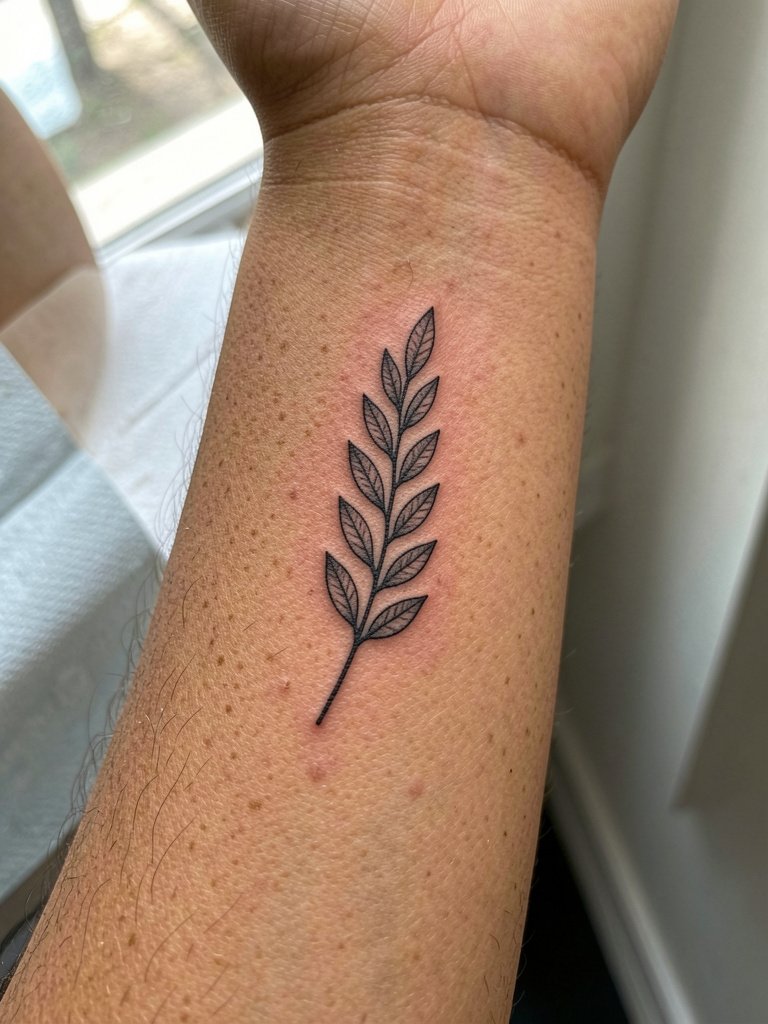
A narrow laurel sprig reads like a whisper on the inner forearm, and I recommend it when you want a botanical accent that you can roll up to show. For linework to age cleanly here, ask for slightly heavier single-needle weight and tiny gaps between opposing leaves so the edges do not merge as skin settles. Common mistake is requesting micro-leaves that are too close together, which often blurs by year three. Session feels straightforward and sits at a low to moderate pain level. For the appointment wear a loose tank top so the artist has full access without you tugging clothing.
2. Crescent Moon with Tiny Olive Branch on Wrist
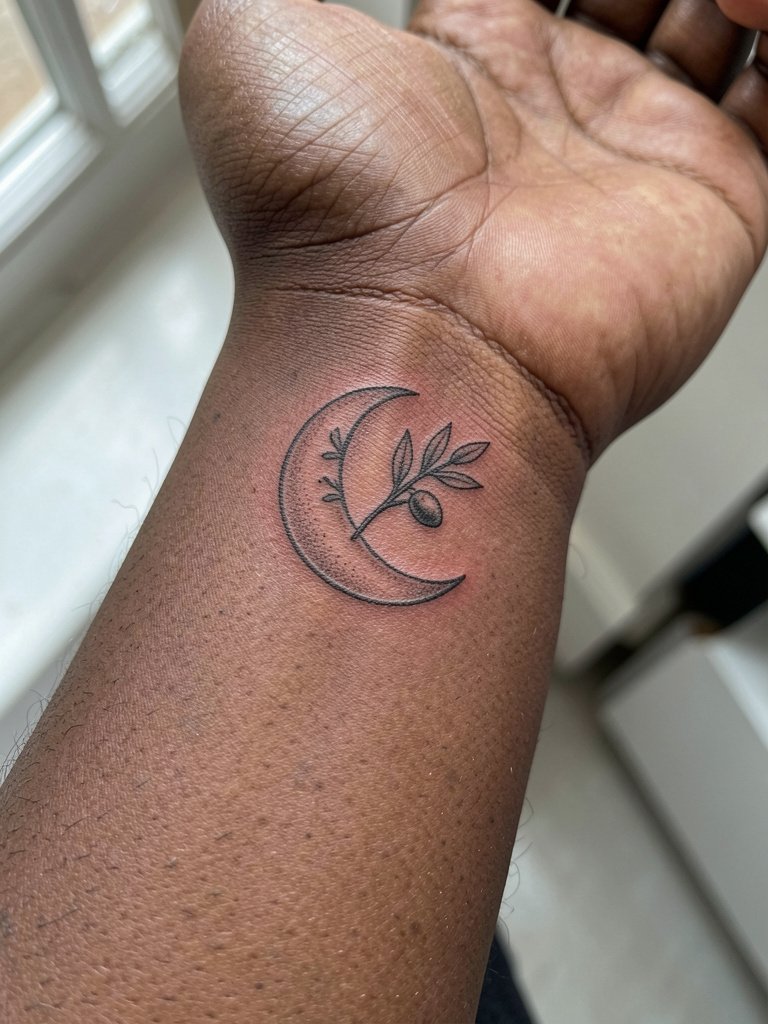
Wrist pieces live through a lot of washing and bracelets, so this moon with an olive branch is best with slightly bolder micro-lines and a bit of open spacing. Discuss placement height with your artist so the design avoids the flex crease near the base of the hand, and plan a realistic touch-up around year two. A frequent error is placing ultra-fine script or tiny dots right over the wrist crease where blowout risk is higher. Expect a 30 to 60 minute session and mild sensitivity. Show-off tip includes stacking with a thin cuff or delicate chain bracelet to frame the curve without rubbing the ink directly.
3. Single-Needle Fern on Ribcage
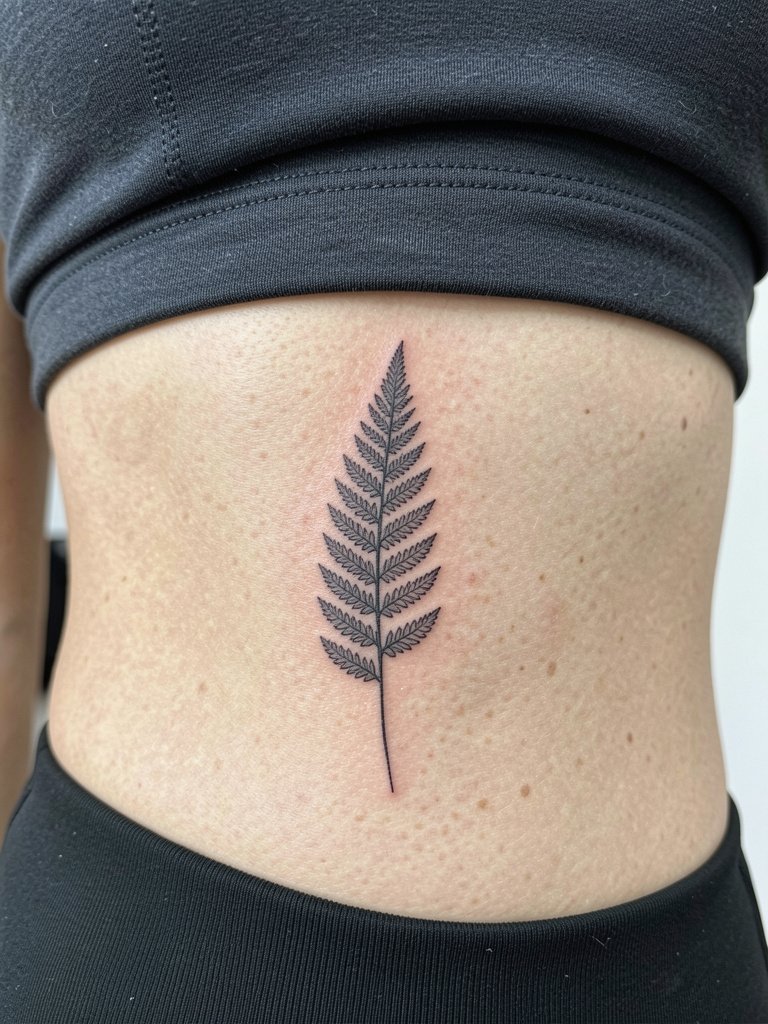
Fine line on ribs splits artists into two camps. One camp says the constant stretch and movement of the side torso blurs micro-lines within two years, especially near the breast crease. The other camp says with the right depth and slightly wider spacing the linework settles fine, and they can show healed photos to back that up. Because of that split, tell the artist you want intentional spacing and plan a follow-up touch-up to lock in delicate fronds. Expect higher pain for this placement and a session that may take one to two hours depending on length. For the studio wear a cropped top so the area is accessible and stays comfortable during breaks.
4. Tiny Mountain Range Behind the Ear
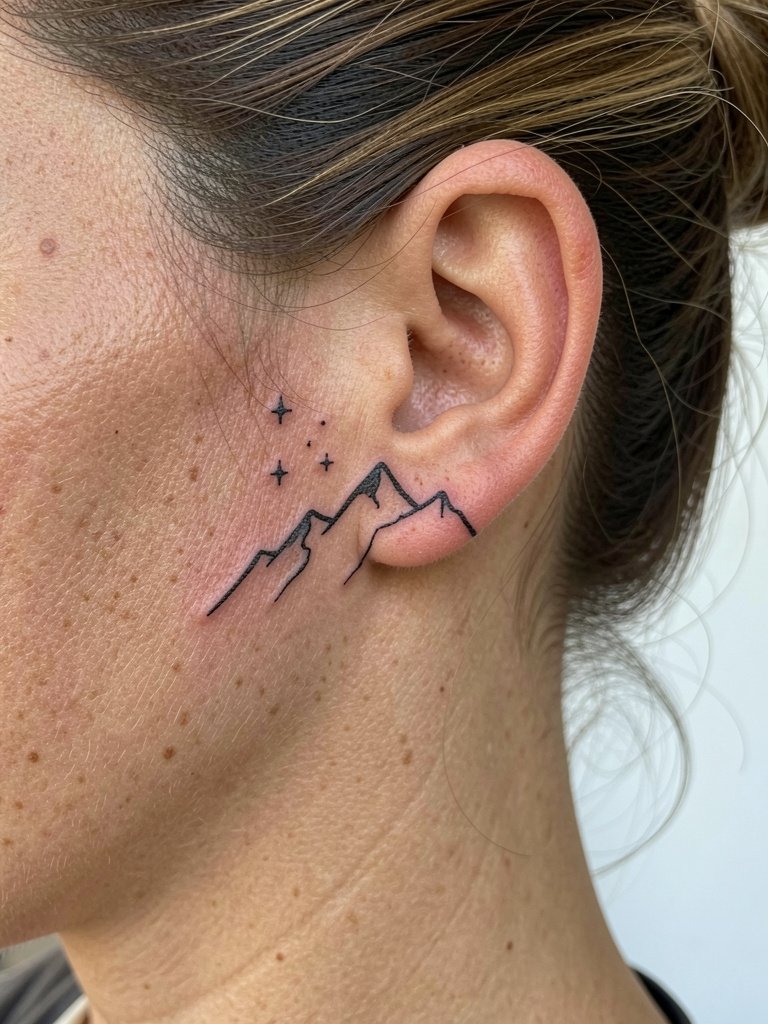
Behind-the-ear tattoos need an artist comfortable with tiny single-needle work because skin there is thin and contour changes quickly. A common mistake is requesting hairline-thin strokes that vanish into the skin texture. Instead, ask for slightly stronger single-needle weight and crisp anchor points so the peaks still read after a year. The session is short but can be noisy near the mastoid so bring ear protection if you are sensitive. This placement sometimes requires a specialist who routinely inks micro work on the head. Pair with a pulled-up hairstyle for nights out and tuck behind hair for professional settings.
5. Watercolor-Like Wildflower Cluster on Outer Thigh
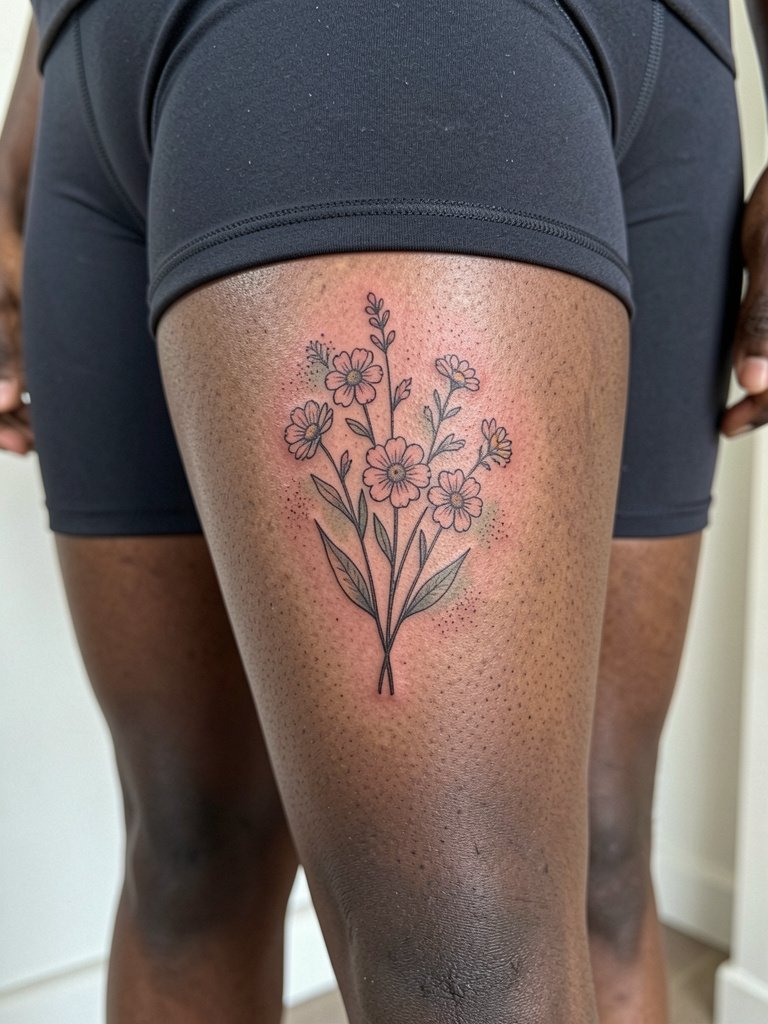
Fine line plus soft color works well on the thigh because the area avoids constant abrasion. For a watercolor-like look, discuss pigment saturation and edge fade with the artist so the color sits as a gentle wash rather than a blotch. A mistake people make is asking for ultra-light watercolors without knowing darker skin tones need slightly more saturation for the hues to show. Expect a one to two hour session depending on color. Styling tip for showing it off is a flowy midi skirt that lets the thigh peek when you walk.
6. Delicate Pine Needle Cluster on Shoulder Blade
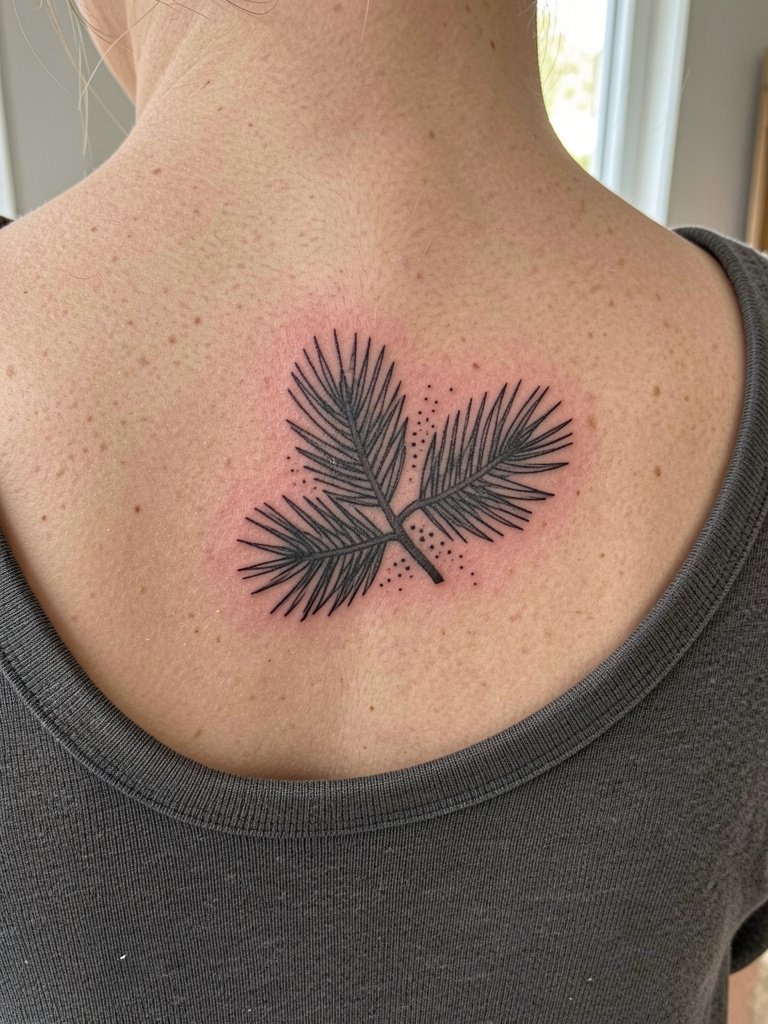
The shoulder blade is forgiving for fine detail since the skin is stable and not subject to constant folding. For a pine cluster, ask for clear node points and subtle stipple shading so the needles retain separation as they age. A common error is over-detailing tiny needles that later soften into a gray patch. Session times are moderate and pain is low to medium. For showing the piece, a spaghetti-strap cami lets the shoulder blade sit visible and flat without rubbing.
Before You Book
The first six ideas include wrists, ribs, and thigh placements that behave differently during healing, so a few practical items help smooth the session and the first week.
- Stencil transfer paper kit. Lets you preview placement directly on skin before the needle touches it, especially useful for the forearm and wrist pieces above.
- 30-minute topical numbing cream kit. Useful for rib and sternum sessions to reduce break-time interruptions while keeping linework consistent.
- Thin protective film roll. Keeps ankle and hand tattoos cleaner during the first week of constant contact.
- Fragrance-free gentle body wash. Cleanses healing skin without stripping fine line saturation.
- Aquaphor Healing Ointment. Widely used as a thin protective layer in the initial days to help fine line work heal without crusting.
7. Tiny Honeybee on Side of Finger
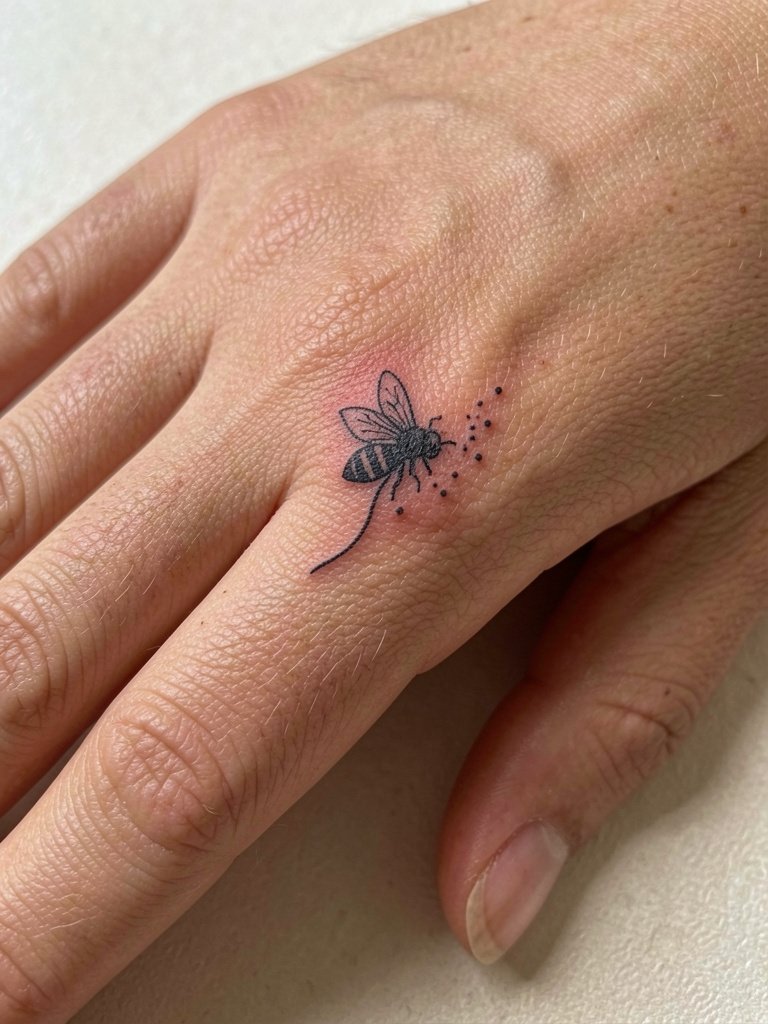
Finger tattoos spark a real debate among artists. One camp argues fingers are high-friction zones that cause lines to fade and blur within a year, especially with tiny single-needle detail. The other camp says with strategic placement on the lateral finger and accepting yearly touch-ups, the look can be maintained. If you want a bee here, plan for touch-ups and discuss how deep the linework should sit so it survives rings and hand washing. Expect a short but sharp session with higher sensitivity. For wearing, a thin stackable ring that sits away from the design helps show the bee without rubbing it directly.
8. Micro-Realism Acorn Behind the Knee
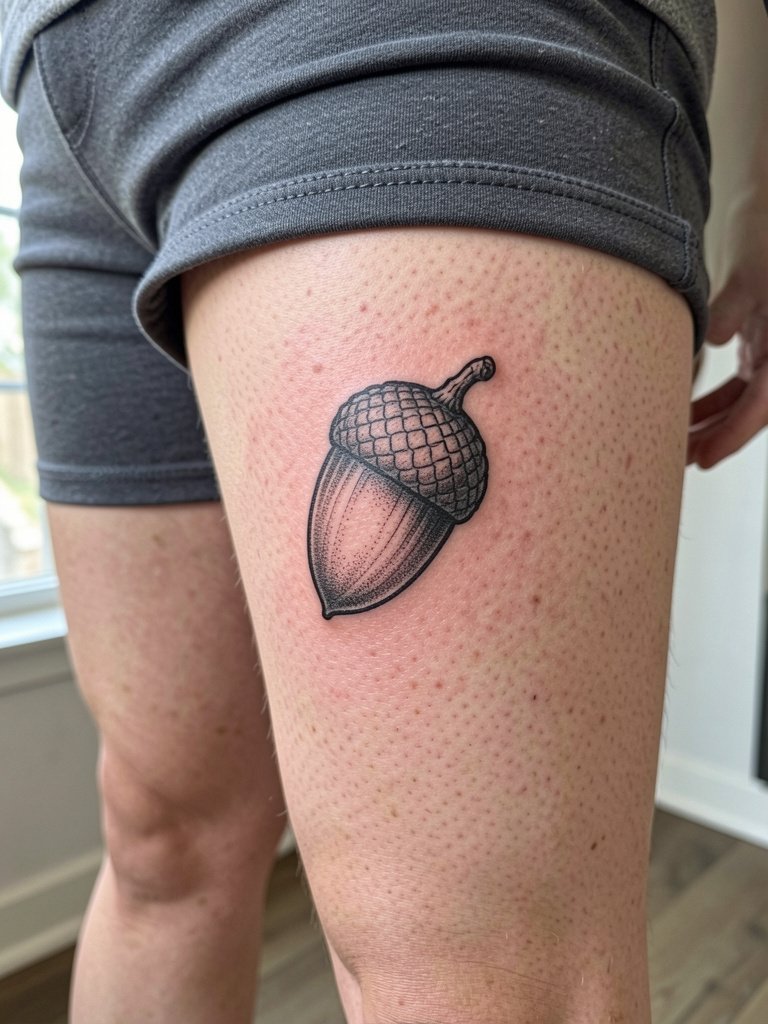
The back of the knee moves a lot and tends to thin the appearance of micro shading. For an acorn motif, anchor the shape with a slightly bolder outline and use stipple shading rather than soft gradients so details hold. People sometimes request full micro-realism right at the crease and then see early softening. Expect moderate pain and a session that benefits from breaks. Styling for showing it off works well with cropped pants or a drawstring linen pant that can be rolled to expose the area without tugging.
9. Thin Line Wave on Ankle
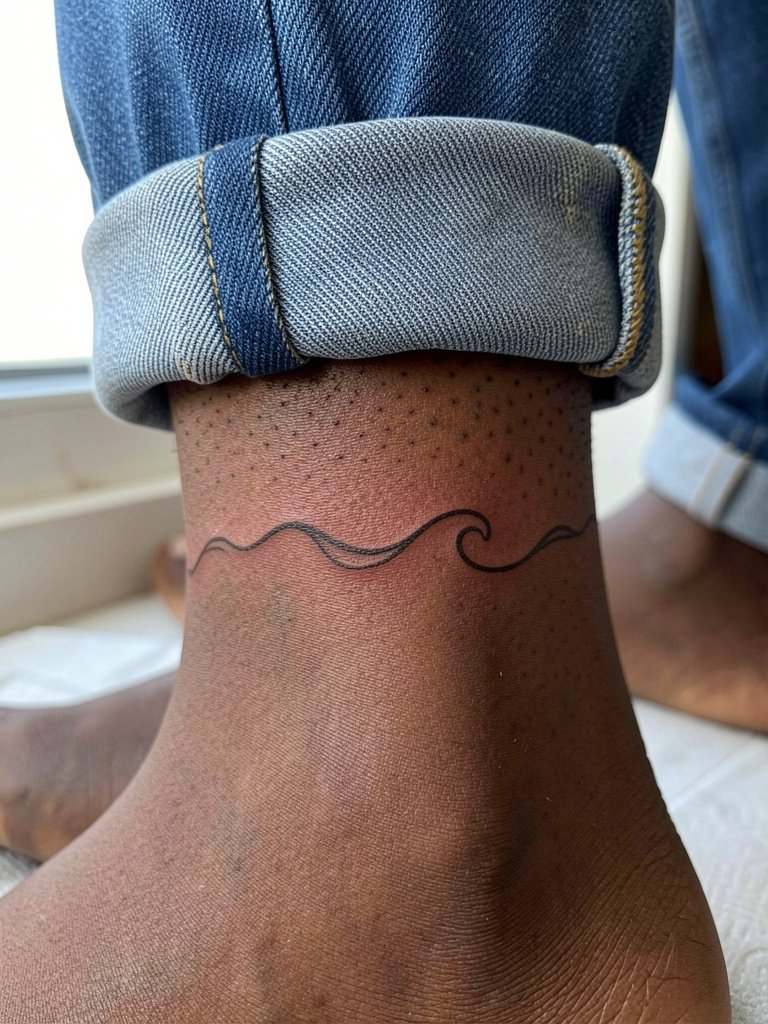
Ankle lines endure rubbing from socks and shoes, so keep the wave simple and avoid tiny interior dots that can smear with friction. A typical mistake is wrapping too much detail around the bone where skin flexes and the design can fragment. For durability, request a continuous curve with slightly increased spacing and plan a touch-up in the first 12 to 18 months. Session is short and pain is typically moderate. For showing it off, cuff your jeans or wear low-profile sandals that draw attention to the ankle without constant fabric contact.
10. Single-Needle Pinecone on Calf
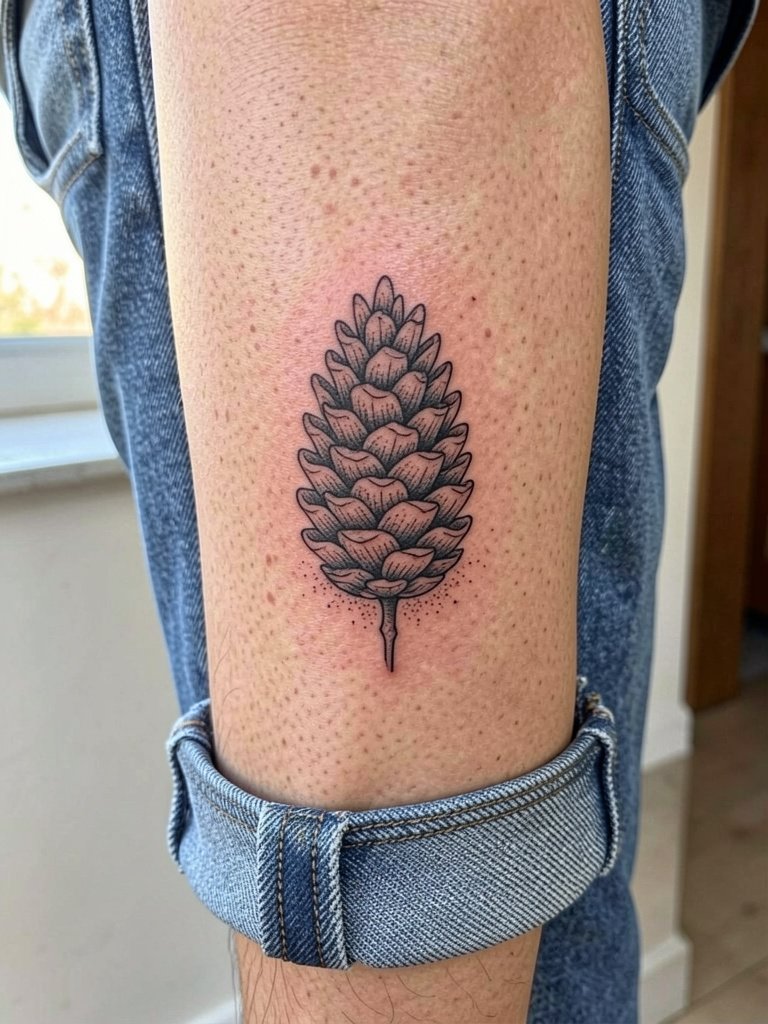
The calf gives single-needle detail room to read, and pinecone scales can be rendered with stipple for texture that ages gracefully. A mistake is compressing too many tiny scales into a narrow band, which looks muddled after healing. Discuss scale and vertical placement so the pinecone sits where leg muscle movement is minimal. Session time is moderate and pain is low to moderate. For evenings out, pair with mid-calf boots that show the lower calf when you move.
11. Tiny Constellation with Sprigs on Collarbone
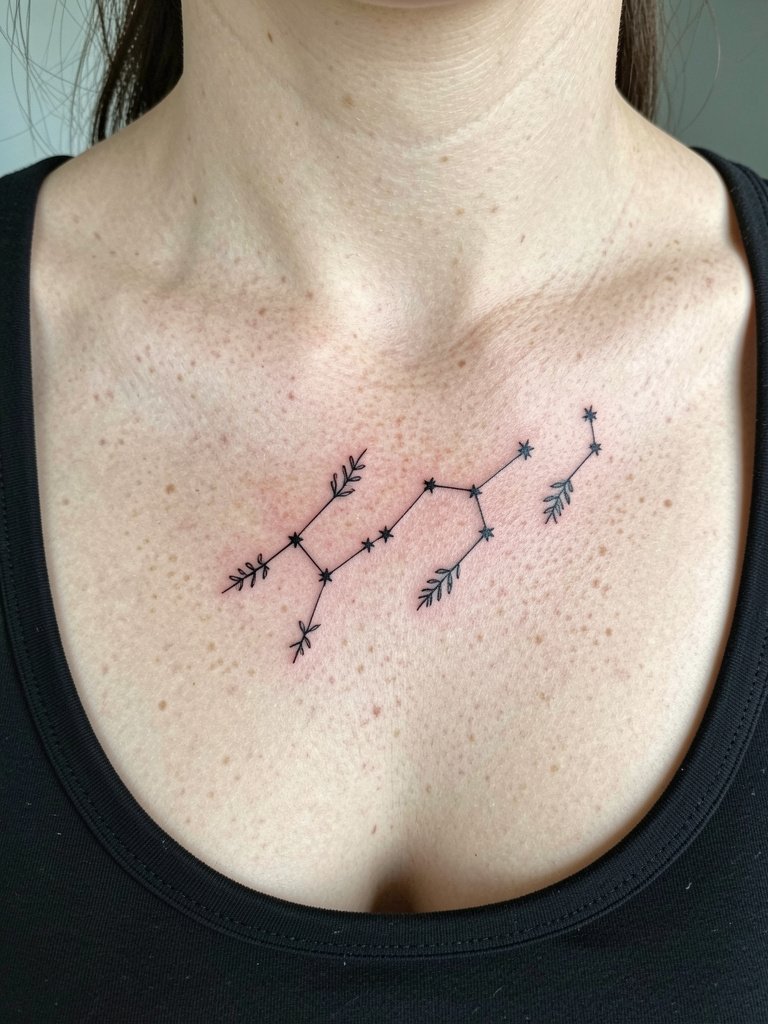
Collarbone tattoos catch light and movement, so keep connecting lines spaced and avoid ultra-thin linking strokes over bony areas where the skin is thinner. A session here is moderate pain and often quick, but the mistake is packing too many stars into a narrow band. Instead, ask for negative space between points and a low saturation touch to maintain delicacy without risking blur. This placement pairs well with open-neck tops and a simple pendant necklace that does not sit directly over the ink.
12. Fine Line Mushroom Trio on Inner Thigh
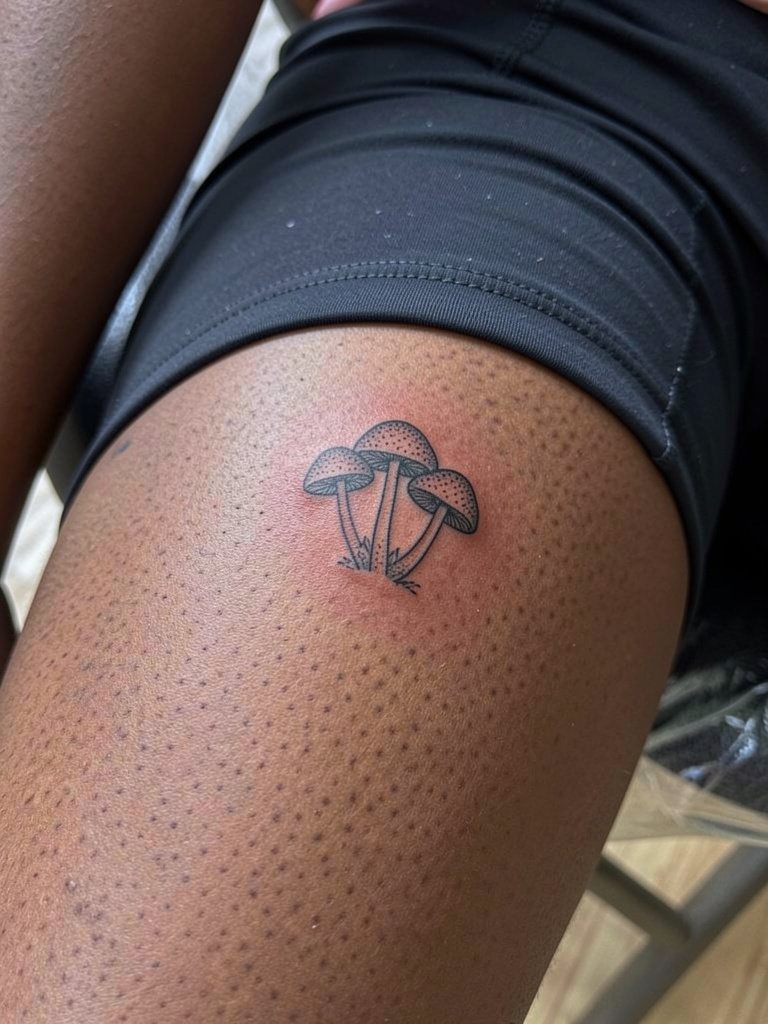
Inner thigh offers protection from abrasion and gives you a private canvas for small fungi with dot work texture. A common mistake is packing multiple tiny gills that lose definition as the area shifts. Ask the artist to space the caps and use stipple shading rather than soft grey wash so the trio keeps depth over time. Pain is moderate and touch-ups are usually cosmetic after the first year. For session comfort, wear loose shorts or athletic bike shorts so the artist can access the area without fabric tugging.
13. Tiny Sailboat Silhouette on Side Rib
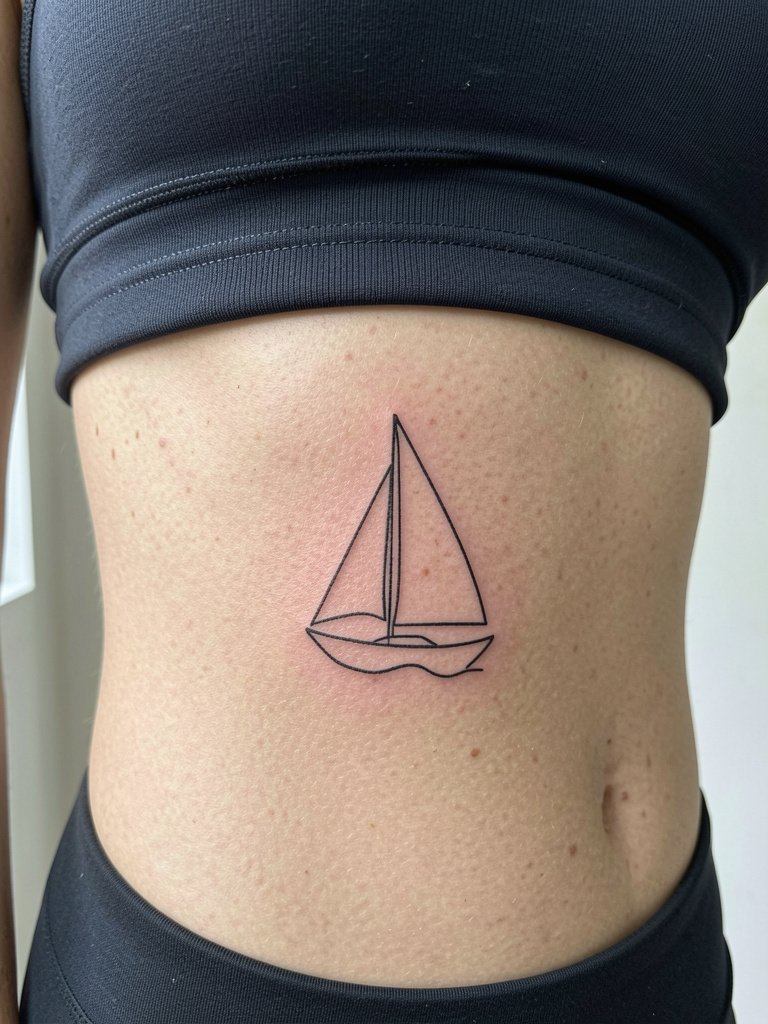
Sailboats on the ribs require the same spacing considerations as other side-torso work. Because ribs experience more stretch, tiny connecting details can fade faster than the silhouette itself. I recommend a clean contour with negative space in the sails so the triangle reads at a distance. Sessions here are higher on the pain scale and may need breaks. If you want this motif visible in summer, choose crop tops that sit naturally above the rib and avoid tight bras that press into the area during healing.
14. Paper-Thin Birch Sapling on Sternum
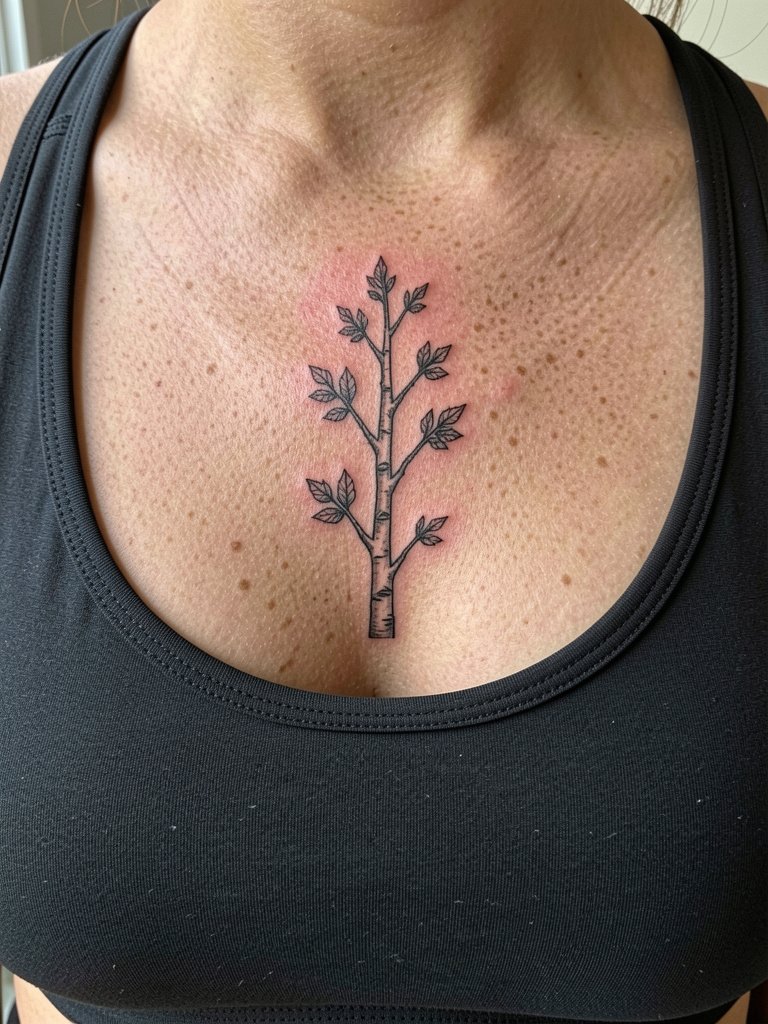
Sternum pieces feel intimate and require an artist who works cleanly with chest anatomy. One mistake is asking for hairline branches directly on the midline without considering the slight curvature and movement; those can blur. Plan for slightly bolder anchor lines down the trunk and softer stipple for leaves. Pain here is higher and sessions can run longer. Because of visibility choices, a fitted bandeau or sports bra during the session keeps the area accessible while providing modesty.
15. Single Stem Lavender on Inner Wrist
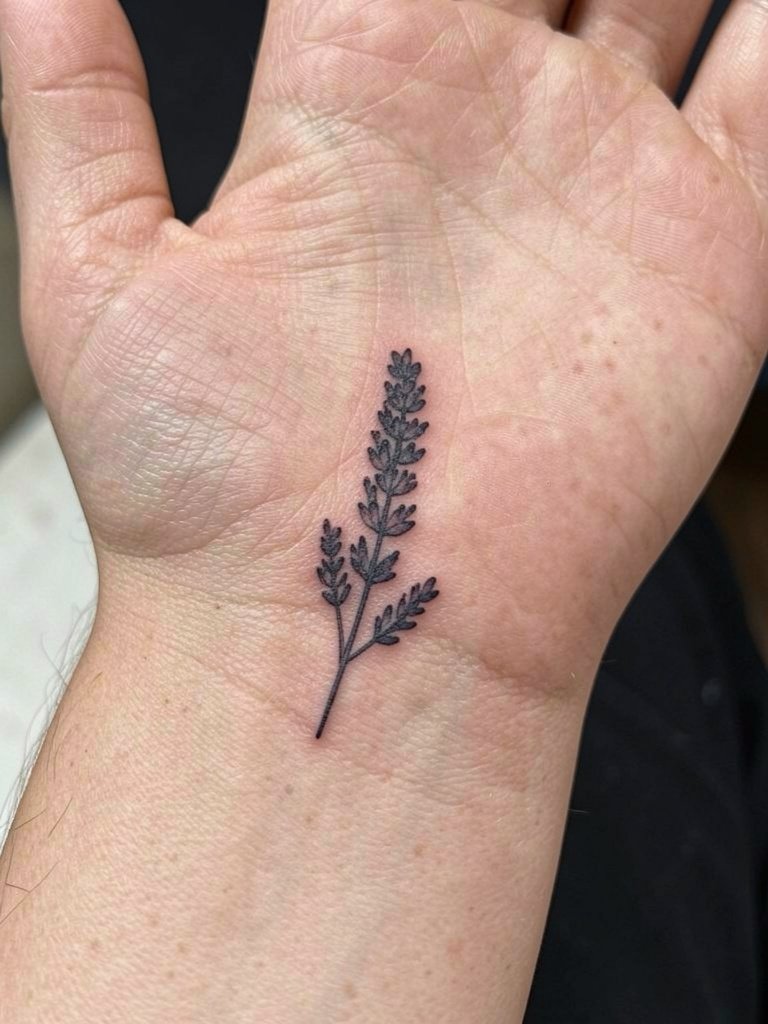
The inner wrist is a high-visibility spot and also high-contact, so the lavender stem needs breathing room around buds to avoid merging. A common error is asking for tiny clustered dots that become indistinct after repeated washing. Specify slight line weight increase for longevity and expect a touch-up within one to two years. Session time is short and pain is low to moderate. Pair with a slim bracelet or minimal watch strap worn above the design so you can show the stem without constant friction.
16. Tiny Oak Leaf Cluster on Back of Shoulder
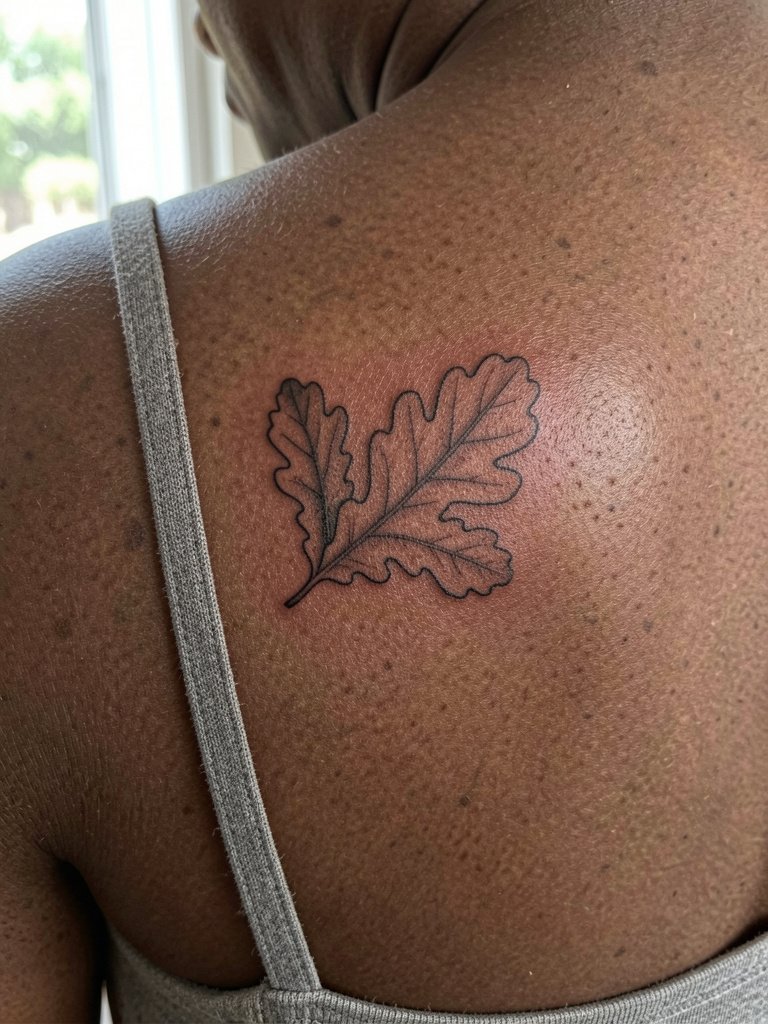
The back of the shoulder is a classic spot for fine leaf clusters because the flat surface helps linework stay crisp. A mistake is over-detailing veins that add visual noise as skin moves. Ask for clear primary veins and minimal secondary lines so the silhouette reads at arm's length. Pain is low to moderate and sessions are comfortable. For outfits, a square-neck sundress frames the shoulder blade without hiding the tattoo under straps.
17. Micro Dot-Work Dew Drops on Palm of Hand Edge
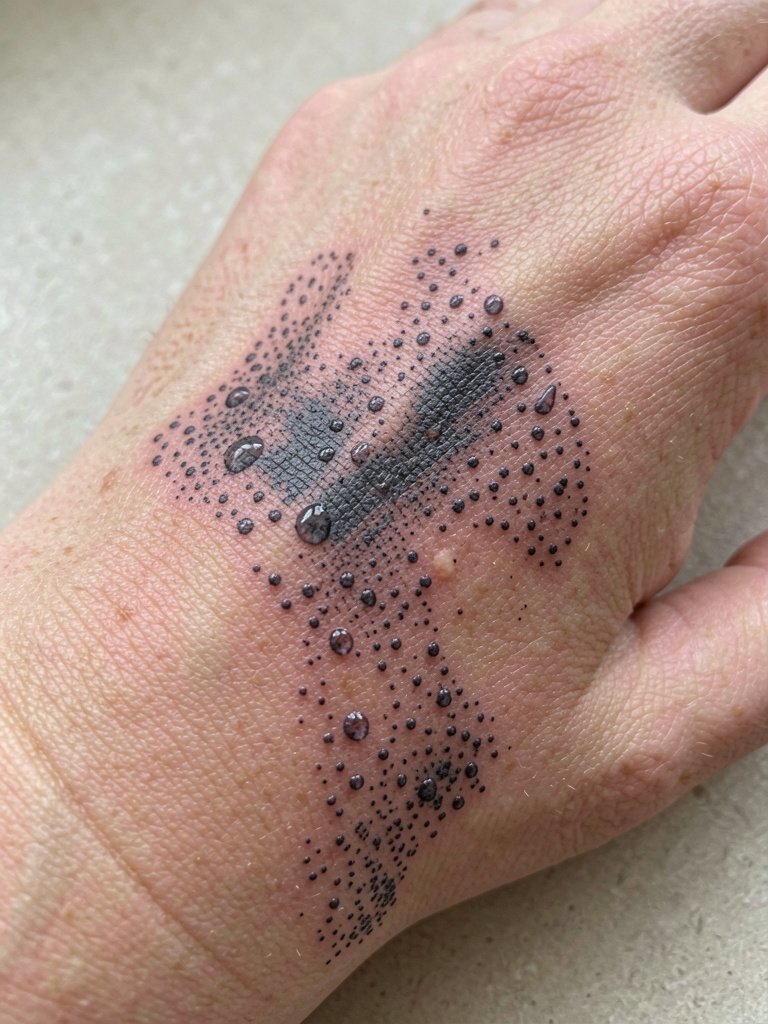
Hand and palm-edge ink touches a raw nerve in the community. One camp insists hands are too abrasive and sanitize-heavy to hold micro dot work for more than a year. The other camp accepts annual touch-ups and points to sustained healed photos as evidence those pieces can be maintained. If you want dew drops here, prepare mentally for routine refreshes and ask the artist to discuss layering strategy for retention. Sessions are brief but painful and the piece may require frequent touch-ups. Avoid rings or tight gloves during the first weeks of healing.
18. Thin Vine Around the Ankle Bone
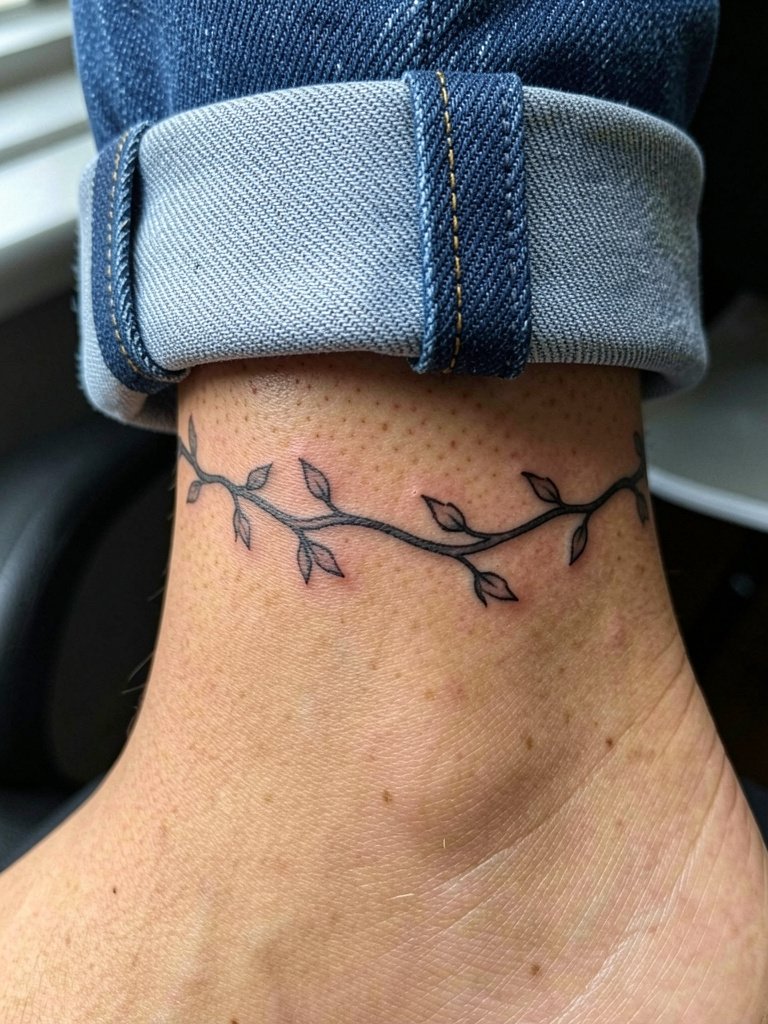
An ankle vine looks delicate but is constantly exposed to shoe and sock friction. For longevity, request a simple repeating motif with intentional gaps between loops so individual leaves do not blur together. A common error is asking for wrapped details that sit directly on the bone where the skin is thin. Expect a short session and plan to keep tight socks away for the first two weeks. For styling, wear low-cut sneakers or sandals and a delicate anklet to draw attention without rubbing the design.
19. Tiny Seedling on Top of Foot
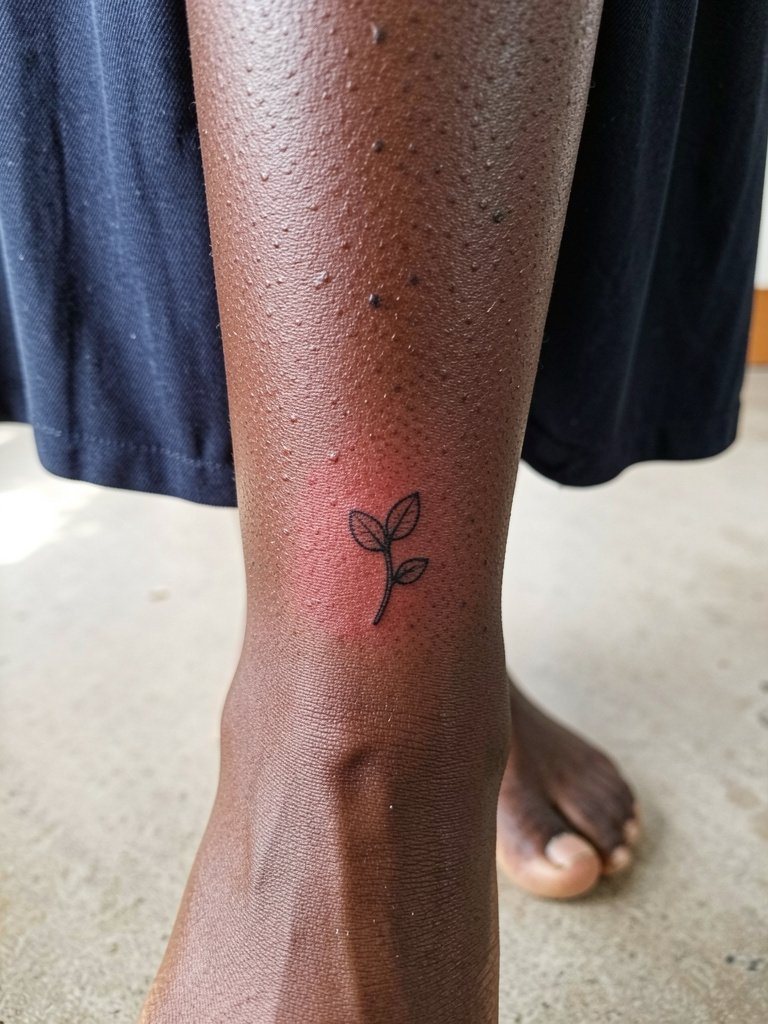
Top-of-foot tattoos are visible and vulnerable to shoe abrasion. For a seedling, place the design away from the highest pressure points and ask for slightly bolder anchor lines so the tiny leaves keep definition. A frequent mistake is centering delicate dots where the shoe sole presses; those dots often fade first. Session pain is moderate and you should avoid tight footwear during the first two weeks. Pair the seedling with open-toe sandals when you want to show it off and to reduce rubbing during healing.
Frequently Asked Questions
Q: How do I choose between single-needle fine line and slightly heavier micro-line for a nature motif?
A: Think about where the tattoo sits and how active that area is. Single-needle excels on stable skin like the shoulder blade or calf, while slightly heavier micro-line is safer for high-contact places like wrists and ankles because it keeps separation over time.
Q: What realistic touch-up schedule should I expect for these small nature pieces?
A: Plan a touch-up around 12 to 24 months for most tiny fine line work, sooner for hands, fingers, and wrists. Touch-ups are usually minor and take 20 to 60 minutes depending on how much softness you want sharpened.
Q: Where can I find healed examples and portfolios without naming specific artists?
A: Search platform hashtags related to the motif and style with location filters, use portfolio sites that allow keyword searching for terms like "fine line botanical healed," and browse community threads that collect healed shots across skin tones. These pathways help you compare how similar designs age in different placements.
Q: Are there placements I should avoid for very detailed botanical work?
A: Avoid creasing zones for extreme micro detail, such as the base of fingers, tight wrist creases, and the direct armpit fold. If you want detail in those areas, increase spacing and accept a regular touch-up plan.
Q: How should I dress for the session based on placement?
A: Wear clothing that exposes the area without being adjusted during the appointment. Examples include a loose tank for inner forearm work, a cropped top for ribs and sternum, and drawstring shorts for inner thigh pieces. Use clothing that remains in a normal worn state so the artist can work comfortably.
