
A surprising number of music tattoos that still read crisp after five years are not the tiny single-note shots all over social feeds. Heavier linework and intentional spacing often keep score readable on wrists and fingers, while delicate scripts can blur unless scaled up. Below are music-focused designs with notes on placement, aging, and how to style them so the piece still looks deliberate years from now.
1. Minimalist Treble Clef on the Inner Wrist
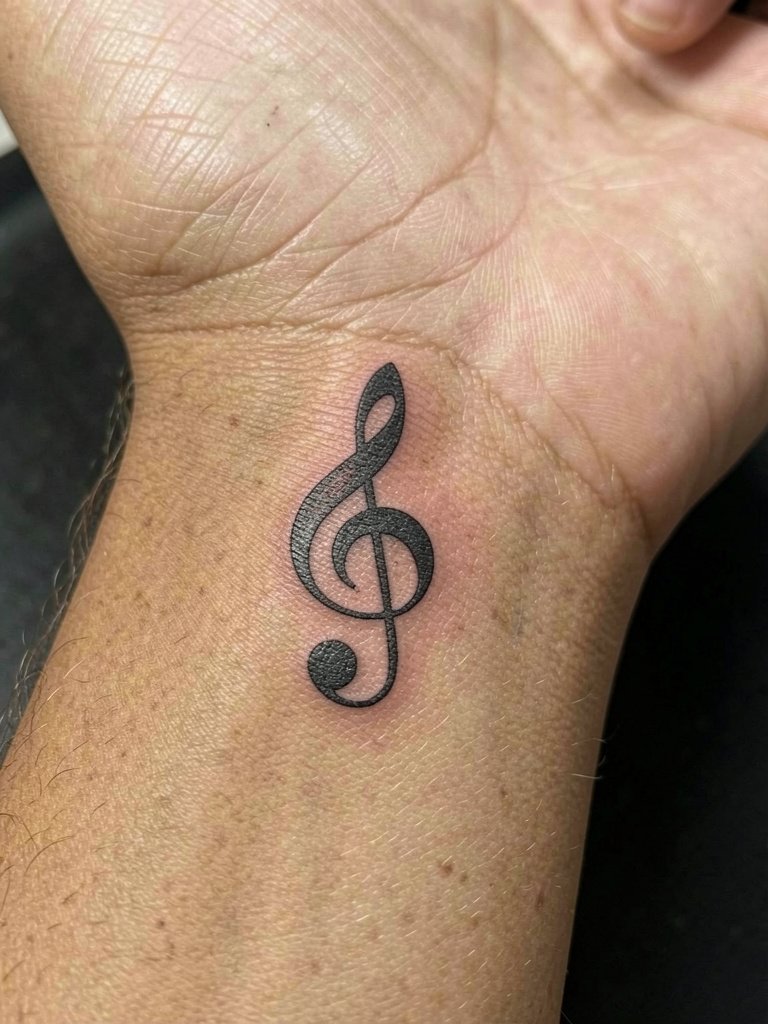
A wrist treble clef reads best when the curl is slightly bolder at its thickest point. Small single-needle curls can look elegant at first and then soften into a blur after repeated washing and friction from bracelets. Recommend bringing two reference photos at different sizes so the artist can show how three millimeters of extra spacing around the curl changes longevity. Expect a 30 to 45 minute session, low pain, and a likely touch-up at the one-year mark. For showing off, roll sleeves and wear a delicate gold chain bracelet that frames the wrist without rubbing the ink.
2. Micro-Realism Vinyl Record on the Ankle
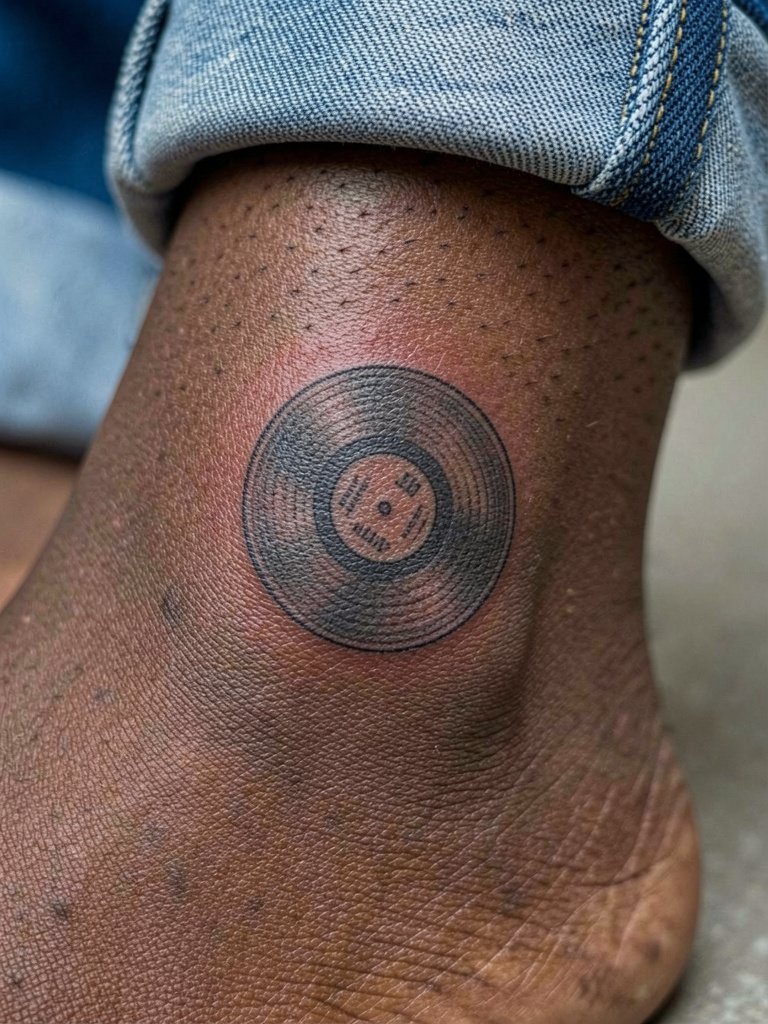
Ankle work faces persistent friction from socks and shoe collars, so the micro-realism vinyl needs slightly stronger contrast than a pure fine-line piece. I suggest asking the artist to keep the center label as negative space and to place the darkest shading away from the ankle bone edge to avoid early fading. Sessions run 45 to 75 minutes depending on detail. Pain is moderate. For nights out, pair this with cropped jeans or a slip skirt and ankle-wrap sandals that let the record peek through without rubbing.
3. Single-Line Soundwave of a Favorite Lyric on the Ribcage
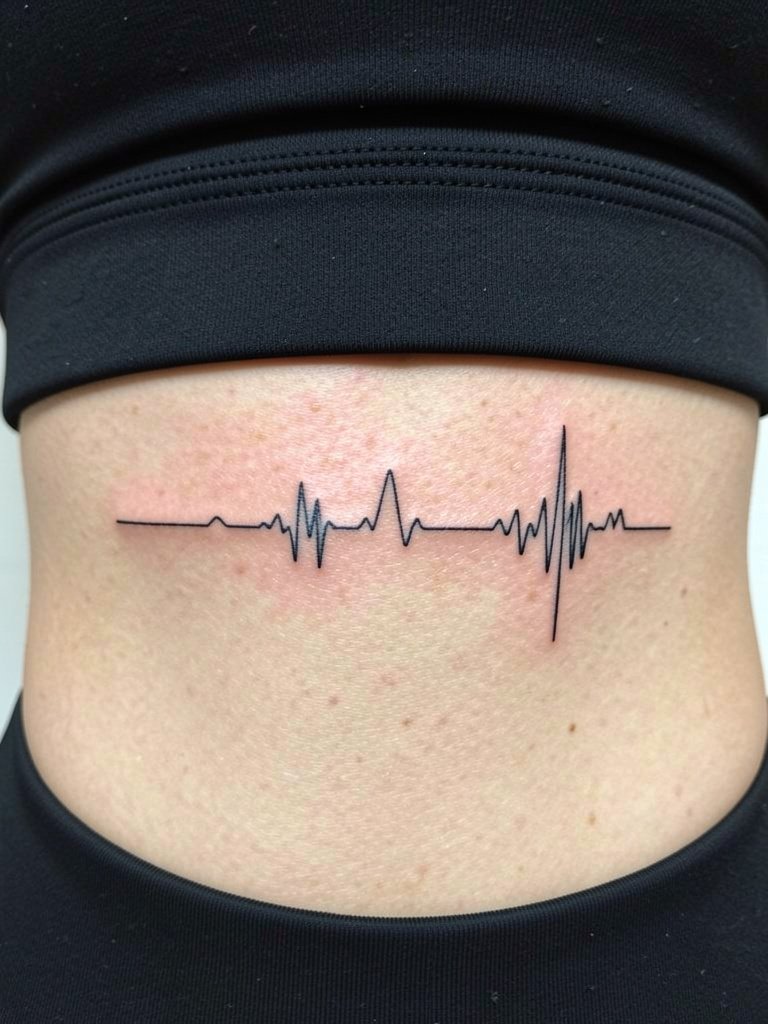
Ribcage soundwaves sit on a high-movement area so the biggest mistake is requesting single-needle hairline peaks with no breathing room. One group of artists says fine-line waves on ribs will blur within two years because the skin stretches. The other group says a slightly heavier line and small gaps make the wave readable for far longer. Pain here is higher and sessions are broken into shorter passes. If you plan to reveal the piece, wear a fitted bandeau or scoop-neck top that naturally exposes the sternum area. For the appointment, a loose sports bra is easiest for access.
4. Tiny Piano Keys Along the Side Finger
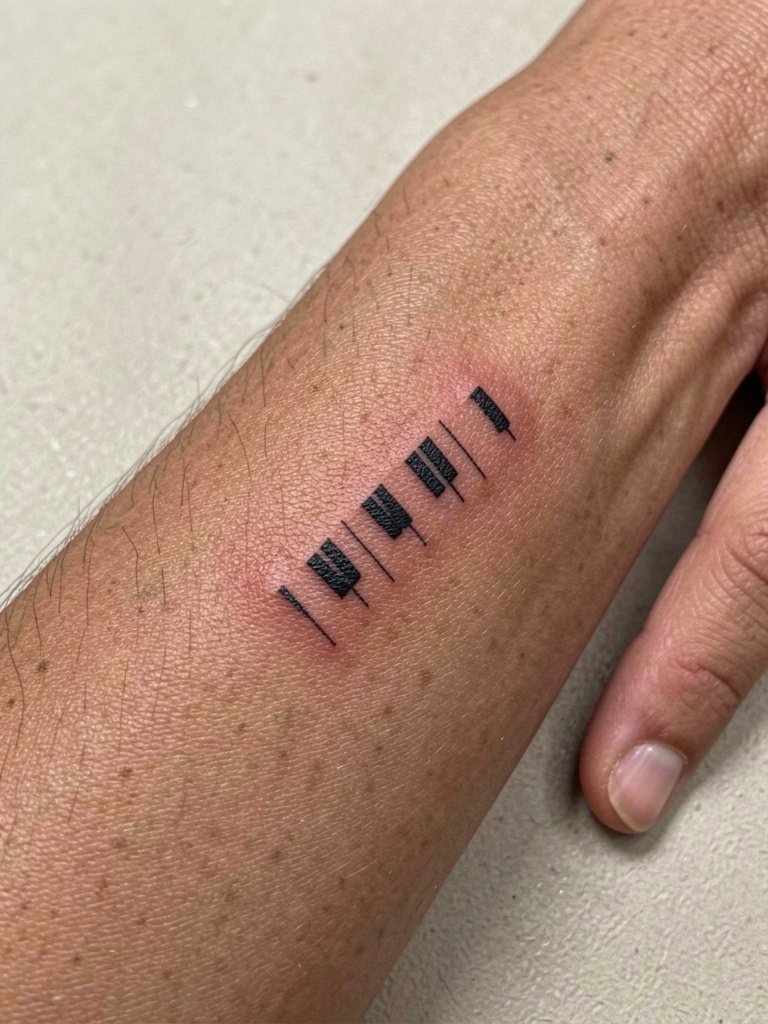
Finger tattoos face constant washing and rubbing, so solid blocks hold up better than narrow white gaps. The common mistake is attempting intricate separations without accepting that the separators will soften over time. Ask the artist to increase the black block width and aim for a bold baseline that survives frequent handwashing. Sessions are short but may need a touch-up at six to twelve months. Show-off pairing is subtle rings on adjacent fingers and a thin black band ring that complements the tiny keyboard without covering it. Hands require an artist experienced with high-wear placements.
5. Retro Cassette Tape on the Upper Thigh
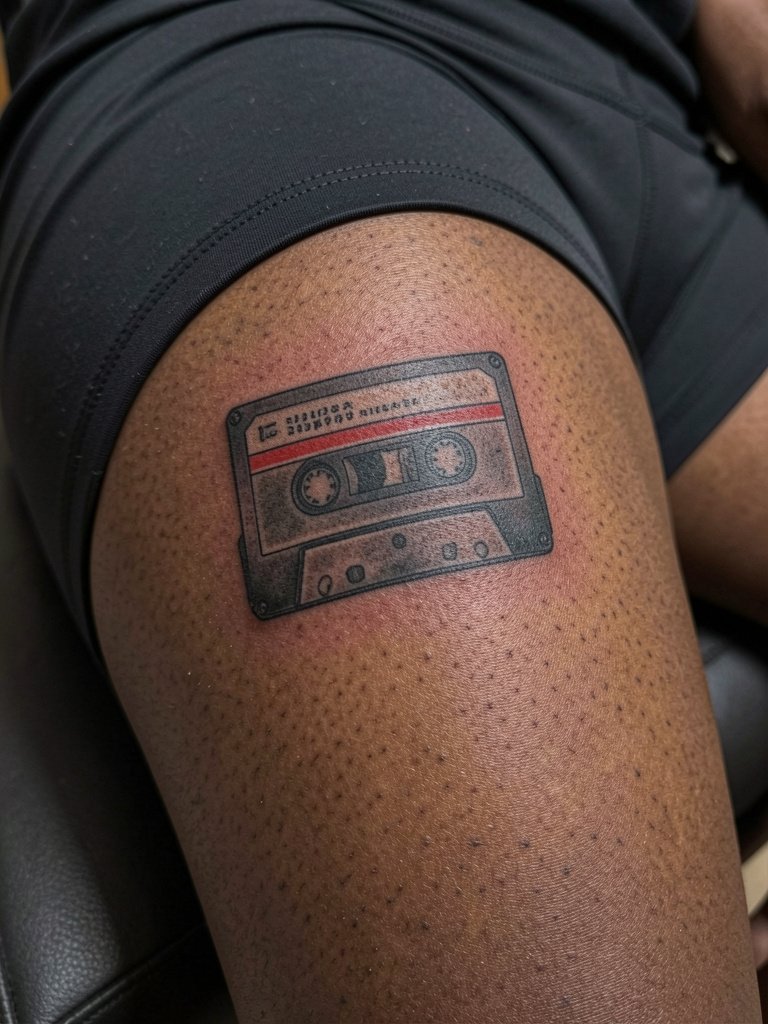
Thigh tattoos enjoy relative protection from UV and friction, so the cassette allows for finer interior details than wrists. The session feels moderate and comfortable if the client stays hydrated. A common error is cramming two lines of tiny text into the label; instead pick one short word or a bold initial. For visibility, try pairing with high-waisted shorts or an open-front skirt and consider a lightweight linen short that sits above the design so it can be shown without tugging at the waistband.
6. Blackwork Guitar Silhouette on the Outer Upper Arm
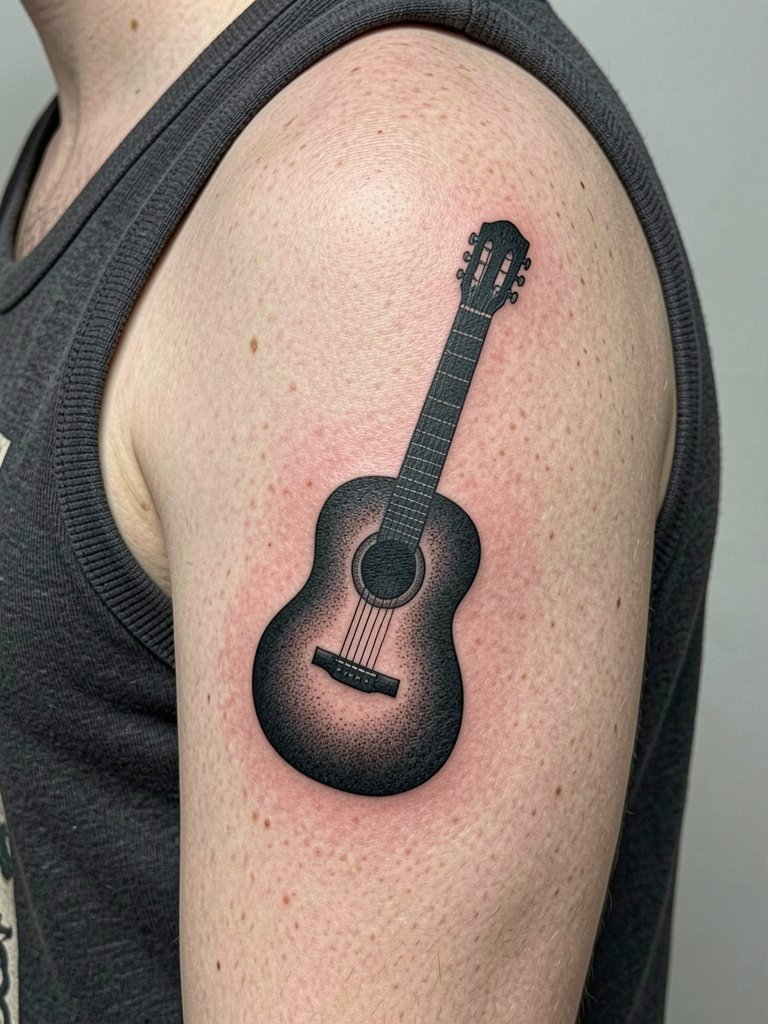
Outer arm silhouettes age remarkably well because the skin is low friction and easy to protect from sun. The usual mistake is adding micro-detail into the guitar's body that disappears over time. I recommend a high-contrast fill and clear negative-space elements that read from a distance. Sessions are typically under two hours and the pain is low. Wear a loose tank to the appointment so the artist can work uninterrupted. For evenings when you want to show it off, a rolled-sleeve linen shirt frames the silhouette neatly.
Pre-Session Essentials
The wrist, thigh, and finger pieces above have different needs for session comfort and first-week protection, so these five items keep the day smoother.
-
Stencil transfer paper kit. Lets you preview line placement on skin before the first pass, which matters for tiny keyboard and treble clef work.
-
Topical numbing cream. Apply as directed before a ribcage or sternum session to reduce skipping because of pain.
-
Thin protective film roll. Useful for finger and ankle tattoos that face lots of washing and friction in the first week.
-
Fragrance-free body wash. Helps cleanse healing areas without irritating delicate linework on wrists and forearms.
-
Healing ointment. A thin layer during the first few days keeps fine line pieces hydrated without suffocating the needle channels.
7. Stylized Headphones Behind the Ear
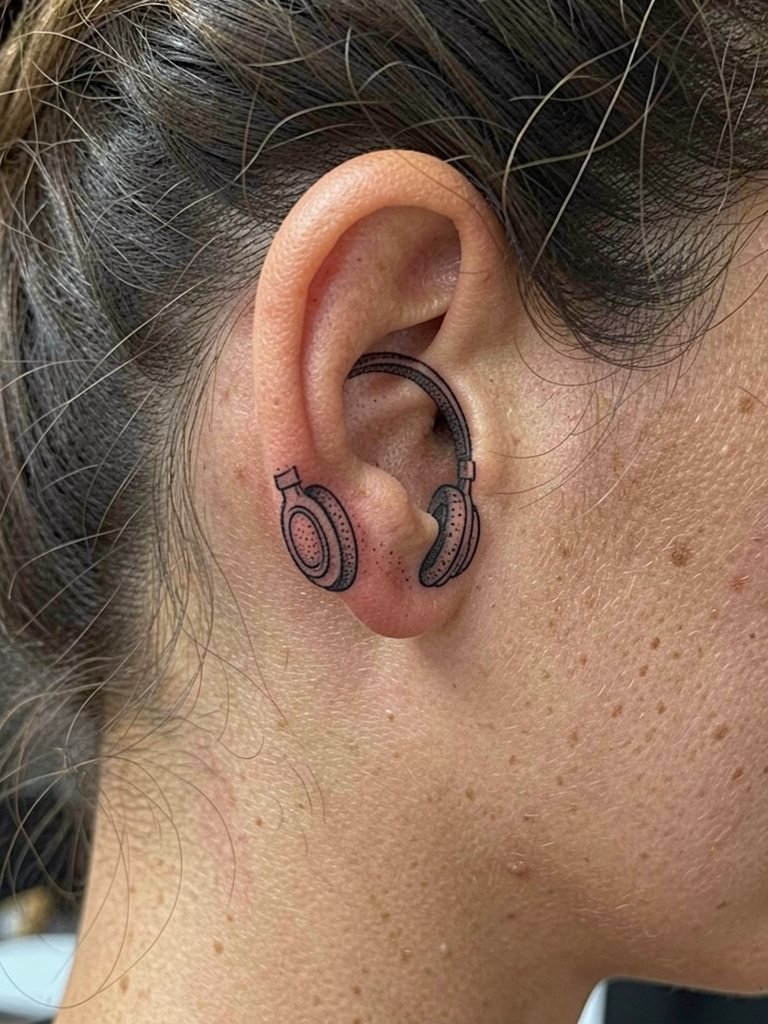
Behind-ear tattoos are small and intimate, so line clarity is crucial. Artists often caution that the area can be touchy because of thin skin and frequent movement. For session comfort, plan very short passes and bring ear-protecting noise-cancelling headphones for longer back-of-neck work. Styling-wise, this hides easily under hair or looks modern with hair up and a simple hair claw clip that keeps the area visible for showing. Because of the placement, seek an artist used to delicate neck zones.
8. Scripted Lyric Banding on the Collarbone
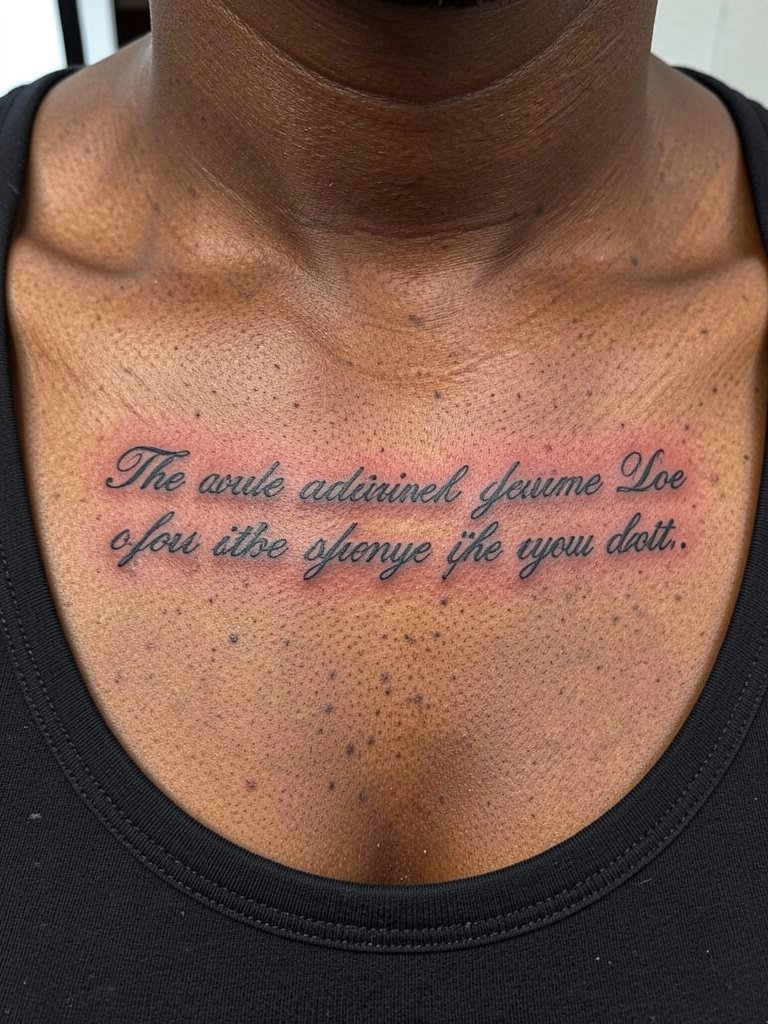
Collarbone scripts stretch across a high-visibility area and suffer from occasional blurring if the baseline is too thin. Instead of a fragile single line, ask for a gentle increase in baseline thickness and consistent letter spacing. A common mistake is cramming long lines onto a short collar space. Sessions are medium pain. For outfits that complement the script, open-neck shirts and scoop-neck tops display the lettering without tugging at the fabric. If the lyric has cultural meaning, mention its origin during the consultation.
9. Sheet Music Fragment on the Inner Forearm
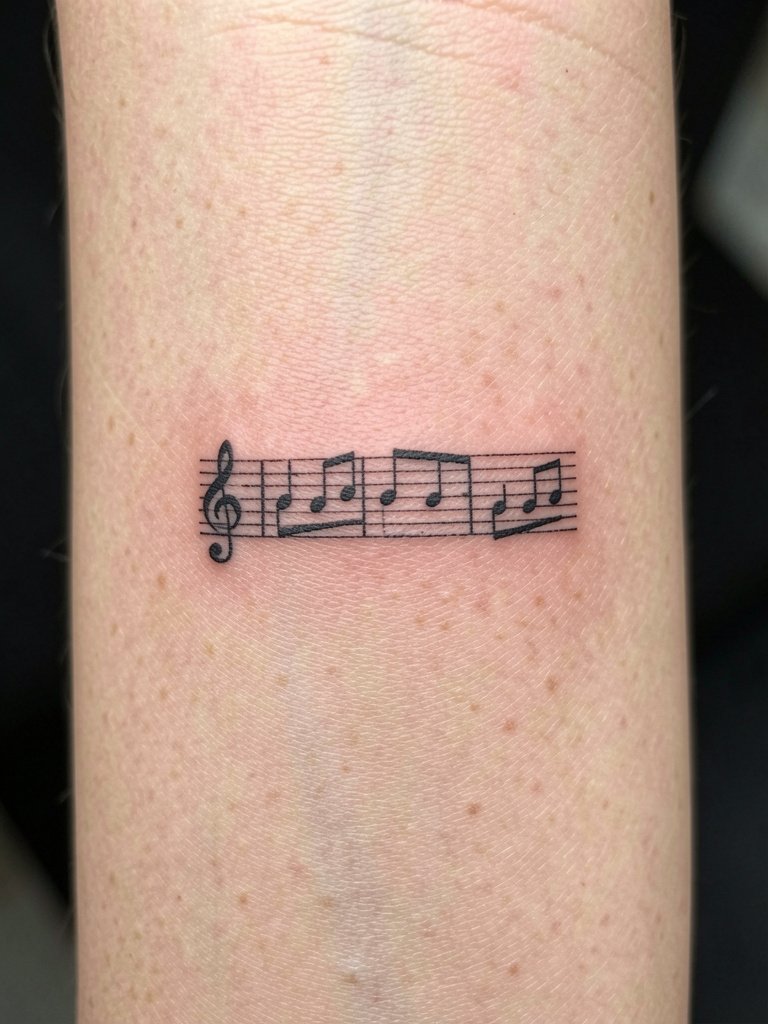
If you want actual notes to remain readable, bring the exact bar you want and request the artist draft the staff lines slightly thicker than on sheet paper. A frequent error is shrinking the staff until ledger lines merge. The forearm is a forgiving surface and touch-ups are usually minor. Sessions last 60 to 90 minutes for clean notation. For showing this one off at rehearsals or gigs, a rolled-up sleeve tee or a linen button-up shirt will frame the music without covering it.
10. Geometric Mandala with Hidden Note
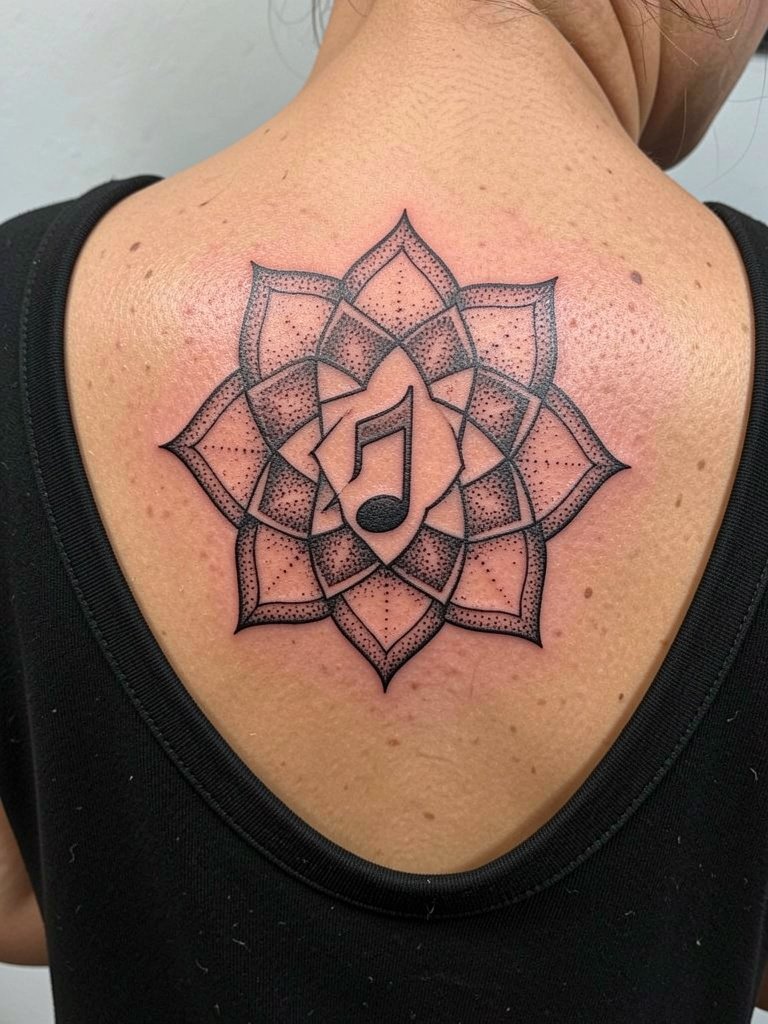
Mandala patterns borrow from specific cultural art systems. If the motif references a tradition, discuss appropriate symbolism and credit the origin during the consultation. The design reads best when lines have breathing room, so avoid cramming micro ornaments into the center. Sessions vary with scale, and stipple shading adds time. For shows where you want the piece visible, a scoop-back dress or open-back midi showcases the mandala cleanly. Respectful use of cultural elements helps avoid unintended appropriation.
11. Vintage Microphone on the Side Neck
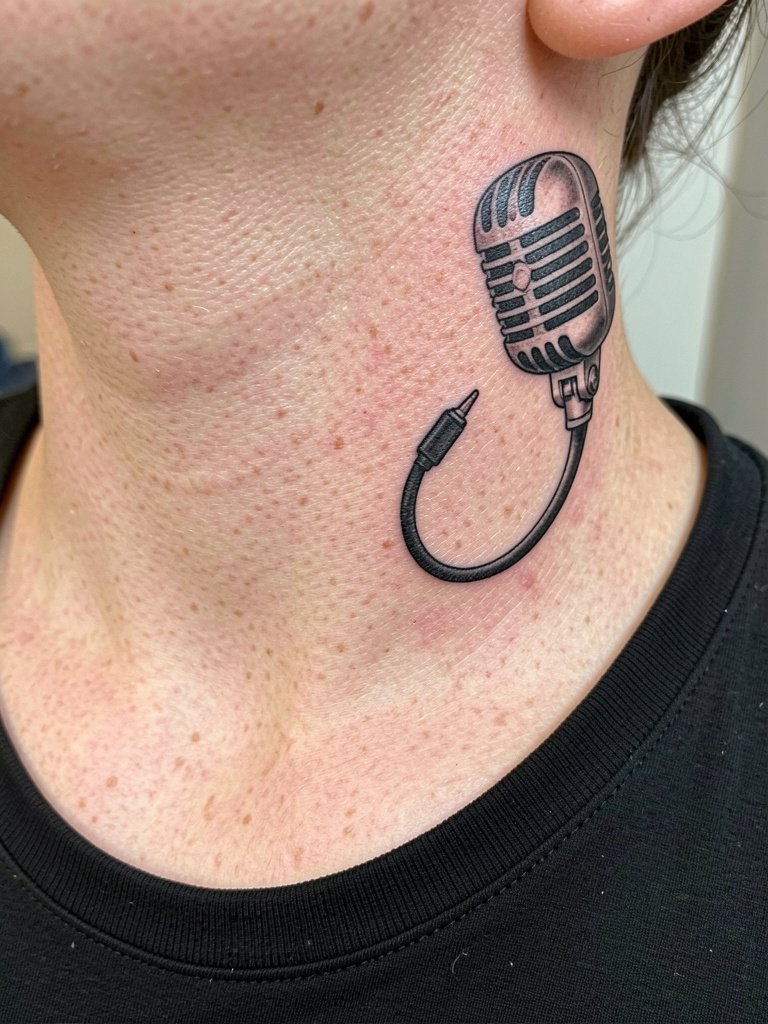
Neck placements are high visibility and high commitment. One camp of artists avoids fine-line neck work because movement and sun exposure accelerate fading. The other camp will do it with heavier outlines and promise regular touch-ups. Sessions are short but can be painful. For a night look, pair with a wide-neck top and a compact silk scarf that frames without rubbing. Ask how they plan to space the grill lines so the tiny details hold up.
12. Waveform Portrait Across the Sternum
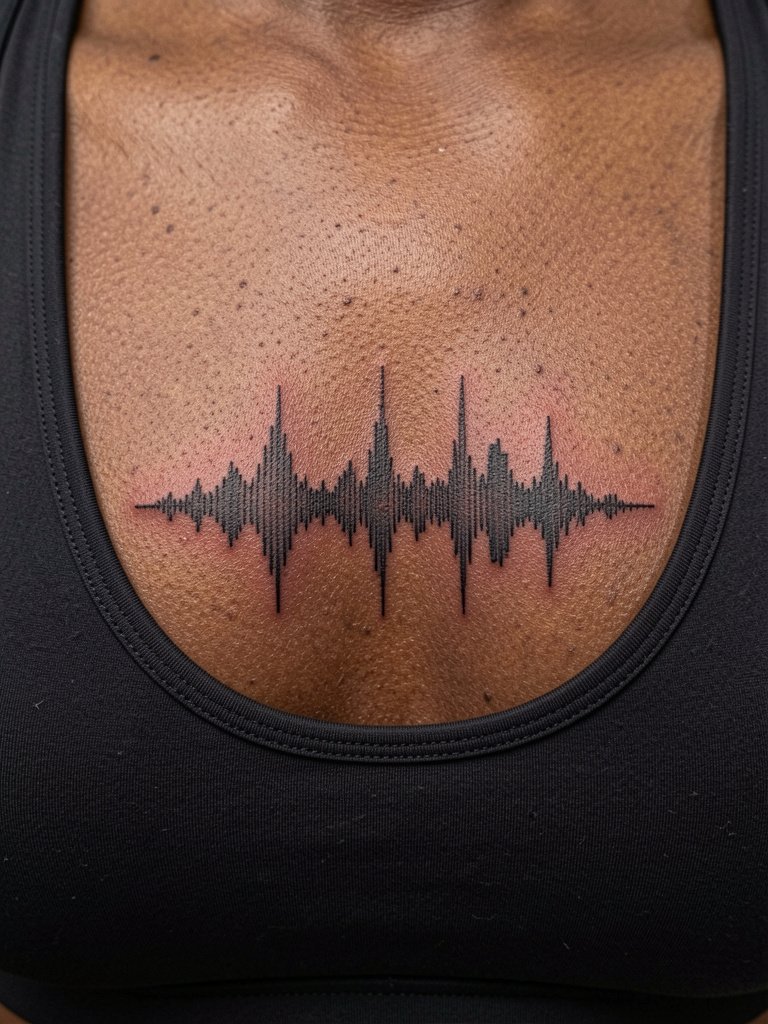
Sternum work can be tender and requires an artist experienced with chest curvature. The main mistake is mapping a waveform without compensating for the convex surface, which makes peaks compress after healing. Bring the exact audio file and request the artist translate it into a slightly expanded waveform. Sessions are more intense and may be split. Because this area is intimate, expect specialized aftercare advice from the studio.
13. Tiny Note and Heartbeat on the Foot Top
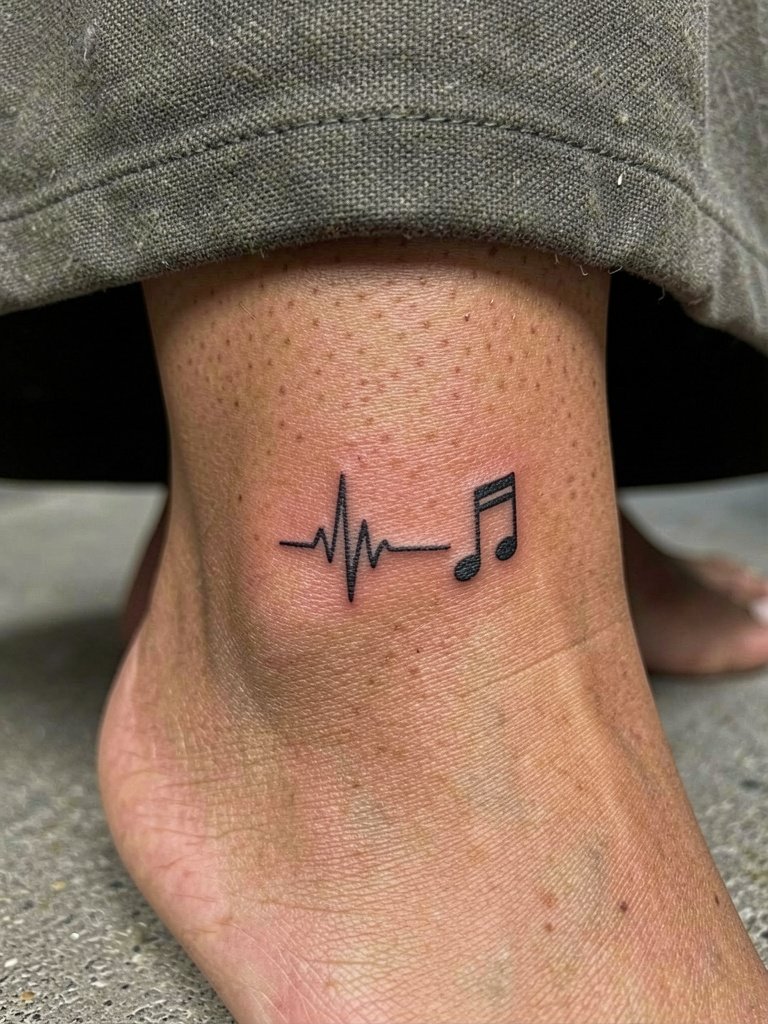
Top-of-foot tattoos are exposed to shoes and sun so give the design a slightly bolder endpoint. Many people under-scale the final note resulting in early loss of definition. Ask the artist to thicken the terminal note and leave the heartbeat line slightly more open. Sessions are quick but the area is sensitive. For showing, sandals or a cropped pant look best and a strappy sandal is an easy complement.
14. Turntable with Floral Accents on the Calf
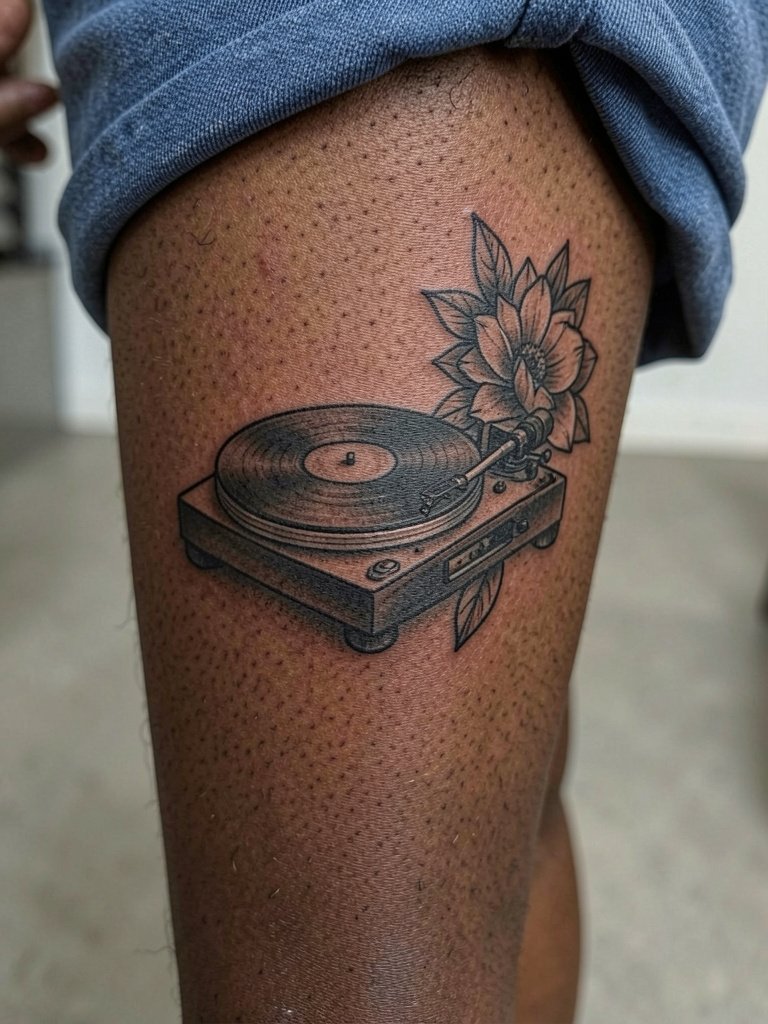
Calf placements allow for decorative combos and aging is generally forgiving. The key mistake is placing too much micro-detail in the platter grooves. Keep grooves suggestive and let the floral accents carry texture. Sessions are comfortable and allow for color saturation if desired. For stage-ready looks, pair with mid-calf boots or a cropped denim skirt that shows the design without rubbing the area.
15. Sheet Music Ribbon Around the Wrist
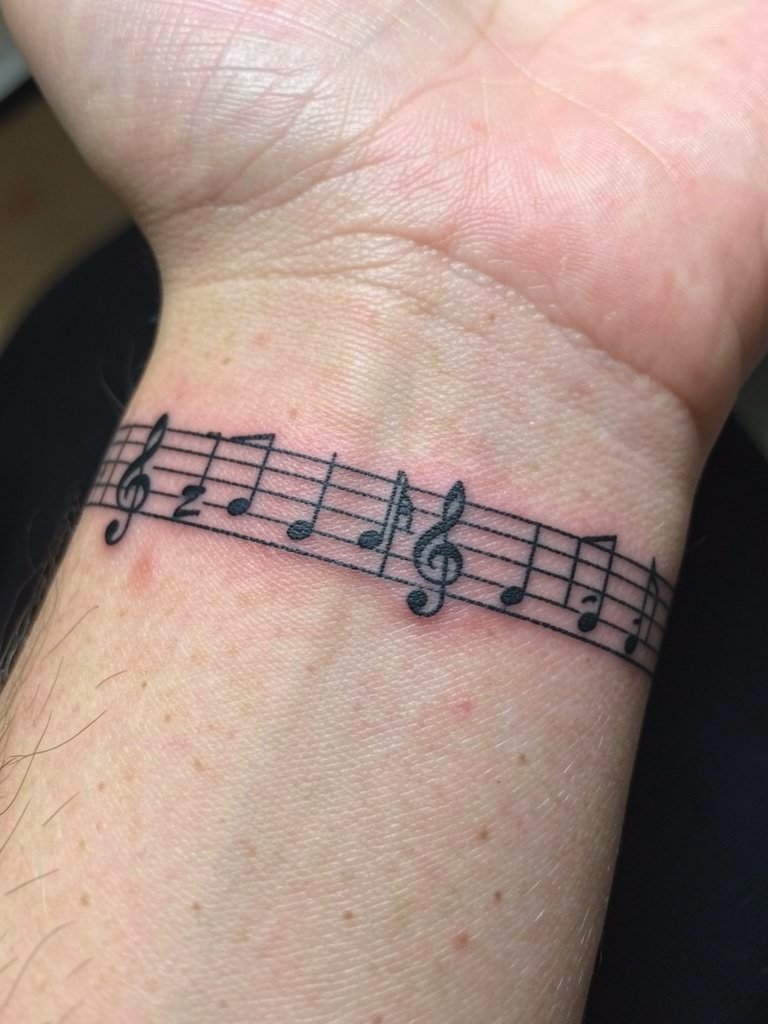
Wrist ribbons get daily exposure so the staff lines must be intentionally bolder than printed music. The common error is expecting notation to remain crisp when drawn with ultra-fine lines. Ask the artist to thicken the staff slightly and to limit the number of ledger lines. Sessions are short. A fine leather cuff or a thin braided bracelet pairs well when you want to lock in an acoustic look without covering the ink.
16. Matching Couple's Waveform Anklet
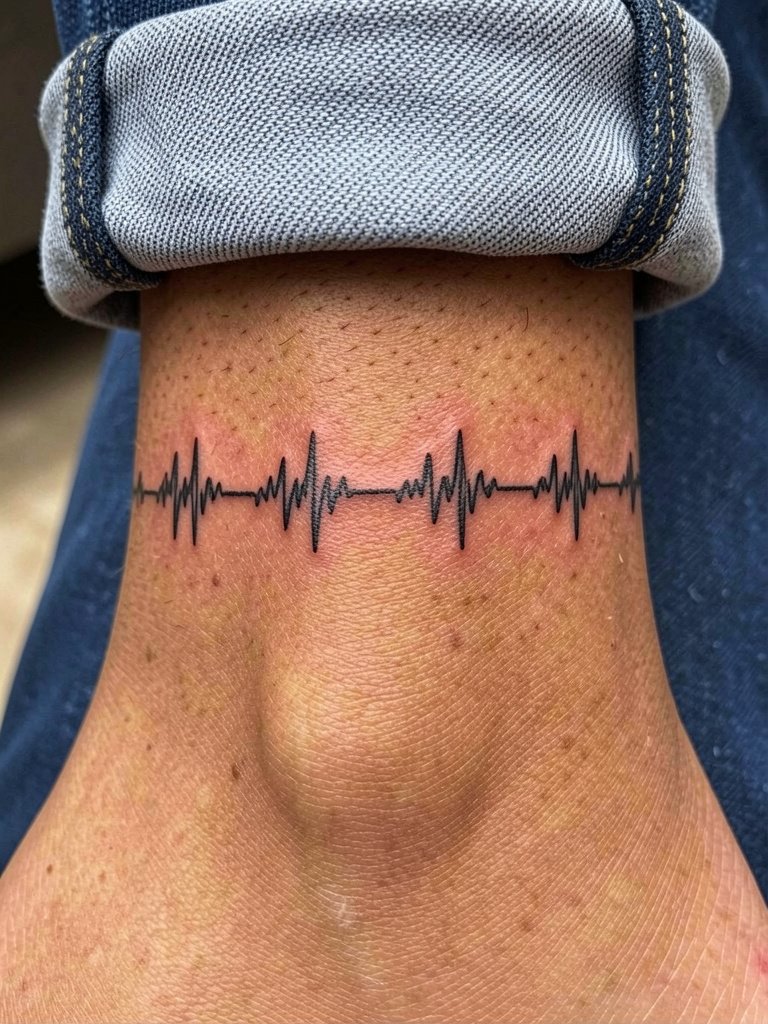
Matching waveform anklets are sentimental, but the main issue is choosing scale. Too narrow and the pattern blends into a grey band. Agree on a consistent width and ask for symmetry marks so two pieces can line up. Ankles are moderate pain and need careful first-week protection because of shoe straps. When showing both pieces, cropped jeans or skirts work best and a delicate ankle chain can accent without rubbing the ink.
17. Micro Portrait of a Favorite Instrument on the Bicep
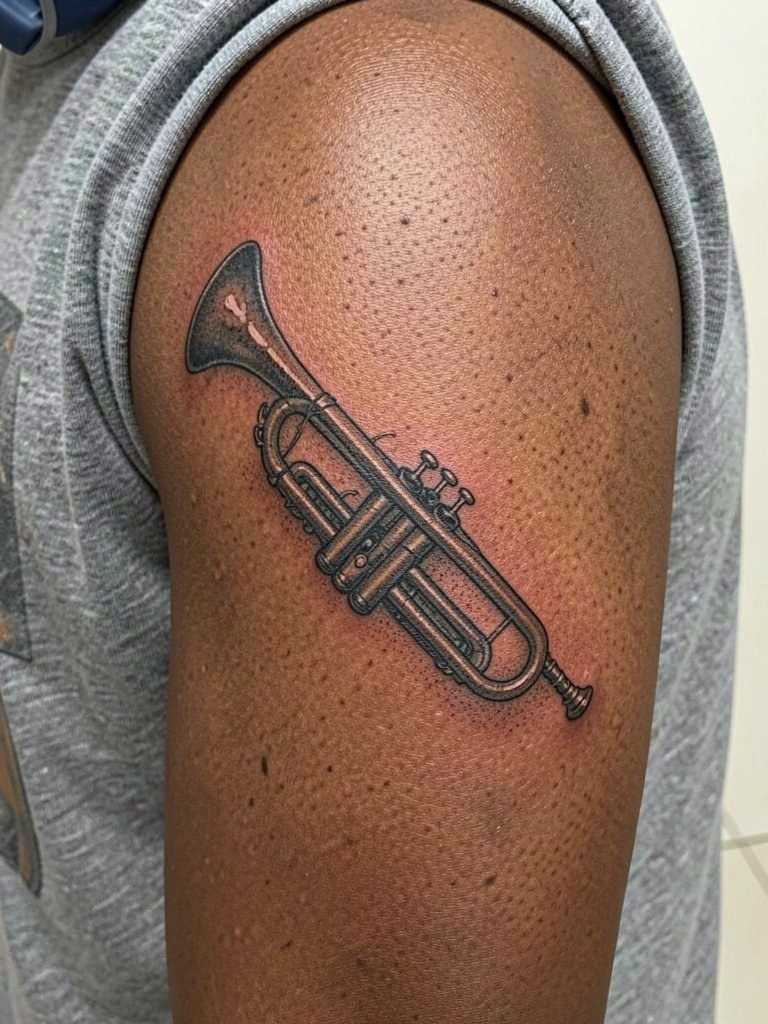
Biceps give room for tiny portrait detail while staying protected from daily wear. Shrinking instruments too small makes highlights vanish, so pick a scale that keeps the bell reflection readable. Sessions are comfortable and typically under two hours. For casual wear that shows the piece, sleeveless shirts or relaxed tank tops work well. For brass or metal instrument depictions, discuss how much white space should remain to represent shine.
18. Broken Record Motif on the Inner Arm
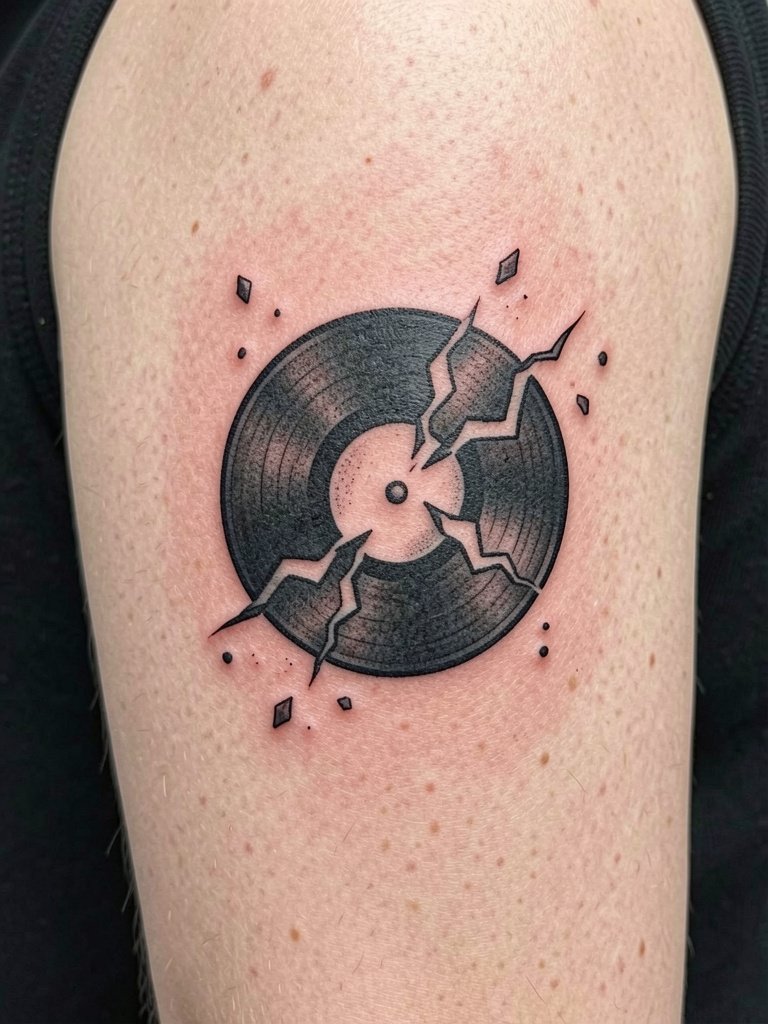
Inner-arm placements hide well and heal gently if you avoid tight sleeves during the first week. The typical mistake is fine crack lines that vanish into the background. Request a slightly heavier crack outline and scattered dotwork to maintain the broken effect. Session time is moderate and pain low. Wear a loose tee so the artist can access the medial bicep without constriction. This placement is good for a private motif that you can reveal selectively.
19. Heartbeat Notation Behind the Knee
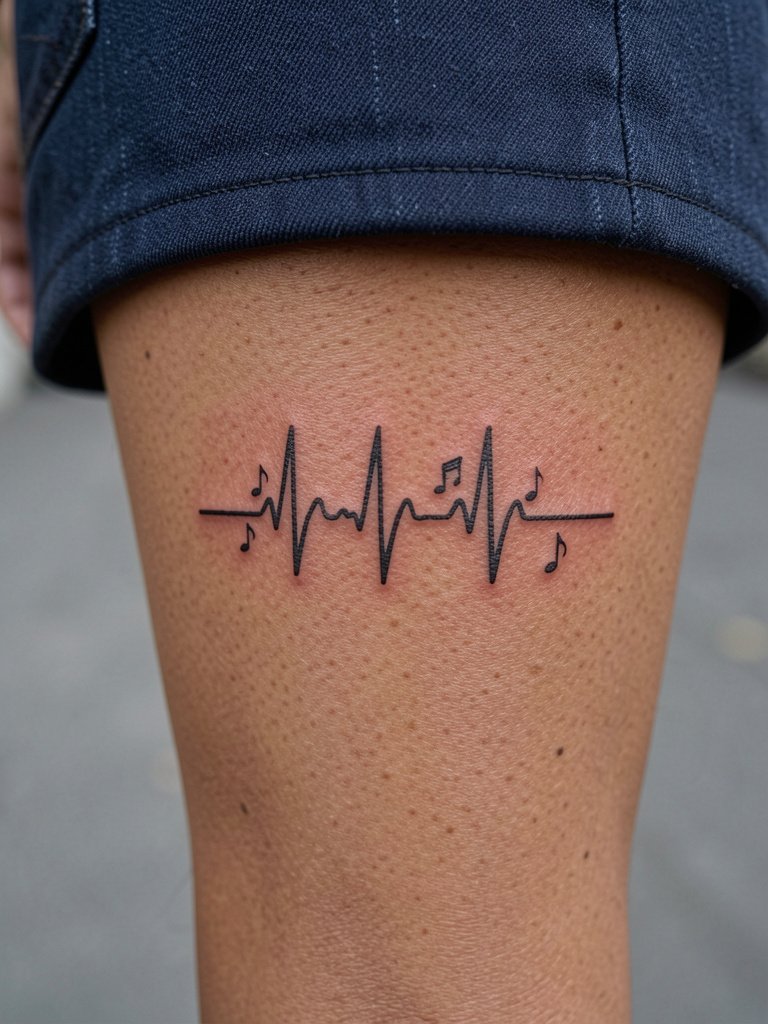
The back of the knee moves a lot so the design should avoid running through the central crease. One common error is placing tight details directly in the flex line, which distorts as you bend. Ask for the notation to sit just above the crease with slightly heavier endpoints. Sessions are quick but the area is sensitive. For showing the piece, summer dresses and cropped hems work, and a midi skirt keeps the look elegant without rubbing.
20. Minimalist Conductor's Baton Along the Collarbone Edge
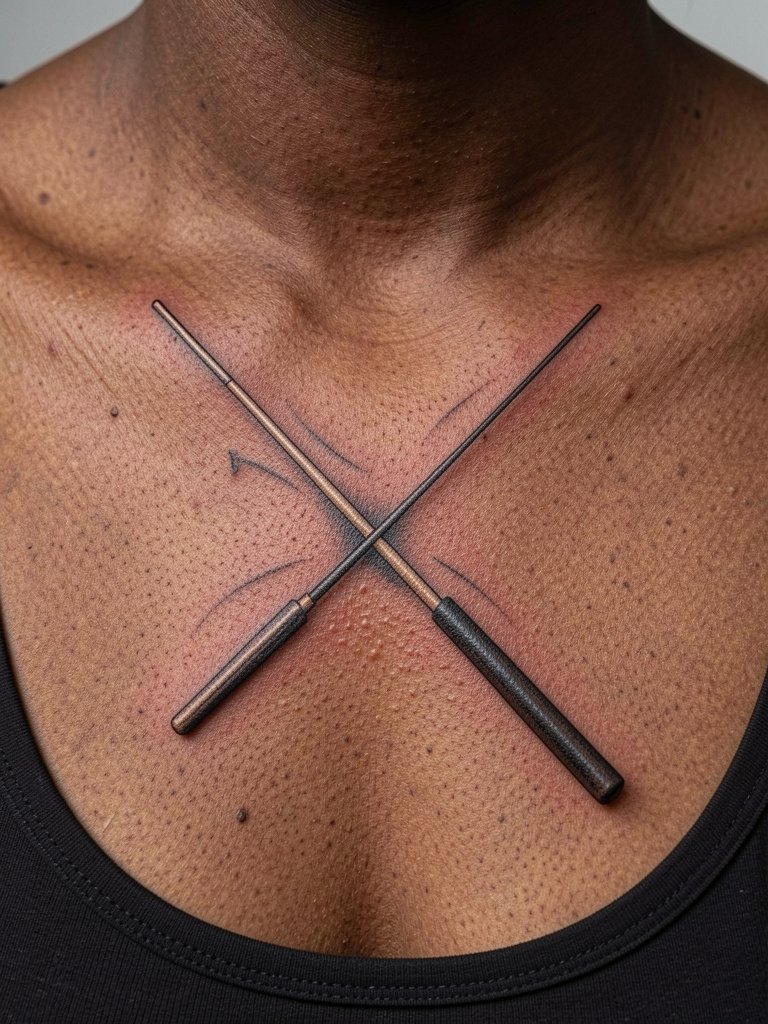
Small linear designs on the collarbone need slight weight changes so the handle does not vanish with time. The visual misstep is demanding a hairline baton with no reinforced sections. Request a balanced weight so the baton reads from both near and far. Sessions are short and pain is mild to moderate. Pair with a wide-neck tank or an open-collar blouse for an elevated rehearsal-night look.
21. Orchestral Instrument Cluster on the Shoulder Blade
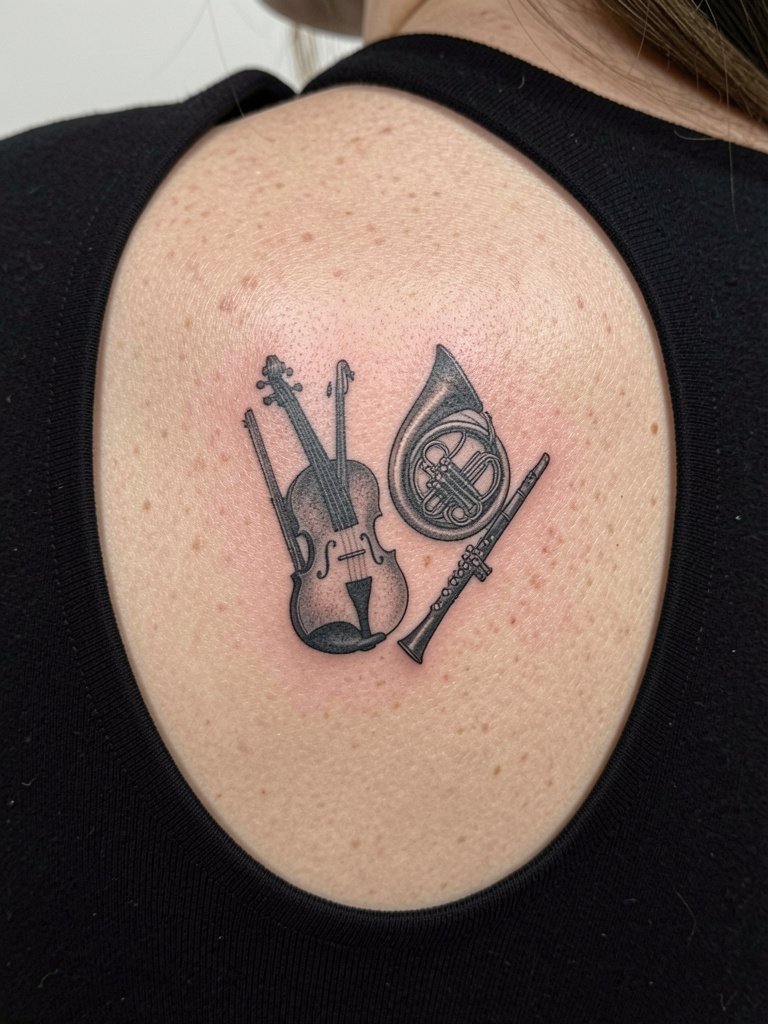
Shoulder blade clusters take advantage of a broad canvas, so avoid over-saturating tiny instruments into a tight knot. The typical mistake is trying to show every tuning peg and key. Instead, simplify silhouettes and let negative space separate the forms. Sessions are comfortable and often done in one sitting depending on size. For gallery nights, an open-back top or backless dress highlights the cluster without fabric interference.
22. Cassette Tape Fragment Peeking from a Pocket
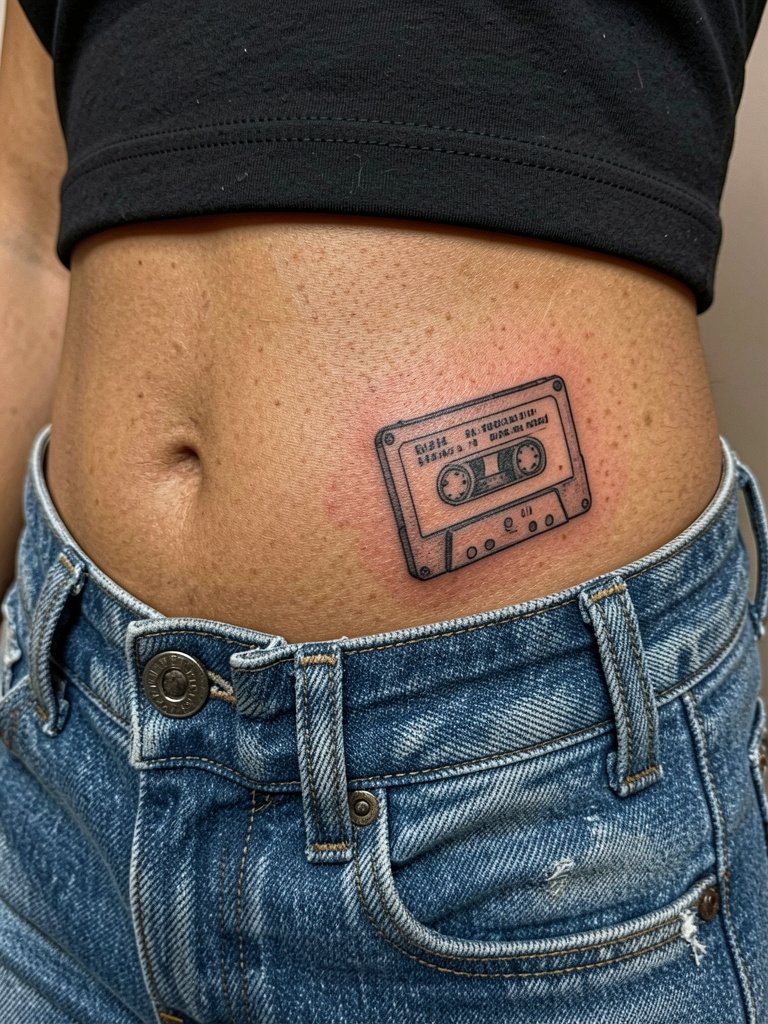
Hip pieces are discreet and tolerate larger scales if you want more detail. The big error is placing tiny text inside a cassette label when the surrounding skin will compress over time. Pick one short word or initials for the label to keep it legible. Session time is moderate. For casual reveal, low-rise jeans and a cropped tee work well and a cropped tee keeps things effortless.
23. Stylized Turntable Needle as a Finger Ring Tattoo
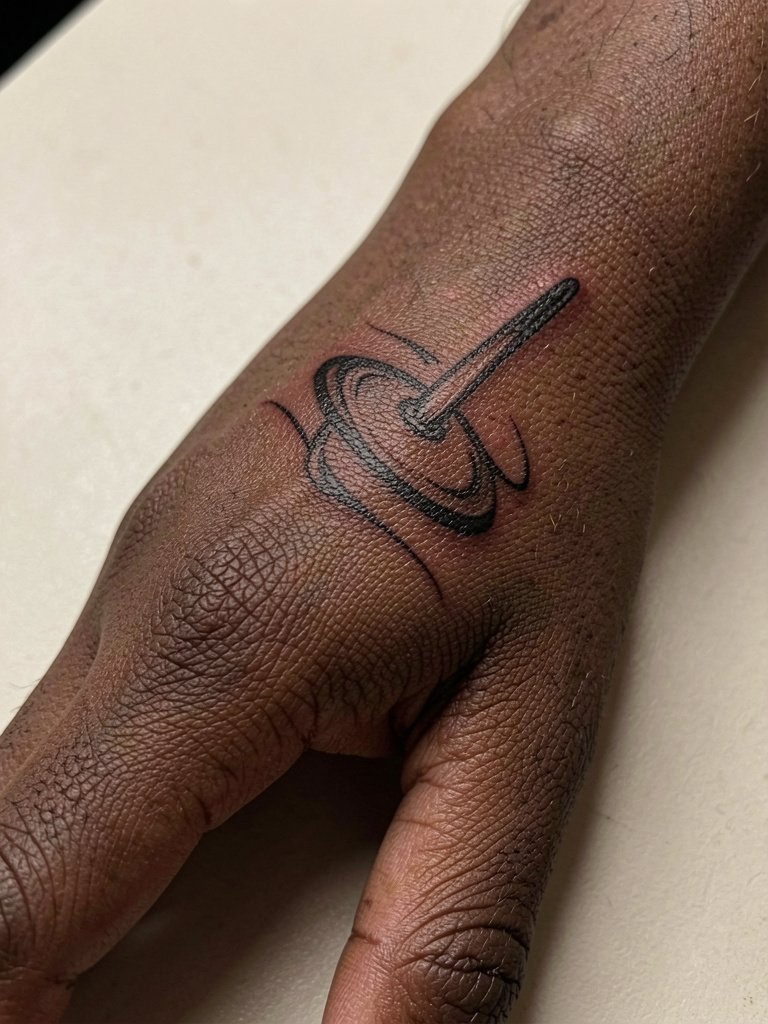
Finger rings are high-wear and need bolder lines than people expect. One camp recommends avoiding rings entirely because daily friction and washing will erase them quickly. Another camp will do them if the line is thick and they plan a one-year touch-up. If you want a ring motif, accept that touch-ups are part of the plan and ask for a slightly thicker baseline. Sessions are short but keep expectations realistic. A slender ring or stack will complement this piece without causing additional abrasion.
Frequently Asked Questions
Q: How do I keep a music tattoo readable after a few years?
A: I have seen the best results when people allow slightly heavier line weight and extra spacing for small motifs. Arrange a touch-up at one year if the design sits on hands, wrists, or fingers. For low-friction areas like the outer arm or thigh, sun protection and occasional moisturization make the piece last longer.
Q: Can I use actual band logos or album art in my tattoo?
A: Some people treat band logos as homage and want exact replicas. Others worry about copyright and prefer stylized or abstract interpretations that capture the same feeling without copying. If you choose a logo, consider discussing legal and cultural implications and ask the artist to create a custom interpretation that keeps the spirit while avoiding a direct copy.
Q: Where can I find healed examples and portfolio pages for music-themed tattoos without naming specific artists?
A: Search platform tags and phrases like #MusicTattoo, #HealedInk, and #SoundwaveTattoo on social platforms with location filters to find healed shots in different skin tones. Niche tattoo forums and portfolio aggregators also let you filter by style and placement so you can compare healed work across realistic timelines.
Q: What should I wear to a session for a chest, rib, or shoulder tattoo?
A: Choose fitted clothing that exposes only the area the artist needs while staying comfortable. For ribs, a fitted sports bra or cropped top helps. For shoulders and upper back, a wide-neck or scoop-top makes access simple. A fitted sports bra is handy for chest sessions.
Q: How visible are touch-ups for fine-line music scripts, and when are they usually needed?
A: Fine-line scripts on high-wear areas commonly need a touch-up within 9 to 18 months. The artist will reinforce the baseline and refine thin junctions. Expect touch-ups to blend naturally if the original spacing was planned with longevity in mind.
Q: Are there cultural concerns with musical symbols like mandalas or ritual instruments?
A: Yes. Decorative mandalas and instrument motifs often draw from cultural visual systems. One respectful path is to ask an artist knowledgeable about the tradition to advise on symbolism. Another option is to commission a custom design that honors the aesthetic without appropriating sacred motifs.
