
Bold trends promise tiny mountain silhouettes, but what usually lasts is careful spacing, a considered contour, and ink that reads at arm's length. These designs focus on how line weight, negative space, and placement age together so the peaks keep shape after years of wear. Keep the scale realistic for the skin canvas and pick a placement that fits the way you live and dress, and the pieces below offer both fresh angles and practical advice for the session and the decade after.
1. Fine Line Ridge on Inner Forearm
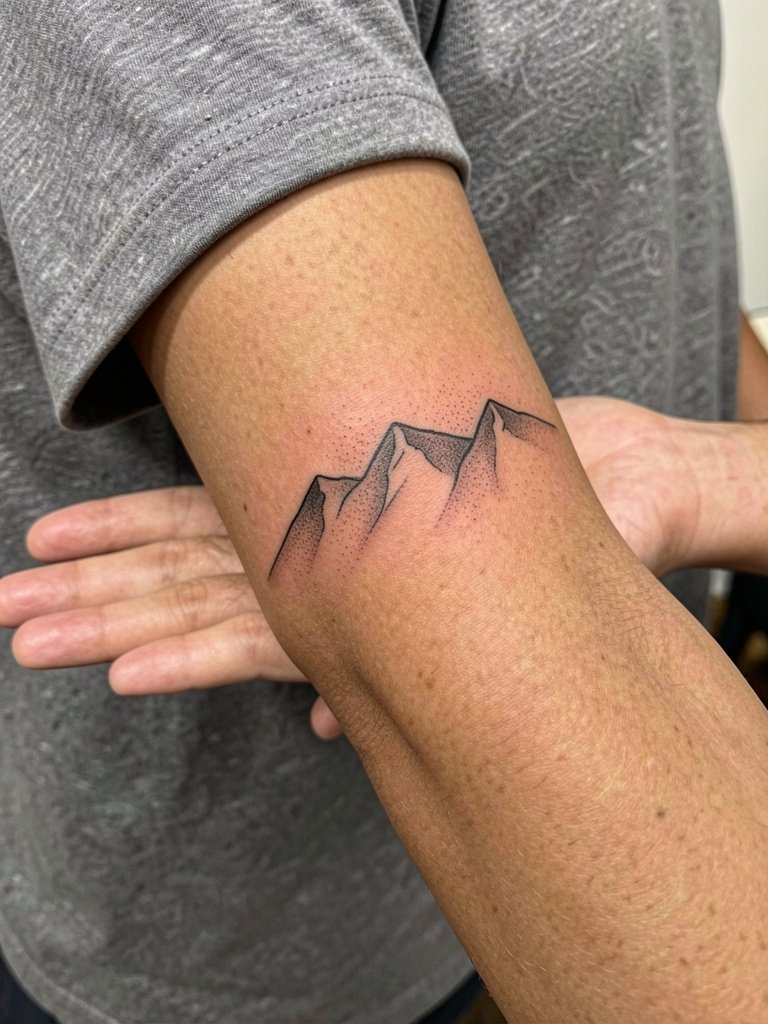
This delicate ridge reads best at three to four inches across, and smaller versions often fade into a smudge. Bring two reference photos at different scales so the artist can show how the line weight reads at each size. Expect a short session under an hour and light soreness along the inner forearm. Fine line here blurs faster on oily or heavily sun-exposed skin, so plan touch-up at the two-year mark. For showing it off, a rolled-sleeve button-up works well and keeps the piece visible. Try a breathable linen short-sleeve shirt to frame the forearm without covering it.
2. Single Peak on the Wrist
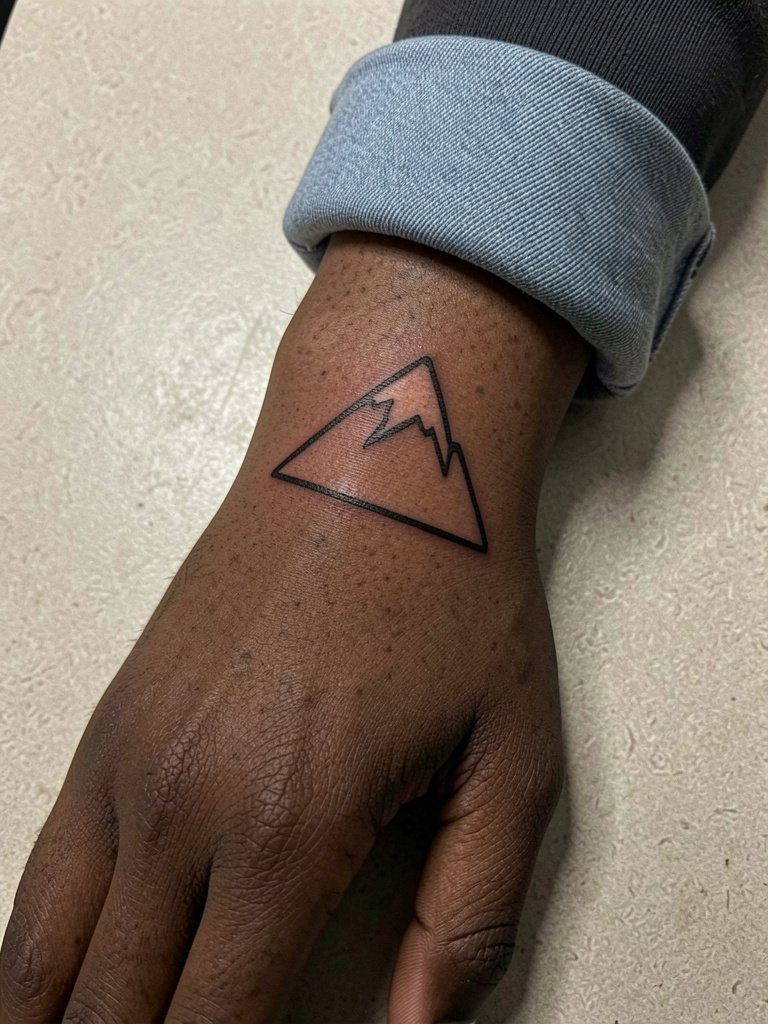
A wrist peak is a visible commitment that takes into account daily friction from watches and bracelets. Make the outline a touch heavier than the reference so the peak keeps definition after repeated hand movement. The session is quick, often under 45 minutes, and the area feels stinging rather than sharp. Common mistakes include placing too many tiny details that disappear by year two. For daily wear choose a low-profile watch and a slim leather band watch strap that avoids rubbing the same spot.
3. Geometric Mountain Trio on Chest
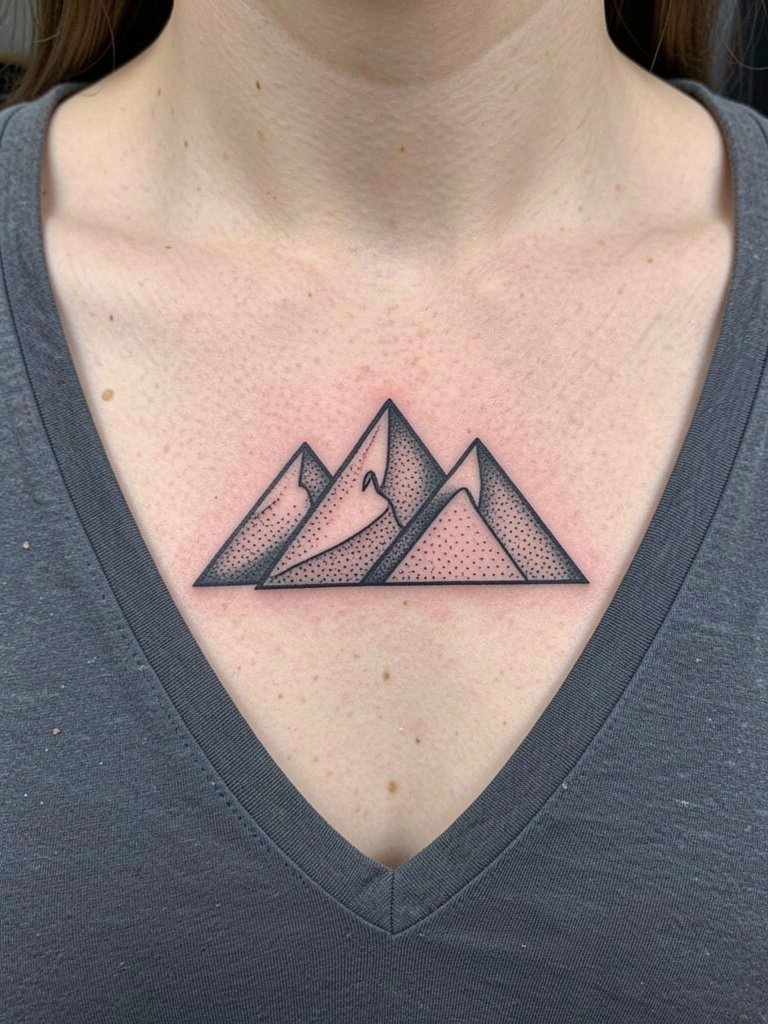
Placing angular, geometric peaks on the upper chest lets you play with symmetry relative to the sternum. Expect moderate pain and a session that can run one to two hours depending on dot-work density. The geometric approach ages well when you use slightly bolder linework and avoid tiny internal lines. During the consultation, show the exact spacing you want between peaks so the artist can account for natural chest movement. This placement pairs cleanly with open-neck shirts. Consider a breathable wide V-neck tee for times you want the piece visible without heaviness.
4. Blackwork Sylvan Range on Upper Arm
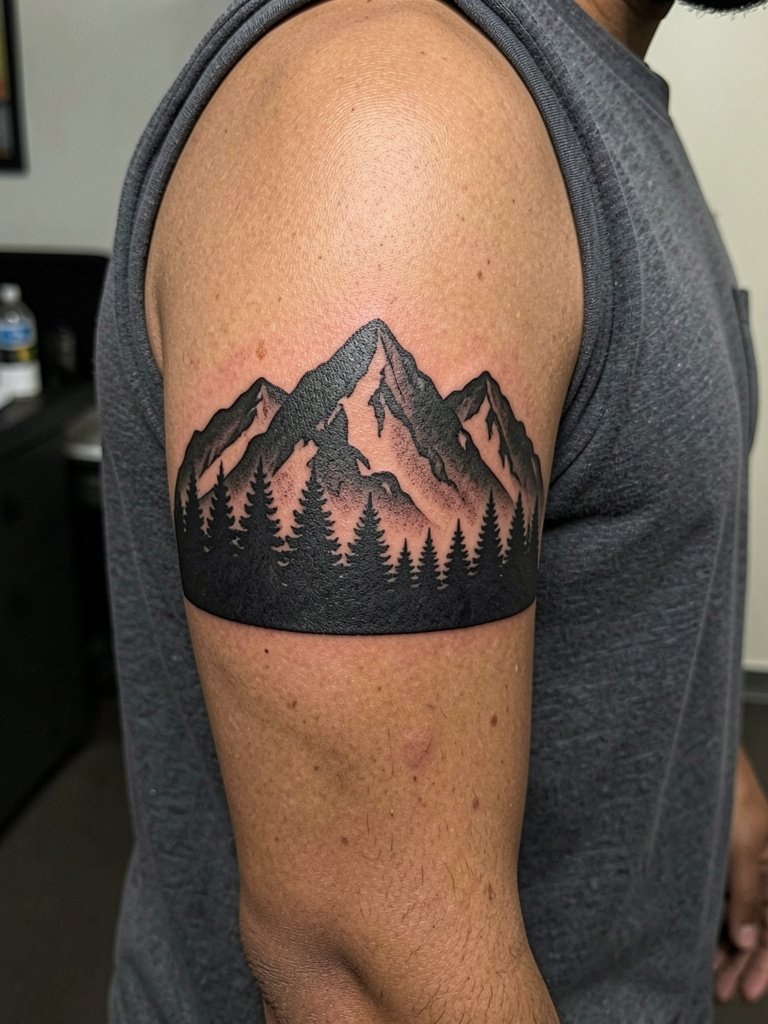
This solid silhouette style reads from a distance and ages into a strong, graphic piece. The session involves heavier saturation and may take two to three hours depending on the band width. Expect deeper soreness than fine-line work but less risk of early blur because the black fills hold. A common mistake is over-detailing the tree line, which can become muddy when packed too tightly. For casual show-off, sleeveless or roll-sleeve shirts frame the upper arm. Try a durable sleeveless performance tee that keeps the area exposed without rubbing.
5. Micro-Realism Peak on Upper Back
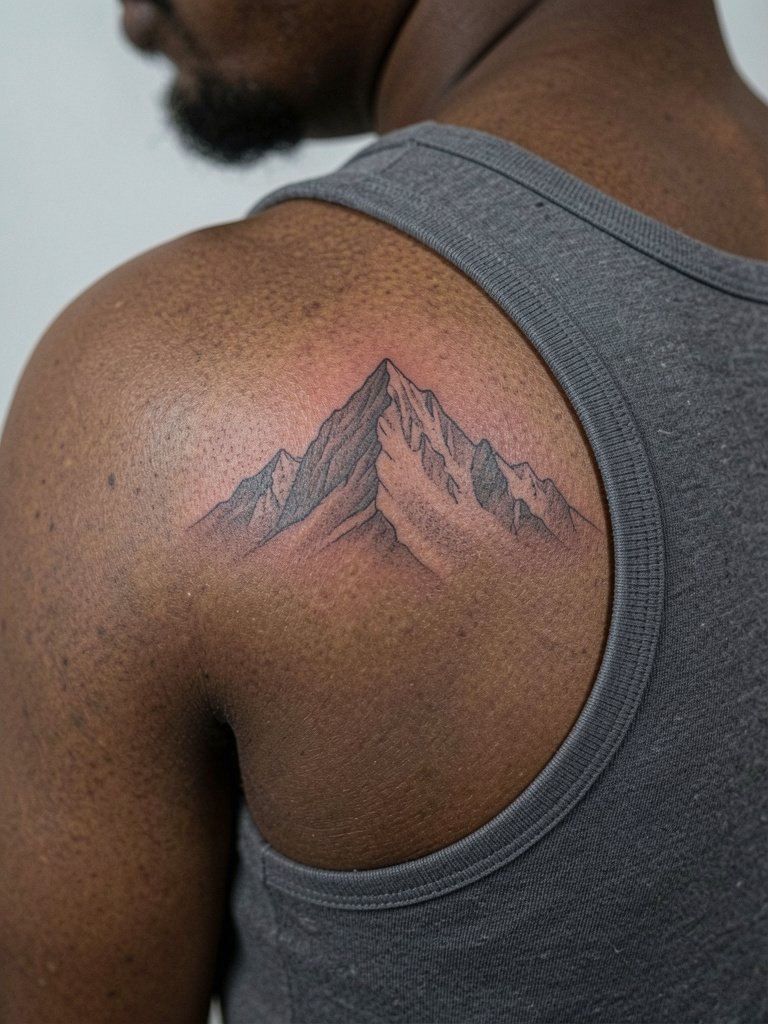
Micro-realism on the upper back demands precise spacing and conservative contrast to avoid a muddy look over time. The session is calm since the area has moderate sensitivity, and artists will often suggest a short break during shading. Most mistakes come from asking for too much tiny detail in a small piece; scale up if you want more depth. Healed, the texture retains subtle tonal variation better on the back than on mobile zones. This placement looks sharp with relaxed shirts that expose the shoulder. Pair it with a lightweight scoop-neck tank for show-off moments.
6. Stippled Horizon on Calf
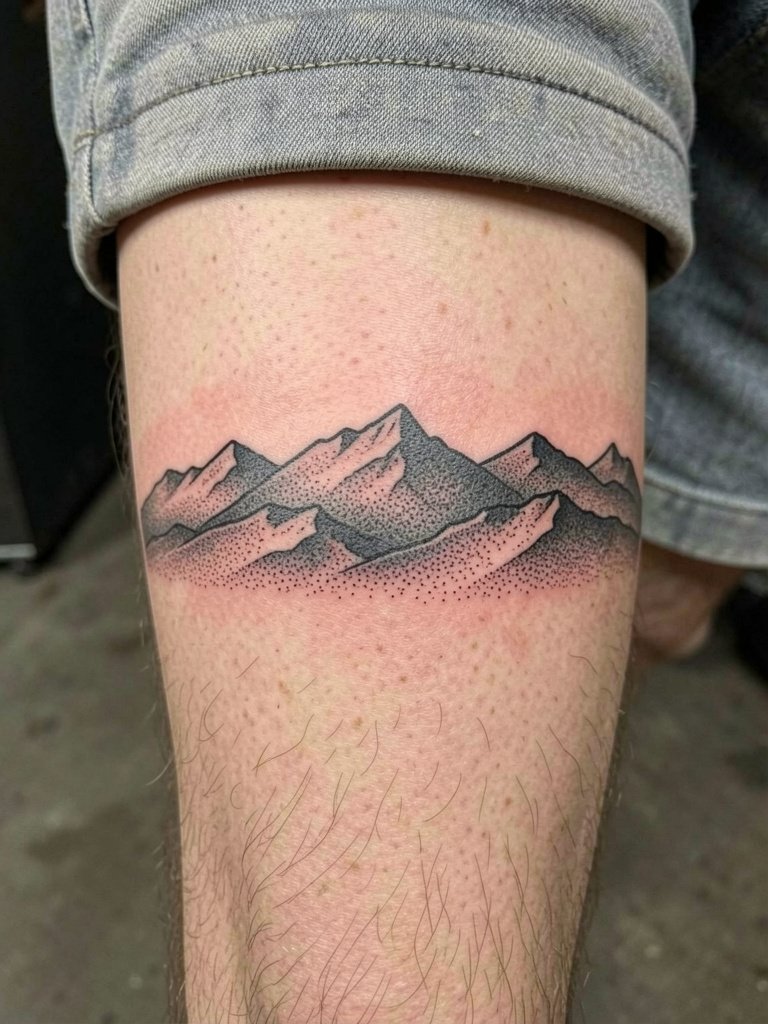
The calf gives room for wrap and gradual perspective that still reads when standing. Stipple shading feels like many small pricks during the session and can take two hours or more. Discuss dot density ahead of time so the artist spaces the stippling to avoid heavy saturation patches. A common error is too-tight dot clusters which age into a heavy grey. For footwear pairing, low-top sneakers and cuffed chinos keep the calf visible. A pair of breathable men's casual shorts makes the piece easy to show.
Session Day Picks
The forearm and calf pieces above have different session needs, so a few well-chosen items smooth the experience for both short and long appointments.
-
Stencil transfer paper kit. Lets you test placement on the skin before committing, which is helpful for the inner forearm and wrist layouts above.
-
Topical numbing cream. Applied 45 minutes before can ease discomfort during dense blackwork or longer shading passes on the calf.
-
Thin protective film roll. Useful for keeping small wrist and hand pieces clean during the first days when friction is highest.
-
Fragrance-free gentle body wash. Cleanses healing skin without stripping moisture, which matters for stipple shading and greywash work.
-
Aquaphor Healing Ointment. Thin layers in the first 48 hours help protect fine lines without clogging the needle channels.
7. Negative-Space Peak Band on Bicep
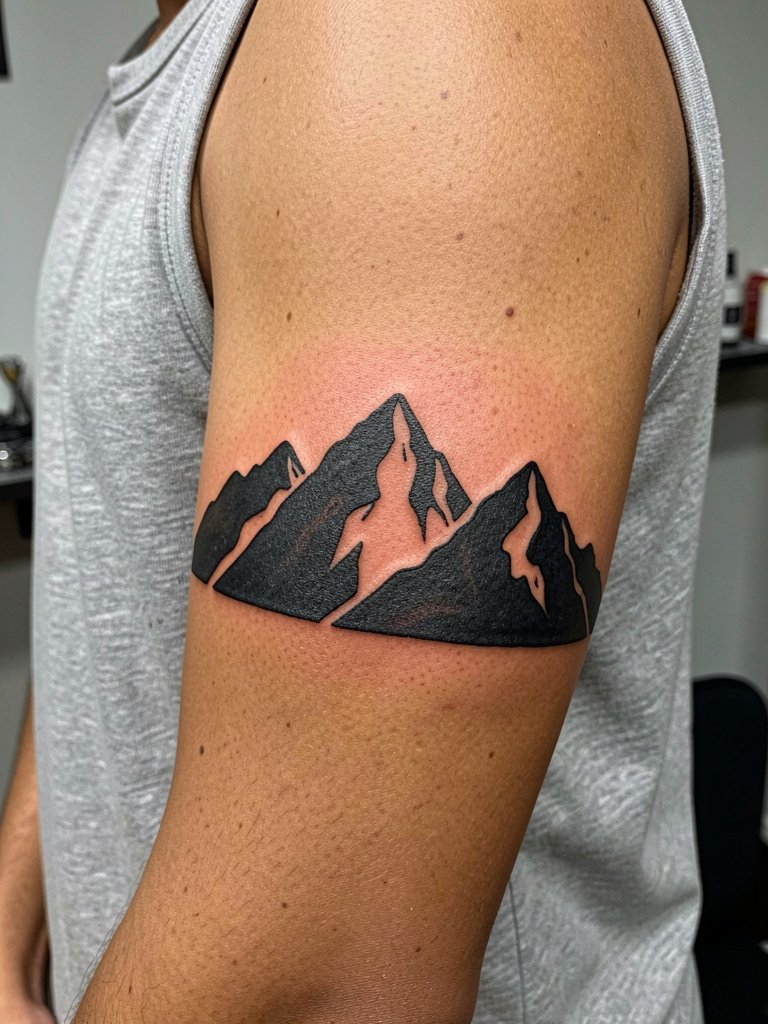
A negative-space band reads like a solid cuff when viewed from the side. The session focuses on crisp edges, and that means steady lines rather than rushed fill. Expect moderate to strong soreness and a session around two hours. The most common issue is inconsistent edge crispness from too-rapid shading. For visibility, short-sleeved shirts with a relaxed sleeve opening highlight the band. Try a soft muscle tee to show the bicep without excessive rubbing.
8. Watercolor Wash Behind Peaks on Shoulder Blade
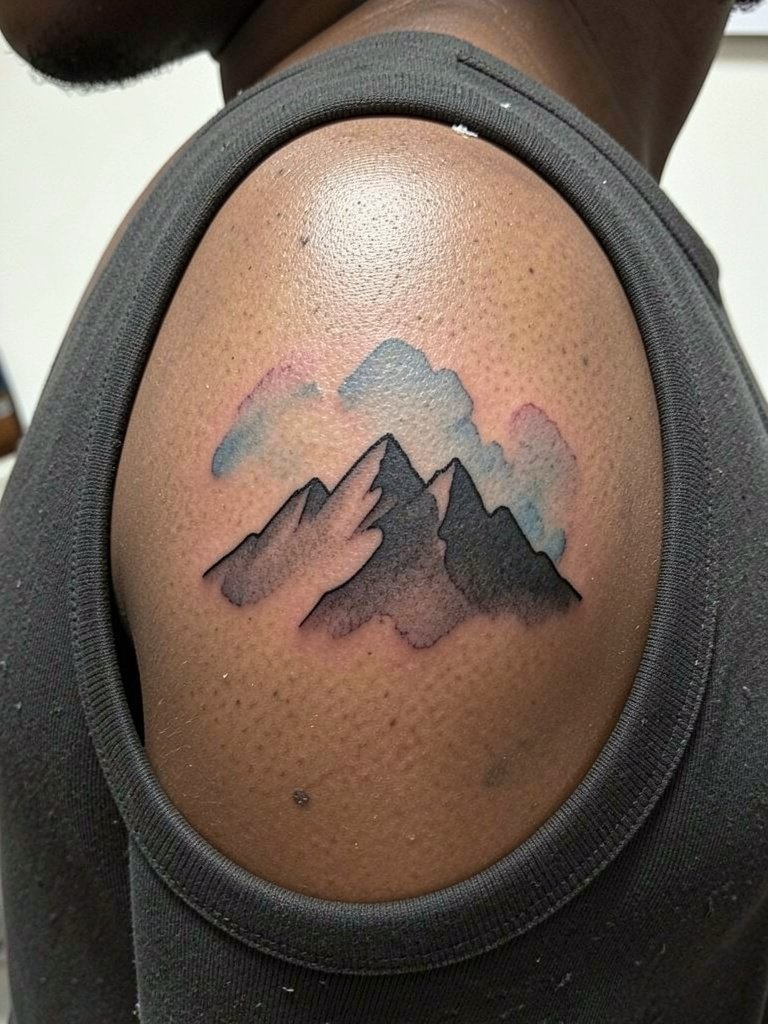
Watercolor effects can offer atmospheric color behind a solid peak but they need room to breathe. Artists disagree over durability of painterly washes on mobile skin. One camp warns that soft washes can blur and patch within a few years when placed on the shoulder blade. The other camp argues that with sufficient contrast and careful saturation the wash holds as subtle background that fades gracefully. The session may take multiple passes and will feel like long shading rather than sharp pokes. Wear a sleeveless top that stays still during the appointment. Consider a breathable fitted tank top that exposes the blade without shifting.
9. Minimalist Linework Peak Behind Ear
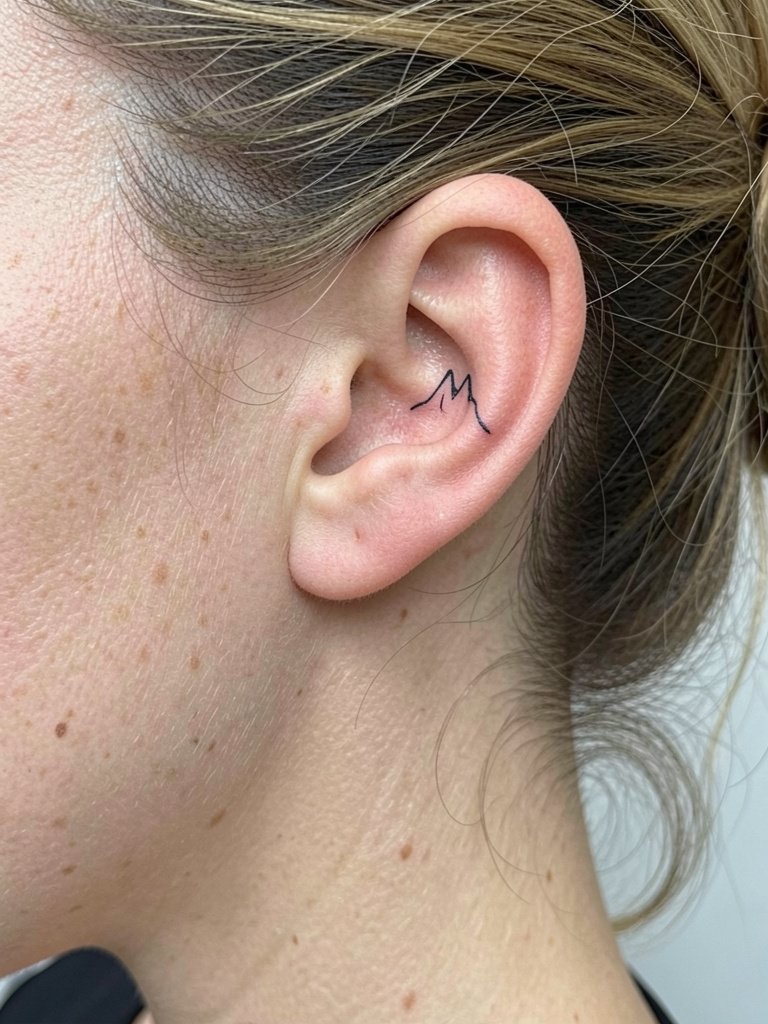
Behind-the-ear placements demand steady hands and precise spacing because the area is small and curved. Sessions are short but the spot is sensitive to bone vibration so the sensation is sharp. Tiny designs age differently depending on hairline changes and sun exposure. Avoid overly intricate text or micro-detail that will blur with time. For session comfort, pull hair into a simple updo and wear a high-collar shirt that is easy to remove. A lightweight cotton button-up shirt makes access simple without tugging at the hair.
10. Color-Blocked Mountain Sleeve Fragment
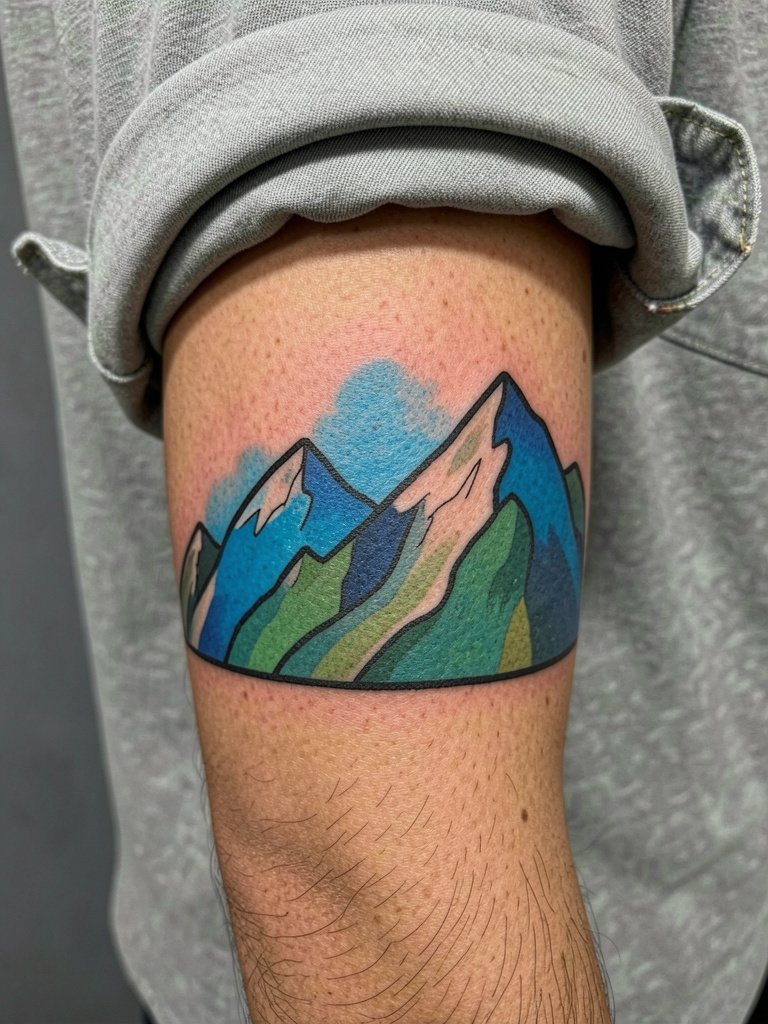
Color versus blackwork is a regular debate among folks who want mountain sleeves. One camp prefers saturated color fields because they maintain visual interest and cover imperfections that appear with age. The opposing camp favors black and grey work because it typically needs fewer touch-ups and reads clearly at a distance. For a sleeve fragment, plan layered sessions and ask the artist to map where color fields will sit to avoid early color migration. Sessions here are longer and the sensation ranges from dull to intense. For show-off outfits, go with rolled sleeves and a breathable long-sleeve shirt you can cuff.
11. Topographic Linework on Sternum
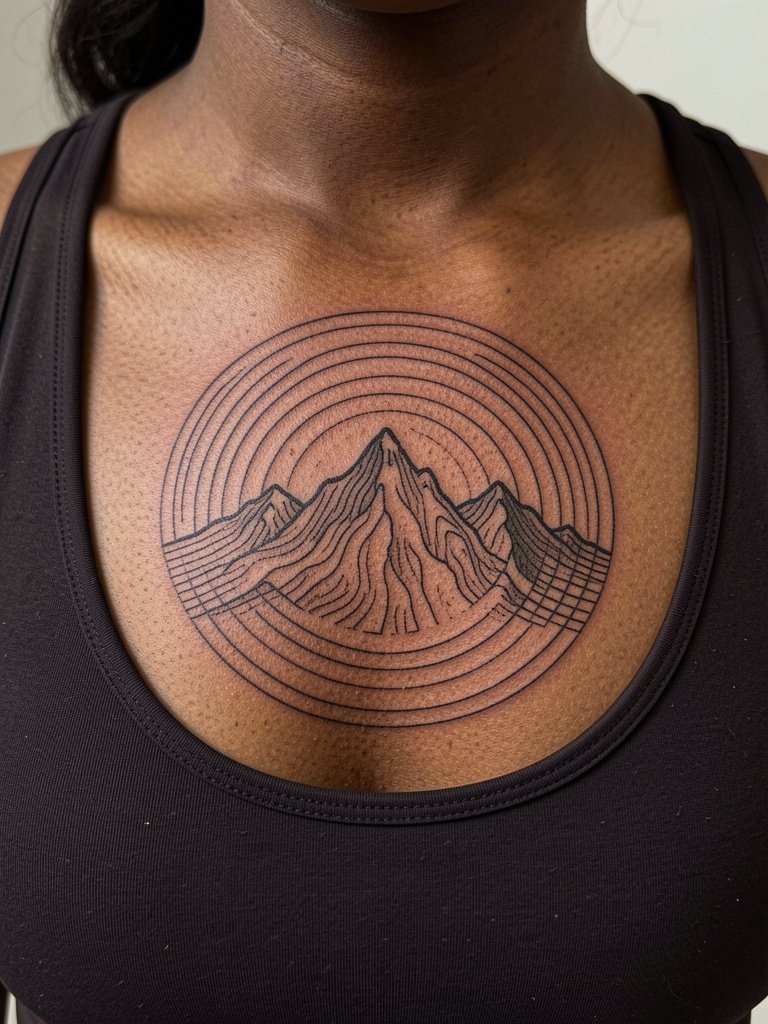
Sternum work is sensitive and requires an artist experienced with chest placement. The sensation is sharp and deep, and sessions may need multiple short passes to avoid fatigue. Topographic lines should be drawn with slightly wider spacing than on paper to allow for natural skin compression. A frequent mistake is insisting on single-needle precision that becomes indistinct when the torso moves. For the session wear a sports bra or fitted top that the artist can leave in place or remove without awkward adjustments. A supportive fitted sports bra alternative for men is a compression top that keeps fabric steady.
12. Dalmatian-Style Speckled Peaks on Thigh
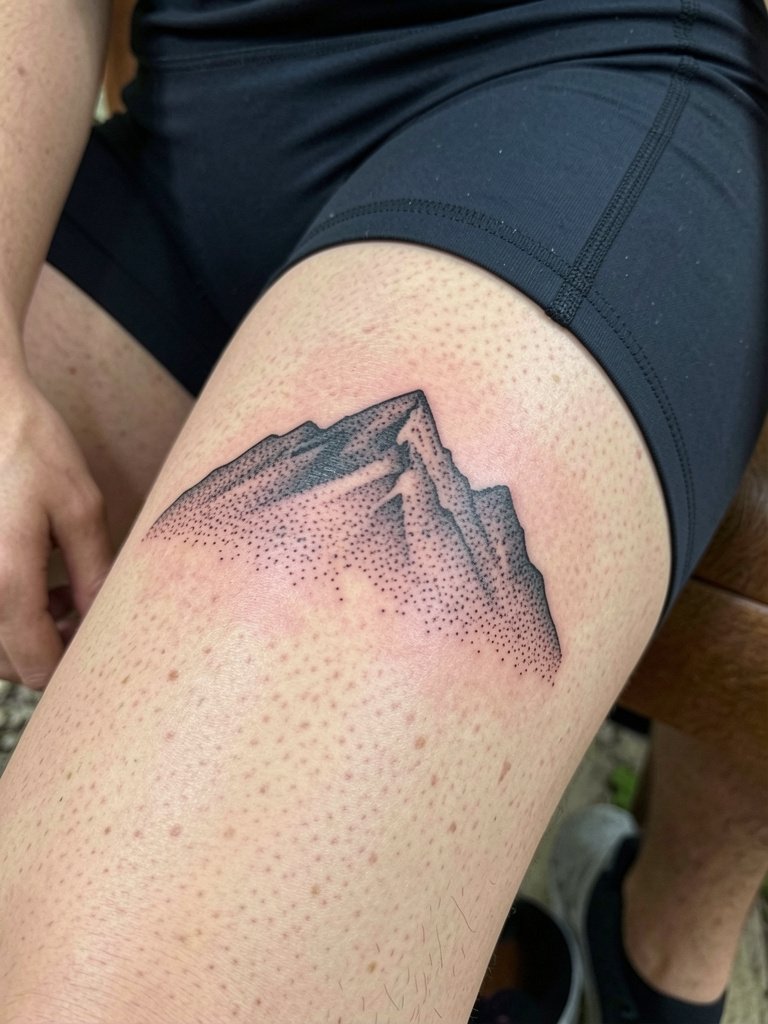
Inner and outer thigh work offers a forgiving canvas for stipple shading and negative space. Session comfort is moderate and often easier than expected because the area is spacious. Common mistakes include asking for too dense stippling which ages into heavy grey. When you want speckled texture, request graduated dot density so the peaks hold form from a distance. For the appointment, wear loose-fitting shorts that the artist can roll without pressure. Try a pair of fitted bike shorts for coverage that stays put.
13. Tiny Outline Peak on Finger
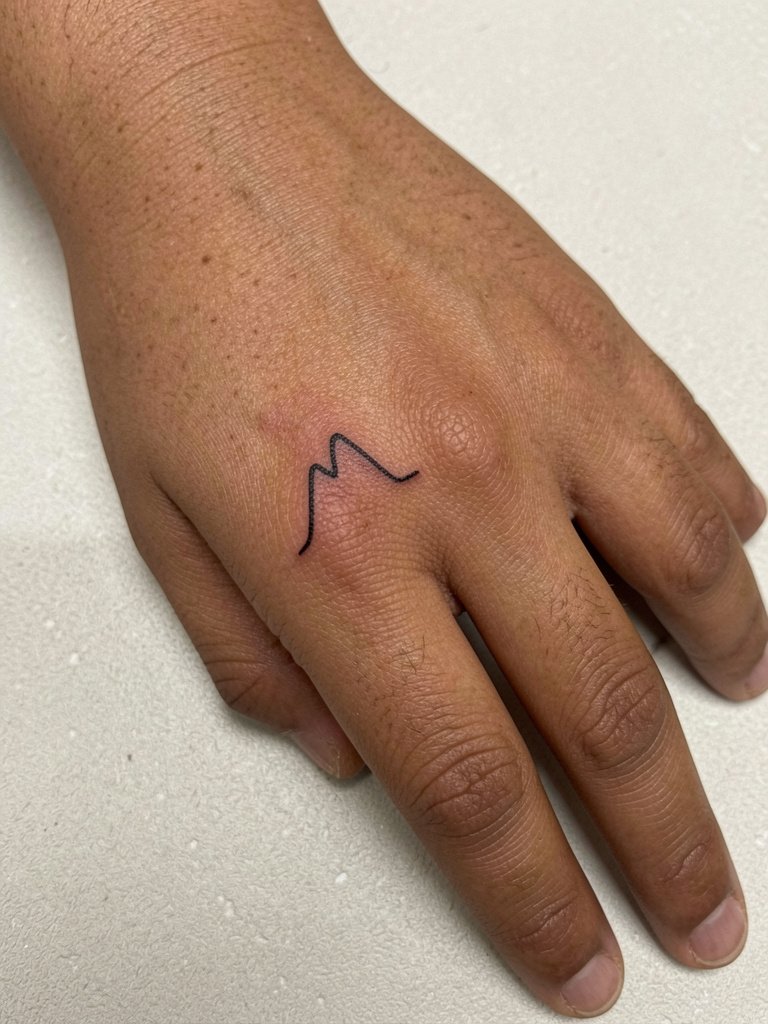
Finger tattoos are notoriously high-maintenance because of constant wear and skin regeneration. Linework should be slightly bolder than a wrist micro piece to survive frequent washing and abrasion. Expect touch-ups in the first year and possible fading beyond that. During the consult, ask the artist to show healed finger shots at similar scale so you set realistic expectations. The session is short but feels sharp. For display, simple rings that do not rub the tattoo and a pair of low-profile wrap rings can frame the design without added friction.
14. Mountain Silhouette Across Scapula
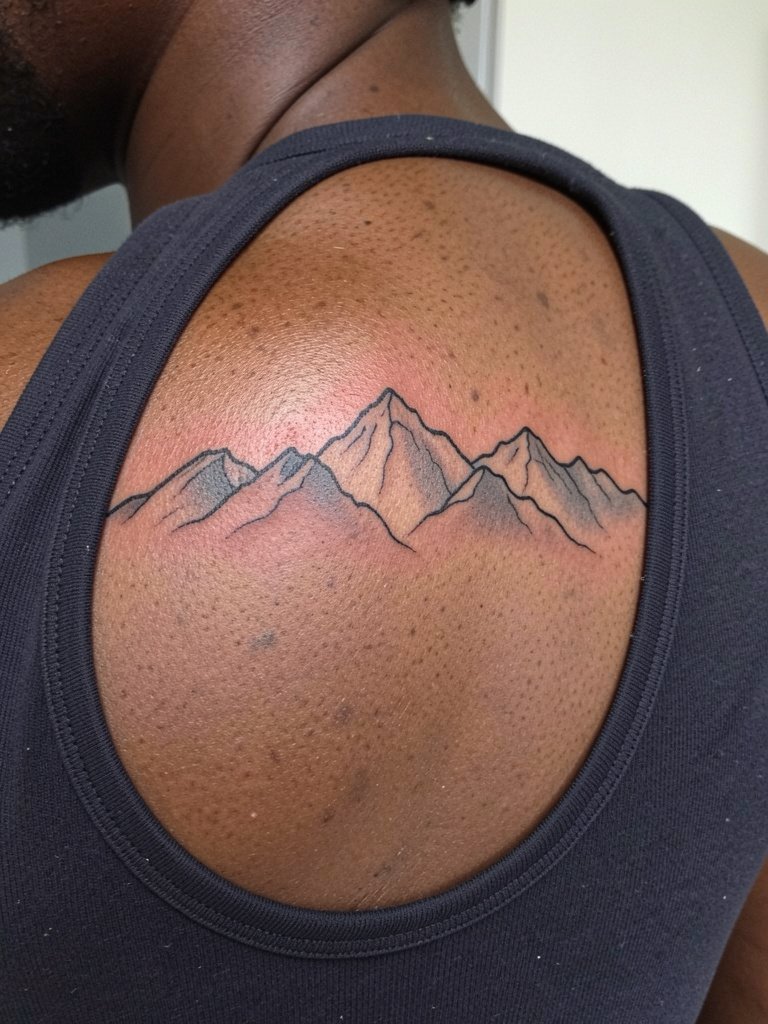
A scapula spread allows panoramic composition that still reads when clothed. Sessions are moderate in pain and often done in one long sitting or two shorter sessions. The most common issue is overstretched composition that loses focal points; ask for a mock stencil to confirm how the peaks sit across the shoulder blade. Healed shading holds well here due to lower friction. For showing the work wear a scoop-neck or racerback top. A simple racerback tank provides visibility without fabric contact.
15. Tiny Lone Peak on Ribcage
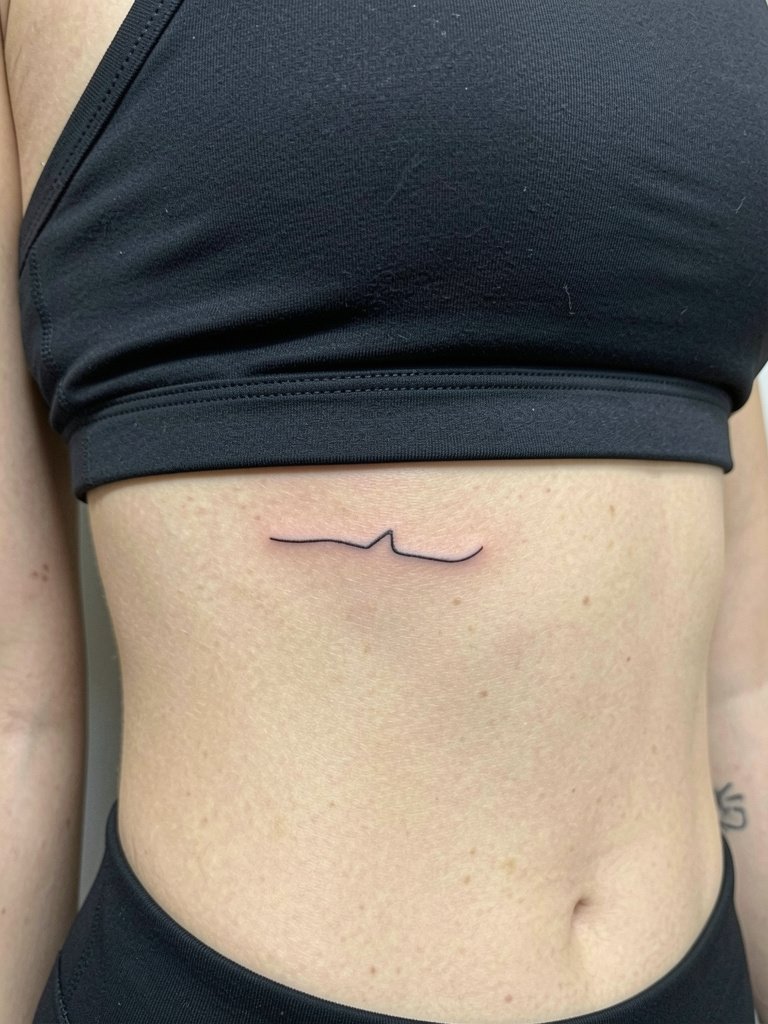
Ribcage placements are notoriously sensitive so plan for breaks during the session. Fine-line rib work can blur if the lines are too close together at small scales. One camp of artists says fine line on ribs blurs within two years because of skin movement and thin tissue. The other camp maintains that with slightly wider spacing and proper needle depth fine lines can settle cleanly on the ribs. If you want the minimalist look, ask for a slightly heavier single-needle weight and schedule a touch-up at year two. Wear a fitted top you can lift without tugging during the appointment.
16. Mountain Compass on Inner Wrist
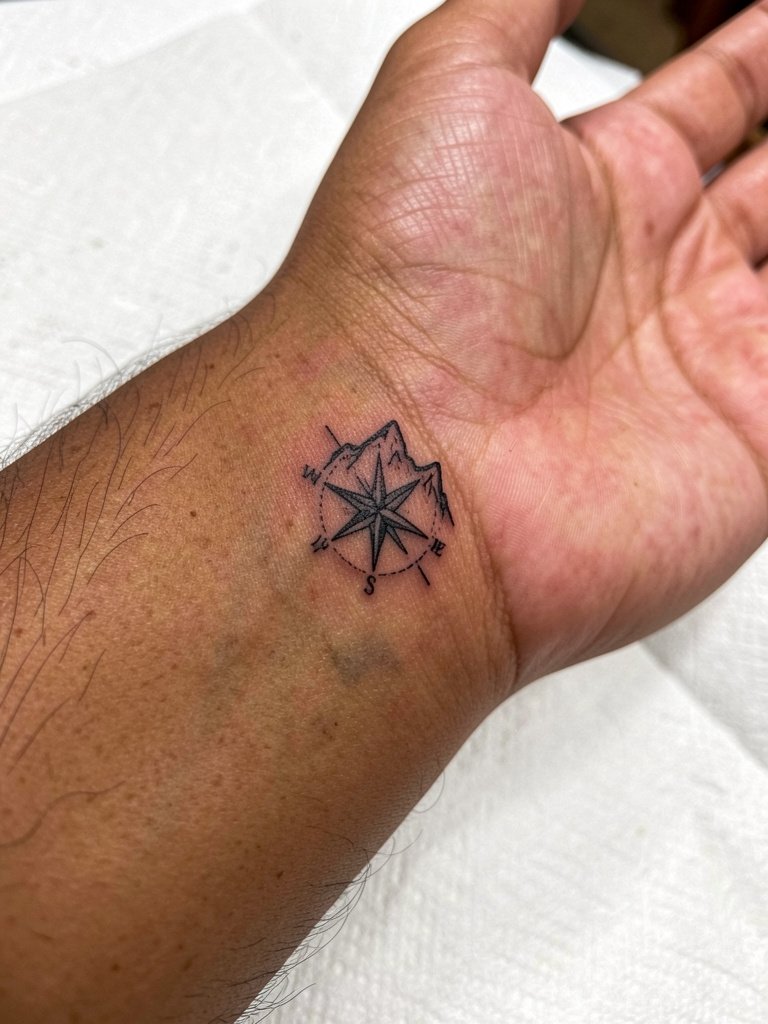
Combining a compass with a peak gives a directional anchor that reads well on the inner wrist. Be conservative with needle-thin points because the wrist eats detail. Session time is short and the sensation is surface-level sting. For longevity, ask the artist to thicken the compass points slightly and to keep the negative space inside the compass clear. A slim bracelet that sits above the tattoo keeps it visible without rubbing. Consider a simple woven bracelet that complements the piece.
17. Layered Silhouettes for Half-Sleeve
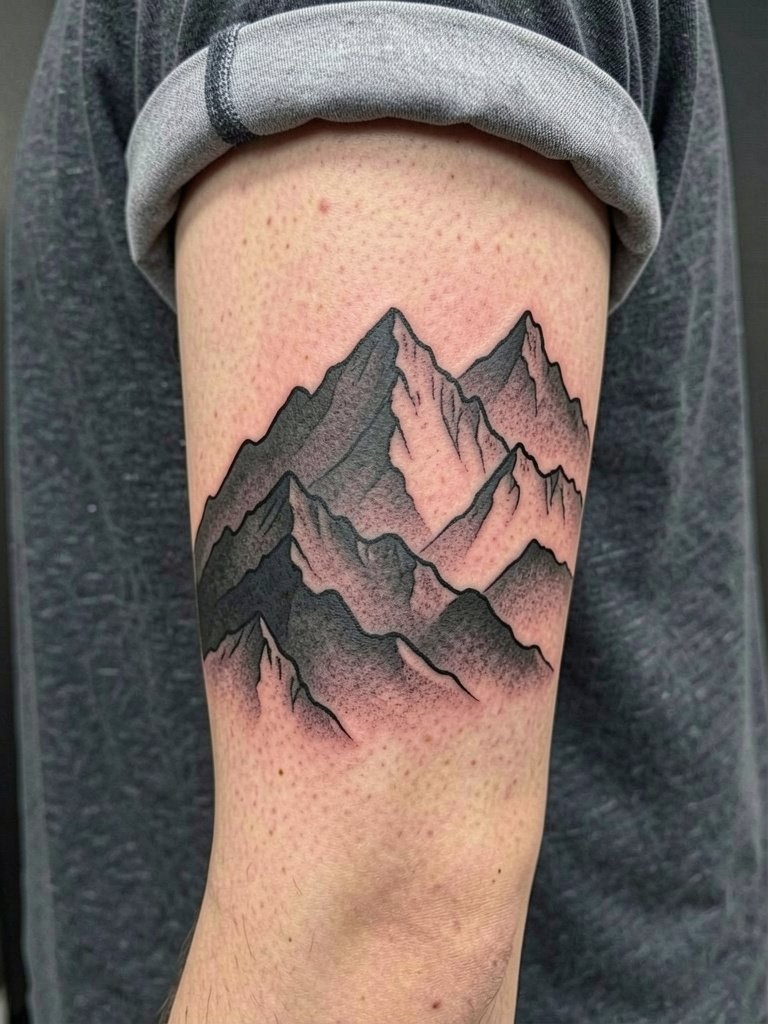
Half-sleeves need a plan for depth so peaks read from near and far. Map out how each layer transitions so the darkest shapes anchor the composition without swallowing the lighter silhouettes. Sessions will be multiple and each pass can take several hours. People often request too many midtones which can blend into an indistinct grey on moisturized skin. For display choose shirts with a wider sleeve opening. A crisp button-up short-sleeve shirt presents the sleeve art without covering it.
18. Negative Space Peak on Lower Leg
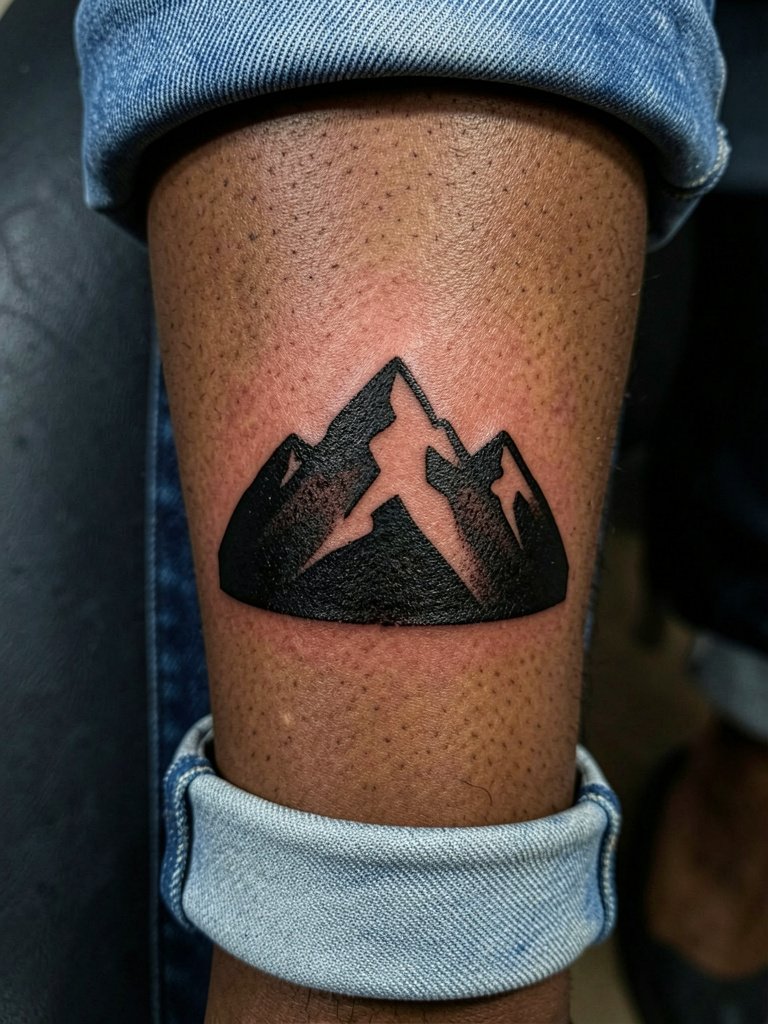
Lower leg work is durable because the area sees moderate abrasion but not constant washing like hands. Crisp negative space needs clean edgework, so the artist should plan the black surround with a steady hand. Sessions are moderate and discomfort level is average. The common error is making the negative space too narrow which invites bleed. For footwear and pants pairing, cuffed jeans keep the piece visible. A pair of casual cuffed jeans displays the lower leg without rubbing the area.
19. Abstract Polygon Peaks on Forearm
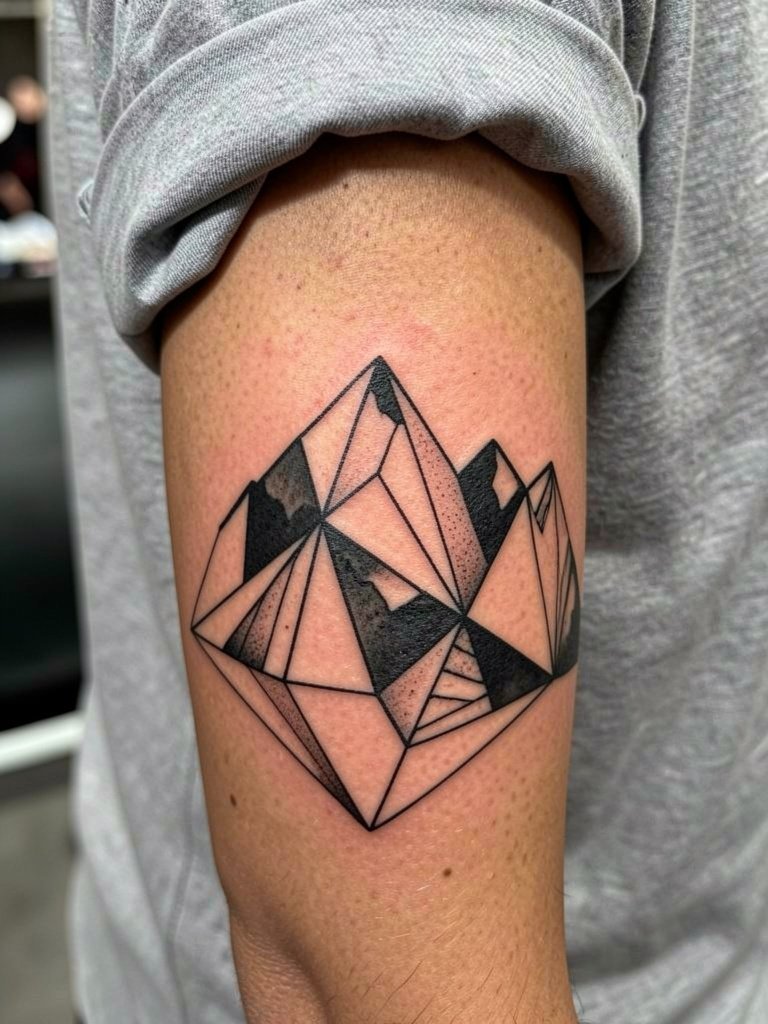
Geometric peaks offer an architectural take on mountains and they age well when lines have intentional spacing. During the consult bring sketches that match the exact line intersections so the artist can plan anchor points. This piece is good for someone who wants structure rather than organic shading. Sessions focus on crisp straight lines and take roughly one to two hours. For daily wear, rolled sleeves and a slim watch highlight the forearm without crowding. Try a minimal leather cuff watch that sits above the design.
20. Crescent Moon Over Peaks on Rib Side
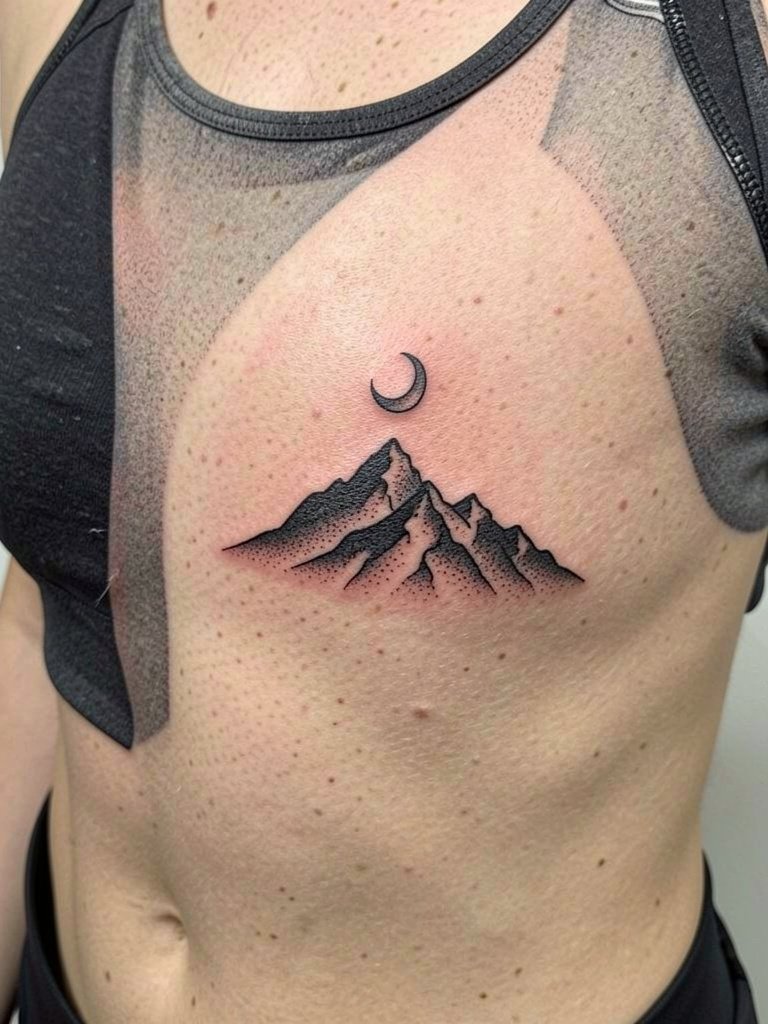
A moon accent gives night-sky character to a rib-side peak. Since ribs move with breathing, spacing around the moon matters to keep separation between elements. The session is sensitive and often done in short bursts. Avoid asking for tiny stars or text near the moon because they will soften with movement. Wear a fitted top that the artist can adjust easily. A simple compression-style top helps keep clothing steady during the appointment.
21. Continuous Line Mountain Tattoo on Wrist Band
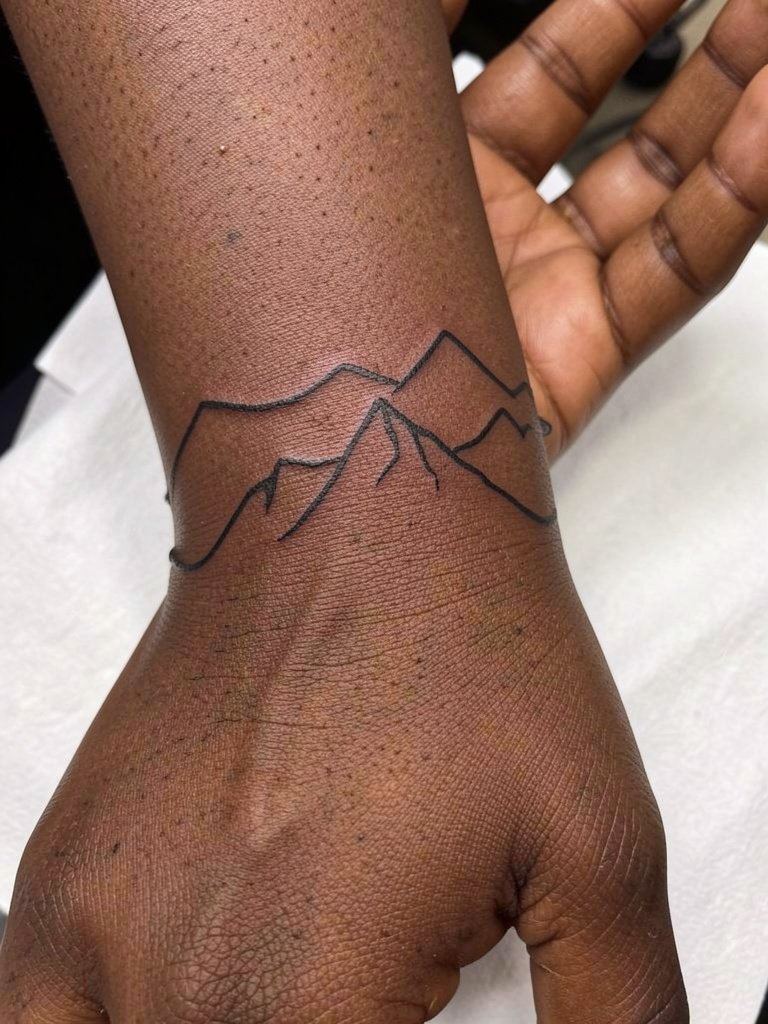
Continuous line pieces are stylish because they read as a single motion. On the wrist the line should be a touch heavier than on the forearm to survive frequent washing. A common mistake is trying to wrap completely around the wrist which can cause join issues where the line meets. Expect touch-up needs within 18 months. For a clean presentation choose bracelets that sit above the tattoo or a slim cuff that complements it. A subtle metal cuff bracelet pairs well without rubbing the print.
22. Woodcut-Style Mountain Block on Thigh
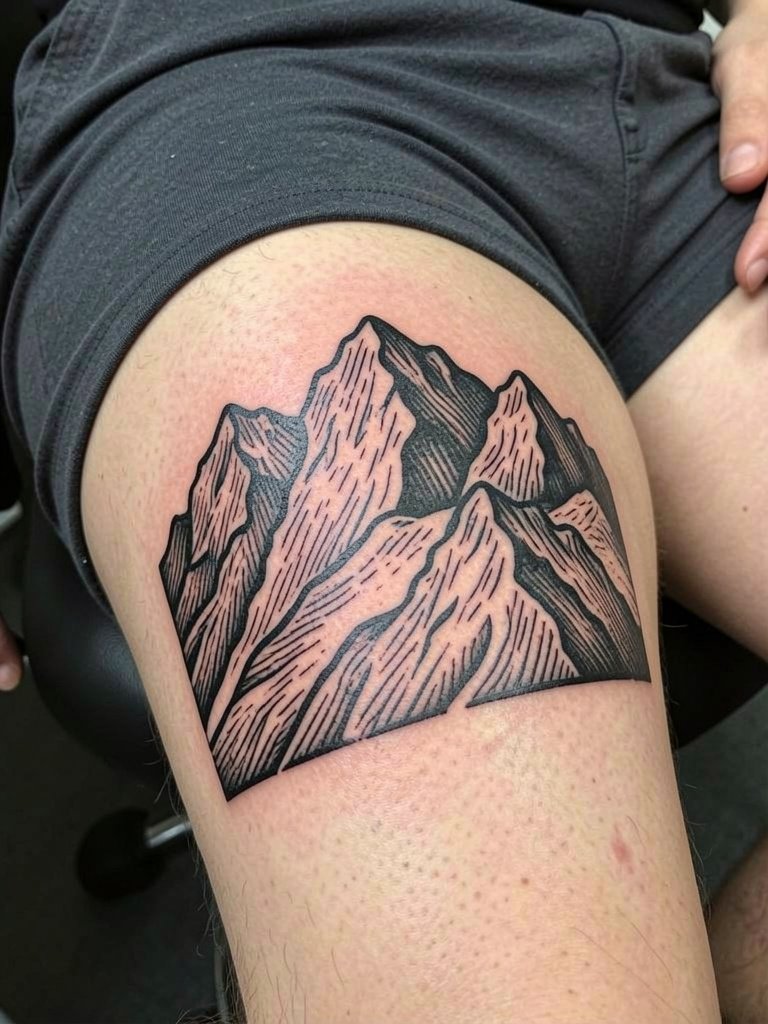
Woodcut aesthetics read like vintage prints and hold texture well on the thigh. Sessions require consistent pressure for carved marks and can be time-consuming. The main mistake is overcomplicating the carved texture which loses clarity when scaled down. For consultation bring black-and-white woodcut references to match contrast and grain. For visibility, shorts that stay put are best. Try a pair of casual fitted shorts that do not shift the skin.
23. Mountain Range with Pine Line on Lower Arm
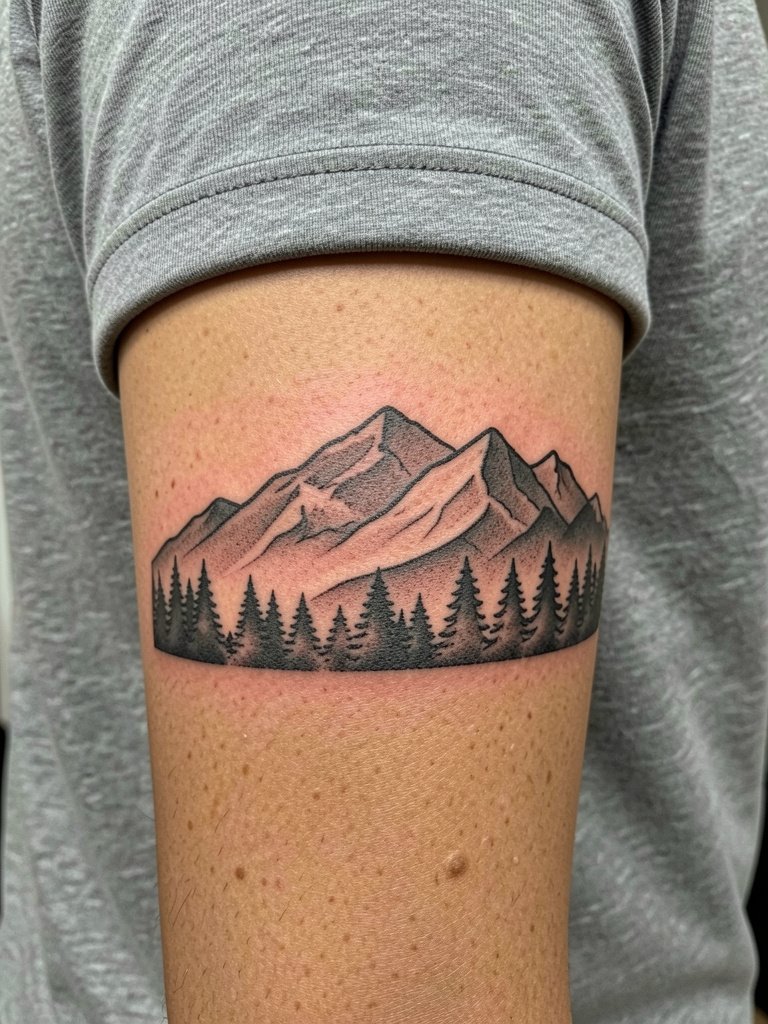
Adding a pine line anchors peaks and adds a natural frame. For this placement the artist should emphasize separation between tree silhouettes and mountain ridges to avoid early merging. Expect a session of one to two hours with moderate soreness. A common mistake is packing too much detail into the trees, which turns into a dark block after healing. For outfits, cuffing a sleeve or a short-sleeve shirt shows the lower arm art. A breathable short-sleeve henley works well.
24. Monochrome Mountain Portrait on Chest Pocket Area
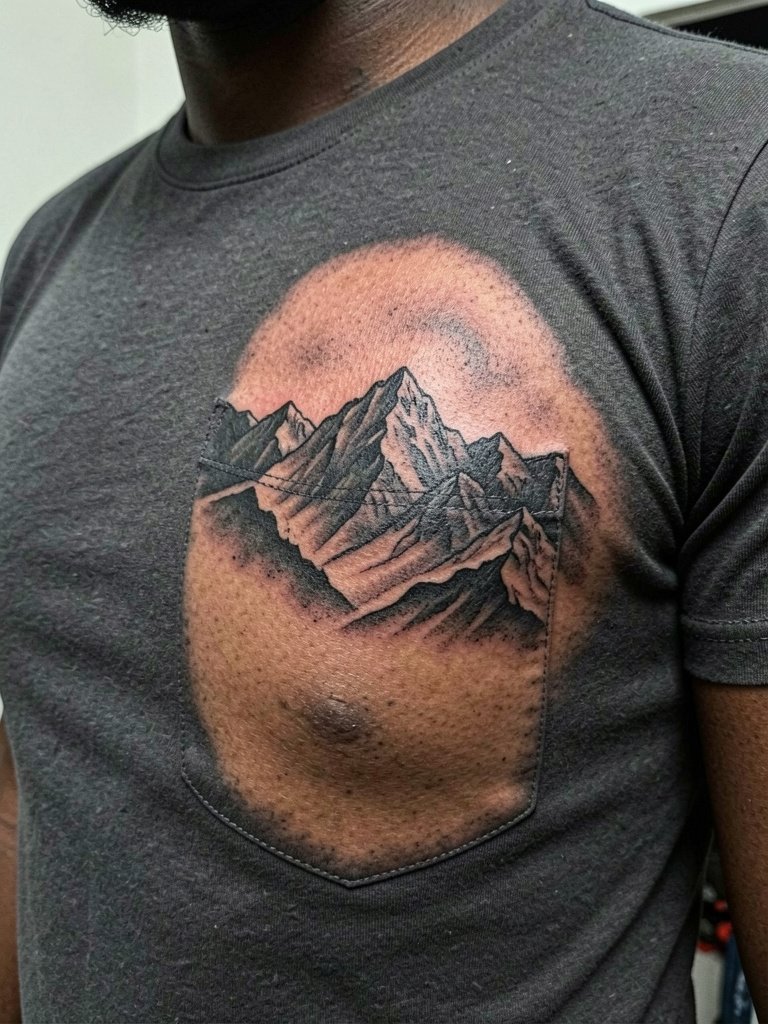
Chest pocket placements are personal and visible when you wear unbuttoned shirts. The piece needs strong midtones so detail does not flatten over time. Sessions vary by size and can be split across visits. Ask for a stenciled placement over clothing so you can preview relative to the pocket. Avoid ultra-fine interior lines which can fade. For show-off looks pick shirts with an open front. A classic short-sleeve button-up gives natural exposure.
25. Minimal Bar Graph Peaks on Foot
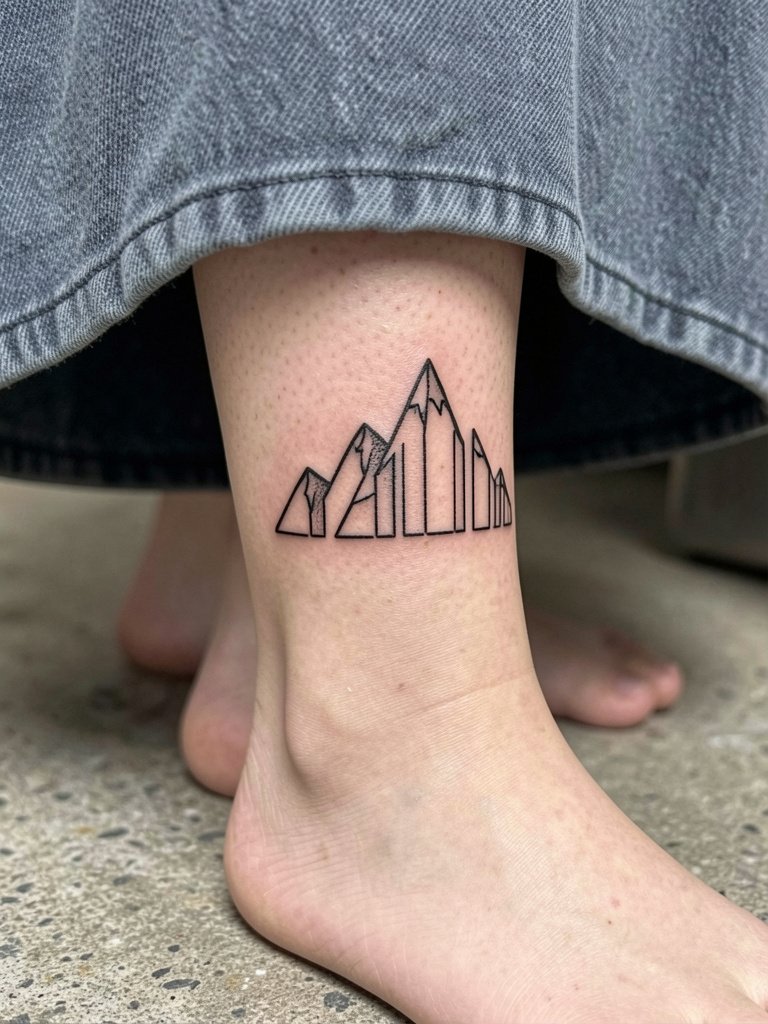
Top-of-foot tattoos see a lot of abrasion so linework should be bold for staying power. Sessions can be sharp because the area sits over bone. A frequent mistake is choosing tiny detail that fades within months. Plan for touch-up at nine to twelve months. For footwear and styling pick low-profile shoes that avoid rubbing the top. A pair of simple canvas slip-on shoes showcases foot art without pressure.
26. Contour Map Wrap on Upper Arm
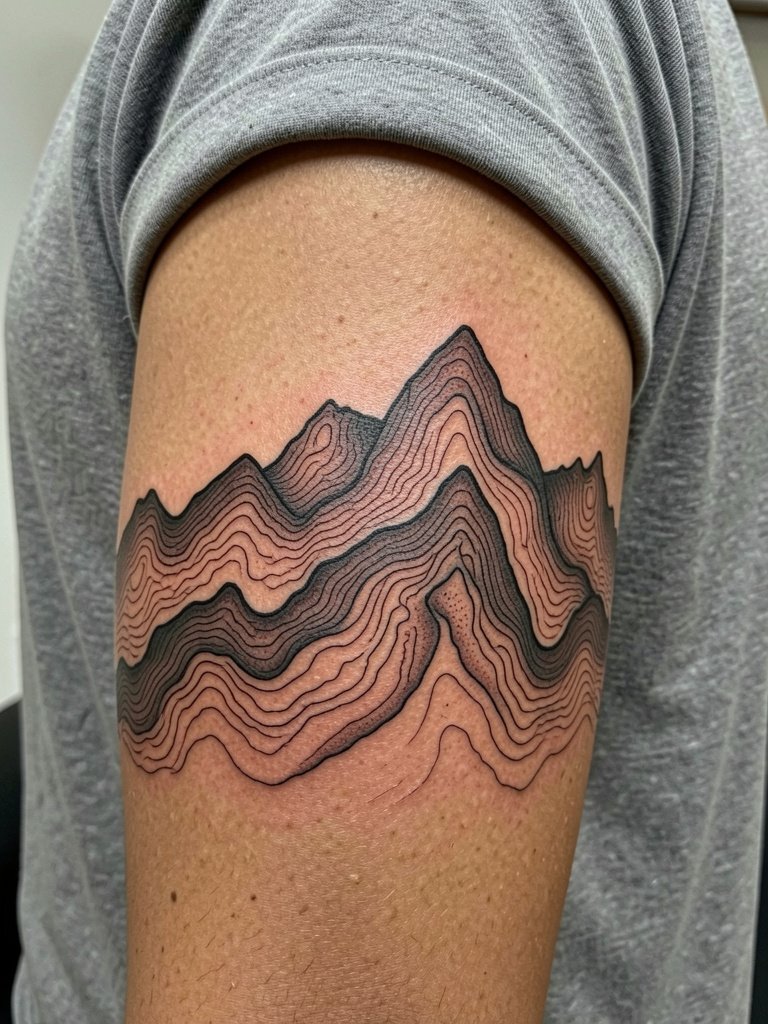
A contour map band needs careful spacing between lines to preserve the elevation effect. The session focuses on consistent spacing and can be done in a single sitting if the band is narrow. Overcrowding lines is the biggest mistake and causes the map to read as a grey block later. For a clean look pick shirts with a roomy sleeve. A classic oxford short-sleeve shirt displays the band without compressing it.
27. Mountain Scene Inside a Circle on Chest
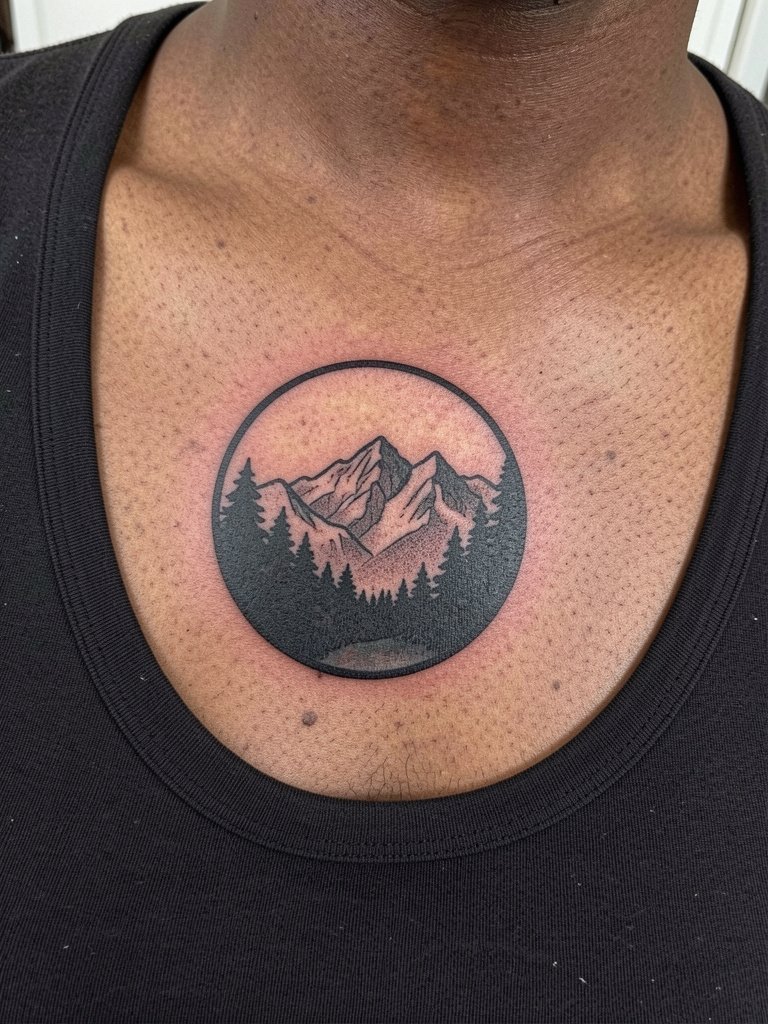
Circle-framed scenes are visually tidy and age well when inner elements have contrast. The ring edge must be crisp to keep the frame definition. Session time depends on inner detail and may run a few hours for trees and shading. A frequent misstep is adding tiny script inside the ring which becomes illegible. For apparel pairing choose tops with natural necklines. A lightweight scoop-neck tee shows the piece without interference.
28. Negative Space Mountain Over Elbow
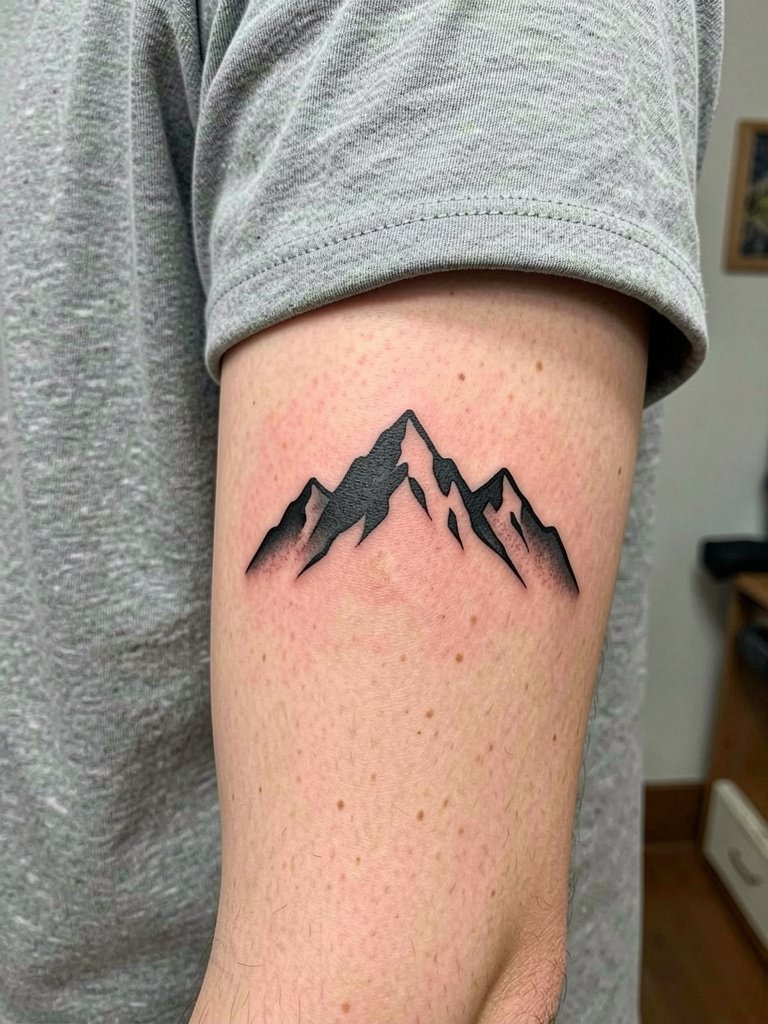
Placement near the elbow requires attention to movement because the skin flexes and compresses with bending. Negative space is a smart choice because it still reads when the joint moves. Sessions can be uncomfortable when working over the bony tip, so plan for short breaks. Mistakes include extending too far over the joint which accelerates edge blur. For showing the work choose shirts whose sleeves fall above the elbow. A casual short-sleeve tee keeps it visible.
29. Horizon Line Across Collarbone
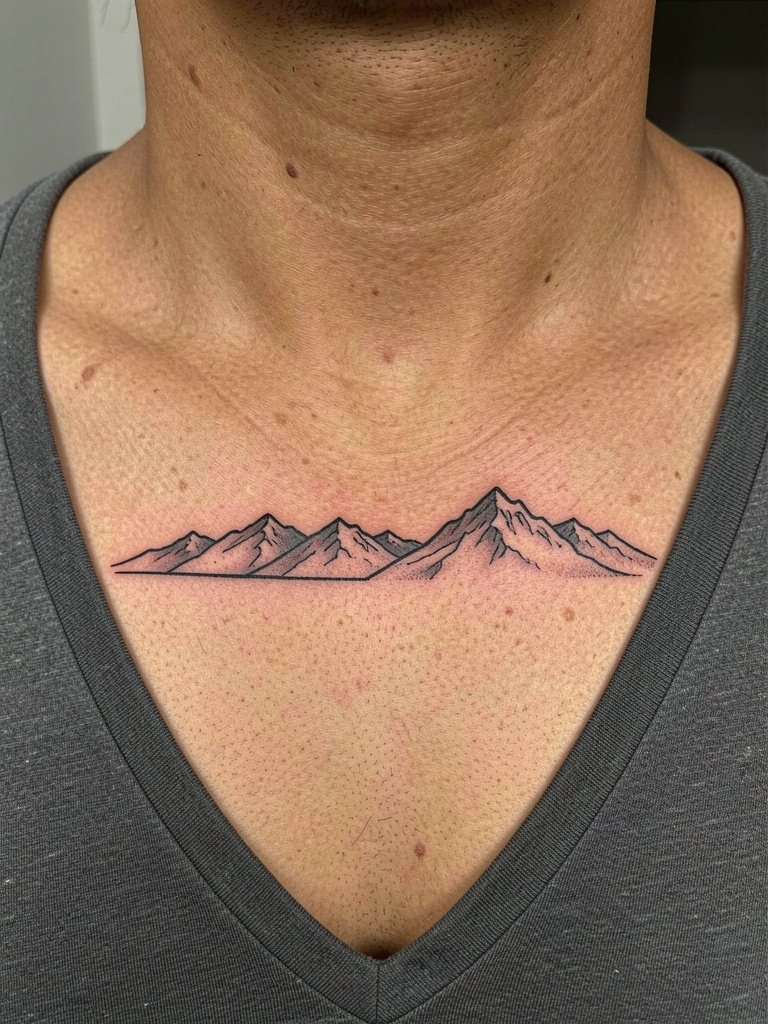
Collarbone horizons are elegant because they follow a natural line that shows with many shirt cuts. Make the anchor points a bit stronger than the connecting hairlines to prevent early fading where the collarbone compresses. The session causes a vibrating pressure sensation near bone and usually finishes quickly. A common mistake is insisting on hairline strokes across the whole span. For visibility pick garments with a wide neckline. A wide V-neck shirt frames the collarbone without competing with the piece.
Frequently Asked Questions
Q: How do I find healed examples and portfolios for mountain tattoos without naming specific artists?
A: Search hashtags and keywords that combine style and placement, for example #mountainblackwork, #mountainfineline, or #scapulamountain on image platforms. Use location filters on social apps to narrow to nearby studios and browse portfolio tags like "healed" and "progress shot" to see real aging. Reddit threads and dedicated tattoo forums often have gallery threads where people post healed shots across skin tones.
Q: Will a fine-line mountain hold up on dark skin?
A: Fine-line work can read beautifully on dark skin but it needs slightly heavier line weight and strong contrast to retain clarity. Ask for healed examples on similar skin tones during the consult and plan for a touch-up at the one- to two-year mark to maintain crisp edges.
Q: How should I dress for a long session that includes chest and arm work?
A: Wear loose layers that expose the planned zones without shifting, for example a wide V-neck tee under a zip-front hoodie you can remove easily. A breathable zip-up hoodie keeps you warm between passes and is easy to take off without disturbing fresh ink.
Q: Do colored mountains need more touch-ups than blackwork?
A: Color can be more susceptible to fading depending on the pigment and sun exposure, while blackwork usually needs fewer frequent refreshes. Plan layered sessions for color saturation and ask the artist about pigment choices and expected touch-up windows.
Q: What are red flags when booking a custom mountain piece?
A: Avoid artists who promise single-session perfection for complex shading, and be wary if they cannot show healed photos at similar scale and placement. A good sign is when the artist proposes a spacing plan for linework and shows examples of touch-ups on similar pieces.
