
Bold micro-peaks on Instagram look fragile up close. In practice, very fine single-needle mountain ranges on thin skin often blur into a grey wash after a few years. Bolder silhouettes and wise placement hold the shape longer, and planning session length and line weight up front matters more than chasing the tiniest detail. These ideas pair styles, placements, and wardrobe notes so you can pick a mountain that still reads after the first touch-up.
1. Minimalist Range on Inner Forearm

A slim inner forearm mountain is great when you want a daily-visible piece that tucks under a long sleeve for work. For longevity, request slightly heavier linework than the reference image so the peaks do not soften into a grey bar by year three. At six months the single-needle lines read crisp, by two years thin detail can blur where skin flexes, and a touch-up around year three often restores contrast. Expect one session under an hour and light soreness, especially near the wrist. For the appointment wear a loose short-sleeve tee so the artist can roll the sleeve without tugging.
2. Micro-Realism Mountain Portrait on Upper Arm
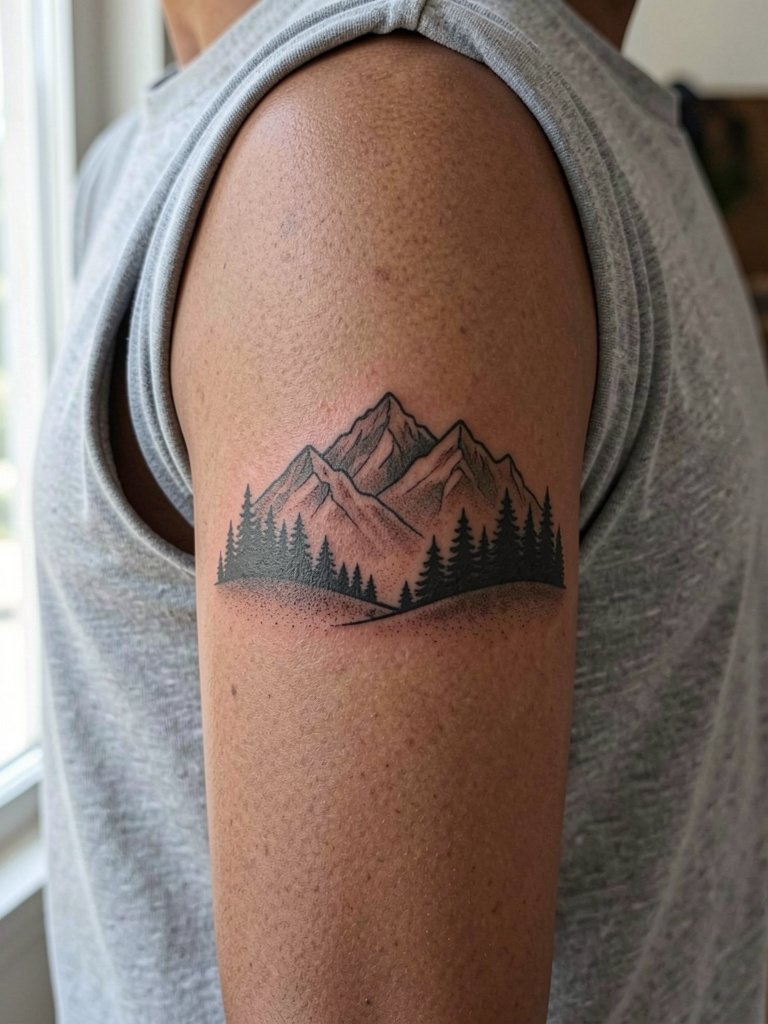
Choose micro-realism when you want photographic feel without a full sleeve. Ask your artist for reference photos at multiple scales so they can translate a landscape into readable stipple and tiny contrast planes. The common mistake is shrinking a photo into postage-stamp size without boosting contrast. Session time typically runs 1.5 to 3 hours depending on detail, and people report moderate pain on the outer arm with easy aftercare. For showing this piece casually, pair it with a linen short-sleeve shirt worn open to let the deltoid peek through.
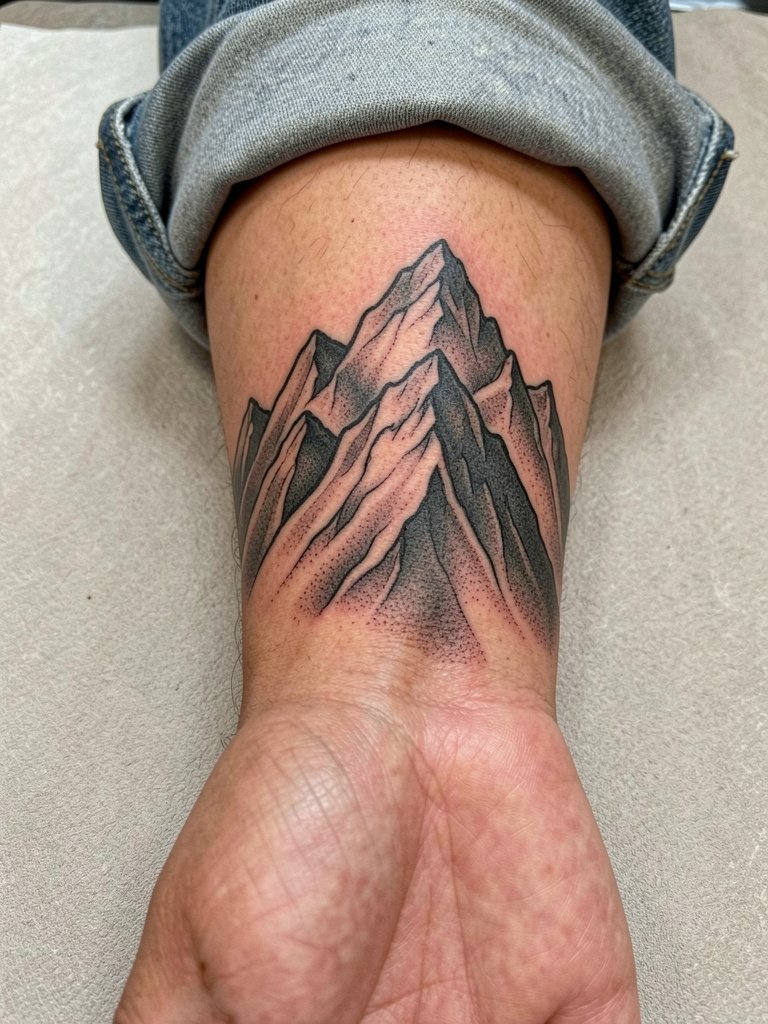
3. Single-Line Horizon on Wrist
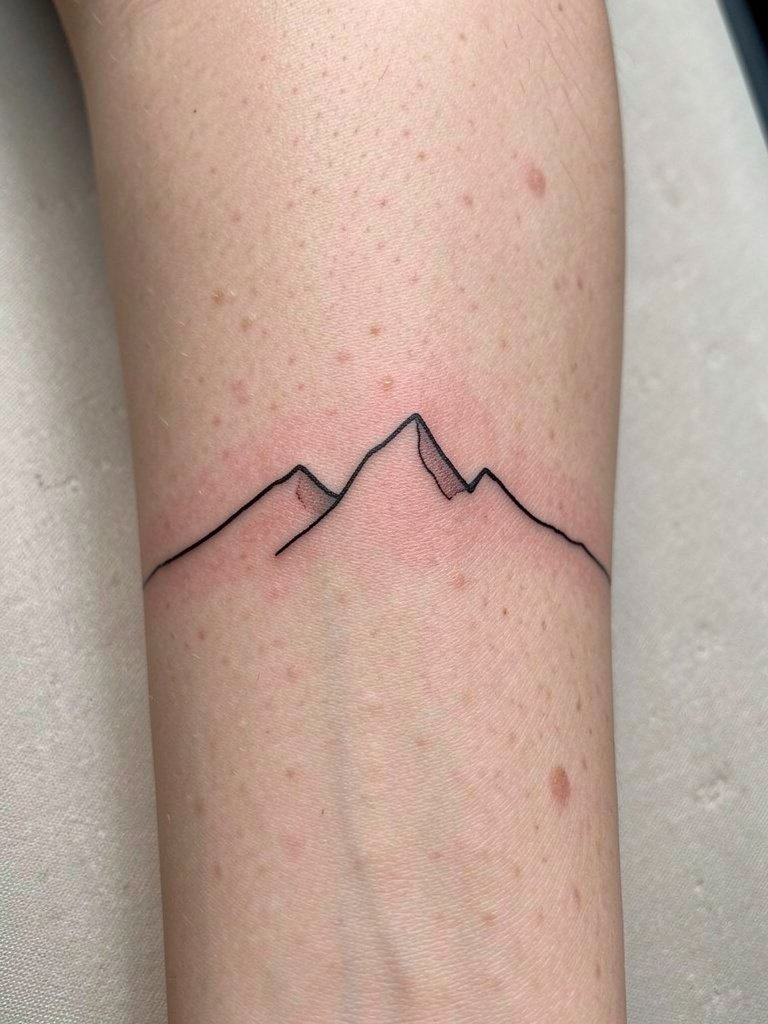
A wrist horizon reads like a subtle statement at first and then becomes a daily detail. The biggest mistake is going too thin; the wrist skin moves and washes away the crisp edge over time. At six months the line is sharp, at two to three years expect softening that often needs a touch-up. The session is short but sensitive, pain is above average for most. Wear a short-sleeve or roll a cuff for access. For evenings when you want the line to show, try a thin leather cuff that frames the wrist without rubbing the healed line.
4. Negative Space Peak on Sternum

Sternum pieces anchor bold black shapes best because the torso moves less than limbs and heavy saturation holds up. Expect a stronger pain response compared with the forearm, and sessions often split into two shorter sittings. One common mistake is trying single-needle detail there; the area compresses and delicate work can lose definition. For the session wear a fitted sports bra or bandeau so the artist has clear access. Keep in mind sternum work requires an artist comfortable with chest placement and longer session pacing.
5. Geometric Peak Band Around Bicep
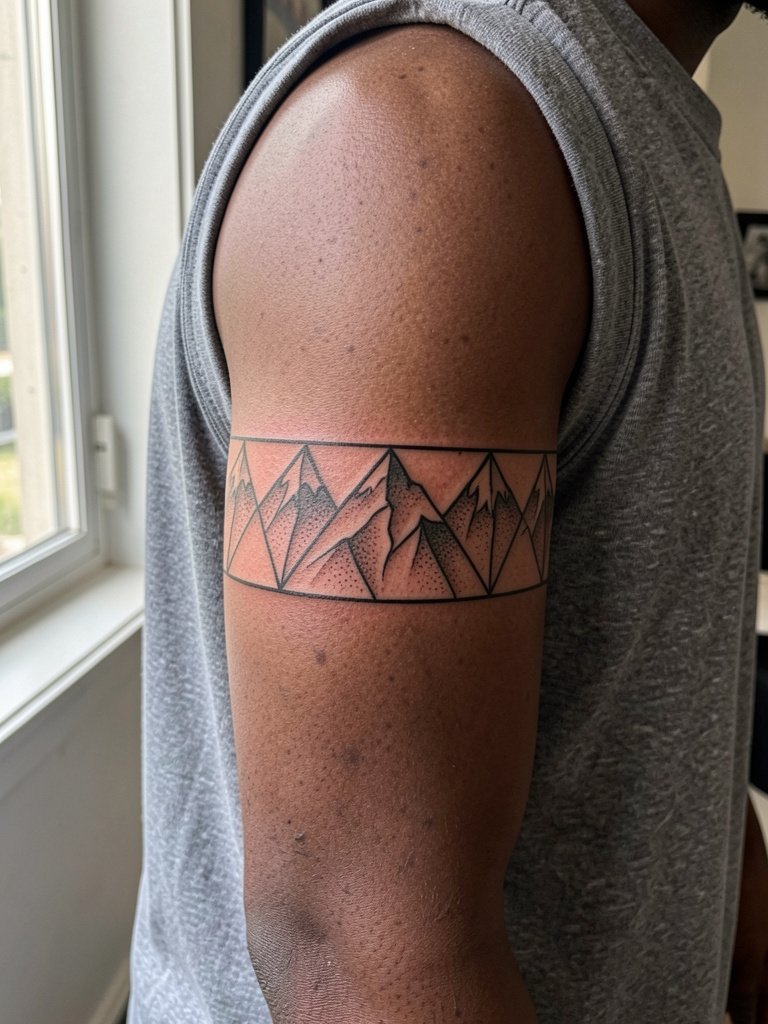
A bicep band works well for men wanting a sleeve-adjacent motif that can expand later. Tell the artist the circumference you want the band to occupy and ask them to mock it on the arm so the repeat aligns with muscle peaks. If you go too narrow you risk the triangles merging when muscles flex. Expect one to two hours and moderate discomfort where skin sits over muscle. For show-off looks, pair the band with a fitted linen tank that leaves the upper arm visible.
6. Blackwork Mountain Sleeve Cap
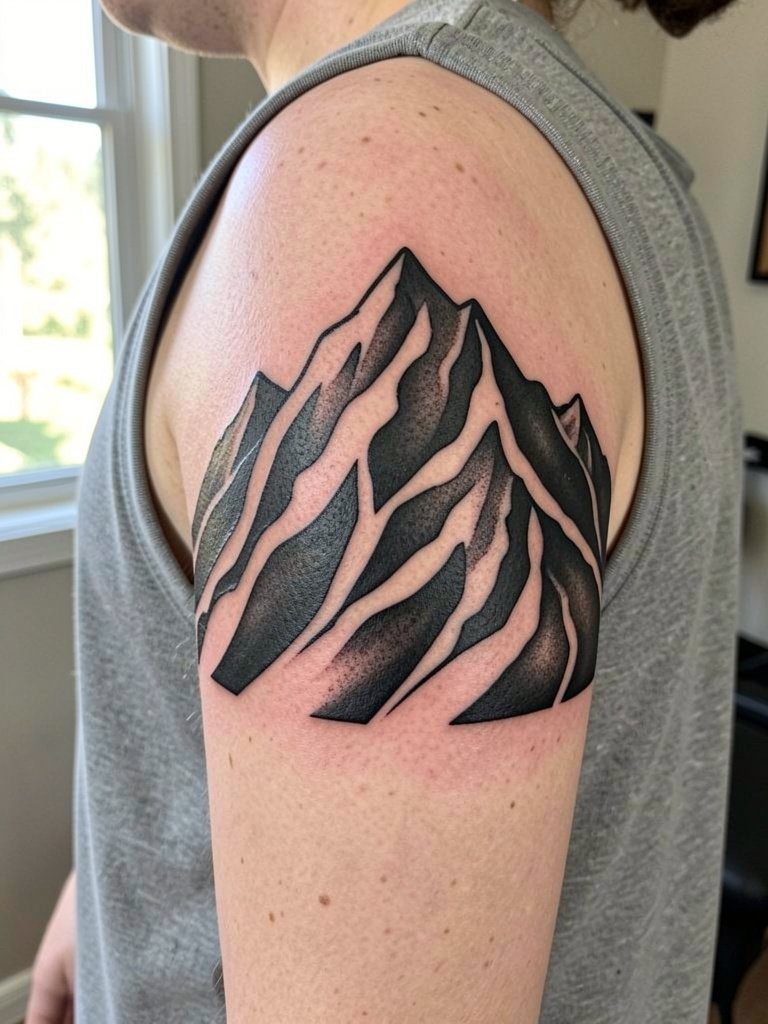
This shoulder cap uses saturated black to give mountains a strong room presence without committing to a full sleeve. Artists will warn that large black fills need careful placement for heat and session tolerance. The session runs two to four hours depending on coverage and often needs a follow-up touch-up to keep saturation even. For the appointment wear a sleeveless or easily removable top so the artist can work the shoulder without tugging. When wearing tanks afterward, the heavy silhouette reads well with a casual athletic vest.
Session Day Picks
These items smooth out the short sessions and primer-level planning from the first six ideas above.
-
Stencil transfer paper kit. Useful when you want to preview exact scale on the inner forearm or wrist before the needle touches skin.
-
Topical numbing cream. Applied per label 30 to 45 minutes before short, sensitive areas like the wrist or sternum can make a one-hour session more manageable.
-
Thin protective film roll. Keeps small wrist and finger pieces clean during the first week of daily handwashing.
-
Fragrance-free gentle body wash. Use for quick rinses around forearm and chest pieces during the first week without irritating fresh lines.
-
Aquaphor healing ointment. A thin layer in the initial days helps lock moisture for fine-line work, especially on areas with less natural oil.
7. Line-Work Ridge on Calf

The calf is forgiving because the skin is thicker and detail tends to age better than the wrist. Ask for slightly heavier contour lines so the elevation pattern keeps reading when you wear shorts. Mistakes include overcomplicating the contour with tiny internals that lose contrast by year two. Sessions are usually one to two hours with moderate soreness afterward. For the session wear drawstring linen shorts so the artist can access the calf without pressing on the freshly inked area.
8. Fine-Line Mountain on Ribcage

Fine-line ribs are divisive among artists. One camp argues the skin stretch and constant motion near the ribs blur single-needle lines within two years and recommend larger spacing or blackwork instead. The other camp insists that with proper needle depth and slightly increased spacing, fine-line ribs can settle and remain readable, and they will show healed examples to back that up. If you prefer the delicate look, specify slightly wider spacing and plan on a touch-up at year two. Pain here rates high and sessions tend to be broken into shorter passes. Wear a fitted cropped top so the artist can work without constant fabric shifts.
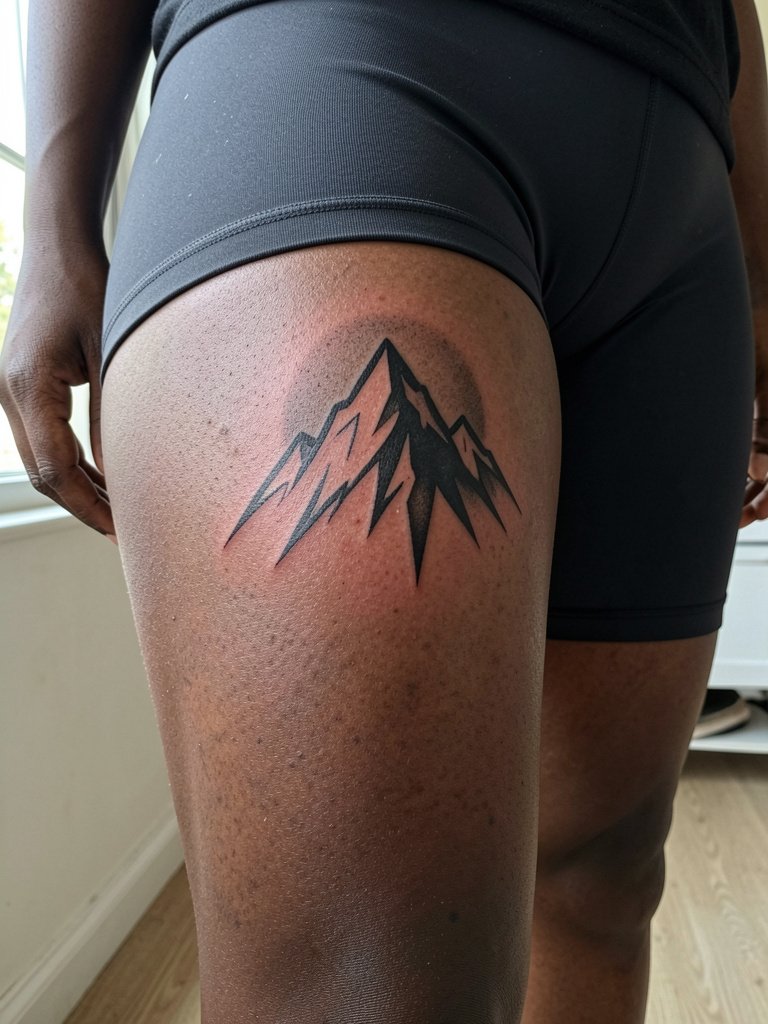
9. Pocket Peak on Upper Thigh
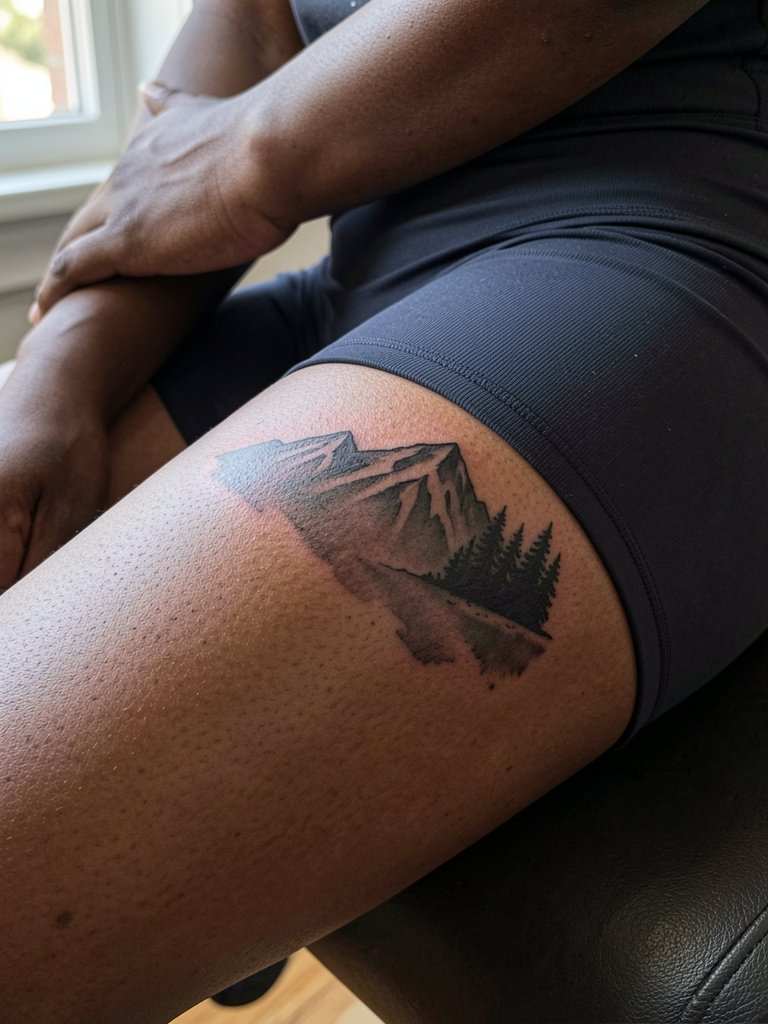
Upper-thigh placements can hide large detail under clothing while letting you reveal a strong landscape when you want. Because the area has more flesh, artists can use softer shading and subtle gradients that hold well. The main mistake is placing too close to the groin or underwear line where friction causes pigment loss. Sessions are comfortable for many, often one to two hours per sitting. For the session choose shorts or loose pants that do not press on the area. If you plan summer looks, the piece pairs well with casual swim trunks that keep the thigh visible.
10. Contour Peak Across Collarbone

A collarbone contour reads elegantly when the peaks follow natural bone lines. Expect a stinging sensation and sometimes sharper pain due to the thin skin. A frequent error is packing too much detail into the narrow band; keep it airy and use dot-work beneath for depth. Session time tends to be under an hour for small pieces. For the appointment choose an open-neck shirt you can remove easily, like a basic V-neck tee.
11. Wraparound Mountain Chain for Forearm Sleeve
A wraparound chain creates motion and reads well from different angles when you turn your arm. Clarify scale by asking for a mock-up that shows how the design looks at three inches versus six inches across the forearm. People often ask for tiny repeats and then find the detail dissolves into blotches by year two. Sessions for a forearm wrap usually run two to four hours depending on coverage and shading. For showing the piece off, rolled sleeves or short-sleeve shirts work best. A casual chambray shirt sleeves-rolled look frames the outer forearm elegantly.
12. Tribal-Inspired Mountain Armband

When using tribal motifs, respect origin and context. One group argues for honoring traditional patterns by learning their history and seeking permission where applicable. The other group views modern reinterpretations as creative homage if they avoid sacred or specifically cultural markers. If you choose this route, tell your artist which cultural references you are drawing from and why, so they can advise on authenticity and sensitivity. Armband pieces age well with heavy blackwork and usually take one long session or two shorter ones. For sessions wear a short-sleeve that is easy to roll up.
13. Tiny Peak Behind the Ear

Behind-the-ear tattoos are perfect for a discreet mountain accent. Expect sharp but brief pain because the skin is thin and close to cartilage. A common mistake is expecting intricate detail; small motifs need bold, simple contours to survive. Sessions are short and healing is quick, though you should plan on avoiding hair products contacting the area during the first week. For the appointment pull hair back into a tidy updo that does not tug the healed area.
14. Low-Resolution Watercolor Wash on Thigh
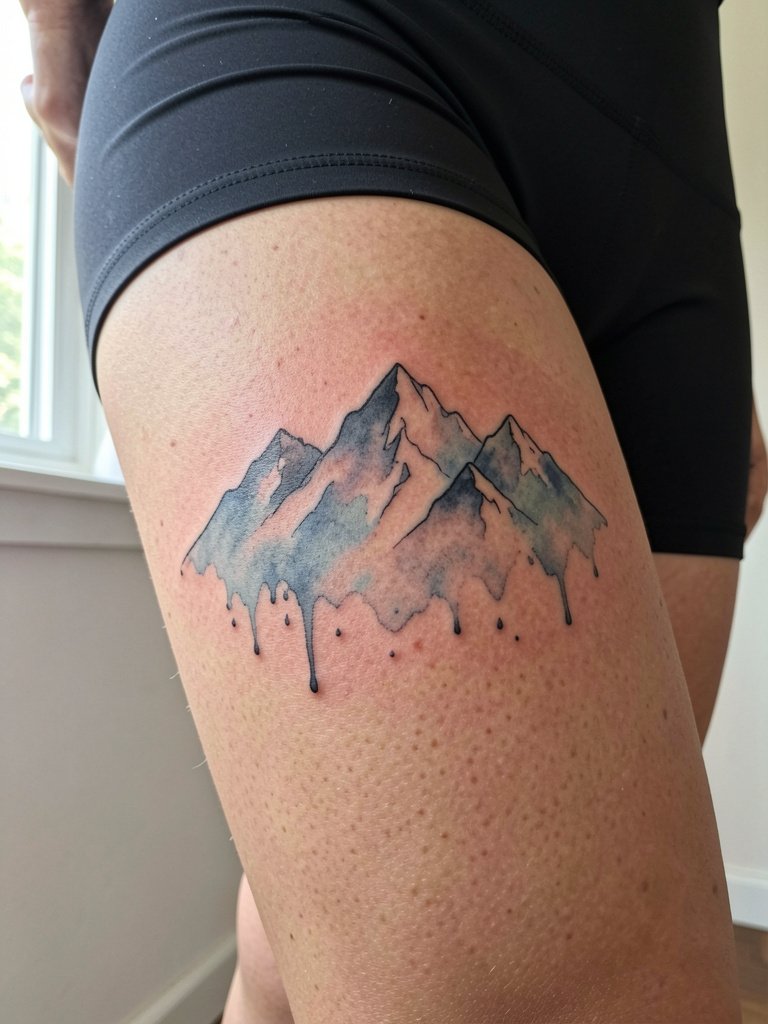
Watercolor mountains can be striking on the thigh where there is volume and less sun exposure. The key is discussing saturation limits because watercolor techniques often fade faster on high-friction areas. Artists split on whether delicate watercolor holds longer with a soft black anchor line or without any linework. One camp says anchors help maintain shape as color fades. The other camp prefers pure wash for an ethereal look and accepts more frequent refreshes. For sessions wear shorts or loose trousers and plan occasional touch-ups for color maintenance. Try pairing the piece with summer casual shorts that keep the area visible.
15. Minimal Peak Over Spine Lower Back
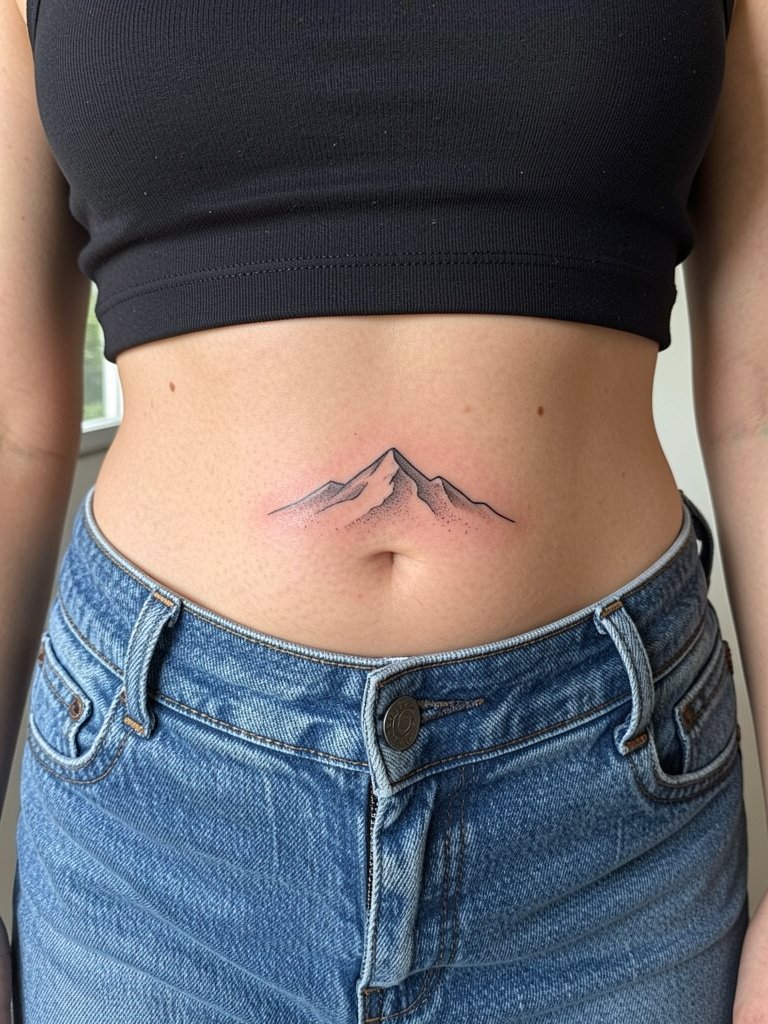
A lower-back mountain makes a contained statement and is easy to hide under shirts. The skin here is stable so fine contour tends to last longer than on limbs. Mistakes include placing the piece too low into the waistband where constant denim friction accelerates fading. Sessions are tolerable for most with short bursts of work. For the appointment wear low-rise jeans and a cropped top so the artist avoids tugging. Consider this placement if you want a private piece that occasionally peeks out.
16. Coordinate Peak on Inner Wrist
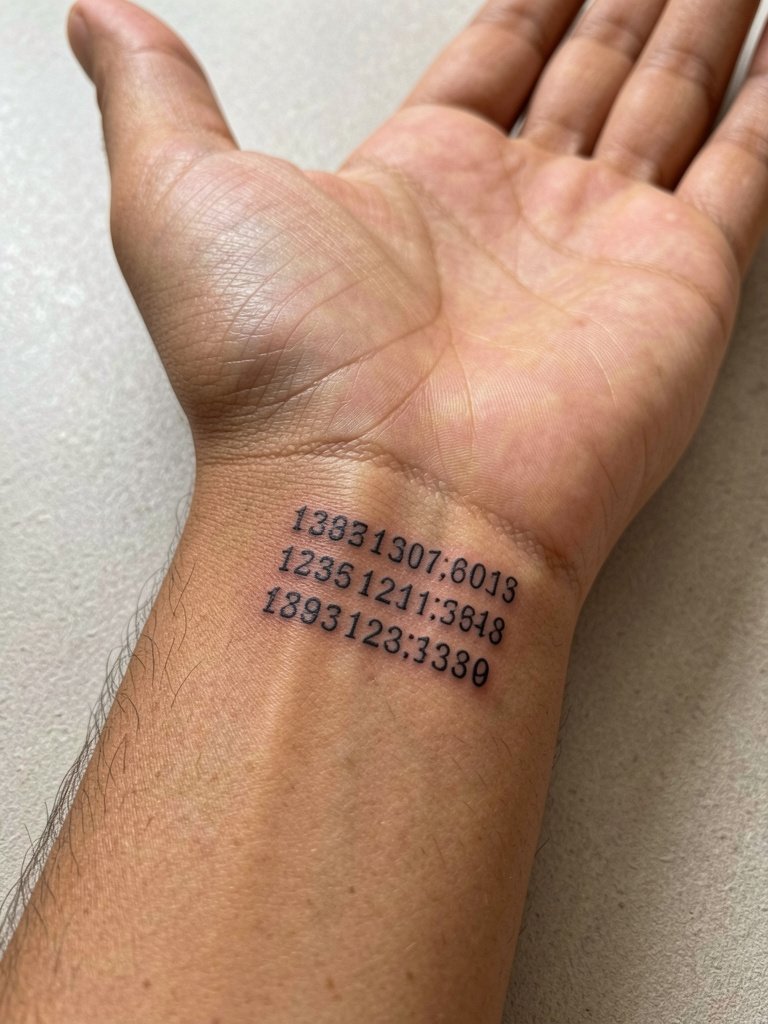
Small coordinate tattoos pack meaning and read well at wrist scale when lettering is crisp and spaced. Have your artist stencil the exact text size because tiny type can liquefy over time. The most common error is using a dense serif font that blurs; choose a simple monospace or thin sans serif. Expect heightened sensitivity and a short session. For the appointment wear a sleeve you can roll up easily. The piece looks great with minimal wrist accessories like a thin metal bracelet that does not rub the healed area.
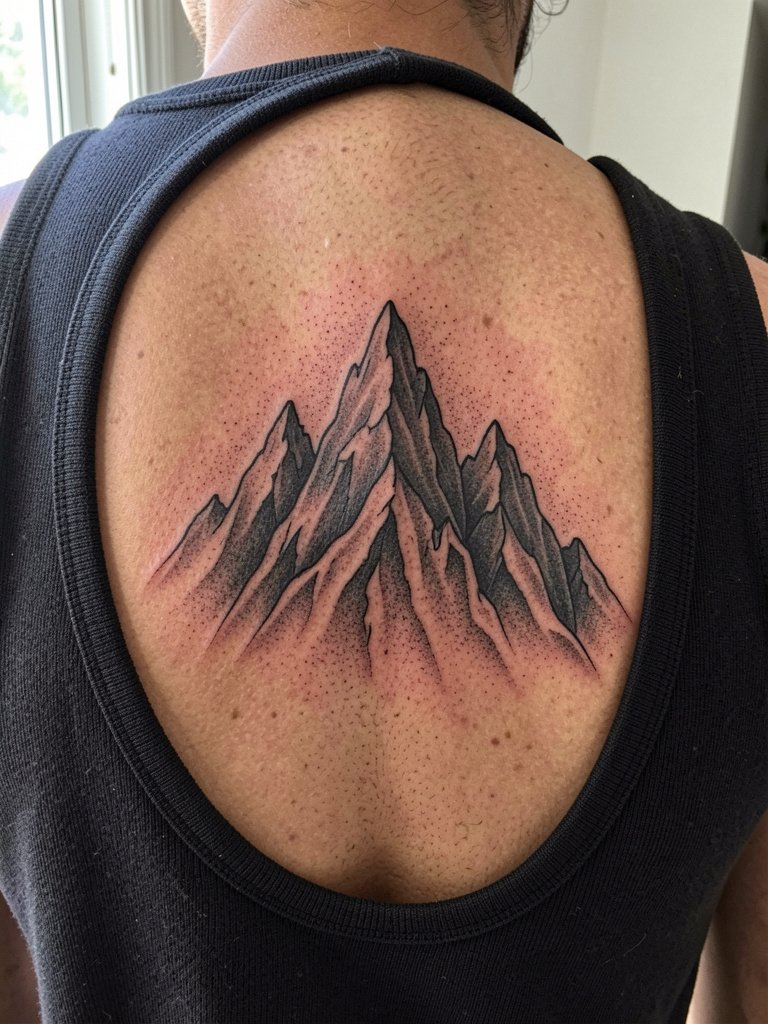
17. Layered Range on Upper Back

Upper-back mountain work benefits from wide canvases and looks great as a future expansion into a full back piece. Tell the artist whether you want the mountains to anchor near the spine or to drift laterally so they can plan composition. Errors often come from centering the focal point too low, which shortens the visual height. Sessions can be long and may be split. For session wear a tank or button-up that you can remove easily to keep fabric from rubbing the area.
18. Tiny Peak on Finger Side

Finger skin wears quickly, and tiny peaks here need bold lines to last. The common mistake is asking for hairline detail that fades in months. Expect a quick but intense session, and plan for multiple touch-ups over time. For the appointment avoid rings that press on the area; wear no jewelry or bring easily removable pieces. If you want the peak to show in casual settings, consider pairing with a slim matte band ring that frames the finger without rubbing the tattoo.
19. Negative Space Range Across Chest

Negative-space chest work gives a bold silhouette that reads easily from a distance. One mistake is crowding the peaks too close to the collarbone where normal movement can distort the edge. Plan the spacing and ask for a mock stencil in the same shirt you wear most often so you can evaluate real-world visibility. Sessions for larger chest bands can run several hours with breaks. For wearing, a scoop or crew neck that sits below the peaks keeps the composition visible at times.
20. Mountain Scrawl Script Along Rib

Integration of script with a mountain motif is a subtle personal option for ribs, but the ribs are a high-motion area. One camp of artists advises avoiding single-needle cursive there because lines can blur quickly. Another camp will accept the risk with slightly bolder script and plan for a touch-up. If you want both text and mountain, request a mock stencil that shows the exact letter thickness and spacing. Pain and session length are both high here, so prepare for breaks. For comfort, wear a fitted cropped top you can remove or adjust easily.
21. Pocket-Sized Geometry on Ankle

Ankle placements face friction from socks and shoes so silhouettes outperform intricate filigree here. The typical error is asking for tiny internal details that get rubbed away. Sessions are brief and pain is moderate. Wear shoes that slide on easily and bring a pair that do not press on the fresh ink during the first week. For style, cropped jeans or rolled denim cuffs highlight the ankle without exposing the tattoo to constant rubbing.
22. Layered Peaks on Shoulder Blade
Shoulder-blade mountains look dramatic and age well thanks to limited day-to-day abrasion. Tell the artist whether you plan to expand into a back piece so they can orient peaks with future panels. People sometimes pick shading that is too light for this area and lose the depth after a year. Sessions here are moderate to long depending on shading. For the appointment wear a removable top and afterwards show the area with a backless summer shirt if you want to reveal the art.
23. Compass-Integrated Peak on Chest Pocket Area

Combining a compass and peak gives a symbolic travel angle that reads well on the pocket area. To preserve clarity, select a simple compass face and avoid intricate inner markings that blur. A common error is shrinking the compass so fine numerals become unreadable. Session time is short and sensitivity moderate. For showing the piece, open-neck shirts or low-buttoned tees frame the pocket area nicely. Try pairing with a casual open shirt to let the tattoo peek through.
24. Stippled Mountain Crest on Upper Arm
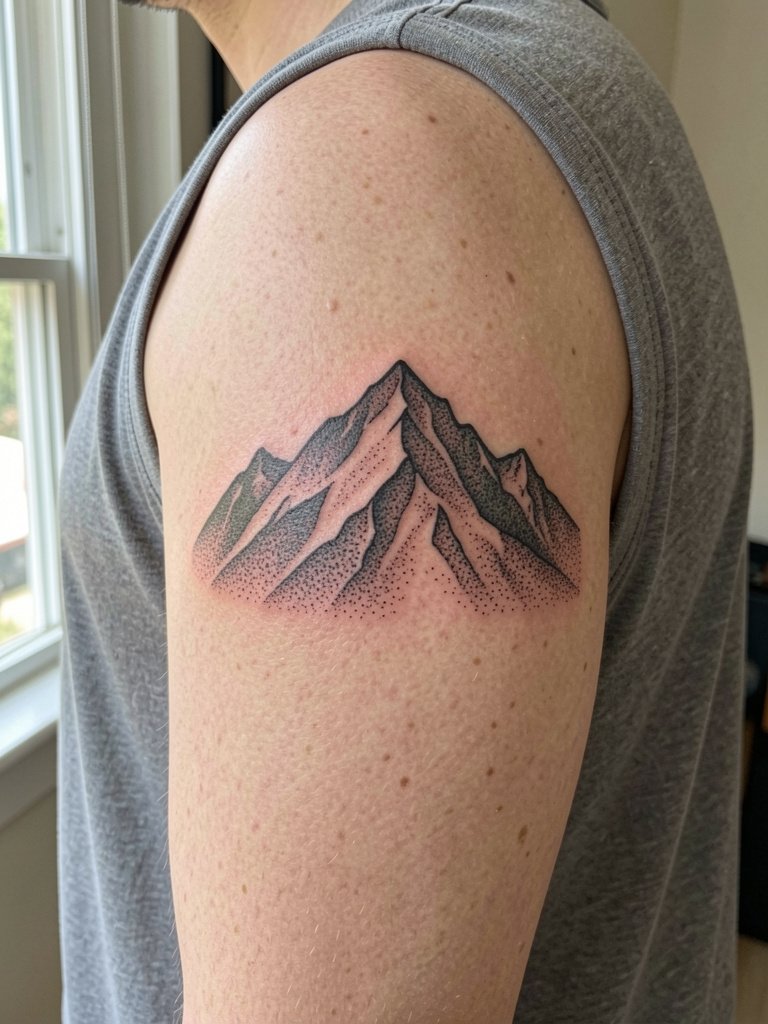
Stipple shading gives texture without heavy solid fills and suits the upper arm where there is room for transition. Ask for sample patches to ensure the dot density will hold on your skin tone. The typical mistake is too sparse a stipple that disappears with time. Sessions may take two to three hours depending on density and placement. For session wear a sleeveless top you can remove without touching the area.
25. Folded Peak on Inner Bicep

Inner-bicep mountains have intimacy and surprise when revealed. The skin under the arm can be delicate so slightly heavier contour beats hairline work for longevity. Expect a medium pain level and one to two hours session. A common mistake is asking for tiny internal details that the inner arm's movement erases. For the appointment wear a tank or sleeveless with easy access. After healing, the piece plays well with short-sleeve shirts and a rolled cuff for occasional display. Consider pairing with a classic short-sleeve button shirt.
26. Mountain Reflection on Calf Inner Side

Inner-calf locations let you incorporate mirrored reflections because the area is long and relatively protected from sun. Clarify where the waterline will sit against muscles so the reflection does not distort with movement. The usual mistake is overdoing delicate ripples that fade during normal wear. Sessions are moderate in length and generally tolerable. Wear shorts for access and consider casual footwear that avoids pressure on the calf during the first week.
27. Bold Peak on Outer Thigh
Outer-thigh peaks allow larger single motifs with strong contrast that last well due to lower abrasion. The main mistake is overcrowding the design with tiny details that the thigh's fabric contact erases. Sessions are comfortable for most and provide room for a bold silhouette that ages cleanly. For the appointment choose loose pants or shorts and afterward show the area with seasonal shorts. A casual athletic short works well for summer reveal.
Frequently Asked Questions
Q: How do I choose between fine-line and blackwork for a mountain tattoo?
A: It depends on placement and your patience for touch-ups. Fine-line reads well on thicker, less mobile skin and when you accept a likely touch-up at year two. Blackwork holds shape with less maintenance and is a strong choice for high-motion areas like chest or shorts-exposed thighs.
Q: Which placements hurt the most for mountain motifs?
A: Ribs and sternum are often the most painful because of thin skin over bone and constant expansion. Fingers and wrists sting sharply but briefly. Upper arm, thigh, and calf are typically the most comfortable.
Q: Where can I find healed examples and portfolios without naming artists?
A: Search platform tags like #MountainTattoo, #SmallLandscapeTattoo, and #BlackworkMountains and use location filters on social apps to find nearby healed examples. Reddit tattoo threads and portfolio aggregators show multiple healed timelines in different skin tones so you can compare real-world aging.
Q: What should I wear to my appointment for these placements?
A: Wear clothing that gives the artist easy access without tugging or exposing unrelated areas. For shoulder and chest, a removable top or wide neckline is ideal. For thighs and calves, loose shorts avoid pressure on fresh ink. One useful item is a drawstring linen pant that you can adjust without rubbing the tattoo.
Q: How often will I need touch-ups for different mountain styles?
A: Thin single-needle pieces often need touch-ups after one to three years, especially on high-movement skin. Bold blackwork can go longer before a refresh, with many people not needing work for three to five years depending on sun exposure and friction.
Q: Are there cultural concerns with tribal mountain designs?
A: Yes. If a motif draws from living cultural traditions, treat it as an act of borrowing that requires research and respect. Use clear conversation with your artist about origins and avoid sacred symbols unless you have community permission.
