
A lot of tiny moon-phase rows look brilliant on a phone screen and then soften into a gray blur by year three. The difference usually comes down to spacing, needle depth, and picking the right placement for the design you want. Read on for moon-phase variations that age better, what the chair feels like for each placement, and simple wardrobe choices that let the work show.
1. Fine-Line Horizontal Phases on the Inner Forearm
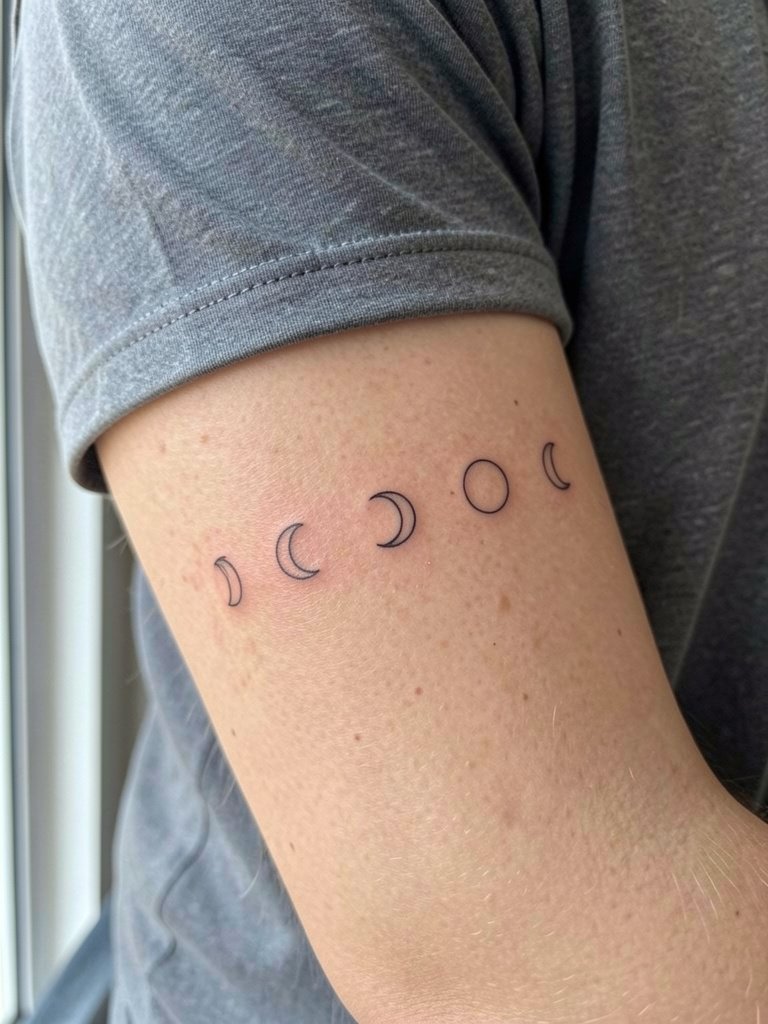
Fine single-needle moon rows look delicate in photos but the inner forearm is a high-motion spot. If you want fine work, pick slightly wider spacing and a hair heavier line weight than the reference. A common mistake is asking for single-needle detail at one inch across. The skin eats the detail over a couple of years and the tiny crescents blur together. Expect a 1.5 to 2 hour session for a neat six-phase row. Pain is low to moderate. Healed at six months the shapes are crisp. At two years tiny crescents can soften unless the spacing was given room to breathe. For the session wear a loose short-sleeve shirt so the artist can roll the sleeve without pressure. This placement pairs well with rolled linen sleeves that show the forearm in warm weather.
2. Cascading Crescents Along the Sternum
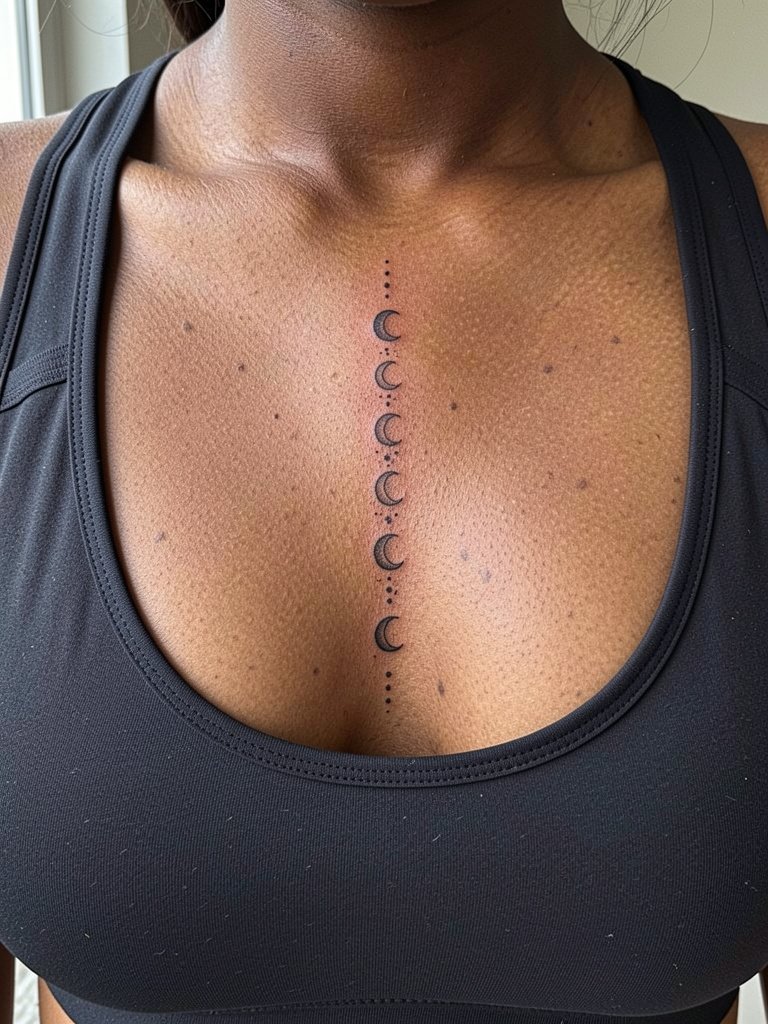
Sternum placements read intimate and dramatic at once, but the skin here moves differently than on the forearm. Session time is usually 2 to 3 hours if the work is continuous. Pain ranges from high to intense for many people because the area sits over bone and thin tissue. Tell your artist how you sleep so they can plan line spacing with that friction in mind. A mistake is compressing tiny crescents into a narrow band. When done with subtle negative space the phases age cleaner. Expect a touch-up at 12 to 18 months for crispness if you wear tight bras that sit across the area daily. Professional considerations apply for sternum pieces, so look for portfolios showing healed sternum work before booking.
3. Micro-Moons Around the Ankle
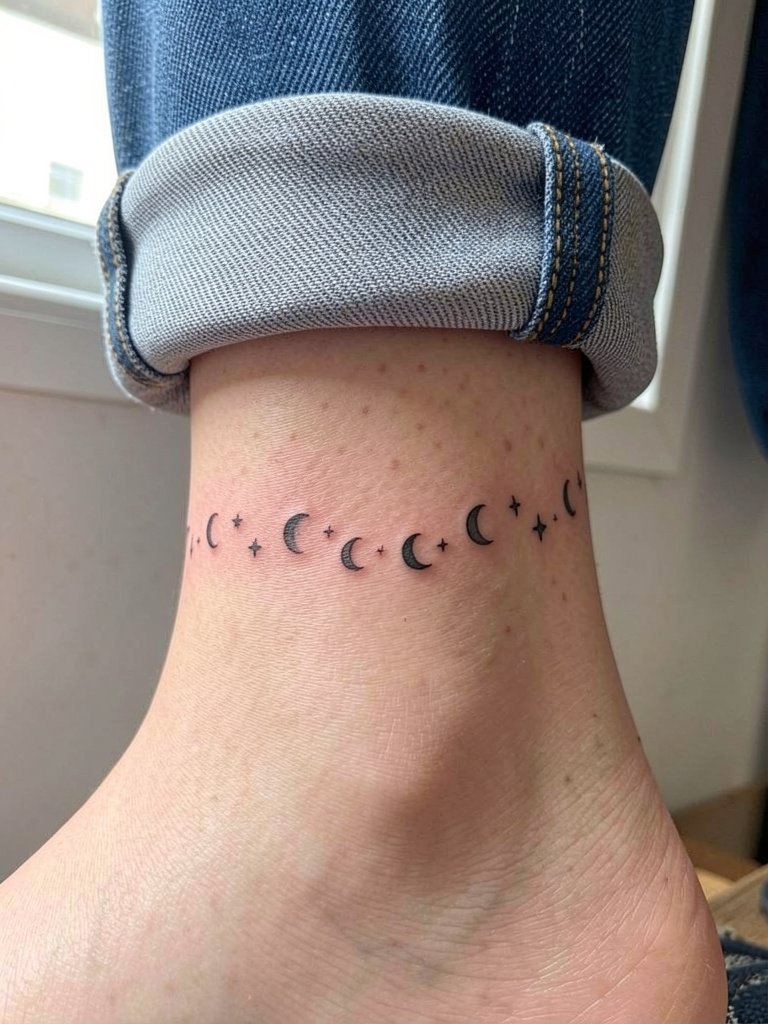
Ankle tattoos face constant friction from socks and shoes. For tiny moon series pick bold, slightly thicker outlines and avoid hairline details. The chair session is usually quick, 45 to 90 minutes, but the area is bony so expect sharp moments of pain. Blowout risk is medium because the thin skin moves against footwear. The common error is asking for millimeter-thin crescents that disappear under footwear friction. Healed at six months the thicker micro shapes keep their silhouette. For showing off the work choose low-slung sandals and ankle-wrap skirts that leave the lateral ankle visible without rubbing.
4. Shoulder-Blade Phases with Mandala Framing
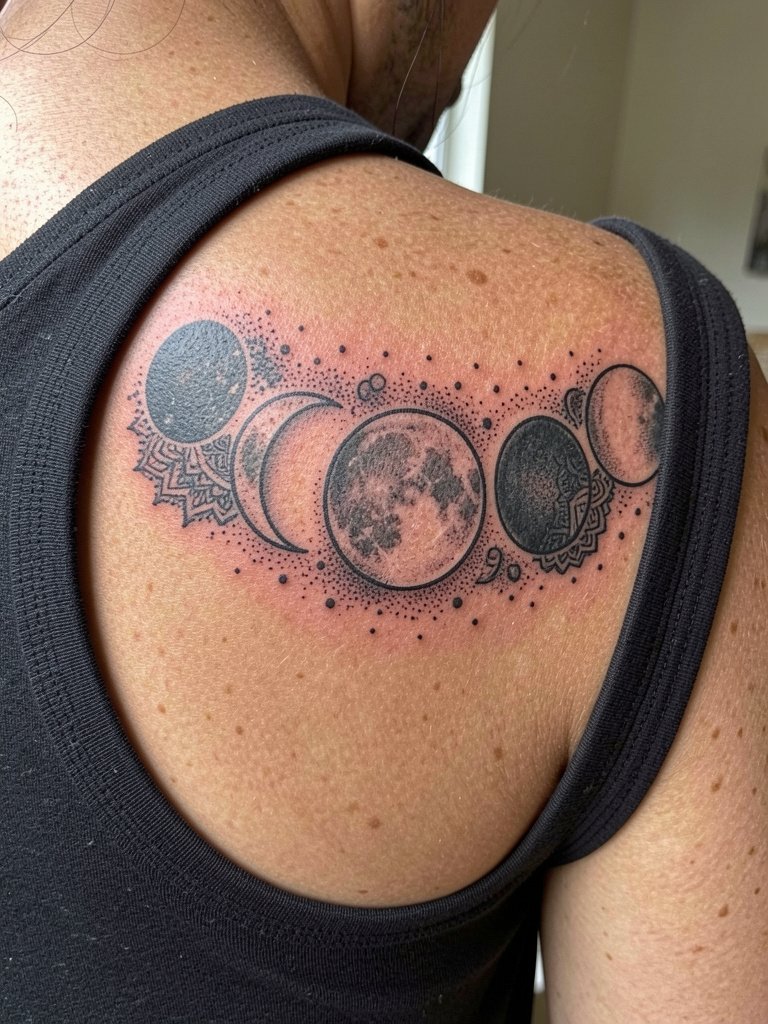
The shoulder blade gives enough flat canvas to combine lunar phases with geometry. If you want the mandala detail, ask for a one-session layout that spaces the dots to avoid tight microwork. A common aging mistake is filling the mandala petals with ultra-fine stipple too close to the moon edges. That detail can blur into the moons after a few years. Session time for a medium mandala arc runs two to four hours. Pain is moderate because the muscle there buffers the bone. For showing off on cooler days pick tops with open backs or backless slip dresses that highlight the shoulder blade without tugging on the area. Expect a touch-up at two to three years if you wear tight backpacks that rub the spot constantly.
5. Watercolor Arc on the Ribcage
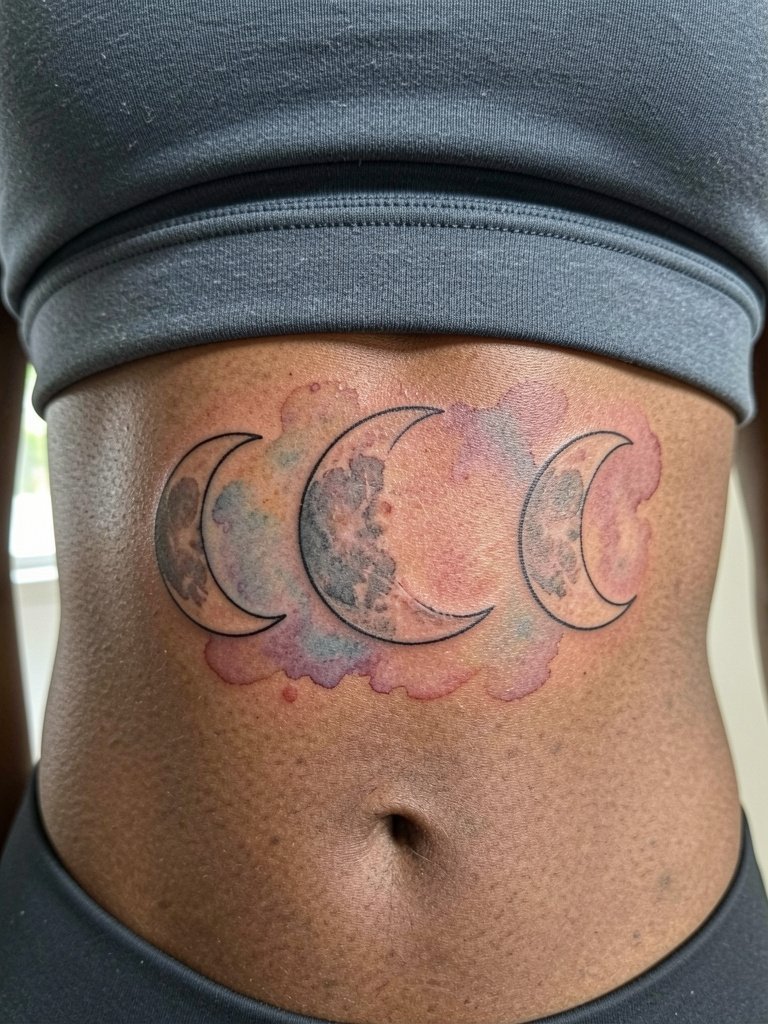
Ribcage moon arcs look organic but are one of the top placements for debate in the community. One camp says fine-line and watercolor on ribs blur quickly because the skin stretches and breathes with every inhale. The other camp counters that with slightly bolder outlines and staged color saturation the piece can hold for years. If you pick watercolor, expect a longer session split into two appointments so the artist can layer color without overworking the skin. Pain is high. Common mistakes include asking for feathered edges too close to the breast crease. For the session wear a cropped tank and high-waisted bottoms so the artist can access the ribs without you being uncomfortable.
6. Tiny Nape Moons Down the Back of Neck
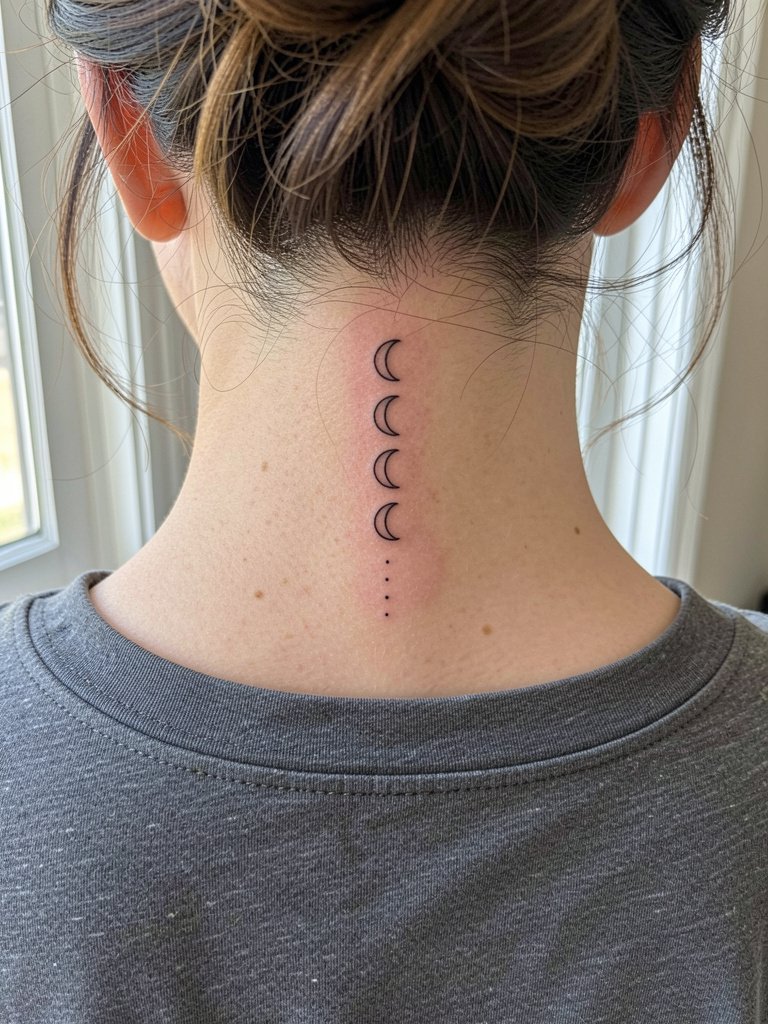
Nape placements are deceptively visible and require an artist comfortable working close to hairlines. The session usually takes 30 to 60 minutes. Pain is low to moderate but the skin is thin. A common mistake is requesting micro-detail right at the hairline. The healed result at six months is clean if the outline avoids the very edge where hair growth and micro-motion live. For week-one comfort tie your hair loosely and bring a soft scarf for the ride home. This spot pairs nicely with delicate updo styles and short-neck collars like a boxy crop tee that keep the nape visible.
Session Day Picks
These first six placements include delicate spots where a few practical items make the session smoother and the first week less fussy.
- Stencil transfer paper kit. A clean transfer helps you preview spacing for inner forearm and collarbone rows before the needle hits the skin.
- Topical numbing cream. Useful for ribcage sessions in idea five and for long shoulder-mandala sittings, applied per artist guidance.
- Thin protective film roll. Keeps ankle and finger pieces from constant water exposure in the first week.
- Fragrance-free gentle body wash. Cleans the area without irritating the new linework during showers.
- Aquaphor healing ointment. A mainstream option that many artists recommend for the very first nights of a fresh fine-line session.
7. Collarbones with Tiny Phases and Script
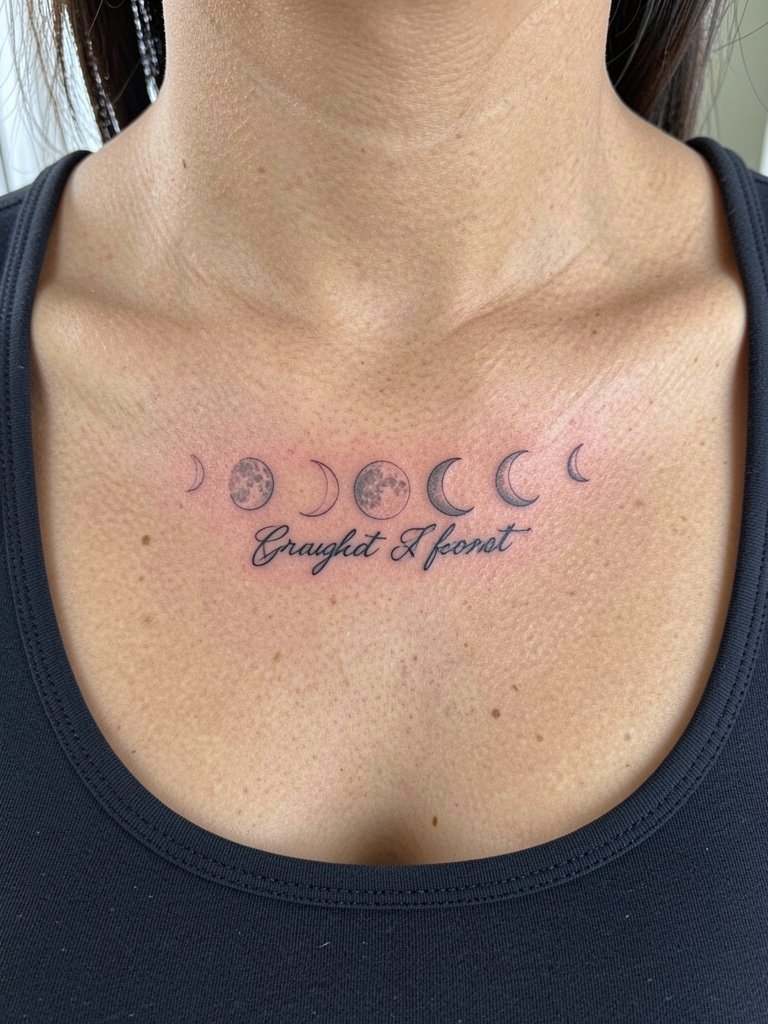
Collarbones are great for horizontal moon rows that follow natural bone lines. The area is thin over bone so expect sharp sensations during a 60 to 90 minute session. A frequent error is compressing script and moons into the same tight band. Instead, give the script room with a slight baseline offset so both elements keep clarity as the skin changes. Healed at six months the script and moons should read clean. For outfit pairing choose open-neck tops or off-the-shoulder sweaters that frame the collarbone without rubbing the linework. If you sleep on your side a touch-up at 18 months is common.
8. Inner Thigh Crescent Chain with Botanicals
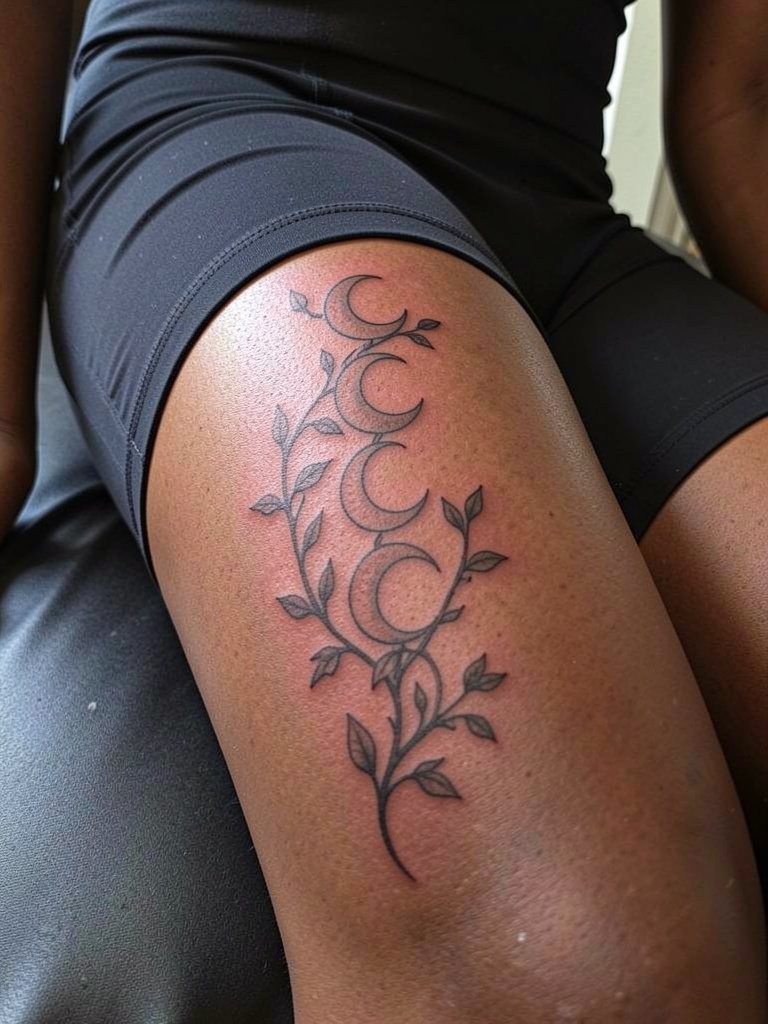
Inner-thigh placements feel private and can be great for moon chains that reveal only when you want. The area is sensitive so pain tends from moderate to high. Session time depends on botanical detail and runs one to three hours. The most common mistake is asking for dense micro-shading too close to the groin line. That area sees friction from clothing, so choose spaced leaves and open vines that age cleaner. Professional considerations are important for inner-thigh work due to healing and intimacy. For sessions wear loose shorts that are easy to remove and put back on without stretching the area.
9. Calf Column of Phases with Constellation Dots
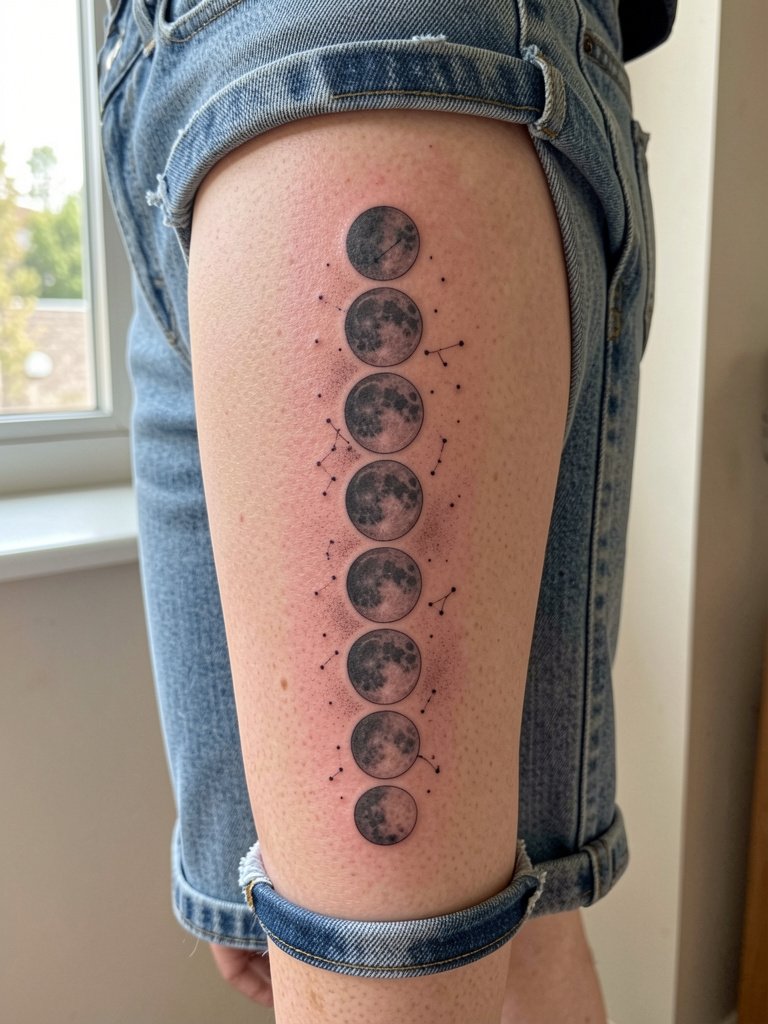
The calf is forgiving for elongated designs and shows well when you sit or stand. Sessions are comfortable and usually take 60 to 120 minutes. A common misstep is packing tiny dots too closely. With movement those dots can muddy, so leave deliberate space between constellation points and ask for slightly heavier dot anchoring near the moons. Blowout risk is low on the calf compared with hands or fingers. For evenings out choose hemlines or midi skirts that let the calf show with wrap sandals. Healed work at two years often needs only cosmetic touch-ups.
10. Stacked Finger Moons as a Ring Alternative
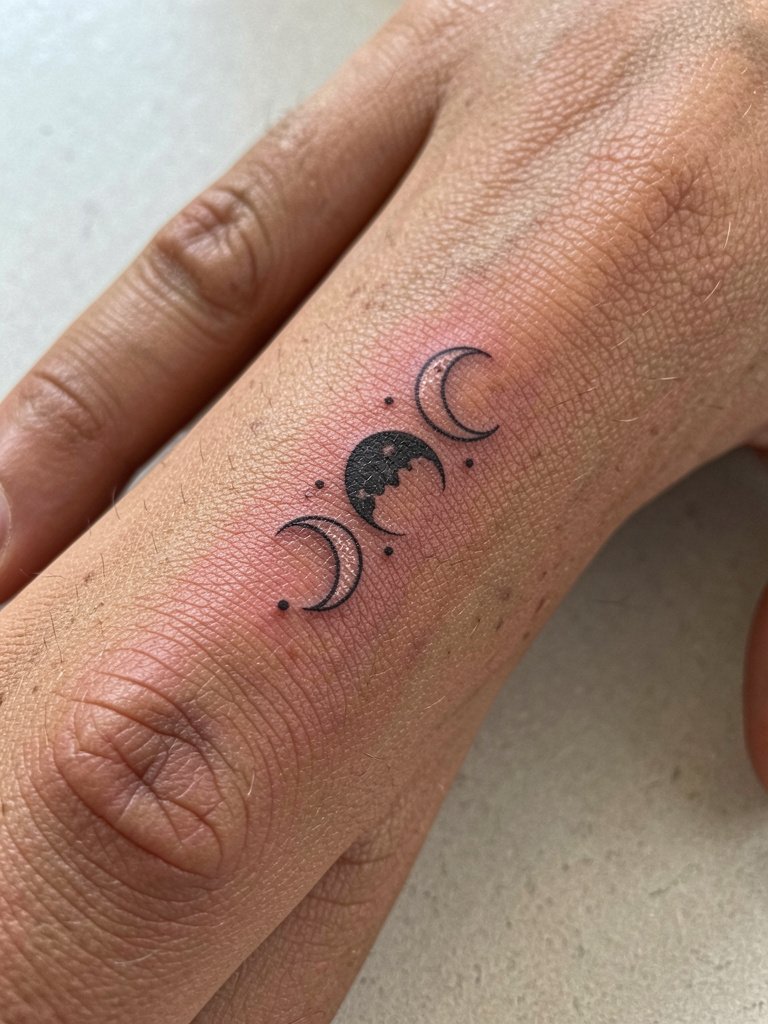
Finger tattoos need planning for longevity because skin and use cause fast wear. One common mistake is asking for fine, filled crescents that require dense saturation on such a small surface. For best long-term read ask for bolder outlines and simple negative-space crescent centers. Sessions are short, often under 45 minutes, but touch-ups are common at 6 to 12 months. Expect higher touch-up frequency than other placements. For showing the stacked moons naturally pair them with thin rings or choose sleeve cuts that leave the hand visible like cropped cardigans. Specialized artist experience with finger healing is important for success.
11. Full Back Moon Phase Mural with Night Sky Texture
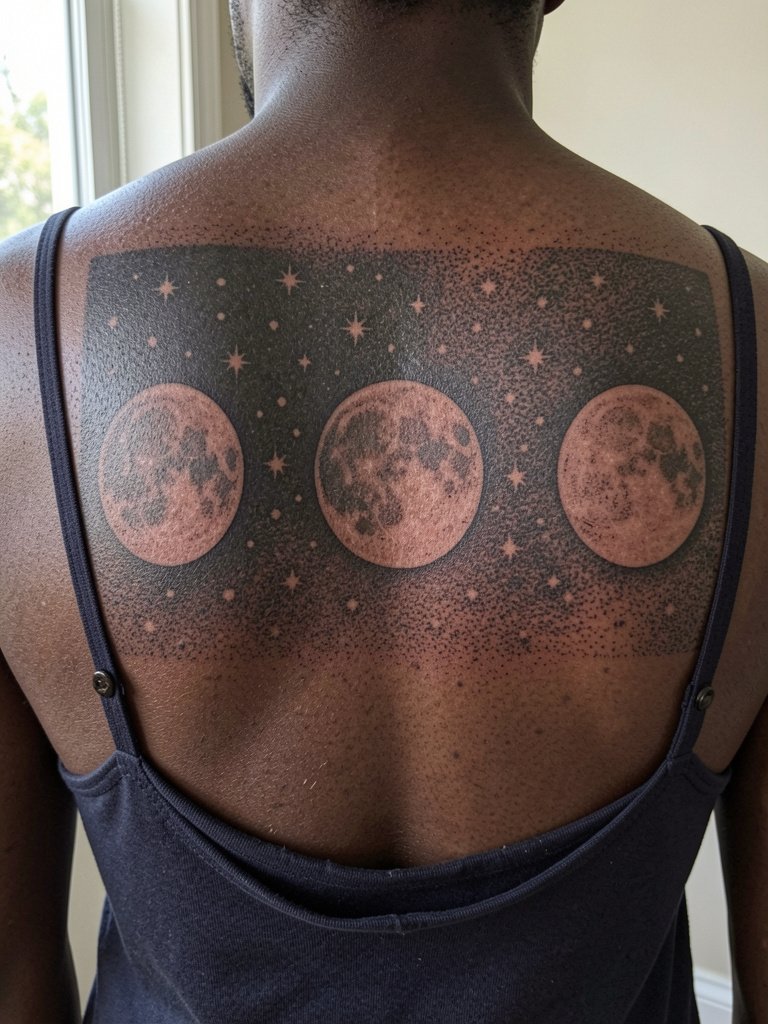
A full-back mural lets you treat each moon as a scene. Because of the size this work is typically split across multiple sessions totaling anywhere from four to twelve hours over months. Pain is variable across the back depending on proximity to the spine and ribs. One mistake is trying to cram ultra-fine texture into the same pass as the main moons. Stage the sessions so the moons get solid outlines and the sky texture gets its own shading pass. In the long run you will likely need occasional touch-ups to keep black saturation uniform. For showing off pick backless evening pieces or low straps that frame the mural without rubbing it. Expect a healing timeline measured in months not weeks.
12. Tiny Crescent Behind the Ear with Dots
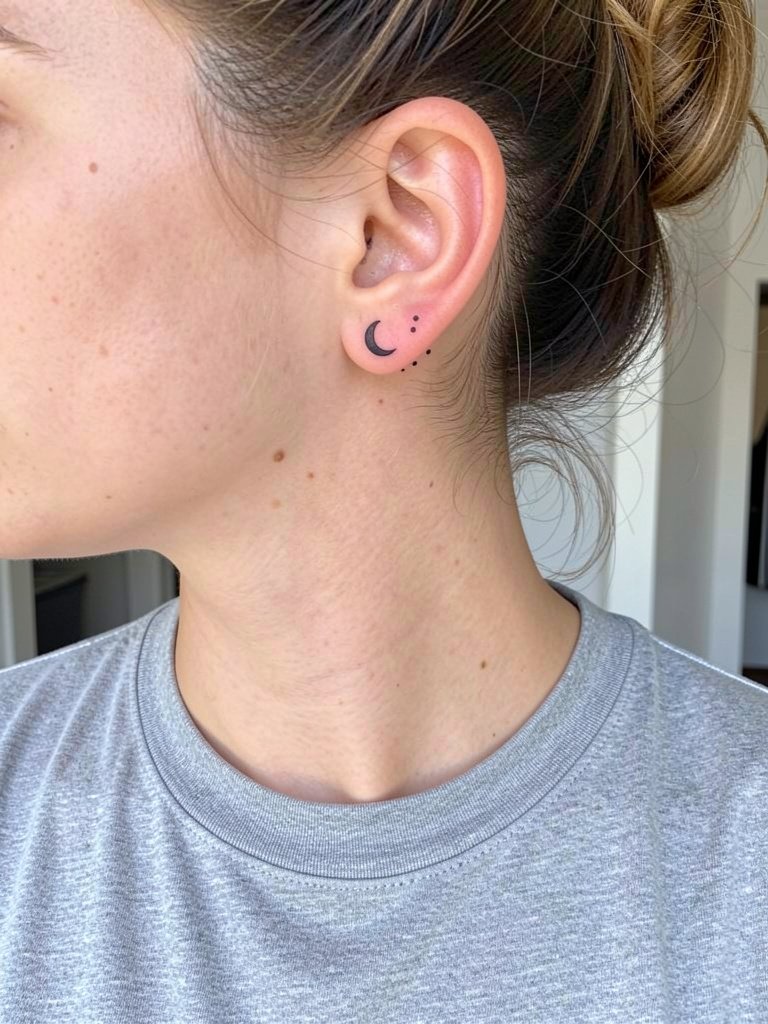
Behind-ear pieces are tiny and visible when you pull your hair up. Sessions are short and low pain, but the area requires a steady hand because the small surface means every millimeter matters. A common mistake is asking for too many micro dots; canonical spacing ensures the dots remain distinct as the skin settles. For session comfort pull hair into a loose bun and wear a top that does not press at the neckline. This spot pairs well with minimalist stud earrings and high collars like a mock-neck top when you prefer to keep the area covered.
13. Hip Bone Half-Moon Row with Chain Detail
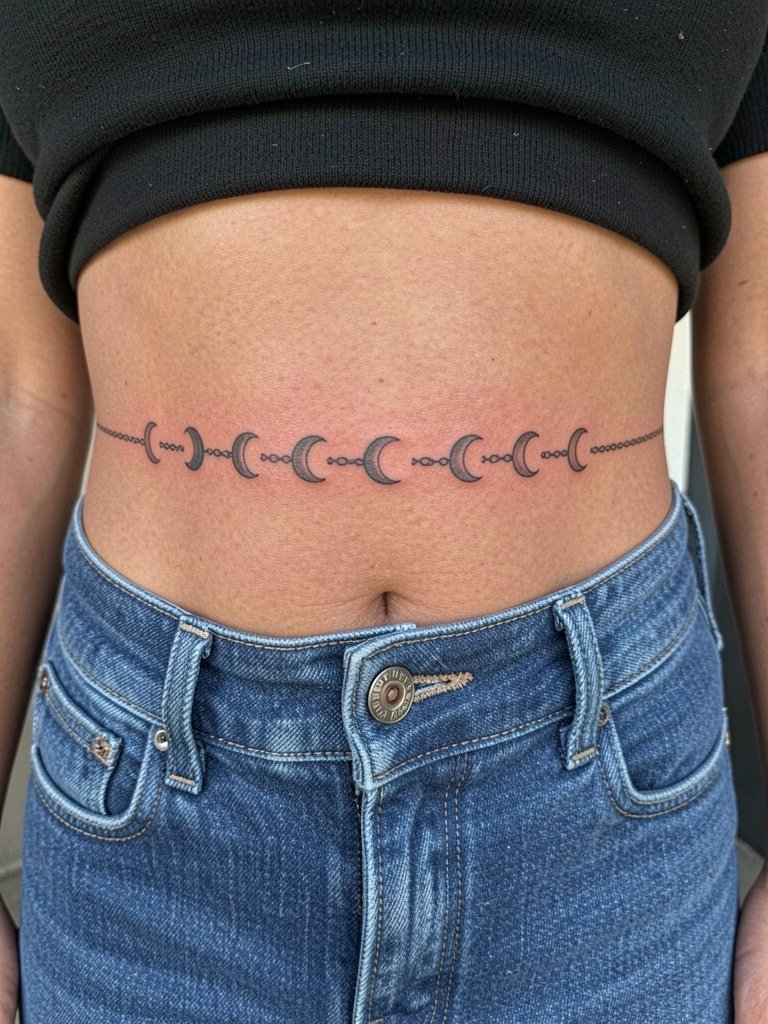
Hip placements sit where clothing can rub daily, so pick a design that tolerates abrasion. Chains and half-moons work when the links are spaced and the moons get slightly bolder outlines. Sessions are usually one to two hours and pain is moderate. A common error is asking for ultra-thin chain lines right on the edge of the waistband. If your jeans sit exactly on the tattoo you will increase friction and the need for touch-ups. For the session wear low-rise bottoms that can be pulled down just enough without stretching the area. Professional consideration applies for hip pieces when they sit near the underwear line.
14. Solar Eclipse Minimalism on the Upper Arm
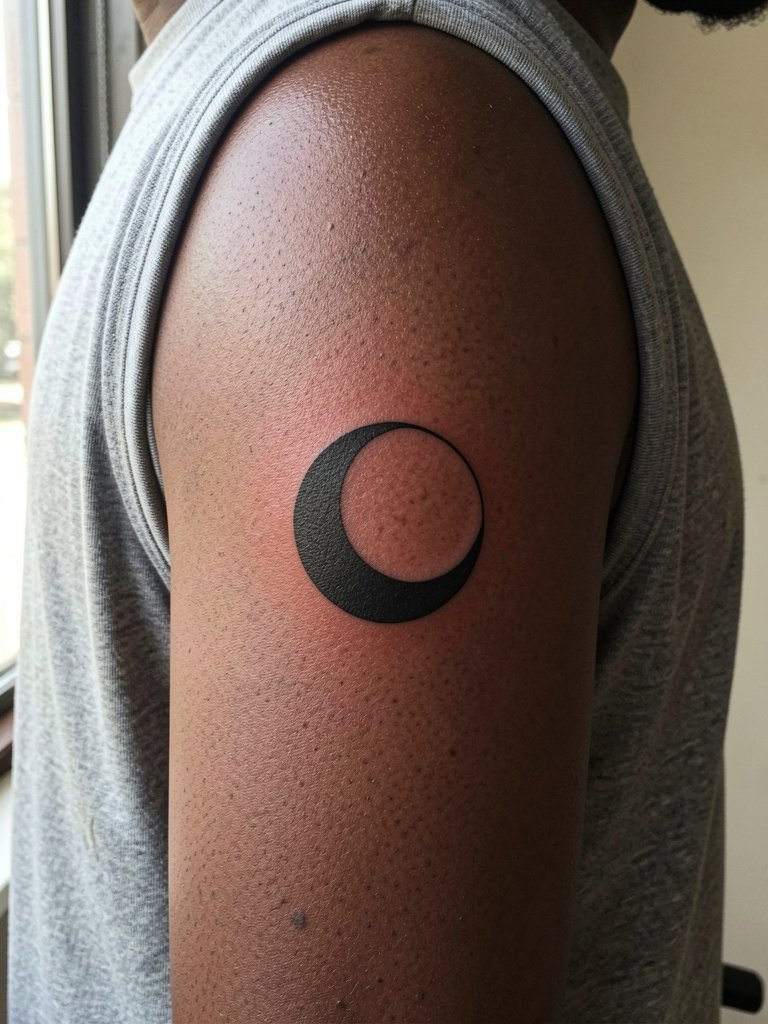
Bold, simple eclipse motifs age well on the outer arm because the area withstands wear. The session is short and manageable at 45 to 90 minutes. A frequent mistake is trying to squeeze micro shading into the solid black. Solid fills heal cleaner and need fewer touch-ups than feathered black. Pain is low. For showing off pick sleeveless shirts or muscle tees that frame the outer arm like a tank with wide armholes. A single-session bold fill often stays visually strong for years with minimal maintenance.
15. Lunar Sleeve Accent with Negative Space
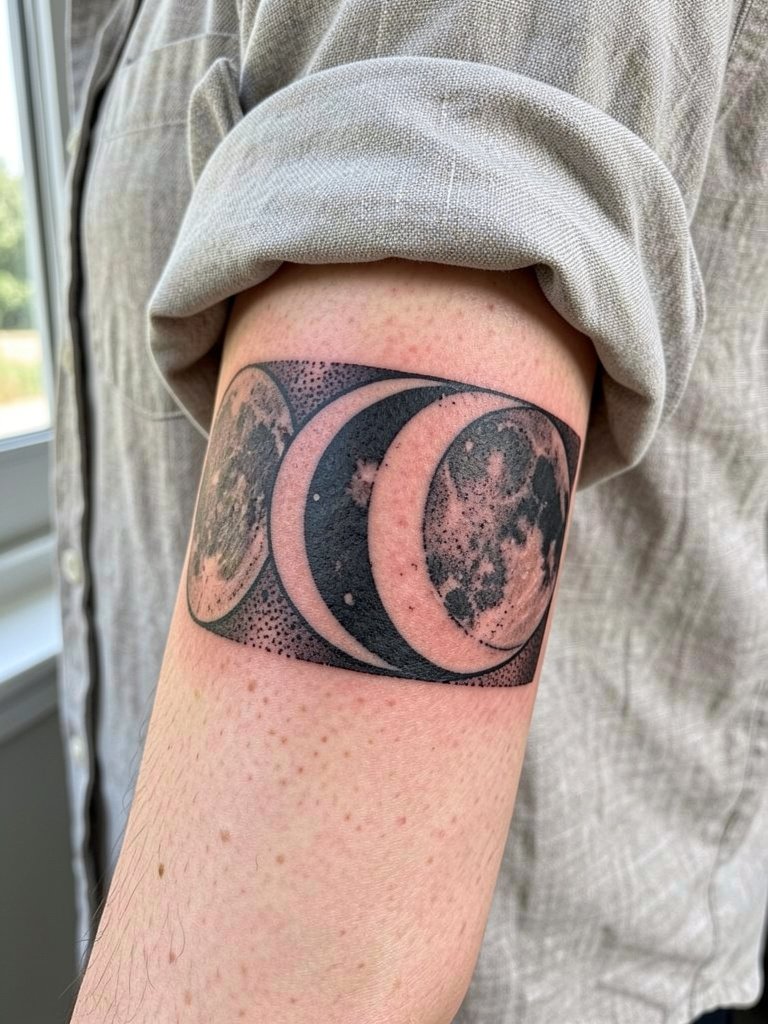
If you are adding moons into a partial sleeve, think about contrast. Negative-space crescents surrounded by dense black create long-term legibility. The session time varies depending on how much of the sleeve is finished in one sitting. Pain is moderate in this area. A common mistake is matching new moons too precisely to the old shading. Instead, plan a small mock layout so the artist can test contrast and adjust saturation. For the appointment wear sleeves you can roll without tugging like lightweight linen shirts. Touch-ups are normal for filled background black in the first two years.
Frequently Asked Questions
Q: How do I find healed examples of moon-phase portfolios without naming or following specific artists?
A: Search platform tags focused on placement and style rather than names. Use hashtag blends and location filters such as #MoonPhaseTattooHealed, #FineLineMoonInk, and city tags on video apps to find recent healed photos. Local tattoo shop pages often post healed shot reels and you can filter by keywords like "sternum healed" or "finger healed" to see how placements behave on different skin tones.
Q: Will a tiny moon row on my wrist truly blur within two years?
A: It depends on line weight, spacing, and daily wear. Very thin single-needle crescents on a high-motion wrist tend to soften faster. If you want longevity, ask for slightly heavier outer contours and add micro negative space between crescents. Expect a possible touch-up around year one or two for the tightest rows.
Q: Are there clear rules about tattoo care that help moon phases heal better in the first week?
A: Keep the area clean and avoid tight clothing that rubs the fresh work. A thin protective film for high-friction spots like ankles and fingers reduces early scabbing issues. Shower gently and pat dry. If you have sensitive skin, choose fragrance-free cleansers and sleep on freshly laundered bedding.
Q: Which placements have the highest blowout risk for moon detail and what should I ask before booking?
A: Fingers, ribs, and inner bicep variations carry higher risk for detail blowout. Before booking, request to see healed shots of the exact placement from the artist. Ask for examples of the same needle style on similar skin tone and for the artist to show how they space crescents to avoid merging over time.
Q: Can I pair my moon-phase tattoo visually with outfits and accessories?
A: Yes. Small ankle moons work with low-slung sandals and cropped trousers. Collarbone rows look intentional with open-neck tops and delicate chains. If you want outfit suggestions, try pairing the look with backless slip dresses for shoulder blades or lightweight linen shirts for forearm accents to keep the work visible without rubbing.
Q: How often should I expect touch-ups for moons on high-motion areas like fingers or wrists?
A: For fingers and wrists plan on a touch-up within 6 to 18 months depending on your skin and lifestyle. These areas wear faster because of frequent washing and contact. The artist can advise a maintenance schedule based on how bold you want the lines to remain.
Q: Where is the best place to see moon-phase ideas organized by placement and healed examples?
A: Use community forums and portfolio filters on image-first platforms to search placement-specific terms. Look for "healed" plus placement words in your searches to find recent real-skin examples. This keeps you from relying only on staged studio photos and helps identify how designs age across skin tones.
