
A thin mountain silhouette still reads decades later when it begins with breathing room. When you pick a minimal mountain, think about contour spacing, how your skin moves in daily life, and whether you want that crisp black line or a soft shaded ridge. These choices determine how the piece looks at six months, two years, and five years, and they set the tone for what comes next in the first section.
1. Fine Line Ridge on Inner Forearm
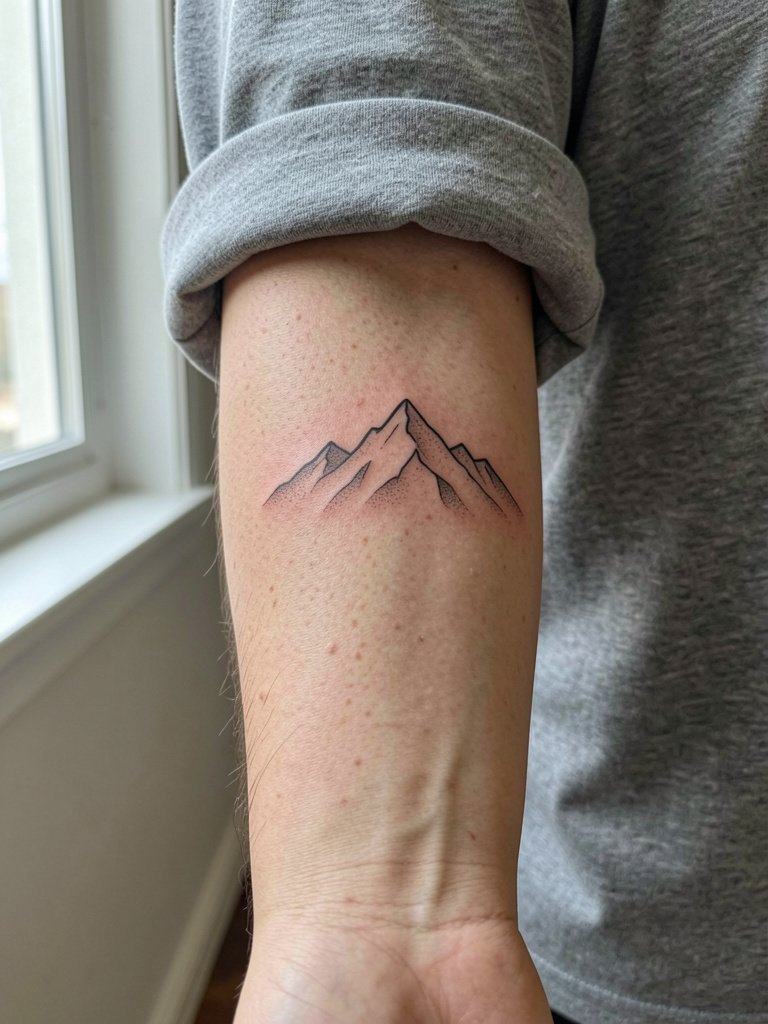
A fine line ridge on the inner forearm is ideal when you want something readable in social distance yet subtle under long sleeves. Expect the session to run 30 to 60 minutes depending on scale. For longevity, plan for slightly heavier line weight than on a paper reference because the underside of the forearm can soften thin single-needle work by year three. Common mistake is asking for the thinnest possible lines without accounting for spacing, which causes cramped detail later. Discuss exact millimeter line weight and spacing with your artist so the peaks keep definition. Pair with rolled linen shirts to show the piece without overshadowing it.
2. Micro-Contour on Collarbone
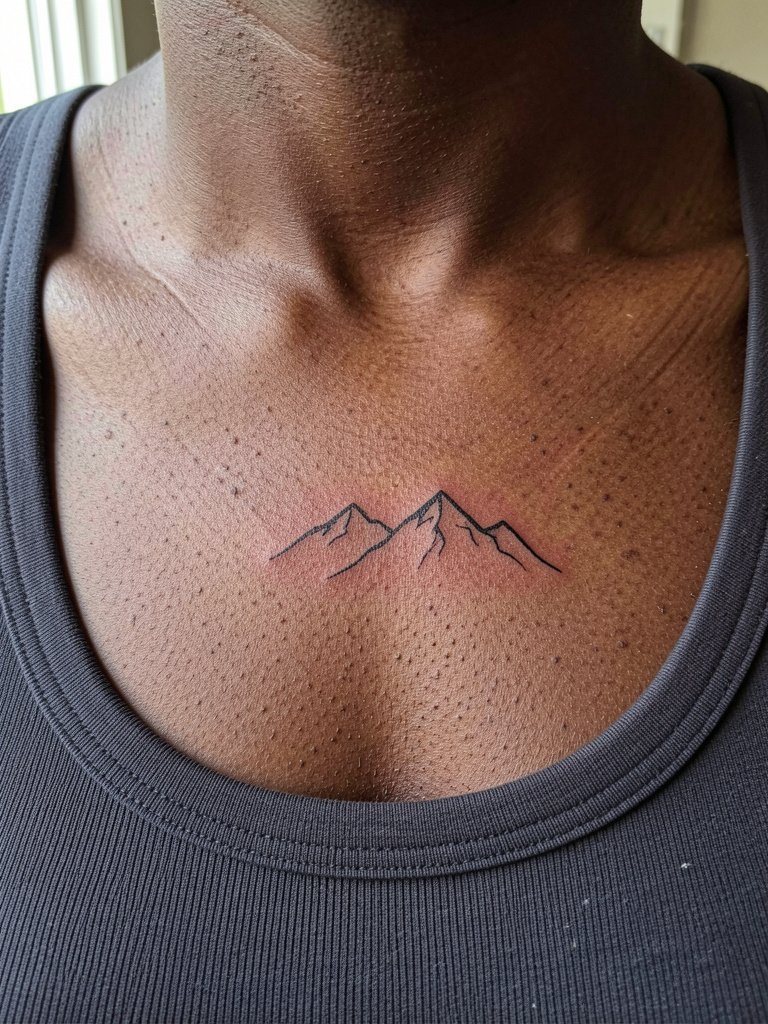
Collarbone placements make minimalist mountains feel editorial but the area sees friction from necklaces and straps. Session time is short, around 20 to 40 minutes, and pain sits at moderate because the bone is close to the skin. The most common aging issue is faint blurring where necklaces rub. To reduce that, ask for slightly bolder contour where lines touch the bone. During the consult show how necklaces will sit so the artist can place the peaks clear of frequent contact. For evenings, wear wide V-neck tops that frame the collarbone without tugging at the ink.
3. Stippled Ridge on Outer Calf
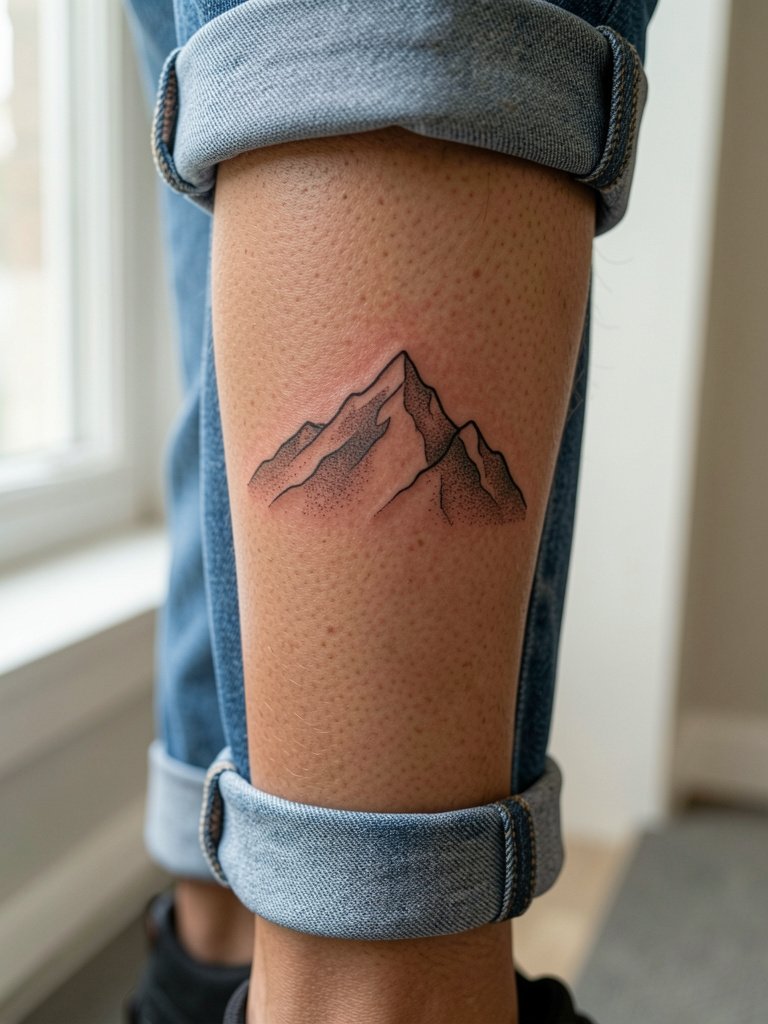
An outer calf piece is a strong option if you want a mountain that reads from a distance. The area handles stipple shading well because the skin is thicker and blows out risk is low. Expect a one- to two-hour session for detailed dot work. A common mistake is compressing too many peaks into a narrow vertical band, which makes the stipple look muddy later. Tell the artist to space negative areas intentionally and map the composition at full scale on the calf so you can check balance. For summer months pick mid-calf boots to showcase the silhouette.
4. Single-Peak Wrist Accent
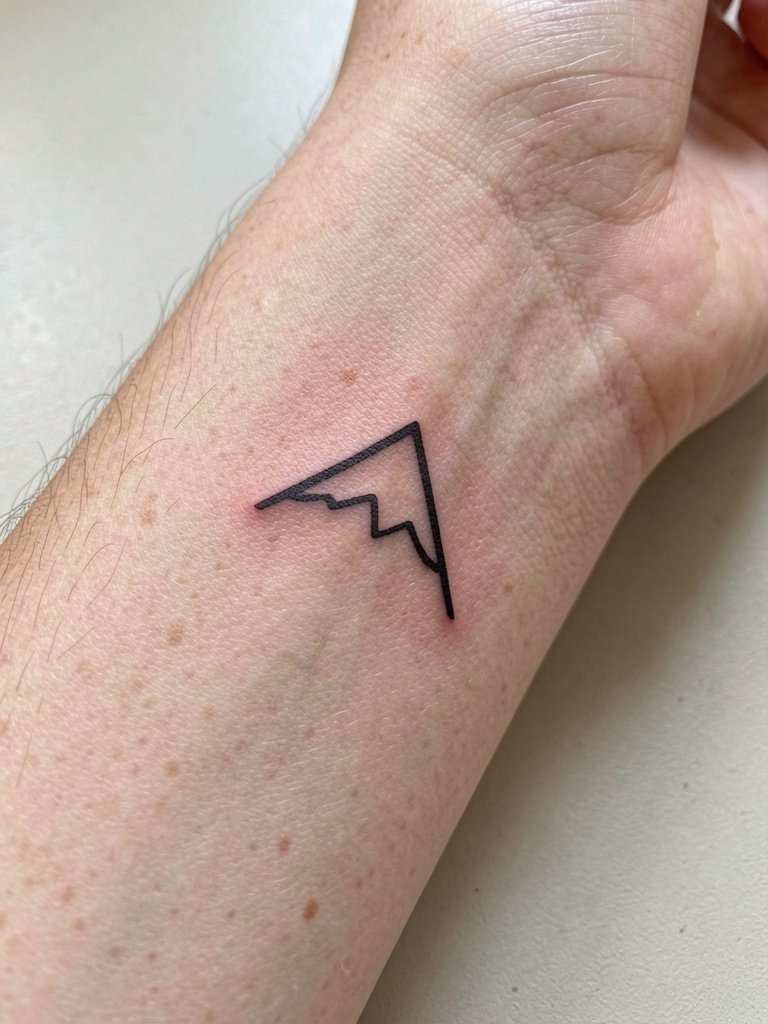
Wrist tattoos show immediately but suffer from constant washing and sunlight exposure. Plan for touch-up at 12 to 18 months depending on lifestyle. A mistake I see is asking for minuscule detail right on the crease. The skin there moves and fades faster, so request a compact bold outline rather than ultra-thin script. During the consultation specify how much gap you want between the design and the wrist crease so rubbing from bracelets is minimized. For wearing the piece, a thin bracelet cuff in matte metal helps frame the triangle without covering it.
5. Negative-Space Range on Upper Arm
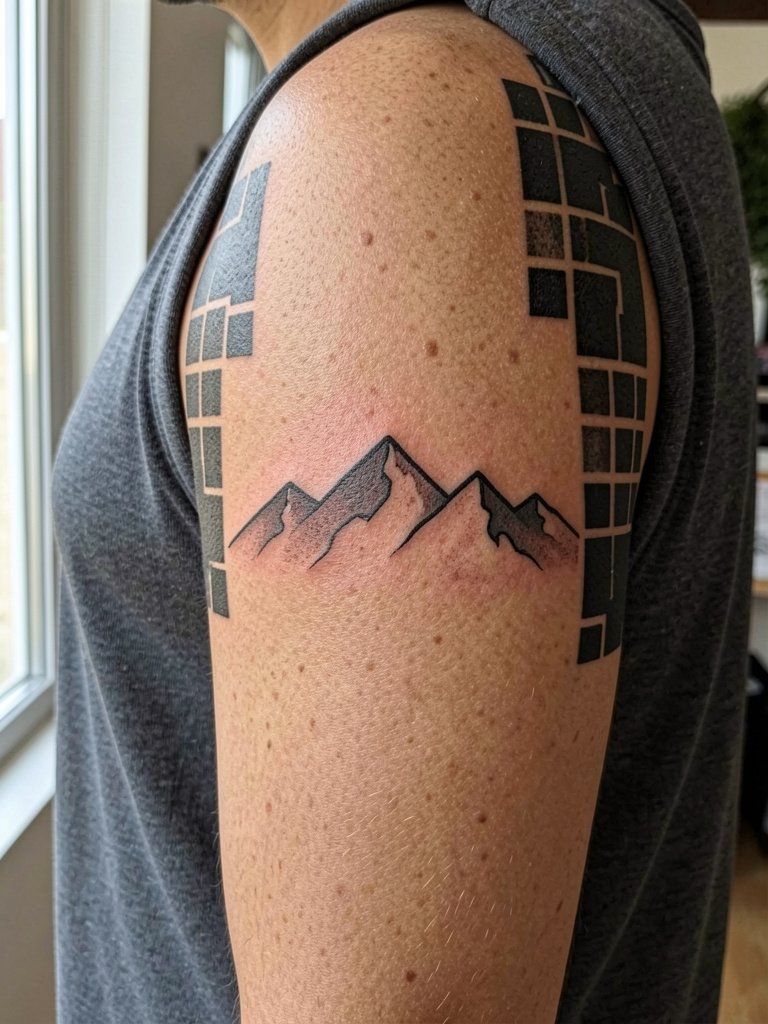
Negative-space ranges read bold without extra color, and the outer upper arm tolerates blocky blackwork well. The session can be longer if you choose a wide band of solid black, so expect more breaks. A common error is leaving too little negative margin between peaks, which causes the carved-out areas to fill over time. Ask for a test stencil wrapped slightly larger than your reference so you can see how the negative shapes breathe on your arm. For warm weather, pair the piece with sleeveless linen tops that let it show without tight straps rubbing the ink.
6. Tiny Geo Peak Behind the Ear
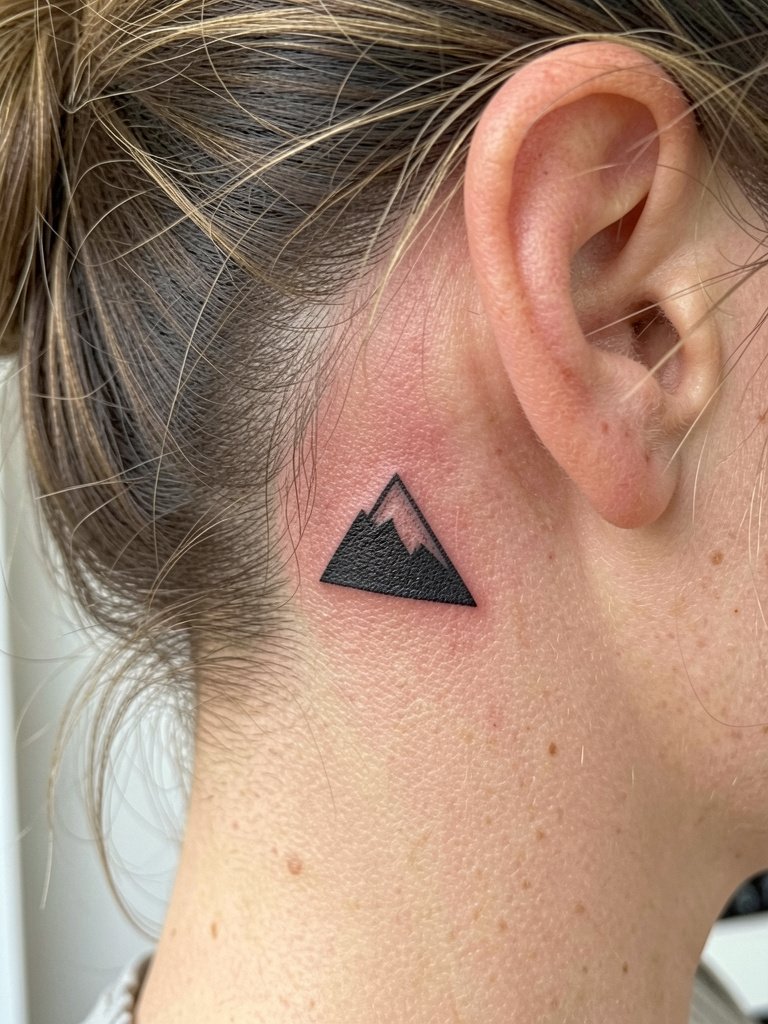
Behind-the-ear peaks are quietly visible when your hair is up and nearly invisible in most professional settings. Expect the session to be short but sensitive because of thin skin. A mistake I often see is asking for complex shading in this tiny zone. Simplicity keeps the shape readable as skin ages. Tell the artist the max millimeter width you will accept so the triangle does not become a dot over time. For styling, an everyday hair clip or simple gold bobby pins helps show the piece without heavy pulling on hair.
Pre-Session Essentials
The ankle, wrist, and behind-the-ear pieces above have different access needs, so pack a small kit that keeps you comfortable and your artist unbothered.
-
Cooling stencil transfer sheets. Lets you preview placement on skin, especially handy for the inner forearm and collarbone designs above.
-
Topical numbing cream pack. Applied 40 to 60 minutes before can ease sensitive spots like the wrist and rib edge.
-
Disposable grip covers for the chair. Adds comfort for longer calf and upper-arm sessions and keeps the studio tidy.
-
Gentle fragrance-free body wash. Use the day before the session to avoid skin irritation around delicate lines.
-
Aquaphor healing ointment. A mainstream option for the first 48 hours that many people find helps with initial scabbing and moisture.
7. Continuous Line Peak on Ribs
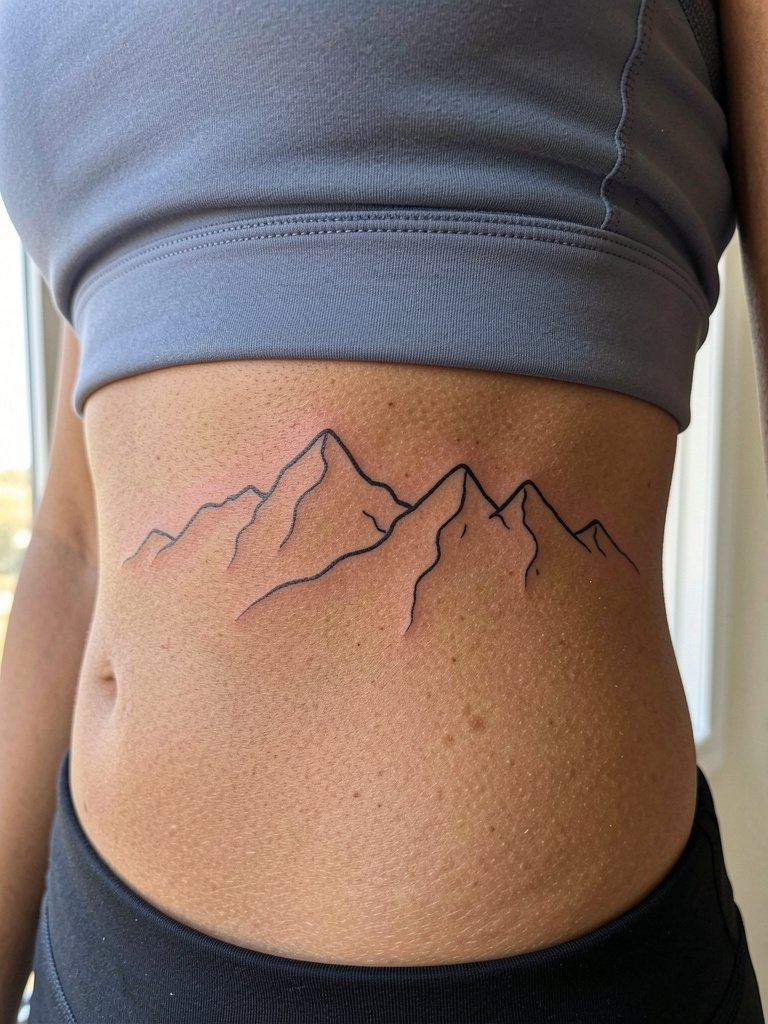
Rib placements are vivid but notorious for movement and sensitivity. Artists split into two camps. One camp argues fine single-line ribs blur within two years because the skin stretches and breathes with every breath. The other camp says slightly heavier line weight and planned spacing lets fine work settle cleanly, and they can show healed photos to back that up. Expect a longer session with breaks and bring breathing techniques. A frequent mistake is compressing peaks too closely to the breast crease. Ask for a placement mockup while standing so the ridge sits where your torso moves least.
8. Minimalist Panorama on Back Shoulder
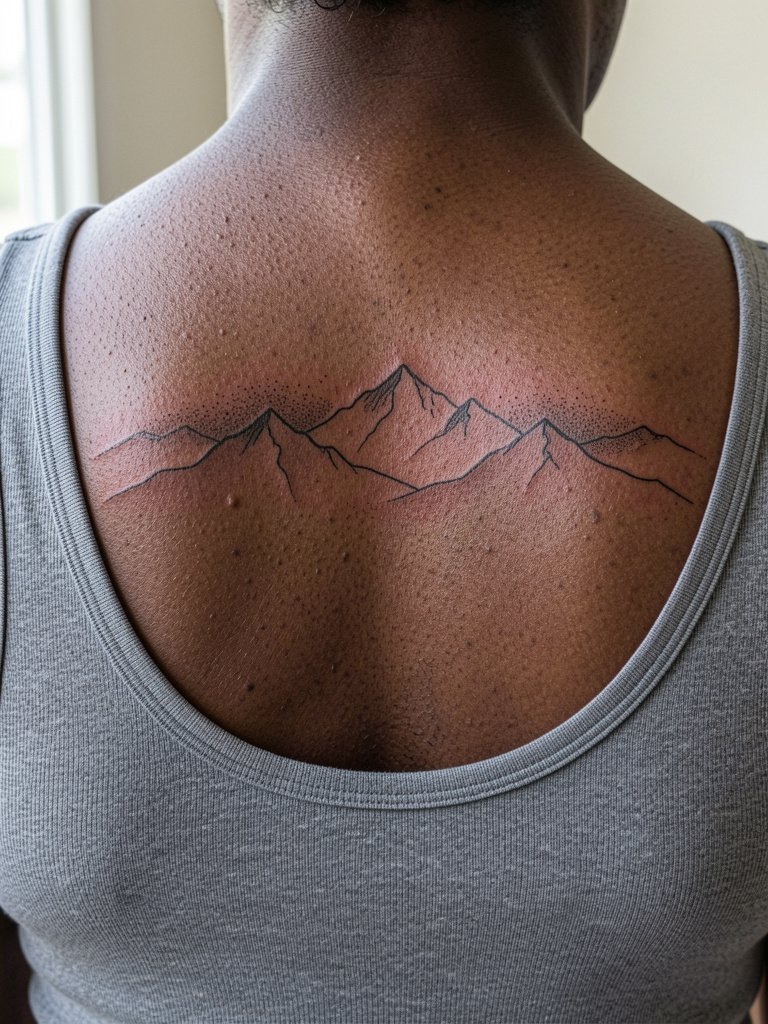
A panorama on the back shoulder creates a clean visual that pairs well with sleeveless pieces. Expect two small sessions if you add stipple fades. The area tolerates thin contours well but will need occasional touch-up at the outer edges where friction from straps or backpacks occurs. A common error is placing the composition too low where bra straps rub. During the consult provide clothing examples so the artist can avoid high-contact zones. For showing it off try open-back dresses that frame the shoulder blade.
9. Micro-Realism Peak on Thigh
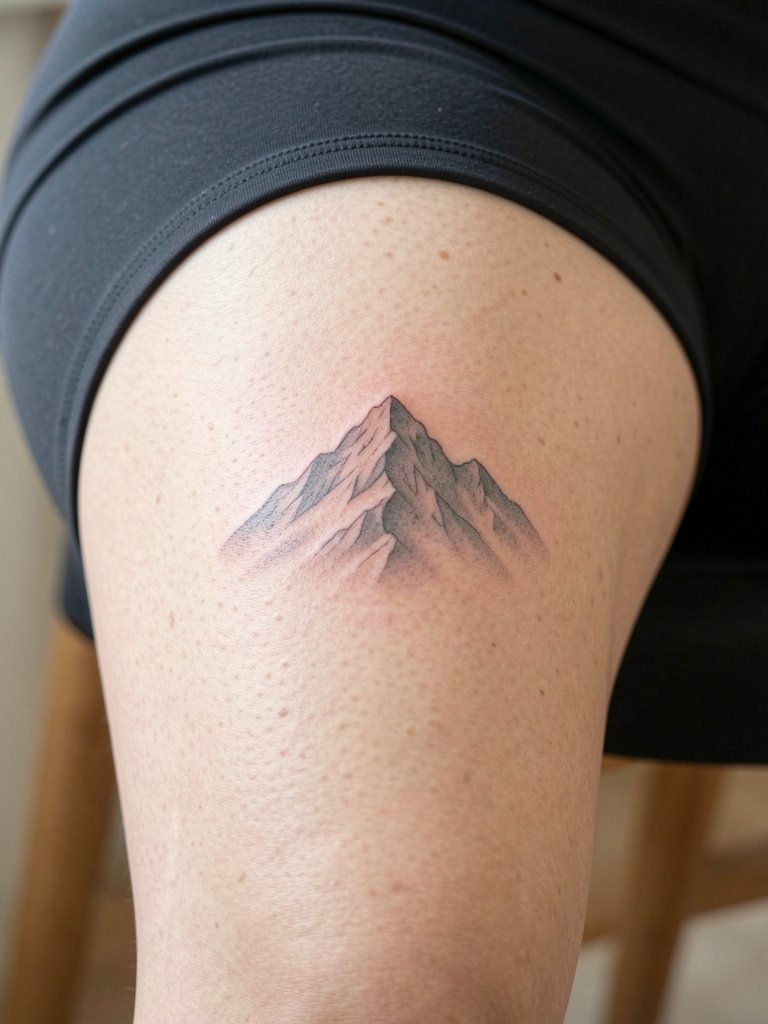
The outer thigh accepts a range of detail and usually feels moderate on a pain scale. Micro-realism looks striking here and ages well because of thicker tissue. A typical session is one to two hours. Mistakes include expecting extremely fine stipple at a scale that will not survive regular friction from pants. Be specific about how much grey wash you want so the wash does not turn into a flat patch later. Wear loose shorts to your appointment so the artist can position the leg without pressure. For evenings, a high-waisted skirt pairs well with a thigh piece.
10. Geometric Peak on Outer Wrist
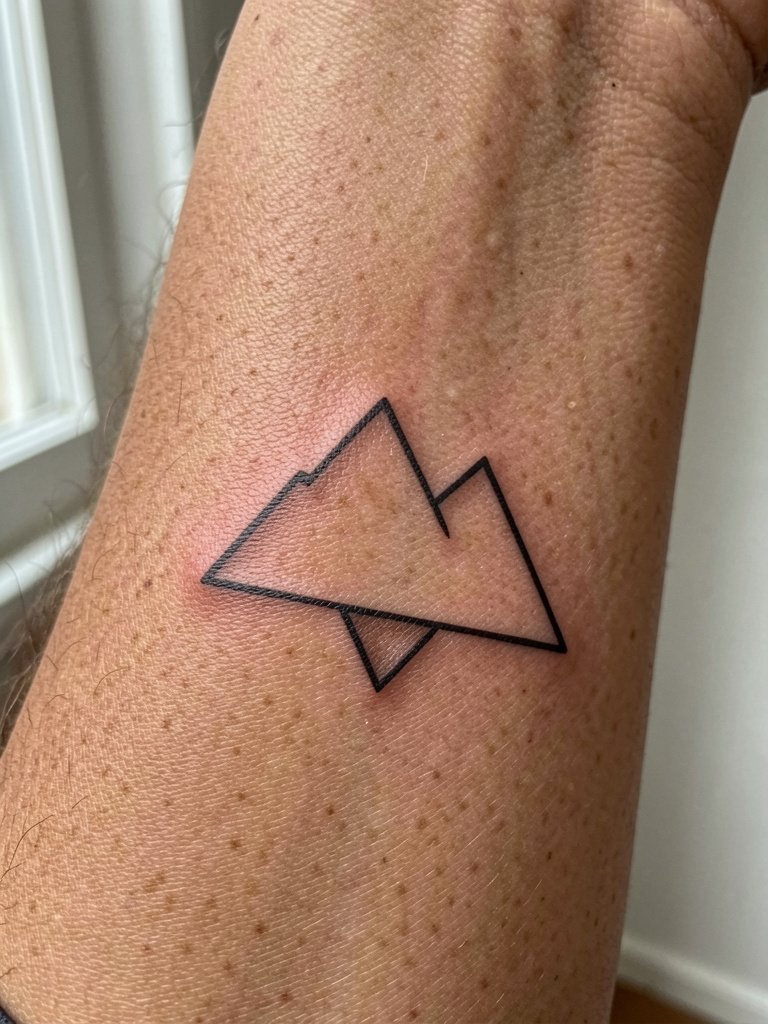
Geometric peaks translate well to the outer wrist because the bone helps maintain crisp edges. The area is high-contact so expect touch-up within one to three years depending on wear. A mistake I see is asking for intersecting fine geometry so small that ink migrates into blobs. Instead ask the artist to scale the shapes so each line has breathing room. During the consult indicate if you wear watches or bracelets often so placement avoids constant pressure. For styled days wear a minimal leather watch to compliment the geometry without rubbing the tattoo.
11. Horizon Band Around Forearm
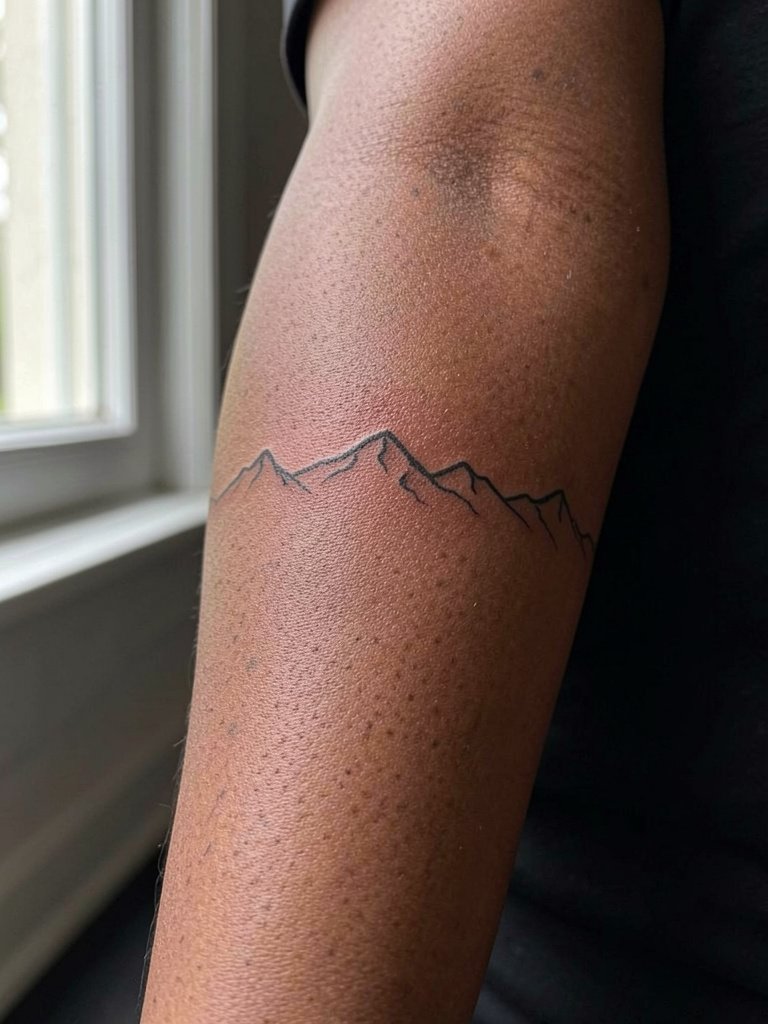
A horizon band wraps the forearm and reads like a cuff. Expect a one- to two-hour session depending on circumference. A common issue is inconsistent spacing where the band meets at the seam, which looks awkward when it ages. Ask for a continuous mockup that the artist views from different arm angles to ensure symmetry. Forearm skin can hold linework well, but heavy sun exposure will fade blackwork faster. For showing it off, rolled sleeves and a lightweight denim jacket make the band a focal point.
12. Dotted Range on Ankle Wrap
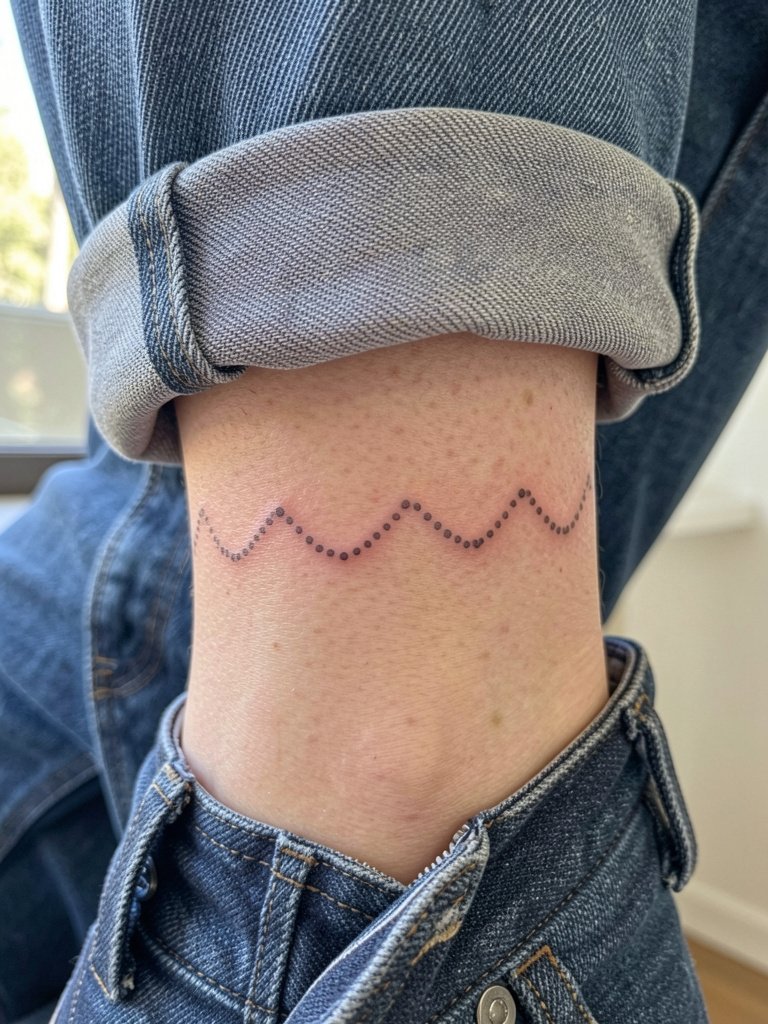
Ankle wraps that use dot work give a subtle texture and low visual weight. The area faces friction from socks and shoes, so dot spacing matters for longevity. Sessions are short but may sting due to thin skin above the bone. A common mistake is placing too many closely packed dots that blur into a smudge under shoe friction. Ask for durable spacing and a small test patch if possible. For footwear choose low-profile pieces like canvas sneakers that do not rub the immediate ankle band.
13. Minimalist Summit on Sternum
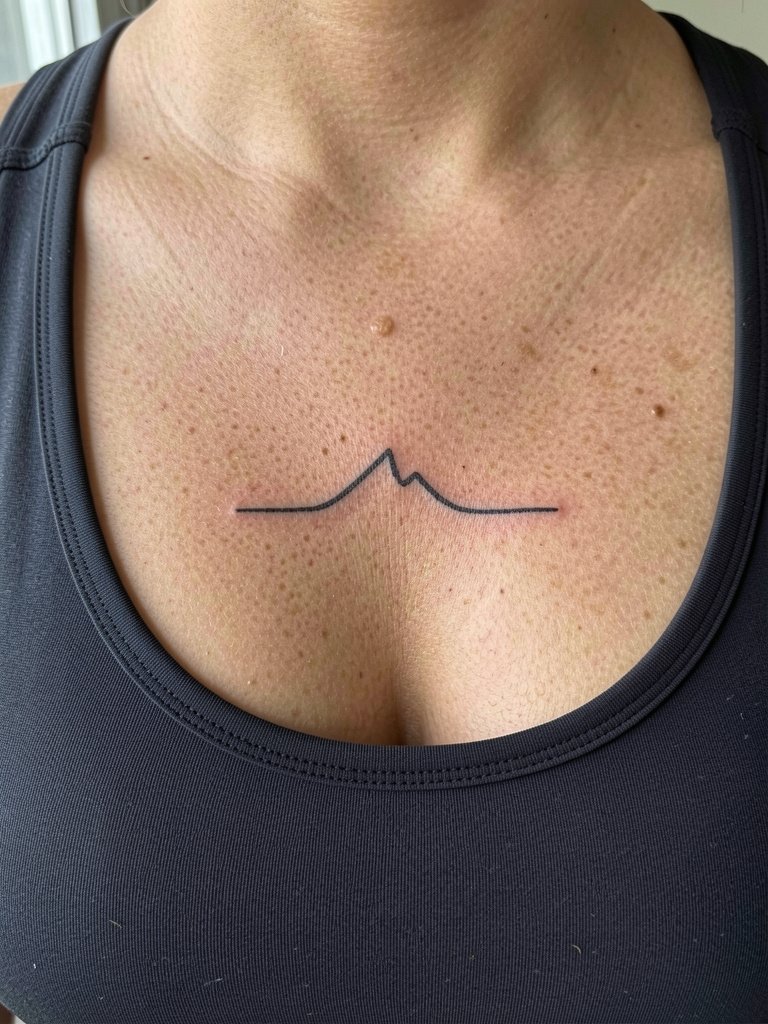
Sternum pieces are intimate and sensitive. The pain tends to be high because the skin is thin and near bone. Artists diverge on technique here. One camp says fine single-needle work on the sternum fades quickly due to natural glandular movement and friction. The other camp recommends slightly wider line weight and strategic spacing so the design remains legible even under compression. If you choose this spot be prepared for longer healing and a potential touch-up after six to twelve months. For the session wear a sports bra that the artist can move without fabric tugging.
14. Minimal Line Sleeve Starter
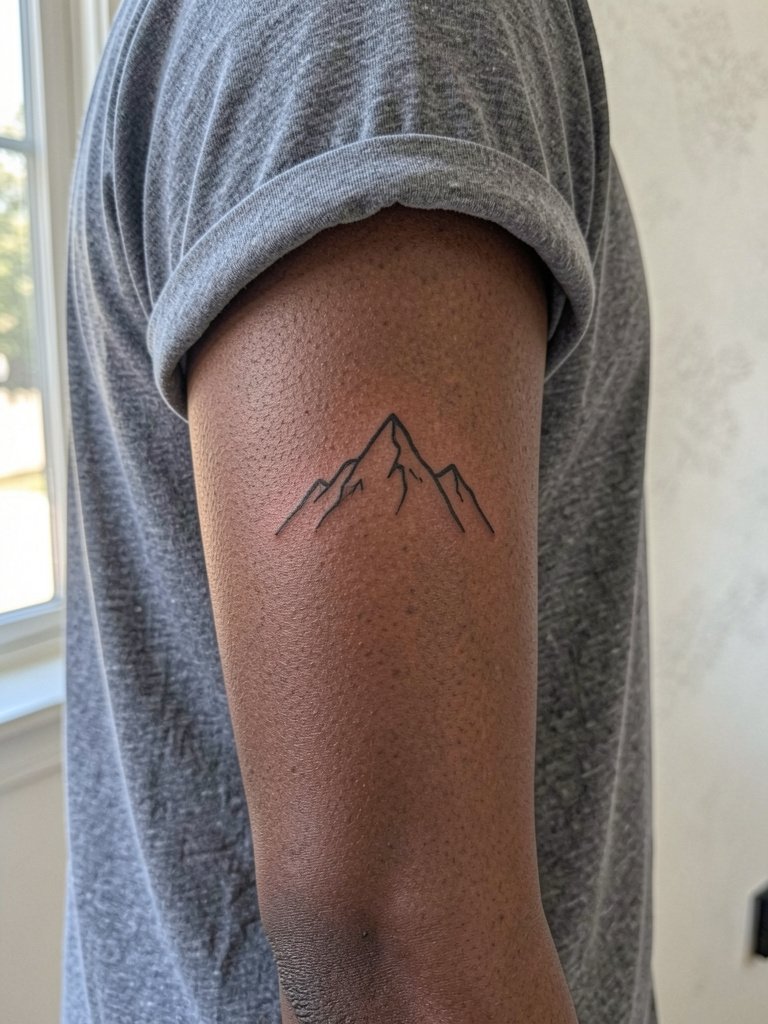
Use a minimalist mountain as a sleeve starter if you see future expansion to landscapes or geometric fills. The session length varies by how much baseline contour you want, often one to three hours. A frequent error is starting too small for a sleeve plan, forcing heavier rework later. Before you book, bring sleeve reference images and ask the artist for a mapping session so the peaks can scale naturally into larger compositions. For casual coverage when needed, consider long-sleeve layers or a lightweight wrap.
15. Tiny Peak on Finger Side
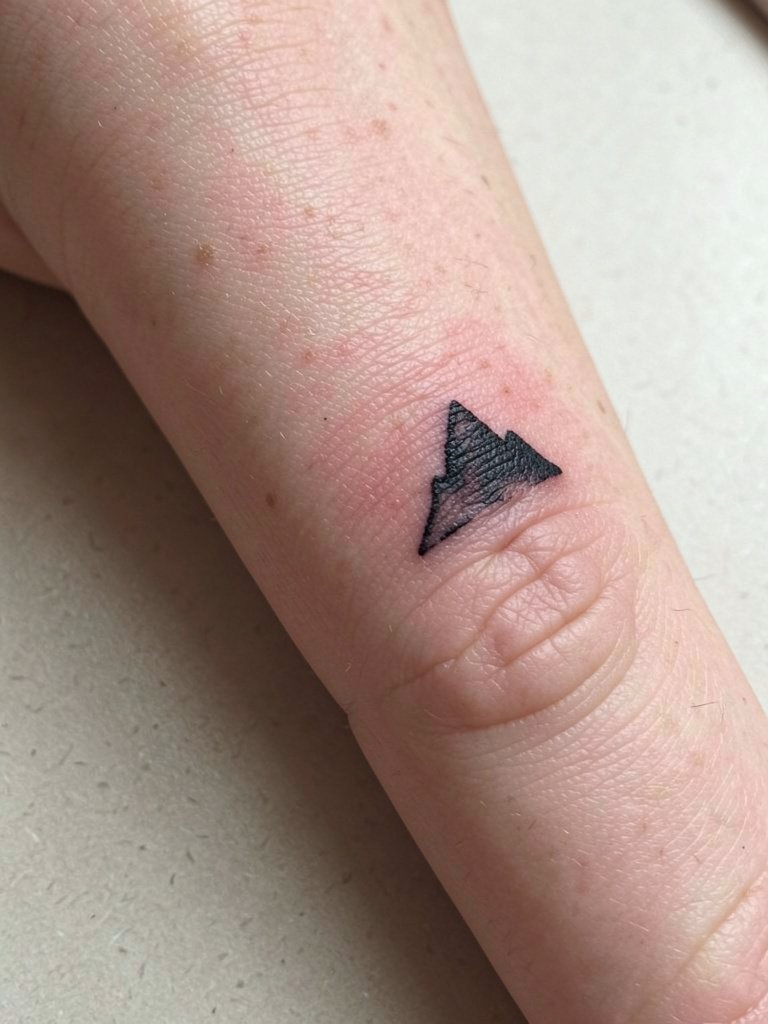
Finger pieces look intimate but fade fast because of constant washing and abrasion. Expect touch-ups sooner than other placements, often within six to twelve months for crisp edges. The usual mistake is asking for ultra-fine dots or tiny negative cuts that the finger skin cannot hold. Tell the artist the exact millimeter height you will accept and request slightly bolder weight. For minimal display, a thin stackable ring worn on the next finger can complement without covering the peak.
16. Mirrored Peaks on Chest Upper
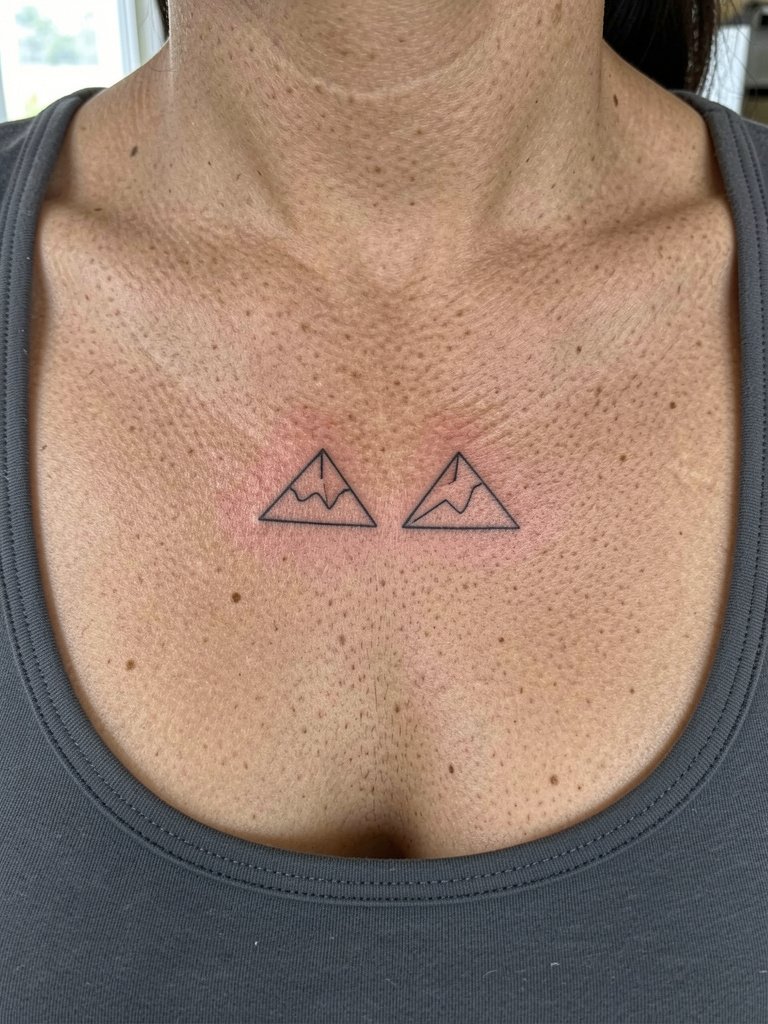
Symmetrical mirrored peaks work well for those who want balanced chest accents. Healing varies with body movement and shirt friction. A common mistake is uneven spacing that becomes obvious as the tattoos settle. Ask the artist to mark the collarbone and sternum landmarks so symmetry is verified while standing and while reclining. If you plan to show the piece, low-profile necklaces or thin chain collars rest above without rubbing the ink.
17. Pocket Peak on Hip
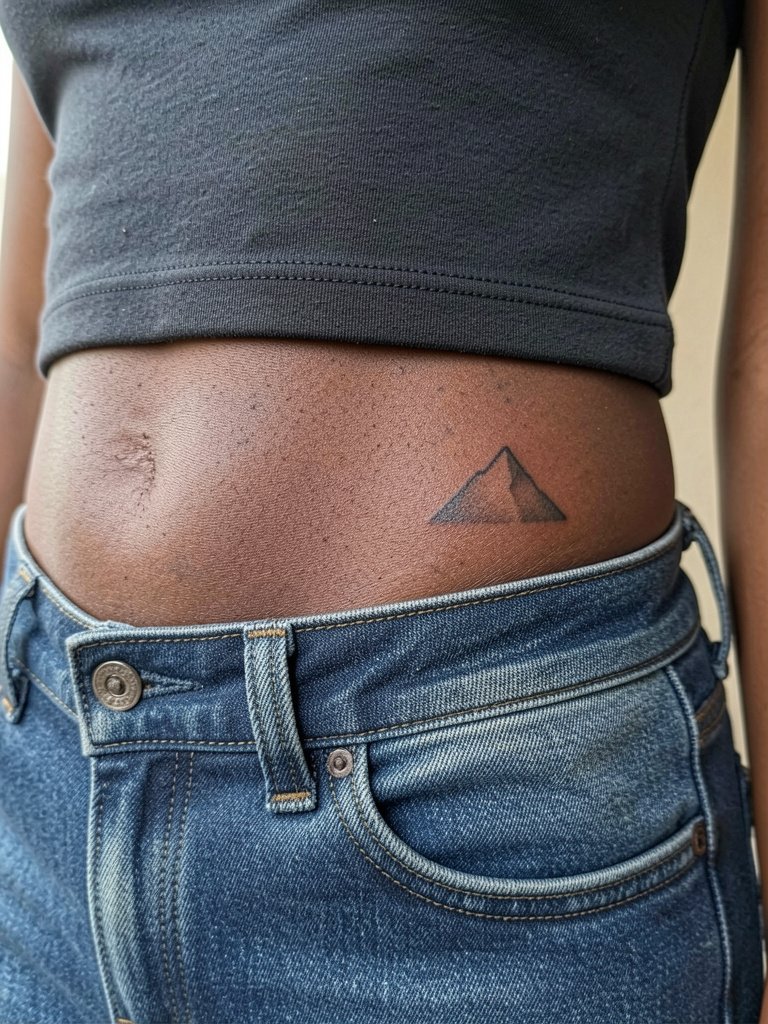
Hip placements are sensual and easy to hide. The session feels moderate and often allows concentrated focus on a small area. A typical mistake is placing the peak too close to the waistband where friction from clothing erases crisp edges. Plan placement with your usual pants so the peak sits above where the fabric sits during normal wear. For beach days pick low-rise swimwear that complements the hip without rubbing the tattoo.
18. Continuous Mini Range on Side Neck
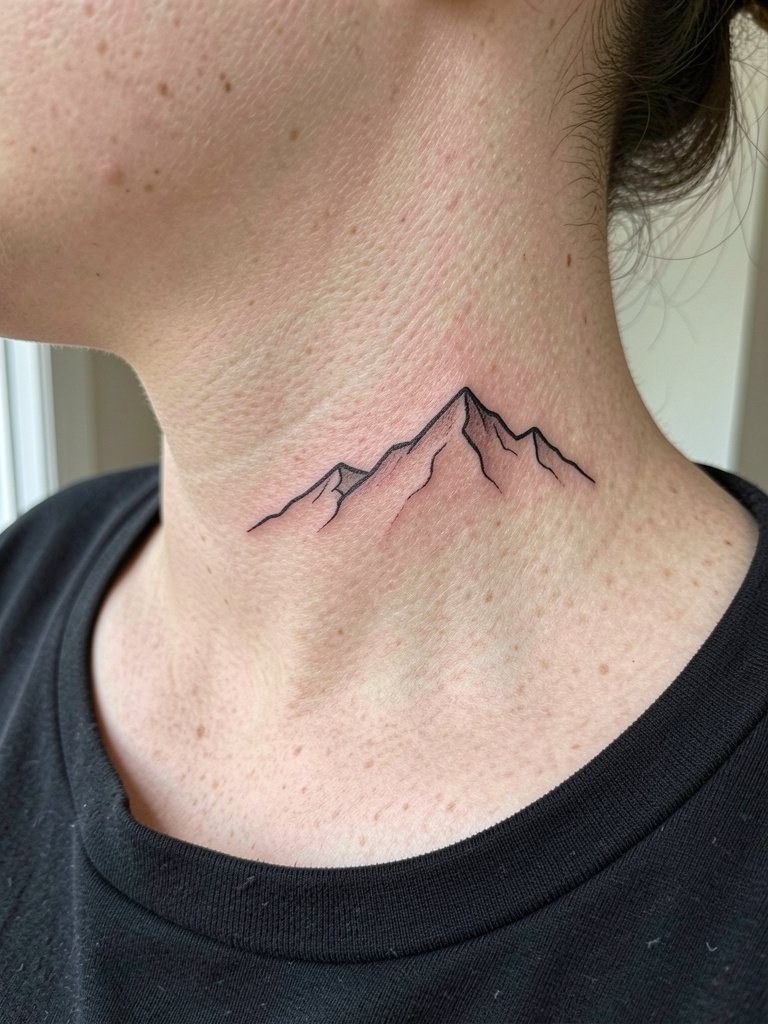
Neck pieces make a statement and require an artist experienced with thin, mobile skin. Pain is higher and visibility is constant. A common error is overcomplicating the linework in a place that will blur with sun exposure. Ask the artist for UV-care guidance and a plan for a six-month check-in. For styling choose tops with wide boat necklines that show the side neck cleanly without layering that will rub the tattoo.
19. Tiny Peak on Behind the Knee
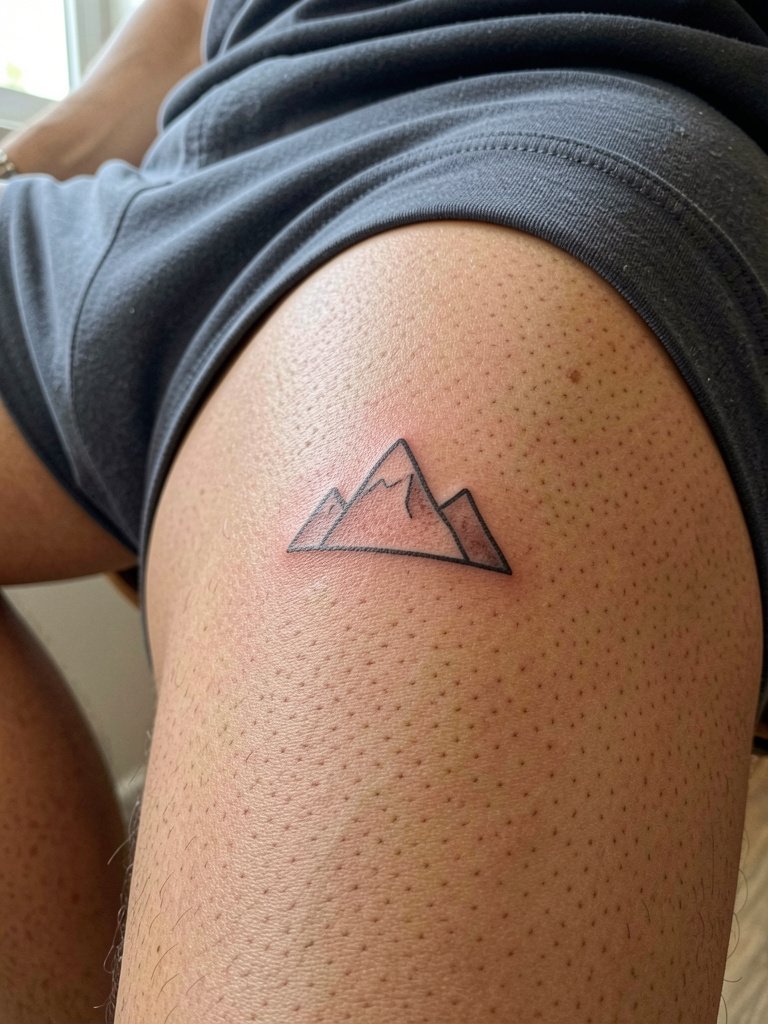
Behind-the-knee tattoos are playful but subject to frequent movement and shear during walking. Expect the area to soften faster than the thigh and plan touch-ups accordingly. The frequent mistake is putting tiny, highly detailed work that will blur from constant flexing. Request the artist map the piece while you bend and straighten the leg so placement avoids crease lines. For summer wear a pair of performance shorts that keep the area visible without compressing it.
20. Layered Peaks on Upper Back
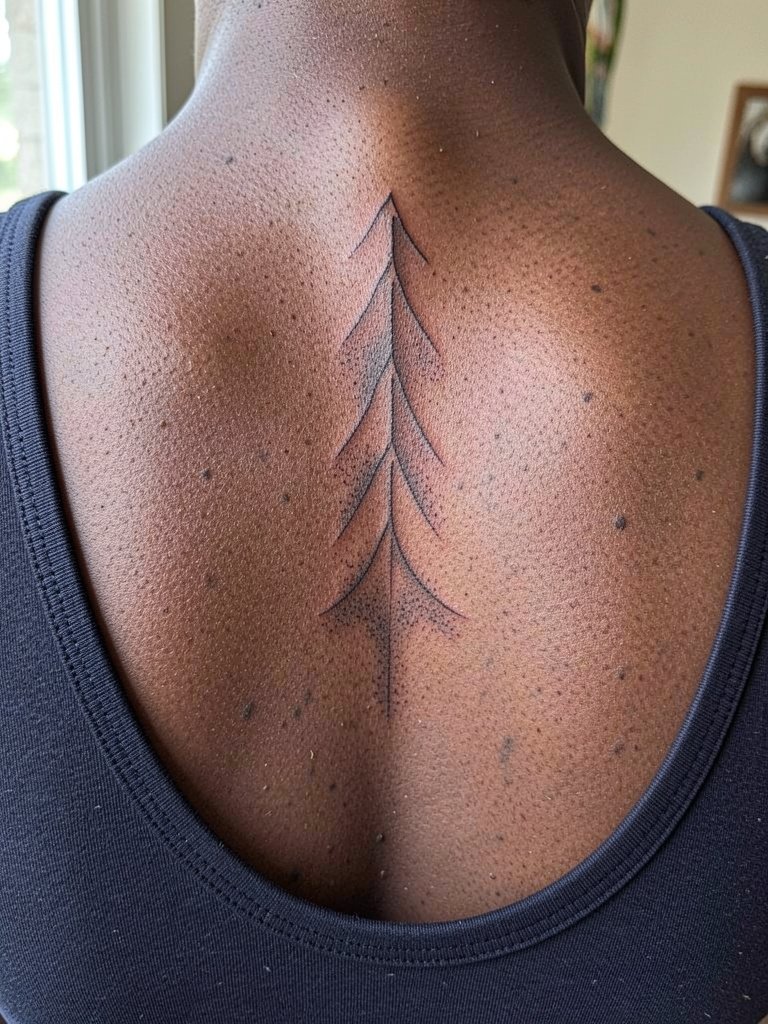
The upper back offers room to let peaks breathe and to add layers later. Sessions here are comfortable and allow the artist clear access. A common error is centering too low where waistband friction can occur. Specify spine-centered alignment and show your typical clothing so placement avoids straps. For nights out a low-back halter dress displays the layers without covering them.
21. Minimalist Peak with Tiny Compass on Wrist Inner
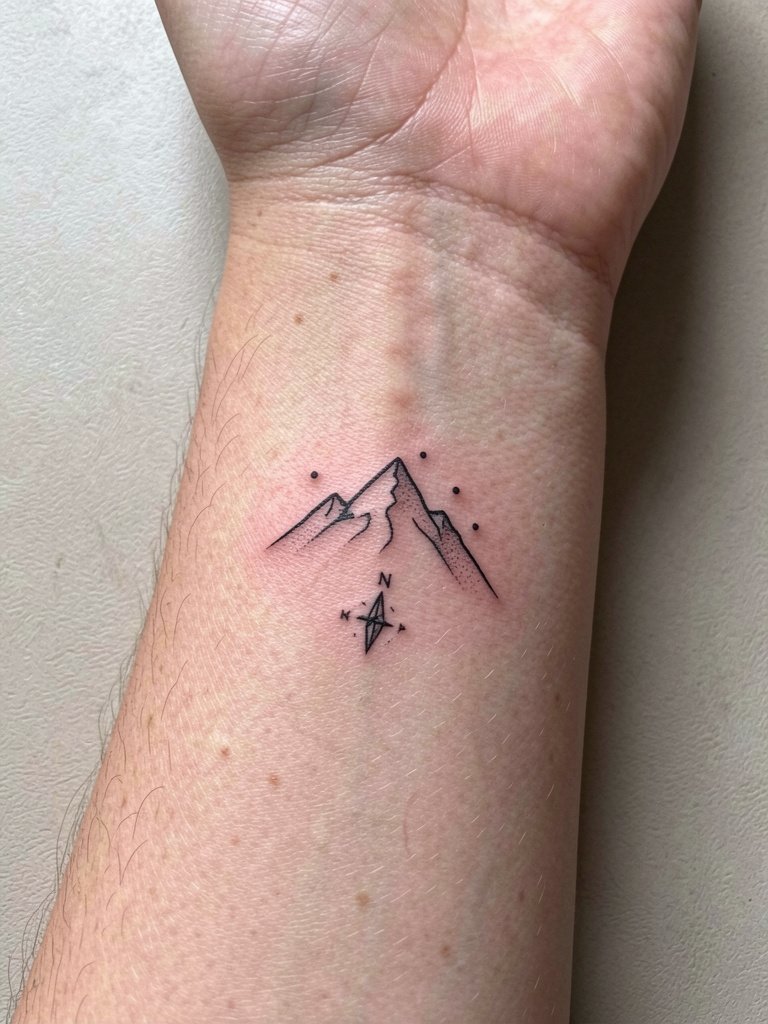
Combining a tiny compass with a peak gives added meaning but increases visual complexity on a small canvas. The inner wrist fades faster with soap and sun, so plan for a light touch-up at one year. A mistake is crowding the compass details into a triangle too small to hold definition. During the consult specify minimum readable size for the compass point and ask the artist to place the compass slightly below the peak to avoid overlap. Pair with a thin braided bracelet that frames the design without constant contact.
22. Minimal Line Cluster on Shoulder Cap
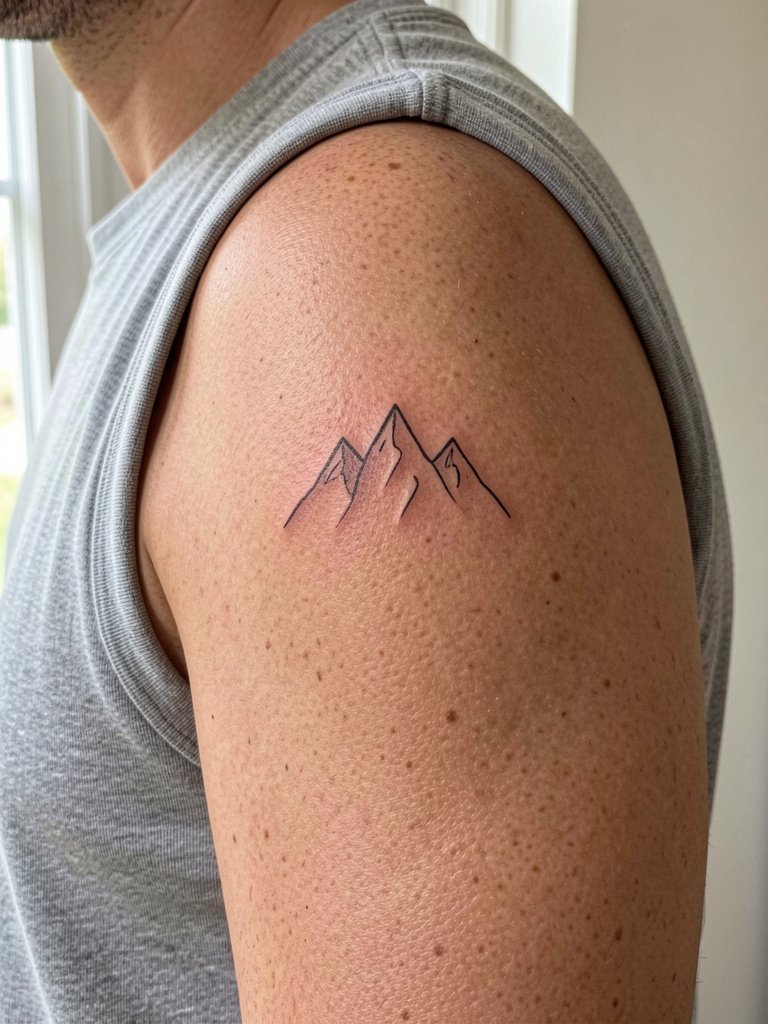
Shoulder cap clusters show nicely in short sleeves and hold linework well because skin there is stable. Expect moderate pain and a one-hour session for a small cluster. A common problem is placing peaks too close to the arm crease where movement causes blurring. Ask the artist to position the outermost peak with your arm both relaxed and slightly raised so you see how it moves. For casual outfits choose cap sleeve tees that highlight the cluster.
23. Horizon Stitch on Lower Leg
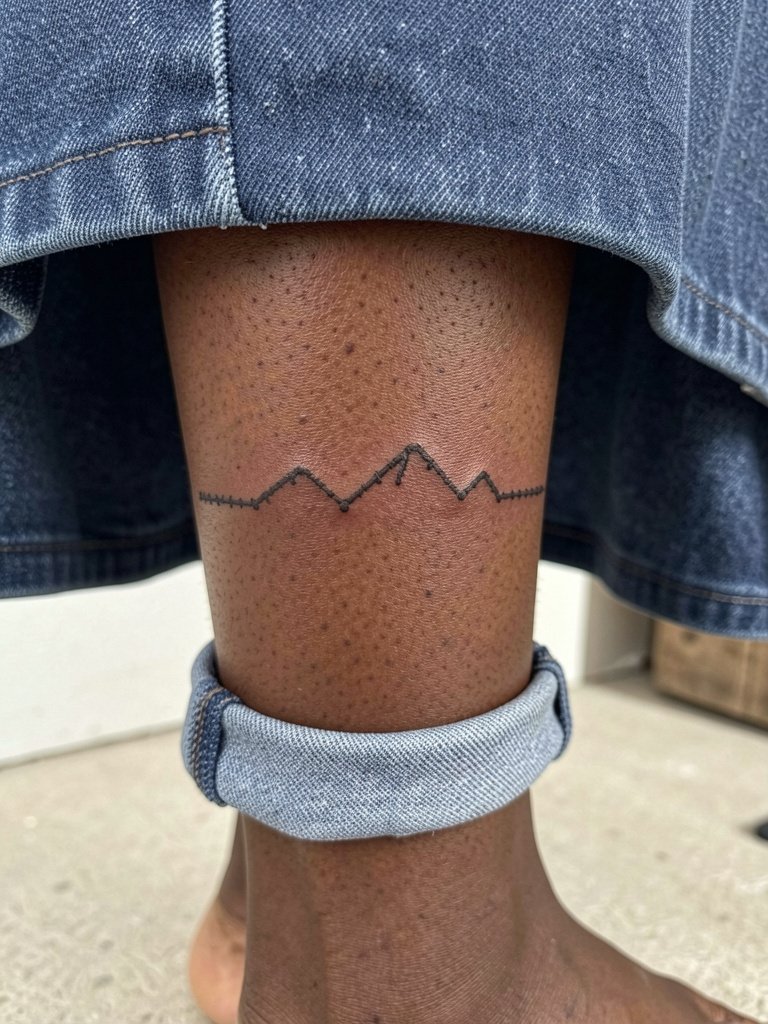
A stitched horizon along the lower leg reads delicate and works well with ankle boots or skirts. The lower leg is less touchy so the stitch pattern holds nicely, but close-packed dots may soften over time. A mistake is compressing the stitch spacing so that each peak blends into the next. Ask the artist to show a healed simulation or older healed examples with similar spacing so you know what to expect. For footwear, low-heel ankle boots highlight the seam without rubbing the area.
Frequently Asked Questions
Q: Which minimalist mountain placements hold up best for fine line work?
A: From observation, outer calf, upper arm, and outer shoulder maintain fine line clarity longest because the skin there is thicker and sees less daily abrasion. Wrists, fingers, and areas near clothing seams need slightly bolder line weight or planned touch-ups. If durability matters most, choose thicker contour and ask for placement mockups at scale.
Q: How much will a minimalist mountain need touch-ups over five years?
A: It depends on placement and lifestyle. High-friction zones like wrists and ankles often need a small touch-up within one to three years. Stable areas like the upper back or calf might go four to five years before touch-up. Plan for a realistic touch-up timeline and budget a light session rather than expecting zero maintenance.
Q: Where can I find healed examples and discovery pathways without naming artists?
A: Try searching platform hashtags and keywords on social media with location filters. Use hashtags like #MinimalMountainTattoo, #FineLineMountain, and #HealedTattooShots to find portfolios. Browse community threads on Reddit or portfolio aggregators for healed photos in different skin tones, and use Instagram location tags to see studio galleries near you.
Q: Are single-needle mountains worth it or should I ask for slightly heavier lines?
A: Single-needle work looks exquisite at first but is more vulnerable to blur on mobile or thin skin areas. Many artists favor a slightly heavier single-line weight for ribs, wrists, and fingers to maintain definition. Specify the minimum millimeter width you want readable at two years so everyone understands the trade-off.
Q: What should I wear to a session for a sternum or rib placement?
A: For sternum and ribs wear a fitted sports bra or cropped top that the artist can move without tugging the fabric. For ribs bring a loose button-up or a tank top that can be easily shifted. Comfortable, easily removed layers help the artist access the area while keeping you warm and secure.
