
Bold optical tricks that still read clearly after years often start with a decision about spacing and contrast. Many of the tiny single-needle illusion pieces that go viral do not survive daily wear. I have seen clients swap a delicate spiral for a slightly bolder negative-space version and keep the three-dimensional effect without the early blur. Read on for technically smart illusion designs and what to tell your artist to make them age well.
1. Negative-Space Spiral on Inner Forearm
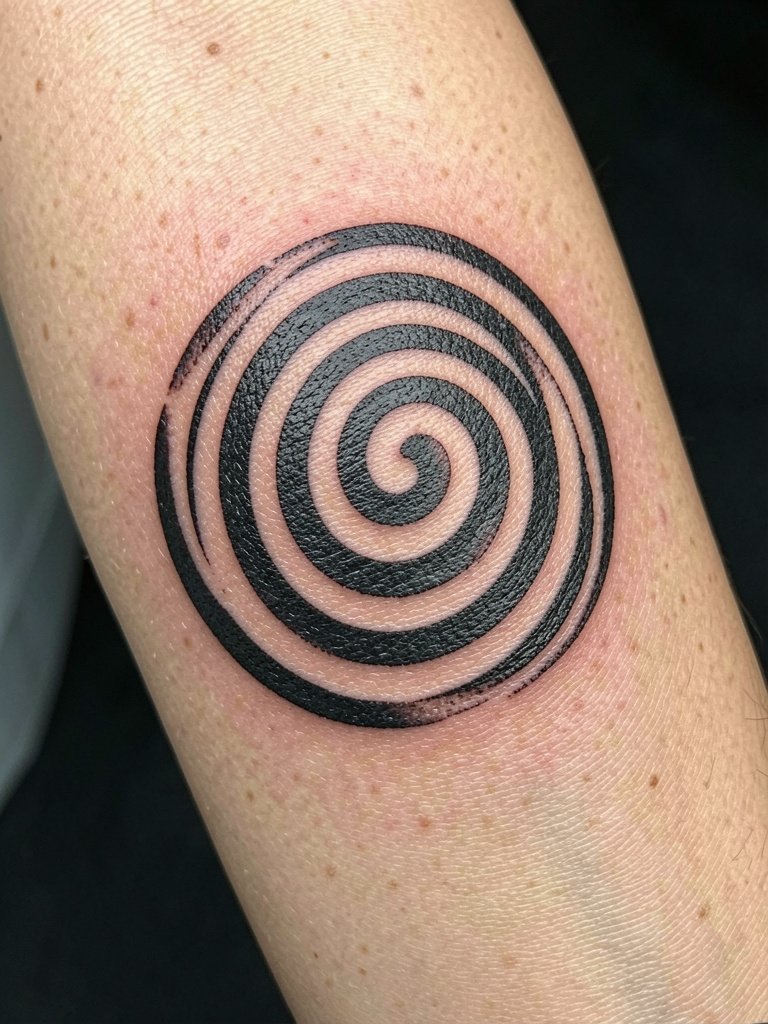
A spiral that relies on negative space wins when lines are spaced to survive the inner forearm's mild friction. I recommend a version with slightly heavier linework and wider gaps than the viral single-needle examples, because the inner forearm tends to soften ultra-fine detail by year two. Tell the artist to scan your forearm at three different orientations so they can show how the spiral reads when your wrist is turned. This placement is low on the pain scale and often completes in a single short session. Pair it with a rolled-cuff linen shirt for evenings out, and try a loose linen tank top during the appointment so the artist has unobstructed access.
2. Impossible Cube on Outer Calf
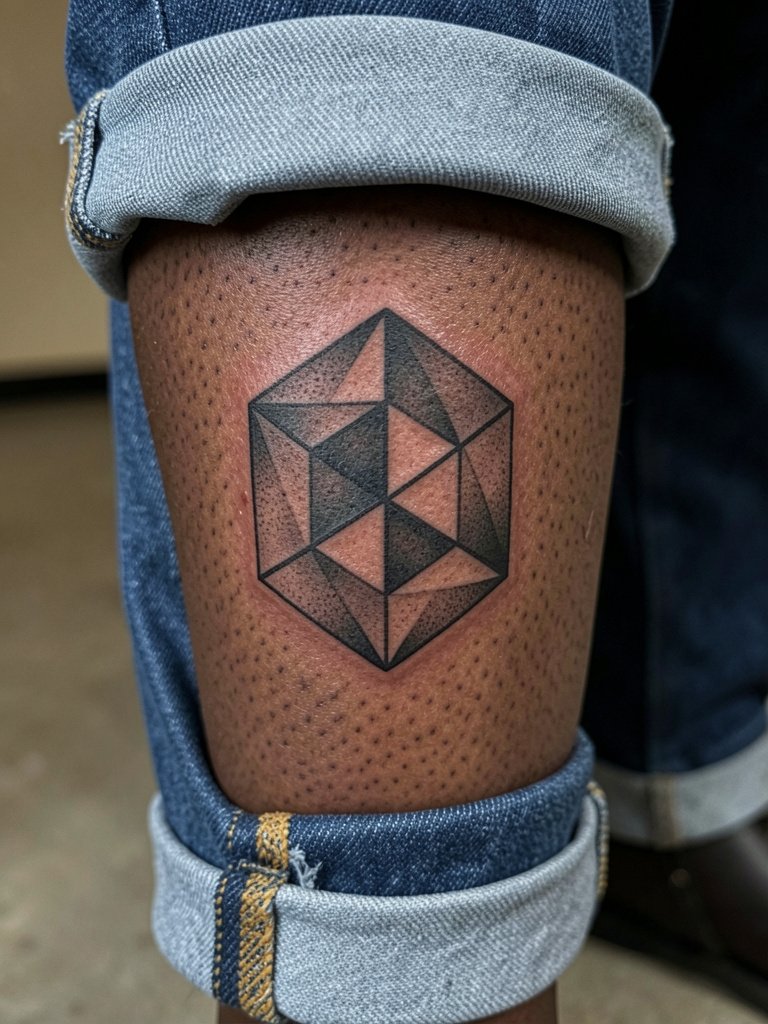
The calf gives room for sharp perspective tricks while keeping blowout risk low compared with very thin-skinned spots. I often suggest a mid-size cube rather than a micro version, because the extra space lets shading do the depth work instead of packing every millimeter with linework. Discuss the contrast plan with the artist, specifically how much solid black versus stipple shading to use to hold the edges after a few years. Session time is moderate, and touch-ups are uncommon unless the piece sits very low near sock friction.
3. Concentric Rings That Pop on the Nape
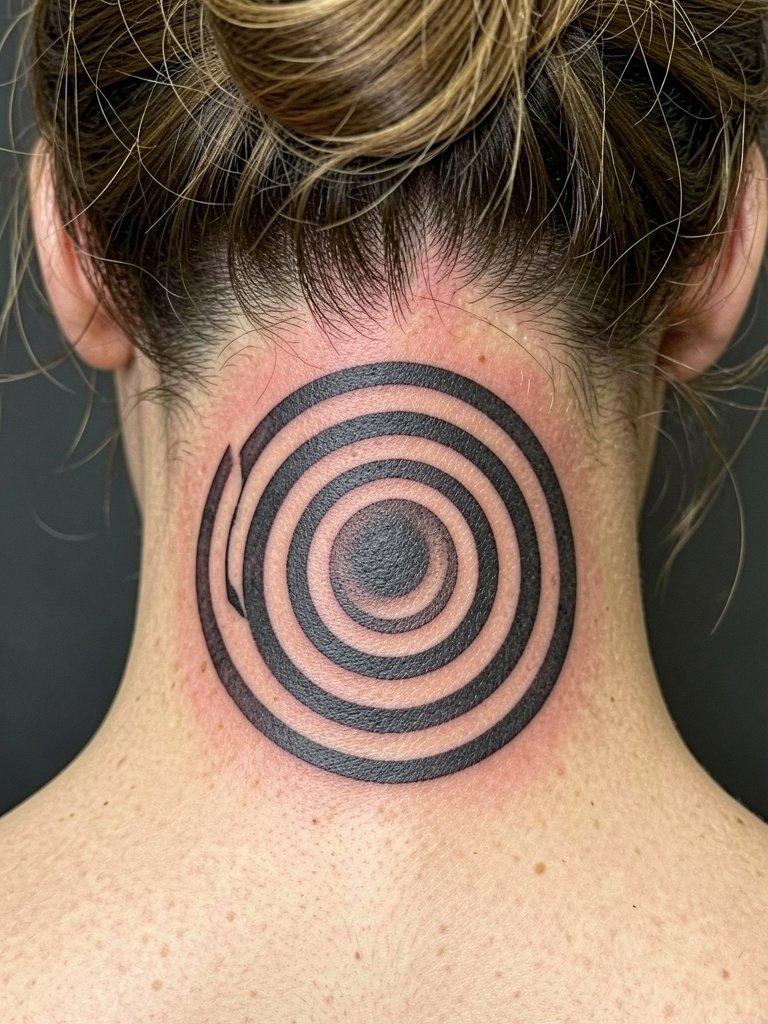
Neck pieces need bold anchors to keep optical details readable when hair grows back around them. Smaller, delicate rings tend to blur into a single grey disc on the nape. I recommend a slightly thicker outer band and clean negative spacing so the rings keep their rhythm as the skin moves. Mention your hair length and styling habits so the artist can position the top edge where your updo will reveal it. Pain on the nape is medium; expect a single-session tattoo that benefits from a follow-up check at the one-year mark.
4. Ribcage Escher Staircase Illusion
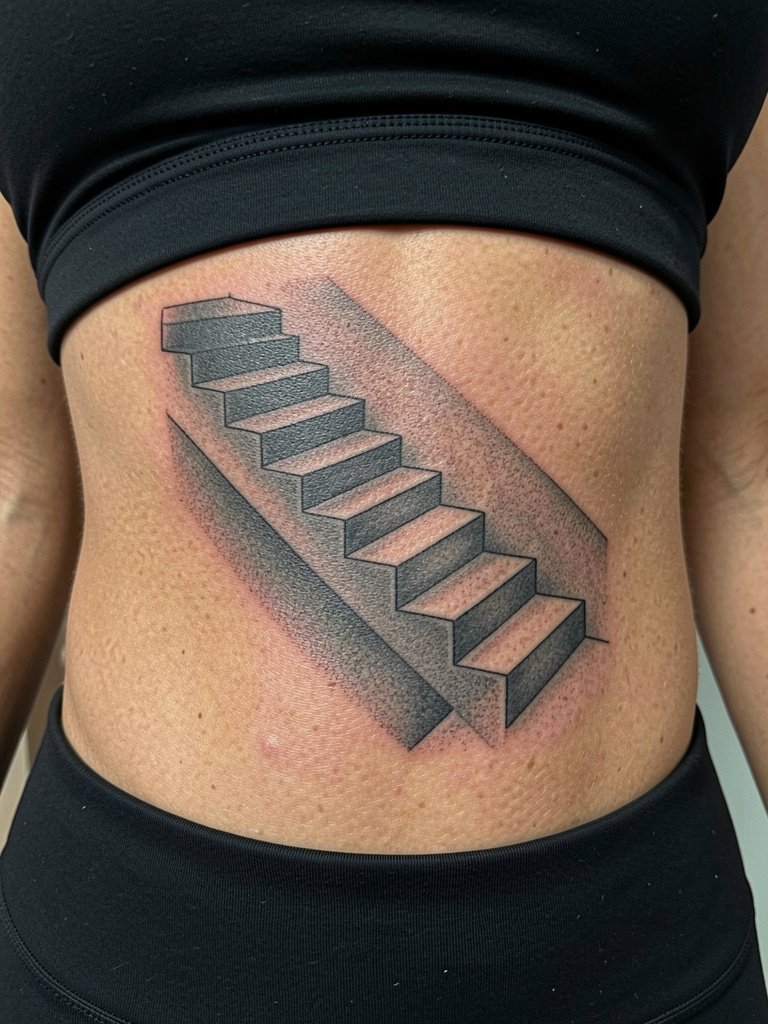
Ribcage illusions look dramatic but divide opinion on longevity. One camp argues the skin on the ribs shifts and stretches enough that tight fine linework blurs within two years and the illusion collapses. The other camp says with slightly wider spacing, consistent needle depth, and conservative contrast, the artwork settles clean and the three-dimensional effect lasts. If you want a ribcage illusion that endures, ask for preview stencils at full scale so the artist can adjust spacing before inking. Plan for a longer session and a possible touch-up at nine to eighteen months.
5. Floating Triangle Cluster on Collarbone
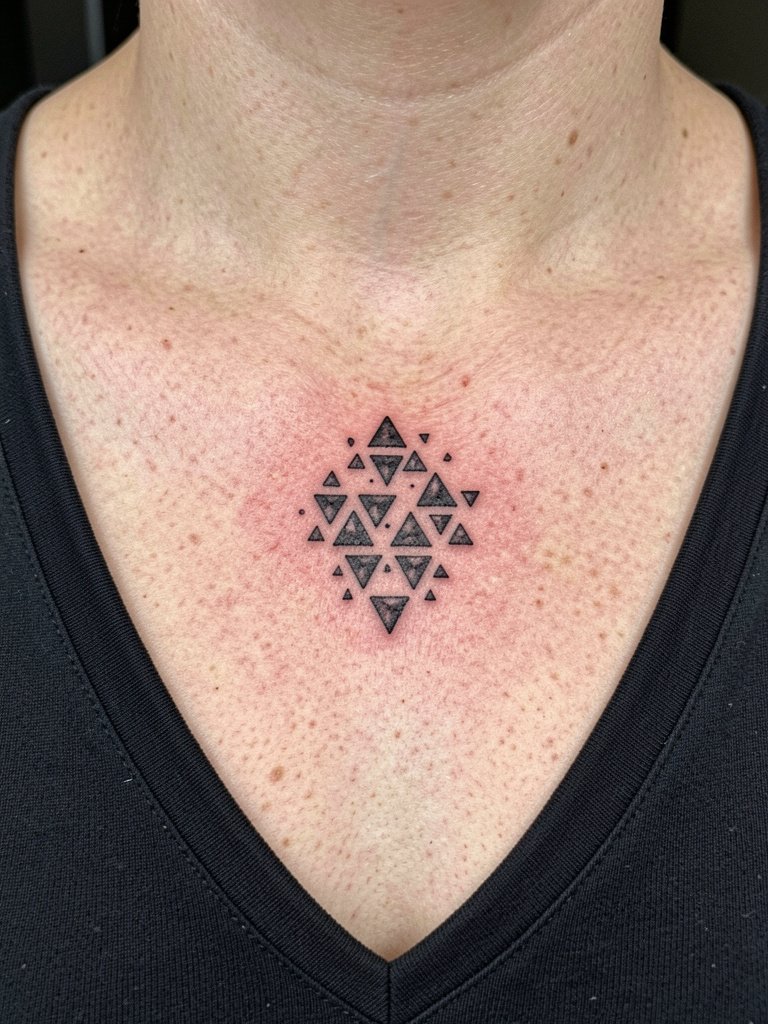
Collarbone placements read well with crisp silhouettes and small areas of saturation to anchor the shape. A common mistake is asking for pin-thin single-needle triangles placed too close together, which often softens into an indistinct blotch on the clavicle. Instead, request slightly bolder outer lines and deliberate negative-space gaps that preserve the floating effect. For outfit pairings, this placement shines with open-neck blouses or wide V-neck tops that frame the angles without covering them. Expect a short session and low blowout risk when spaced correctly.
6. Tessellated M.C. Escher Band on Outer Bicep
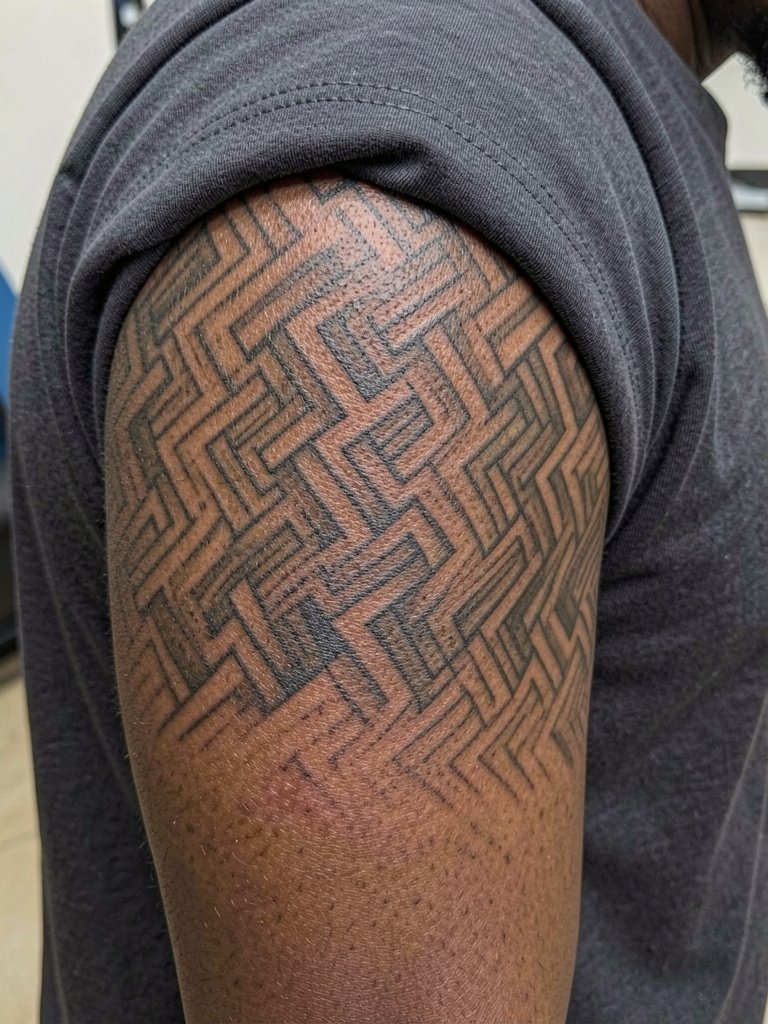
A band of repeating shapes works on the bicep because the curve helps sell the illusion. Small repeating elements are tempting, but when they are too tiny the pattern loses crispness after a couple of years. I suggest slightly larger modules and consistent saturation across repeats so the optical motion stays intact. Bring photos showing the exact scale you like so the artist can map it to your muscle curve. Session time is medium and touch-ups are rare unless the pattern is placed directly under clothing seams.
Session Day Picks
These first six placement choices include wrists, collarbone, and ribs, so a few small session items smooth the appointment and the first week.
-
Stencil transfer paper kit. Lets you preview the linework on skin before committing, which is useful for negative-space spirals and tessellated bands.
-
Topical numbing cream. Applied 30 to 45 minutes before can help with ribcage and sternum sessions without changing the tattoo depth.
-
Thin protective film roll. Keeps wrist and finger illusion pieces cleaner during the first week of handwashing and friction.
-
Fragrance free gentle body wash. Gentle cleansing helps preserve crisp linework in the first week for high-contrast opticals.
-
Aquaphor healing ointment. Thin application for the first few days locks in moisture for detailed blackwork without suffocating the skin.
7. Moiré Pattern Sleeve Accent on Outer Forearm
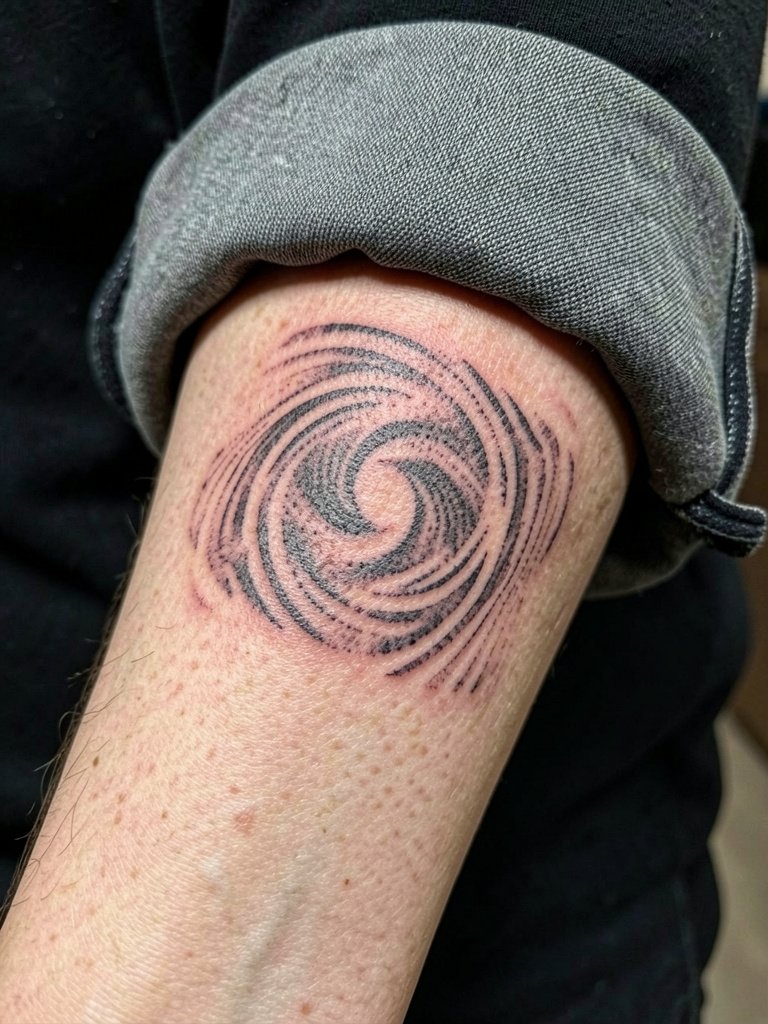
Moiré bands need clean, parallel linework and stable skin to keep the effect lively. Outer forearm is ideal for this because the area sees less stretch than the inner arm. A frequent mistake is trying to cram too many waves into a small band, which blurs into muddled grey. Ask the artist to draw the pattern at full scale and test it with small movements so you can see the optical shift. For showing it off, short-sleeve shirts and rolled-sleeve linens let the motion read across your arm.
8. Stacked Cubes on the Upper Thigh
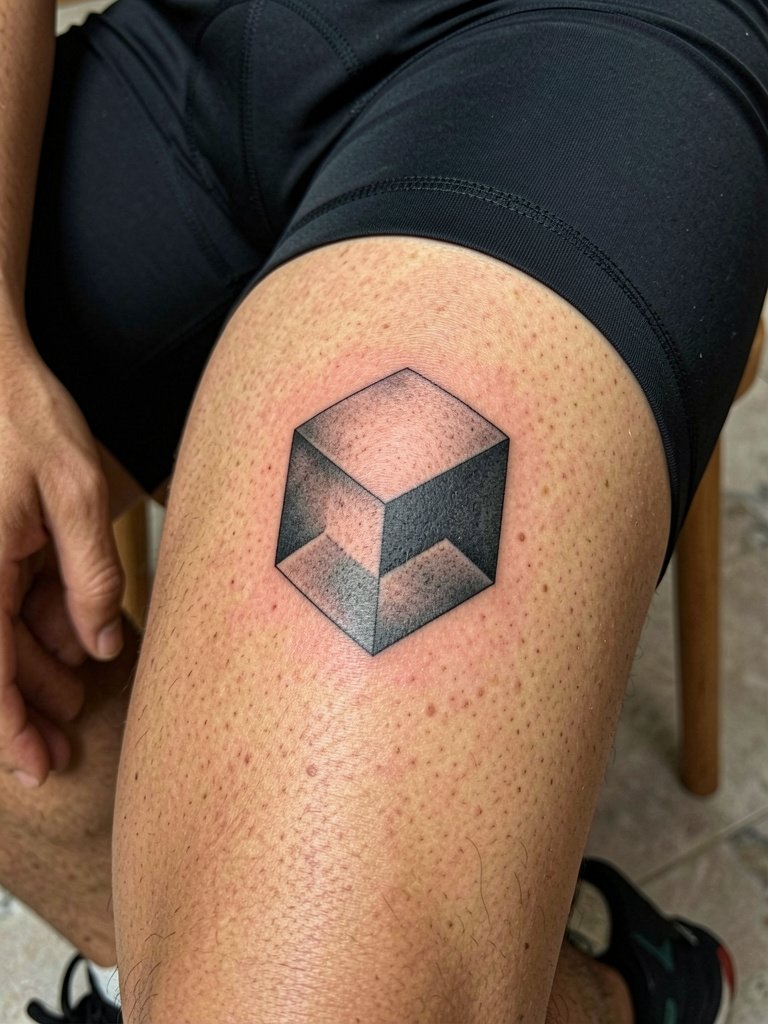
Thigh placements give breathing room for dense optical stacking and reduce blowout risk compared with hands and fingers. If you want a thigh illusion that keeps its edges, emphasize contrast between full black faces and finely stippled shadow faces, not micro-lines. Discuss how the design will look when seated and standing so the artist can adjust perspective. Sessions for this area are comfortable and often completed in one medium-length sitting. Because it is typically covered, plan wardrobe choices for reveal events rather than daily showing.
9. Finger Knot That Looks Like a Loop
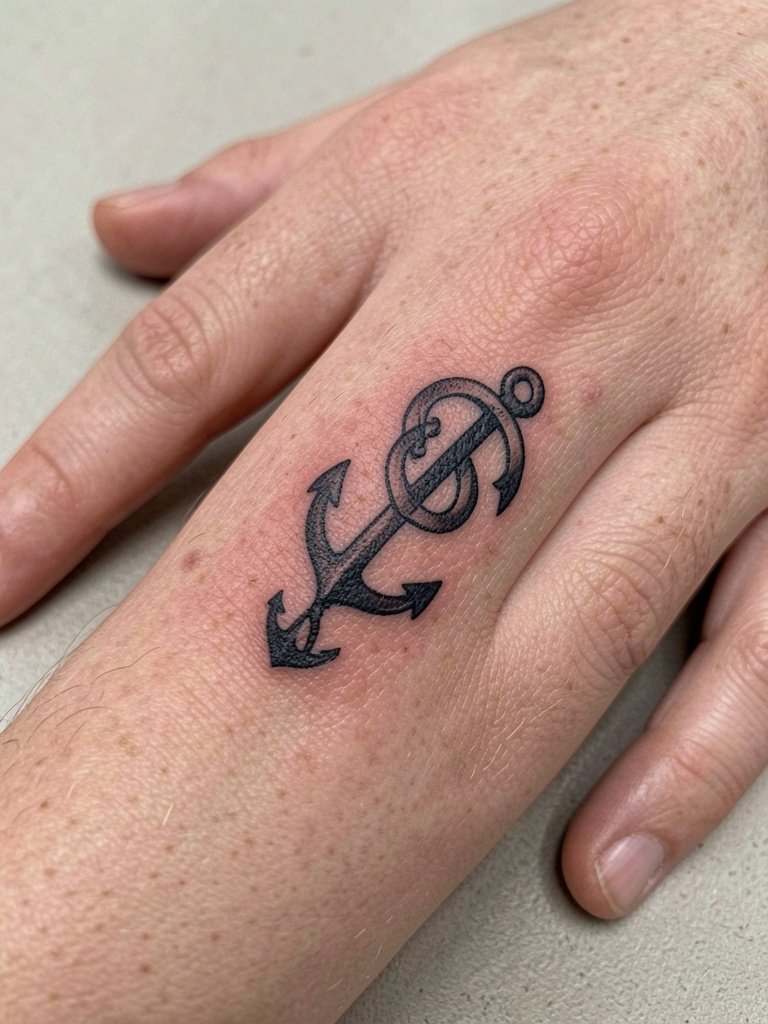
Finger illusions are striking but controversial for longevity and touch-ups. One camp warns that the skin on fingers moves and wears so quickly that fine loops and thin anchors blur within a year. The other camp points to careful placement on the proximal phalanx and slightly heavier anchor points as a way to keep the design readable for longer. If you choose a finger knot, ask for a plan that uses small blocks of saturation at stress points instead of pure single-needle lines. Expect yearly touch-ups if you wear rings or wash hands often. For the session, avoid tight gloves and wear a comfortable short-sleeve shirt.
10. Checkerboard Ankle Warp
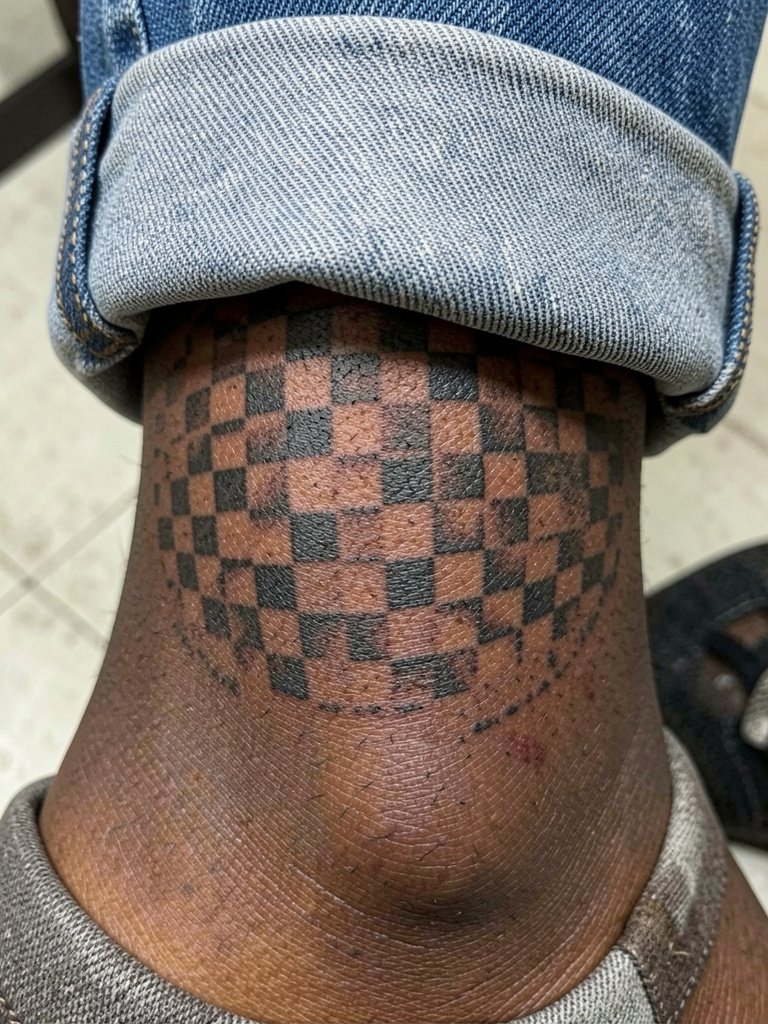
Ankle illusions must account for repeated friction from socks and shoe collars. Tiny checks too close to the ankle crease will disperse into grey within a couple of years. I recommend slightly larger squares and a small margin away from the highest friction line. Have the artist mark the exact placement with your shoe on so you can test movement. Touch-up intervals depend on footwear and activity. For weekend shows, ankle tattoos pair cleanly with cropped jeans or ankle boots.
11. Double Helix Band on the Wrist
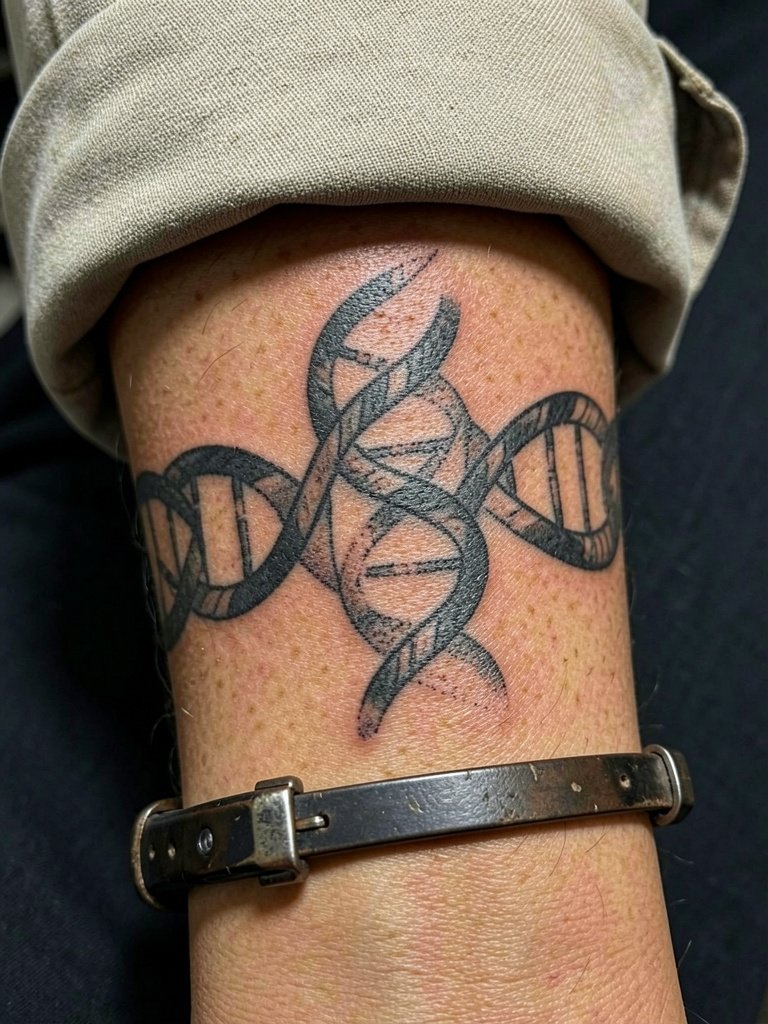
Wrist bands read best when the artist maps how they look during common wrist positions. Very thin helical strands fade fast because the wrist skin rubs against clothing. Ask the artist to mock the band around your wrist at life-size and to widen the smallest strands slightly so they do not disappear after six months. Session pain is low, and most pieces finish quickly. For showing off, pair the wrist band with delicate bracelets or a minimalist leather watch strap that frames without covering the design.
12. Anamorphic Staircase on the Lower Back
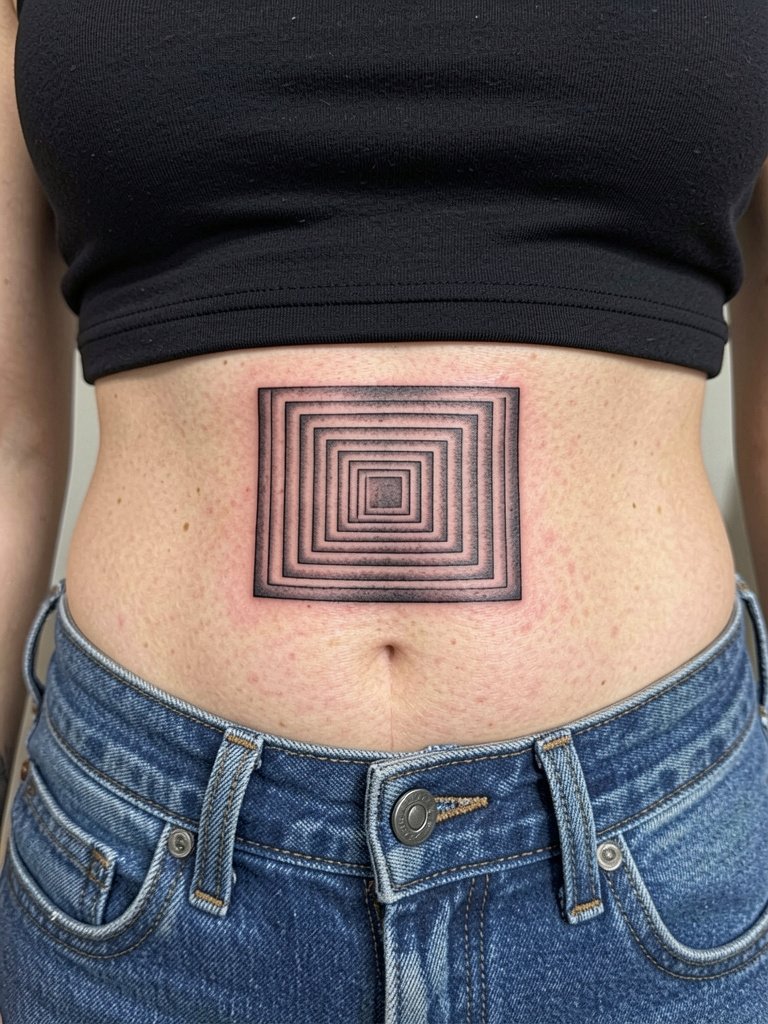
Lower back illusions expand neatly across the lumbar because the area is wide and relatively stable. One mistake is placing too many tiny perspective steps that collapse into indistinct shading under everyday tension. Request an artist mock-up that shows the staircase while you bend and twist so they can adjust vanishing points for your posture. Healing is straightforward when your waistband sits below the tattoo. For nighttime reveals, low-back dresses highlight the vertical drop.
13. Optical Mandala That Warps on the Shoulder Blade
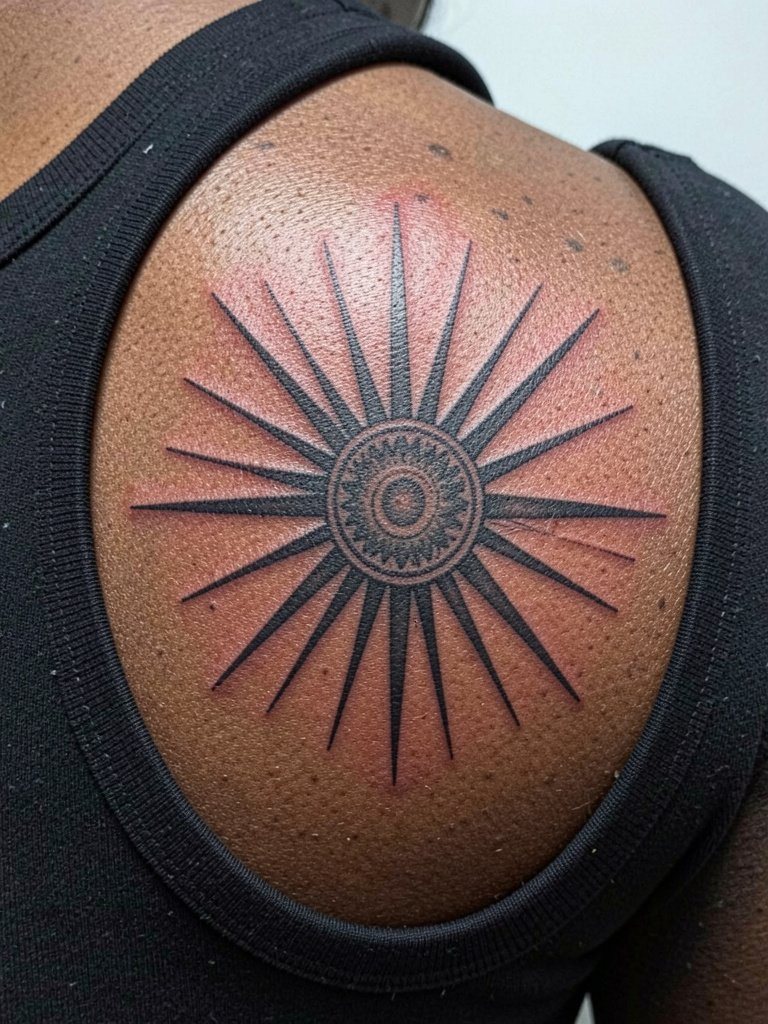
Shoulder blade placement benefits from larger-scale mandalas that let spokes breathe without crowding. Tiny filigree in the center often melts together after a couple of years because of shoulder movement and clothing friction. Ask for a centered composition with a negative-space ring to protect the core detail. Sessions are medium in length and relatively tolerable. If the mandala references cultural patterns, be explicit about origin and intent so the artist can honor the form respectfully.
14. Layered Moebius Loop on the Side Neck
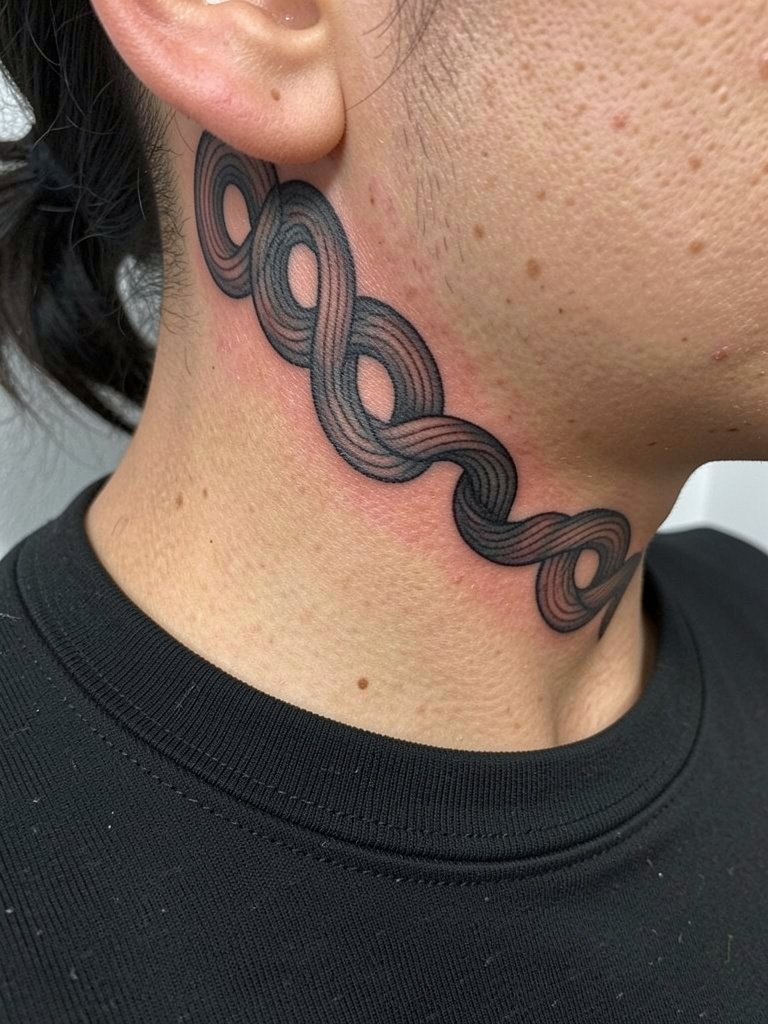
Side neck illusions have visibility but demand confident, bold anchors to resist softening. Some artists say neck lines must be slightly thicker because the skin there can make hairline work vanish in two to three years. Others counter that with precise depth and slightly wider spacing, fine lines can settle well. If you plan a neck illusion, provide photos of healed neck tattoos in similar scale so the artist can match what holds up. Expect medium pain and schedule a touch-up window at around the one-year mark.
15. Optical Sleeve Edge That Folds at the Elbow
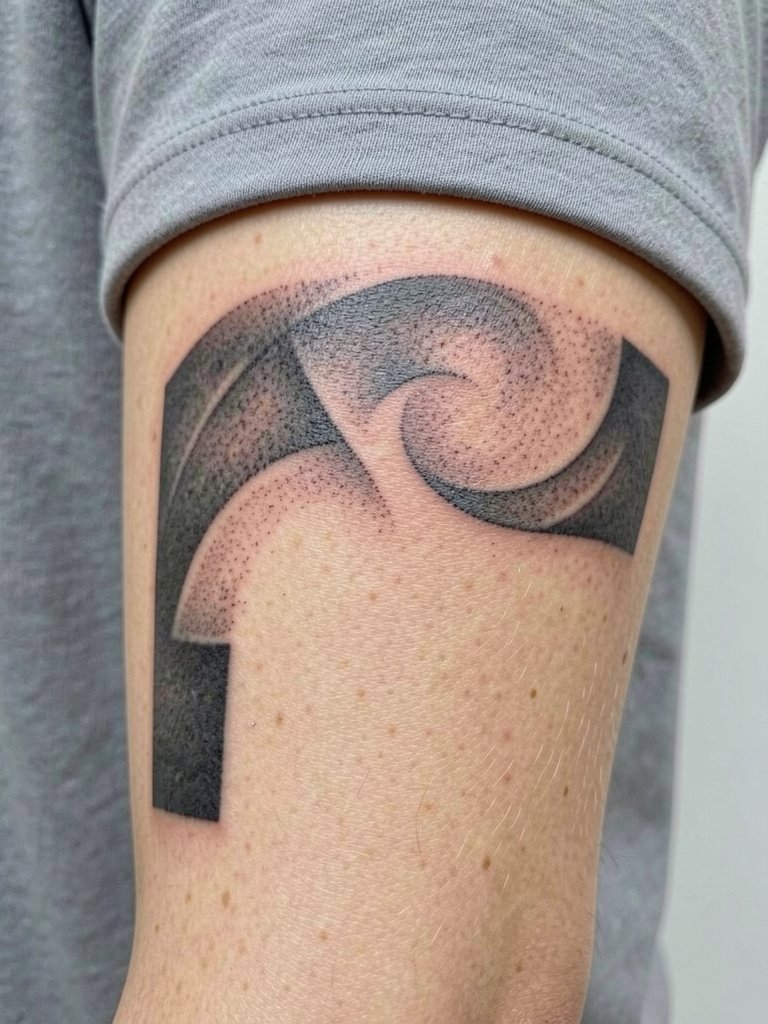
Elbow-adjacent illusions must account for frequent flexing and tough skin. Very tight micro-shading across the crease tends to disperse and needs earlier touch-ups. I suggest keeping the highest-contrast elements a few millimeters away from the active crease and letting the illusion fold visually rather than physically. Tell the artist how much you bend your arm during regular activities so they can place the fold where movement supports the illusion instead of destroying it. Sessions can be gritty at the elbow and may include a short break for comfort. For visibility, short-sleeve tees show the fold without interfering with healing.
Frequently Asked Questions
Q: How do I find portfolios with healed optical illusion tattoos without naming artists?
A: Search platform tags like #OpticalTattoo, #HealedBlackwork, and #IllusionInk on Instagram and TikTok, and use location filters to find portfolios in your city. Reddit threads in tattoo communities often include before and after photos that show real healed timelines. Narrow searches by adding terms like "healed 2 years" or "healed 5 years" to see longevity examples.
Q: How long do these optical illusions usually take to heal and when might I need a touch-up?
A: Most small to medium illusion pieces need two to three weeks to surface heal and three to six months to fully settle. Expect touch-ups between nine months and two years for areas with high friction like wrists and fingers, and less frequent touch-ups for thighs and back work.
Q: What should I wear to a session for a collarbone, rib, or thigh illusion?
A: For collarbone pieces pick a wide V-neck or scoop-neck top that the artist can work around without fabric shifting, wide V-neck tops work well. For ribs bring a fitted crop or sports bra so your artist can access the area without you being uncomfortable. For thigh sessions wear loose shorts that you can sit in and that expose the mid-thigh.
Q: Will my skin tone affect how the optical effect reads?
A: The principle is the same across skin tones but contrast planning changes. On darker skin tones the artist may favor denser black anchors and larger negative spaces to preserve the illusion. On lighter tones you can often use finer gradients. Ask for healed photos on similar skin tones to be sure the chosen approach reads as intended.
Q: Are hand and finger optical tattoos worth it if I want longevity?
A: Hand and finger placements will likely need more frequent touch-ups due to wash friction and daily use. If you accept periodic maintenance, design choices like slightly larger anchor points and modest saturation keep the illusion readable longer. If you want a lower-maintenance option pick the wrist or outer forearm instead.
Q: Where else can I discover artists and healed examples beyond social tags?
A: Use curated portfolio sites and local shop websites to search for keywords like "optical," "illusion," and "geometric." Visiting shops in person lets you see healed photos in varied lighting and talk through technique choices before booking.
