
Fine line micro tattoos look easiest on a mood board, but the pieces that stay readable for years are usually planned with spacing, a touch of weight, and placement that avoids constant friction. I wrote this list with how a tiny tattoo will age in mind, what to show your artist, and how to wear each design so it actually gets seen. Expect realistic trade-offs and practical styling tips you can use at the appointment.
1. Fine Line Arrow on Inner Forearm
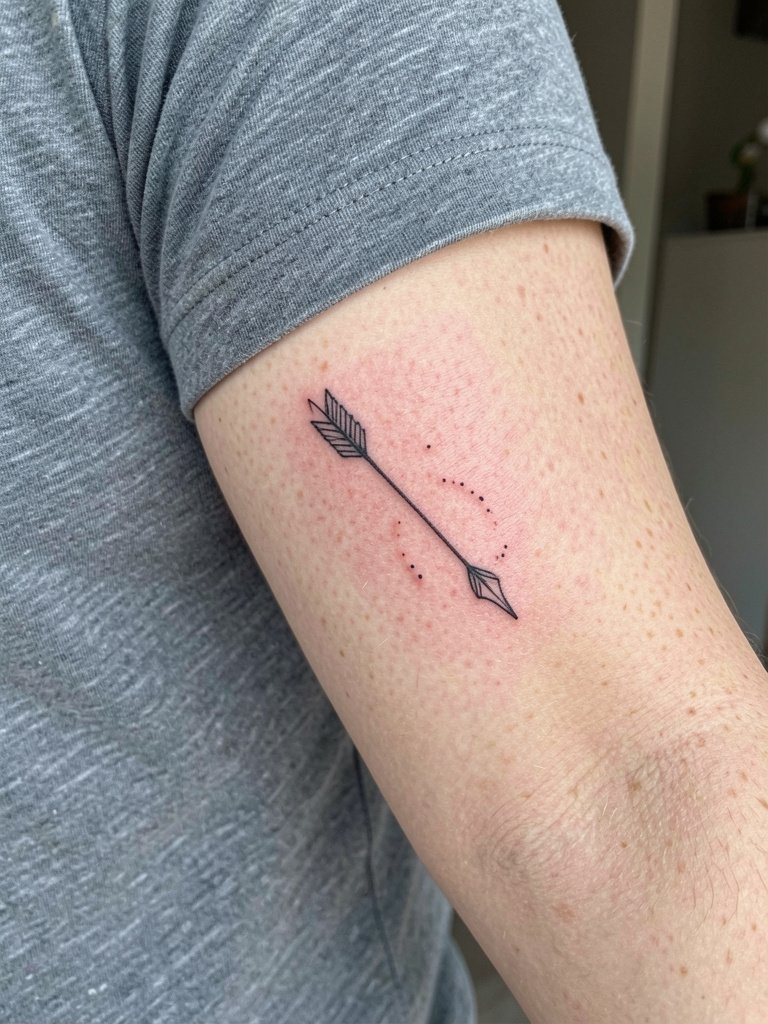
The inner forearm is a forgiving spot for tiny directional pieces because it avoids constant rubbing. I recommend slightly heavier linework than the thinnest single-needle you see online so the arrow keeps its shape after two years. Bring a photo showing the exact line weight and the length you want so the artist can map how the arrow sits when your arm is relaxed. Expect a 30 to 45 minute session and a light sting around the wrist crease. A common mistake is asking for a three-point arrow at two inches; spacing collapses as the skin moves. For showing off, pair with a rolled-sleeve linen shirt that keeps the forearm visible.
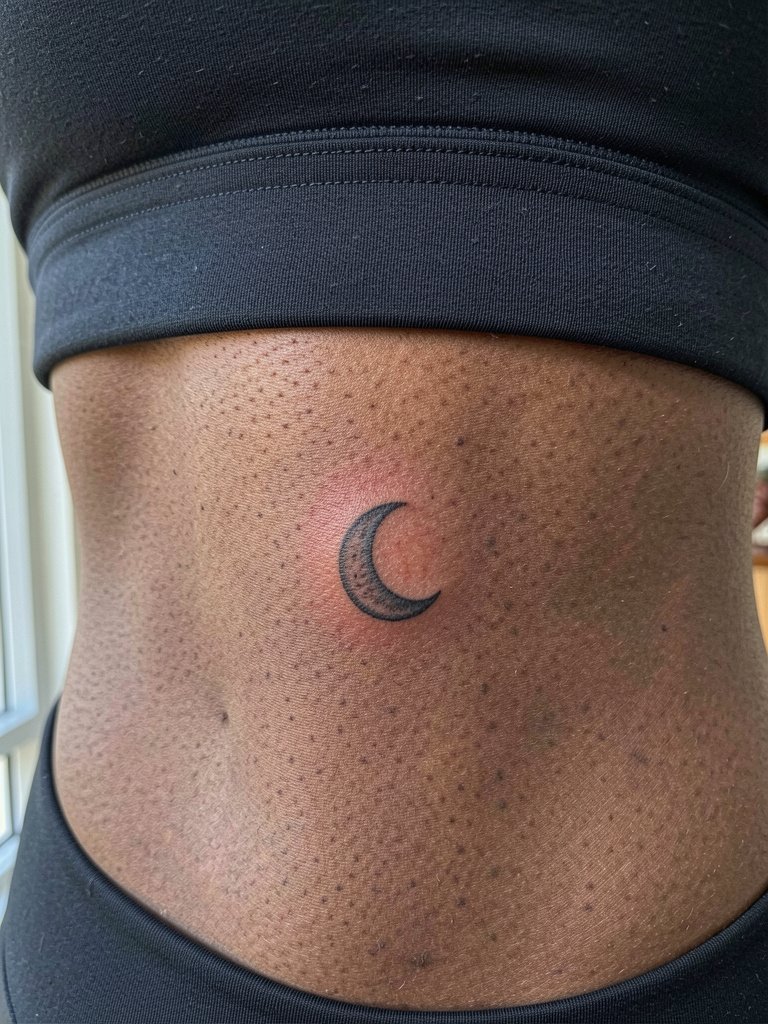
2. Tiny Crescent Moon Behind the Ear
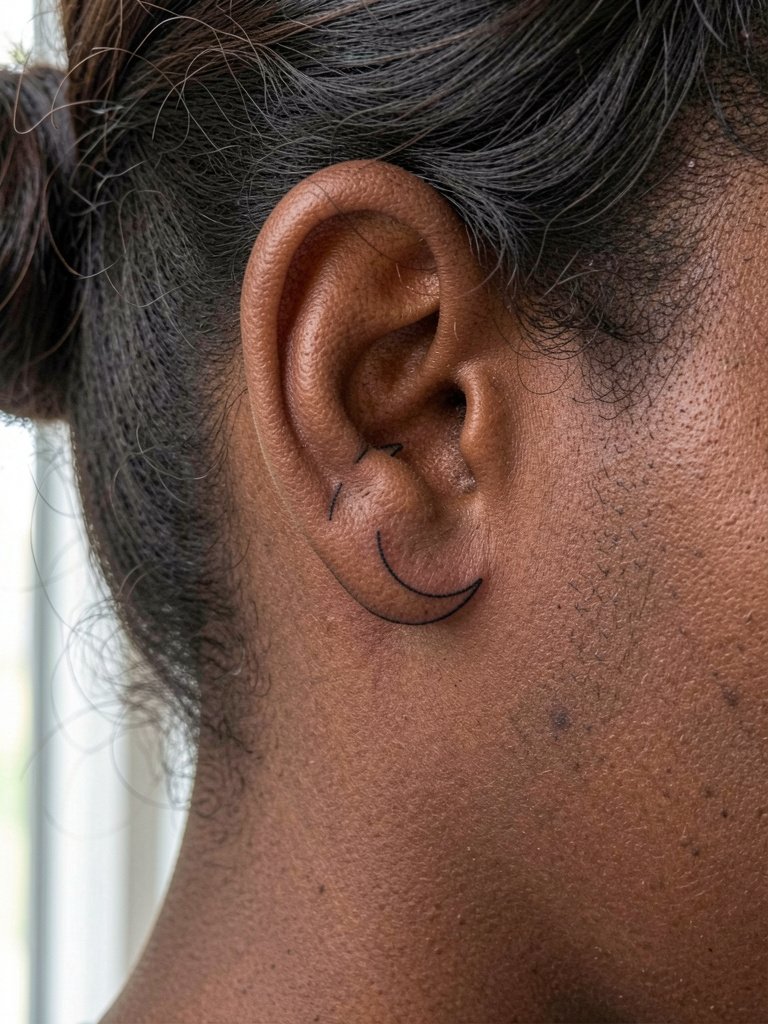
Behind-the-ear micro pieces read as delicate statements but that is also their risk. The skin there is thin, so lines can appear lighter once healed. Ask for slightly more saturation than you think you need and plan for a touch-up at eight to twelve months. Session time is usually under 20 minutes and pain is brief but sharp because of the bone proximity. If you want to keep it subtle, wear smaller hoops or studs that frame the area. Try a pair of dainty gold stud earrings to make the curve of the moon pop.
3. Micro Botanical Sprig on the Ankle
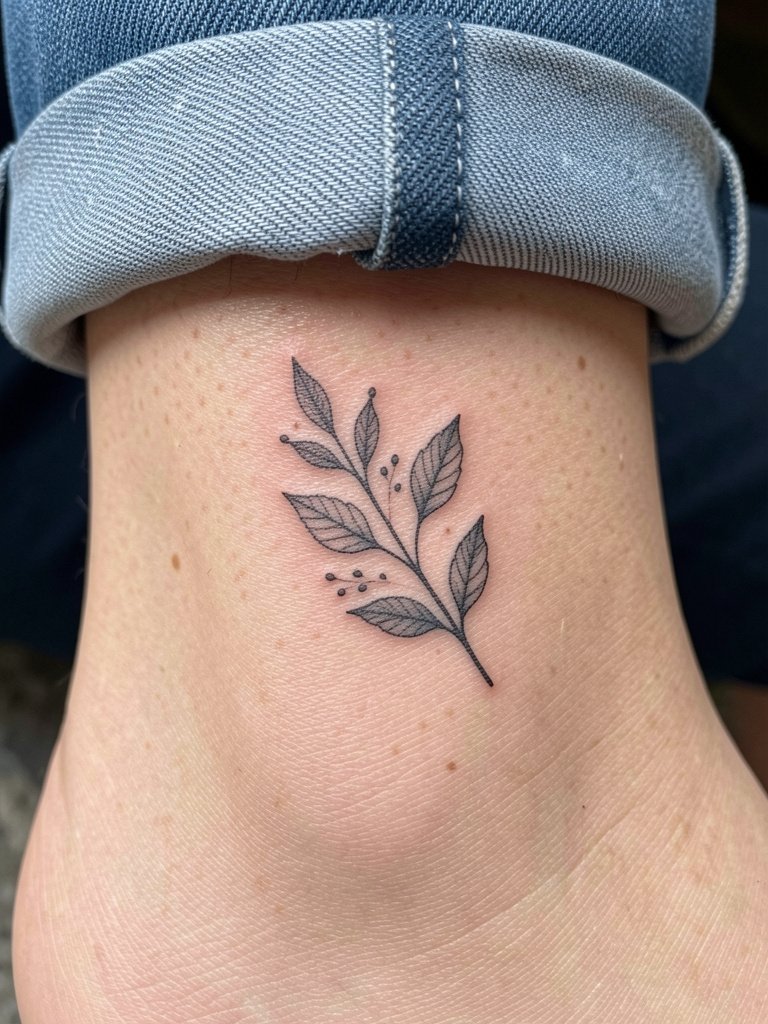
Ankle tattoos face friction from socks and shoes, so solid silhouettes usually outlast the wispier leafwork. If you love delicate stems, ask your artist to thicken the main stem slightly while keeping the tips refined. Expect a 20 to 40 minute session and tenderness where the skin meets the bone. The most common error is placing tiny dots too close together, which merge over time. For outfits, a low-heeled sandal or cropped jeans draw attention to the ankle. A lightweight pair of strappy leather sandals complements the placement.
4. Minimal Script Word on Collarbone
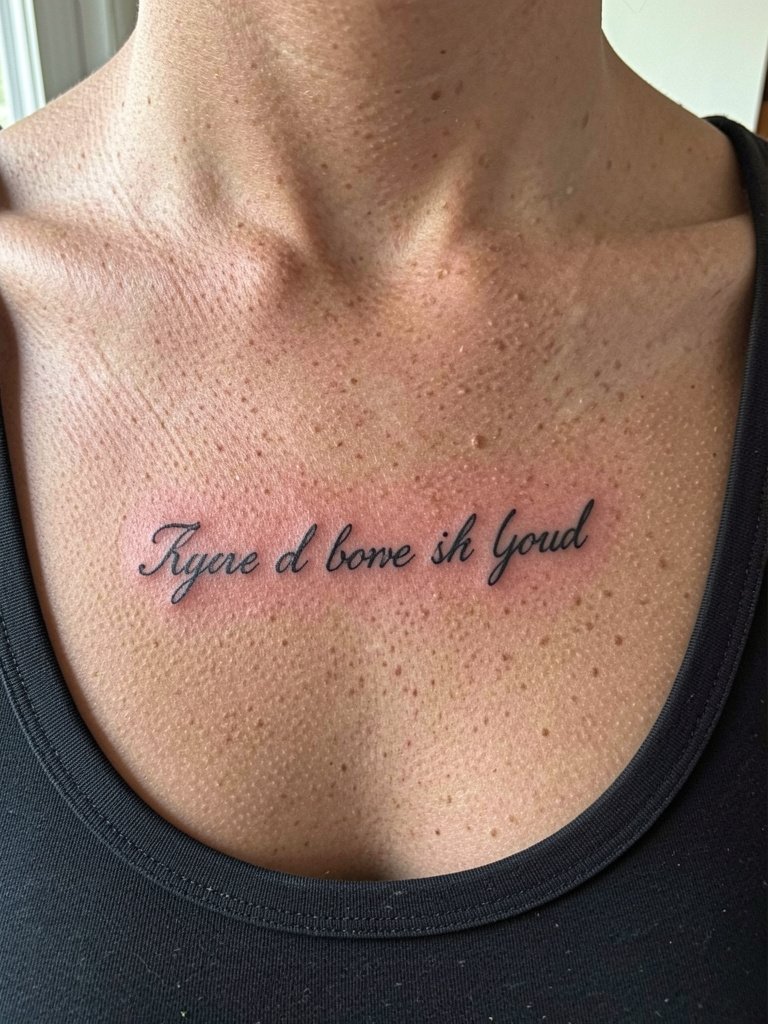
Collarbone scripts read beautifully when spaced horizontally across the bone rather than tucked into the hollow. Ask for a mock stencil in the position where you plan to wear necklaces so you can see how chain lengths sit next to the wording. Expect a 30-minute session and a higher pain score near the bone. The usual mistake is requesting ultra-tiny cursive with no breathing room between letters. For styling, a delicate chain necklace in a short length frames the word without covering it.
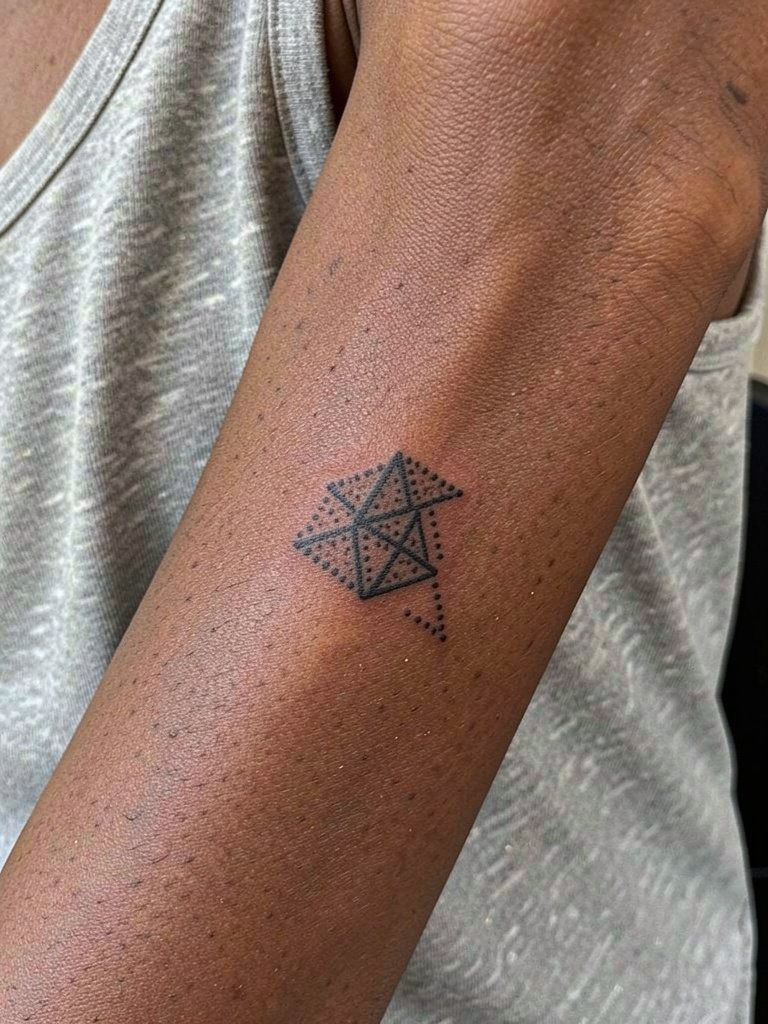
5. Tiny Geometric Star Cluster on Fingers
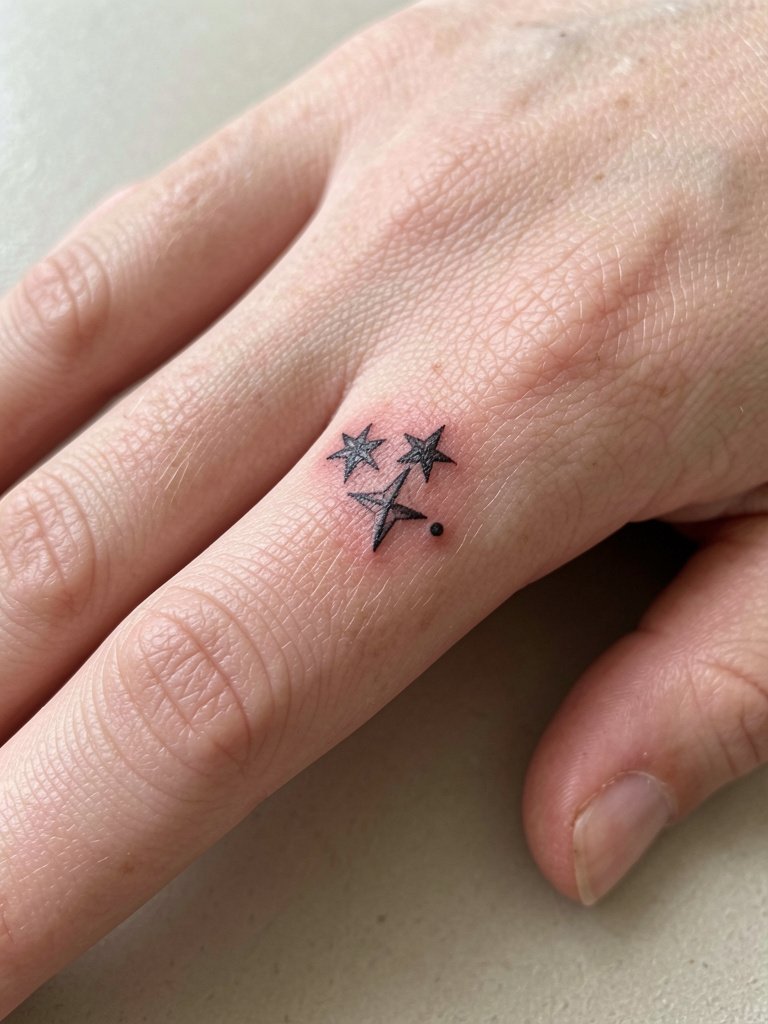
Finger tattoos are fashionable but notorious for fading and early blur because of constant washing and thin skin. One camp argues fingers are a poor canvas for micro fine line because the work often needs touch-ups within a year. The other camp says experienced artists can space and saturate tiny marks so they last longer, and they point to healed portfolios as evidence. If you choose fingers, plan on more frequent touch-ups and ask for slightly bolder anchor points rather than hairline strokes. A roll of activities like frequent typing increases wear. Stackable rings or a thin midi ring set highlights the tiny cluster without masking it.
6. Tiny Wave Line on the Side Rib
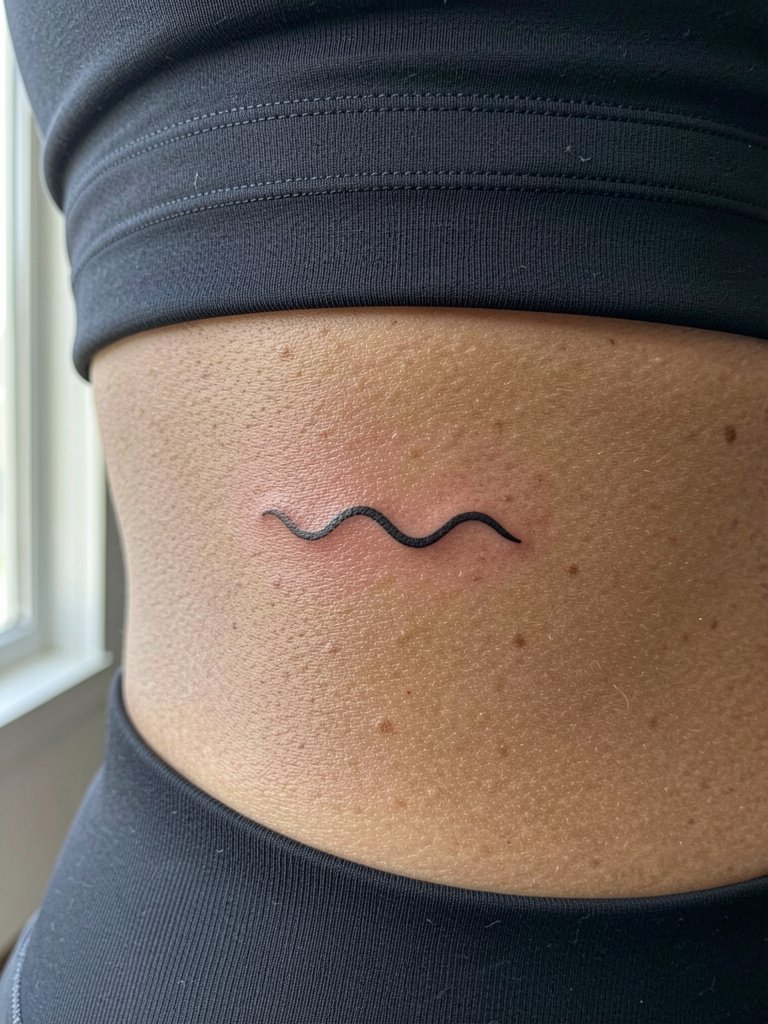
Rib micro tattoos can read as intimate statements and they come with an aging conversation. One camp contends that the skin stretch on the ribs makes ultra-fine lines blur within two years. The other camp says with slightly wider spacing and controlled needle depth, fine line settles well and stays crisp. If you pick ribs, request a stencil while seated and supine so you see how breathing affects placement. Sessions can be intense and take 45 to 90 minutes depending on repeats. For the appointment wear a fitted sports bra or bandeau so the artist has clear access, and plan a touch-up around the one-year mark if needed.
Before You Book
The ankle, fingers, ribcage, and collarbone pieces above have different healing quirks, so a few small items smooth the appointment and the first week.
- Stencil transfer paper kit. Lets you preview line placement on skin before committing, especially helpful for the collarbone and inner forearm pieces above.
- Topical numbing cream. Applied per product directions 45 minutes before session reduces discomfort for sensitive sites like the ribs and behind the ear.
- Thin protective film roll. Keeps small wrist and finger tattoos cleaner during the first week of frequent hand washing.
- Fragrance free gentle body wash. Cleanses healing skin without irritating fine line work on areas like the ribs and ankle.
- Aquaphor healing ointment. Thin layer for the initial days locks in moisture for delicate linework without clogging.
7. Micro Sunburst on the Back of the Neck
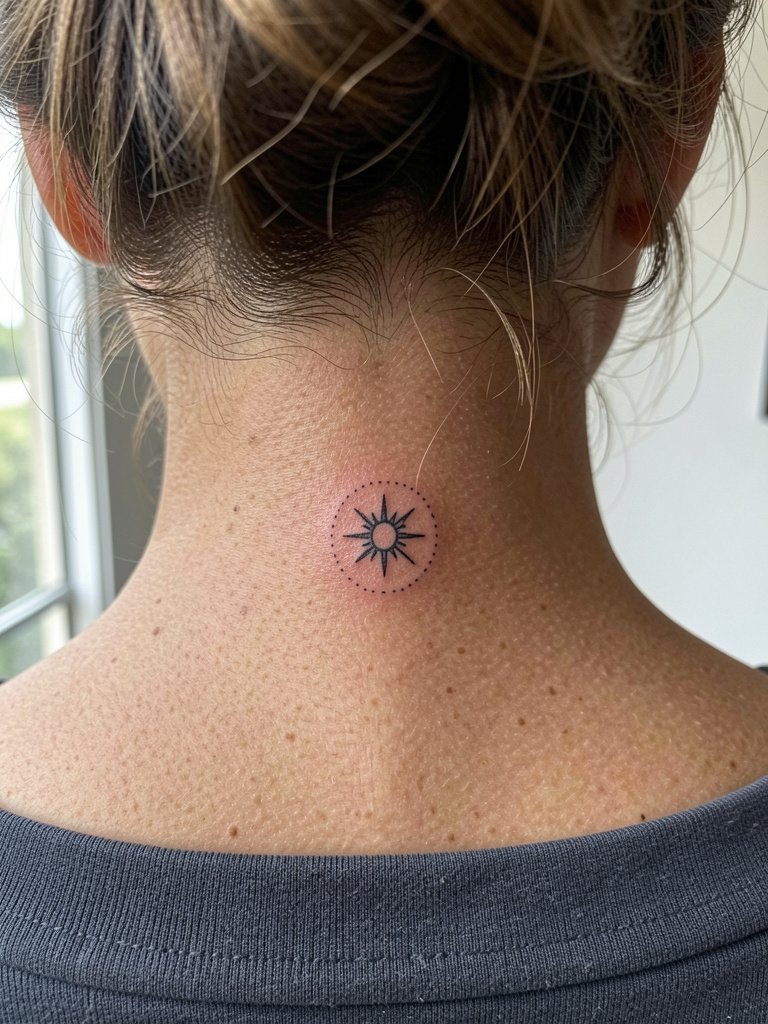
The nape takes micro detail well because it is a low-friction area when hair is down. Ask for slightly heavier ray anchors so the burst maintains contrast after a year. A 20 to 40 minute session is typical and pain is moderate because the area sits over soft tissue. A common error is crowding dots too tightly into the halo; give the dots room to breathe. For styling, short hair or a low chignon shows the piece. Try pairing with a simple silk hair tie for days you want the tattoo visible.
8. Micro Heart Over the Sternum
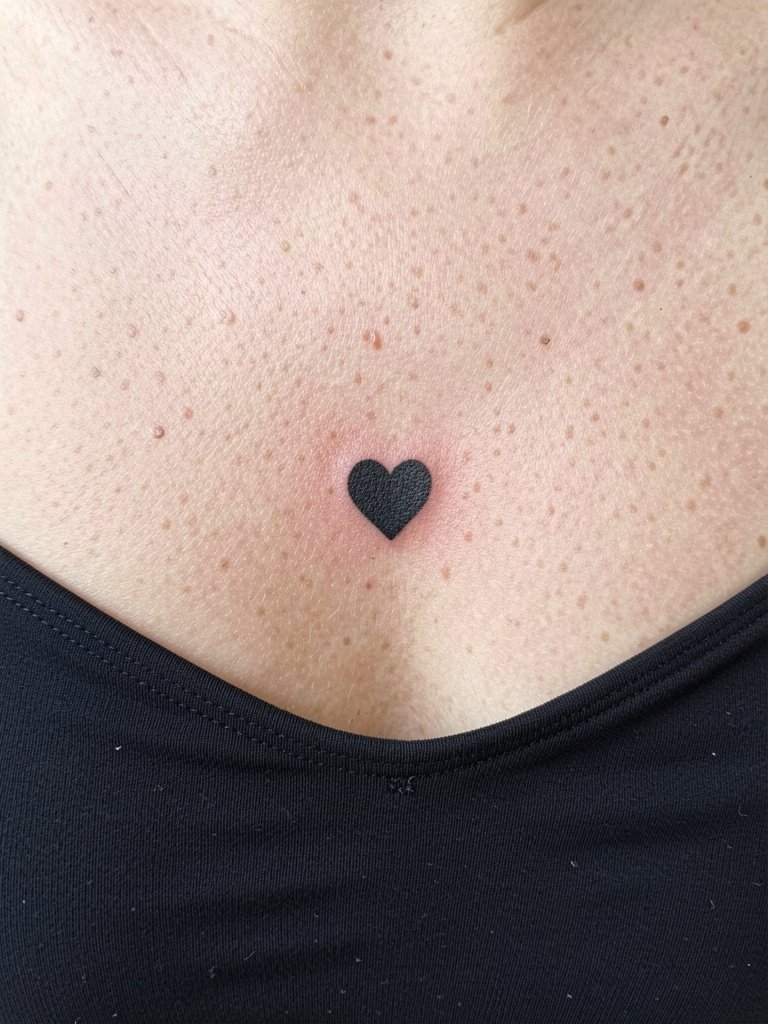
Sternum micro pieces can be striking but require a steady hand because the skin changes with posture and chest movement. Bring a reference showing the exact size and ask for a stencil while standing and lying down so you see the shift. Sessions can be slightly more painful around the sternum bone and may take 30 to 60 minutes. One frequent mistake is picking a heart that is too thin in outline; a solid fill holds up better. If you plan to show it, backless tops and bandeaus highlight the area without exposing more than you want.
9. Micro Geometric Dot Work on the Inner Wrist
The inner wrist is visible and will be seen often, so the dot spacing matters. Ask the artist to map the cluster at the scale you expect to wear it at every day, because tight stippling can blur with frequent motion. Session time is quick but the wrist can be sensitive. A common mistake is placing fine stipple too close to veins or creases. For jewelry, a slim leather cuff or minimalist watch frames the design. Consider a minimal leather cuff bracelet for styling.
10. Micro Crescent Botanical on the Upper Thigh
Inner thigh micro pieces are intimate and can be a good choice if you are comfortable with occasional touch-ups from friction. Tell your artist if you prefer the piece visible when seated or when walking, because placement shifts with stance. Sessions are moderate on pain and usually under an hour. Common mistakes include placing elements too close to the underwear line where irritation is likely. During appointments wear modest shorts or bike shorts so the artist can access the area easily without exposure.
11. Micro Anchor on the Side Hip
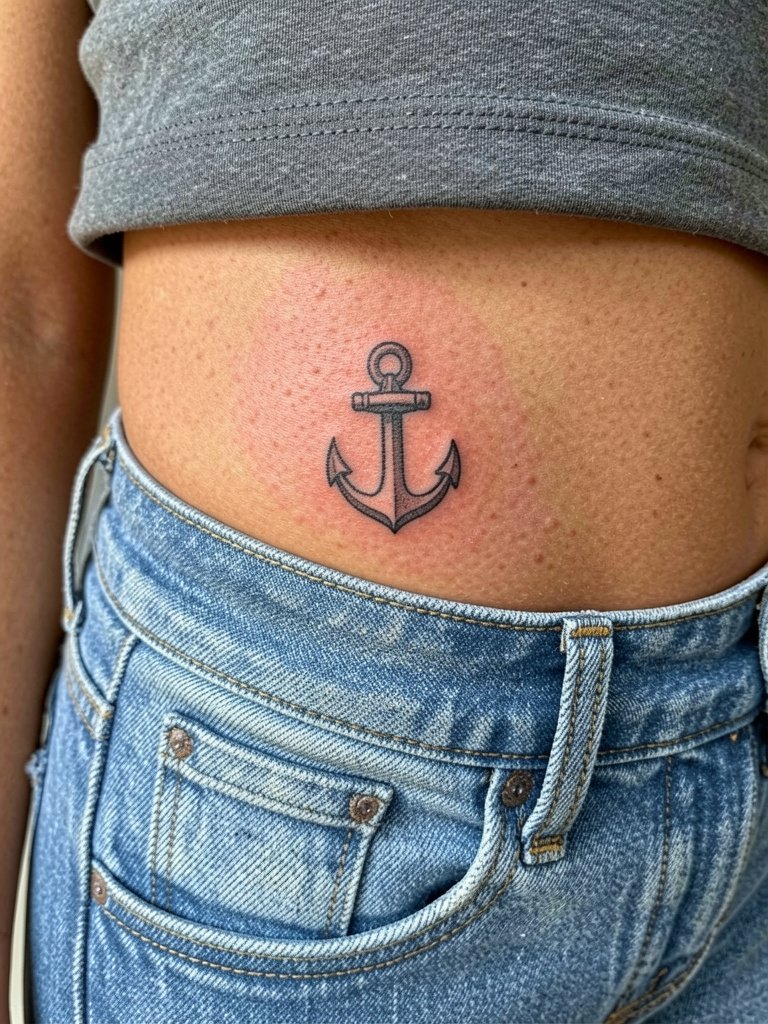
Hip micro tattoos can age gently because the skin there is relatively stable. I suggest asking for a slightly bolder outline so the anchor keeps a crisp silhouette under low-rise waistbands. Expect a 30 to 45 minute session and a dull pressure sensation rather than sharp pain. The most frequent error is choosing a motif that is too small for the natural movement of the hip. For nights out, low-rise jeans or a cropped top lets the piece peek out. Pair with a high-waisted skirt that sits below the tattoo for a subtle reveal.
12. Micro Realism Eye on the Inner Arm
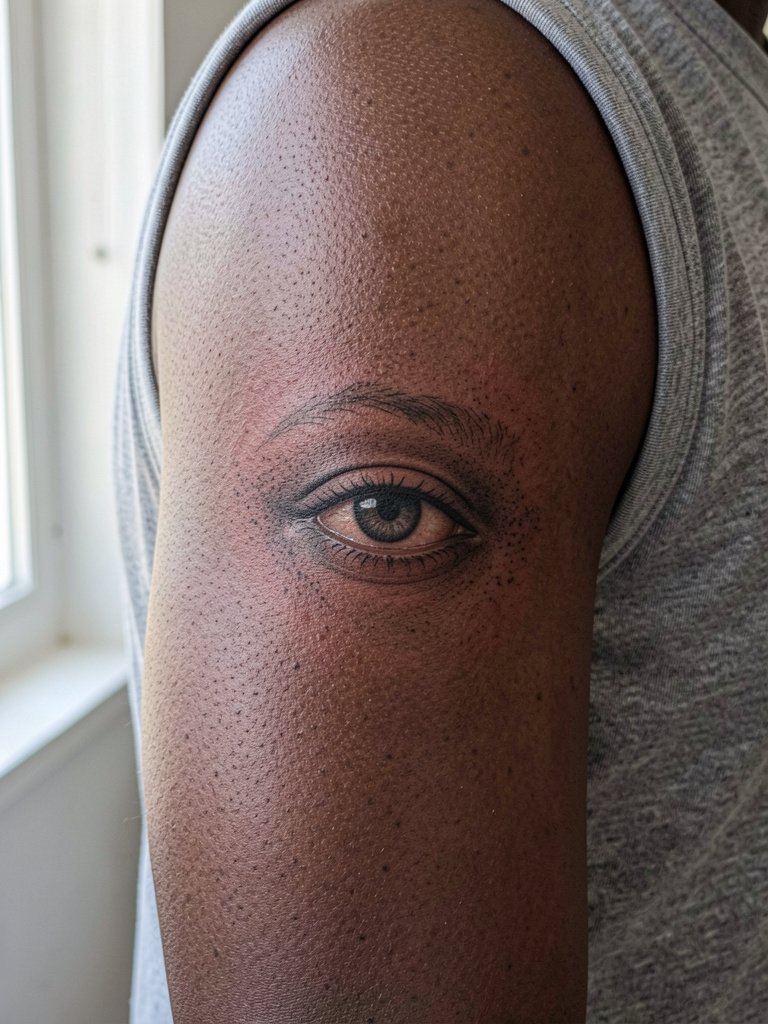
Inner arm micro realism reads well if the shading is done with tiny stipple and the pupil is given a small block of saturation. Tell the artist you want a solid black pupil and softer stipple around it so the contrast survives two years of wear. Sessions run 30 to 60 minutes depending on shading. Mistakes happen when clients ask for extremely detailed lashes at too-small a scale. For visibility, short sleeves or rolled sleeves make the inner arm noticeable. Consider a sleeve-roll shirt to showcase the piece.
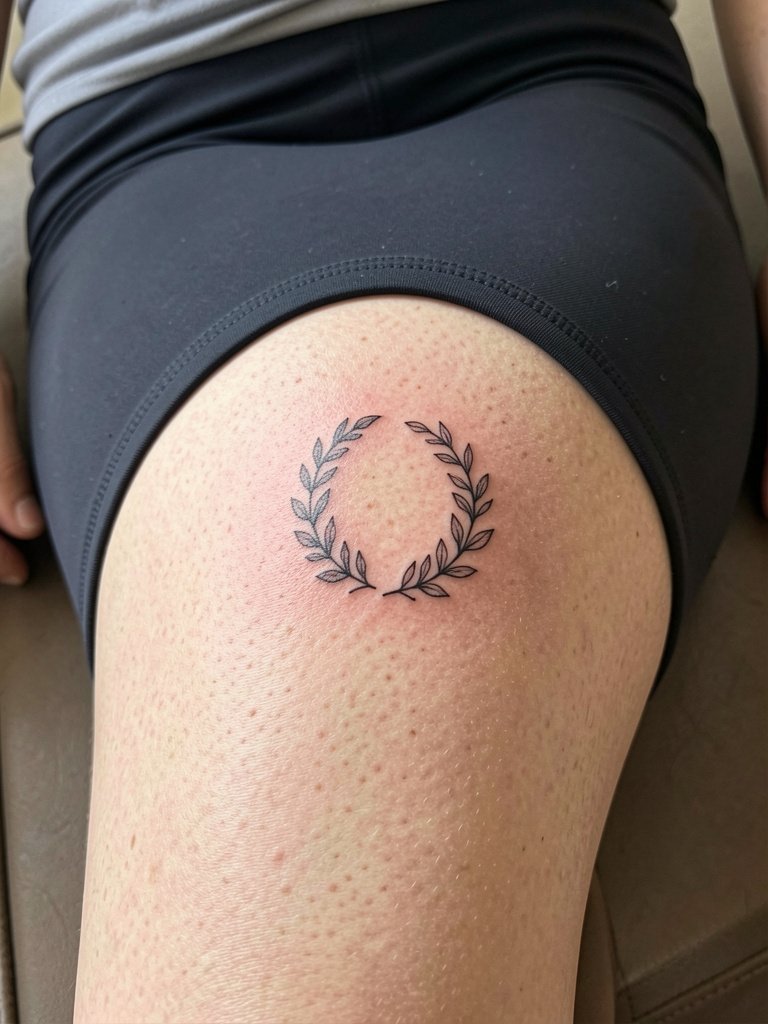
13. Tiny Laurel Wreath on the Ankle Inner Side
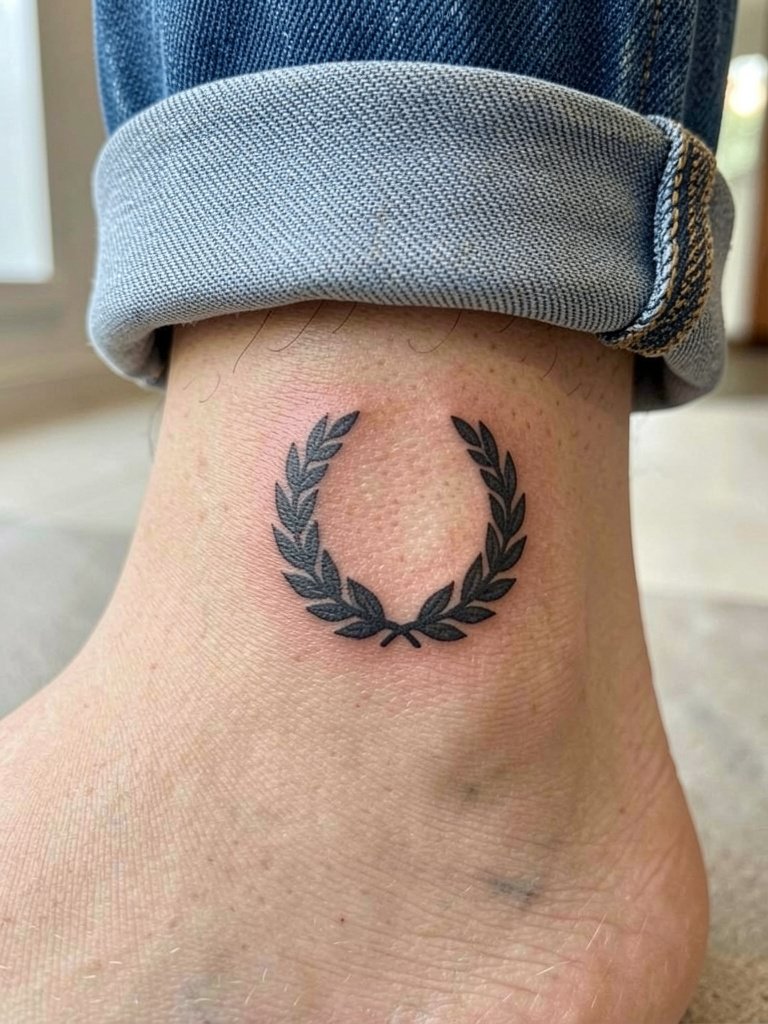
Inner ankle placements are visible and handle small motifs well if the wreath leaves have slight spacing. Ask for a mock-up at the size of the bone so the leaves do not blur into a single mass. Sessions are quick and sensitivity is low to moderate. The usual misstep is requesting many tiny leaf veins that merge over time. For weekends, ankle bracelets or cropped pants keep the wreath on show. A thin anklet chain accents the motif without hiding it.
14. Micro Botanical Ring Around the Finger Base
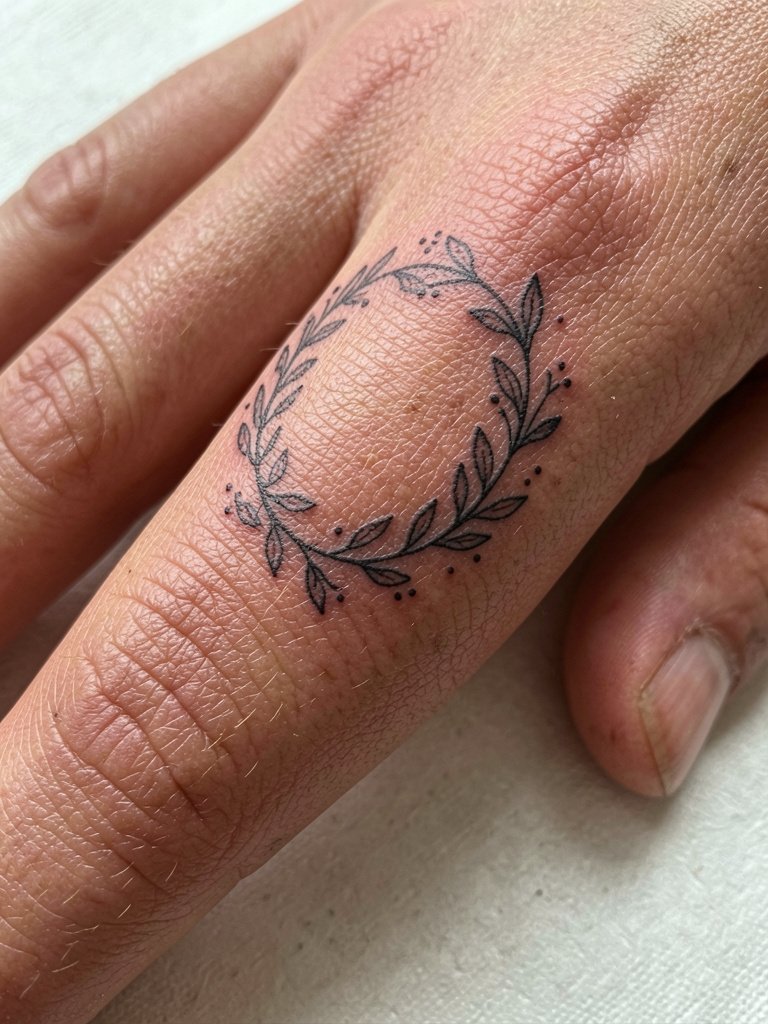
Finger ring tattoos look delicate but they blur faster than bands on other parts of the body. Ask for slightly thicker stems in the wreath and avoid tiny internal detail that will soften. Expect the wrist and finger area to need touch-ups at around one year. A common mistake is trying to mimic engraved ring texture at tiny scale. For styling, stack with thin rings on adjacent fingers rather than covering the tattoo. A petite open ring set enhances the botanical without competing.
15. Micro Linework Mountain on the Outer Upper Arm
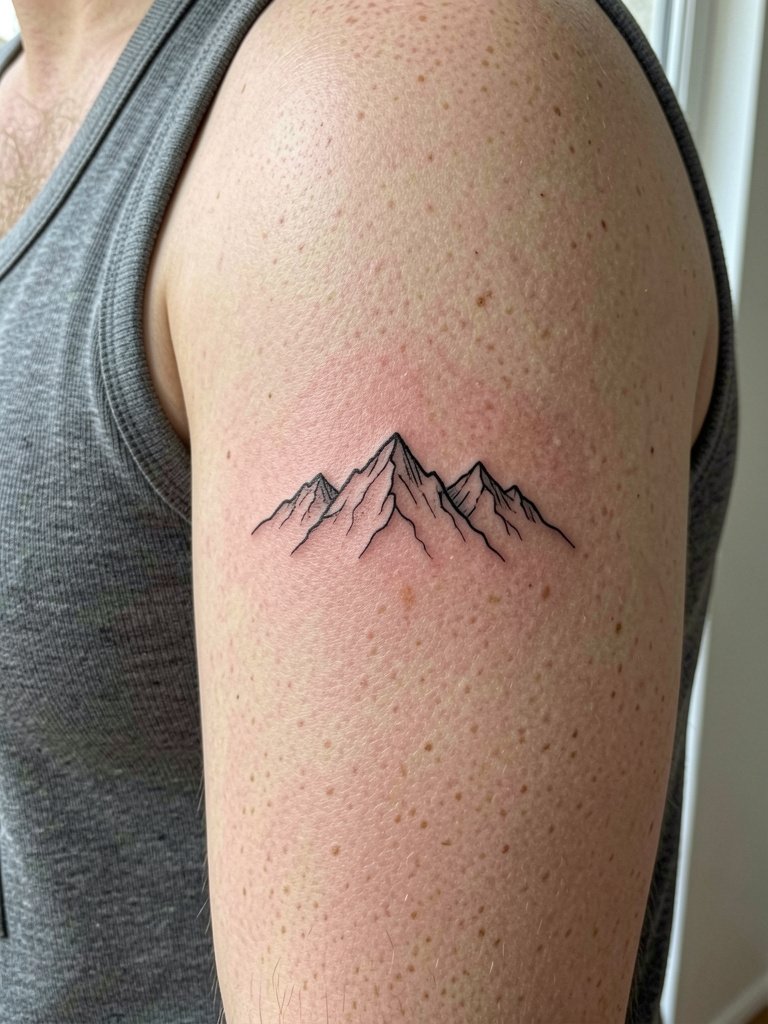
Outer upper arm is a great canvas for tiny landscapes because it avoids constant movement from washing. Request a middle-weight line so the peaks retain definition over time and ask to preview the wrap at your natural arm circumference. A session for a small mountain piece is usually 30 minutes and the pain level is low. A common oversight is placing too many micro peaks in a small band, which blurs. For showing off, sleeveless tops and sundresses keep the outer arm visible. Try a cotton sundress with thin straps.
16. Micro Single-Needle Crescent on the Rib Edge
Rib-edge micro crescents require planning for breath and posture. Specify that you want the piece visible when standing and seated, and request the stencil be checked with a deep breath so placement does not ride into softer skin. The session can be intense and may need a 30 to 60 minute window. Some artists say single-needle ribs blur quickly and avoid them altogether. Other artists maintain that slightly wider spacing and confident saturation fixes the issue and will show healed examples. For the appointment wear a fitted crop top so the artist can access the ribs cleanly.
17. Micro Arrow Behind the Ear Lobe
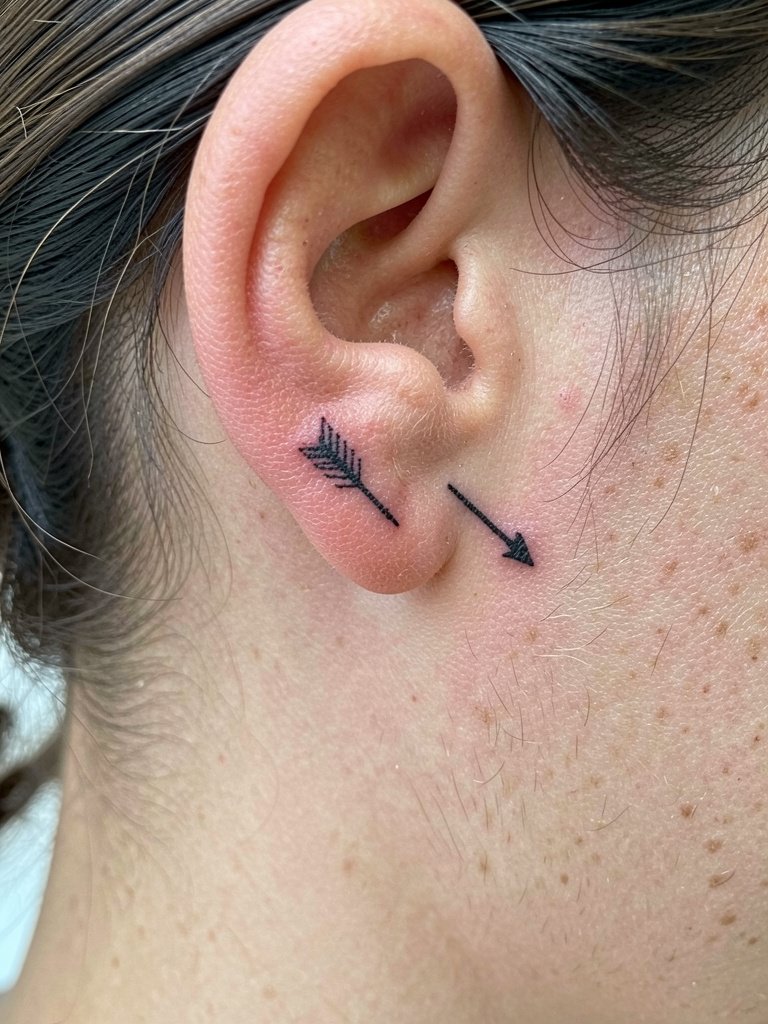
Tiny marks behind the earlobe heal well when the artist keeps the shaft short and the tip slightly thicker for longevity. Ask the artist to mark the axis so the arrow points where you prefer when your head is turned. Sessions are swift and the area is generally low pain. A typical mistake is extending the shaft too long, which becomes invisible under hair growth. For visibility on days you want to show the arrow, tuck your hair behind the ear and balance with an ear cuff or small hoop. A slim ear cuff pairs well.
18. Micro Botanical Anchor on the Wrist Side
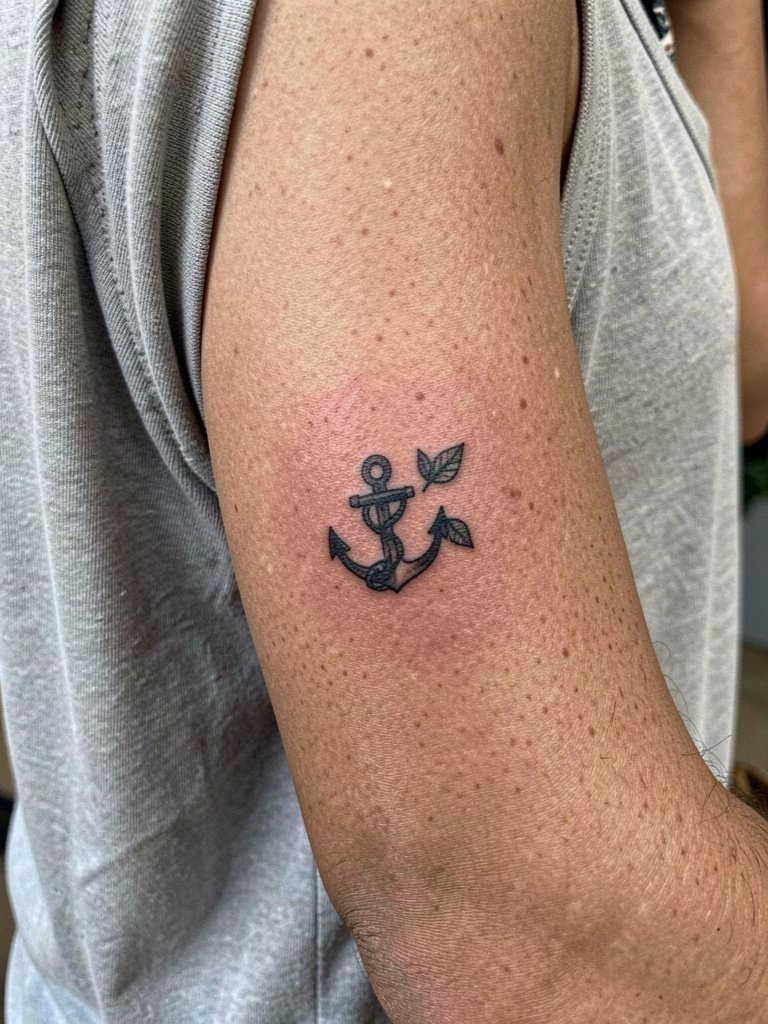
The wrist can handle small compositions if the anchor has compact negative space. Tell the artist you want the anchor to remain legible when you bend your hand so the lower loop is a touch wider than you expect. Sessions are short and the sensation is sharp near the bone. A frequent mistake is asking for extra internal detail that fades into smudge. For daily style, a leather strap watch or thin cuff frames the wrist without covering the anchor. Consider a slim leather band watch.
19. Tiny Single-Needle Constellation on the Back of the Hand
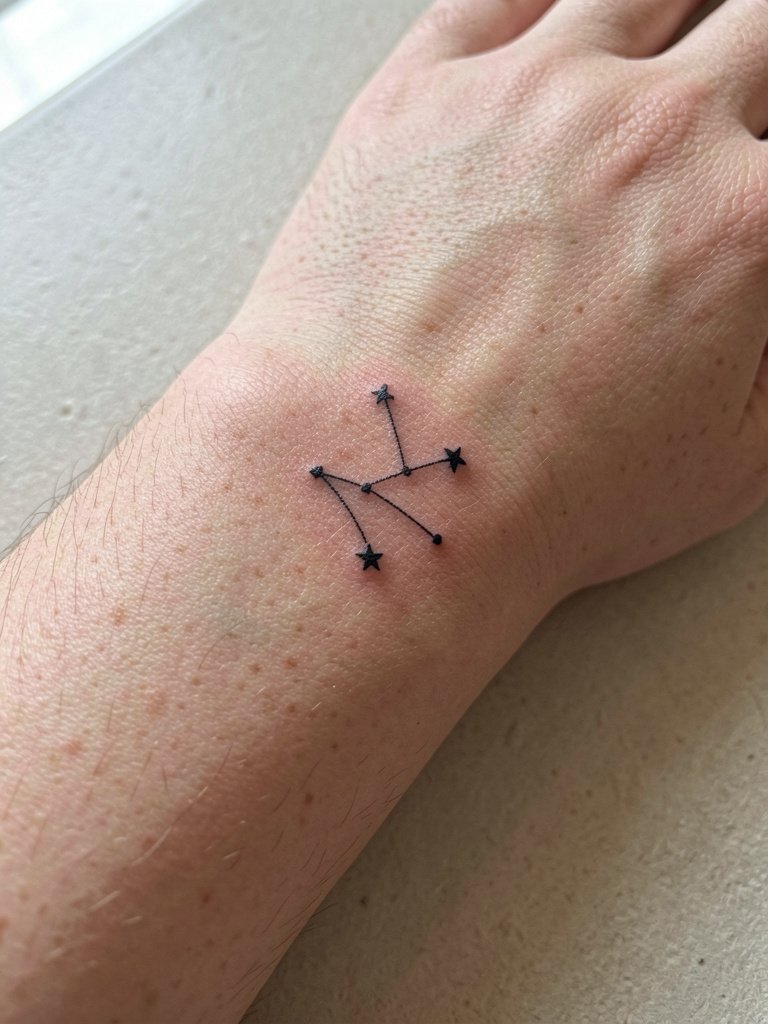
Hand tattoos see heavy wear and often need more frequent touch-ups. One camp says the back of the hand is a high-risk area for blur due to constant sun and washing. The other camp believes micro constellations can hold with robust saturation and periodic maintenance and will point to several-year-healed examples. If you accept maintenance, ask for anchored star points with slightly heavier dots. Sessions are brief but may sting because of exposure. For styling, rings on other fingers and a lightweight hand cream in your routine help keep skin supple and extend clarity.
20. Micro Floral Nape Line Along the Hairline
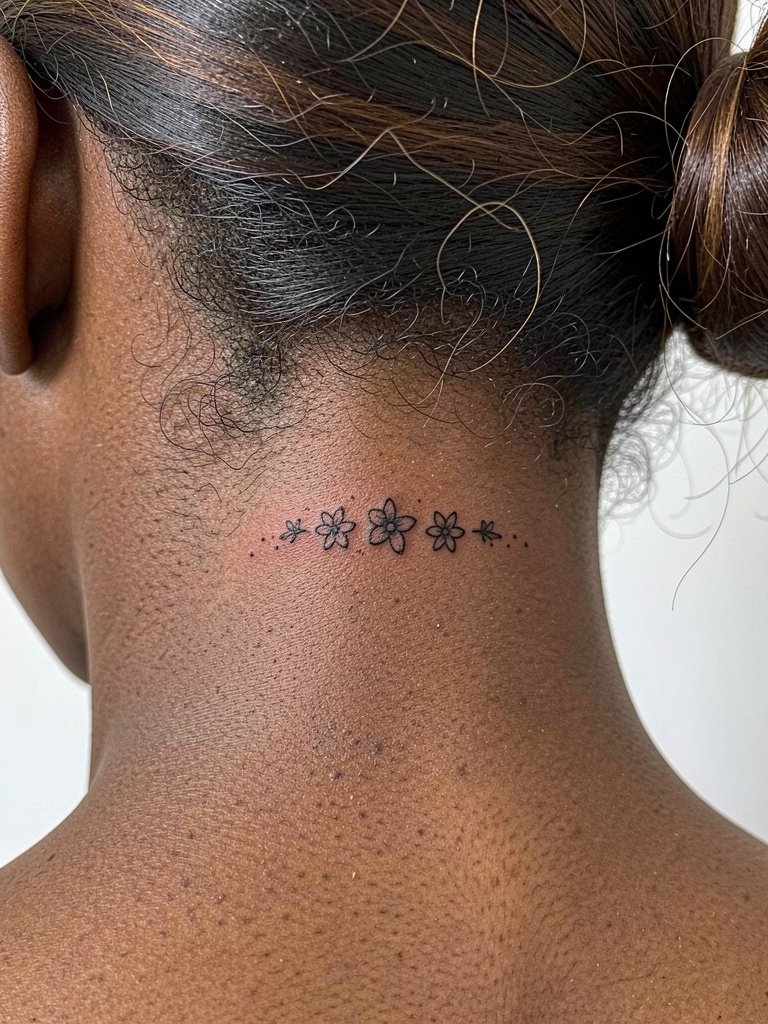
Nape linework holds well when the flowers are spaced out and anchor dots receive a bit more saturation. Ask for a tiny contrast test on a similar patch of skin if you have darker hair since that can change perceived contrast. A 30 to 45 minute session is common and pain is mild. Mistakes include clustering too many petals in a small area. For wearing, low buns and half-up styles showcase the line. Use a simple silk scrunchie when you want the nape visible.
21. Micro Abstract Line on the Calf
Calf pieces are low wear and excellent for micro abstracts because they sit under thicker skin. Ask for a preview of how the line looks when you walk so it does not distort across the muscle. Sessions are comfortable and usually under 30 minutes. The frequent mistake is designing a line that wants more negative space than the chosen scale allows. For summer looks, a pair of ankle boots or midi skirts displays the calf art. A flowy midi skirt keeps attention on the leg.
22. Tiny Single-Dot Coordinate on the Rib Lower Side
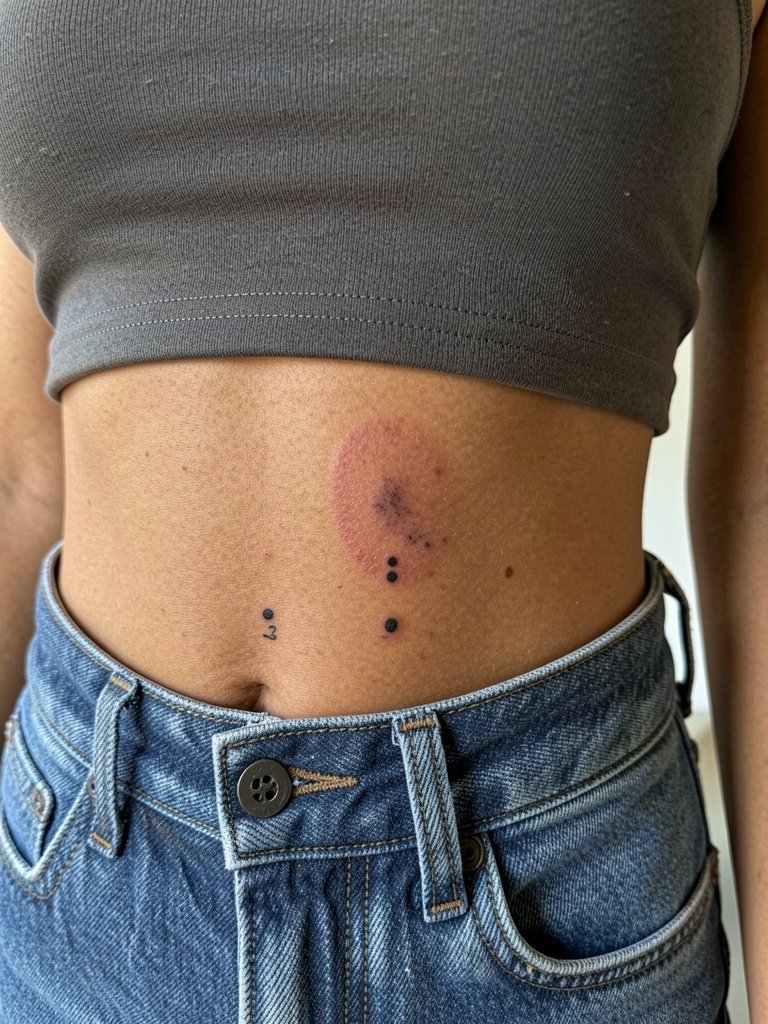
A single-dot coordinate is deceptively simple yet placement-sensitive. Ask the artist to check the spot while you are standing and while you are slightly bent forward so you do not end up with the dot inside a creased area. Sessions are short and discomfort is moderate. A common oversight is neglecting how high-waisted clothing will hide the dot during regular wear, so test with the outfits you plan to wear. For visibility at shows or evenings, a cropped top above the waistband works well.
23. Micro Tiny Rose at the Wrist Inner Crease
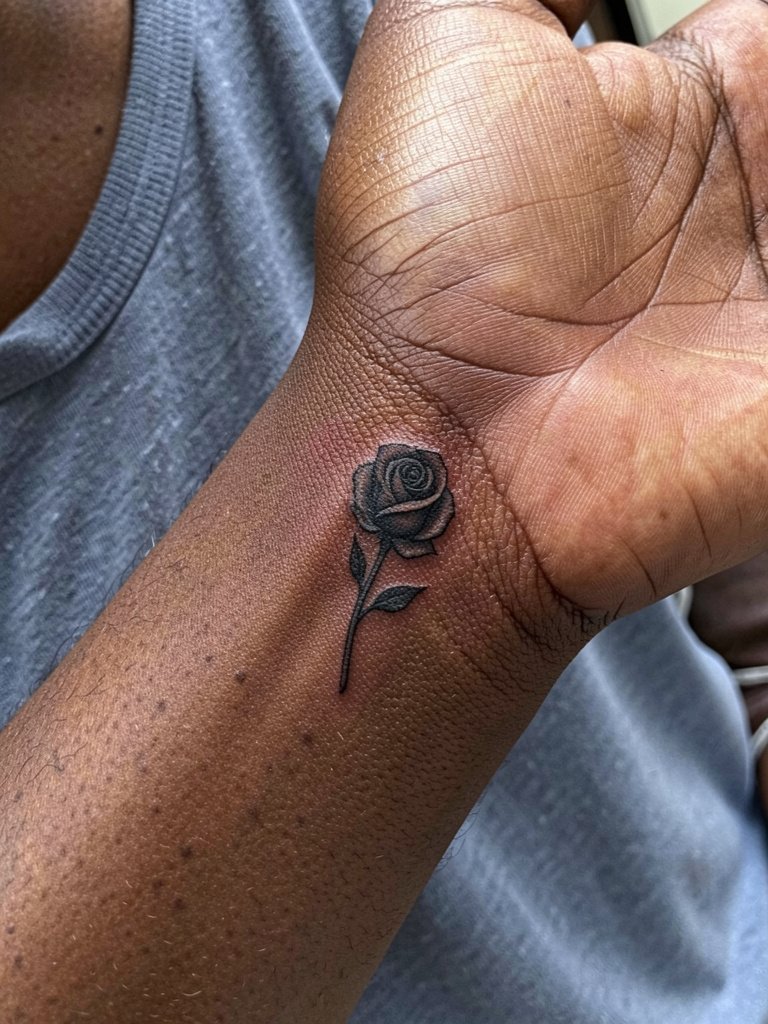
The inner wrist can make a micro rose look like a charm when the artist balances bud size and stem weight. Ask that the head of the rose get a small block of saturation and that the stem be slightly thicker than the finest line you like so the image retains definition over time. Sessions last 20 to 45 minutes and sensitivity is moderate. People often pick a rose that is too detailed for the scale. For outfits, short sleeves and bracelets that do not press on the tattoo make it visible. A slim adjustable bracelet complements the rose without rubbing it.
Frequently Asked Questions
Q: How do I find healed examples and portfolios for micro tattoo ideas without naming artists?
A: Search platform hashtags focused on healed results and narrow by location and time frame. Try hashtags like #MicroTattooHealed, #TinyTattooHealed, and #SmallTattooPortfolio, filter by recent posts, and add your city name to locate local portfolios. Reddit tattoo threads and community albums often show multi-year healed shots that reveal how detail holds up across skin tones.
Q: What are the realistic touch-up timelines for micro finger, wrist, and rib tattoos?
A: Finger tattoos commonly need touch-ups within a year because of washing and sun exposure. Wrist micro pieces typically show noticeable softening around year one to two and often benefit from a light touch-up at 12 months. Rib micro tattoos can be stable if placed with spacing and saturation, but expect to reassess at the one-year mark and plan a possible touch-up then.
Q: Are there clothing recommendations for the appointment itself for sensitive placements?
A: Yes. For rib and sternum work wear a fitted sports bra or bandeau that the artist can work around without excessive fabric movement. For inner thigh sessions choose modest bike shorts so you stay comfortable while giving clear access. For ankle and wrist work wear shorts or rolled cuffs so the artist can see the exact bony landmarks.
Q: How much does skin tone affect micro tattoo legibility and what should I show my artist?
A: Darker skin tones may need slightly heavier saturation in focal points to preserve contrast, while lighter skin can show ultra-fine strokes more readily. Bring healed photos of similar skin tones and ask for a small, localized contrast test if you have concerns. Clear reference images help the artist recommend line weight and dot spacing that will hold.
Q: Can small symbolic or cultural designs be done respectfully?
A: Yes, but handle cultural motifs with deliberate respect. If a design originates from a cultural practice, mention that origin and ask the artist about appropriate simplification or adaptation. Some traditional symbols require context or permission from communities, and good artists will guide you toward respectful alternatives or suggest collaboration with an artist experienced in that tradition.
