
The stencil sat crooked on the side of his neck when the artist paused, smoothed it, and moved the design a half inch toward the clavicle. That small correction keeps bold linework from drifting into shadowed skin over the years. Neck tattoos demand the same kind of early attention, a plan for growth, and wardrobe thinking so the piece reads strong today and still looks deliberate in five years.
1. Bold Neo‑Traditional Dagger on Side Neck
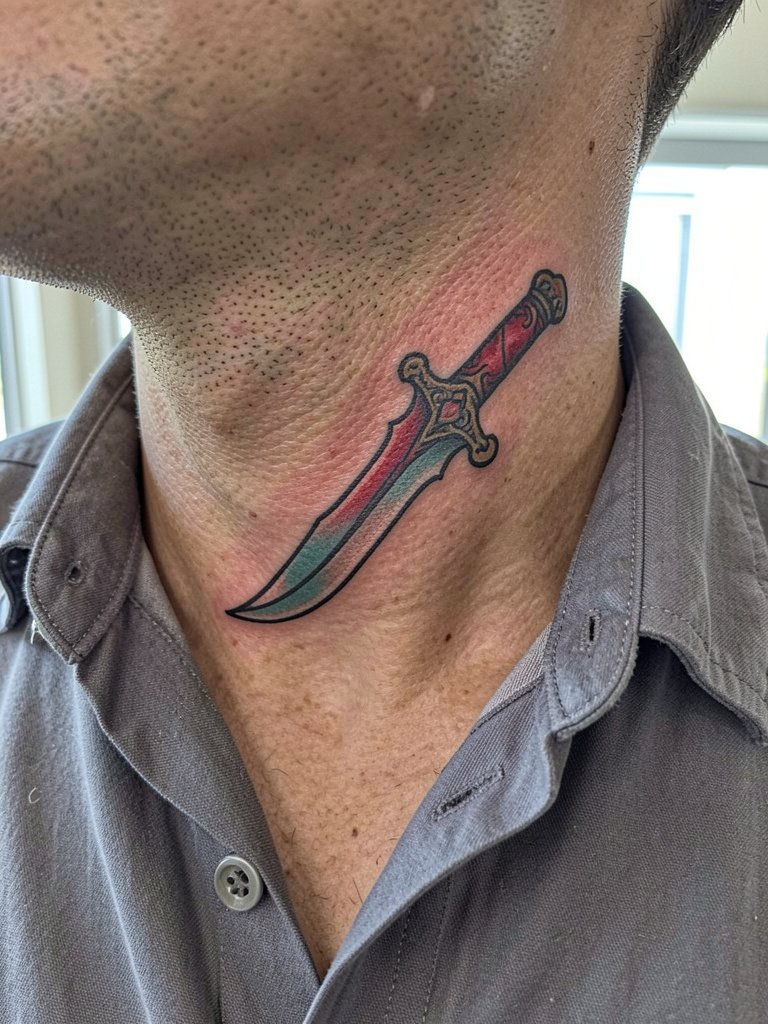
A neo-traditional dagger reads bold on the side of the neck because the silhouette interrupts the collarline. I recommend this style for guys who want an anchored piece that still works with shirts and jackets. Discuss exact placement with your artist using a tape mockup so the tip avoids creases when you turn your head. Expect a two-hour session for a single-color version and a longer slot if you want color fills. Common mistake is asking for tiny decorative dots around the blade because those fade faster on thin neck skin. Professional consideration: pick an artist experienced with neck stencils and how the skin moves when sleeping.
2. Heavy Blackwork Crescent at Nape
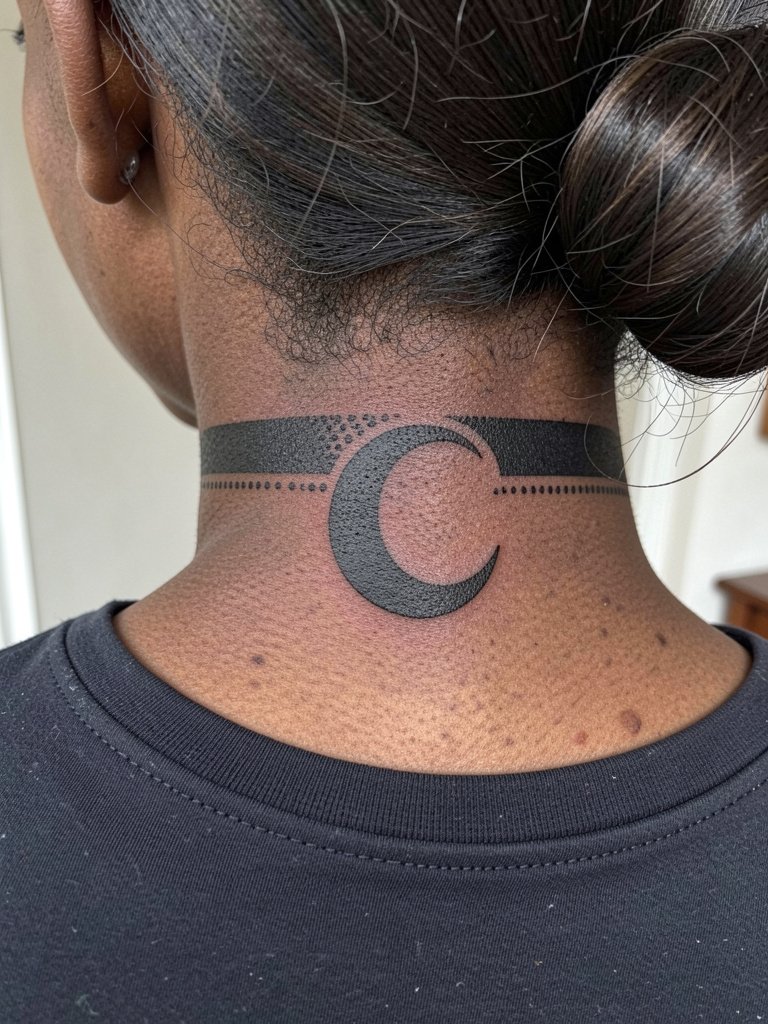
A solid black crescent performs like armor at the base of the skull because saturation keeps contrast long term. Choose this if you want minimal maintenance and strong visual weight. Talk to your artist about edge grading so the crescent sits flat against the hairline without feathering. On thin-skinned neck areas the sensation leans sharp but tolerable for most clients and the session runs around 60 to 90 minutes. The usual error is making the band too thin, which invites blowout. Professional consideration: pick someone who plans for hair regrowth so the top edge does not disappear.
3. Script Tag Under the Jawline
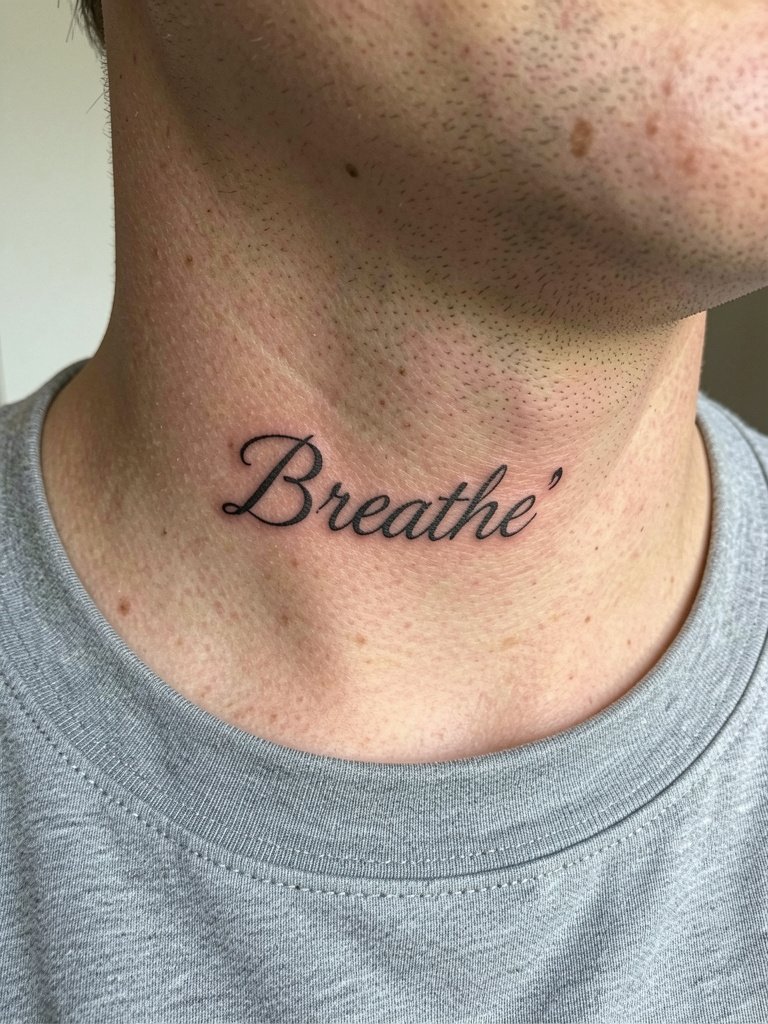
A crisp, compact script looks bold when the lettering is slightly heavier than the desktop reference. For this placement I advise a slightly thicker hairline than you might choose for wrist script because neck skin spreads more. Bring two reference scales so the artist can show how the word reads at three versus five centimeters. Expect a single-needle pass that feels sharp and quick, then a short touch-up window at six to twelve months if any letters soften. Common mistake is choosing ultra-tiny lettering that becomes illegible. Professional consideration: choose an artist who has healed close-up neck scripts in their portfolio.
4. Stacked Bar Work Along the Throat

Stacked bars are a statement that avoids small detail. I recommend them for men who want a bold, graphic focal point that pairs with short collars. Ask the artist to mark spacing while you move your neck so the bars do not sit across a fold. The area can be tense for clients, so plan small breaks in a single session to keep the lines steady. Look for evenly healed contrast at the six-month check. Mistakes usually come from inconsistent spacing or trying to compress too many bands into a short vertical area. Professional consideration: choose someone who plans for breathing and swallowing during the stencil check.
5. Micro-Realism Eye at the Side of the Neck

A micro-realism eye reads intimate up close and bold from a distance when the shadow is dialed in. This is best for clients who want a discreet statement that still holds texture. Discuss reference scale and the degree of contrast you want, and insist on healed photos of similar neck placements from the artist. Micro shading on neck skin can lose crisp tiny highlights over time, so plan a touch-up after one year. The main mistake is expecting wrist-level detail to translate unchanged to neck skin. Professional consideration: only book someone who has demonstrated micro realism on thin skin areas.
6. Traditional Rose Beside the Adam's Apple
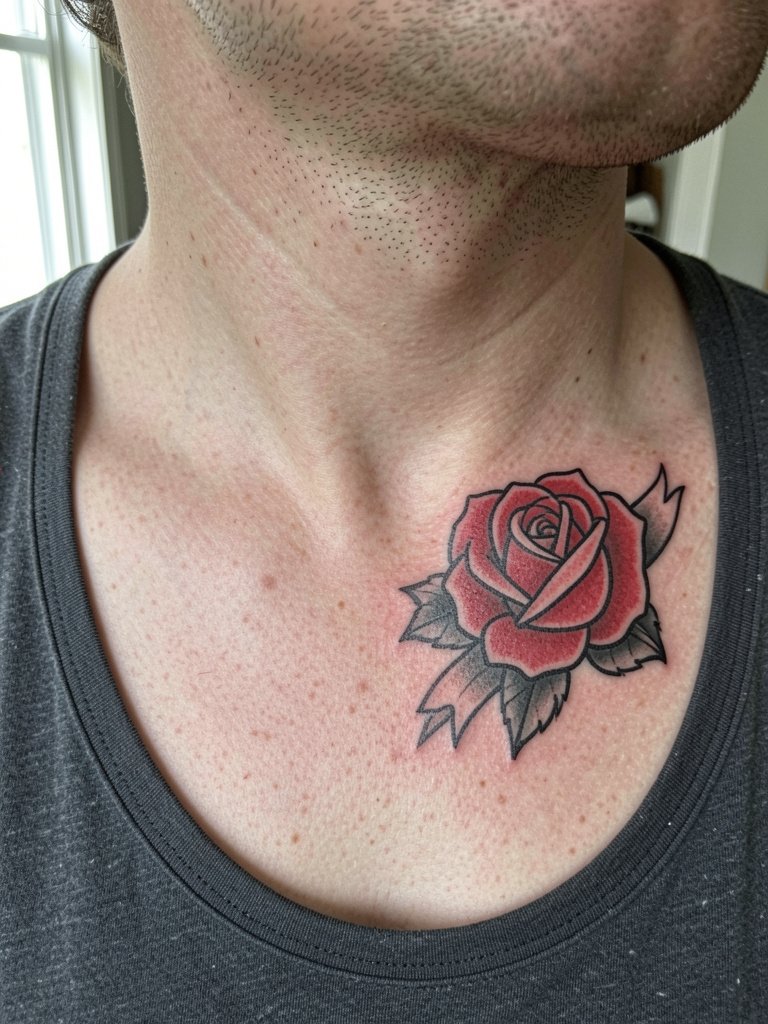
A classic rose handles neck movement well because the bold outlines keep form as the skin stretches. Choose a size that gives the petals room to breathe rather than tiny decorative flourishes. During consultation specify how the stem will fall if you tilt your head, and review how the banner would read when swallowing. Expect a one to two hour session with mild to moderate sensitivity. The common error is packing in too much tiny shading that melts over time. Professional consideration: confirm the artist has experience placing traditional motifs near the throat.
Session Day Picks
The pieces above sit across visible collarlines and thin skin, so a few practical items make the appointment and the first week easier.
-
Disposable stencil transfer sheets. Useful for trying slightly different stencils on the neck so you can see how a line falls against the jaw and collarbone before final placement.
-
Medical-grade adhesive film strips. Keeps small neck pieces protected when clothing might rub during the first 24 hours.
-
Cooling gel packs, reusable. Applied between breaks to ease swelling and help you finish a longer neck session without tension.
-
Hair ties for men, strong elastic pack. Keeps hair up in a stable bun so the nape and upper neck stay exposed while the artist works.
-
Aquaphor Healing Ointment. Thin layers in the first days lock in moisture for bold blackwork and help avoid scabbing that pulls ink.
7. Script Collar Extension Along the Clavicle
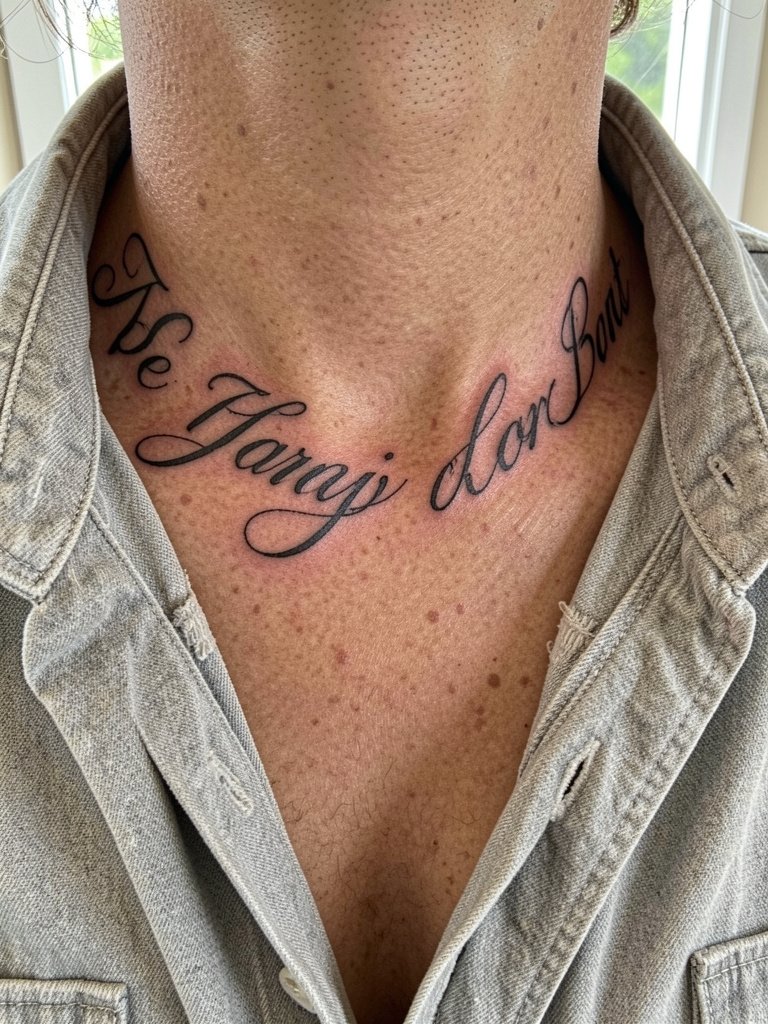
A collar extension script reads bold when the letters are spaced and slightly darkened to fight early softening. This placement suits men who layer shirts and want the piece to peek under collars. For the consult bring reference photos of exactly how the phrase sits with the shirt styles you wear. Expect a 45 to 90 minute session and a likely touch-up at the ten to twelve month mark. The mistake is choosing an ornamental script that loses legibility when the neck shifts. Styling note: this area looks sharp with open-collar linen shirts and a lightweight button-down that frames the collarbone.
Professional consideration: book an artist comfortable with how collars and necklaces will intersect your lettering.
8. Thick Black Ribbed Wrap Around the Lower Neck
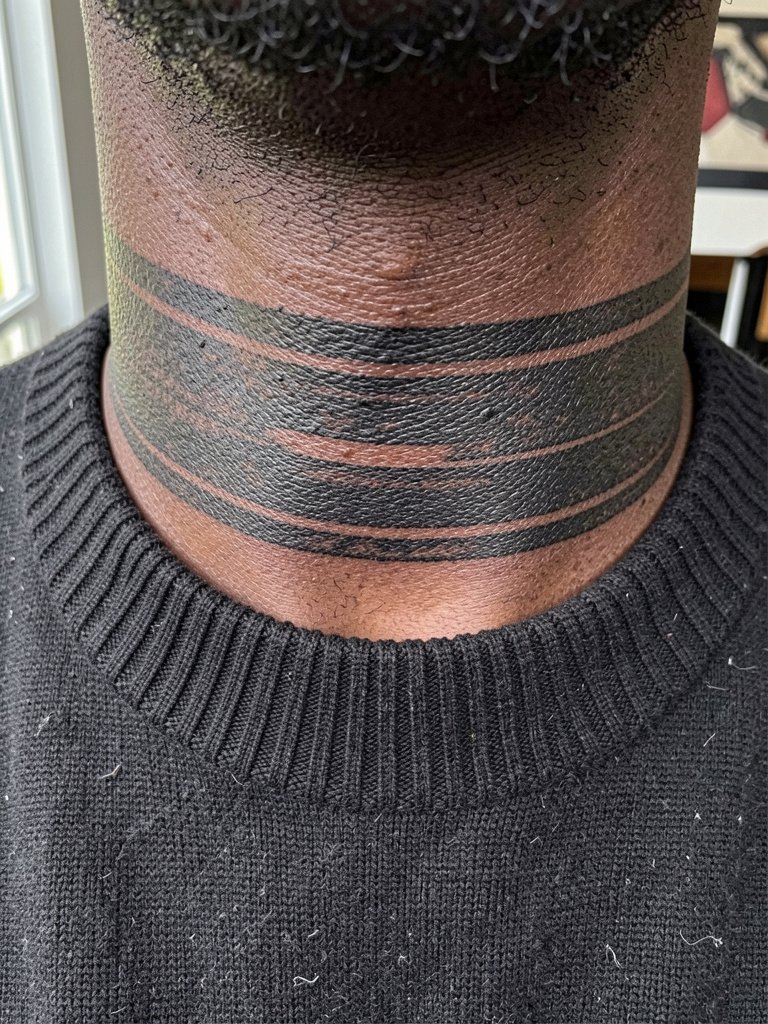
A thick wrap is a strong choice for men who want a collar that reads at a glance. It resists detail loss because the mass keeps contrast. Discuss how far around the neck you want the band to go so movement does not fold the edges. Sessions can be uncomfortable where the skin is thin, so plan short breaks. Expect touch-ups within the first year if any edge softens. Common error is making the band too narrow. Professional consideration: ensure the artist can map the band to your natural breathing and posture.
9. Geometric Line Work Along the Side Neck
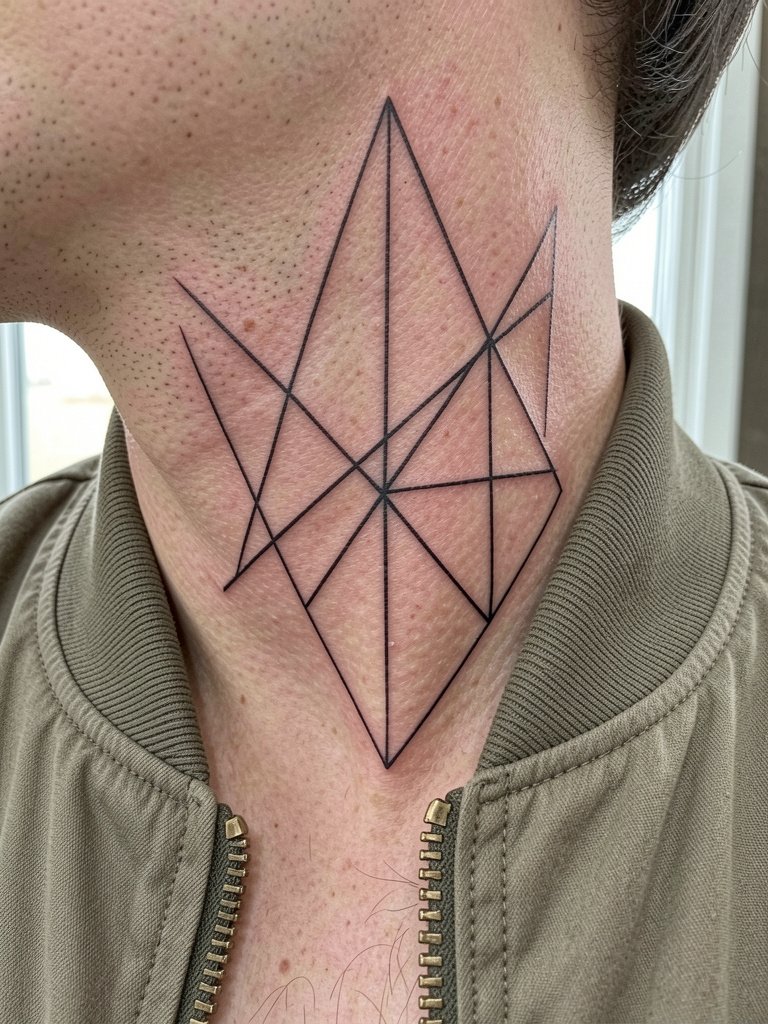
Geometric lines look bold when spacing is deliberate and not overly dense. Recommend this for men who like a modern, architectural look that pairs with minimal jewelry. During consultation ask the artist to draw the grid on skin and inspect it while you tilt your head so the pattern remains coherent in motion. Fine lines on the neck can soften, so a slightly heavier line weight up front helps. Session feel is sharp but brief for most clients. Styling note: a cropped crew or an unzipped jacket highlights the angle work, try a light bomber jacket to frame it. Professional consideration: confirm the artist understands how lines flow with muscle and tendon.
10. Single Needle Portrait Miniature at the Nape

Micro portraiture at the nape is a specialized move that reads bold because of tight contrast. Use this when you want a private piece that still feels weighty visually. Ask to see three-year healed neck portrait examples and compare needle spacing. That conversation should cover expected softening and an honest touch-up plan. These sessions are patience tests because the artist works small and slow. A common mistake is assuming wrist portrait detail will translate directly to neck skin. Professional consideration: only book an artist who posts healed neck portrait shots.
11. Gothic Blackletter Script Across the Throat
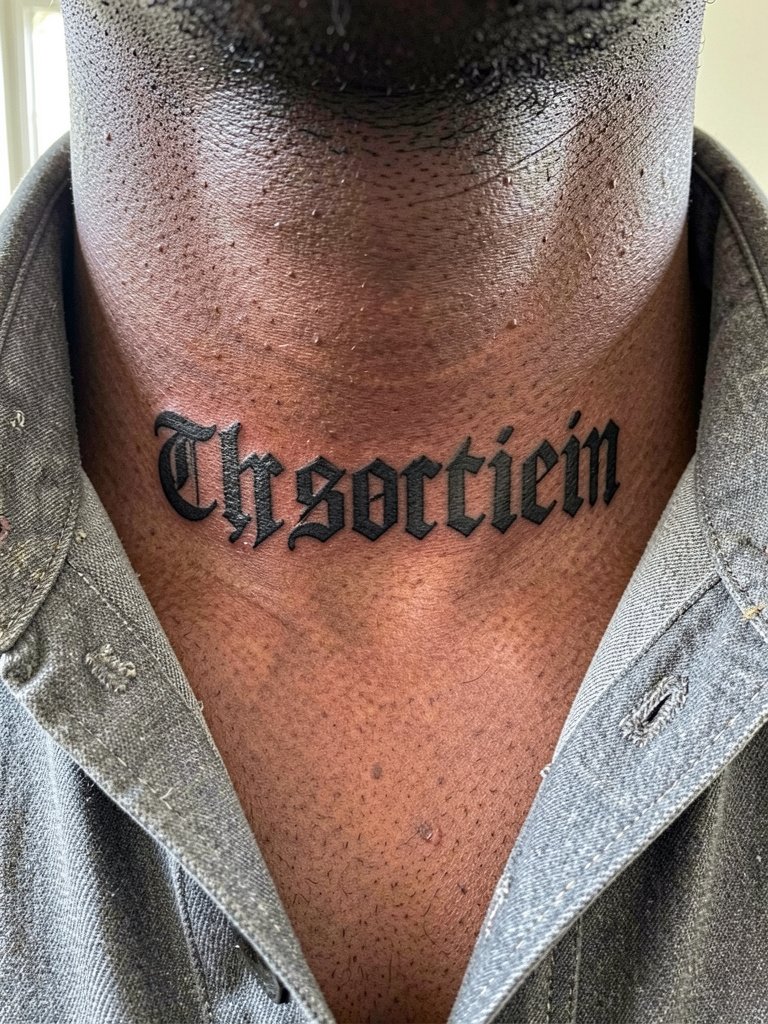
Blackletter stands out on the throat because its heavy shapes resist early ink spread. Choose letters that have generous internal counters so they do not collapse as the skin ages. Discuss kerning and letter height at the stencil stage so spacing survives movement. The session often includes two short numbing pauses if you are anxious. A realistic timeline is a touch-up within the first year for crisp contrast. The usual error is compressing too many letters into a short span. Professional consideration: find someone who has executed neck blackletter pieces in healed photos.
12. Chain-Link Geometric Band Behind the Ear
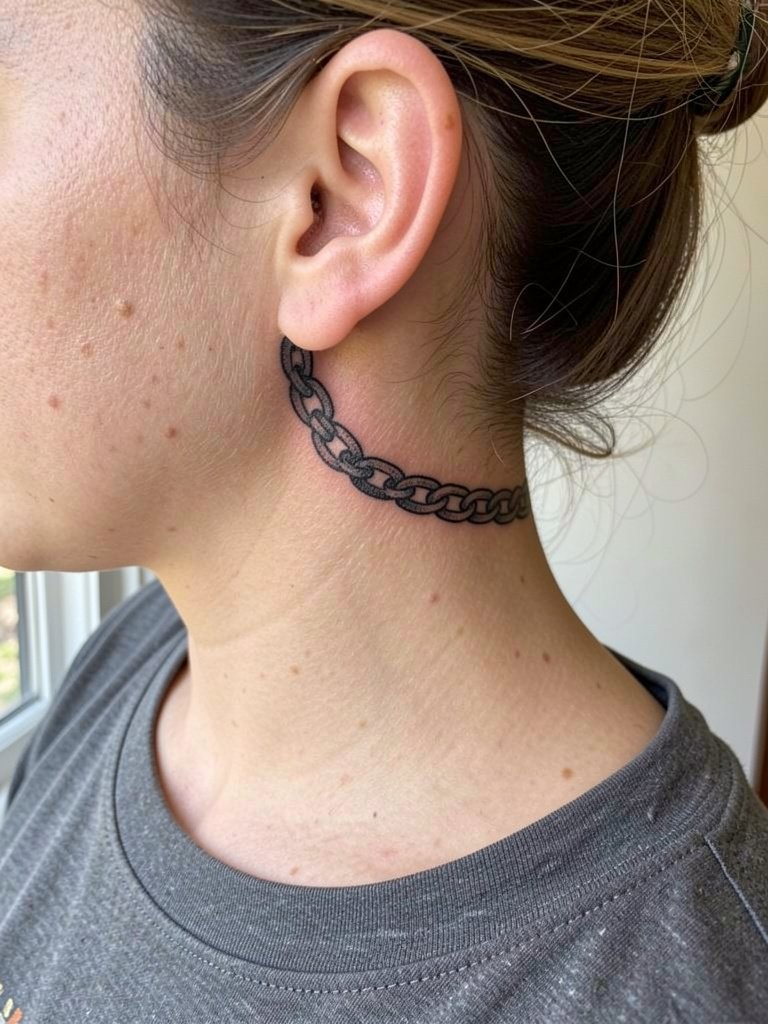
Behind-the-ear bands read bold because the contrast sits near the hairline. This is ideal if you want a piece that peeks out only when hair is up. Tell the artist if you wear glasses or facial hair because the chain should not collide with frames or beard contours. Sessions are short but the skin is thin and sharp. Expect a small touch-up after healing if some loops soften. The frequent mistake is pursuing ultra-thin links that disappear. Professional consideration: seek artists who post healed behind-ear work.
13. Bold Script Name Curved Under the Jaw
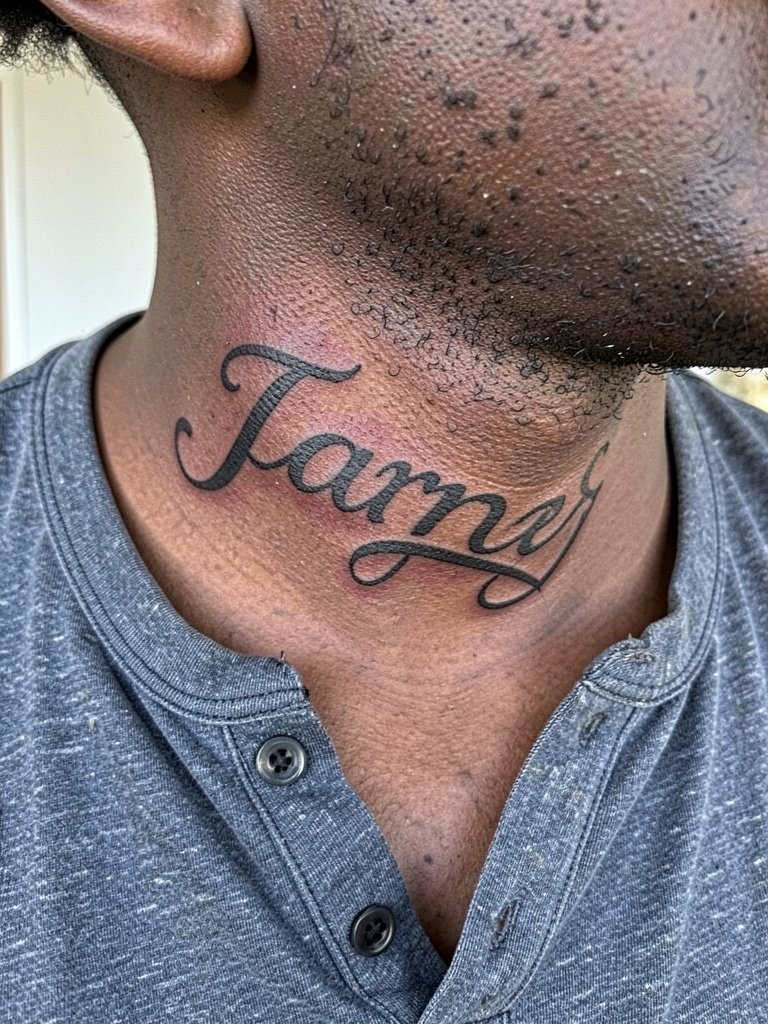
A curved name under the jawline makes a bold visual frame for the face and works well with stubble and short collars. Ask the artist to stencil and photograph the curve from multiple angles before inking so you can see how it sits with your cheekbones. Tiny flourishes often wash out here, so prefer weight and spacing over ornament. The session feels intense because the area is sensitive, and a small touch-up is common at three to six months. Mistakes usually come from unrealistic font scale expectations. Professional consideration: pick someone who has placed script around facial contours.
14. Blackwork Triangle Pointing Up at the Throat
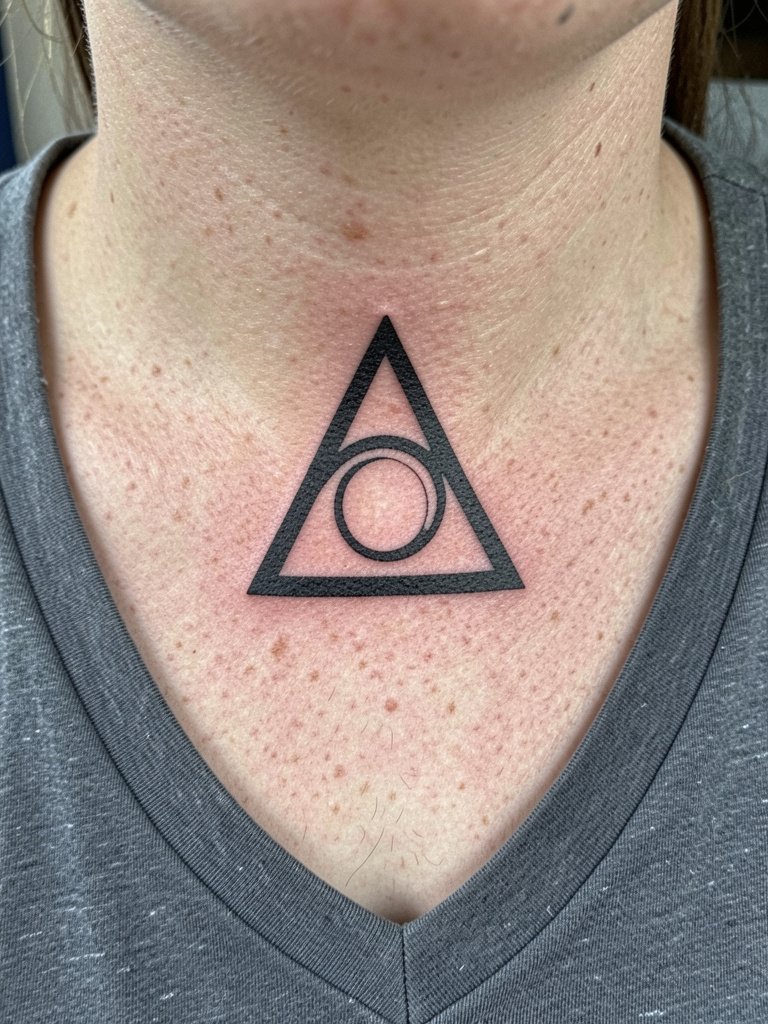
A bold geometric apex reads sharp and minimal. This design works when you want a direct center focal point that contrasts with necklaces. Discuss exact angle and how the point aligns under chin movement to avoid it shifting into a crease on your anatomy. The session is usually fast and intense. Expect assessment at the six-month mark for any edge softening. The common error is choosing a micro scale which invites blowout. Professional consideration: ensure mapping includes jaw movement and swallowing tests.
15. Ribbed Dot-Work Band Across the Back of the Neck
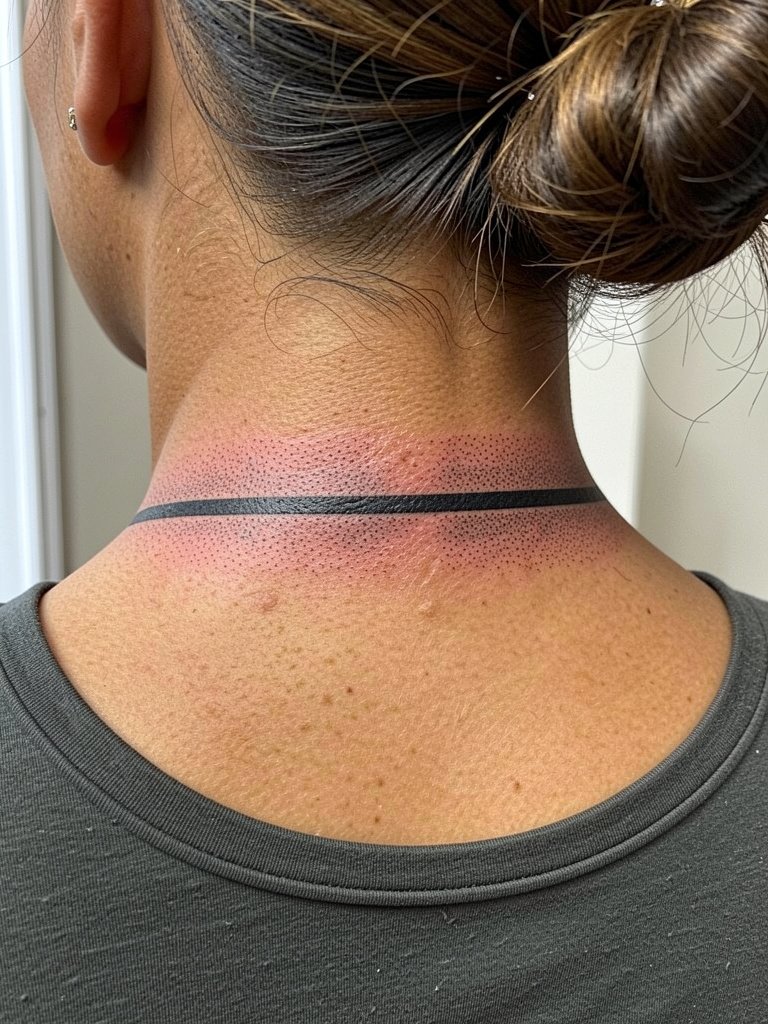
Dot-work bands make a bold pattern that reads from a distance because the center mass keeps density. Choose stippling if you want texture rather than flat black across the nape. Ask for healed examples of dot-work on necks, and confirm expected touch-up frequency since stippling can soften more than solid fills. The session is steady and can be longer because stipple requires controlled passes. A frequent mistake is underestimating session time and wanting it rushed. Styling note: short hair or pulled-up styles show this best, try a strong elastic pack of hair ties to keep hair up during reveal. Professional consideration: pick an artist who understands how stipple density reads on healed neck skin.
16. Thick Gothic Collar Wrapping to the Sides
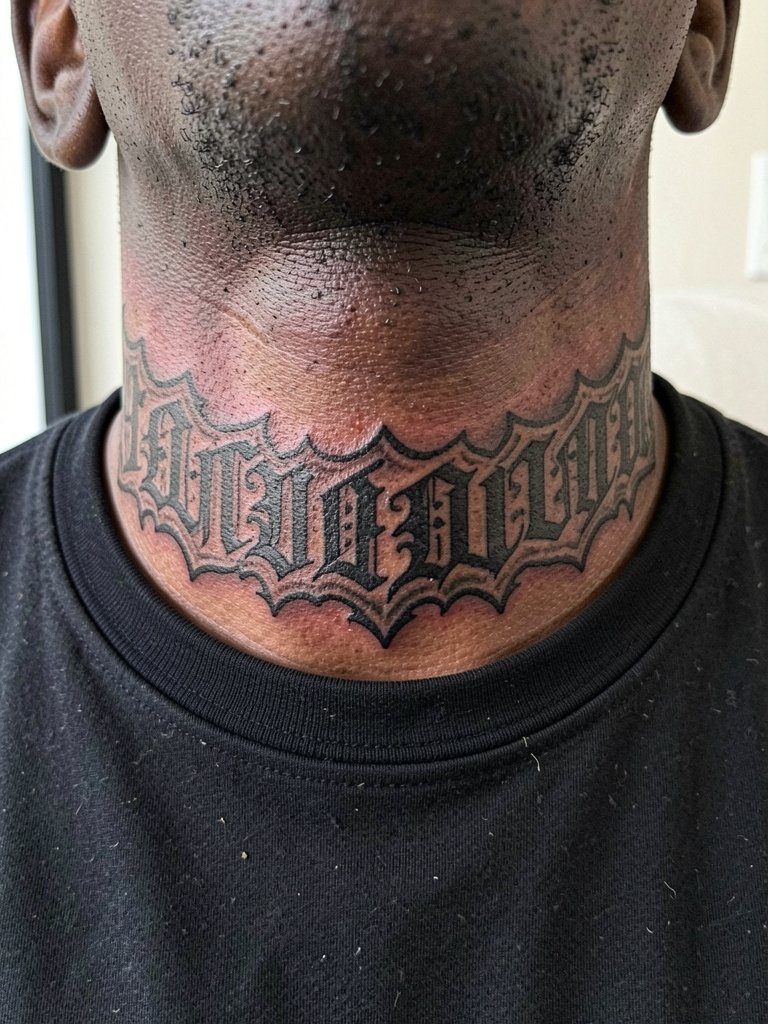
A gothic collar wrap reads bold and dramatic because of its mass and symmetry. This is ideal for men who want an architectural collar that works with jackets. Ask the artist to map the wrap against your jawline and collar so it frames clothing in the way you intend. Expect a multi-hour session and possible two sittings for heavier saturation. The frequent error is attempting to wrap too tightly, which creates tension when you turn your head. Professional consideration: hire artists experienced with multi-angle neck wraps.
17. Minimalist Anchor at the Lateral Neck
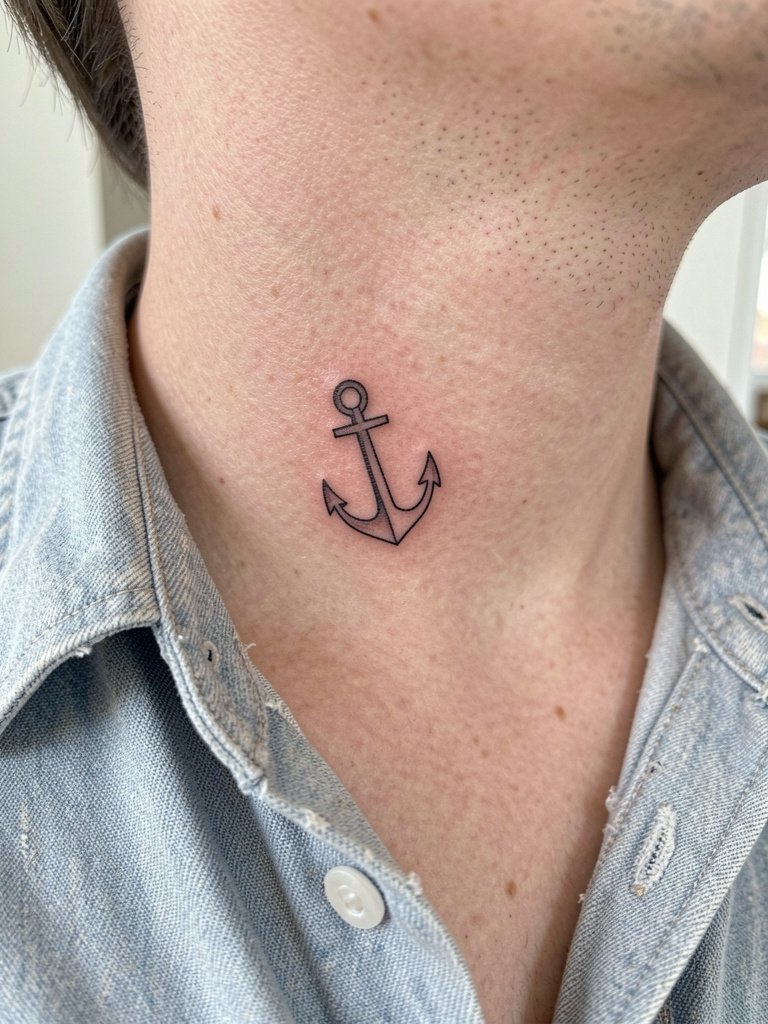
A minimalist anchor is a subtle bold choice that pairs well with necklaces and short shirts. Use this when you want a naval nod that remains readable. During the consult be specific about the negative-space ring size and how thick the main strokes should be for long-term clarity. Sessions are quick and feel sharp because the skin is thin. Expect a small touch-up after healing if lines slightly soften. The common mistake is making the anchor too fragile. Professional consideration: find artists who show healed small symbols on necks.
18. Mandala Wedge at the Side of the Neck
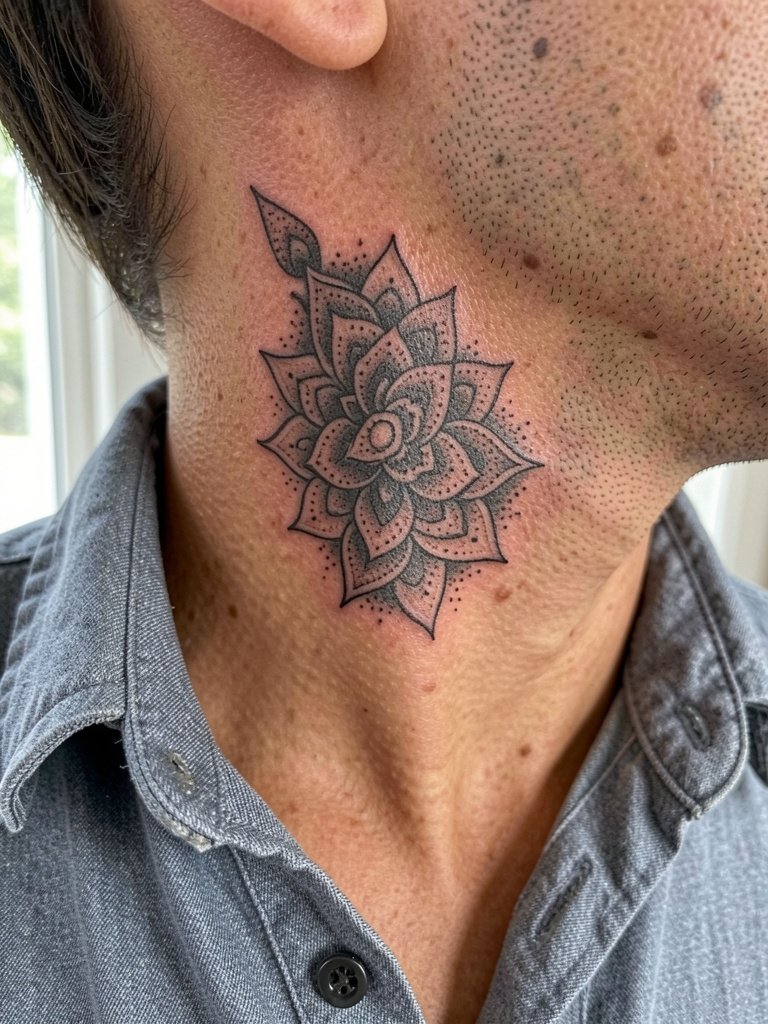
A mandala wedge offers detailed patterning that reads bold because of centralized contrast. This suits men who like ornamental work without a full neck wrap. Ask for a scaled stencil and test the wedge while you move your head so the petals do not collapse into creases. Sessions require steady handwork and patience. Expect a follow-up at one year for any tiny dot-work touch-ups. A mistake is trying to compress an entire mandala into too small a wedge. Styling note: a low collar or open shirt shows off the mandala pattern nicely with a linen button-down. Professional consideration: confirm the artist has strong healed dot-work examples on neck placements.
19. Arrowhead Pointing Down the Midline
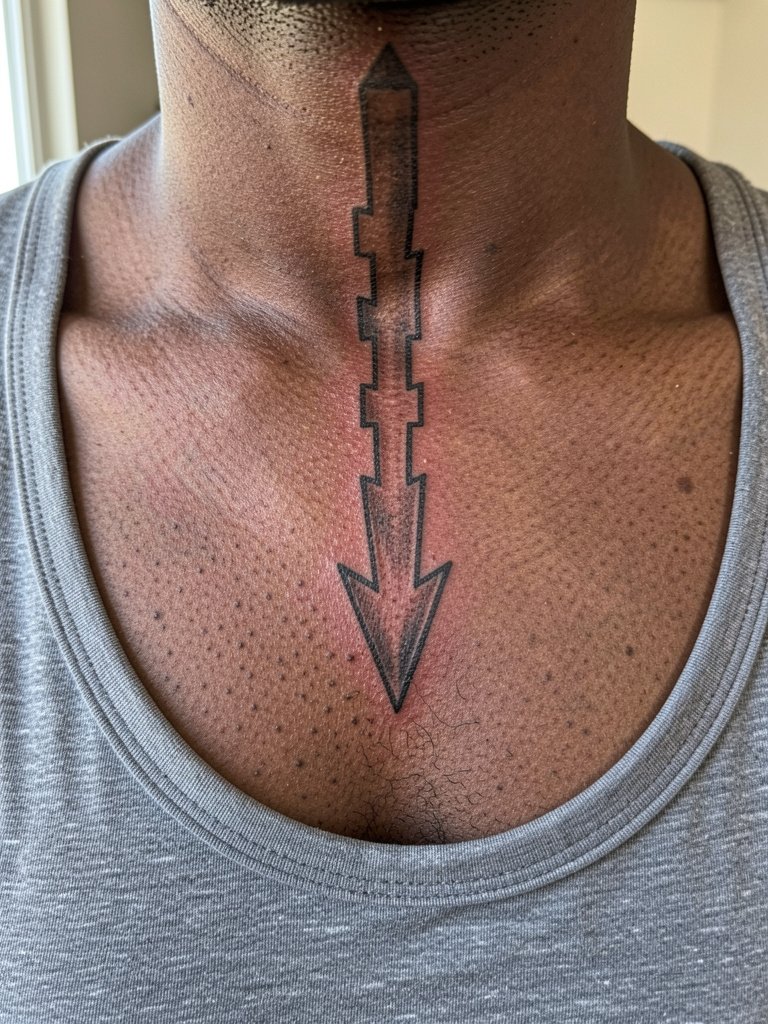
A downward arrowhead gives a strong vertical line for the front of the neck and works with open shirts. Ask how far down the shaft should go so the tip does not sit over the Adam's apple in a way that moves while you swallow. The session is focused and often under ninety minutes for a single solid black piece. Expect touch-ups if any shading softens. The usual error is a shaft that is too thin relative to the head. Professional consideration: choose an artist who understands central neck anatomy.
20. Anchored Compass Badge on the Side Neck
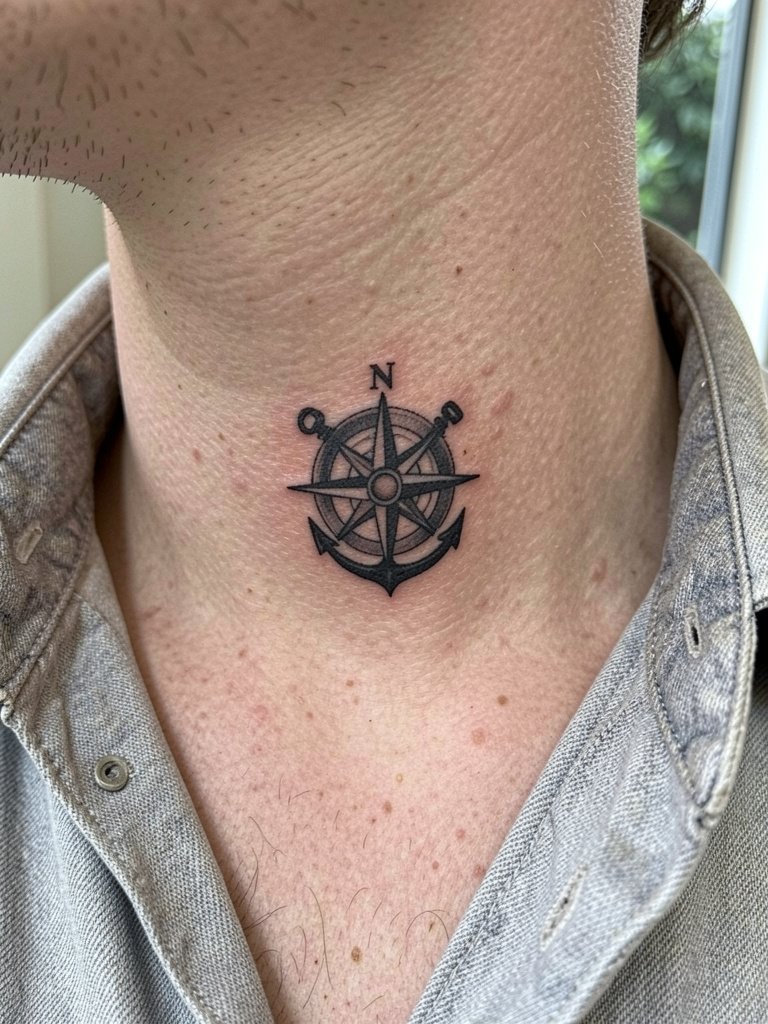
A compact compass badge reads bold because the outer ring keeps the symbol distinct against shifting skin. This is an excellent pick for men who wear open-neck shirts or blazers. Ask for a mockup against your collar to ensure it does not interfere with shirt seams. The session is usually moderate in time and the touch-up timeline is within the first year. Mistakes include crowding small internal marks that later become a blur. Styling note: pairs well with light blazers or open button-downs and a lightweight blazer for evenings out. Professional consideration: verify the artist has healed badge work on neck placements.
21. Block Letter Monogram Along the Lower Throat
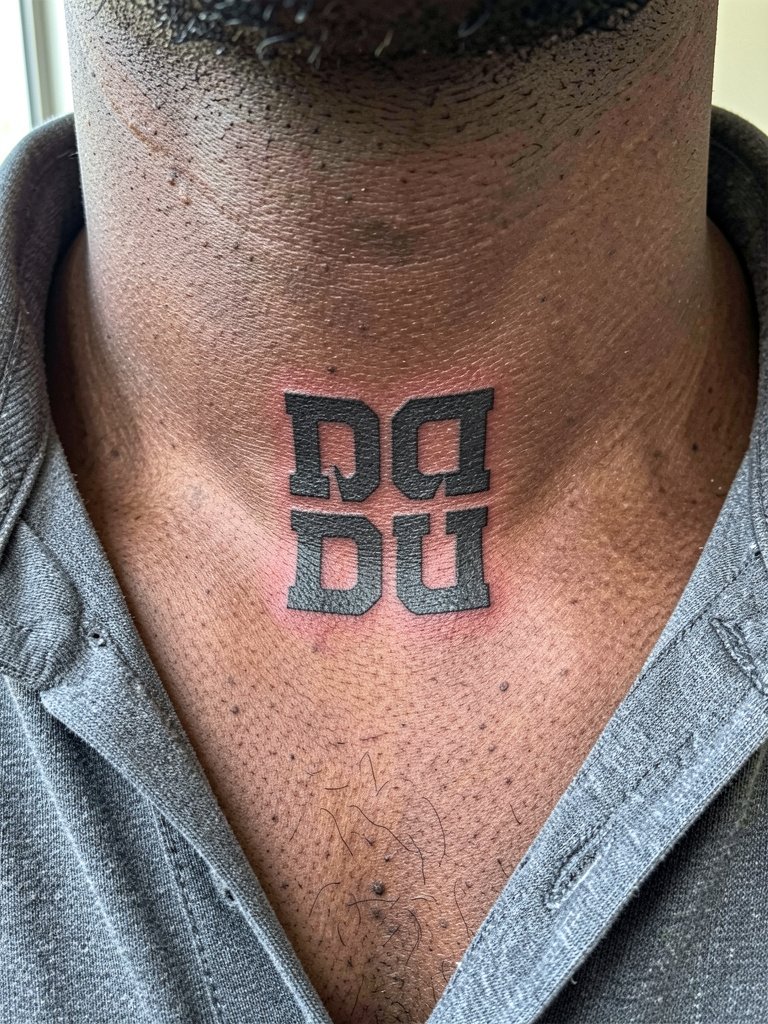
A block monogram reads bold and architectural because the heavy strokes keep letterforms legible. This is good for men who want initials that stay distinct. During the consult ask for scaled proofs and how negative-space counters will age. Sessions are quick for a two-letter mark but the throat is sensitive. Expect a touch-up if inner counters start to fill. The typical error is too much ornamentation around the letters. Professional consideration: choose someone who shows healed letterforms on neck skin.
22. Thick Arrow Wrap to the Nape
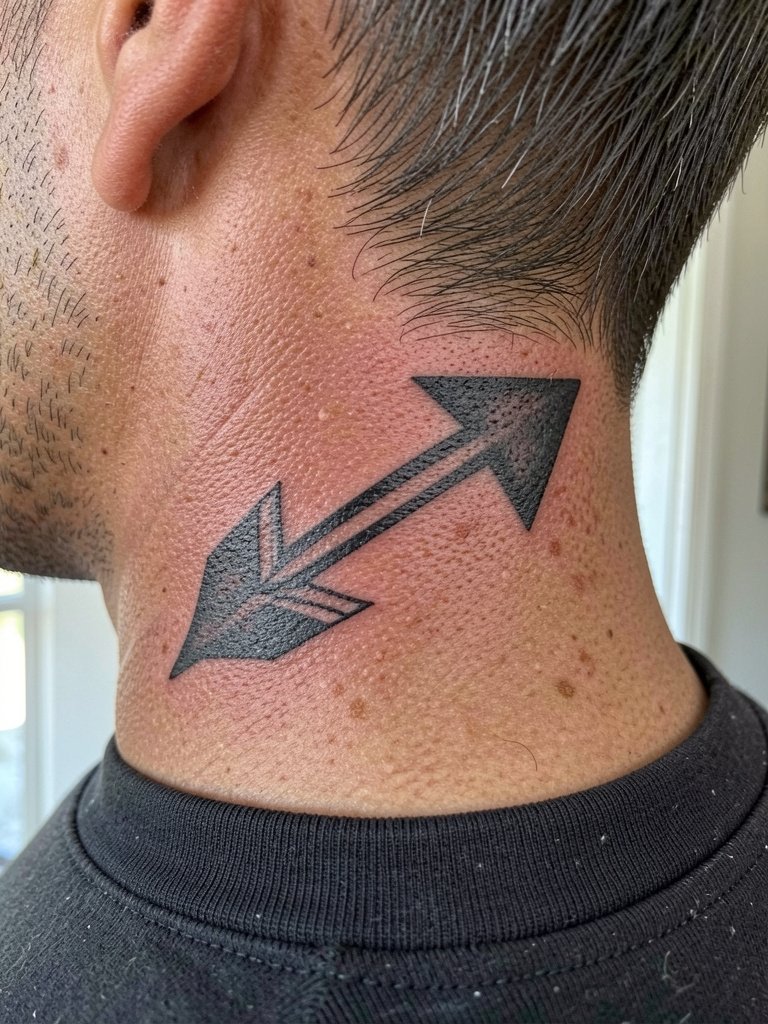
A wrapping arrow creates movement and reads bold because the mass crosses the curve of the neck. This style is great if you want a piece that still reads under a jacket. Ask how far the wrap should reach so it sits comfortably under collars and avoids the hairline. The session will likely be longer than a simple nape dot because the artist needs consistent saturation around curves. Expect a follow-up for any softened edges. Mistakes usually come from an imbalance in wrap length. Professional consideration: pick an artist skilled at working across curved neck planes.
23. Bold Single-Line Wave Along the Side Neck
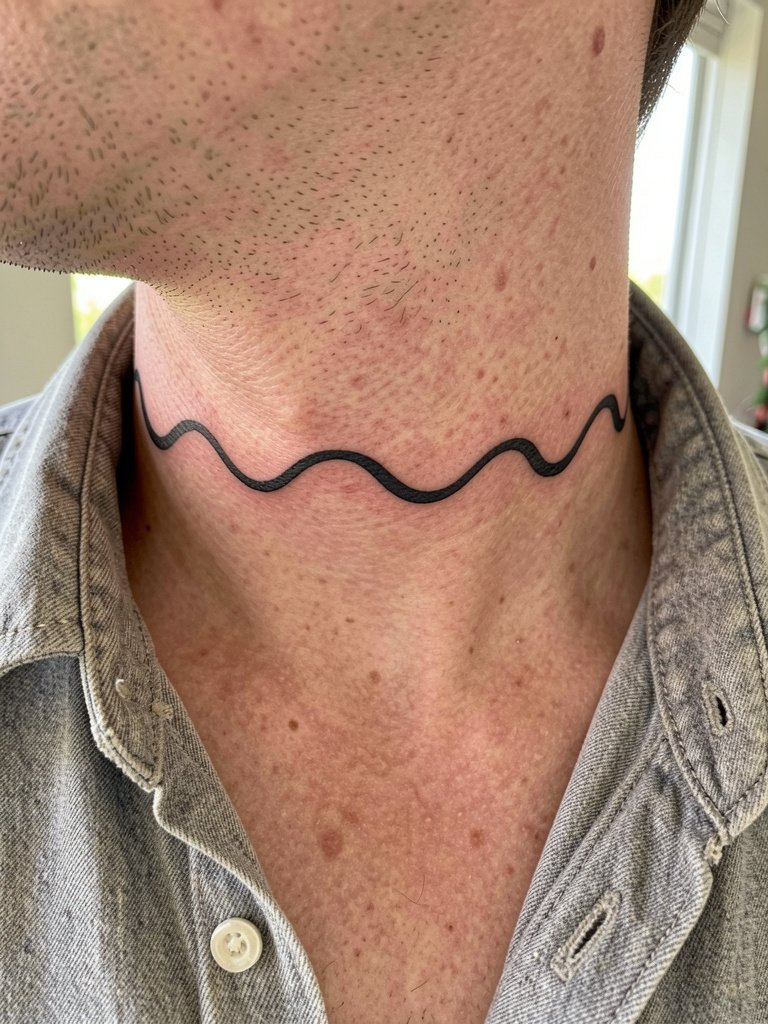
A continuous wave line acts like a graphic cord that complements jawline movement and reads bold when the line weight is consistent. Choose this if you want a fluid, single-stroke aesthetic. During the consult have the artist draw the full stroke on skin and watch it as you speak and swallow to ensure it sits outside natural creases. Sessions are brief and concentrated. Common mistake is using too fine a gauge that loses its rhythm. Professional consideration: confirm the artist can produce long, consistent single-line work on thin neck skin.
Frequently Asked Questions
Q: How much does a neck tattoo usually cost and how long will it take to heal?
A: Pricing varies by studio and complexity but expect a range that reflects session time and saturation. Healing for a bold neck piece usually follows a standard path, with the outer surface healing in one to two weeks and deeper settling over three to six months. Plan for a touch-up check between six and twelve months if edges soften.
Q: Are fine-line neck scripts a bad idea for longevity?
A: Artists are divided on this. One camp says ultra-fine scripts on the neck blur quickly because the skin there moves and has thin subcutaneous layers. The other camp argues that with slightly increased line weight and deliberate spacing those same scripts settle remarkably well and show strong healed photos. If you want a fine script be specific about initial line weight and plan a realistic touch-up window.
Q: How can I find healed neck tattoo portfolios without naming artists directly?
A: Search platform tags and keywords on social platforms and portfolio sites using phrases like "neck blackwork healed," "nape healed tattoo," and "throat script healed" with your city filter when available. Tattoo community forums and dedicated healed galleries are good places to compare how pieces age on different skin tones. Looking for multiple healed shots at the same time of day gives you the most reliable view.
Q: What should I wear to a neck tattoo session and what should I bring?
A: Wear a button-down or open-collar top so the artist has clear access without you having to remove layers. Bring a clean T-shirt to change into for the ride home if you sweat during the session. If you want styling guidance for show-off reveals consider an unbuttoned linen shirt or lightweight blazer for evenings, and a linen button-down pairs well with many collar-area pieces.
Q: Are there specialized risks with neck tattoos I should know about?
A: Yes, the neck is a sensitive zone with thinner skin and frequent motion, so blowout risk and line softening are real concerns. Good artists plan line weight, spacing, and placement to account for movement and advise on realistic touch-up timing. If you have professional or social considerations, discuss visibility and placement options ahead of booking.
