I spent months saving screenshots of linework tattoos before I realized the real issue: some styles look brilliant fresh but lose their character as they settle. These 22 clean linework ideas are the ones I kept coming back to — designs that read modern now and age with intention. I pulled trends from recent artist roundups and my own healed-tattoo observations to pick pieces that stay crisp.
Quick context: I focus on fine line, single-line, geometric, and etching-style linework here. These choices work well for forearms, wrists, ribs, shoulders, and calves. Trends I saw in 2025 pointed strongly toward fine line minimalism and single continuous line portraits, plus micro-realism in tiny scales.
Fine Line Floral Armpiece on Inner Forearm
Style/Technique: Fine Line / Botanical
Pain Level: Low-Medium (3-4/10)
Session Time: 1–3 sessions, short passes
Best For: First tattoos, visible everyday piece
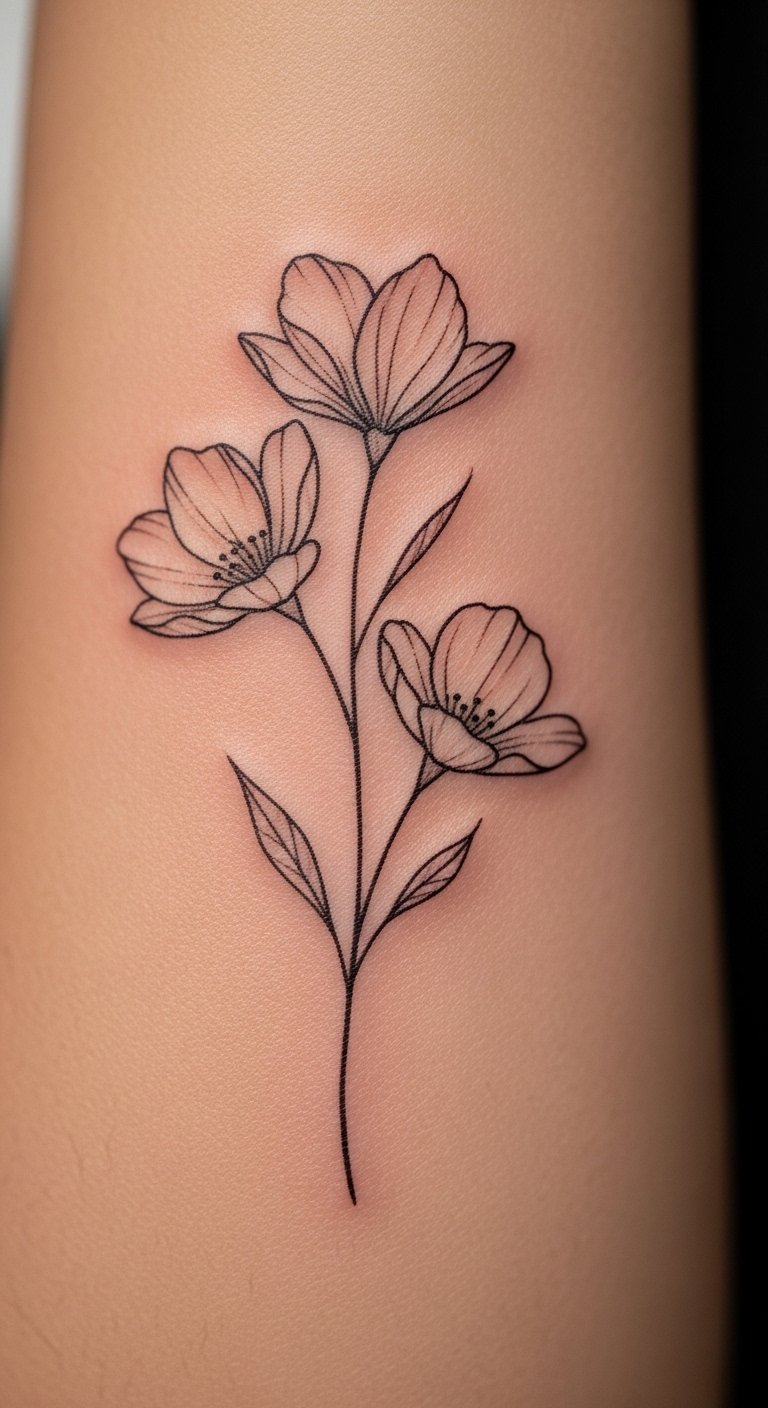
I love this for how subtle and timeless it reads. Fine line florals use single-needle linework to capture petal edges and vein details without heavy fill. Inner forearm placement lets the design breathe with your arm’s natural curve; it’s low pain and heals predictably. Expect surface healing in a couple of weeks and full settling by 3 months — lines can soften slightly but still read crisp if ink depth was right. Common mistakes: asking for lines that are too thin for high-motion zones (wrists, fingers) — match line weight to the area. Ask the artist for healed photos and mention “fine line floral” and “single needle” during consultation.
Geometric Mandala on Outer Forearm
Style/Technique: Geometric / Symmetry-focused
Pain Level: Low-Medium (3-4/10)
Session Time: 1–3 hours per session
Best For: Balance-focused statement, forearm visibility
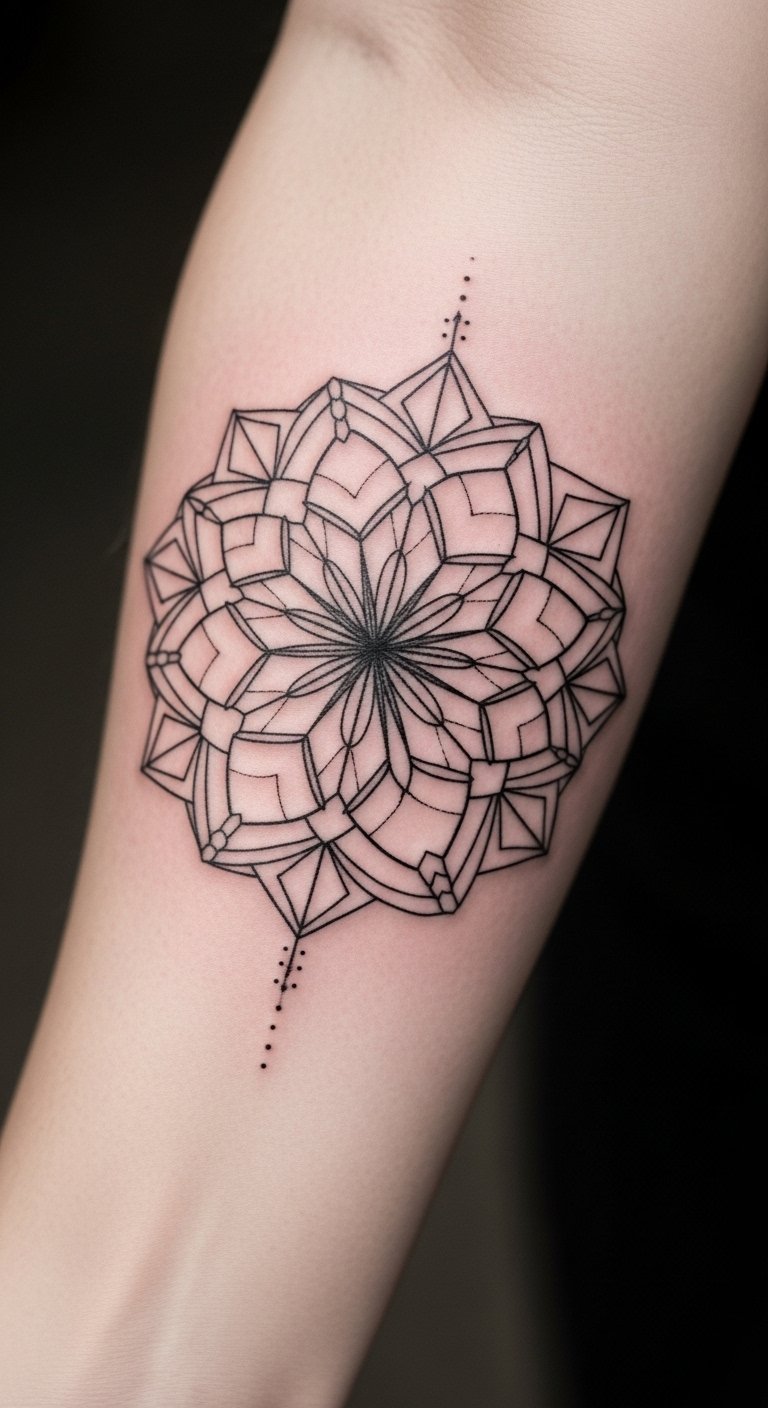
Geometric mandalas thrive on precise linework and consistent spacing. Outer forearm suits this because it’s relatively flat, so lines land straight and age evenly. This is a place where lineweight matters: mix thin decorative lines with slightly bolder anchors to help the pattern hold over time. Pain is moderate; the outer forearm is forgiving. Healing requires careful sun protection—negative space and black line contrast are what keep the design modern-looking. Avoid over-detailing tiny segments that will blur; instead use repeating motifs and ask for “geometric line tattoo” and varying line weights.
Single Continuous Line Face Portrait on Collarbone
Style/Technique: Continuous Line / Illustrative
Pain Level: Medium (4-5/10)
Session Time: 1–2 hours
Best For: Artistic statement, subtle visibility
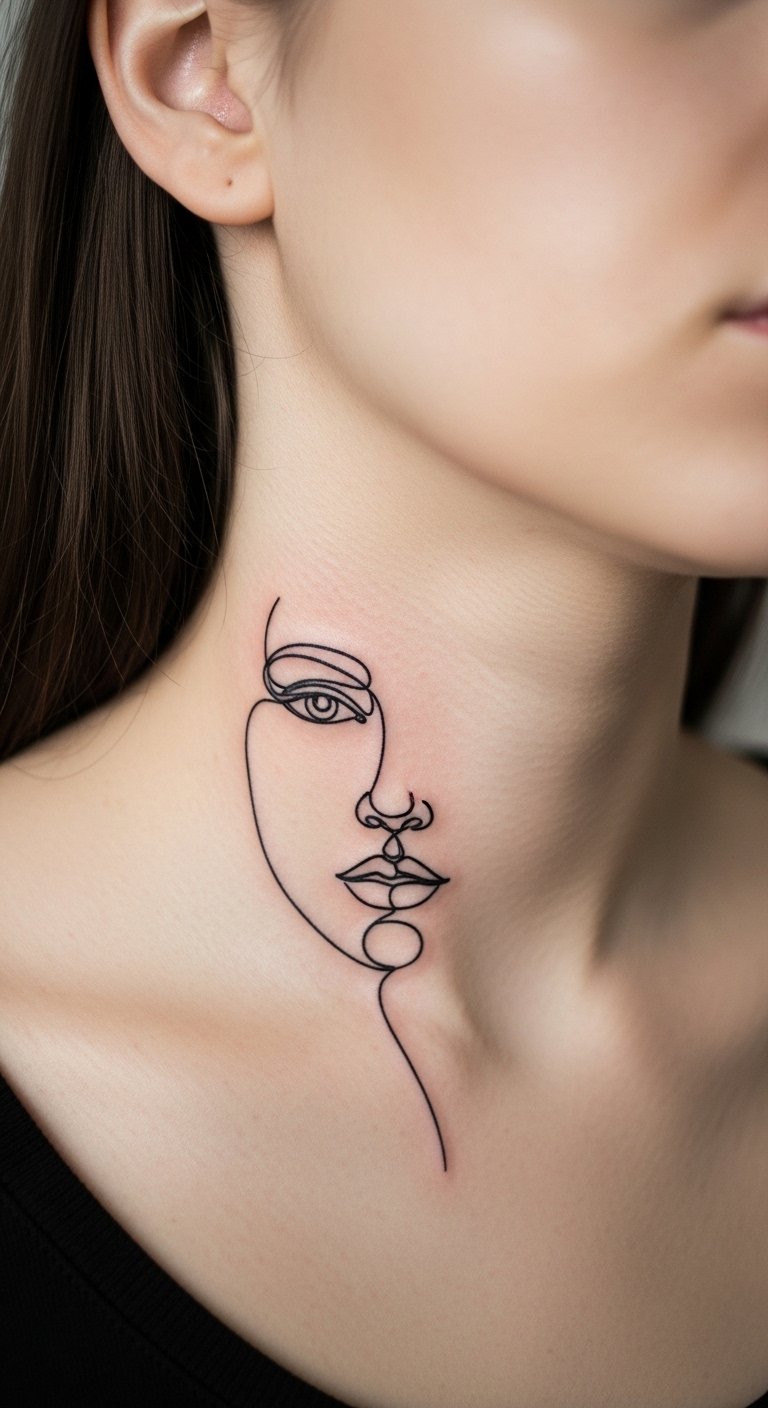
Single line portraits say a lot with very little. Placing one along the collarbone makes it feel like jewelry or a sketch tattoo. Expect some tenderness during the session because collarbone is bony, but sessions are short. How it ages depends on line continuity: a steady, slightly bolder single-stroke will keep shape longer than an ultra-fine whisper line. A common error is asking for too-small facial details — keep the scale moderate. Mention “single line tattoo” and “continuous line portrait” when you brief your artist so they plan clean paths and appropriate line weight.
Delicate Butterfly Wrist Tattoo on Inner Wrist
Style/Technique: Fine Line / Animal
Pain Level: Low (2-3/10)
Session Time: 30–90 minutes
Best For: Symbolic, small visible piece
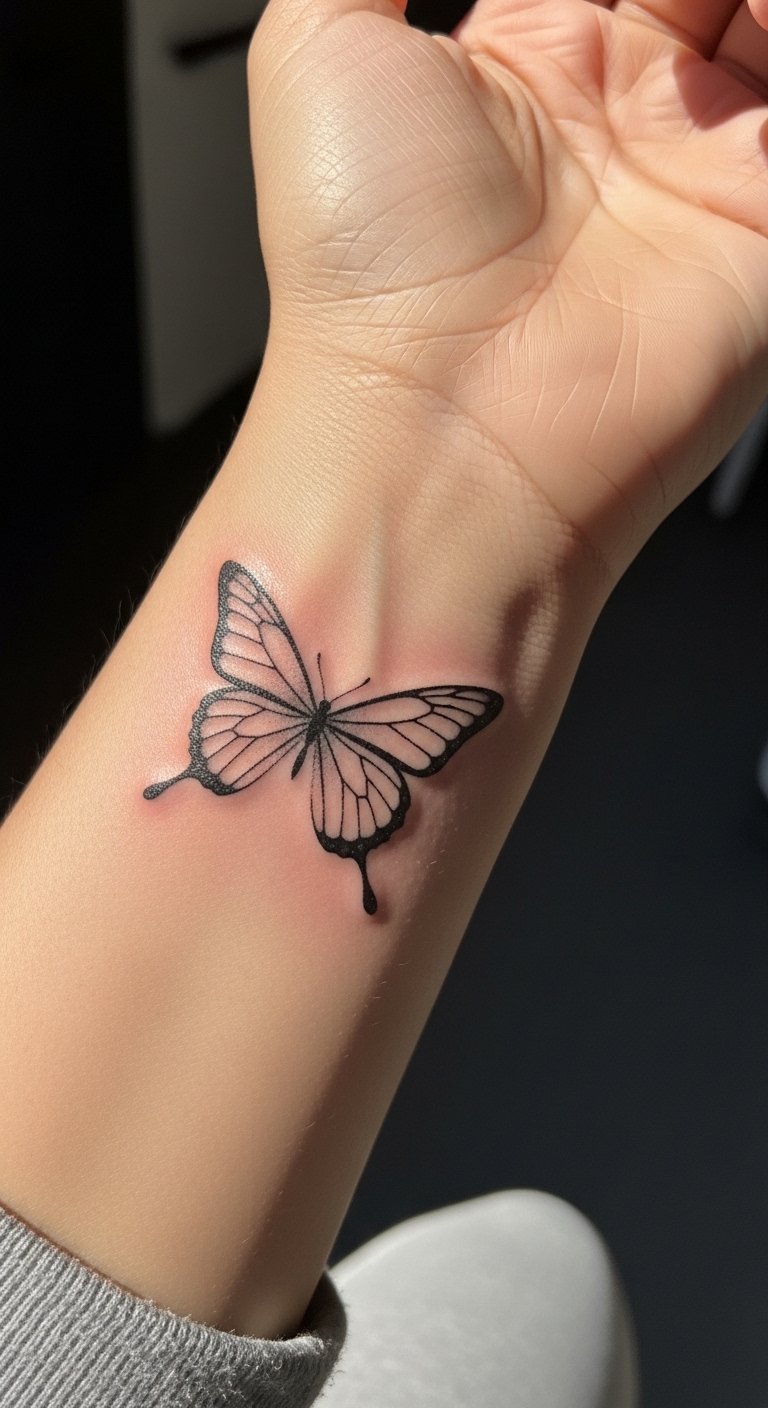
Butterflies are a classic for movement and transformation. The inner wrist is a small canvas — thin single-needle lines deliver the wings’ veins and outline without crowding. Watches, bracelets, and sun make this spot visible, so sunscreen is critical during healing. Expect quick surface healing but be mindful of friction from clothing; that’s a common reason tiny lines blur early. If you want longevity, ask for slightly reinforced outline points, and say “fine line tattoo” and “animal linework” so your artist balances delicacy with durability.
Etching-Style Compass on Calf
Style/Technique: Etching / Cross-hatch linework
Pain Level: Low-Medium (3-4/10)
Session Time: 2–4 hours
Best For: Masculine, directional pieces; visible with shorts

Etching-style uses cross-hatching instead of smooth shading to create depth while keeping the line aesthetic. The calf’s thicker, steady skin is ideal for this technique. It ages well because heavier anchor lines resist blur and the hatched detail reads as texture even as fine points soften. Pain is tolerable; calf sessions are comfortable compared to ribs. Don’t overdo micro-hatching in very small areas — it can become a muddy patch later. Use terms like “etching linework” and “compass tattoo” when discussing depth and negative-space balance.
Single Line Dog Portrait on Ankle
Style/Technique: Single Line / Pet Tribute
Pain Level: Medium (4-6/10)
Session Time: 1–2 hours
Best For: Personal tribute, small-medium display
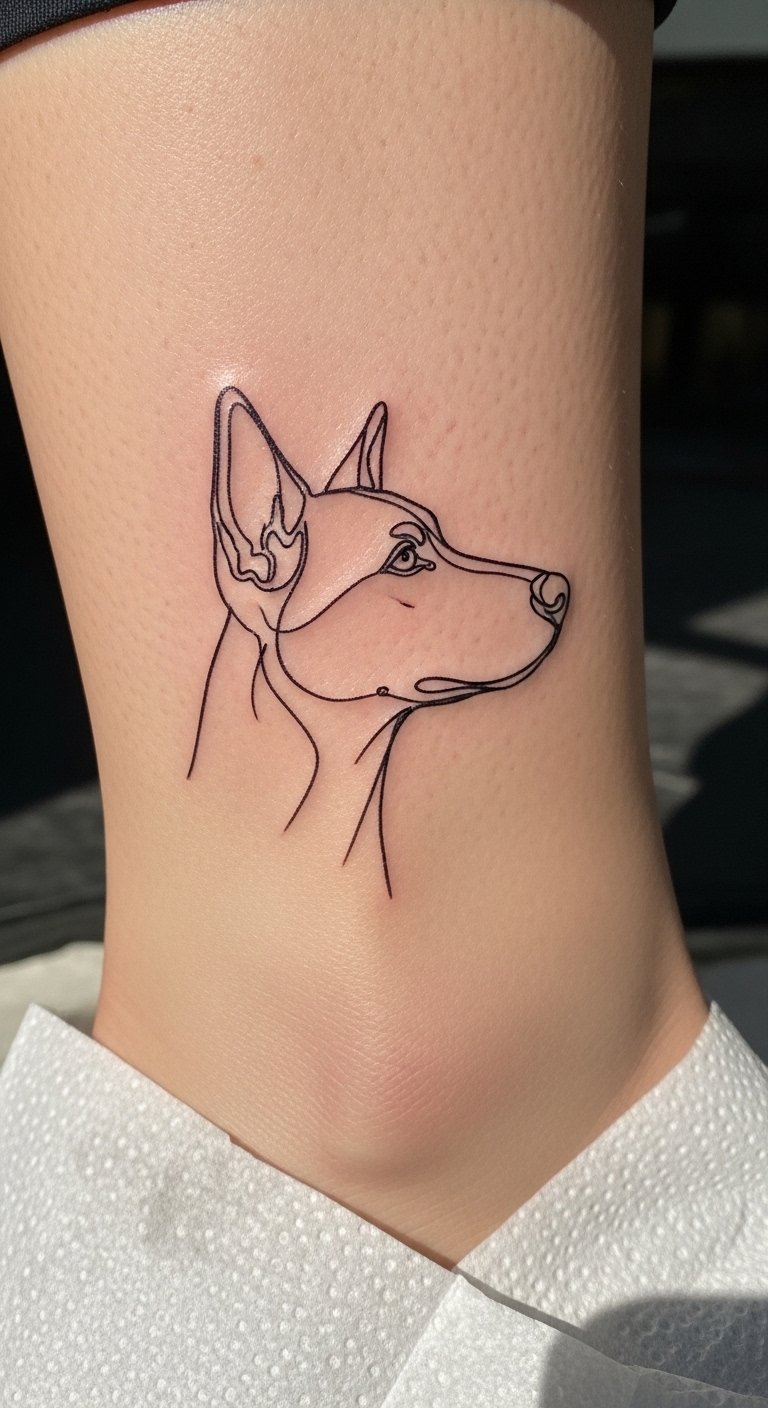
Single-line pet portraits capture your pet’s essence without literal realism. Ankles are intimate but higher movement; choose slightly thicker single strokes so the portrait keeps shape as the skin shifts. Expect more pain on the ankle than on the forearm; short sessions help. Aftercare should prevent rubbing from socks and shoes during the first week. Common mistake: shrinking the portrait too small — scale matters for recognizability. Ask for “single line animal” and “pet portrait” references so the artist can balance character and line weight.
Architectural Blueprint Chest Piece on Sternum
Style/Technique: Blueprint / Structural Linework
Pain Level: High (6-8/10)
Session Time: Multiple sessions
Best For: Large statement, body-structure emphasis
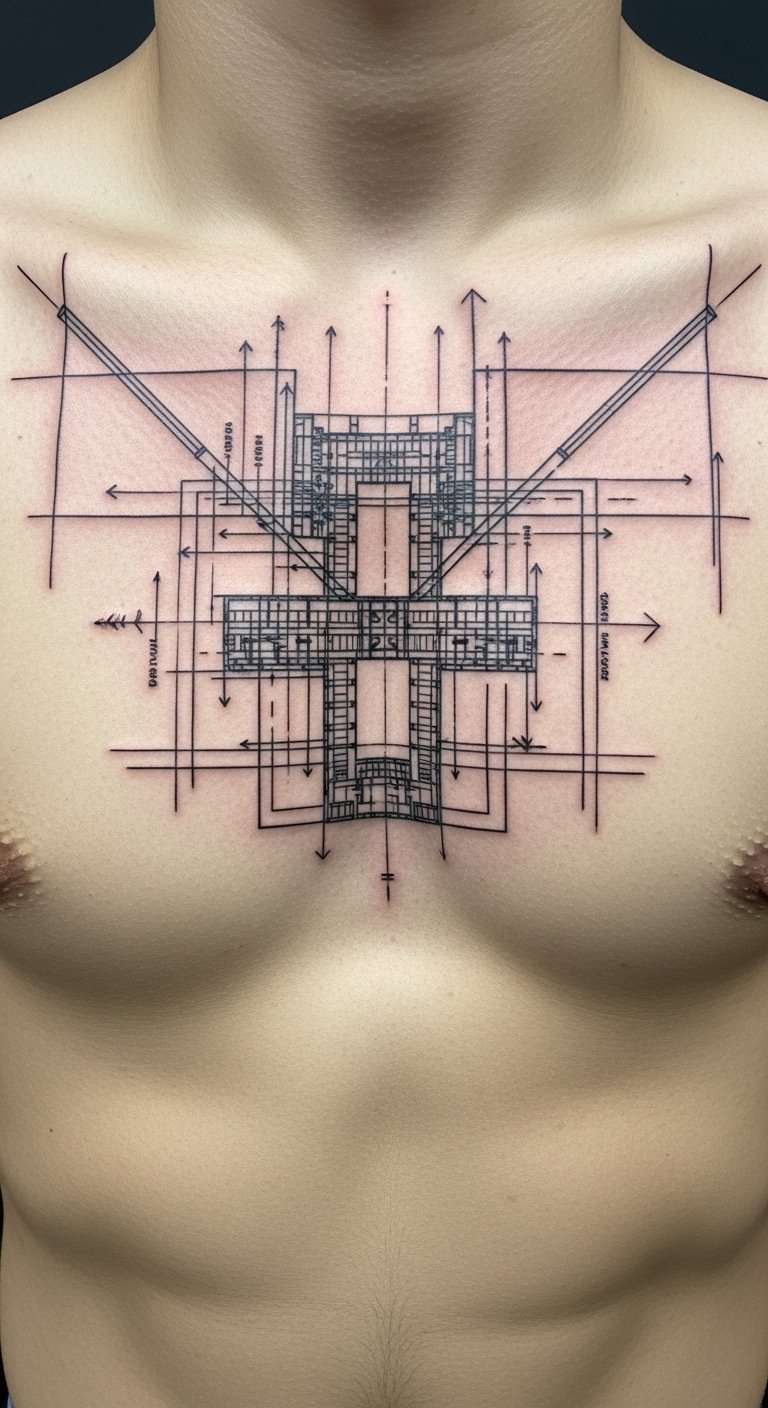
Blueprint linework translates cityscapes or building plans into the body, favoring straight, confident lines. The sternum and chest present curvature that suits architectural composition but can be painful and needs multiple sessions. Use heavier primary lines for longevity and reserve tiny hatch details where movement is minimal. The look is modern and masculine but also graphic and clean. Avoid hyper-fine grids over high-motion skin. Mention “blueprint linework” and “architectural tattoo” so the artist plans line weights and negative space strategically.
Minimalist Arrow Finger Tattoo on Side of Finger
Style/Technique: Fine Line / Minimalist
Pain Level: High (6-8/10)
Session Time: 15–45 minutes
Best For: Micro symbol, discreet meaning
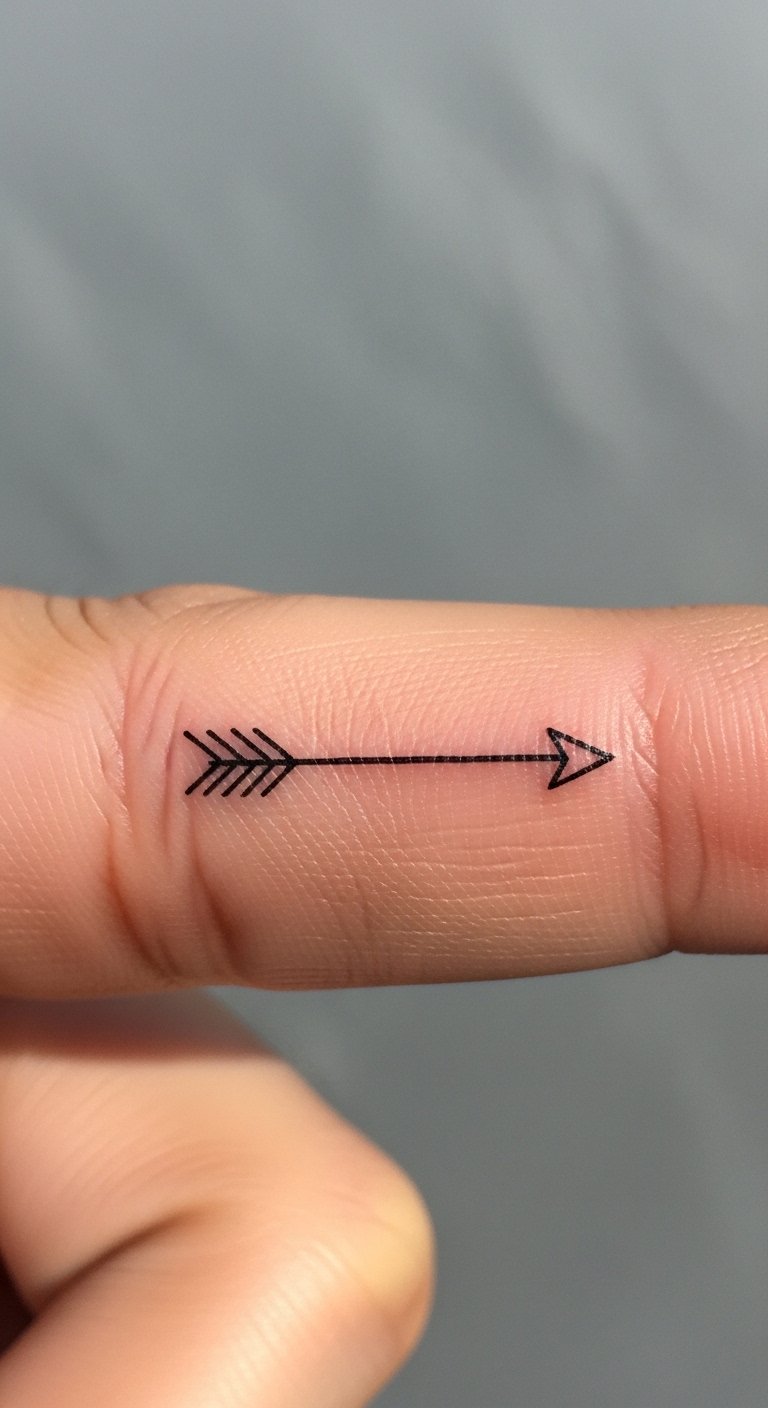
Tiny finger tattoos are discreet but tricky: the skin regenerates often and lines can blur faster. I recommend a minimalist arrow placed on the side pad, with a slightly bolder line than you might expect. Pain is sharper on fingers, and healing requires avoiding constant handwashing friction. Common mistake: asking for ultra-superfine detail — thicker simple strokes will last. Use “minimalist” and “fine line” in your description, but ask your artist about longevity on fingers.
Single Line Floral Rose on Ankle
Style/Technique: Single Line / Floral
Pain Level: Medium (4-5/10)
Session Time: 1–2 hours
Best For: Timeless symbol, subtle placement

A single-line rose is classic and reads like an elegant sketch. The ankle lets the stem wrap naturally with movement. Because ankles flex, a continuous but slightly reinforced outline will keep the silhouette recognizable as it ages. Expect moderate pain and careful aftercare to avoid sock friction. The main mistake is tiny petal loops that merge as the skin settles. Tell your artist “single line floral” and emphasize healed-photo examples.
Micro-Realism Portrait on Thigh
Style/Technique: Micro-Realism / Fine Line Texture
Pain Level: Low-Medium (3-4/10)
Session Time: 2 sessions typical
Best For: Photo-like detail in a compact area
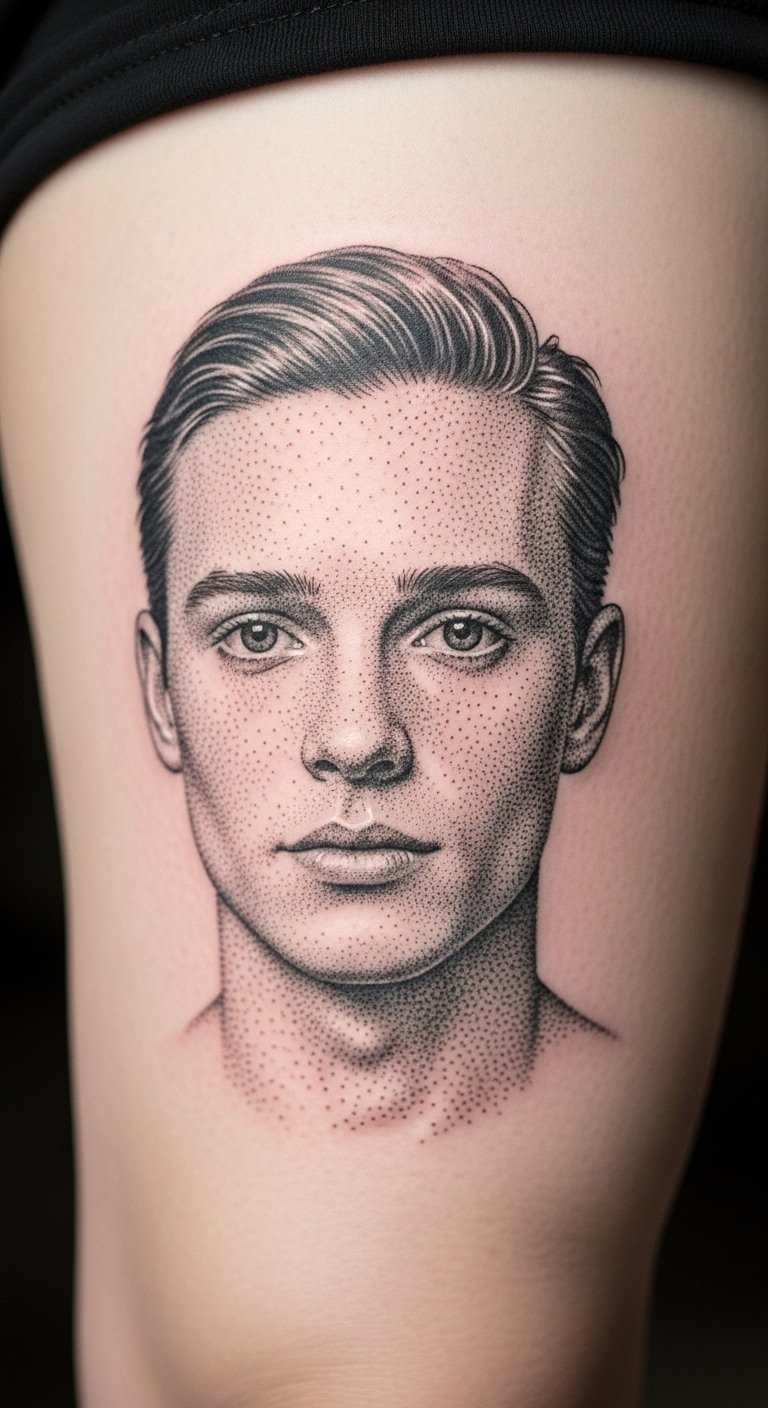
Micro-realism puts photo-like detail into a small scale using delicate line texture and dot work. The thigh’s generous canvas and thicker skin are ideal for this; it’s less painful and heals well. Because it uses fine-line texture rather than heavy shading, the piece holds character as lines soften. The risk is asking for too much detail in too small an area — facial features need space. Use “micro-realism” and “fine line portrait” so the artist plans adequate scale and layering.
Line Art Sun and Moon on Upper Back
Style/Technique: Line Art / Celestial
Pain Level: Low-Medium (3-4/10)
Session Time: 1–2 hours
Best For: Symbolic balance, center-back visibility
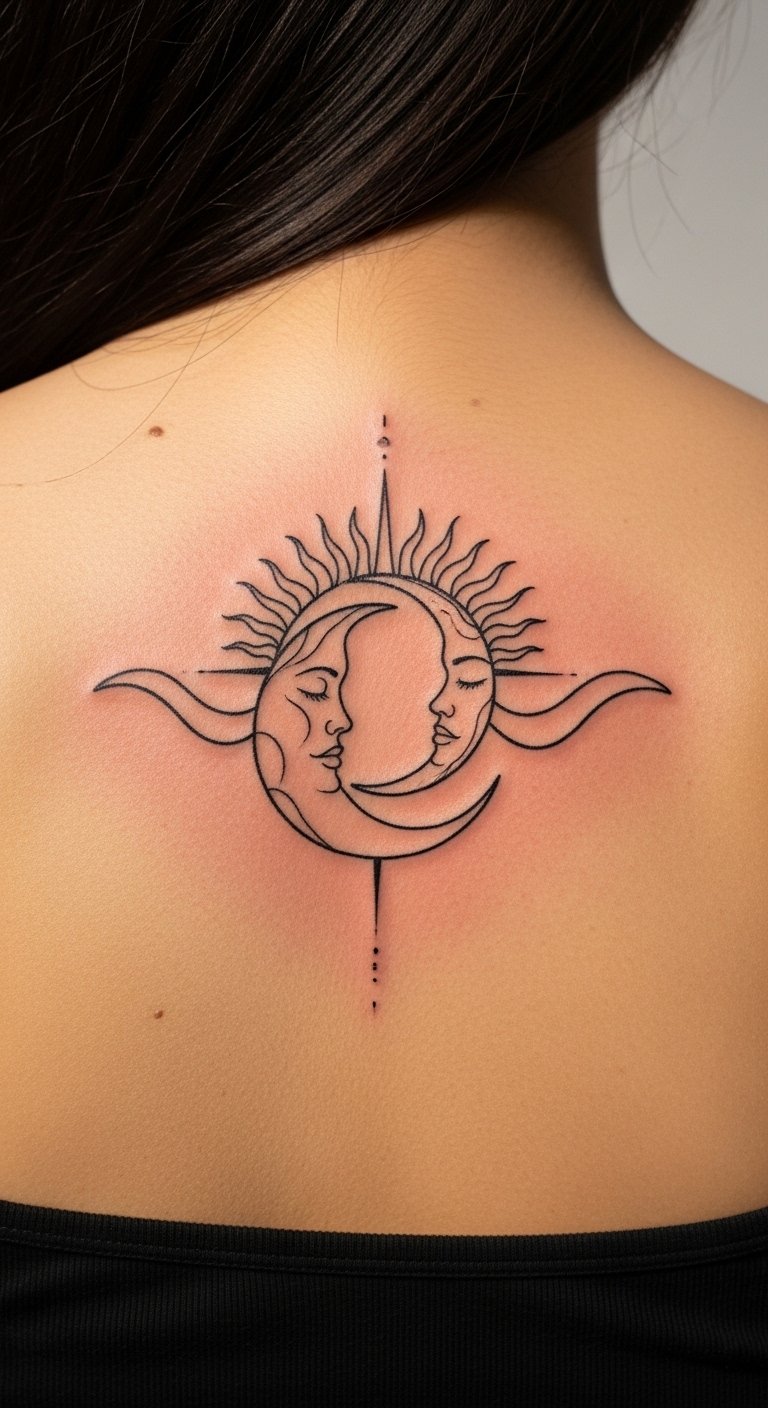
Sun and moon line art reads like a minimal emblem of balance. The upper back is a forgiving canvas for slightly wider compositions and varying line thickness. This placement sees less daily abrasion, so thin lines can fare well here. Healing is straightforward, but prolonged sun exposure on the back while out in summer is a fading risk — sunscreen helps maintain contrast. Mention “line art” and “minimalist celestial” to guide the artist’s approach to negative space.
Continuous Line Phoenix Silhouette on Shoulder
Style/Technique: Continuous Line / Mythical
Pain Level: Medium (4-6/10)
Session Time: 1–3 sessions
Best For: Rebirth symbolism, shoulder visibility
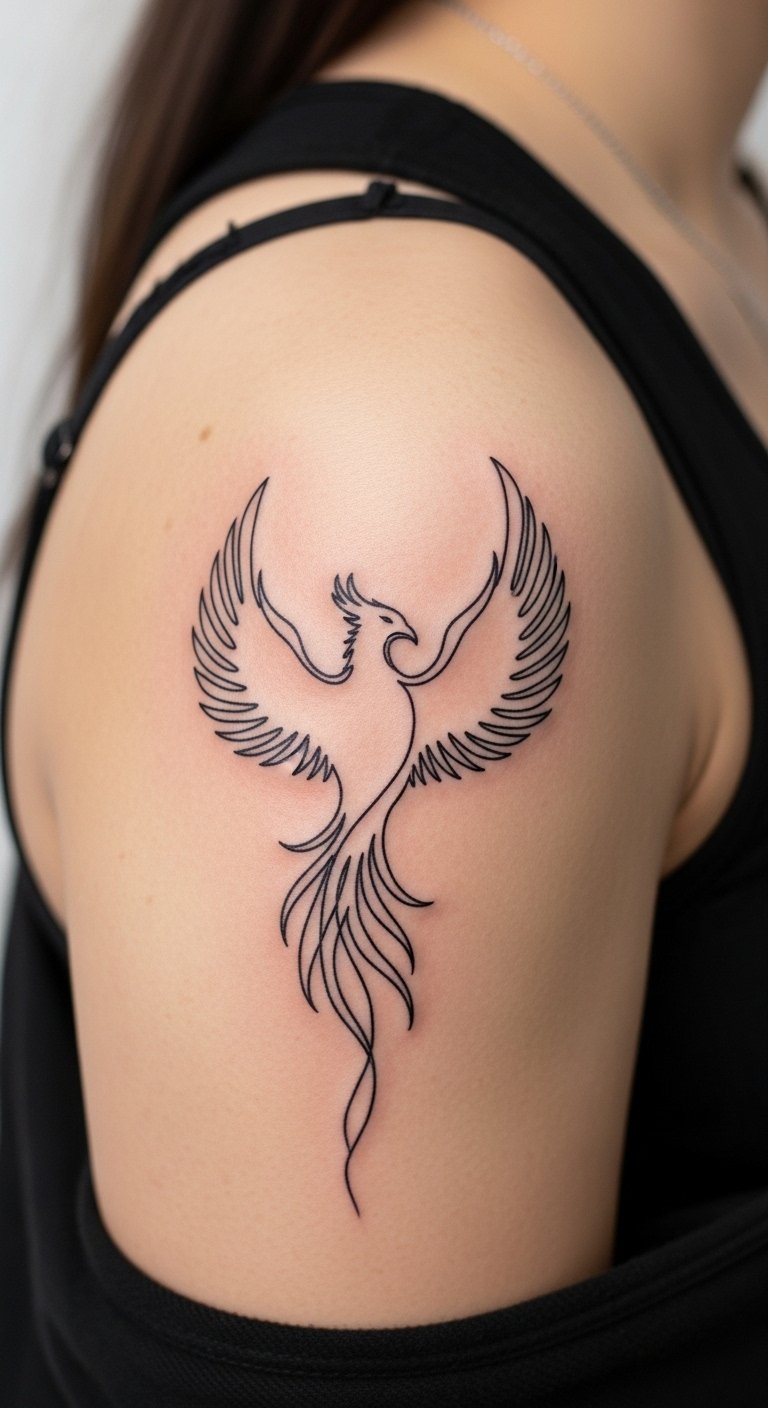
A continuous-line phoenix is dramatic while staying modern. Shoulders provide a rounded surface that showcases sweeping lines. Because it’s a mythic silhouette rather than heavy shading, it ages well — the main lines anchor the shape even if tiny details soften. Shoulder sessions are tolerable; larger scale may need multiple visits. Avoid cramming small feather details into tiny areas. Use “continuous line” and “mythical silhouette” when briefing your artist.
Fine Line Geometric Constellation on Ribcage
Style/Technique: Fine Line / Celestial Geometry
Pain Level: High (7-9/10)
Session Time: 1–2 hours
Best For: Intimate placement, personal symbolism
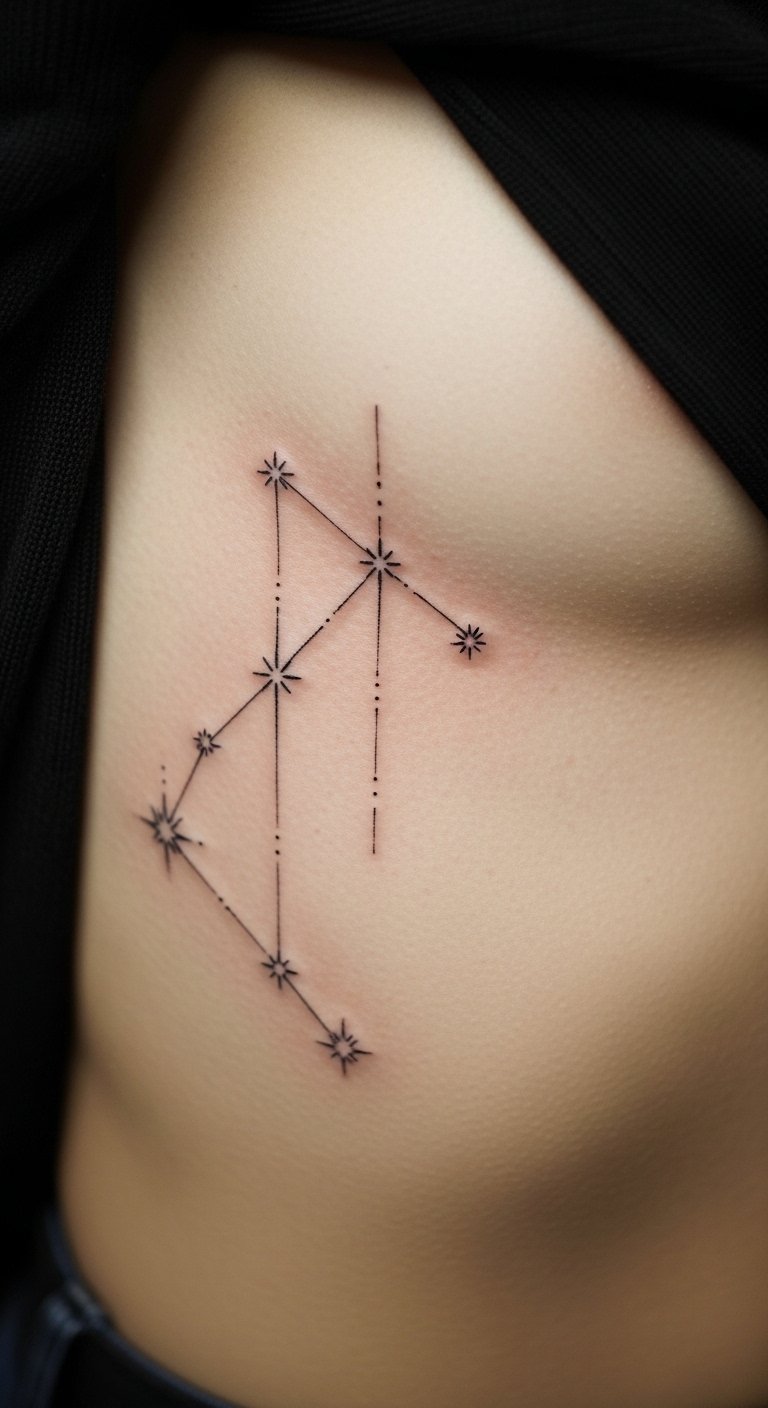
Ribcage pieces are intimate and high on the pain scale, but they can be worth it for the subtle curve and concealability. Fine-line constellations use tiny dots and connecting strokes; on ribs, choose a slightly bolder main axis so it doesn’t blur into a smudge over time. Healing is slower because of movement and stretch; expect tenderness. Common mistake: too many micro-stars in a small area — give each element room. Mention “fine line” and “geometric constellation” to ensure proper spacing.
Minimalist Mountain Range on Ankle
Style/Technique: Minimalist / Landscape Linework
Pain Level: Medium (4-5/10)
Session Time: 30–90 minutes
Best For: Nature lovers, subtle horizon lines
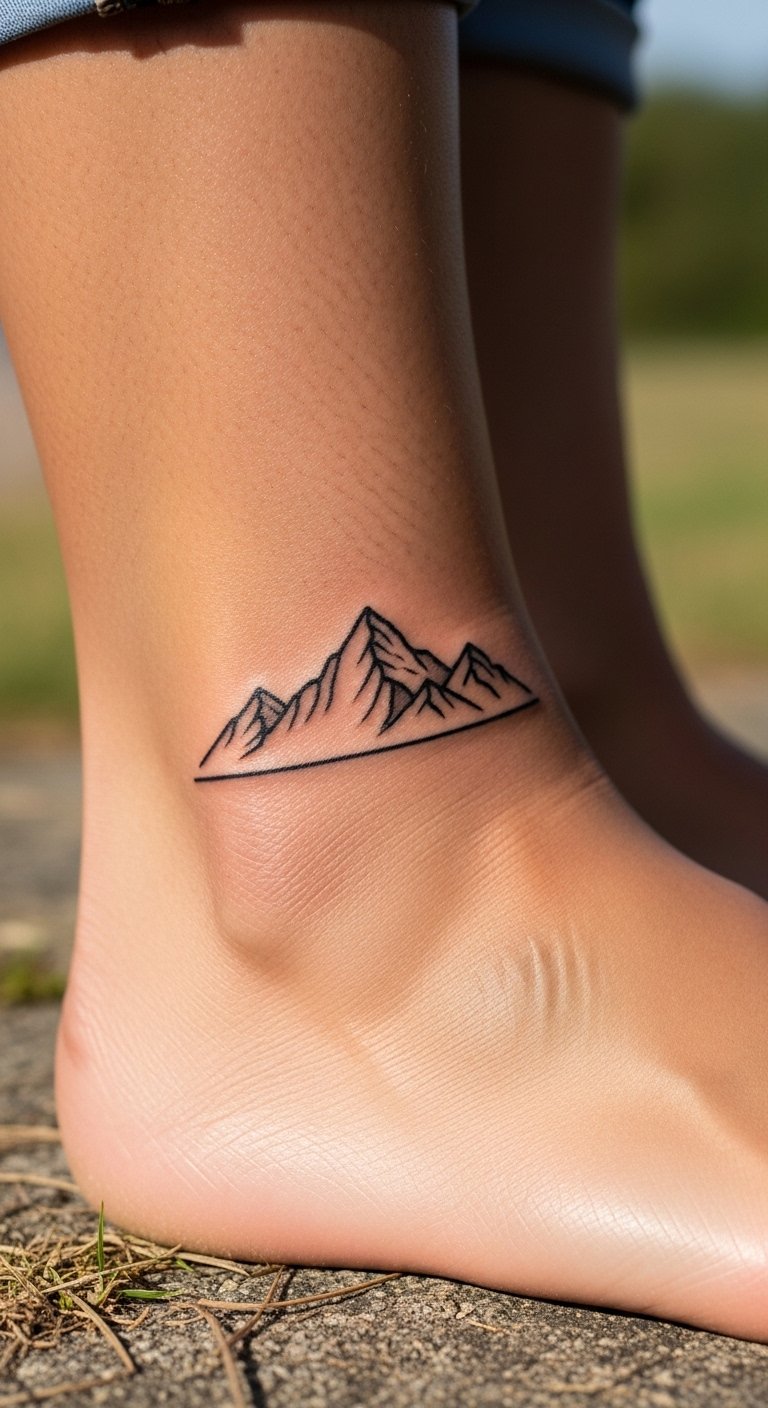
A minimalist mountain range reads like a tiny horizon at rest. Ankle placement shows movement and can wrap slightly, playing with perspective. Keep lines bold enough to remain legible as skin moves. Healing needs protection from shoes. The common mistake is excessive tiny detail on a small ankle canvas; stick to clear silhouettes. Use “minimalist” and “linework tattoo designs” in your brief so the artist knows to favor clarity.
Single-Line Owl Behind Ear
Style/Technique: Single Line / Animal Sketch
Pain Level: Medium-High (5-7/10)
Session Time: 30–60 minutes
Best For: Subtle, playful spot; hidden when needed
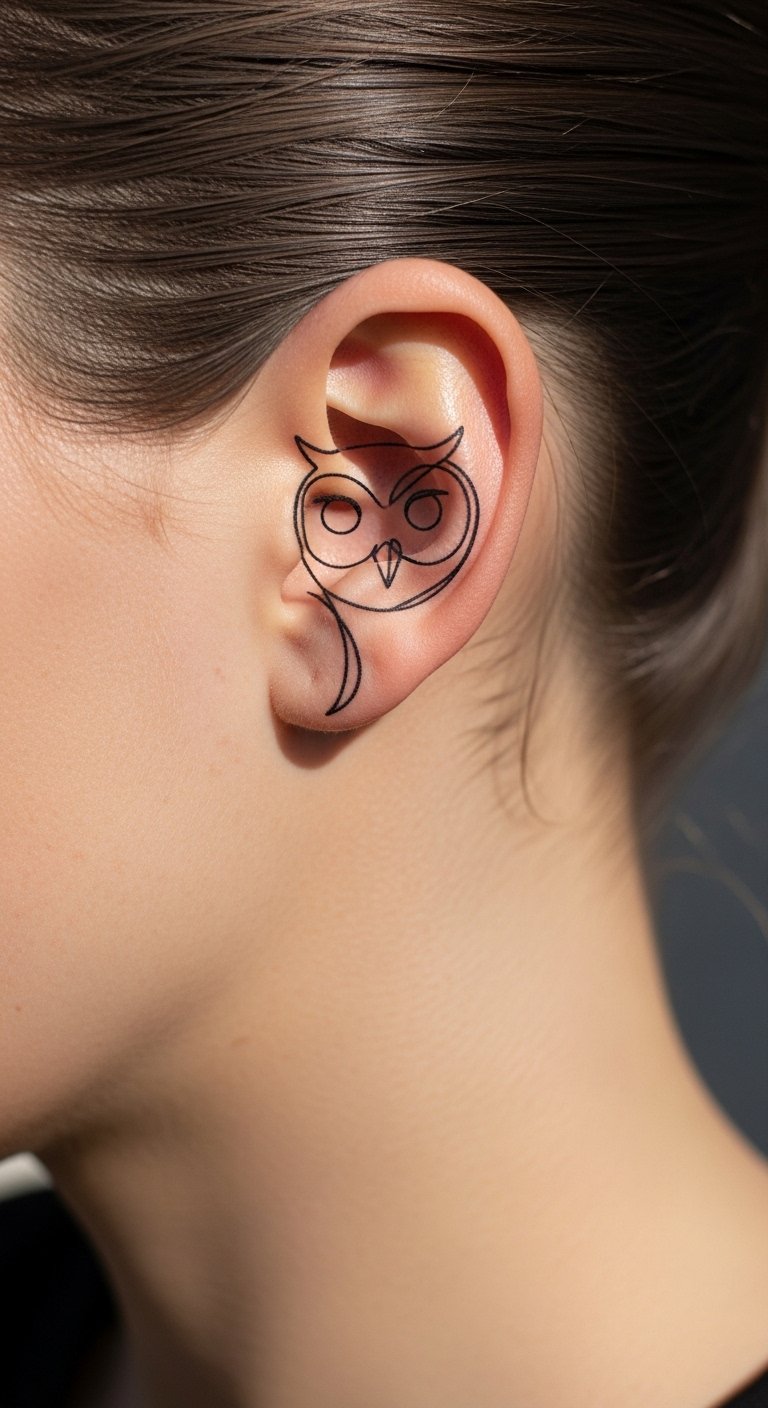
Behind-the-ear tattoos are small and intimate; single-line owls work well here because the shape reads clearly even tiny. Expect more sensitivity in this area. Lines should be slightly reinforced so they don’t disappear into ear folds over time. Avoid overly tiny details; strong simple contours travel better. Mention “single line animal” so your artist balances scale with the spot’s anatomy.
Geometric Dotwork Band on Upper Arm
Style/Technique: Geometric / Dotwork and Line
Pain Level: Low-Medium (3-4/10)
Session Time: 1–3 hours
Best For: Arm band statements, symmetry lovers
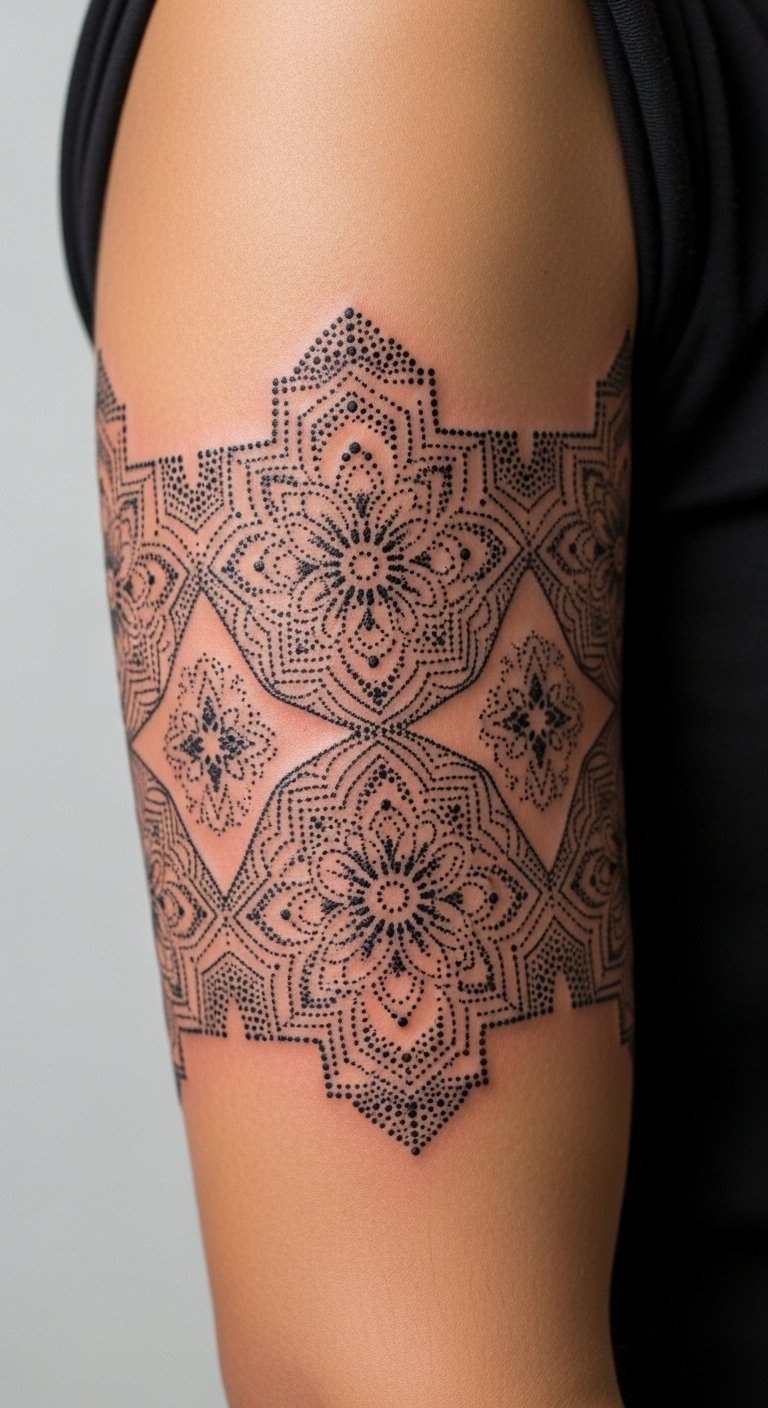
Bands on the upper arm let you combine geometric symmetry with dotwork texture. Upper arm skin is forgiving so dotwork and fine lines hold well. For durability, pair delicate dots with structured anchor lines. Pain is moderate; sessions are comfortable. A common mistake is over-detailing a narrow band — use bold anchors. Ask for “geometric line tattoo” and “dotwork band” so the design scales properly.
Chicano Single-Needle Sketch on Forearm
Style/Technique: Chicano / Single-Needle Illustration
Pain Level: Low-Medium (3-4/10)
Session Time: 1–3 sessions
Best For: Story-driven black-and-gray narrative pieces
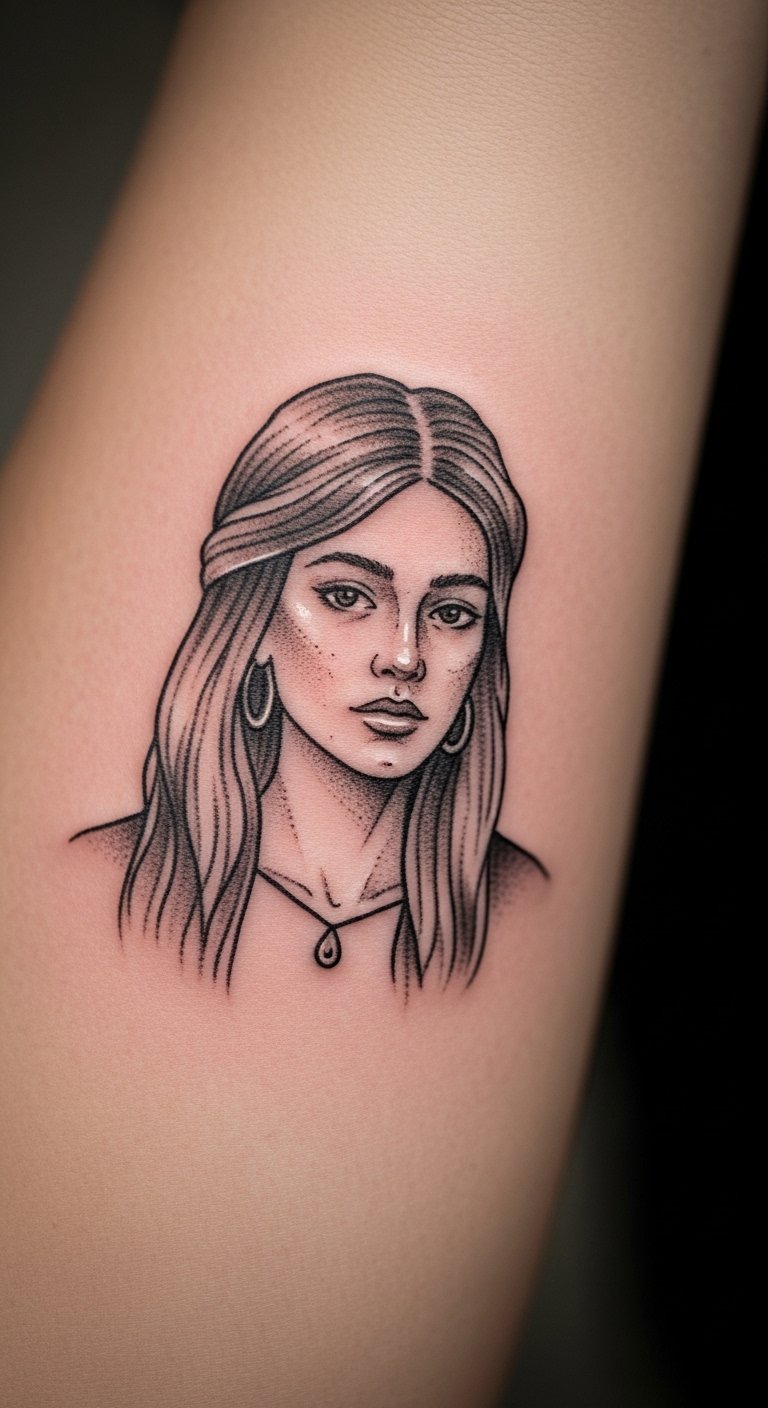
I’ve noticed a revival of Chicano-influenced single-needle illustration: expressive faces, script, and symbolic objects rendered in delicate black lines. Forearms let the narrative read like a strip of sketchbook pages. Because it’s single-needle, pick an artist experienced in fine portraiture to avoid wobbly lines. Healing is typical for forearm pieces but protect from sun. Avoid asking for tiny script that’s unreadable later. Use terms like “Chicano single-needle” and “illustrative linework.”
Negative Space Collar Tattoo
Style/Technique: Linework / Negative Space Emphasis
Pain Level: High (6-8/10)
Session Time: 1–2 hours
Best For: Graphic neck pieces, modern silhouettes
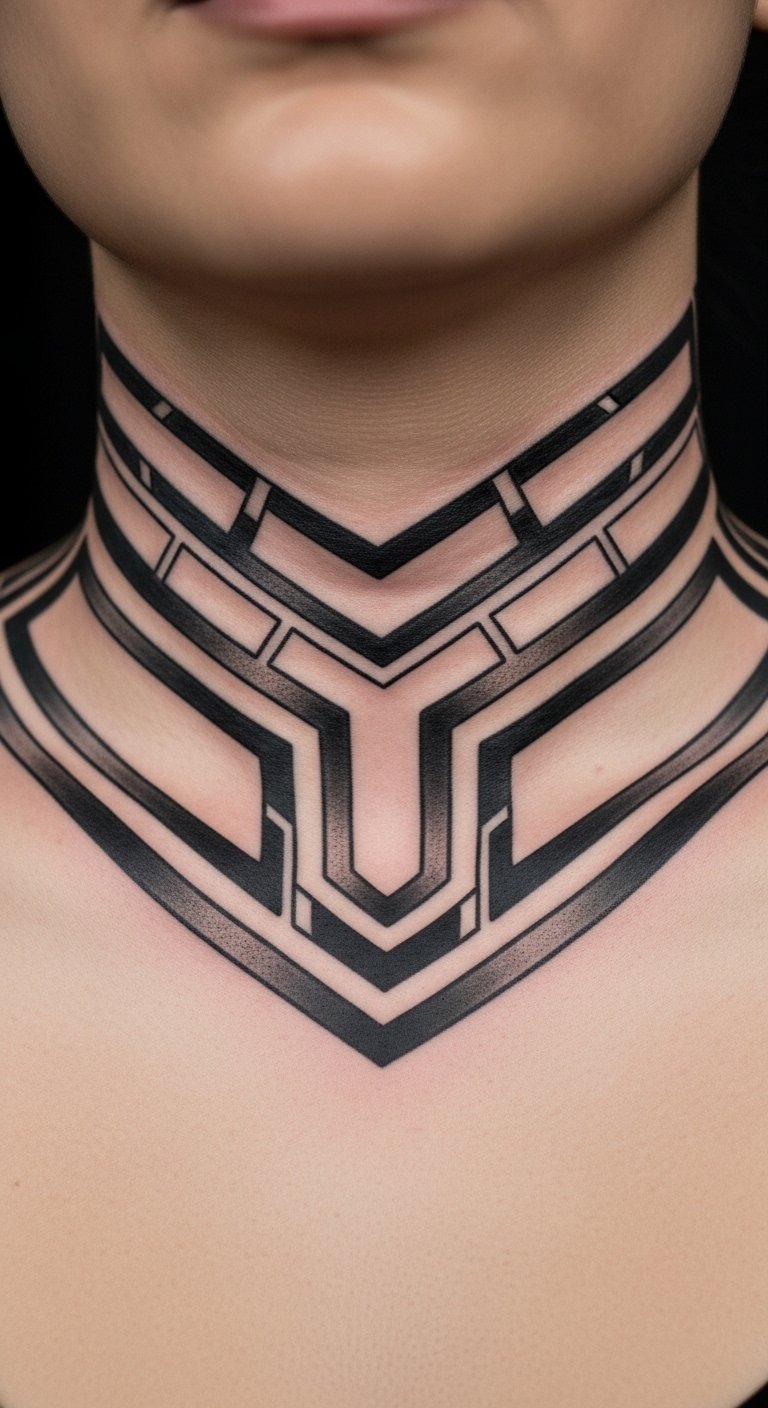
Negative space lets the skin be part of the design, reducing session time while creating striking shapes. Collarbones and necks show this effect well, but expect higher pain and sensitivity. Strategically placed bolder lines around the negative gaps help the design endure as fine edges soften. Common mistake: too many tiny cutouts that merge as skin regenerates. Say “negative space linework” to your artist so they plan shape breathing.
Blueprint Cityscape Across Upper Chest
Style/Technique: Blueprint / Linear Cityscape
Pain Level: Medium-High (5-7/10)
Session Time: Multiple sessions
Best For: Travel-minded, architectural homage
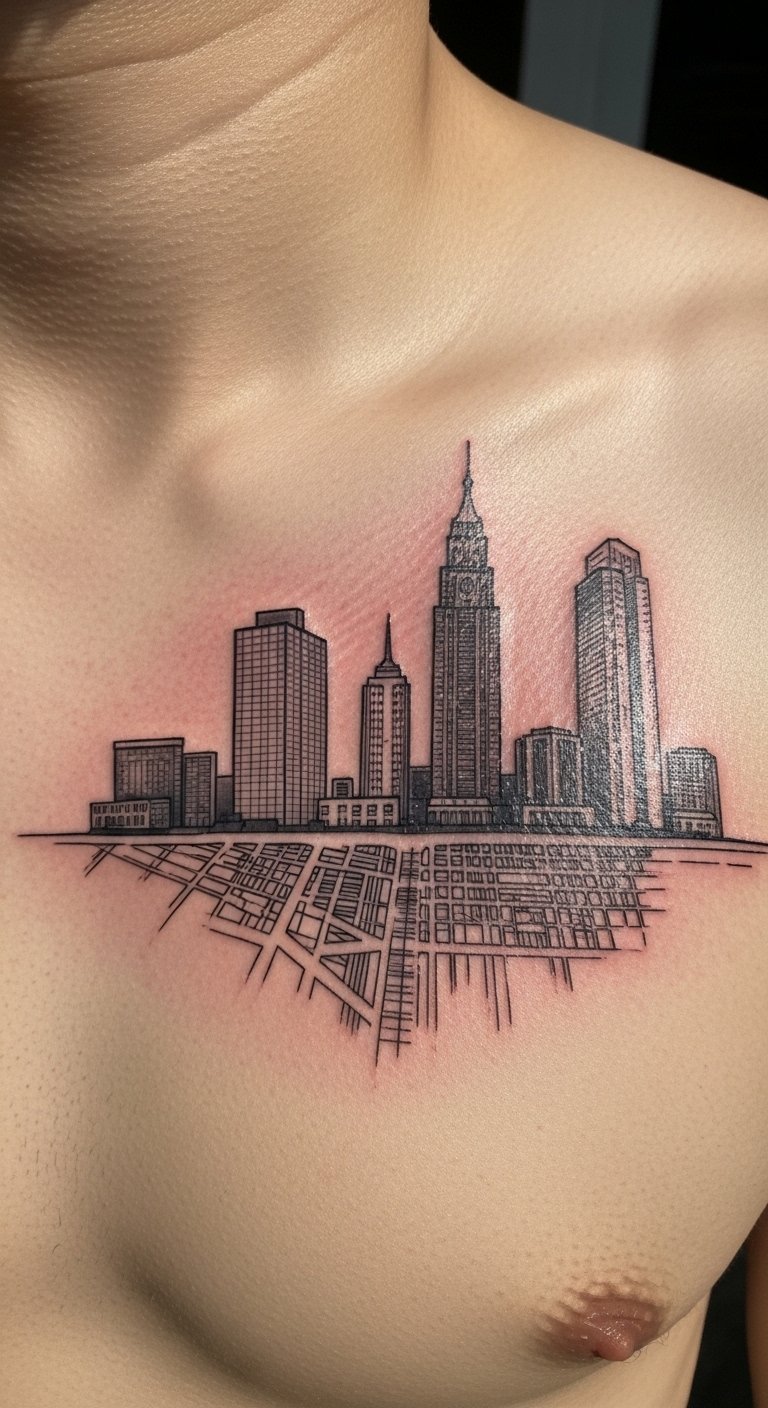
A skyline stitched in blueprint lines becomes a modern wearable map. Chest placement allows horizontal spread; use bolder baseline lines with finer architectural accents. Because the chest shifts with breathing, prioritize structure over micro-detail. Sessions can be broken up; healing takes care with shirts. Avoid ultra-fine hatching across moving areas. Use “architectural blueprint” and “chest cityscape” in your artist brief.
Micro-Realism Insect on Wrist
Style/Technique: Micro-Realism / Fine Line Detail
Pain Level: Medium (4-6/10)
Session Time: 1–2 hours
Best For: Tiny realism, unique micro pieces
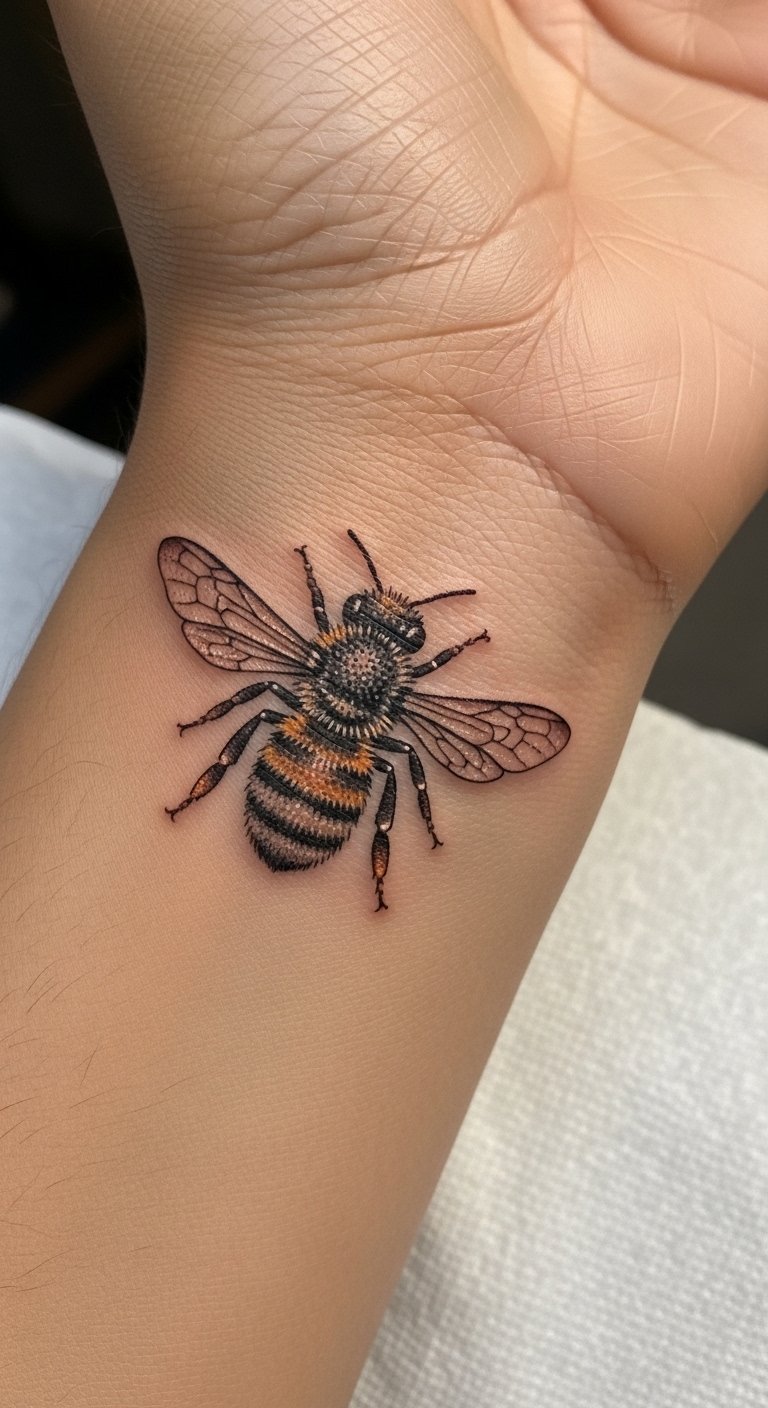
Micro-realism insects are a fresh way to wear tiny realism — a bee or moth that reads like a small photograph. Wrists are visible and move a lot, so scale up slightly to keep details distinct. Healing is quick but protect from constant friction. Main mistake: cramming too much tonal range into a tiny area. Tell your artist “micro-realism” and show reference scale.
Minimalist Star Constellation Behind Shoulder
Style/Technique: Minimalist / Celestial Linework
Pain Level: Low (2-4/10)
Session Time: 30–60 minutes
Best For: Subtle shoulder accents, easy to hide
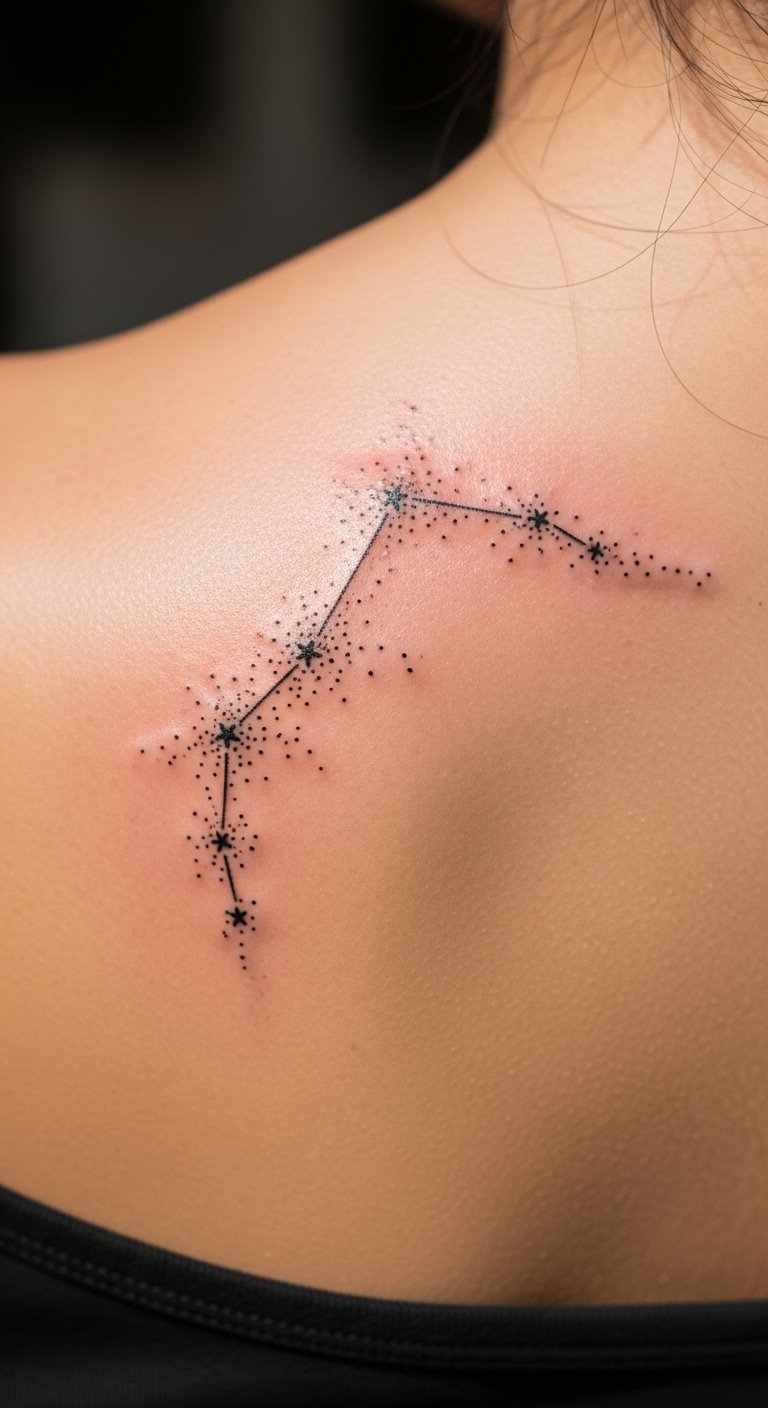
A behind-shoulder constellation is playful and hides under clothing easily. Thin lines and dots work well here because movement is moderate and sun exposure varies. Keep star spacing generous to avoid clustering that blurs. This spot is lower pain and quick to heal. Use “minimalist” and “linework tattoo designs” to guide scale choices.
Fine Line Coordinate Wrist Tattoo
Style/Technique: Fine Line / Typography + Line
Pain Level: Low-Medium (3-4/10)
Session Time: 30–60 minutes
Best For: Personal maps, subtle reminders
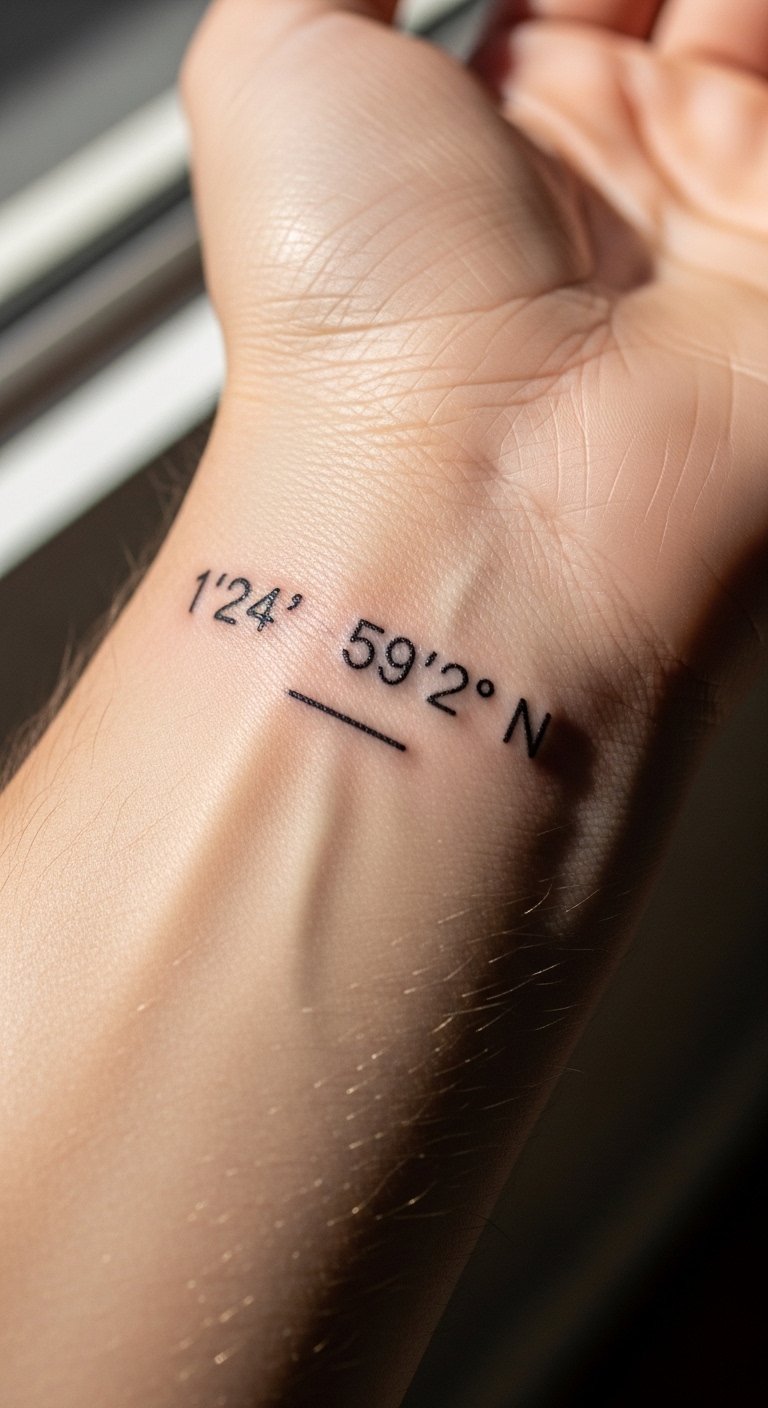
Coordinates are modern, meaningful micro-tattoos. Wrists are visible and wear contact with clothing, so pick a crisp weight for the numerals. Expect surface healing quickly; longevity depends on how bold the digits are. Avoid fonts that are too thin or ornate. Tell your artist “fine line tattoo ideas” and show the exact font scale you want.
Tattoo Prep and Aftercare Essentials
Aftercare Essentials:
- Aquaphor Healing Ointment, 14oz tube — Recommended for first 3–5 days to protect fresh ink
- Saniderm Transparent Adhesive Bandage, 6-inch roll — Second-skin healing option that many artists prefer
- CeraVe Fragrance-Free Moisturizing Lotion — Daily moisturizer for weeks 2–8
Before Your Appointment:
- Tattoo Numbing Cream with 5% Lidocaine — Use only if your artist approves; helps with sensitive placements
- Tattoo Stencil Transfer Paper — Useful if you’re testing sizing and placement at home
Long-Term Maintenance:
- SPF 50 Sunscreen Stick for Tattoos — Daily protection prevents early fading
- Mad Rabbit Tattoo Balm — For keeping healed tattoos supple and color-rich
- Hustle Butter Deluxe — Vegan aftercare option artists often recommend
Optional Comfort & Small-area Care:
- Tattoo Numbing Spray — For touch-ups or very sensitive clients
- Hydrocolloid Bandages (large) — Good for protecting small areas from friction
- Dr. Bronner's Unscented Castile Soap, 32 oz — Gentle cleaning in the first week
I mention products like Saniderm and Aquaphor because they came up repeatedly in artist discussions and healed-tattoo threads (Tattoodo and Burned Hearts recs).
Frequently Asked Questions
Q: How bad does a line tattoo actually hurt?
A: Pain depends on placement. Outer forearm or thigh = lower pain (3–4/10). Ribs, collarbone, ankle = higher (6–8/10). For sensitive spots, ask about a tattoo numbing cream with lidocaine but confirm with your artist first.
Q: Will fine lines fade faster than bold lines?
A: Fine lines can blur sooner on high-movement areas. That’s why line weight matters. Black ink on flatter areas tends to age best. Use daily SPF 50 sunscreen to slow fading.
Q: What’s a common linework mistake to avoid?
A: Asking for ultra-fine detail in tiny areas (fingers, eyelids, toes). Scale your design to the placement and request healed photos from the artist.
Q: Can I exercise after getting a line tattoo?
A: Wait 48–72 hours at minimum. Skip heavy sweating for about a week to reduce infection risk. Clean gently with mild soap like Dr. Bronner's Unscented Castile Soap.
Q: How long until a line tattoo looks “settled”?
A: Surface healing is 2–3 weeks; lines typically settle and look natural around 2–3 months. Micro-realism and fine lines may continue to soften, so expect subtle change.
Q: Do tattoos look different on different skin tones?
A: Yes. Black and gray linework reads well across tones; light colors may not pop on deeper skin. Find artists who show healed examples on your skin tone.
Q: Is virtual try-on helpful for placement?
A: I used a 3D try-on tool to preview a forearm piece — it’s underrated. Try a placement mockup before you commit.
Q: Can negative space reduce session time and pain?
A: Yes. Designs that lean on negative space often require fewer passes, which is easier on the skin and shortens sessions.
Start with a consultation and healed-photo references. Pick a design that feels meaningful and plan for proper aftercare — Saniderm and daily SPF will go a long way. What style from this list are you leaning toward?