
Fine-line hourglass pieces are the ones that surprise people most as they age. The smallest flowing-sand designs that rack up likes on day one often soften into a blur within a couple of years, while bold traditional hourglasses keep their silhouette. If you want an hourglass that holds its meaning without frequent touch-ups, think about line weight, placement, and whether the sand should move at all.
1. Fine Line Winged Hourglass on Inner Forearm
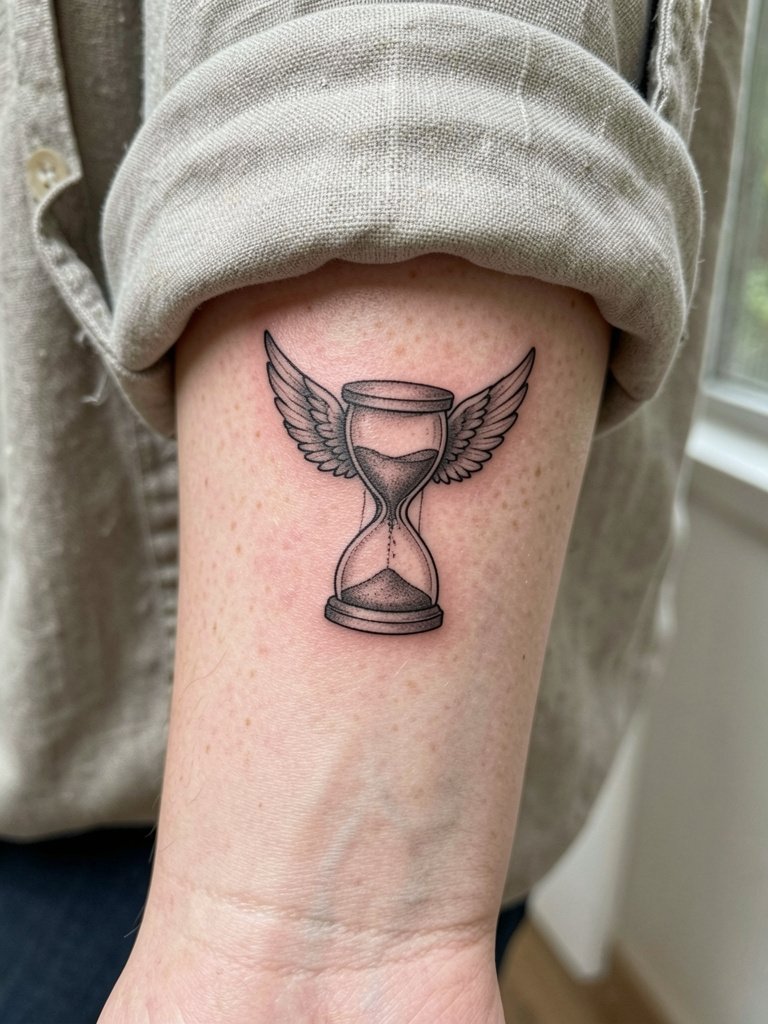
This fine-line winged hourglass reads airy on the forearm and pairs naturally with vertical arm movement. If you want the wings to keep separation from the sand, ask for slightly heavier outer frames and a single-needle interior for texture so the wings do not merge into the bulbs as the ink settles. The session is usually short for a forearm piece, expect one focused sitting and mild wrist sensitivity. For showing it off, roll up a linen button-down and wear a thin bracelet on the opposite wrist so the wing details contrast with a neutral palette. Avoid asking for micro script inside the bulbs, since tiny text in that area tends to blur by year two.
2. Neo-Traditional Hourglass with Skull and Rose on Outer Thigh
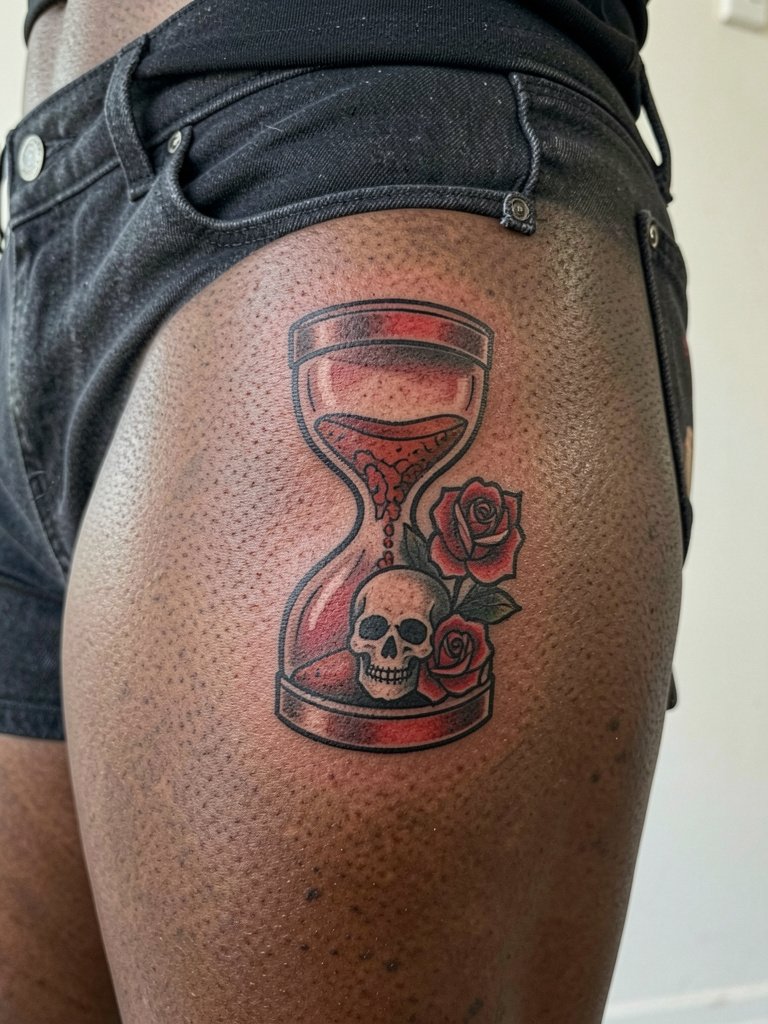
This is the clearest visual way to pair life and death around an hourglass silhouette. The outer thigh gives the artist room for thick outlines and saturated color without the stretch issues you get on hips. If you want the skull to read in five years, ask for solid black anchors and limited dot shading around the petals instead of tiny stipple inside the skull eyes. Plan for a two-part session for a six- to eight-inch piece and wear loose drawstring pants you can roll down without tugging the area at the end of the appointment. For nights out, style it with high-waisted vintage shorts and a layered leather belt so the composition remains the focal point.
3. Minimalist Black Hourglass (No Sand Flow) on Inner Bicep
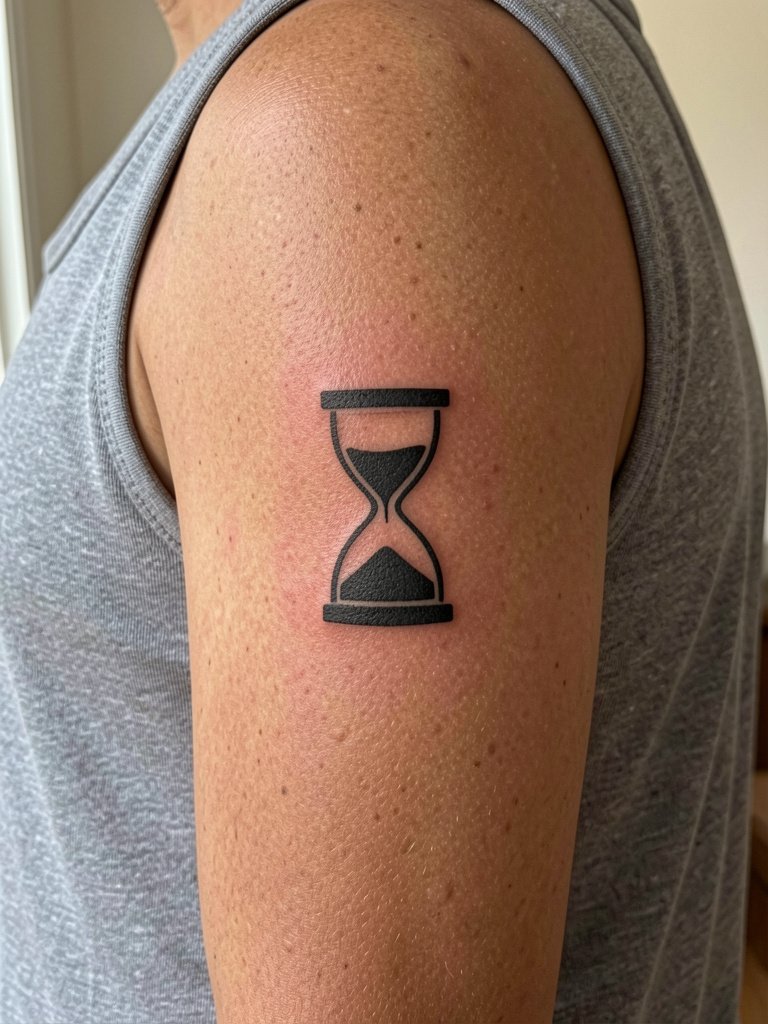
A static, filled-black hourglass conveys time paused, which is why many pick it for grief or stasis. The inner bicep gives you a relatively private canvas that still sits flat and heals predictably. Expect moderate pain near the armpit edge and a one-session appointment for a small two- to three-inch solid piece. A common mistake is asking for tiny internal detail inside a filled black silhouette, which disappears as the pigment settles. Bring reference scale photos so the artist can show how the piece reads at two inches versus four inches.
4. Realism Hourglass with Flowing Sand Turning to Roses on Ribcage
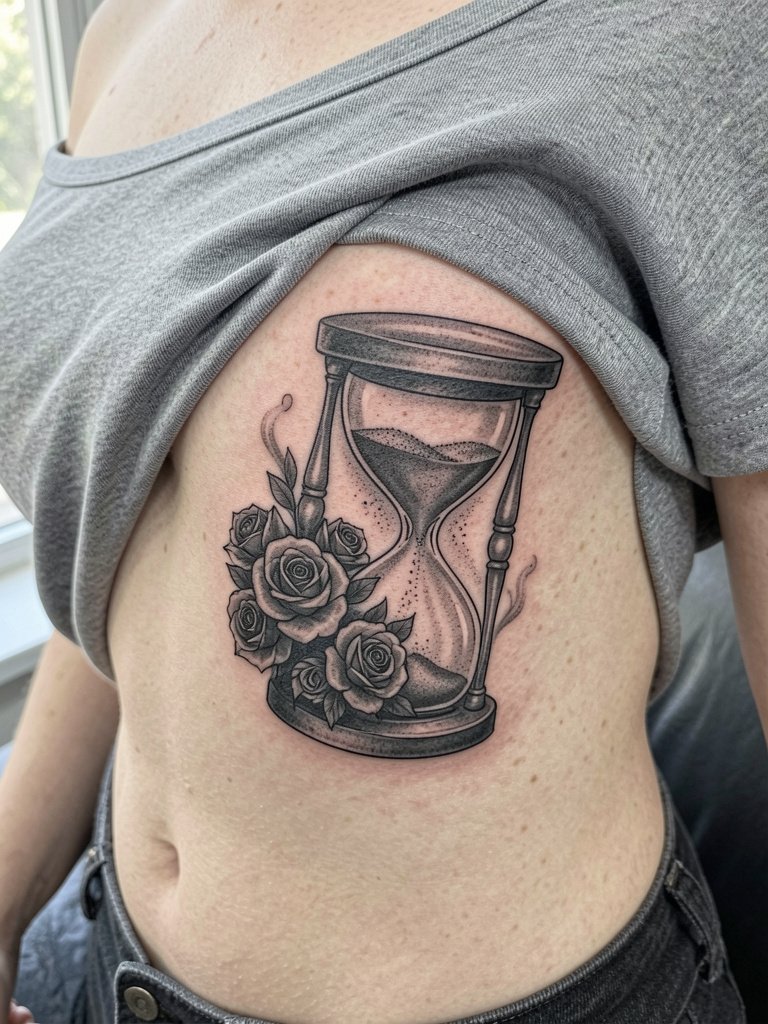
Ribcage realism looks stunning up close but it carries placement trade-offs. Artists are split into two camps on fine-line ribs. One camp says the skin stretches and compresses constantly, especially under the breast crease, so fine lines can blur inside two years. The other camp says that with slightly wider spacing and correct depth, fine line settles fine and will produce three-year healed shots that prove the point. If you choose realism here, expect a multi-session commitment, careful positioning for sleeping and dressing while healing, and realistic touch-up planning at the two-year mark.
5. Ornamental Mandala Hourglass on Sternum
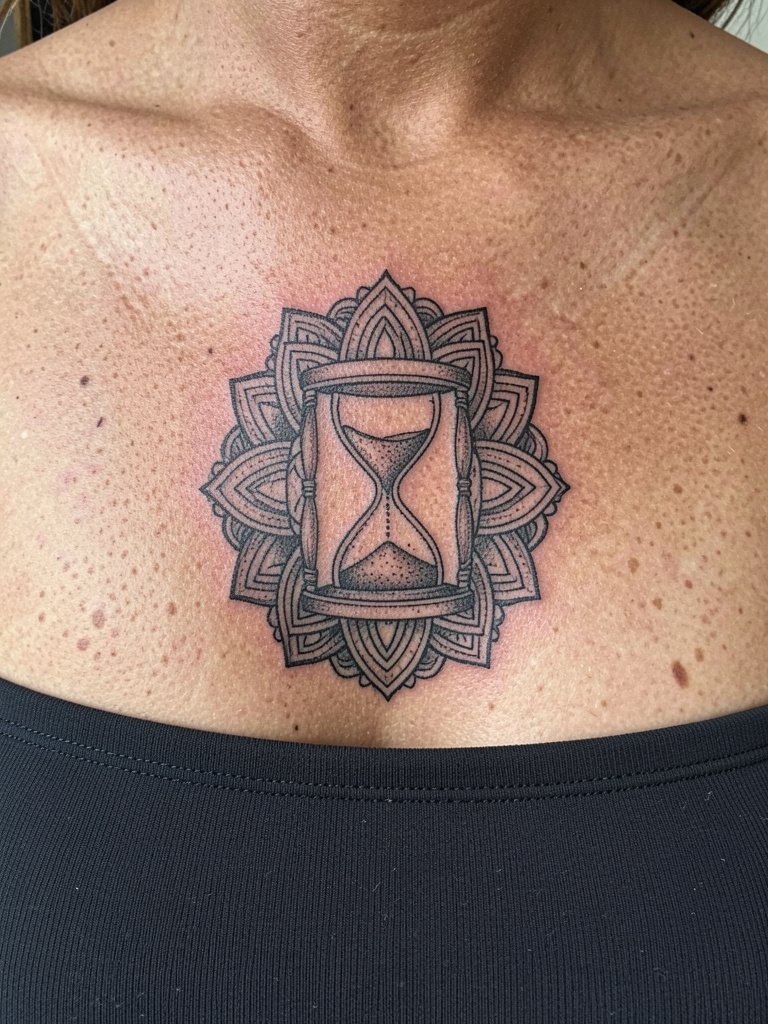
A symmetrical mandala around an hourglass reads balance and order when centered on the sternum. The sternum can be sensitive, but the flat surface lets linework sit consistently if the artist spaces filigree for long-term legibility. In the consult, request mockups scaled to five to seven inches so you can see how negative space holds up near the sternum. For showing healed work, layer delicate gold chains or a pendant that frames the piece without covering it. Wear a strapless or low-cut top the day of the session to give the artist clear access and to keep fabric from rubbing on fresh ink.
6. Classical Traditional Hourglass on Shoulder Blade
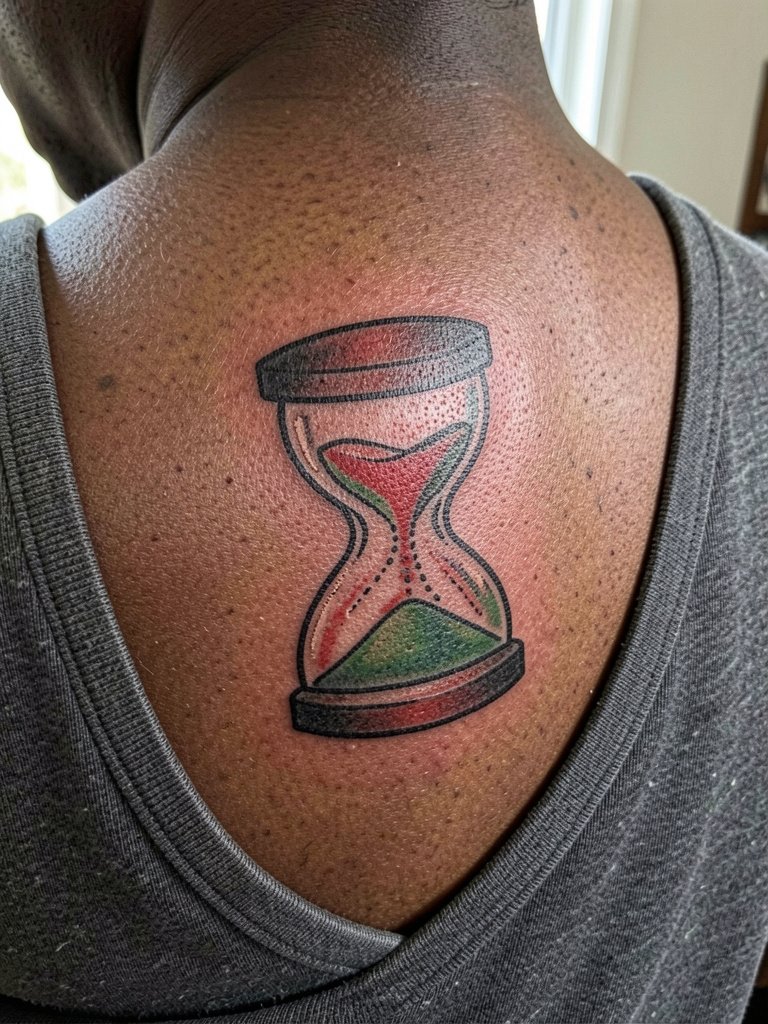
Classic bold outlines and flat color are the simplest way to keep an hourglass readable over time on the shoulder blade. The area tolerates one-session work for a mid-sized piece, with low friction from clothing if you choose open-back tops regularly. A common mistake is packing tiny hand-lettering into the background; traditional shading reads better when scale is generous. For session comfort, wear a loose button-down that can be removed without stretching the shoulder. To style the healed piece, open-back tops or vintage-cut dresses highlight the silhouette and let the bold palette pop.
Pre-Session Essentials
The pieces above include sensitive ribs and detailed sand grooves, so a few practical items smooth out chair day and the first week of healing.
-
TattooGrap tattoo balm. A thinner Australian-style balm can help detailed sand grooves avoid trapped debris during early healing, which matters for hourglasses with tiny texture.
-
Clear Mist saline spray. A gentle saline mist helps clean narrow sand channels without smothering them, especially useful for fine-line and micro-realism sand details.
-
Ink Cure non-greasy balm. Lightweight, non-comedogenic balms reduce the risk of clogged pores around detailed grooves that hourglasses often have.
-
Saline tattoo spray. Use during the first week to irrigate fine-line grooves gently instead of heavy ointment that can build residue.
-
Aquaphor healing ointment. Many studios still recommend Aquaphor for the initial days because it locks in moisture and prevents hard scabs. Others warn that Aquaphor is too thick and can clog narrow needle channels in intricate hourglass sand, so weigh the two approaches based on your skin's oiliness and the design detail.
7. Fine Line Hourglass with Candle on Inner Forearm
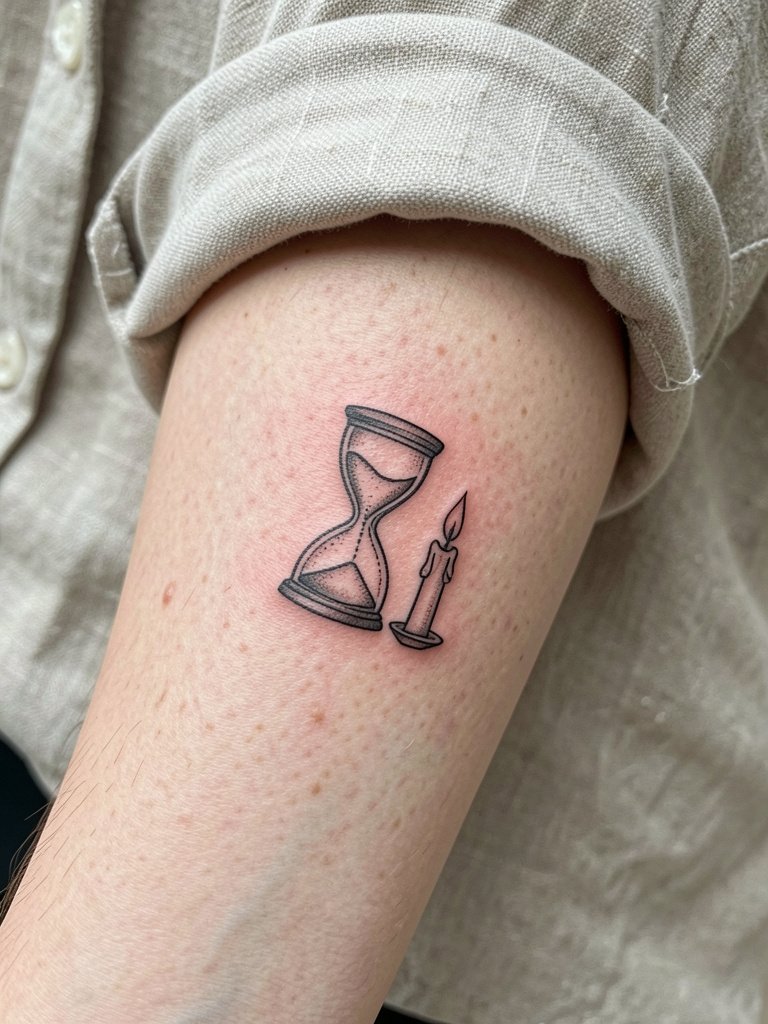
This mourning-forward composition uses candle imagery to make a single-needle hourglass feel reflective. Expect a short session and mild sensitivity near the wrist. For the candle flame and wick, avoid micro-stippling inside open areas, since tiny shading can pool with thick ointments. There is a heated debate about Aquaphor versus thin balms for pieces like this. One camp argues Aquaphor is too heavy and clogs tiny grooves, leading to trapped debris. The other camp says Aquaphor prevents scabbing and keeps moisture locked in for delicate linework during the first three days.
8. Gradient Sand Hourglass (Color Accent) on Lateral Hip Bone
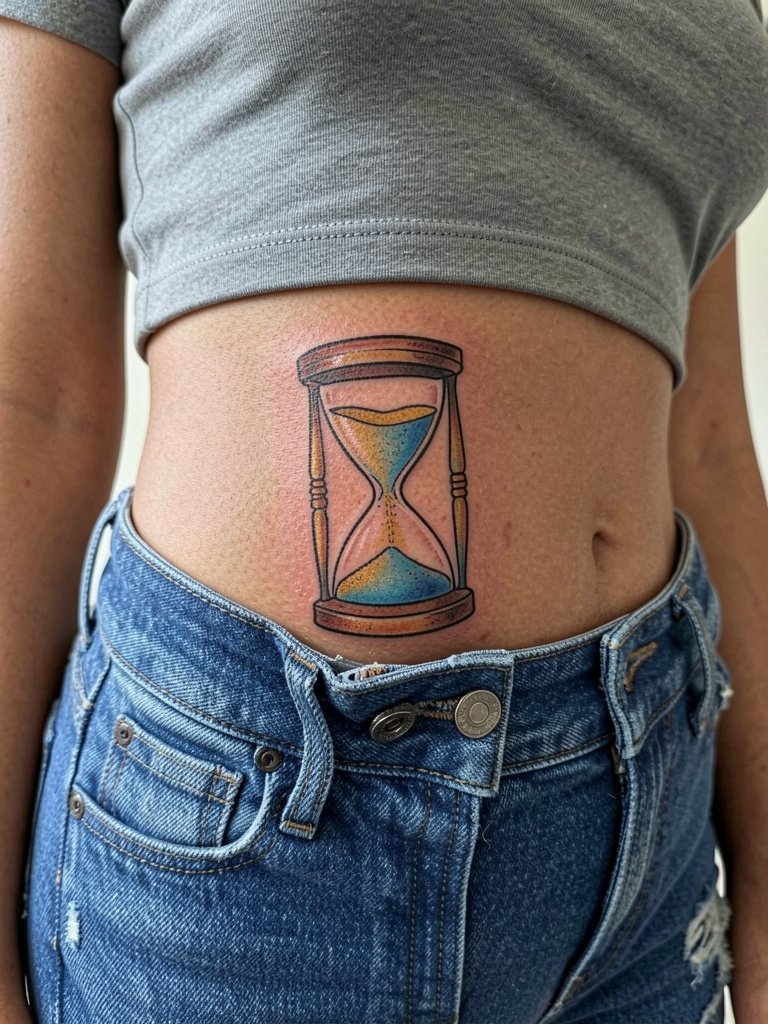
Color-accented sand is a practical choice if you want the sand to show on darker tones and in photos. The lateral hip gives a private but photographable canvas and suits gradient fills that run vertically. For this placement, expect one to two sessions and wear loose drawstring pants that the artist can roll without compressing the area. High-waisted skirts in neutral tones make the color accents pop when you want to show the piece off. If you plan weight fluctuation, pick a slightly larger scale so the gradient reads when skin shifts.
9. Small Hourglass with "Carpe Diem" Script on Wrist
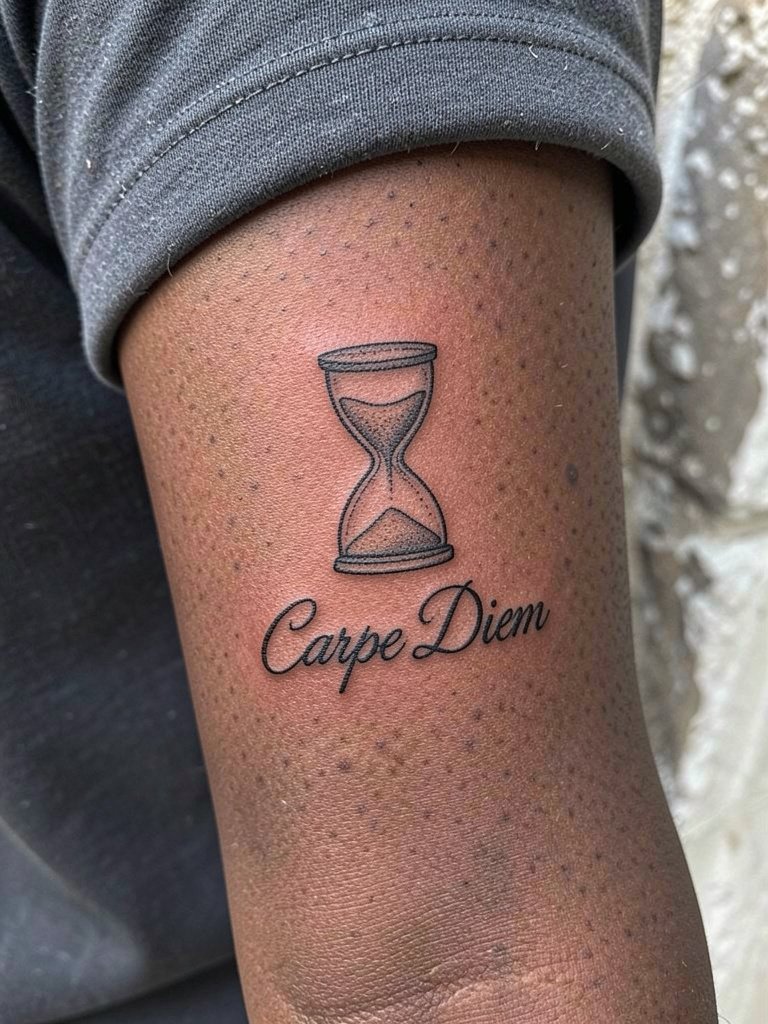
A small wrist hourglass plus script reads like a compact reminder and suits someone testing commitment with a first tattoo. The wrist is high-motion and exposed to sun, so pick saturated black for the script to keep contrast in photos. The session is quick but expect a two-year softening timeline for the thinnest script. Style it simply with a minimalist watch or thin chain bracelets on the opposite wrist so the lettering remains legible in pictures. For the appointment, a short-sleeve top lets the artist access the area without tugging clothing.
10. Horror-Gothic Hourglass with Snake at the Nape
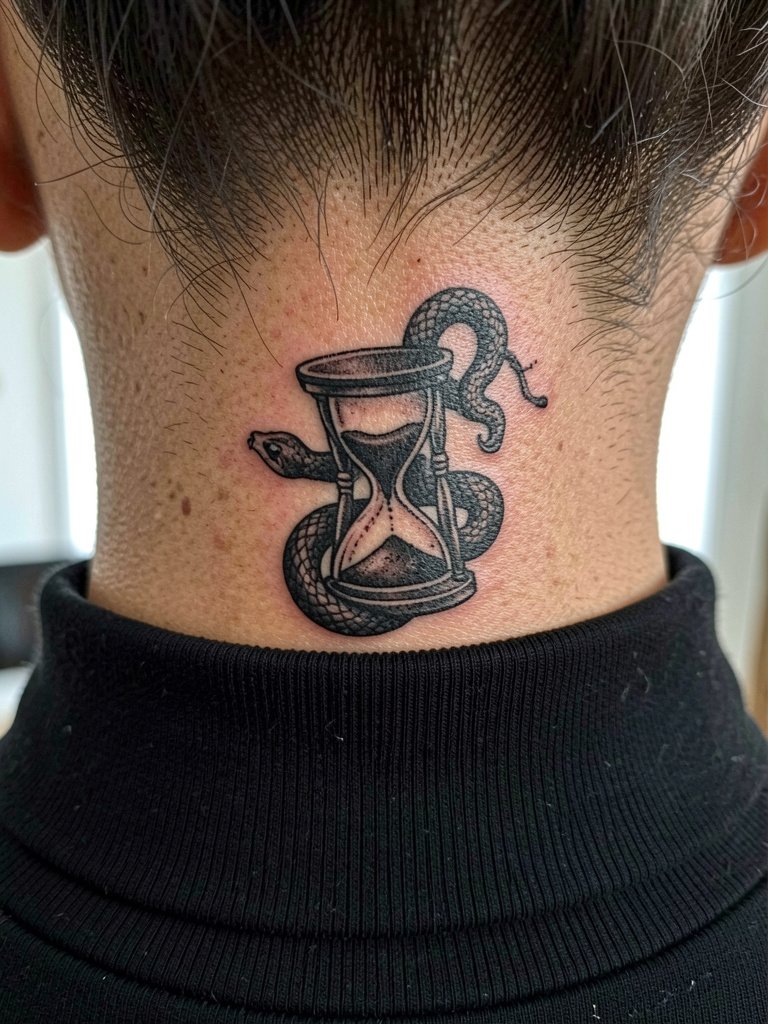
Nape placements give gothic hourglasses an intimate but bold presence. The skin at the nape tends to hold blackwork well, though the area can be tender and session breaks help with comfort. Expect a single- to two-session booking for a four- to five-inch design, and wear a loose top that can be easily removed without snagging hair. For showing it off, a high-neck black top or open-back dress frames the nape without covering the piece. Keep in mind hair length matters for visibility when you photograph healed work.
11. Split-Chamber Hourglass on Chest (Past vs Future)
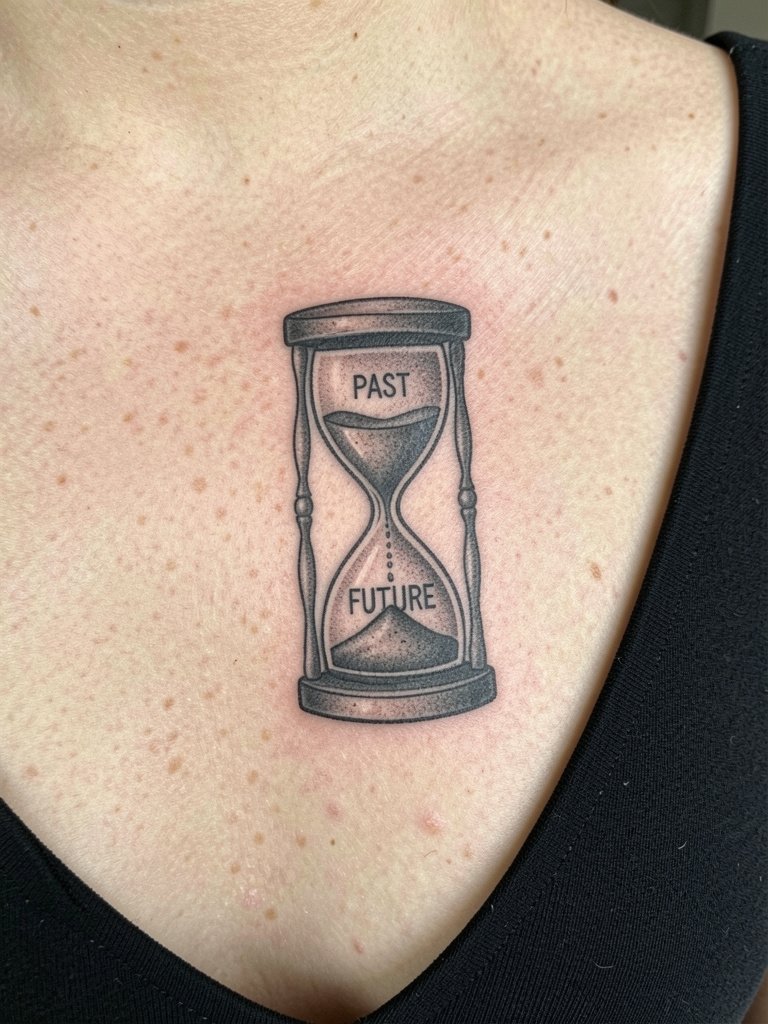
A split-chamber layout works well for people who want a literal past/future composition. The upper chest allows a six- to seven-inch symmetrical piece, but be aware chest skin moves with breathing and posture. A common mistake is crowding both chambers with tiny symbols; the visual reads best when one chamber has a single clear element and the other contrasts it. Expect a one- to two-session plan and practical staging for sleeping and clothing while healing.
12. Hourglass with Broken Glass on Inner Forearm
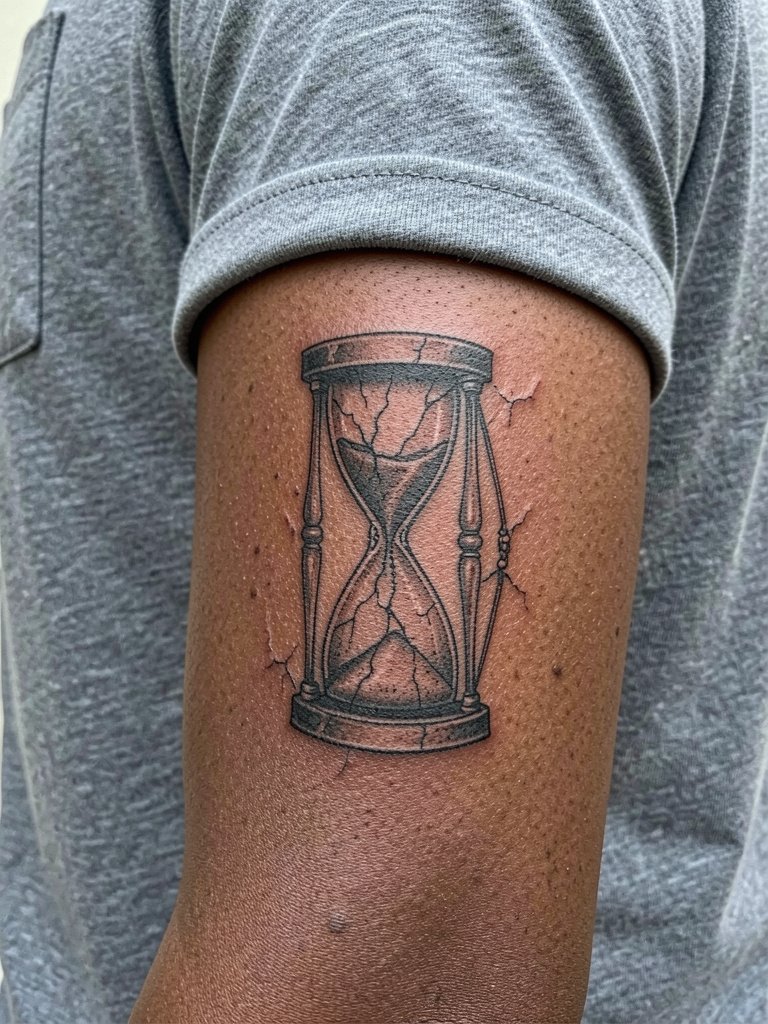
Cracked glass lines add motion and a fragile edge to an hourglass motif. The inner forearm keeps those fracture details visible day to day, but the area can be prone to rubbing if you wear watches or bracelets. For longevity, request slightly bolder fracture anchors rather than micro-hairline cracks that tend to soften quickly. Use saline cleaning for narrow grooves in the first week to avoid ointment buildup inside the cracks. A realistic touch-up plan at 12 to 24 months can bring fractured highlights back without altering the core composition.
13. Vertical Hourglass on Spine
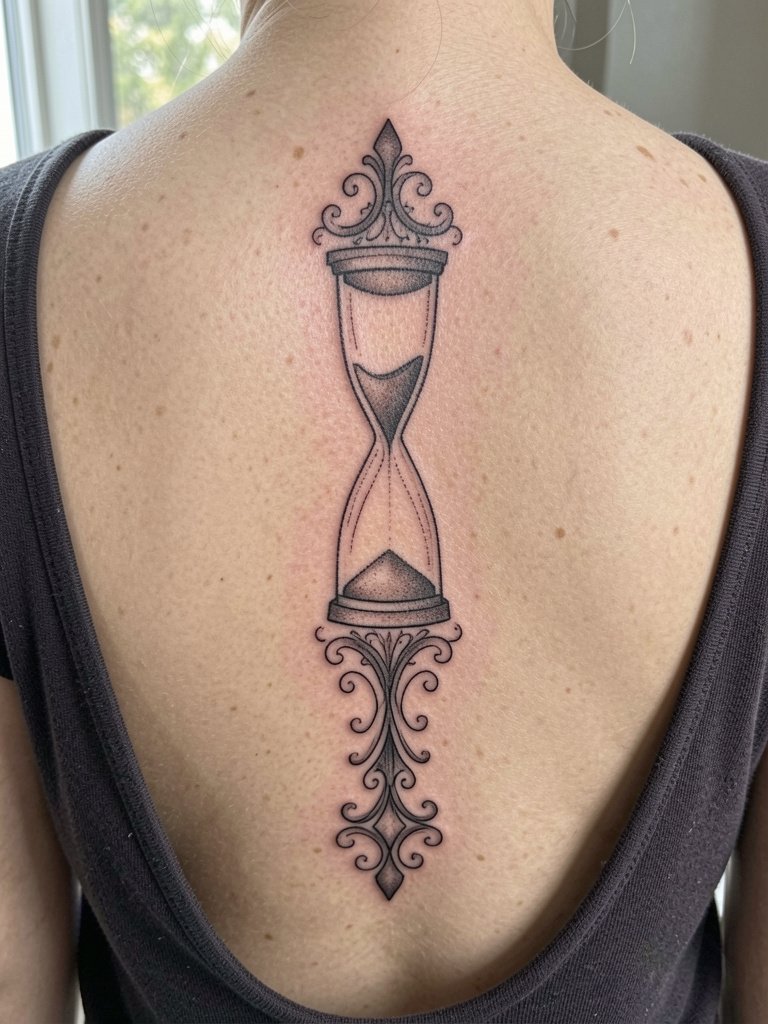
A spine-aligned hourglass takes advantage of the body’s vertical axis and reads well in photos. Plan for two sessions if the piece is eight to ten inches, and expect increased sensitivity along vertebral processes. The vertical composition benefits from even spacing so sections do not compress when you move or sit. For outfit pairing, open-back tops show the full length while keeping the piece elegant. During the consult, bring posture photos so the artist can map the design to where your spine naturally aligns.
14. Hourglass with Wings on Upper Back
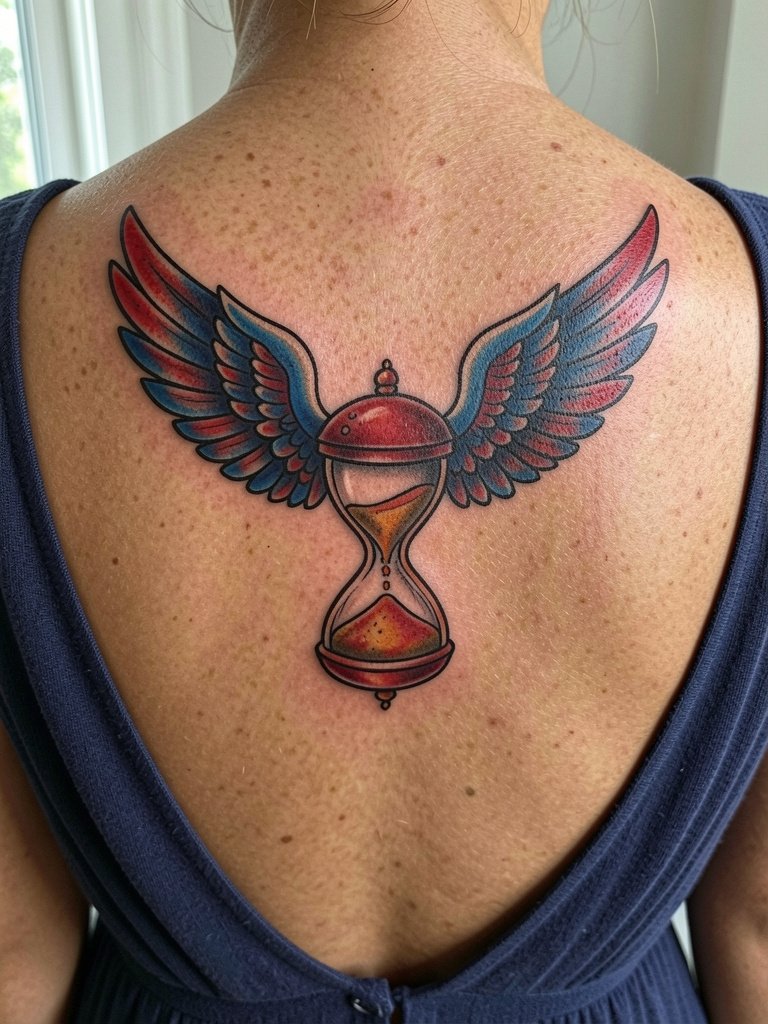
A large winged hourglass on the upper back reads cinematic and lets the wings spread without interference from movement. Expect a multi-session plan for an eight- to twelve-inch composition with heavier sessions for color saturation. The most common error is over-detailing feathers at too-small a scale; keep feather blocks broad and use negative space to preserve depth. Choose open-back garments when you want to show off the healed piece and wear a loose button-down to the appointment so the area is comfortable after inking.
15. Hourglass with Sand Transforming into Butterflies on Lateral Hip
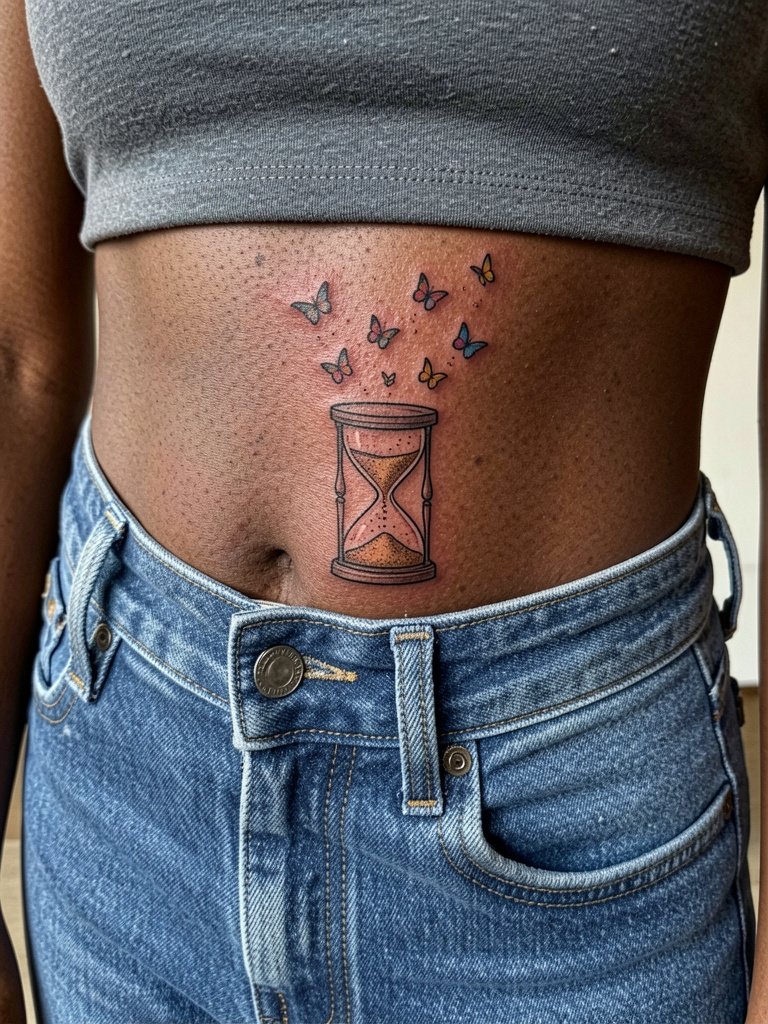
Turning sand into butterflies reframes mortality into renewal, and the lateral hip gives the narrative space to flow diagonally. Expect one to two sessions and wear low-rise fitted pants the day of the appointment so the artist can access the area without fabric tugging. The biggest mistake is compressing the butterflies into too small a cluster, which flattens their motion once healed. For a color-accent approach, pick a muted palette so the butterflies read on medium and dark skin tones.
16. Inner Knee Hourglass for Fragility Symbolism
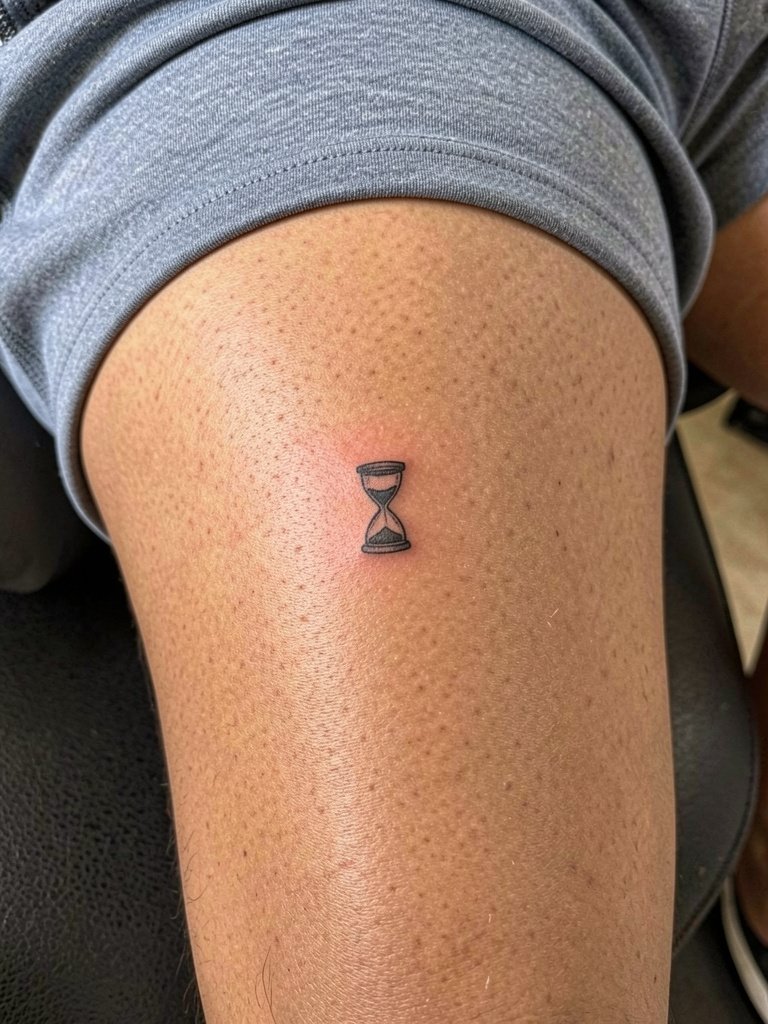
The inner knee is an intentionally fragile placement that reads very personal. Expect high discomfort from movement and longer healing because the joint flexes constantly. If you want this location for symbolic reasons, plan for extra aftercare and realistic touch-up expectations. The inner knee is one of those areas where small scale can become unreadable, so go for two to three inches rather than a tiny dot. Session wear should be loose shorts that can be rolled to give the artist clear access.
17. Mirrored Hourglass with Both Chambers Filling on Upper Back
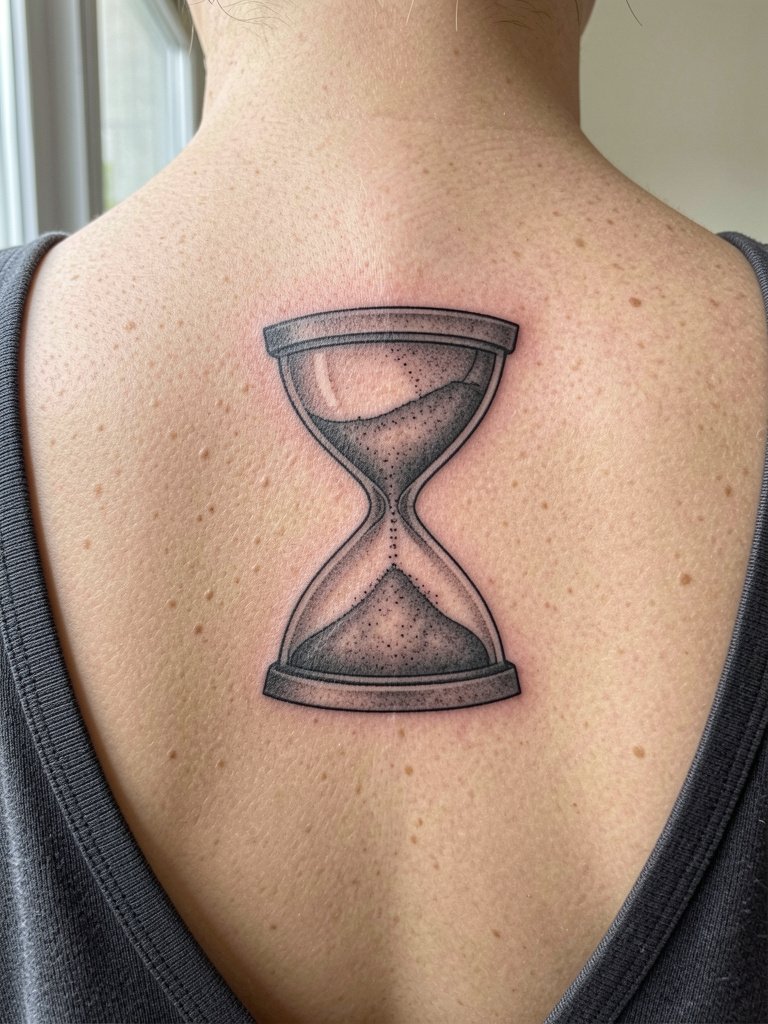
Mirrored filling makes the hourglass read like a cycle rather than a countdown. Upper back symmetry benefits from centered placement and bold negative space so the mirrored sands stay distinct. The area tolerates medium-sized work with solid shading that ages cleanly. For evening wear, open-back tops showcase the symmetry without competing with the composition. During the consult, ask for mockups that show the piece against your shoulder blades so you can confirm visual balance.
18. Mechanical Hourglass with Gears on Forearm
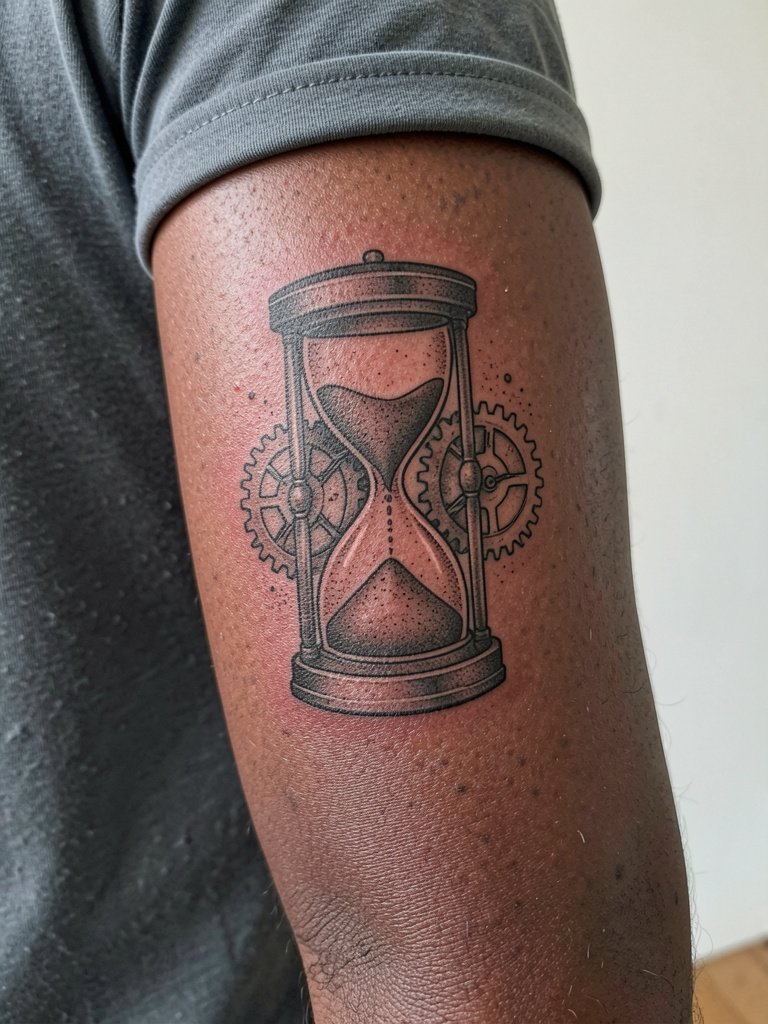
A mechanical hourglass leans graphic and contemporary, and the forearm provides a clean horizontal runway for visible gear relationships. The common mistake is over-detailing with tiny teeth and screws at small scale, which fills in over time. Ask for simplified gear silhouettes at small sizes and increased contrast in the central vial to preserve the hourglass shape. Sessions typically finish in one long sitting for a forearm piece and the area is easy to protect while healing.
19. Tiny Hourglass Beside a Wristwatch on Outer Wrist
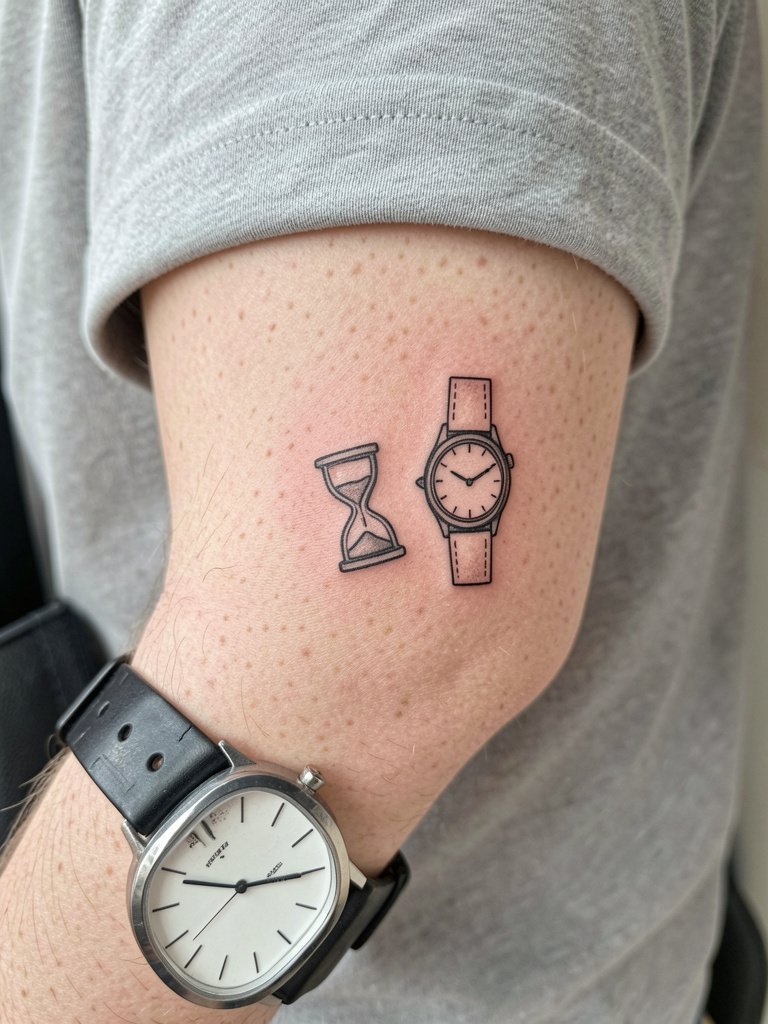
A paired tiny hourglass and watch is a subtle commentary on measured time, and it is very beginner-friendly. Keep scale across both elements consistent so the watch does not overpower the hourglass. Expect a quick session and straightforward healing, but remember the wrist sees a lot of sun and friction. For a polished look, balance with thin chain bracelets or a simple watch on the opposite wrist when you photograph the healed ink.
Frequently Asked Questions
Q: How do I choose between flowing sand and a static hourglass?
A: Flowing sand suggests time passing and is often used for memento mori pieces, while a static, filled hourglass reads as time paused or grief. Think about the emotion you want the image to hold in five years and ask for mockups at two scales so you can judge how the motion reads from a distance.
Q: Will fine-line hourglasses on the ribs blur faster than on the forearm?
A: Rib skin stretches more with breathing and movement, so the risk of line softening is higher than on the forearm. If you want ribs for a realistic hourglass, request slightly wider spacing, plan for a two-year touch-up timeline, and be prepared for higher pain and a longer seated session.
Q: Where can I find hourglass tattoo portfolios and healed examples without naming artists?
A: Search hashtags like #hourglassink and #mementoMori tattoo on Instagram and TikTok, then use location filters to surface local portfolios. Tattoodo and Booksy let you search by keywords like "fine line hourglass" or "neo-traditional hourglass skull." Reddit communities such as r/tattoos and r/tattooadvice often share healed progress photos across skin tones and can help you weigh style options.
Q: How should I dress for an upper-back or sternum session?
A: For upper back and spine pieces, wear a loose button-down or a top that can come off without tugging. For sternum and chest work, a strapless or a fitted bandeau keeps fabric from rubbing the fresh tattoo and gives the artist clear access.
Q: My skin is darker and I want the sand to show in photos. What works best?
A: High-contrast black-and-grey with selective color accents like gold or blue helps sand read on medium and dark tones. Ask for richer saturation and slightly bolder separators inside the vial so the sand pattern does not wash out under camera flash or sunlight.
