
Hourglass tattoos often read as simple symbols, but the choices you make at the stencil stage determine how they age. A tiny single-needle hourglass on a high-motion spot can lose its silhouette in a few years, while a slightly bolder geometry with negative space will keep meaning and clarity. Below you will find practical variations, placement trade-offs, and outfit pairings that help an hourglass stay legible and feel intentional for the long run.
1. Minimalist Single-Needle Hourglass on Inner Forearm
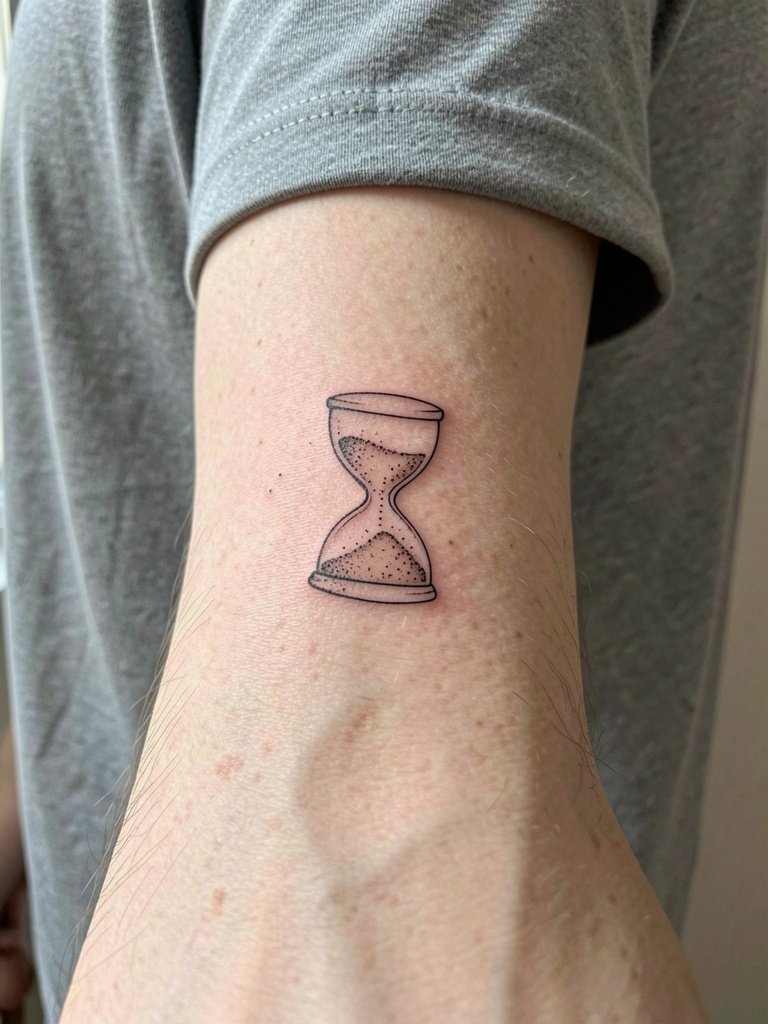
A single-needle hourglass on the inner forearm is crisp the first year but needs slightly more spacing than most references show. I recommend bumping the inner contour by one to two points of line weight and asking for a tiny stipple texture for the sand so it reads after a touch-up. Pain is low and a session takes under an hour. Expect visible softening at two years on this placement and a likely touch-up around year three. For showing it off, roll sleeves to mid-forearm and pair with a short-sleeve linen shirt to keep attention on the linework.
2. Micro-Realism Hourglass with Tiny Landscape Inside on Outer Bicep
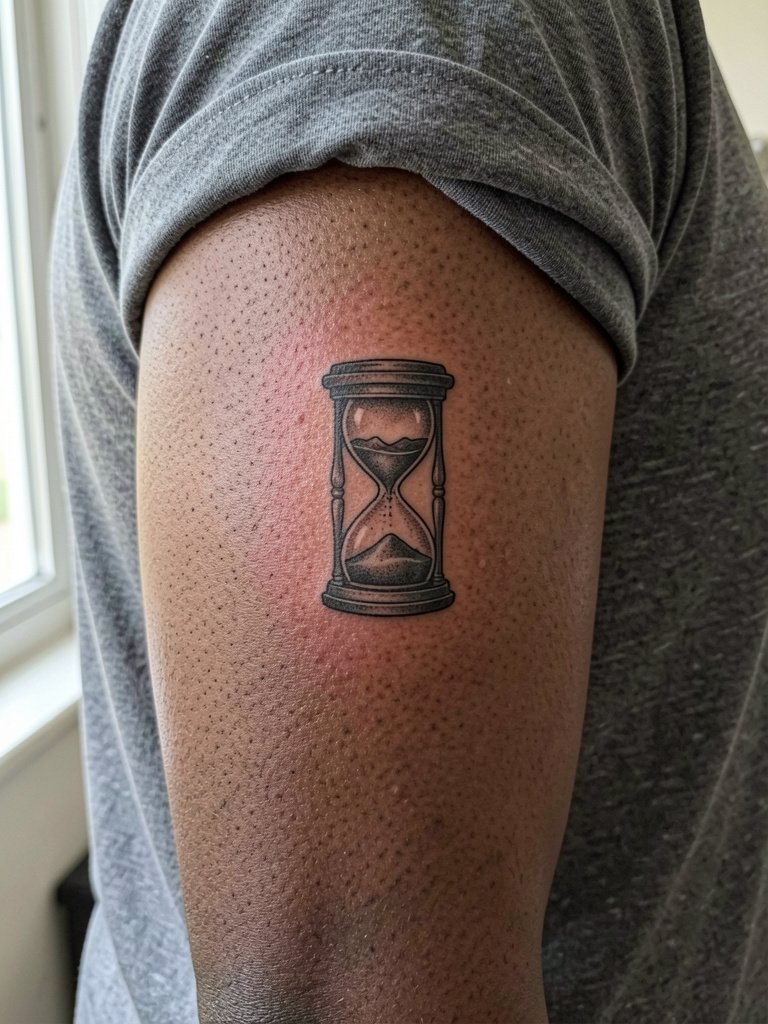
Micro-realism brings extra detail into the hourglass glass area. On the outer bicep you have room for subtle highlights so the landscape reads as depth rather than a blot. Session time is moderate, around 90 minutes, with low-to-moderate pain. A common mistake is packing too much micro detail into a sub-two-inch piece. Ask for the reference scaled to the exact size you want so you see how the tiny horizon looks at three versus five inches. For daytime wear, a fitted tee with sleeves that hit mid-bicep frames this placement well.
3. Blackout Band Hourglass Sleeve Accent on Upper Arm
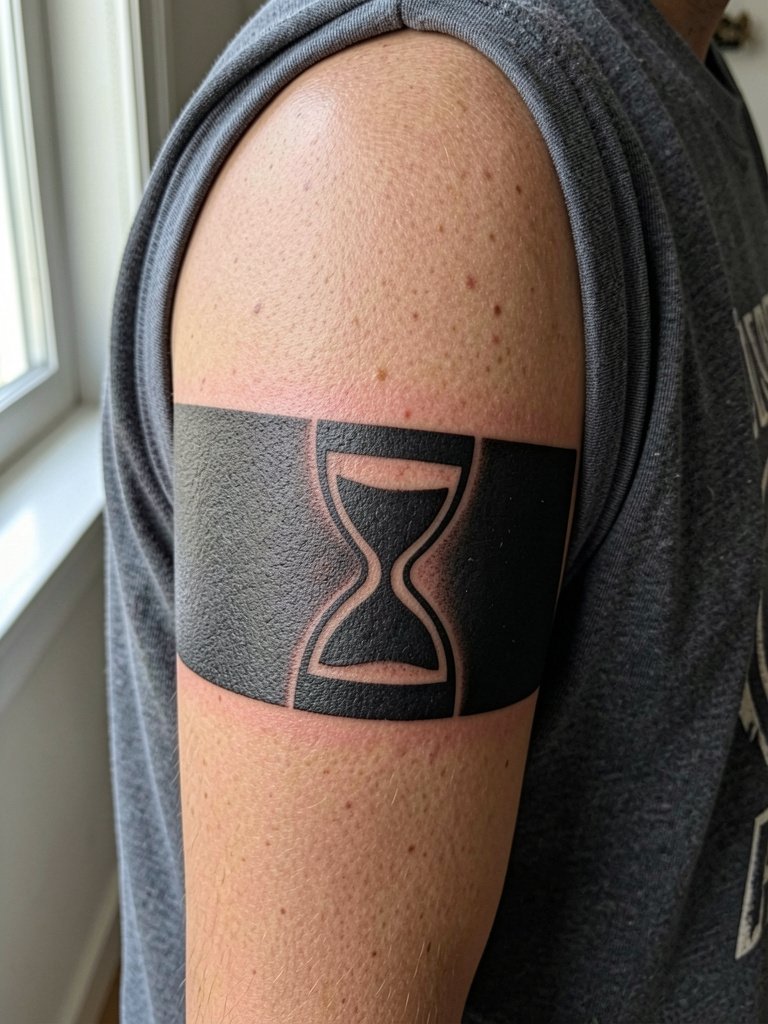
Using negative space hourglass inside a blackout band makes a strong silhouette that resists blowout over time. Pain is moderate and the session can run two to three hours depending on how much fill is needed. A common error is asking for a tiny negative hourglass on an already-blackened band. Instead, discuss edge spacing so the negative shape does not collapse when the skin settles. This style looks sharp under a tank top for summer show-off moments and hides easily under sleeves when needed.
4. Geometric Hourglass with Sacred-Geometry Lines on Sternum
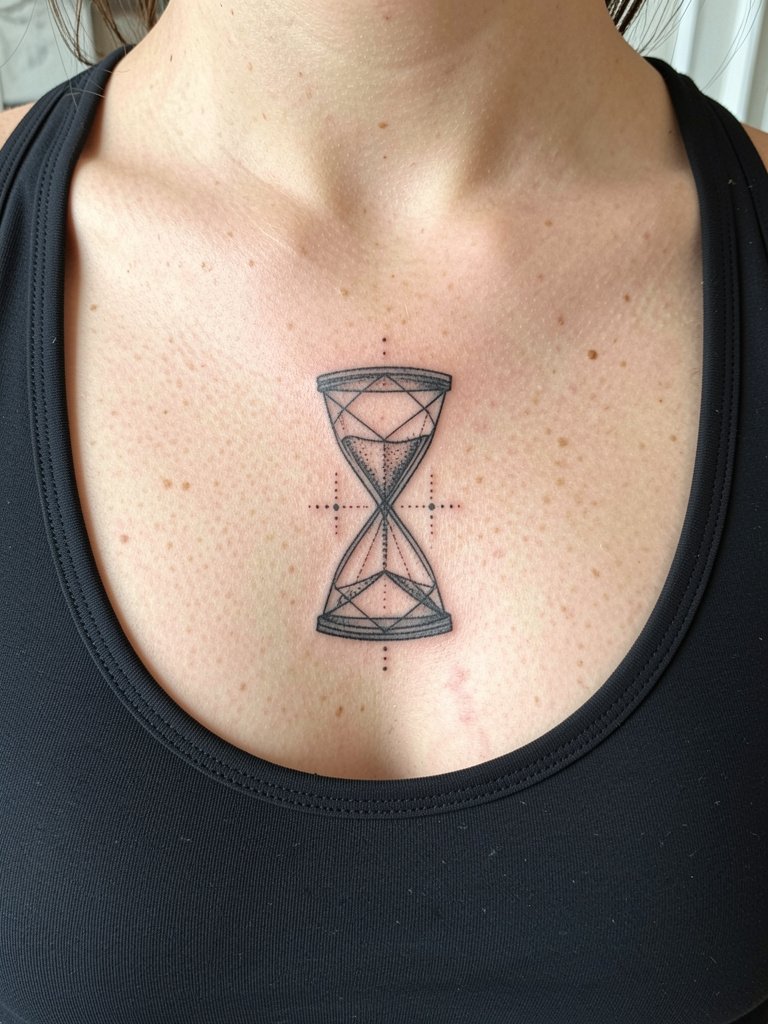
The sternum is a placement where line spacing matters for longevity. Fine intersecting geometry can look incredible at six months and then soften if the lines started too thin. Expect higher pain and a session broken into shorter passes. A frequent mistake is requesting single-needle line intersections directly over the breast crease. Instead, ask for slightly heavier contour lines and deliberate negative space at crossing points so the geometry keeps its separation at five years. Session wear tip: a low-pressure cropped top makes access simple and comfortable, and you can wear a fitted sports bra to the appointment for modesty.
5. Ornate Victorian Hourglass on Thigh with Lace Frame
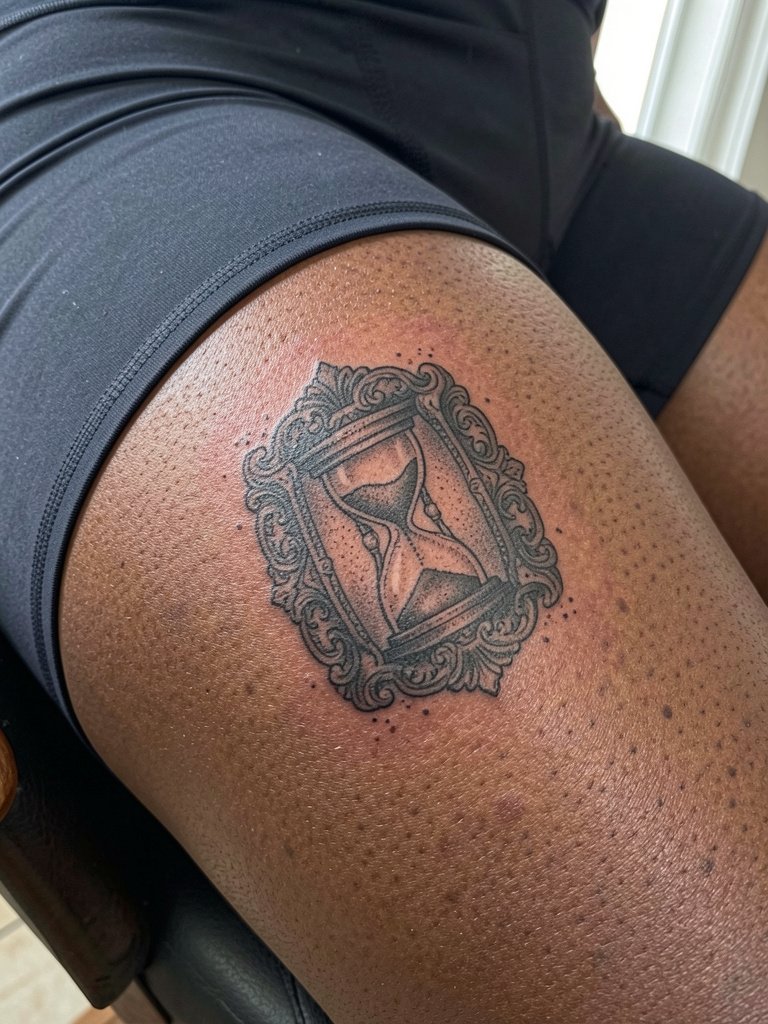
A decorative hourglass on the thigh gives you size and preservation. The thigh rarely encounters the same friction as wrists, so ornate filigree can hold fine details longer. Pain is low-to-moderate and sessions can be long if you want full shading. A common misstep is requesting ultra-fine lace that reads as blur on darker skin tones when done too small. During consultation, show the artist the size scale you want and ask them to test the lace pattern at that scale. For evenings out, pair with a mid-thigh chino short that lets the piece peek without overexposure.
6. Hourglass Compass Combination on Outer Calf
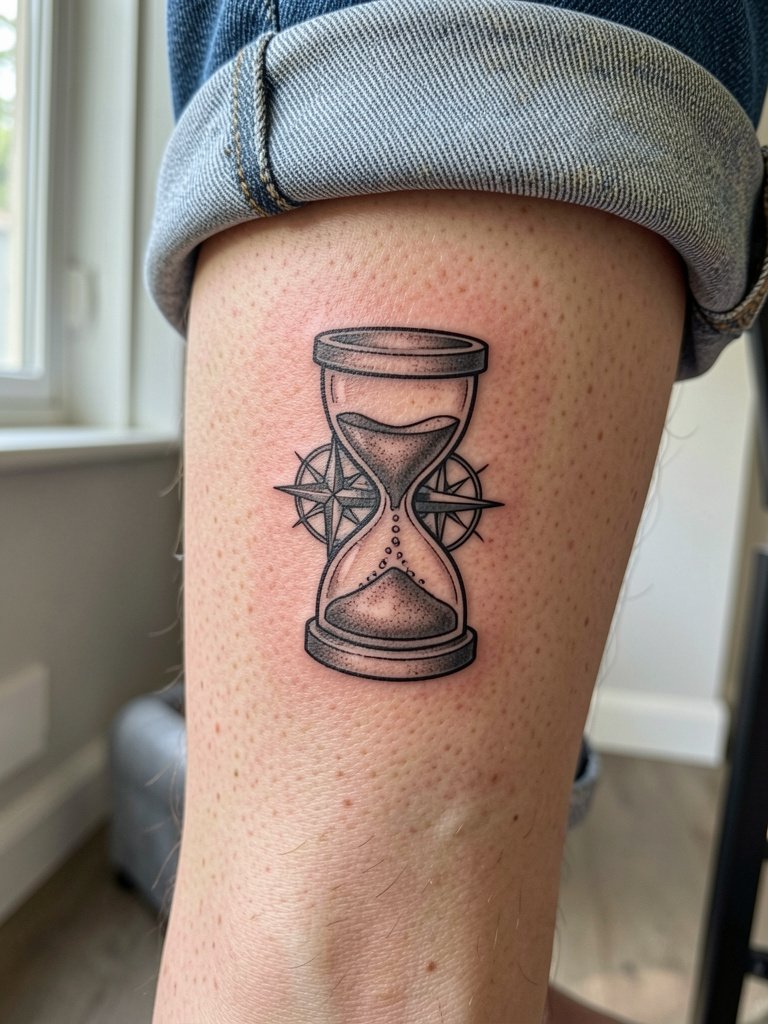
Combining an hourglass with a compass turns time into direction visually. Outer calf placement handles medium detail and shows well in shorts. Sessions run between 60 and 120 minutes depending on shading. A frequent error is packing the compass points too fine; ask for slightly thicker cardinal tips so they hold contrast at two years. The calf tolerates touch-ups well. Wear rolled jeans to show the work without revealing too much.
Session Day Picks
The chest and thigh hourglasses above need different access and fabric choices, so a few small items smooth the appointment and first 72 hours.
-
Stencil transfer paper kit. Lets you preview and test placement on skin, especially helpful for the inner forearm and thigh layouts in ideas above.
-
Disposable tattoo grip covers. Keeps equipment tidy during longer sessions like blackout bands and ornate Victorian sleeves.
-
Thin protective film roll. Useful for ankle and hand placements that face constant friction and water exposure in the first two days.
-
Fragrance-free gentle body wash. Cleans the healing area without stripping oils or aggravating fine line work.
-
Aquaphor healing ointment. A widely known option for the thin first-layer care window on small blackwork pieces.
7. Dot-Work Hourglass with Mandala Backdrop on Shoulder Blade
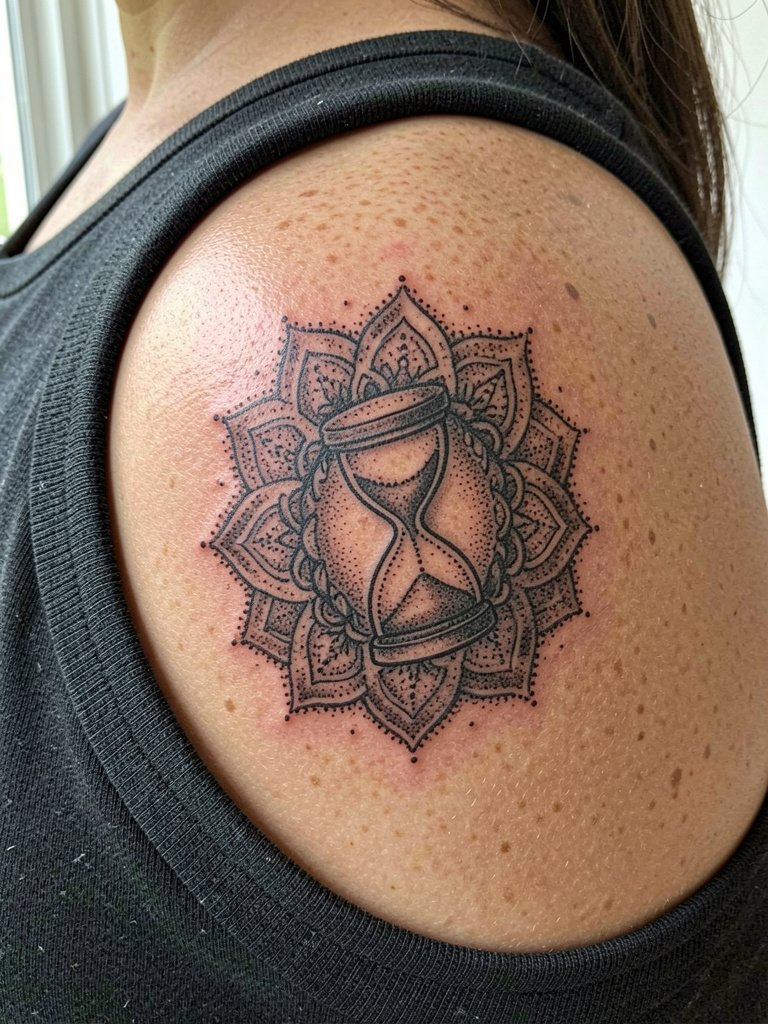
Dot-work gives an hourglass an ornamental presence while keeping linework minimal. The shoulder blade handles stipple well because the skin is flat and low-movement. Sessions are moderate in length. People often ask for dot density at the same scale used in large back pieces and end up with muddiness. Ask the artist to show a healed dot density sample at the size you want so the mandala negative space remains deliberate. For visibility, a scoop-neck tee frames the area without competing with the pattern.
8. Watercolor Hourglass with Color Drips on Forearm
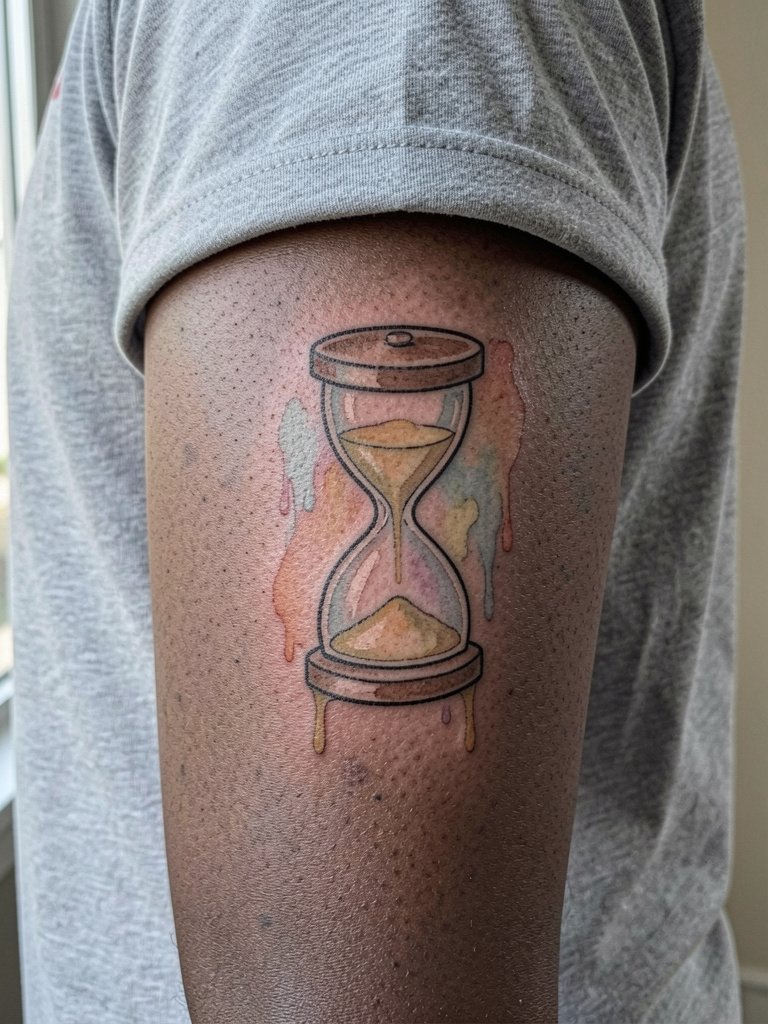
Watercolor techniques can make an hourglass feel organic, but pigments fade on high-friction spots. Forearm exposure speeds color loss and can turn soft washes into muddy patches if they were applied too thin. A common mistake is choosing vivid washes without planning for yearly refreshes. If you want color longevity, request slightly denser saturation in the first pass and plan a touch-up at 12 to 18 months. For outfit pairing, a short-sleeve linen shirt with the sleeve rolled showcases the color without heavy sun exposure.
9. Neo-Traditional Hourglass with Rose and Banner on Upper Arm
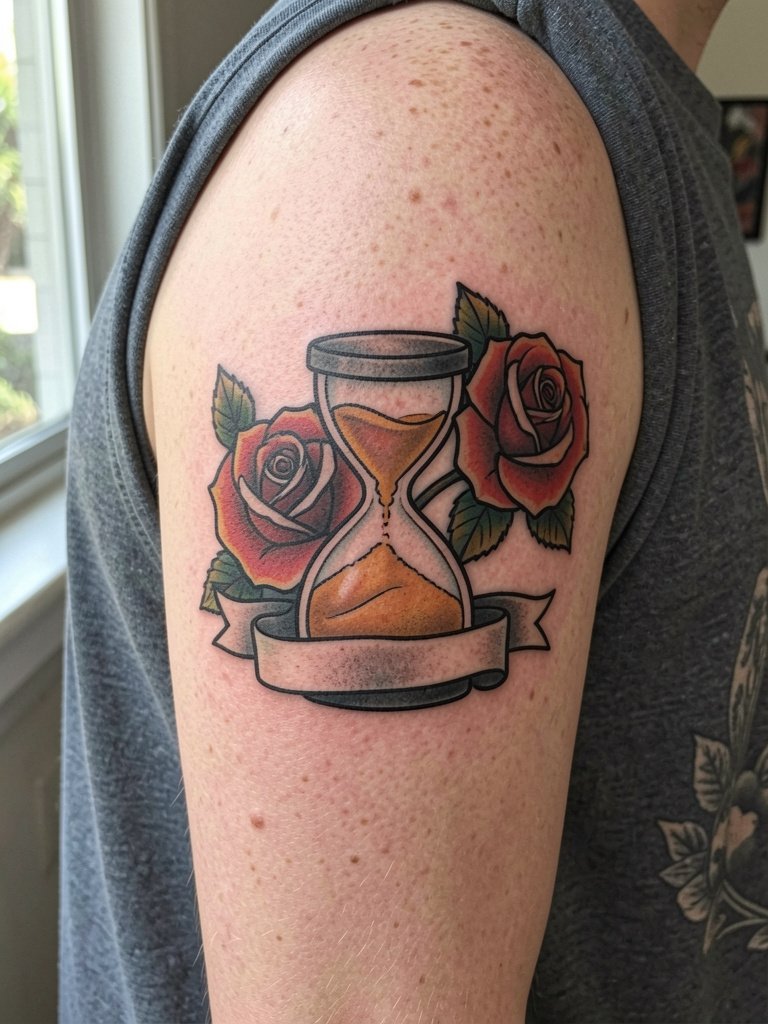
Neo-traditional shapes help an hourglass read from a distance and age into a classic look. Upper arm siting tolerates saturated color and bold outlines, which is why many pick this style. A real mistake is shrinking the banner text so it becomes illegible in a year. Specify exact banner wording and font size at the consultation. Session time depends on color saturation but plan for two sessions if you want deep fills. For casual show-off, a sleeveless hoodie or tank pairs well.
10. Small Geometric Hourglass on Side of Finger
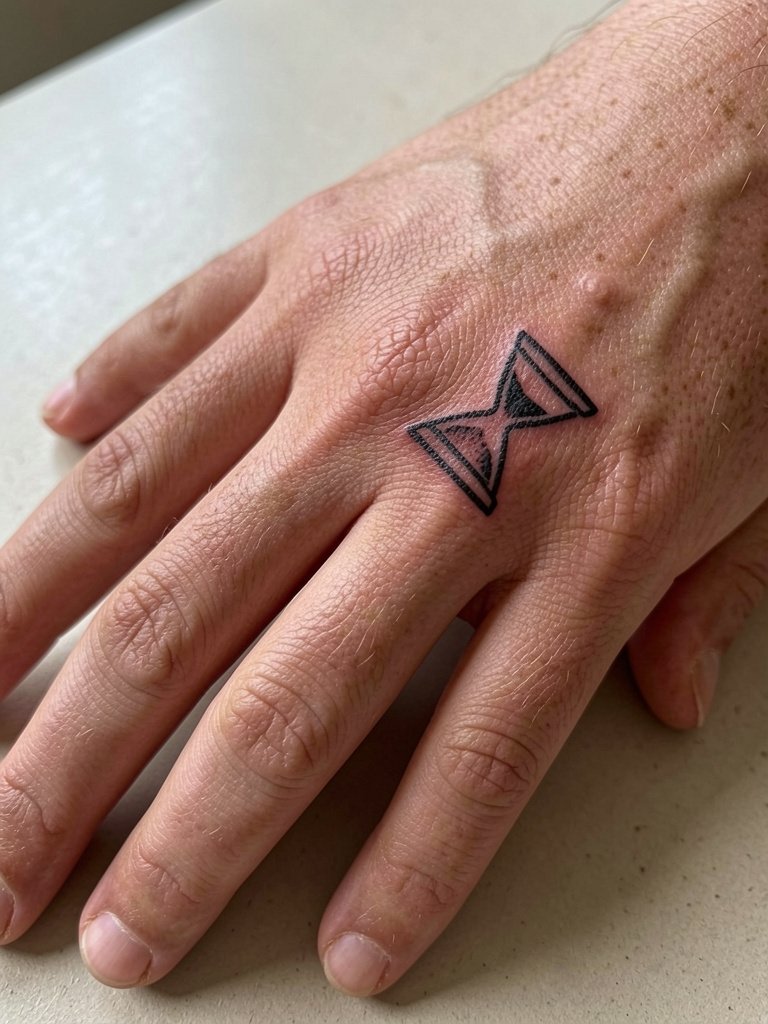
Fingers are high-blowout risk areas because the skin constantly flexes. A tiny hourglass here is striking initially and likely requires touch-ups within a year. One camp argues small finger work is fine if you accept annual maintenance. The other camp warns that frequent touch-ups add cumulative trauma and recommends placing small icons nearby on the hand or wrist instead. If you choose the finger, ask the artist to map the lines at the exact width they'll use so you see how the shape reads at scale. Keep the hand moisturized and avoid heavy abrasion during the first weeks.
11. Mechanical Hourglass with Gears on Inner Wrist
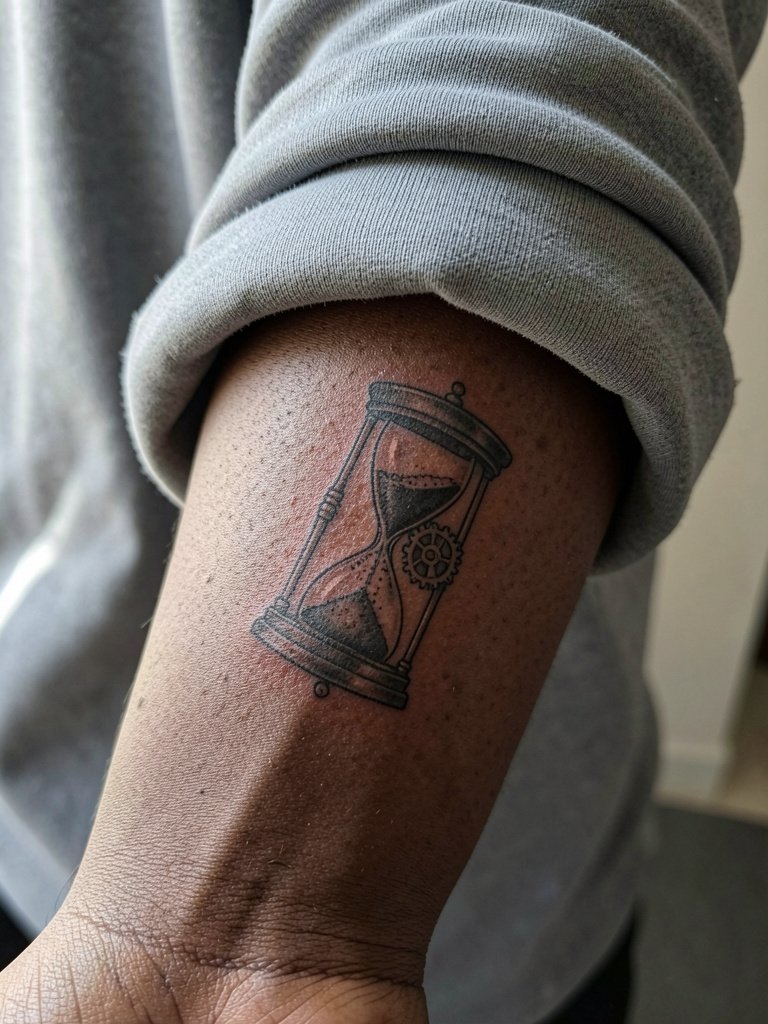
The inner wrist is visible and vulnerable. Mechanical details look crisp on day one but the fine cogs can soften. Expect a short, intense session and a likely touch-up at the one-year mark. A common mistake is crowding gear teeth too tightly. Instead, request simplified gear teeth or slightly bolder separations so the negative space holds. For session comfort, wear a loose button-up shirt so the artist has full access without fabric restricting the arm.
12. Split-Hourglass with Moon and Sun Halves on Chest
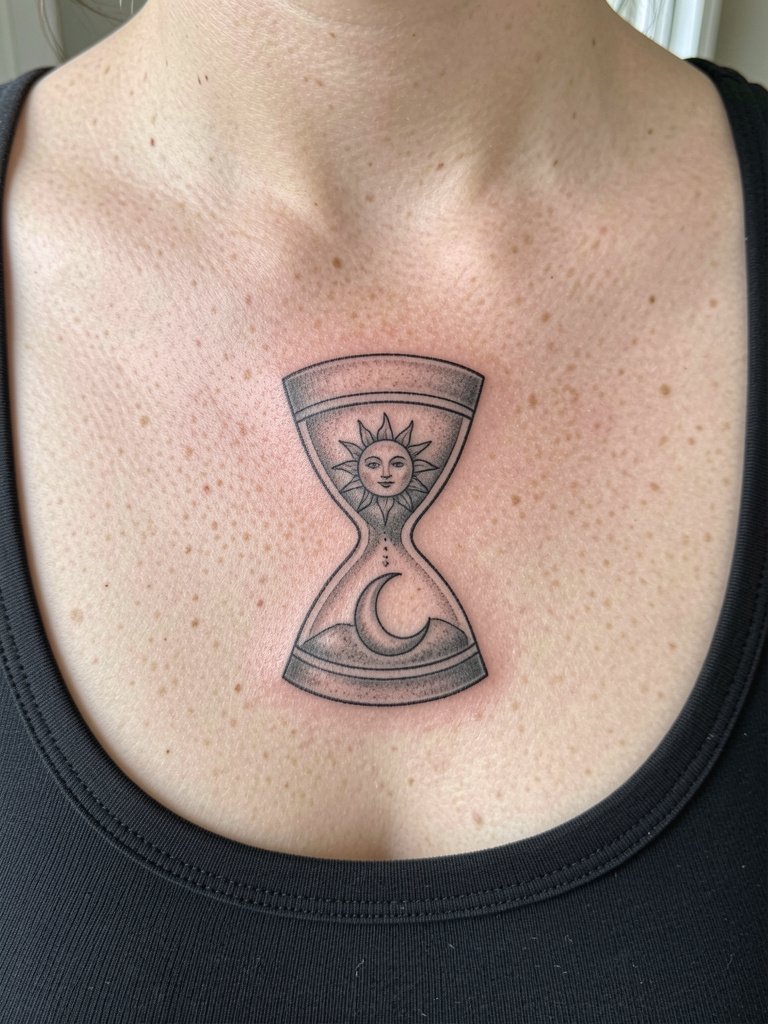
Center-chest hourglasses read as statements. Thin moons and suns can hold, but the chest moves with breathing and stretching so slightly heavier contour lines help. A session here can be more sensitive and may need breaks. A mistake is placing tiny celestial details too close to the sternum crease. Ask for spacing adjustments so the top and bottom chambers keep separation when you move. For layering with outfits, a wide V-neck shirt gives glimpses without exposing the whole chest.
13. Forearm Sleeve Hourglass Series with Timeline Symbols
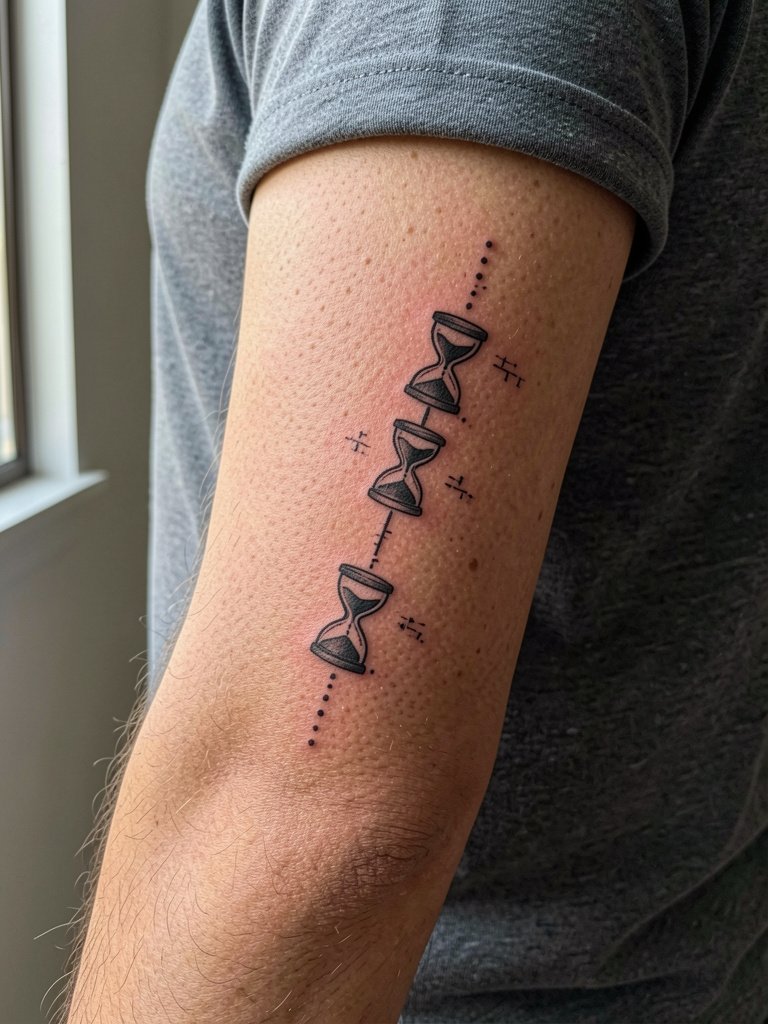
A forearm series tells a narrative without a single crowded icon. The movement across the forearm gives each hourglass breathing room, which reduces blowout risk compared with stacked tiny pieces. Sessions are segmented and easier to schedule. A mistake is compressing too many symbols in a narrow band and losing individual clarity. Bring the exact timeline symbols you want and have the artist draw them to scale. For visibility, cuff a light-weight denim jacket or push sleeves for a casual reveal.
14. Negative-Space Hourglass on Ribcage
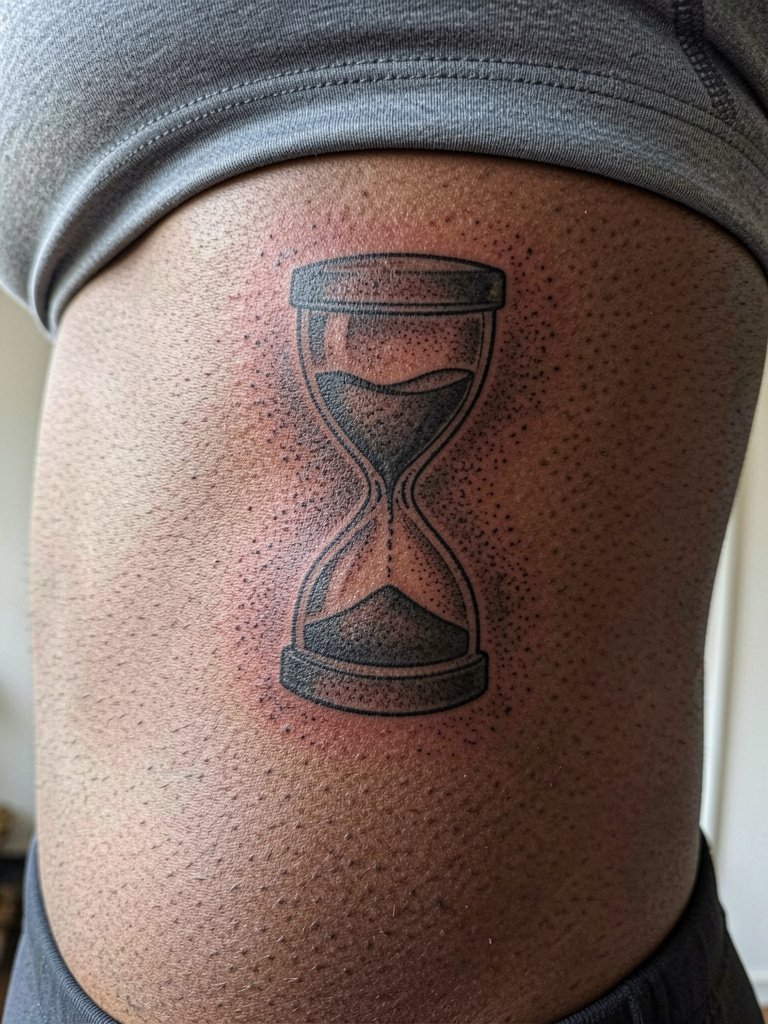
Negative-space ribs look striking when done with confident saturation around the silhouette. This placement is one of the controversy hotspots for fine line. One camp argues that fine line on ribs blurs because the skin stretches and lines merge within two years. The other camp says with proper needle depth and slightly wider spacing fine line can settle fine and point to healed photos as evidence. If you pick negative-space work here, request a mock-up that shows how the negative will survive at two different sizes and expect a tougher pain threshold during the session.
15. Minimal Script Hourglass Quote Along Collarbone
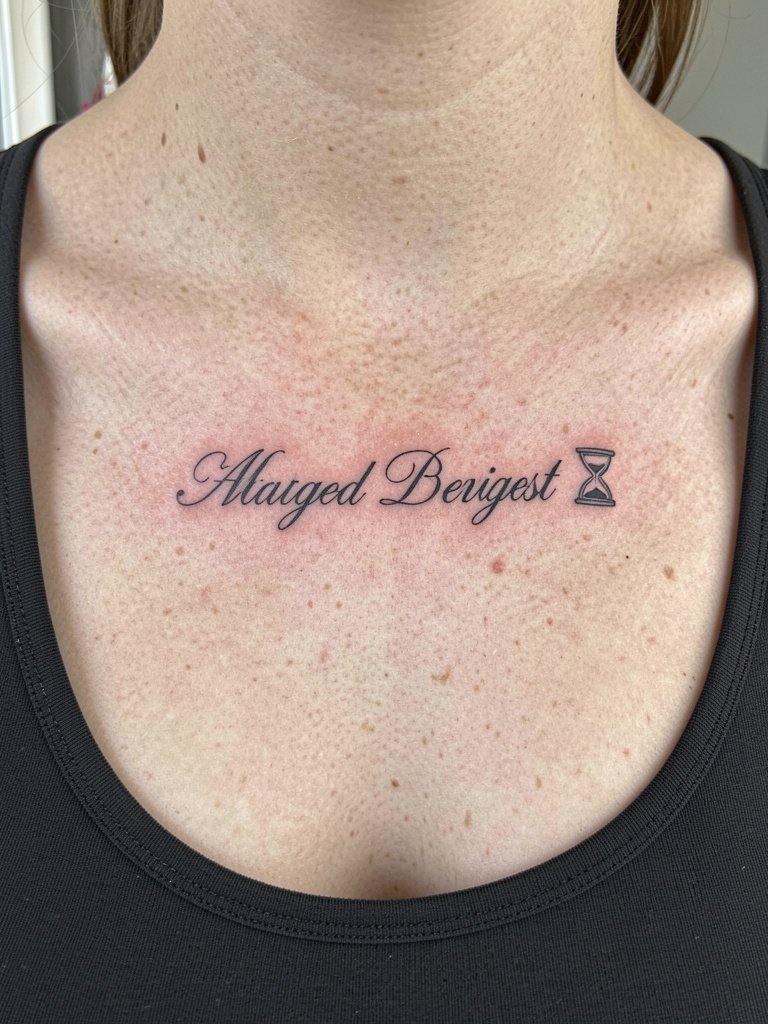
Script along the collarbone reads elegantly, but fonts matter. Tiny serif fonts can blur where the collarbone creases and rubs against straps. A common mistake is giving the artist a tiny screenshot of the font and not asking how it scales. Bring a scaled example and request the artist draw the exact letters at the final size. Session pain is moderate and healing is straightforward. Pair it with an open-neck shirt or a wide-collar button-up to highlight the area.
16. Hourglass Portrait with Realistic Hands on Sternum Side
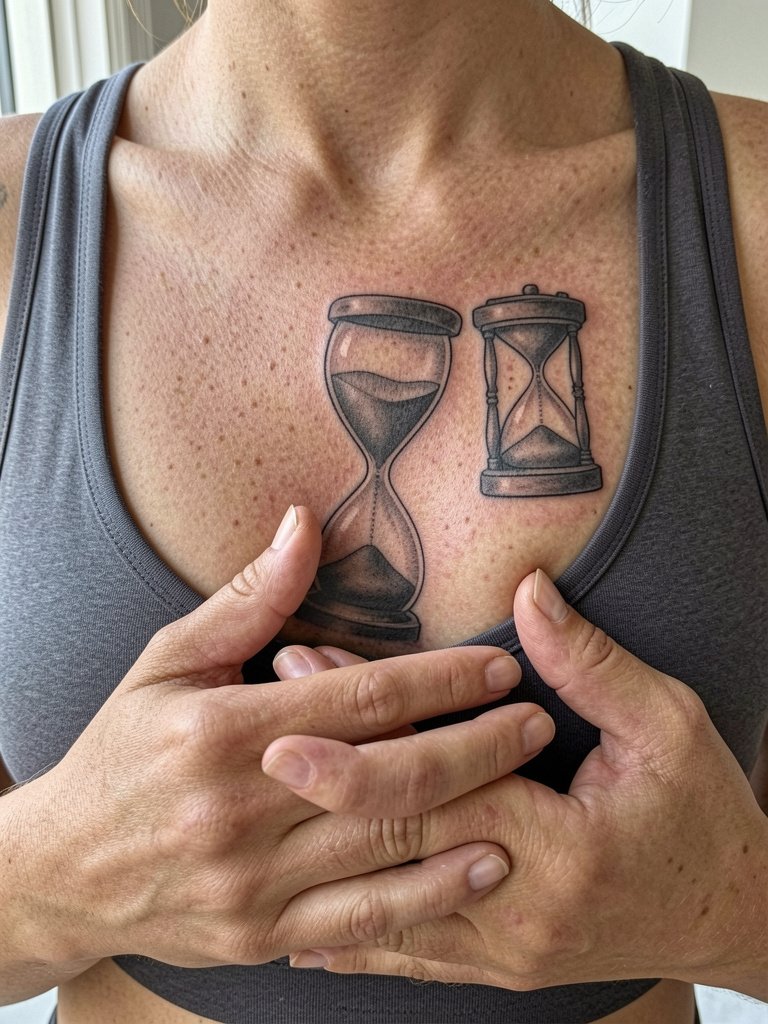
Realistic hands give the hourglass emotional weight and look striking near the sternum. Because the area shifts with respiration, ask for slightly heavier contours and softer shading rather than ultra-fine hairlines. Pain is on the higher side and sessions may be split. A mistake is aiming for photo-realistic skin texture in an area that heals unpredictably. Talk about the level of realism you want and see healed photos from the artist on similar placements.
17. Tiny Hourglass Behind the Ear with Script Accent
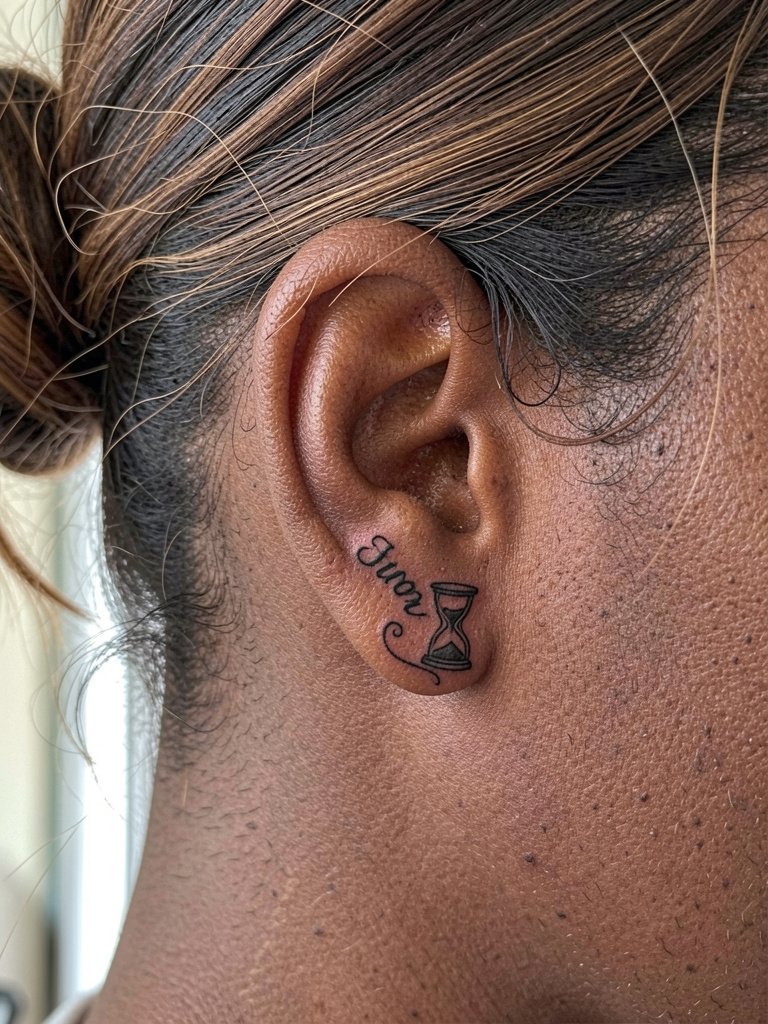
Behind-the-ear tattoos are discreet and vulnerable to fading. The skin there is thin and sessions are short but sharp. A mistake is requesting delicate script that is too small to stay legible over time. Ask the artist to show the letter height they will use and consider a slightly bolder script for longevity. For reveal, a neat updo or asymmetric haircut frames the area, and a simple hair tie or clip keeps the hair away during healing.
18. Hourglass with Plant Growth Wrapping on Ribcage
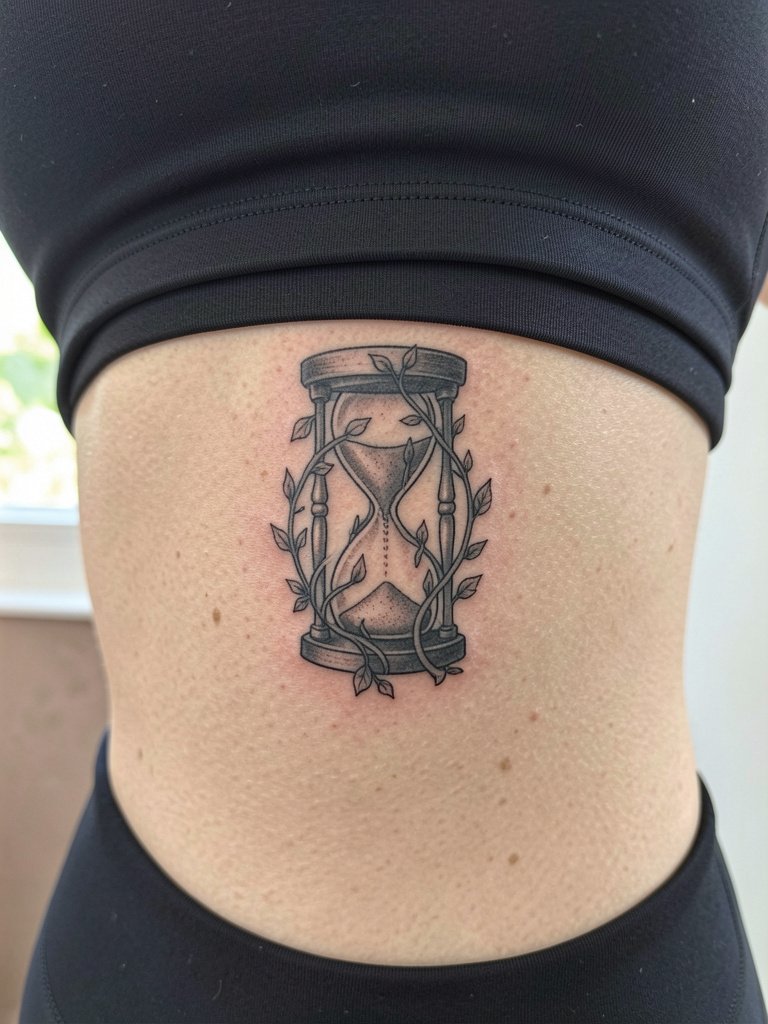
Botanical wraps around an hourglass create narrative motion, especially on the ribs. Keep in mind the rib skin flexes, so request slightly thicker connecting lines in the vines to prevent threads from softening. Sessions are sensitive and you will likely break this into smaller sittings. Avoid packing too many tiny leaves into narrow spaces. For session comfort, wear a fitted cropped top that the artist can work around easily.
19. Hourglass and Anchor Nautical Piece on Calf
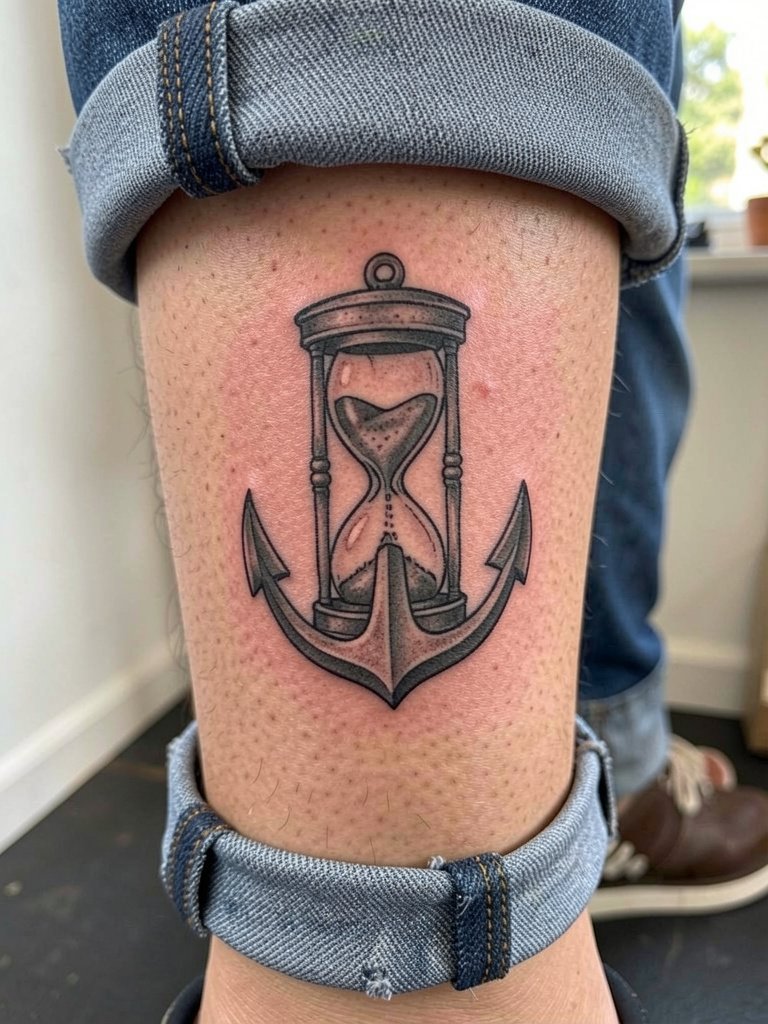
Nautical motifs pair naturally with hourglasses and the calf keeps the composition readable over time. Bold anchors resist blowout and touch-ups are straightforward if needed. A common mistake is over-detailing rope texture in a small area. Ask the artist to simplify small rope sections for clarity. For show-off, cuff your trousers and wear ankle-high boots or shorts that frame the lower leg.
20. Atomic Hourglass with Constellation Fill on Shoulder Cap
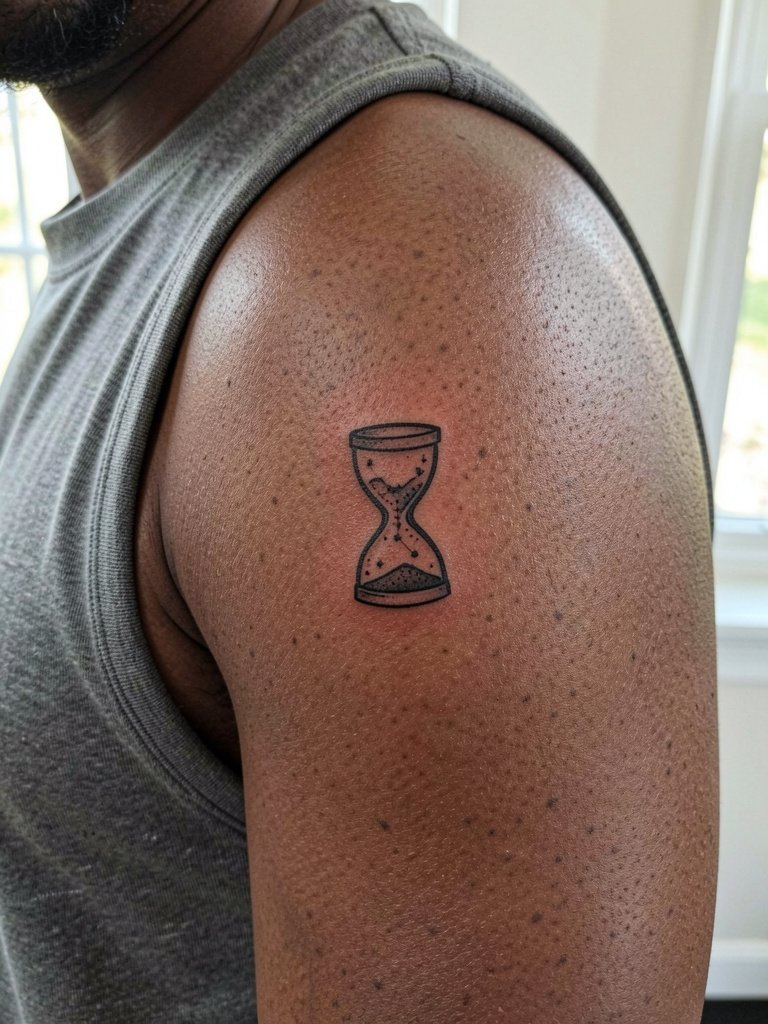
Shoulder cap placements take pigment well and constellations inside an hourglass can look like tiny jewels. Mistakes happen when dot spacing is too tight and creates a gray wash after healing. Request a dot spacing mock-up at the exact size you want and ask for slightly larger negative gaps. Session is quick and pain is low. For beach season, a tank top keeps the piece visible.
21. Etched Linework Hourglass on Inner Bicep
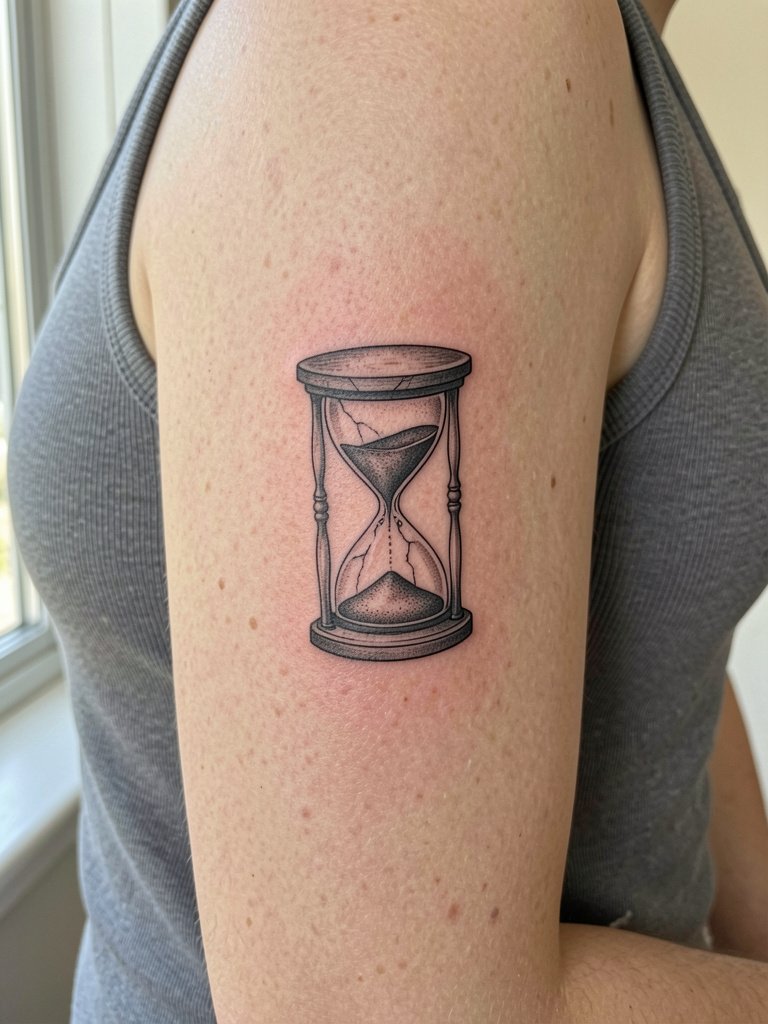
Inner bicep is a protected area where fine etched lines can survive longer than wrists. Pain is moderate and the skin is forgiving, but avoid placing ultra-fine cracks right next to hair follicles. A common misstep is asking for needle-thin cracks without considering future hair growth and texture. Ask the artist to map hair follicle areas and leave slight spacing so the etched look keeps contrast. For sessions, a sleeveless top gives easy access.
22. Hourglass with Chain Link Around Wrist
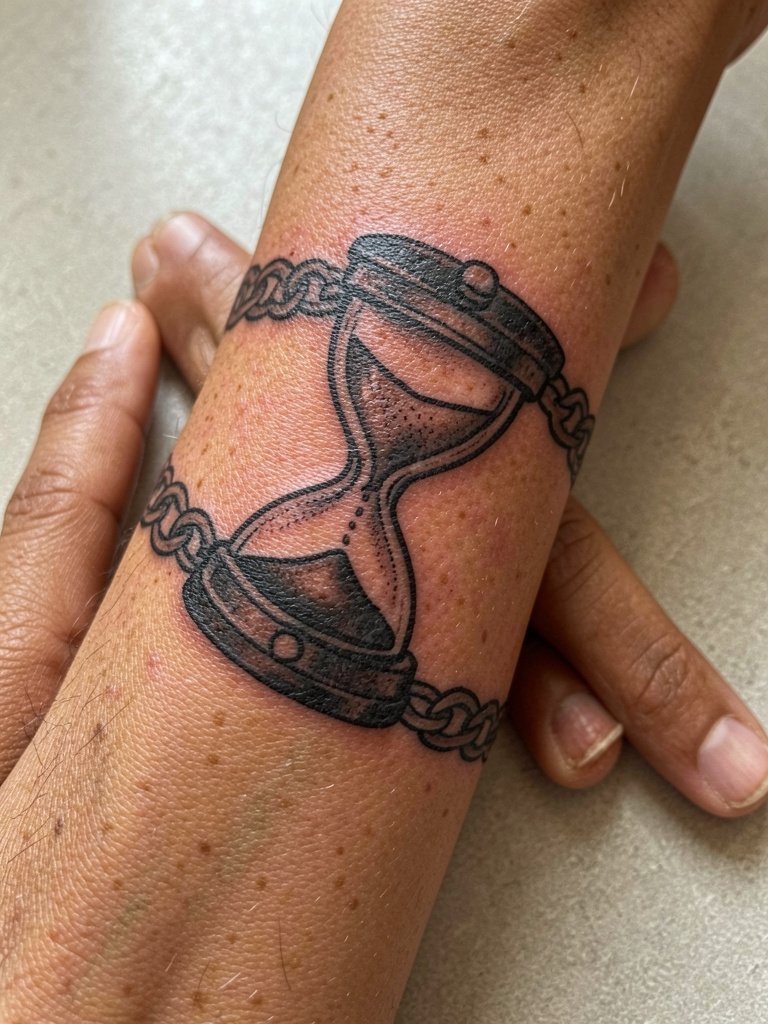
Wrist cuff hourglasses feel like jewelry but are exposed to frequent washing and friction. Chains and repeated small links must be drawn with spacing that allows for movement. A typical error is asking for continuous tiny links that blur together. Instead, request fewer, slightly larger links and confirm how the cuff sits when the wrist is at rest. Keep the wrist protected in the first five days and avoid heavy bracelets during healing.
23. Large Back Piece Hourglass with Scene Inside
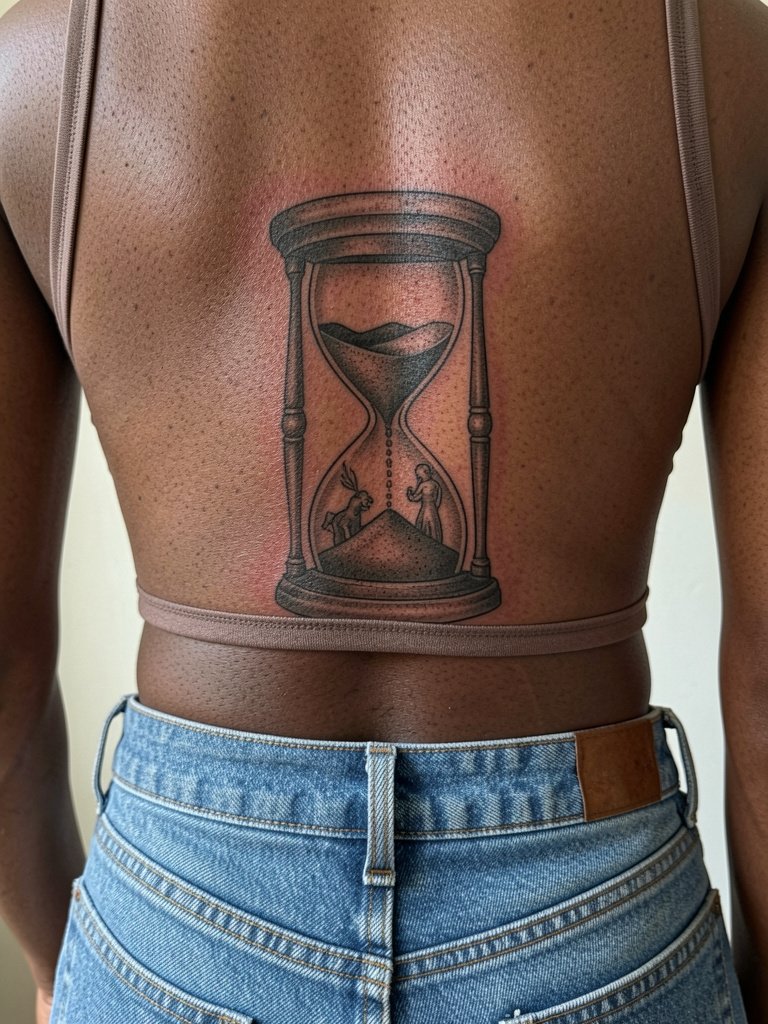
A back hourglass gives you scale for narrative detail and makes long sessions worthwhile. The lumbar and upper-back skin handle large shading passes well. Plan multiple sessions of three to four hours and expect staged healing. A mistake is overloading the chambers with micro detail that reads nothing from a standing distance. Ask the artist to show both a close-up and a viewing-distance mock-up. For appointment comfort, wear a loose drawstring linen pant so the waistband does not press on freshly inked lower-back skin.
Frequently Asked Questions
Q: How do hourglass tattoos age on different placements like wrist, ribs, and thigh?
A: Wrist and finger tattoos face the most movement and washing, so expect softening and earlier touch-ups. Ribcage work depends on body motion and stretch, so slightly bolder linework helps. Thigh and back placements generally age best because they avoid constant friction. Plan one to two touch-ups in the first five years for delicate styles.
Q: Where can I find healed hourglass examples and portfolio discovery without naming artists?
A: Search targeted hashtags and location filters on image platforms for healed shots. Try searches like #HourglassTattooHealed, #MinimalHourglassInk, and platform location filters to see nearby portfolios. Reddit tattoo threads and curated portfolio sites are good for side-by-side healed progress photos in different skin tones.
Q: Are fine-line hourglasses on the ribs worth it given the controversy over longevity?
A: One camp says fine-line ribs blur within a couple of years because of skin stretch and movement. The other camp believes slight adjustments to needle depth and spacing allow fine-line ribs to settle well, and they cite healed examples at multi-year marks. If you pick ribs, prioritize spacing and ask the artist to draw the design at the exact final size so you can judge how it will age.
Q: What should I wear to the studio for a sternum, inner bicep, or thigh hourglass session?
A: For the sternum, a fitted sports bra or bandeau keeps access and modesty. For inner bicep, a tank top with the arm relaxed is ideal. For thigh work, tight bike shorts or shorts with a mid-thigh hem let the artist reach the area without fabric pulling. Pack a comfortable loose top for breaks.
Q: How often will I need touch-ups for watercolor or pastel-style hourglasses?
A: Watercolor pigments fade faster than saturated blackwork, particularly on exposed forearms and hands. Plan a color refresh between 12 and 24 months for pastel washes and expect more frequent touch-ups if you spend a lot of time in the sun. Ask the artist about their preferred pigment density on the first pass to improve longevity.
