
Fine line looks gorgeous on a scroll-through, but what keeps a half sleeve looking crisp after three years is spacing, ink saturation, and where the design sits on your body. Pick the wrong placement for single-needle work and the lines can blur. Choose the right placement and build the sleeve in staged sessions, and the piece will age with clarity instead of softening into a vague smudge.
1. Fine Line Botanical Half Sleeve, Inner Upper Arm
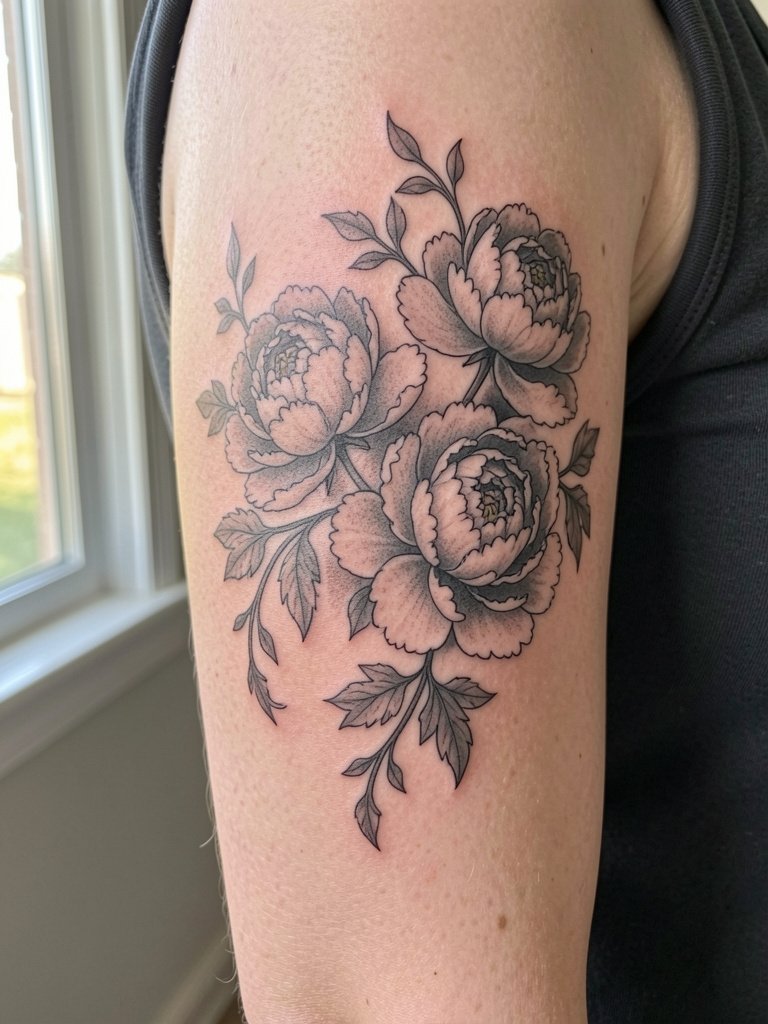
Delicate vines read beautifully on the inner upper arm because the skin there is smooth and the piece gets protected from constant sun. If you want fine line, choose inner upper arm over high-stretch zones like ribs. One camp argues fine line on ribs blurs within two years because that skin shifts and compresses constantly. The other camp says fine line can settle fine on ribs when the artist spaces lines slightly wider and controls needle depth. Plan for two to three sessions, expect gentle touch-ups around year two, and wear a linen button down shirt to show the work without covering the arm.
2. Neo-Traditional Skull and Roses, Outer Deltoid to Elbow
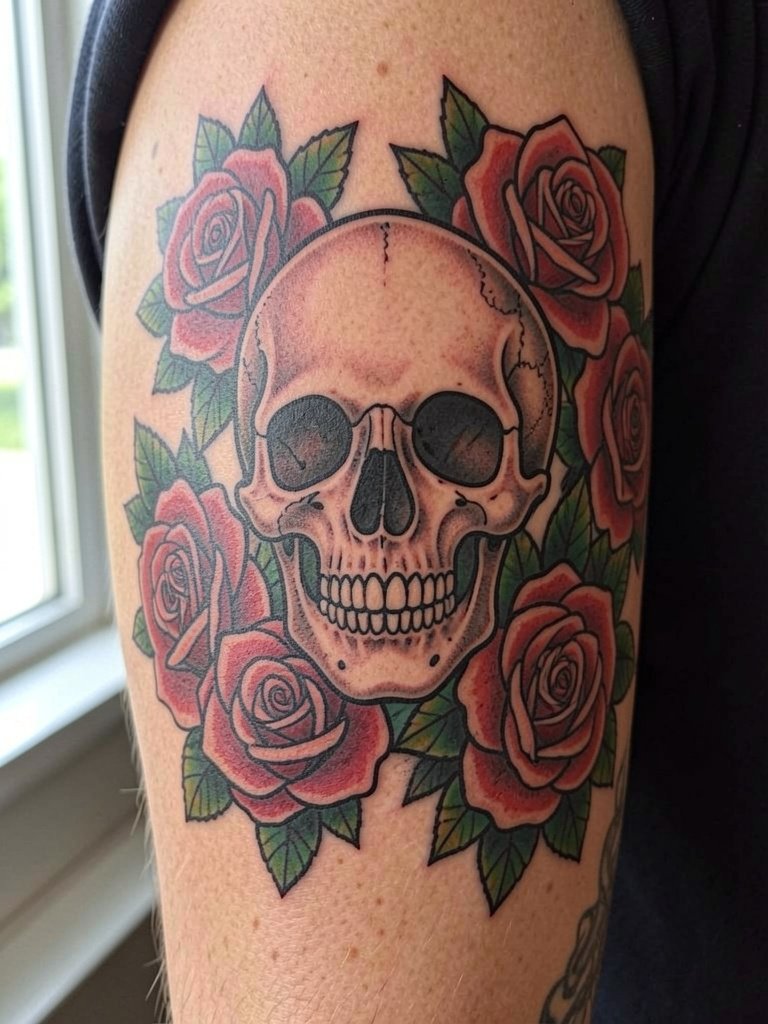
Neo-traditional holds up because thick outlines protect against blur and color saturation resists sun loss. This placement reads from across a room, so expect three sessions for full saturation. Common mistakes are asking for tiny skulls with the same line weight as a chest piece. For a half sleeve, scale the motifs so petals and jawlines breathe. Session wear: use a vintage tank top that gives the artist full shoulder access and flat fabric that does not pull on the deltoid during airflow.
3. Blackwork Ornamental Mandala, Inner Forearm
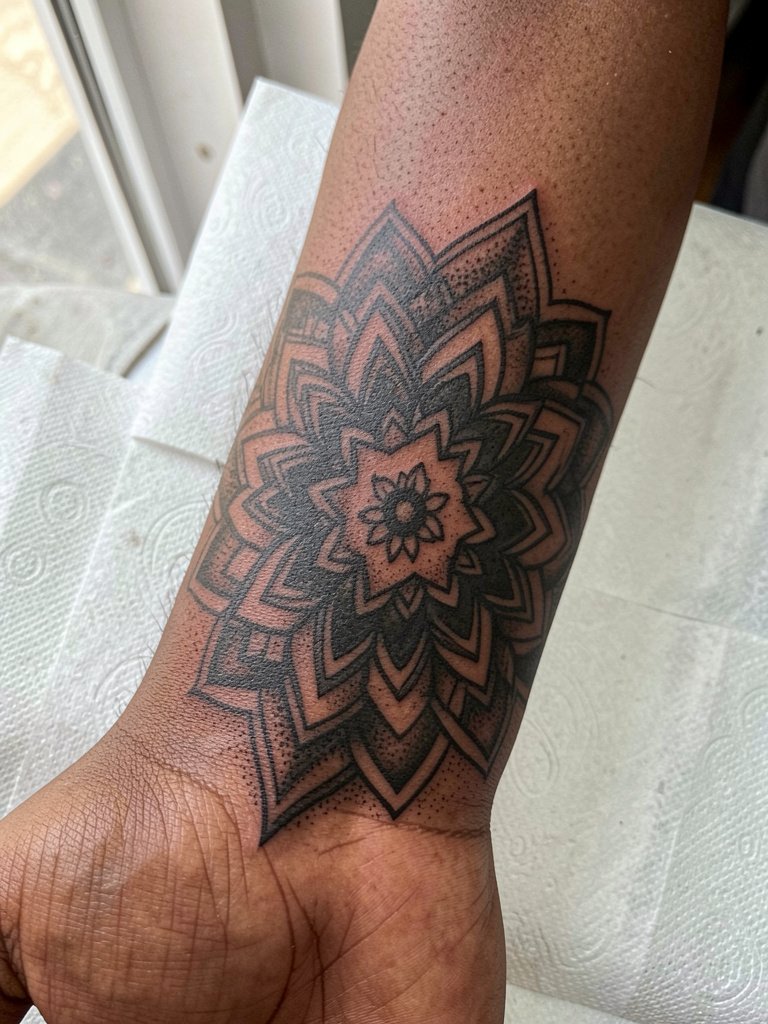
A mandala in dense blackwork ages well because contrast is forgiving as lines soften. Expect two to three sessions for crisp negative space and stipple shading. The main mistake is making elements too small; geometry needs room to breathe or the pattern will knit together by year three. For session comfort and to show it off, roll up a linen button down shirt. During consultation bring scale references so the artist can map how the pattern will look at six months and at two years healed.
4. Watercolor-Style Abstract Splash, Outer Forearm
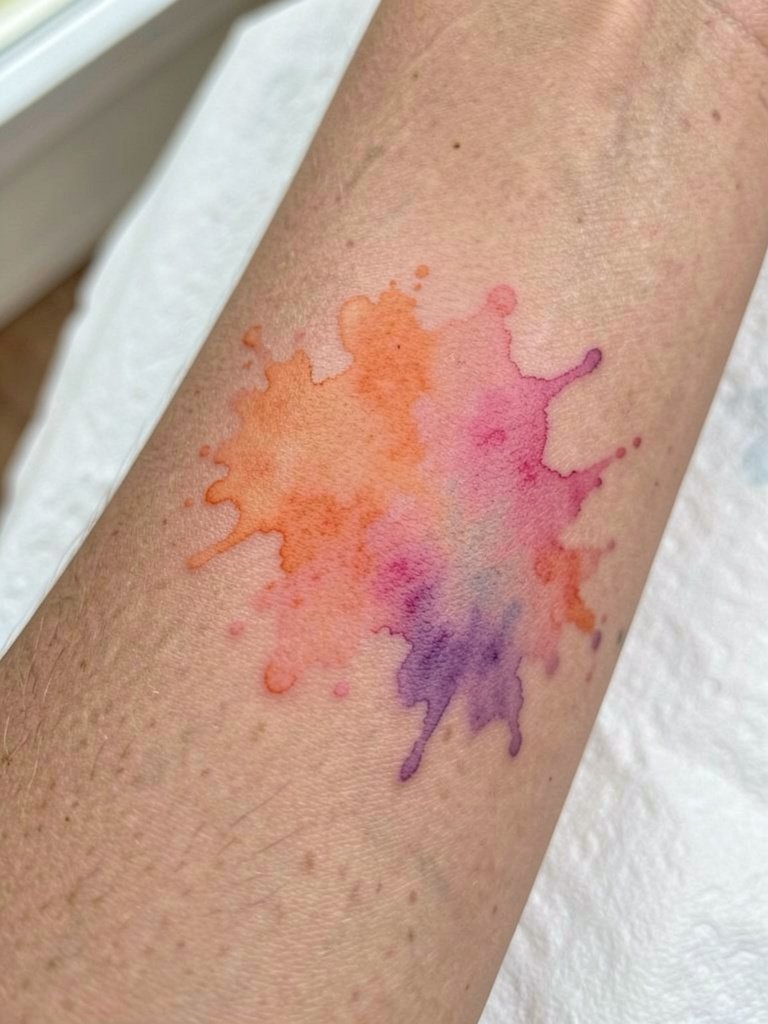
Watercolor looks painterly but it can fade unevenly because of low saturation and lack of outlines. If longevity matters, ask for slightly more saturation and a faint anchor line behind color washes. The mistake is copying a tiny watercolor flash from social media that lacks pigment depth. Expect three sessions and touch-ups sooner than blackwork. Show-off pairing: light, airy fabrics in pastels emphasize the soft edges, try a chiffon blouse to complement the palette.
5. Minimalist Line Art Femme Silhouette, Inner Upper Arm
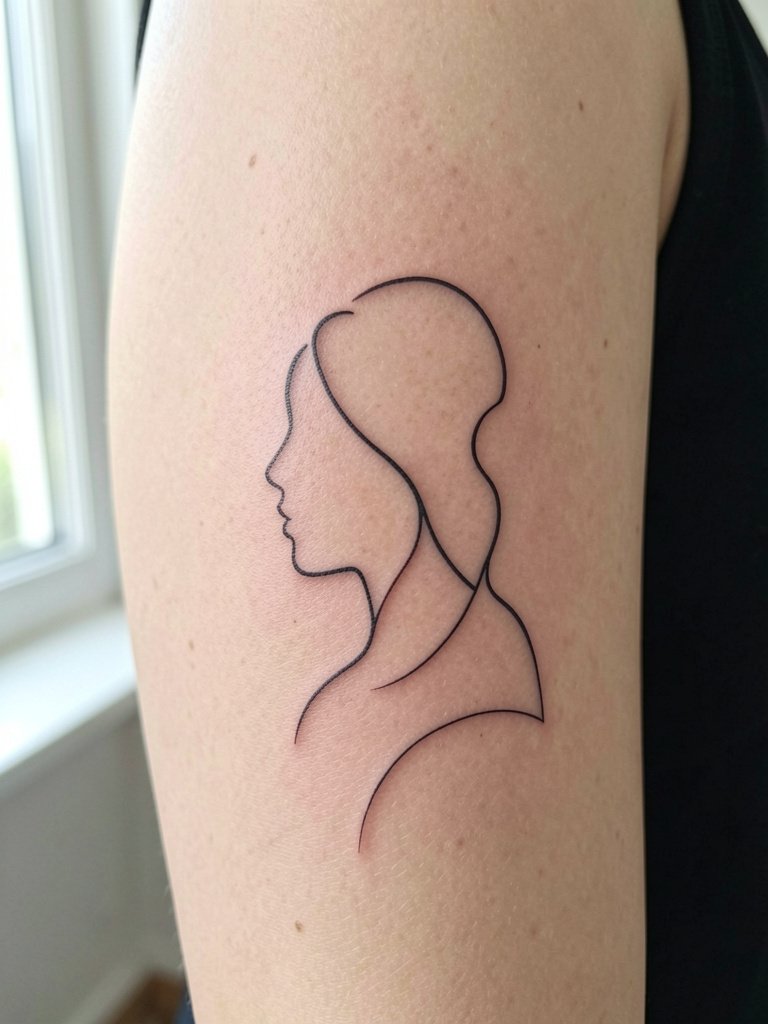
Single-line silhouettes feel intimate and usually need one to two sessions. The common error is going too small for single-needle work on textured skin. On the inner upper arm the skin is a forgiving canvas, but fine line still softens with time. Talk specifics about line weight and ask for a hair-thicker single-needle approach if you want the image to read at year three. For appointment day wear a loose button-down so the artist can access the area without a tight cuff. Pair the piece with a dainty gold stacked bracelet set on the opposite wrist for editorial balance.
6. Micro-Realism Portrait, Outer Deltoid
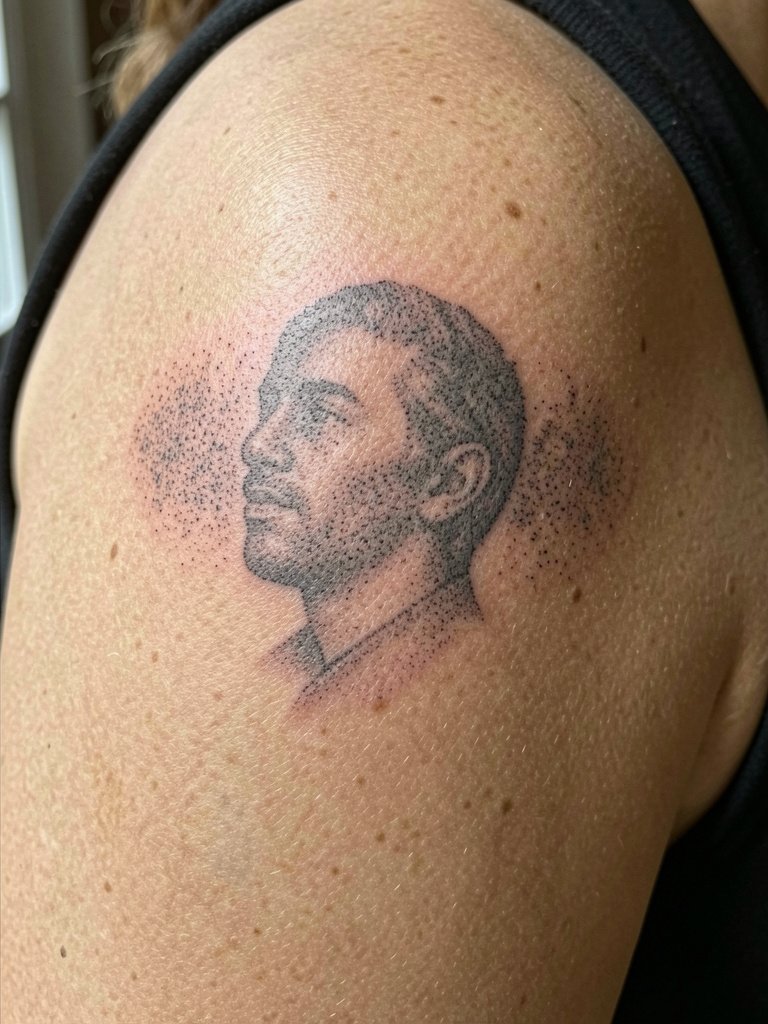
Micro-realism portraits need three to four sessions and careful shading to avoid muddying. The biggest mistake is requesting a tiny photo-realistic face and expecting it to hold detail at shirt-sleeve scale. For this placement, schedule longer shading sessions and plan a touch-up around year two. Bring two clean reference crops at different scales so the artist can see how the features translate. For showing off saturated greys, a solid-color tank or sleeveless blouse works great; try a sleeveless blouse solid color on nights out.
Pre-Session Essentials
After the first six ideas many of the pieces above share the same session needs, so these five items help the day and the first week.
- Stencil transfer paper kit. Lets you preview line placement directly on skin before the needle starts, which matters for symmetrical mandalas and script wraps.
- Topical numbing cream. Applied as directed can ease longer deltoid and rib sessions for first-timers.
- Thin protective film roll. Useful for small areas that face friction in the first week, especially on forearm pieces.
- Fragrance-free gentle body wash. Cleans the area without added fragrance or harsh detergents during the early healing window.
- Aquaphor healing ointment. A familiar mainstream balm for the thin initial layer recommended by many clients for fine line zones.
7. Ignorant-Style Doodles, Inner Forearm
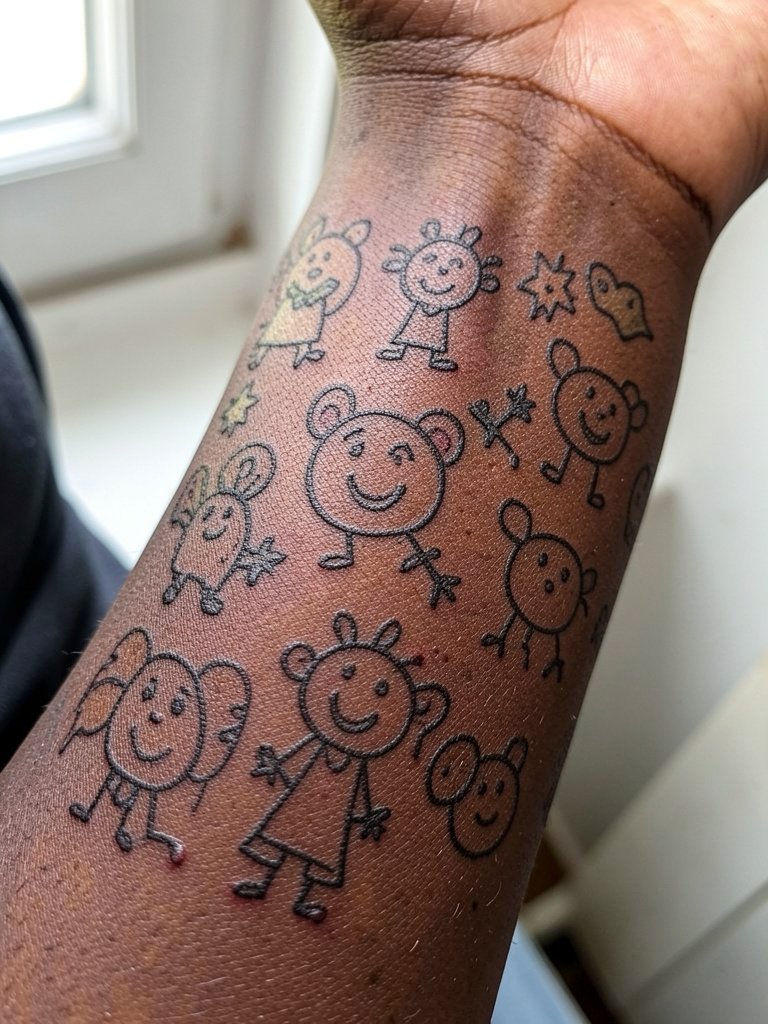
Ignorant-style doodles are low-commitment and fun for a patchwork half sleeve. They usually take one to two sessions depending on the number of elements. People often copy tiny online doodles that lack presence; scale them up slightly so the imperfect lines read as intentional. For session wear a loose button-down or short-sleeve shirt that gives full forearm access. If you plan a patchwork sleeve later, leave negative space between doodles so each piece can stand alone when fresh and after several years.
8. Ornamental Lace and Filigree, Collarbone to Outer Deltoid
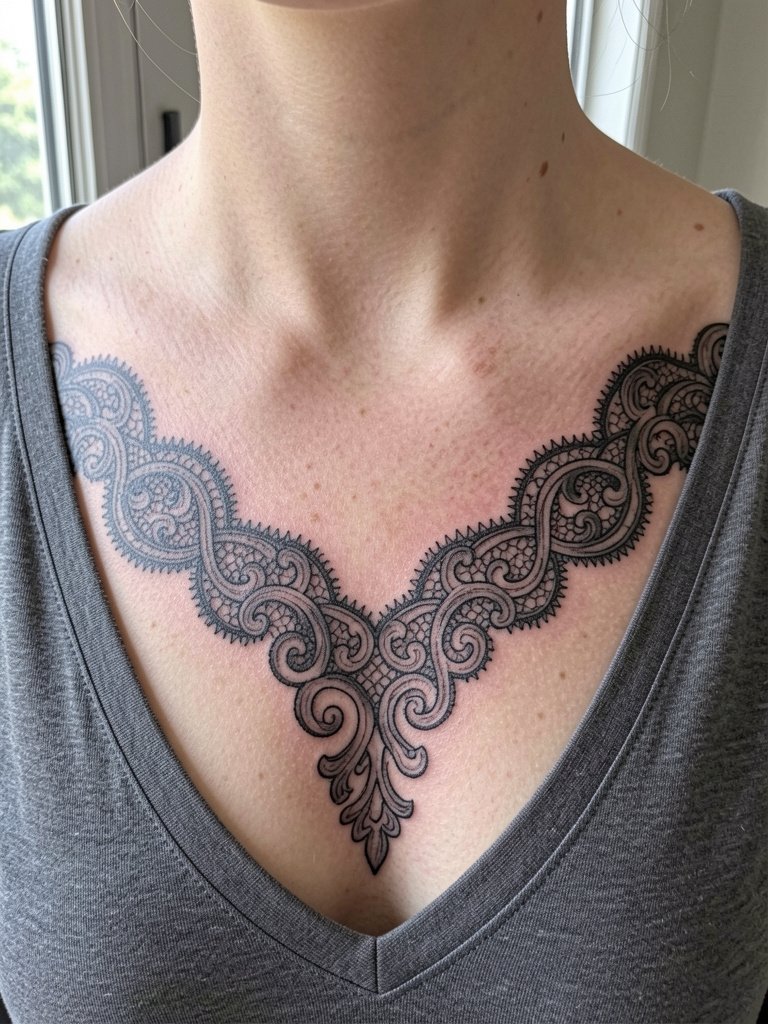
Lace motifs need careful spacing so delicate loops do not merge over time. For collarbone work, the skin there moves with breathing and bras. One common failure is placing ultra-fine filigree too close to seams or underwire. Expect two sessions and plan to show the artist the neckline of the clothes you intend to wear. Show-off pairing: strapless tops or lace-trimmed camisoles will let the lace echo the garment, try a lace camisole for evenings.
9. Neo-Traditional Butterfly and Thorns, Outer Forearm
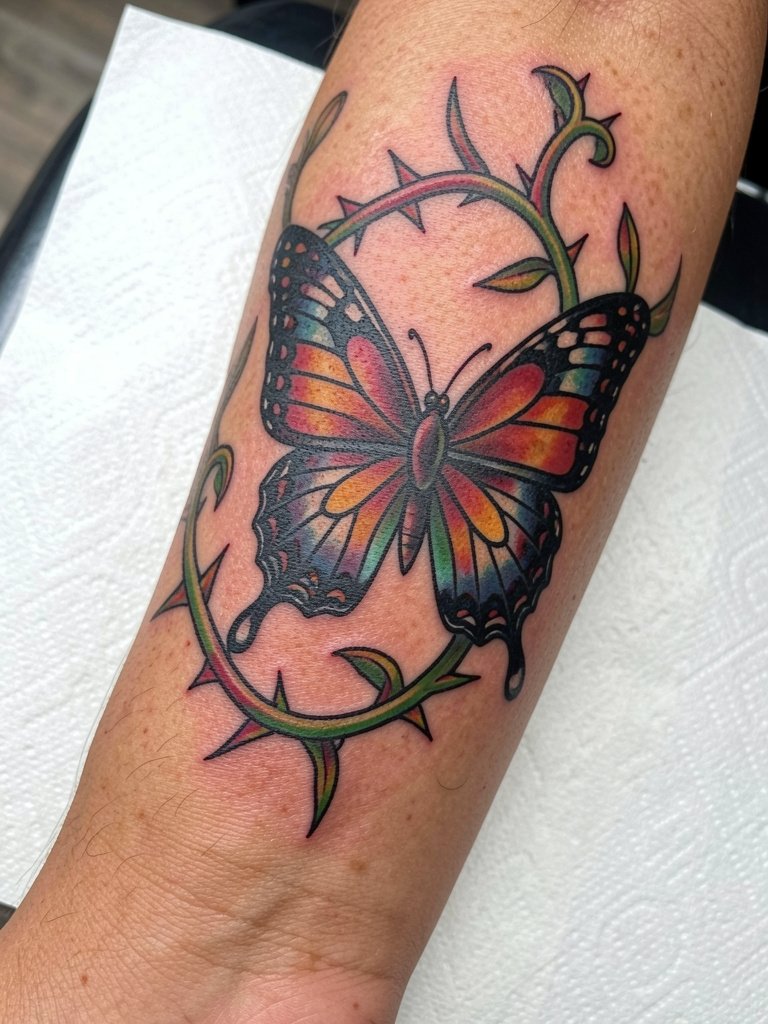
Butterflies with thorned vines make strong composition when the wings have enough solid color to retain shape as the ink ages. The typical mistake is tiny wing details that vanish. Plan two to three sessions for full color saturation. For showing the outer forearm, light, short sleeves or a pastel blouse complement watercolor edges and saturated neo-traditional fills.
10. Fine Line Script and Star Cluster, Inner Upper Arm
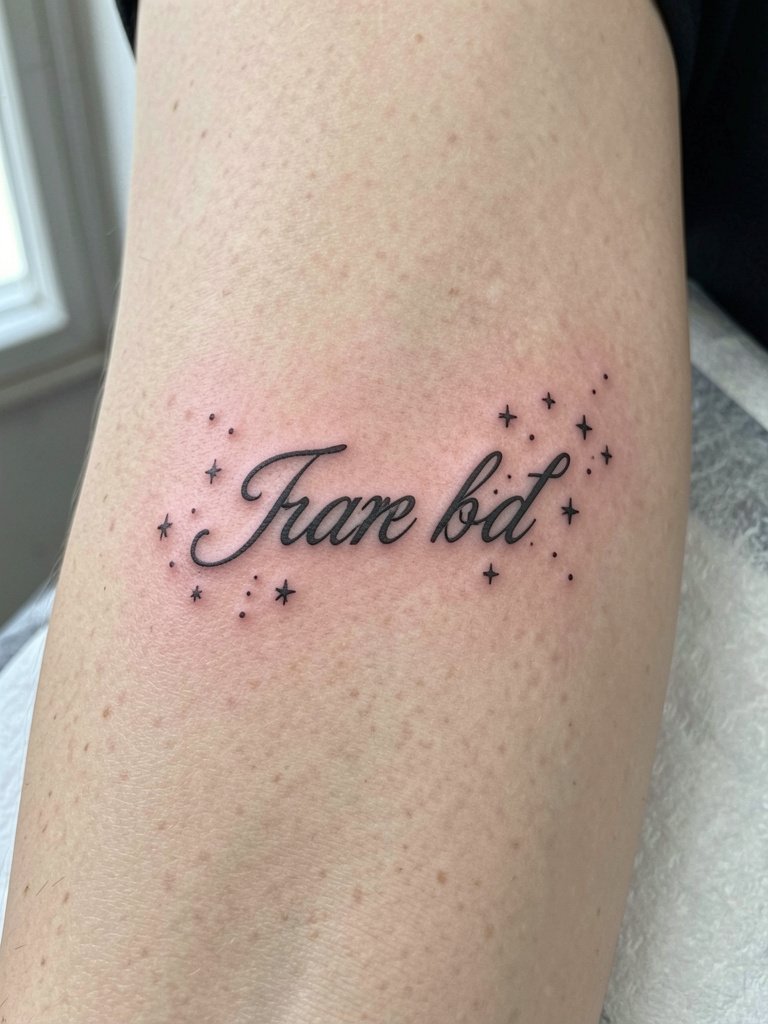
Script is very sensitive to line weight and spacing. Pick a slightly bolder single-needle thickness if you want the quote to remain legible after a few years. The common misstep is copying ultra-thin script that looks beautiful in a macro photo but becomes an unreadable hairline in person. Plan for a one to two session timeline and ask for a touch-up option at year two. For session comfort wear a loose short-sleeve shirt so the cuff does not press on the healing area.
11. Blackwork Anchor and Rope, Outer Deltoid
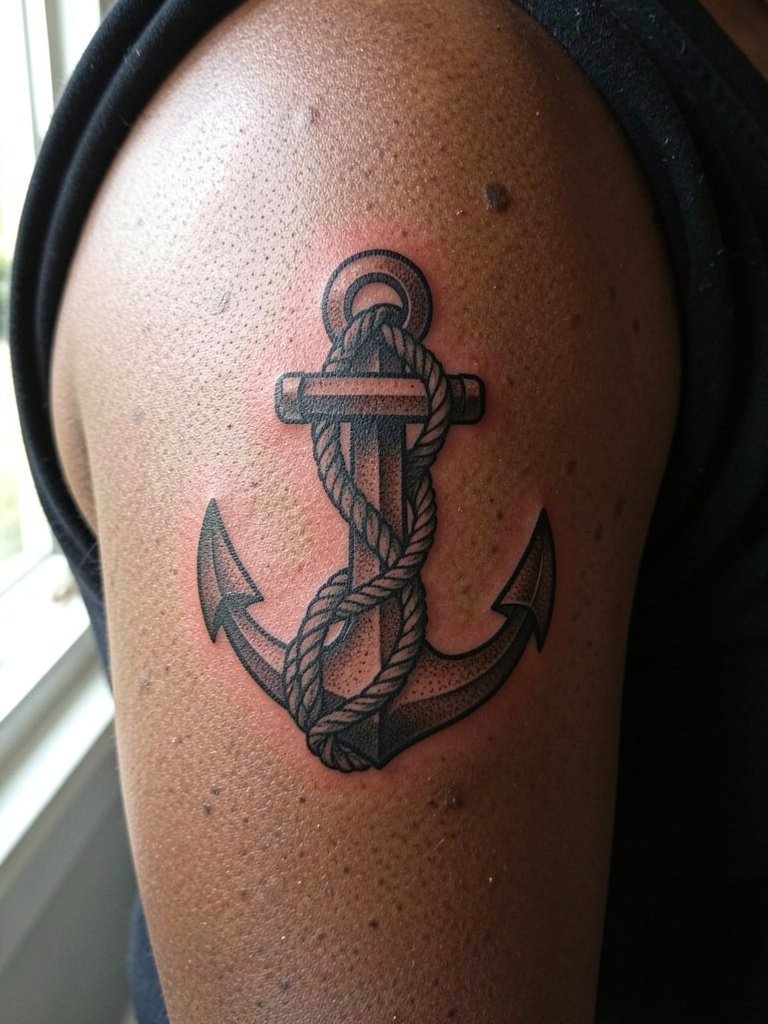
Blackwork anchors are classic and durable because the heavy saturation resists fading. Expect two sessions for full black fill and a solid rope texture. The main error is underestimating how much black you want; ask about saturation density so the anchor does not look patchy later. Showing off a blackwork deltoid works well with a solid-color tank top. Plan post-healing photos in indirect light so saturation reads accurately on camera.
12. Watercolor Sunset Gradient, Outer Forearm
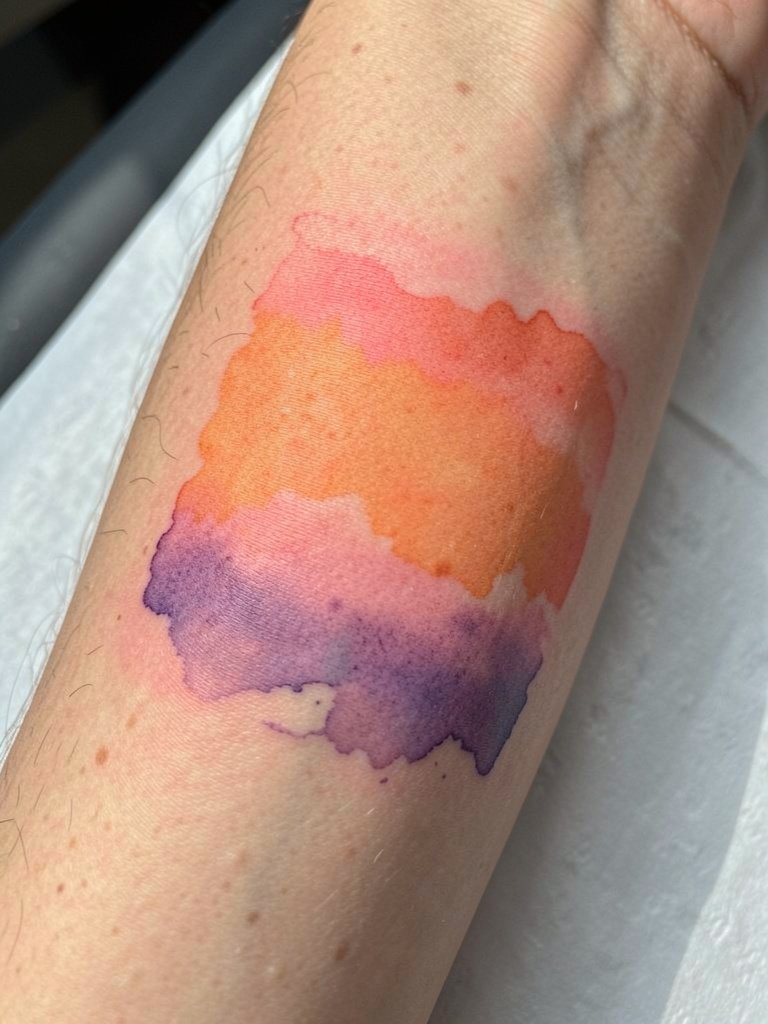
Watercolor gradients give a soft horizon across the forearm, but artists often debate the best healing approach. One camp favors using protective film for the first few days to lock moisture and reduce scabbing. The other camp prefers dry healing to let the skin breathe and avoid adhesive reactions. Both positions exist for a reason and studios will recommend the method they have seen succeed most in their book. If you want watercolor to hold color, plan for a three-session approach and a realistic touch-up around year two.
13. Minimalist Geometric Triangle, Inner Forearm
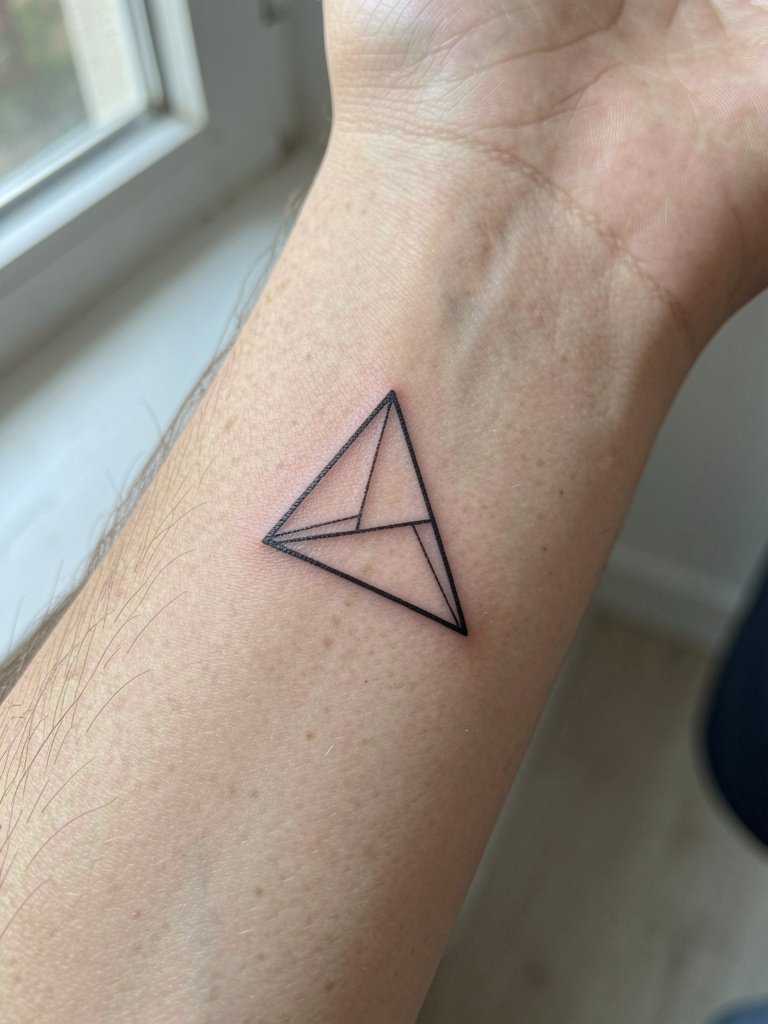
Geometric pieces need precise spacing and confident linework. The mistake is making the internal lines too close to the triangle's border. On the inner forearm choose slightly wider negative space so the triangle reads at year three. This is a single-session design for experienced artists, but confirm the healed photo examples during booking. For display, rolled cuffs on a linen button down shirt frame the geometry without overpowering it.
14. Neo-Traditional Dragon and Clouds, Outer Deltoid to Elbow
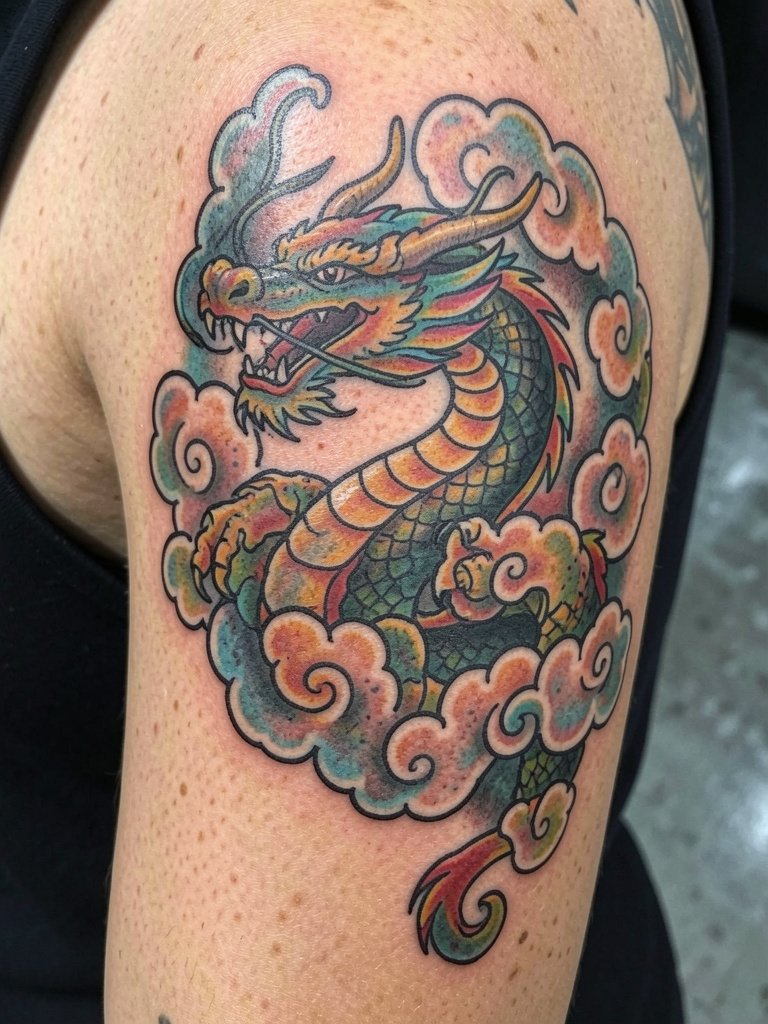
Dragons require scale and contrast to retain their silhouette over time. Expect three to four sessions depending on wrap and color load. A common issue is asking for too many tiny scales; the texture can blur into a muddled gray. For a sleeve feel plan the cloud placement with the artist so negative space reads as wind rather than blotches years later. Session wear: sleeveless or short-sleeve tops let the artist rotate the arm freely.
15. Fine Line Feathers and Wing, Inner Upper Arm
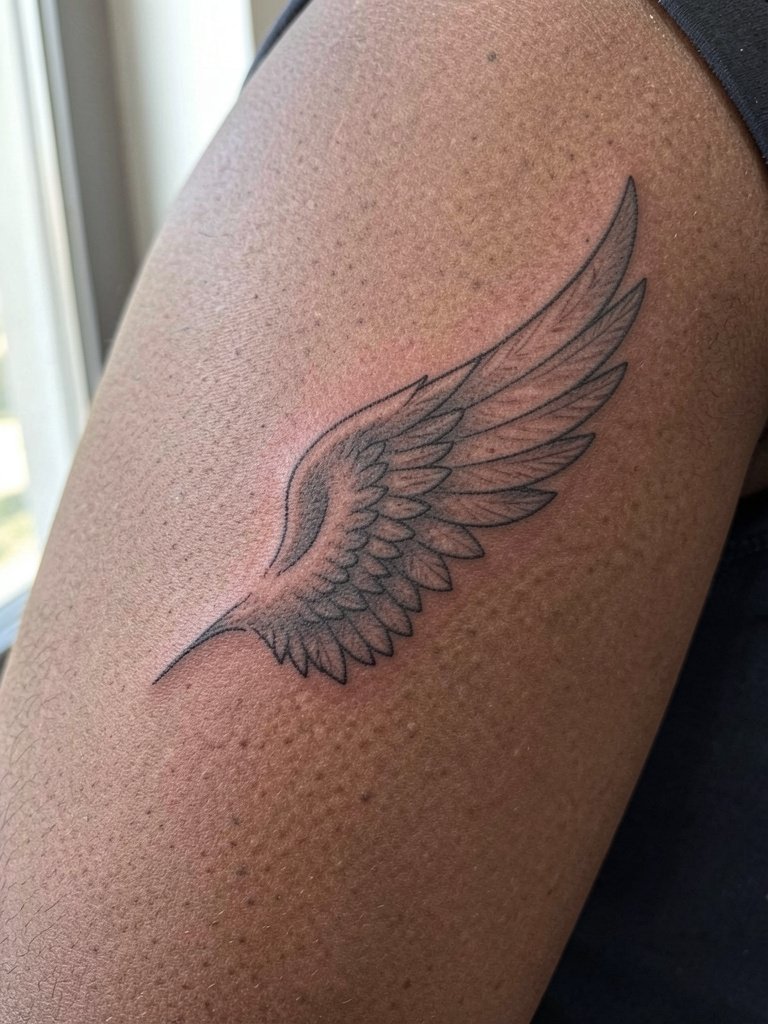
Feathered wings look best when feather detail is balanced with slightly heavier quill lines so they do not disappear. The usual mistake is asking for ultra-thin barbs everywhere. On inner upper arm opt for a mix of single-needle hairlines and slightly bolder anchor lines. Two sessions are typical. Plan your jewelry choices so necklaces do not rub the area while it heals; delicate necklaces that sit away from the arm are ideal.
16. Patchwork Half Sleeve, Mixed Placements
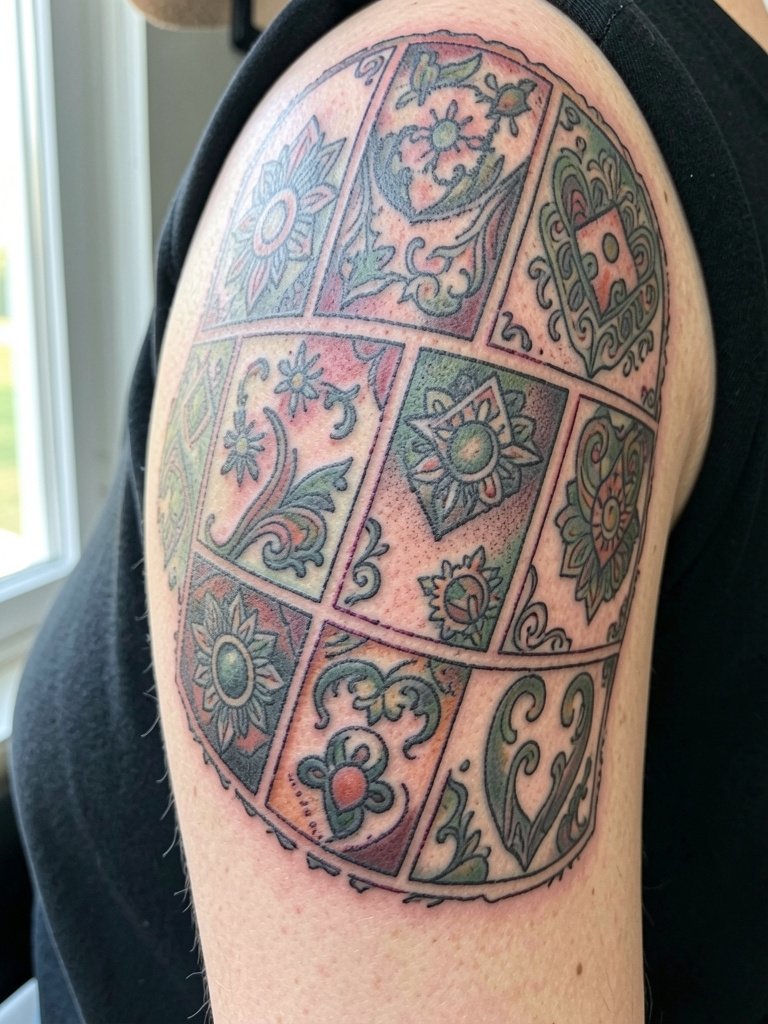
A patchwork approach spreads cost over time and gives flexibility if you are on a budget. Build with a shared ink tone or consistent filler to keep the sleeve cohesive. The main error is mixing too many tiny motifs without a unifying element, which ages like a collage. Plan sessions over months or years and keep a visual map so later pieces align with earlier ones. For showing off an eclectic sleeve, solid-color tanks and vintage cuts work best; try a vintage tank top when you want to photograph the stitched motifs.
17. Minimalist Wave and Horizon, Outer Forearm
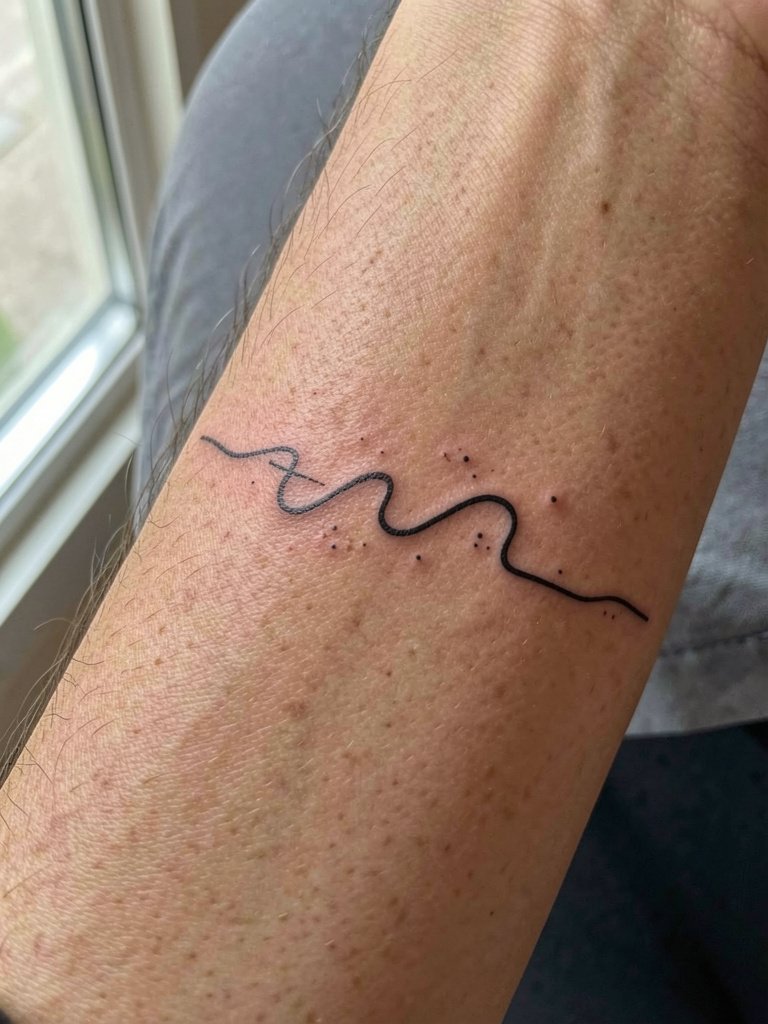
Continuous lines need the right line weight to survive stretching and mild blowout. The classic mistake is copying a micro-thin photo that fades into a hairline after one year. Opt for a slightly stronger single-needle thickness and ask about spacing from wrist and elbow edges so the horizon does not warp with joint movement. Session time is short but ask for proof of healed examples at the same scale. Casual summer wear and cropped sleeves highlight the horizon cleanly.
18. Koi and Water, Outer Deltoid
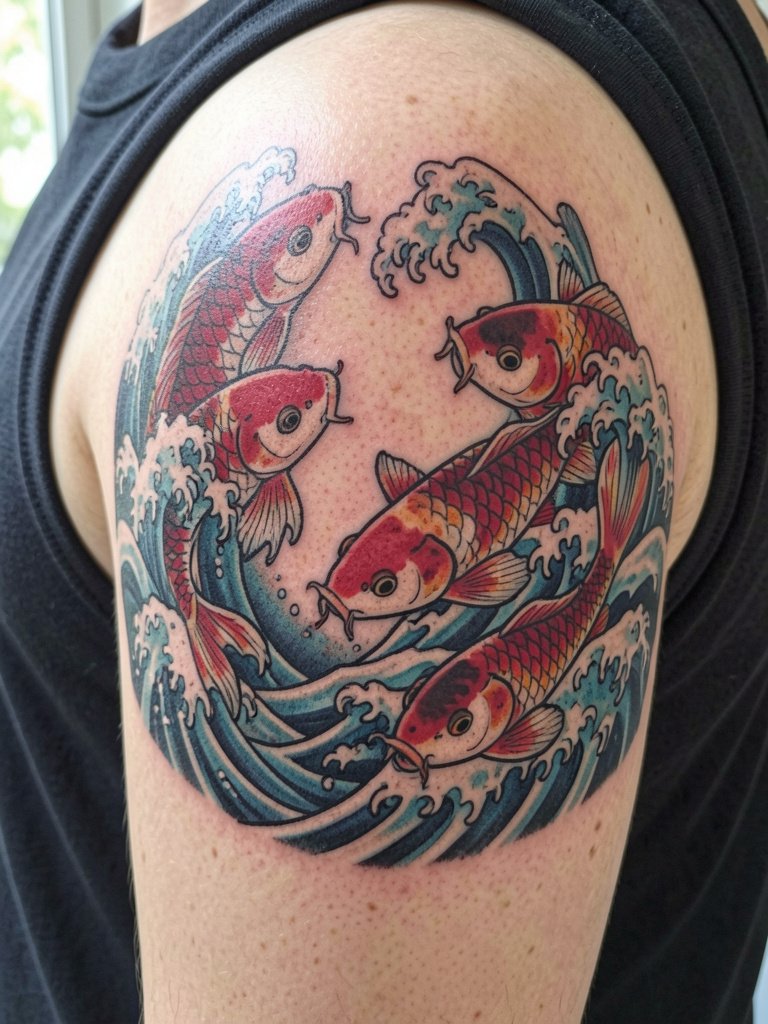
Koi compositions wrap well on the deltoid and read dynamically when the fish has room to curve. The common error is compressing scales and flow into a narrow band, which flattens the movement over time. Plan for three sessions and ask about saturation levels for reds and golds so the koi remains lively. For show-off pairing a tank top bold color complements vibrant fills while granting full shoulder access during session days.
19. Geometric Mandala with Negative Space, Inner Forearm
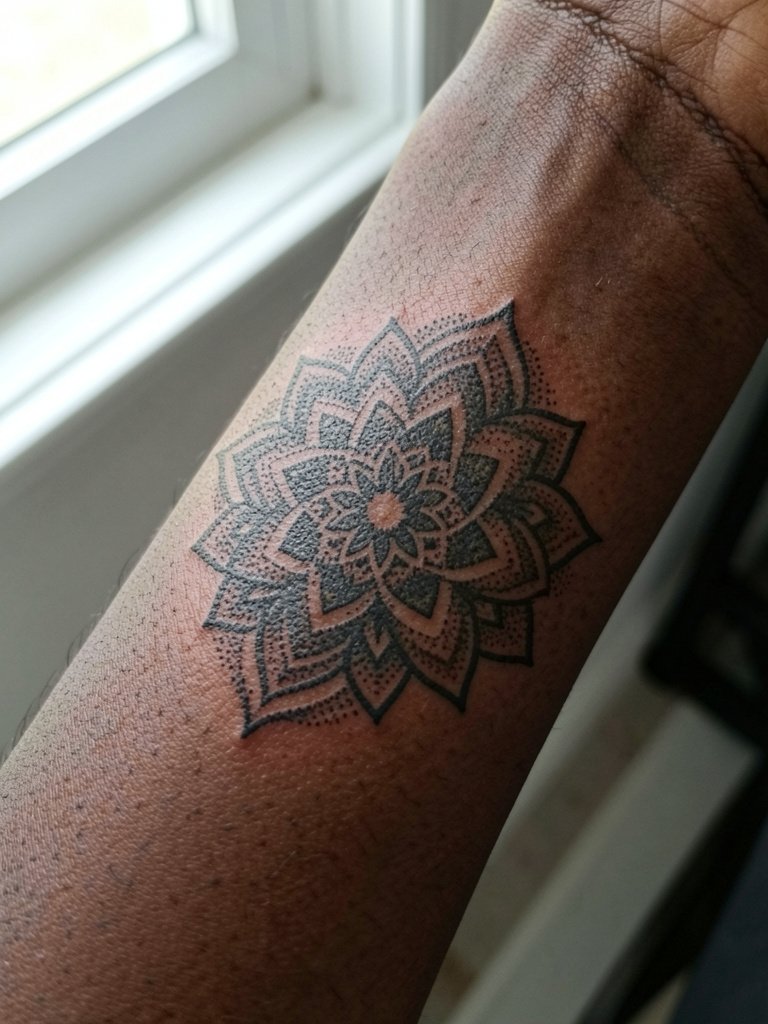
Negative-space mandalas are meditative and durable if set with generous gaps. One mistake is packing the pattern too tightly, which reads as a blob at two years. Talk about the dot-work density and expect two to three sessions for crisp stippling. For appointment wear choose a rolled-cuff linen or cotton shirt to keep the forearm accessible and clean.
20. Feather-to-Bird Transition, Outer Upper Arm
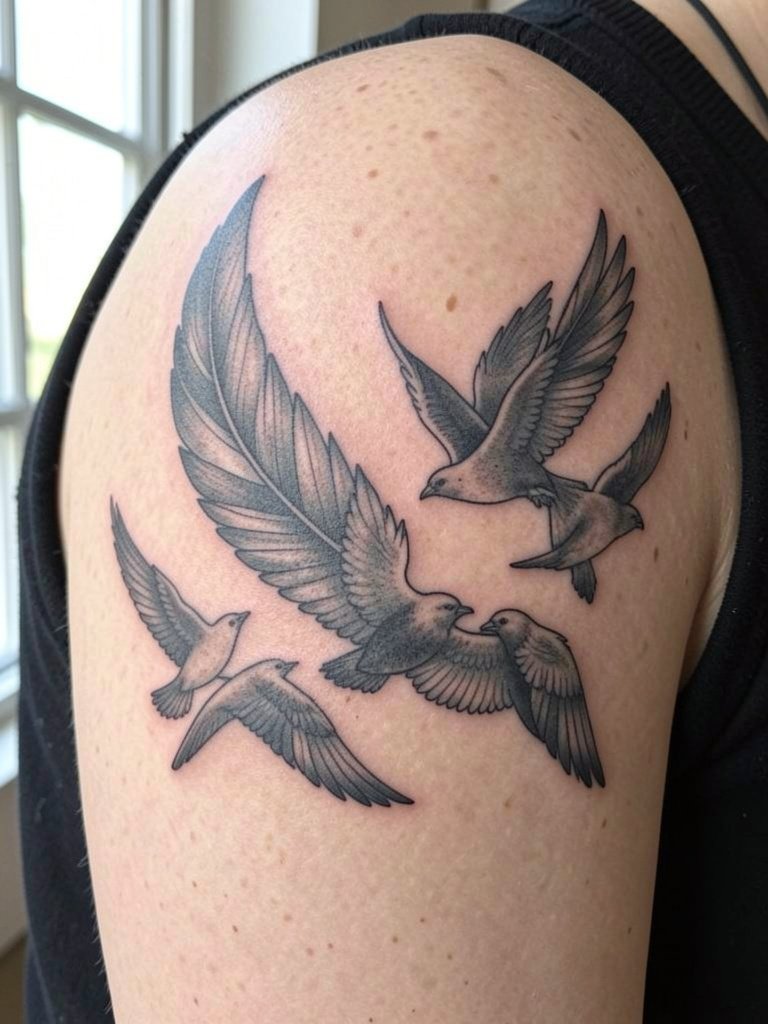
Morph designs need careful composition so the motion reads at all angles. The frequent error is putting too many birds too close together; negative space keeps the motion legible. Expect two sessions for the transition and a touch-up for wing tips if they interact with the elbow crease. For showcasing the sequence, a sleeveless blouse or tank complements the arc and keeps the shoulder free during session time; try a sleeveless blouse solid color.
21. Stacked Small Motifs, Outer Forearm and Deltoid Mix
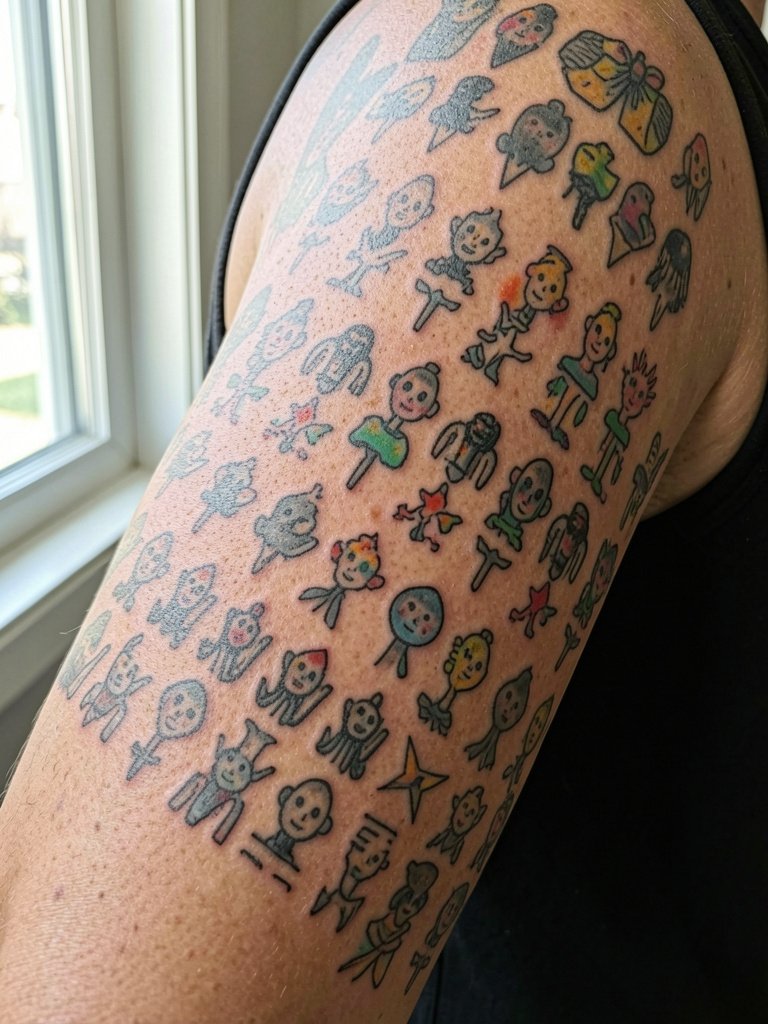
Stacking small motifs into a sleeve is a common route for building a half sleeve over time. The trick is defining a visual anchor, such as a recurring color or a line of filler pattern, so pieces read as part of a whole later. Mistakes include neglecting how motifs align at different arm positions. Plan with placement photos and expect a multi-year timeline. For everyday wear a neutral rolled-cuff linen shirt keeps the arm visible without distracting from the mix.
Frequently Asked Questions
Q: How much time should I expect to finish a half sleeve?
A: A cohesive half sleeve typically runs ten to twenty hours split across multiple sessions depending on style and saturation. Fine line sleeves can fall toward the lower end in hours but might need touch-ups sooner. Neo-traditional or fully saturated color sleeves usually take more sessions to achieve even saturation.
Q: Will fine line work hold up on darker skin tones?
A: Yes, but the approach changes. High-contrast blackwork and slightly bolder single-needle lines show more consistently than pale pastels on darker skin. Ask for healed photos on similar skin tones and discuss slight increases in line weight if legibility at year three matters to you.
Q: What is the Saniderm versus dry healing debate and which should I use?
A: One camp claims transparent protective film speeds healing, reduces scabbing, and keeps ink crisp by locking in moisture. The opposing camp says dry healing lets the skin breathe and avoids adhesive reactions that can trap ink or cause irritation. Many studios choose the method they have seen work best in their client base, so ask about their before-and-after healed examples and follow the shop protocol.
Q: Where can I find artists and healed portfolios without naming individuals?
A: Search hashtags like #finelinetattoo, #neotraditionaltattoo, and #blackworktattoo on Instagram and TikTok while filtering by your city. Use Tattoodo and Booksy to search by keyword combos such as "fine line botanical half sleeve" or "neo-traditional skull and roses." Reddit communities r/tattoos and r/tattooadvice surface peer recommendations and healed examples across skin tones.
Q: What should I wear to my session for an upper arm half sleeve?
A: Wear loose, easily adjustable clothing so the artist can access the deltoid or inner arm without fabric rubbing the area. For upper arm sessions a tank top or loose button-down works well. Avoid tight cuffs or rough fabrics that press on the skin during long sessions.
