
Bold trends and practical choices collide when you plan a half sleeve. Popular tiny scripts and ultra-fine filigree look great on a screen. In real life the skin texture and daily wear often blur the detail inside a few years. These 27 half-sleeve ideas focus on what reads now and stays legible later, with concrete consult points and outfit pairings you can show your artist at booking time.
1. Geometric Blackwork Half Sleeve With Negative Space
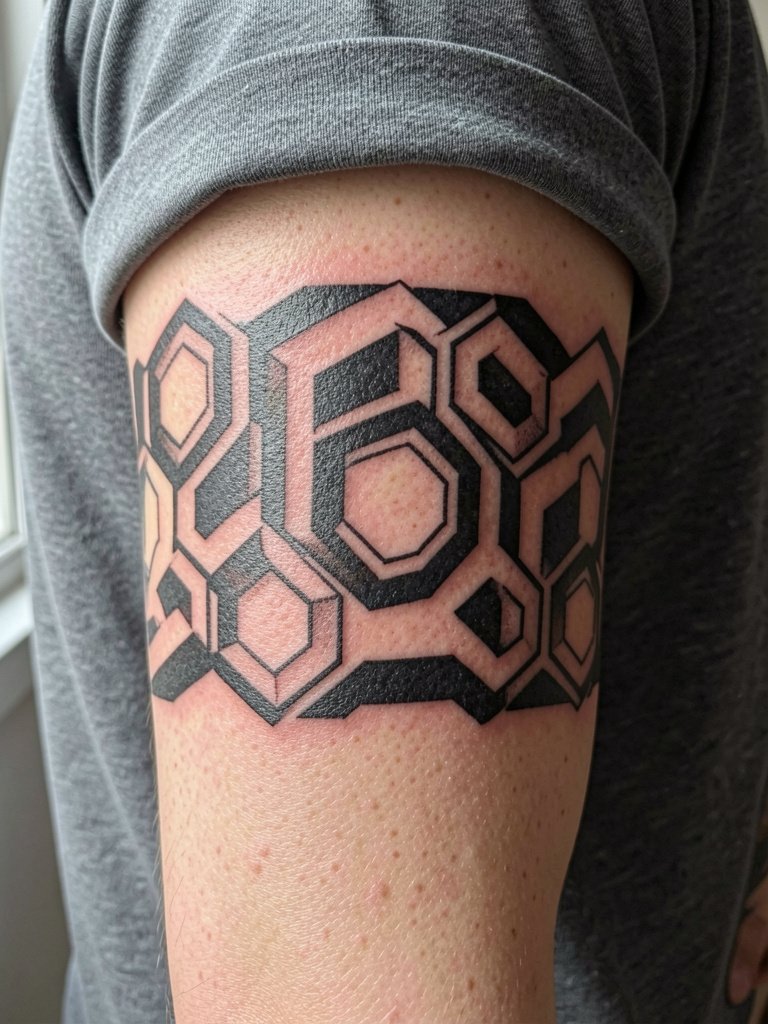
Geometric blackwork reads from distance and holds up because saturation creates a stable visual anchor. Recommend this when you want strong contrast on a muscular upper arm. During consultation bring two scale references so the artist can map hex sizes against muscle curvature. The session feels moderately intense near the inner arm edges, expect two to three hours with short breaks. Common mistake is shrinking the pattern too small. Tiny shapes merge into gray patches after a few years. For showing off, pair with a rolled short-sleeve linen shirt that stops above the sleeve line to keep the geometry visible.
2. Neo-Traditional Portrait With Floral Accents
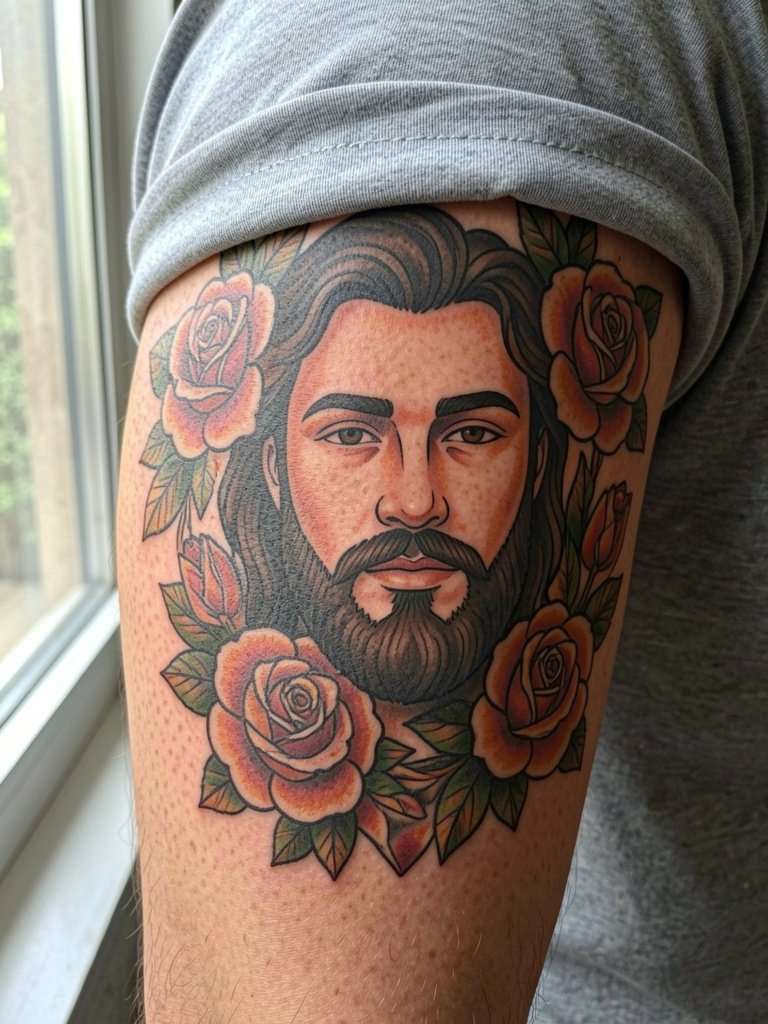
Portrait work with neo-traditional treatment keeps facial forms readable by using heavier outlines and selective saturation. I suggest this style for clients who want character without hyperreal detail. Ask for reference photos that match the intended face angle, and ask the artist to block the hair and jawline in bolder contour so the portrait does not lose shape as it fades. The session runs longer if color fills are included. Pair it with fitted short-sleeve tees that stop above the elbow so the portrait stays visible.
3. Black and Gray Japanese-Influenced Half Sleeve
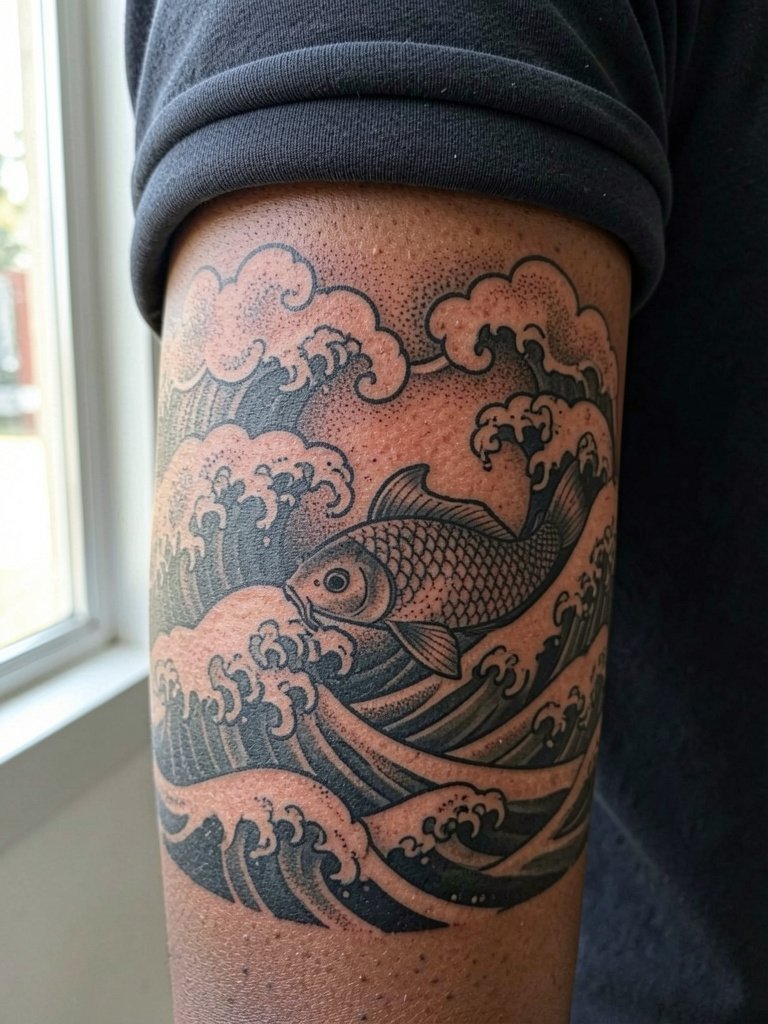
This aesthetic borrows Japanese composition without copying protected emblems. It works when you want flowing negative-space pathways that wrap natural muscle lines. During the consult show the artist where you want movement to travel, and request heavier outlines on the outermost motifs so they read from across a room. The session can be split into two sittings to manage saturation and healing. A common mistake is packing too many tiny details into shadowed areas. For evenings out try a button-up linen shirt with sleeves rolled just once to frame the work.
4. Fine Line Mountain Range With Dot Work Sky
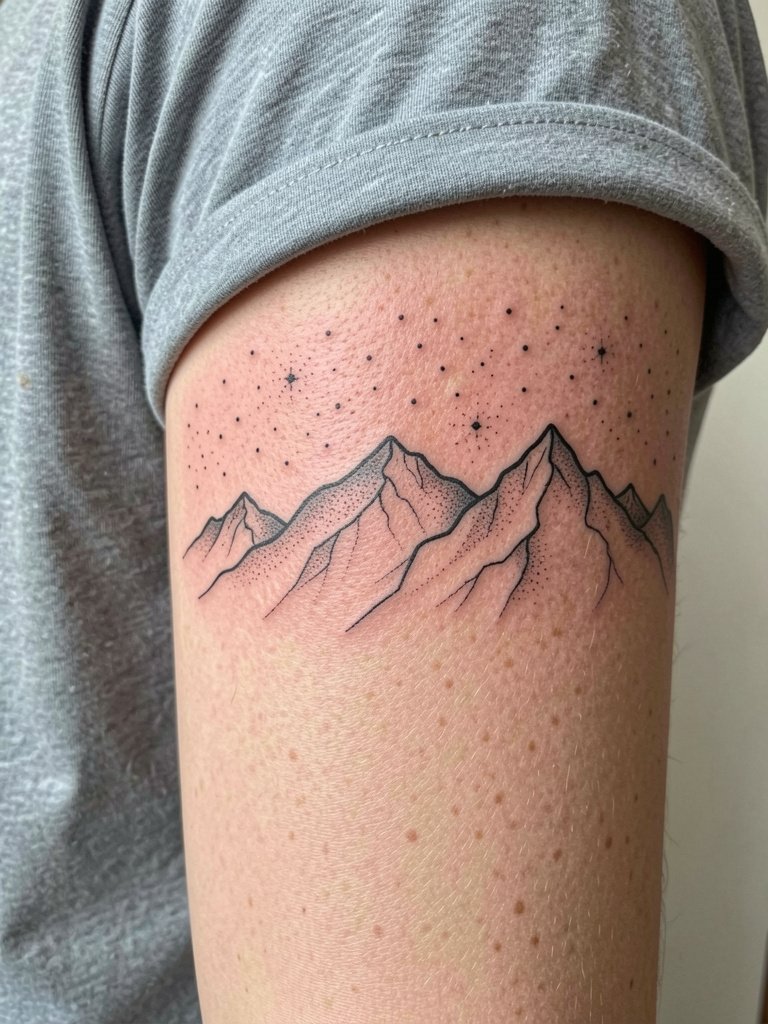
Fine line landscapes can be elegant but they risk softening over time when placed across curved muscle. Recommend this when you prefer subtlety and will commit to touch-ups. Ask for a slightly increased line weight compared to your saved photo. That change preserves contour without losing the minimalist feel. Expect a calmer session than color saturation pieces. The mistake to avoid is requesting single-needle lines for large fields of dot work, which can look like gray wash later. Wear a lightweight henley to appointments so the artist can access the upper arm easily.
5. Trad Dagger and Rose Cluster in Bold Color
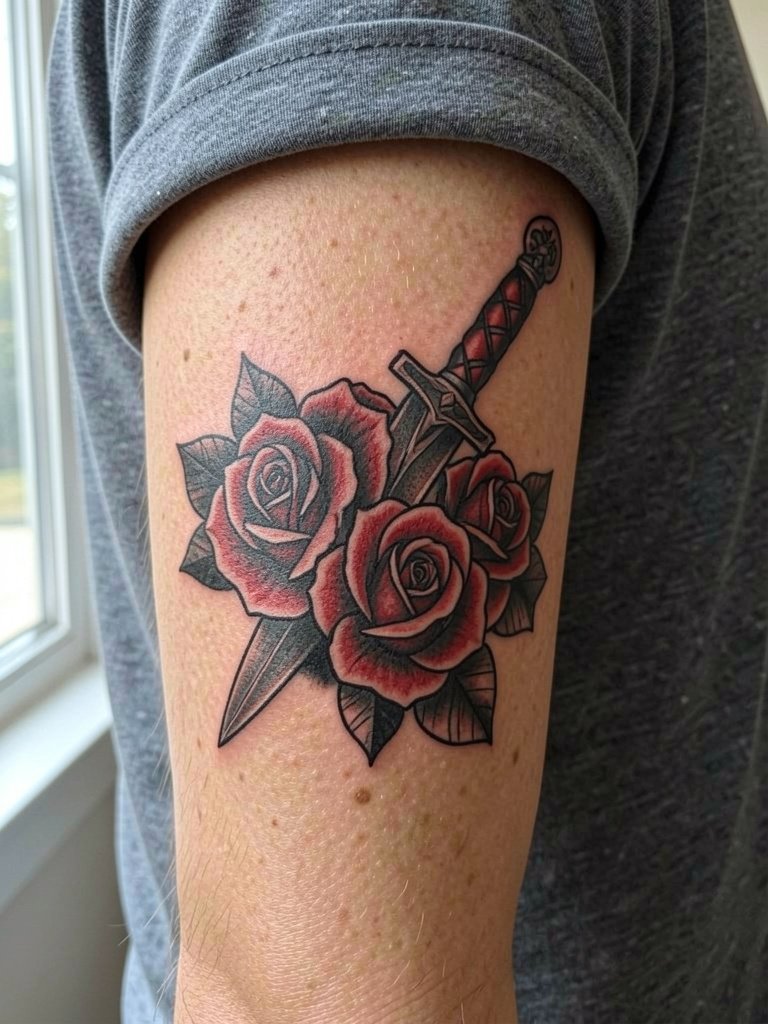
Traditional motifs age favorably because the heavy linework and saturated fills keep contrast as the skin changes. Choose this when you want longevity without frequent touch-ups. During the consultation request classic bold outlines and full saturation instead of subtle gradients. A typical session for a clustered dagger and roses is three hours for linework and a follow-up for color fills. Avoid tiny petals and filigree that the skin will blur. For a night out wear a crew-neck tee in neutral tones to let the reds and blacks pop.
6. Biomechanical Half Sleeve With Negative Space
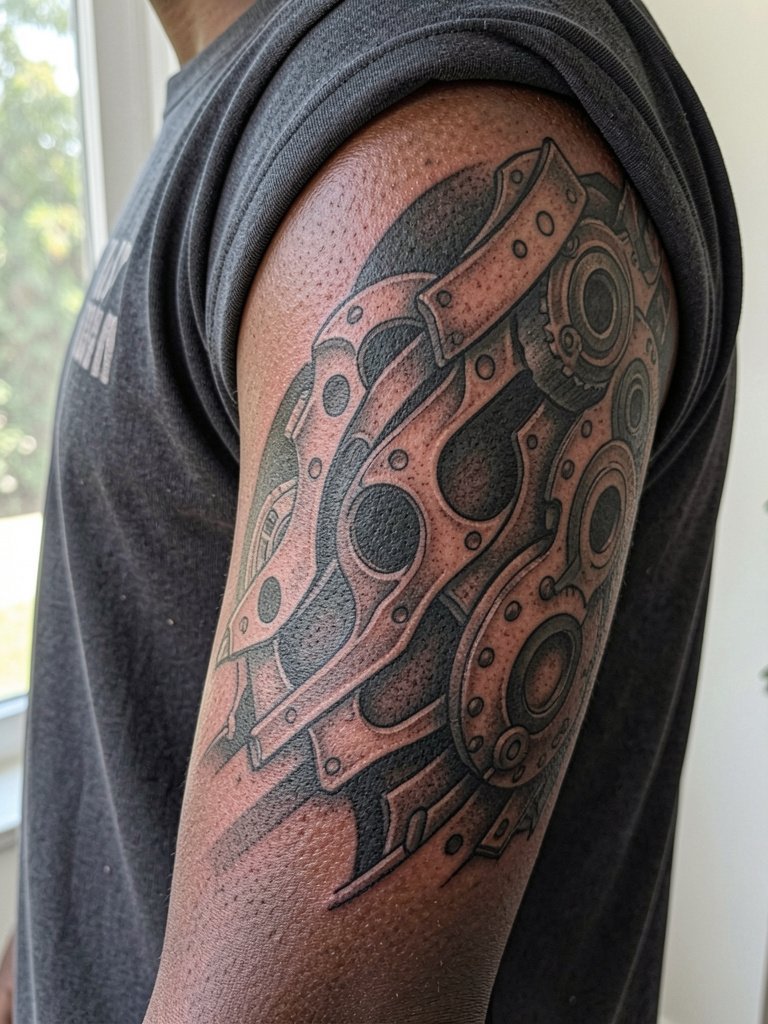
Biomechanical pieces rely on layered contrast to sell depth. Pick this if you want a graphic, modern half sleeve that keeps structure as it ages. Bring photos that show angles you like, and ask the artist to map the largest plates where the arm bulges. The session can be long because saturation and shading need breaks. Mistakes include over-detailing tiny joins that blur into muddiness. When you want to highlight components, roll sleeves up and wear a cotton workshirt that stops just above the tattoo.
Chair Day Prep
The six ideas above vary in detail and saturation, so a few small items smooth the session and the first week of healing.
-
Stencil transfer paper kit. Lets you preview linework placement on skin before the first pass, which is useful for the geometric and fine line pieces listed above.
-
Topical numbing cream. Applied according to the product instructions, it can ease the shoulder and inner-arm sensitivity without interfering with the artist.
-
Thin protective film roll. Keeps newly inked areas free from friction and contaminants, especially handy for sleeves that sit against clothing.
-
Fragrance-free body wash. Gentle cleansing during showers prevents irritation to fresh ink without stripping needed moisture.
-
Aquaphor healing ointment. A mainstream balm used by many for the initial barrier stage, applied thinly to avoid clogging the needle channels.
7. Minimalist Linework Nautical Map
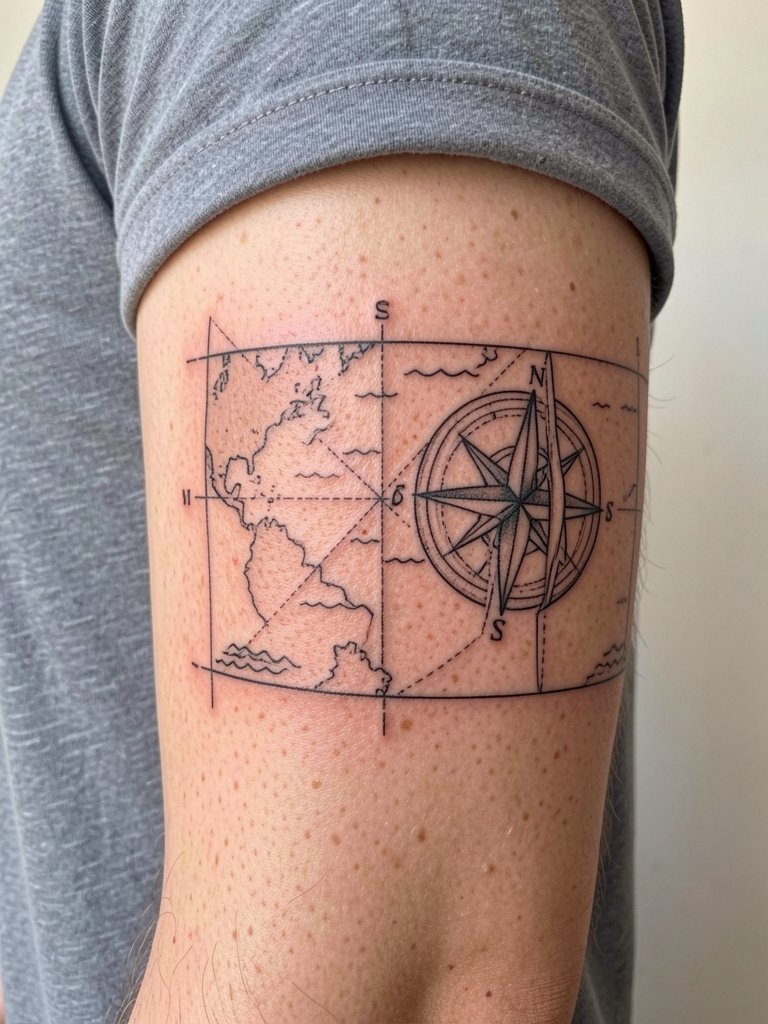
Cartographic half sleeves read best when scaled to the arm circumference. I recommend slightly thicker contour lines than a reference photo to preserve map features at year three. Bring two references at different magnifications so the artist can show you a mock-up at actual arm size. Expect a steady, low-intensity session for linework. Common regret is trying to squeeze tiny place names into a curved band. For casual display, a short-sleeve chambray shirt with the cuff rolled once keeps the map visible.
8. Botanical Sleeve With Stipple Shading
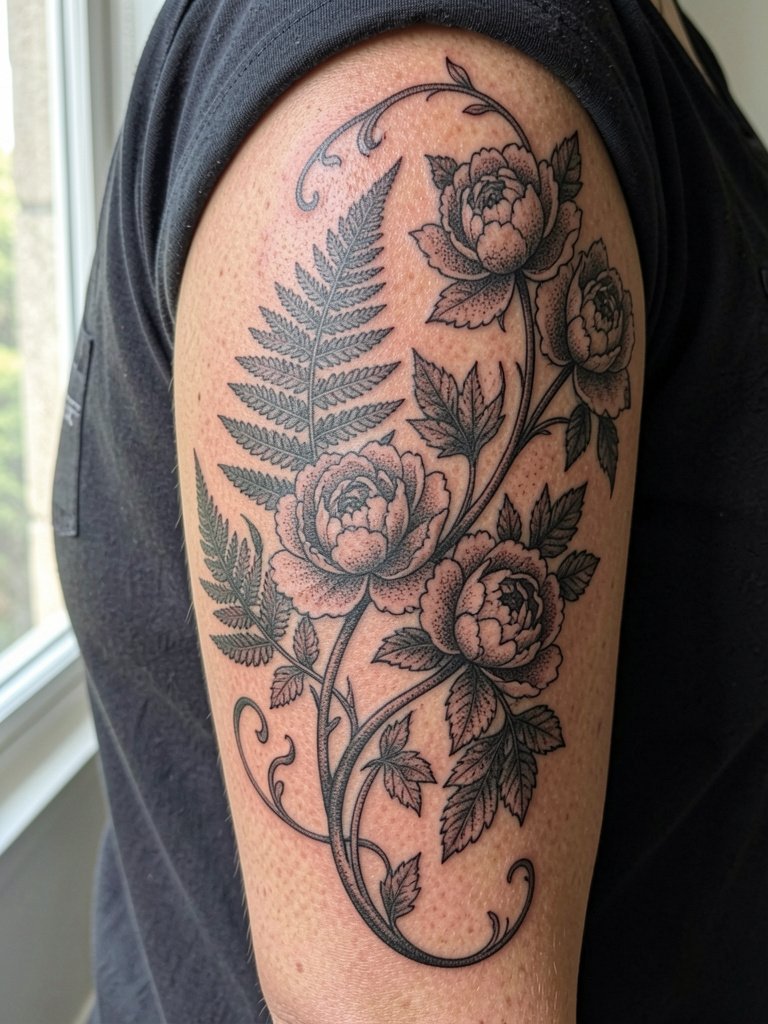
Botanical pieces benefit from rhythm and breathing room between elements. Choose this if you want organic flow that follows muscle movement. On the consult ask the artist to leave negative-space breaks and to prioritize bold contouring on primary blooms. The session is moderately long with careful stipple fills. A common mistake is requesting extreme micro-detail in shaded leaves. Pair with a rolled-sleeve flannel so leaves peek out against textured fabric.
9. Mythic Beast Blackwork Half Sleeve
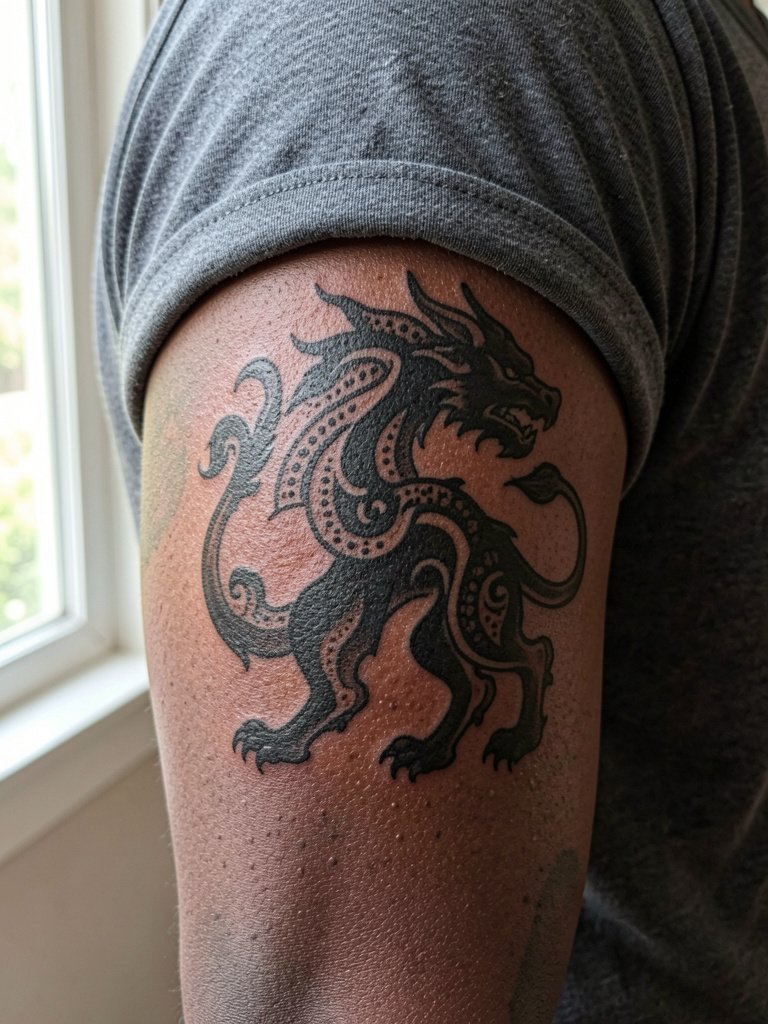
A single dominant silhouette in blackwork simplifies the composition and preserves readability for years. I recommend this when you want a striking emblem without small internal detail. During planning decide how much negative space will separate the beast from surrounding motifs. Sessions go quicker because of thicker lines and blocks of black. Avoid adding tiny internal line textures that will wash together. For a night out try a light jacket with cropped sleeves to balance the bold silhouette.
10. Japanese Koi With Water Flow and Wind Bars
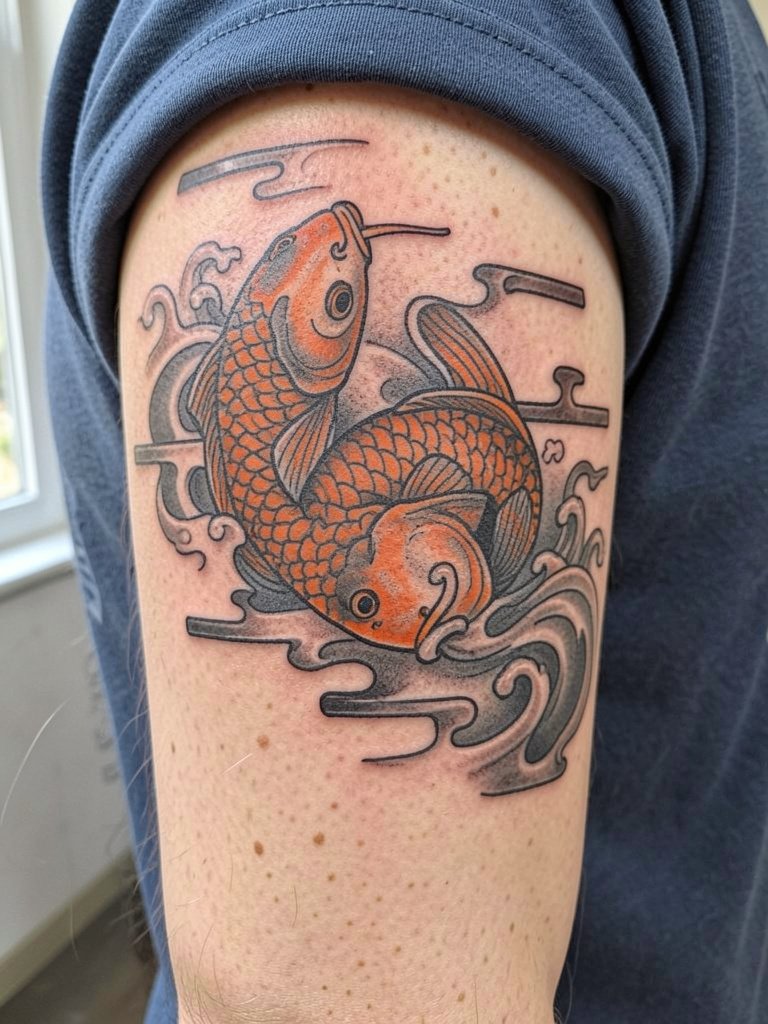
Koi compositions use directional elements to guide the eye along the arm. Choose this when you want movement that follows flex and extension. Ask the artist how the fish will sit while your arm is relaxed and when flexed, and request the main flow lines to remain visible in both positions. Expect color layering across sessions. A frequent mistake is crowding the background with tiny scales that become noisy. Wear a sleeved button-down you can roll to show the swimming curve.
11. Celtic Knotwork Half Band
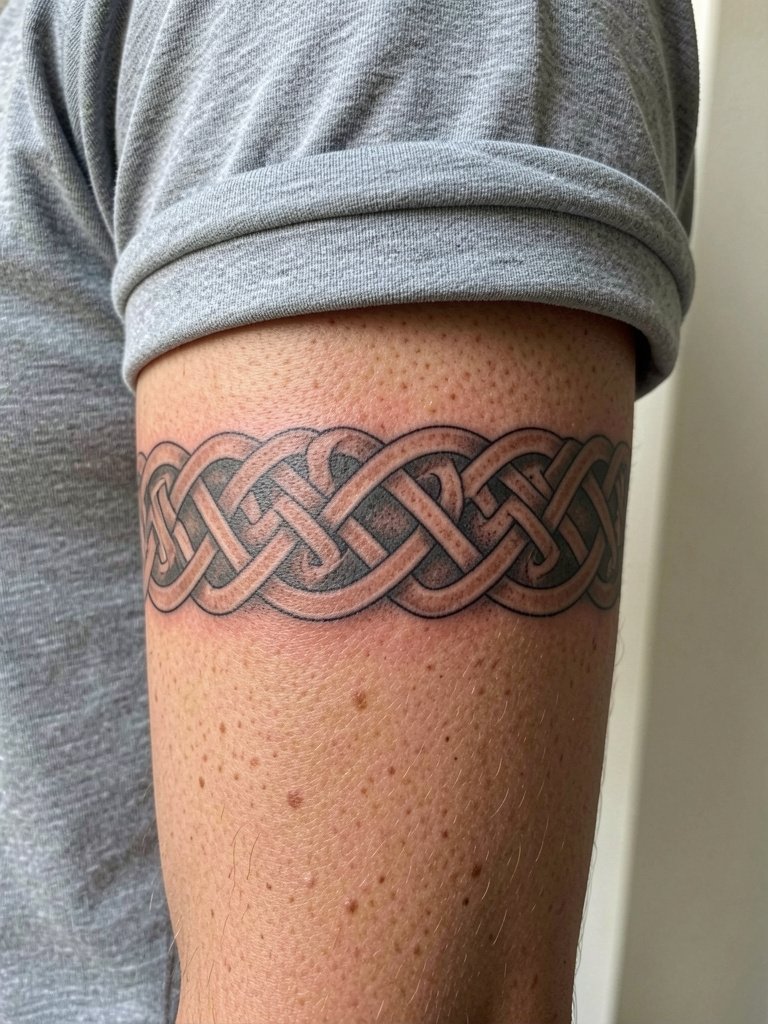
Knotwork demands precision in spacing so the pattern does not collapse visually. Pick this if you like structured, repeating motifs. Ask the artist to mock up a band template at full arm circumference so you can see how links align at rest. Expect a steady session focused on linework and consistent spacing. A common error is starting the knot very tight, which causes overlap as skin ages. For presentation, a rolled short sleeve oxford frames the band cleanly.
12. Surreal Composite Scene With Micro-Realism Details
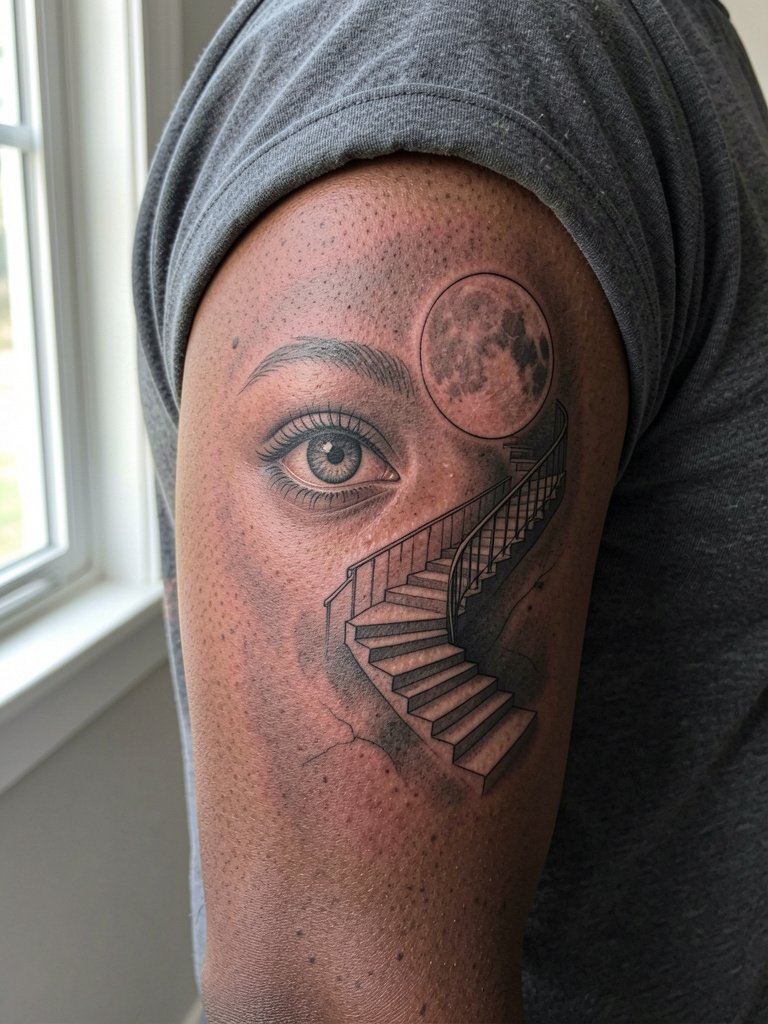
Micro-realism punctuated within surreal layouts gives focal points that age differently. Use this when you want moments of photoreal detail without committing the entire sleeve to realism. Request that the artist isolate the tiny realistic pieces with slightly bolder surrounding outlines to protect edges. Sessions will pause between dense detail passes to check healed tone. Mistakes include overloading several micro spots, which creates many tiny faded areas needing touch-ups. Pair the composition with a textured tee that keeps attention on the small focal points.
13. Traditional Sailor Chest-to-Arm Transition Sleeve
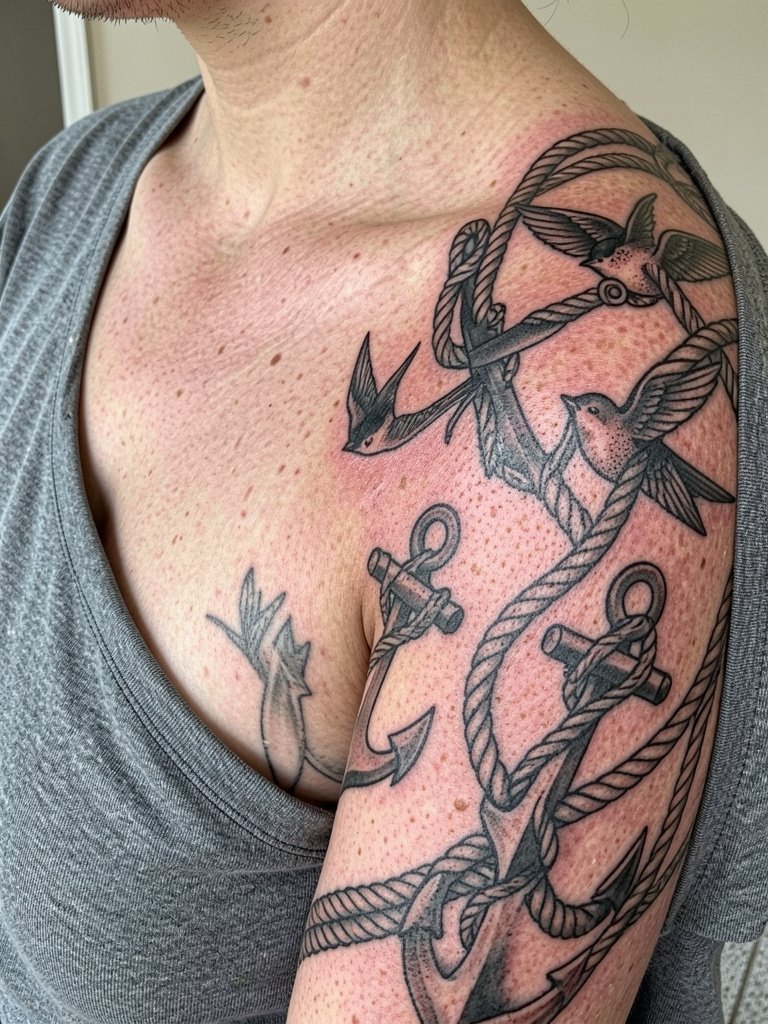
Transition pieces that start at the chest require early mapping so the flow feels cohesive. This style is best for people who want classic iconography wrapped into a visible sleeve. During consultation provide chest images and arm contour photos so motifs align at rest. The session time can be extensive across two or more visits. A common problem is mismatched line weight across chest and arm. For showing off, open the top with a wide-neck tee so both chest and arm elements are visible.
14. Modern Script Band With Bold Lettering
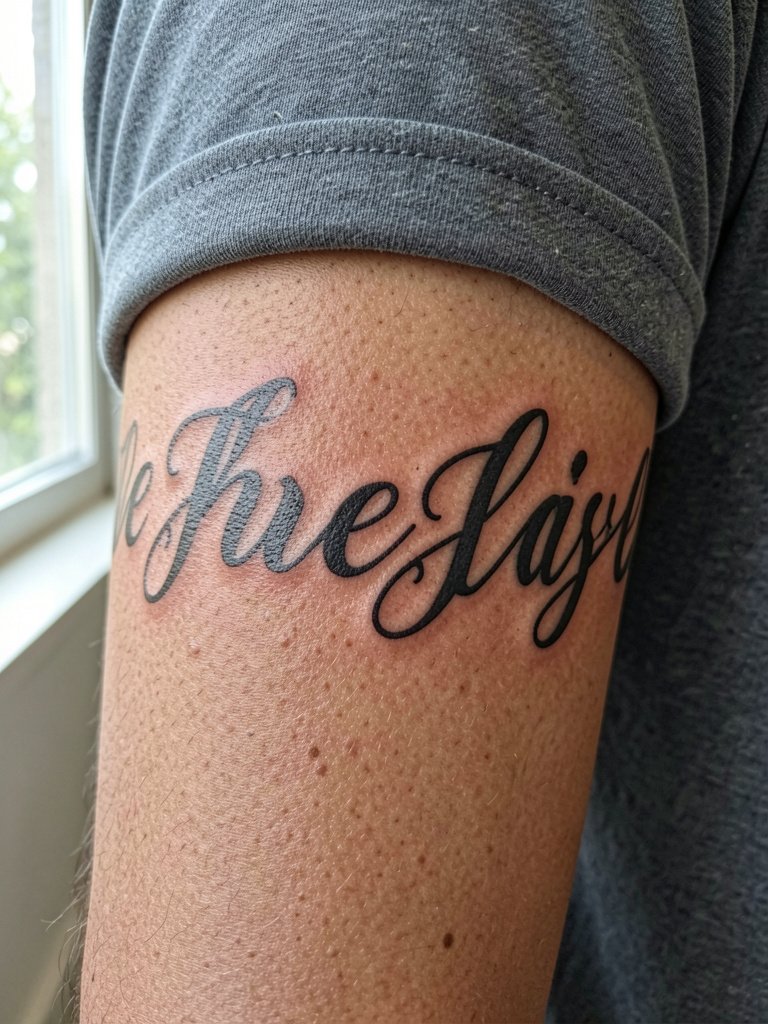
Text bands must be sized to read at arm scale. Choose bold, slightly wider lettering to prevent letters from turning into smudged strokes. When planning, provide the exact text and ask the artist to show how the band reads at the full circumference. Touch-ups are more frequent for thin scripts. The big error is insisting on hairline scripts that disappear over time. For visible presentation try a short-sleeve henley to keep the band unobstructed.
15. Surreal Blackwork With Geometric Overlays
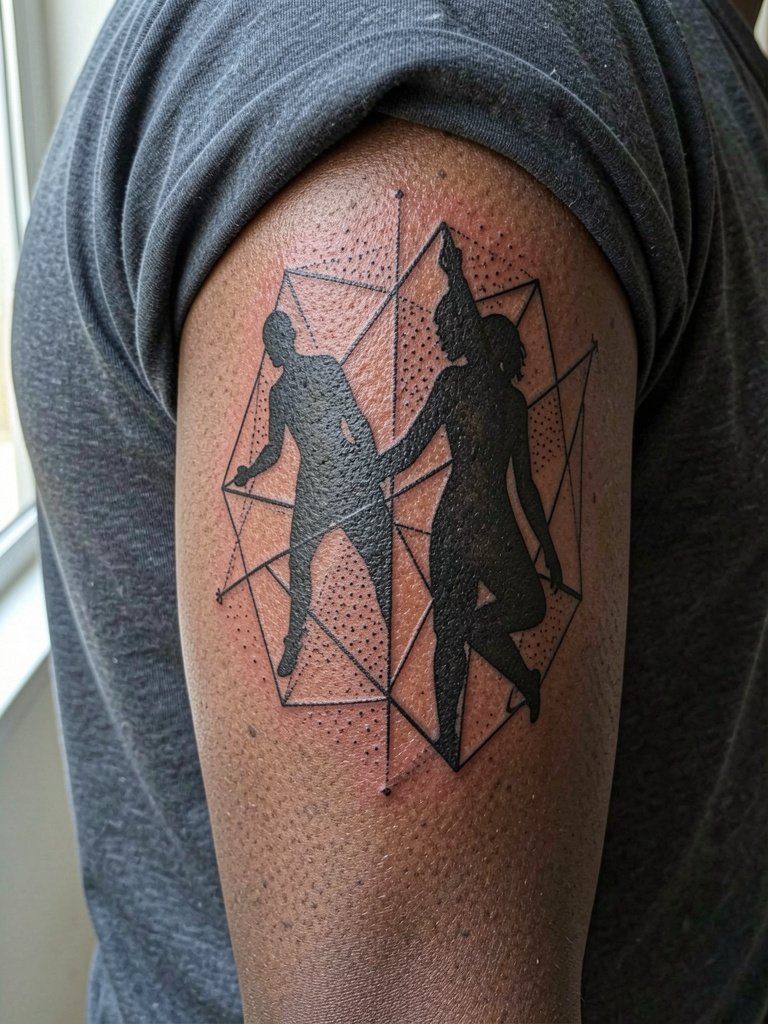
Layered blackwork with geometric elements holds because strong blacks maintain edge definition. This option suits someone who wants a modern, graphic half sleeve. In the consult specify which shapes should remain as the primary read and ask for clear negative-space separation. Session intensity is moderate, focused on saturation and crisp edge control. Avoid packing tiny internal textures that will blur. For casual wear a lightweight bomber with short cuffs keeps the arm profile clean.
16. Ornamental Mandala Paneling With Dot Shading
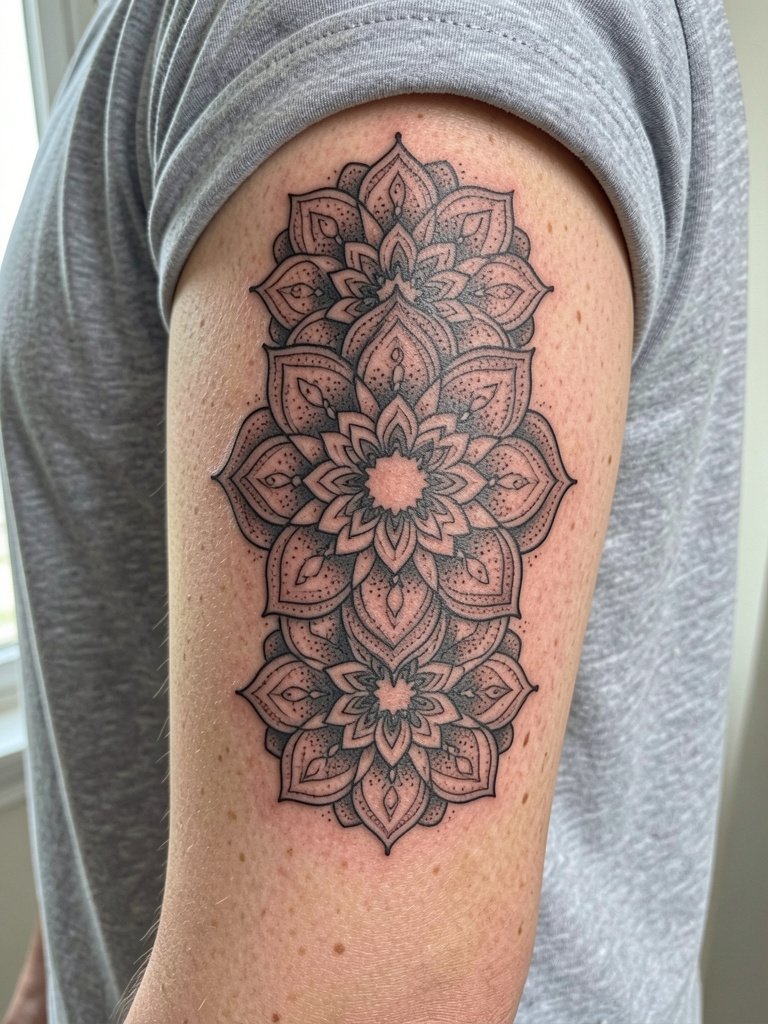
Mandala work demands room to breathe so each radial petal reads over time. Pick this if you want decorative rhythm that follows the arm. Request that the artist size the central motifs generously and use stippling for midtones rather than hairline shading. Sessions are steady and require precision. A common misstep is compressing too many rings into a narrow band. For evenings out select a rolled-sleeve shirt that places the mandalas in clear view.
17. Minimal Blackwork Animal Silhouette
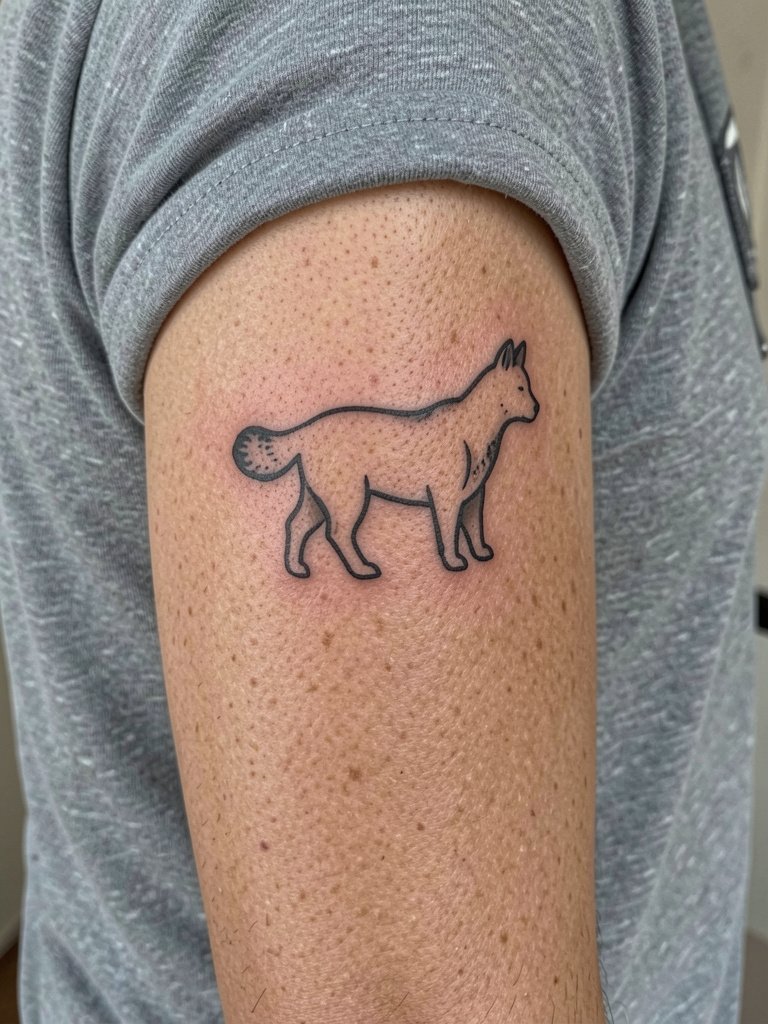
Silhouette tattoos are low-maintenance and remain legible because they rely on shape rather than tiny detail. Recommend this if you want symbolic reference without complexity. During consult specify scale and whether inner negative highlights will be left as skin. The session is relatively brief for a single silhouette. Avoid requesting intricate inner linework that defeats the silhouette clarity. Pair with a short-sleeve rugby shirt to keep the shape evident.
18. Irezumi-Inspired Panel With Respectful Sourcing
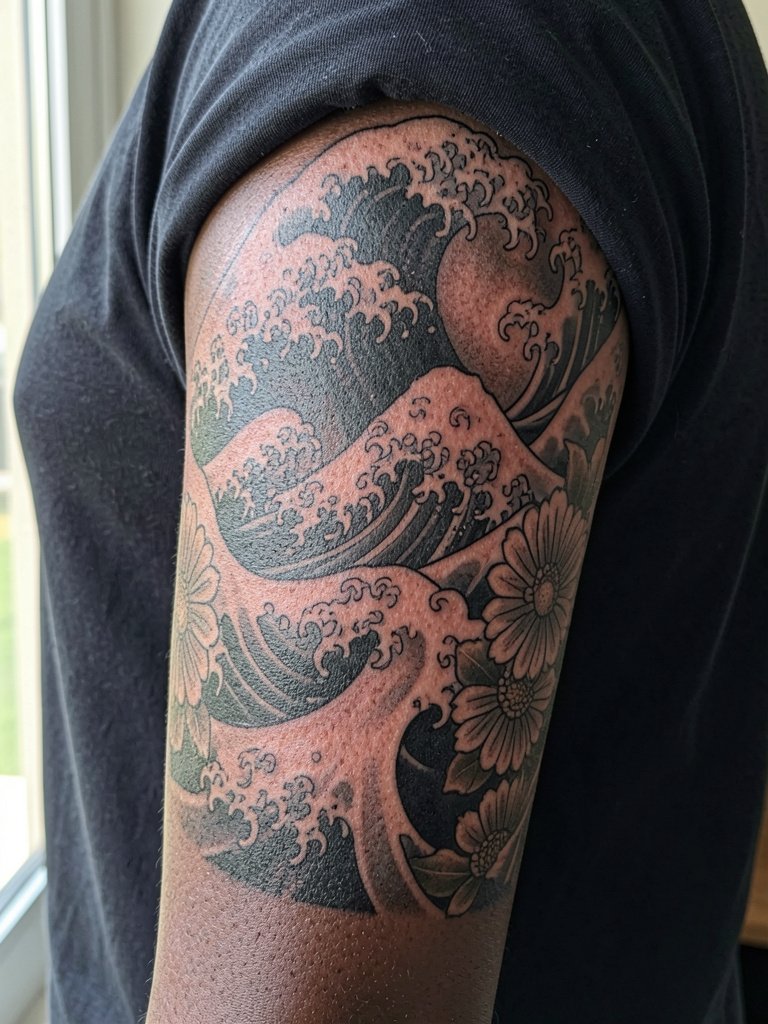
Traditional Japanese visual language has cultural origins that require respect. One camp argues for strict adherence to historical motifs and rules to preserve meaning. Another camp supports contemporary reinterpretation when done with knowledge and credit to the source. If you choose this direction, discuss symbolism and placement specifics explicitly and avoid direct copying of sacred or ceremonial images. The session time varies with saturation. For presentation select a short-sleeve kimono-style shirt worn in its normal position.
19. Optical Illusion Half Sleeve With Negative Space Bands
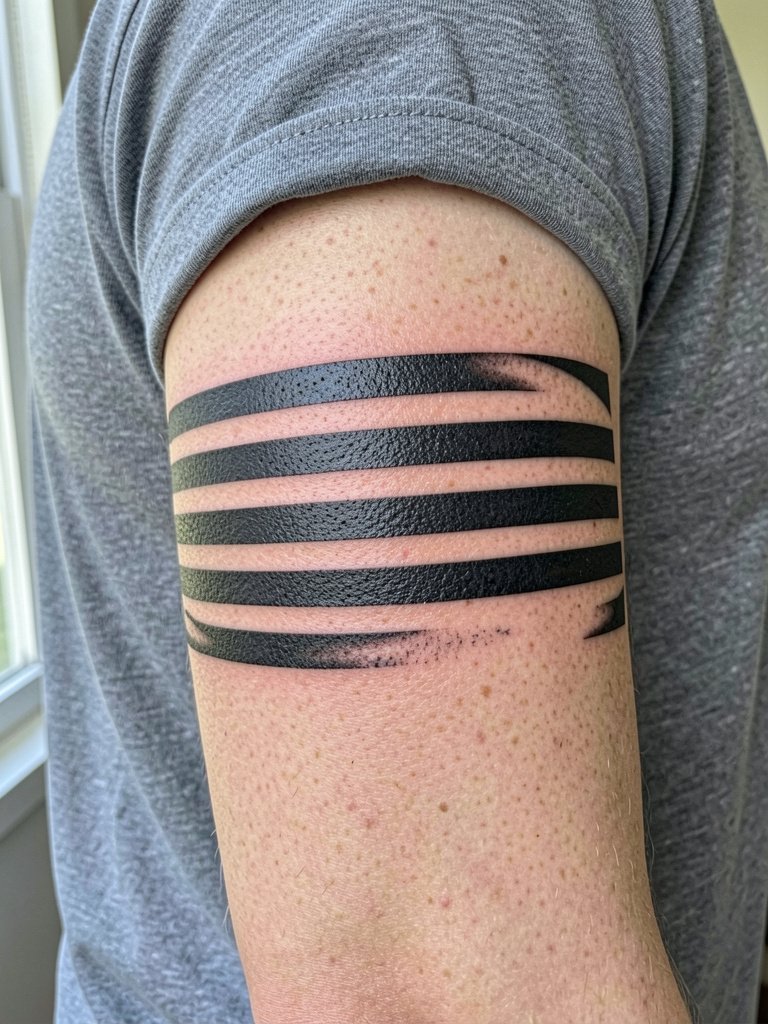
Optical sleeves depend on exact spacing so plan measurements carefully. This style suits someone who wants graphic movement rather than pictorial imagery. During consultation ask the artist to test the band widths on your arm shape to avoid visual warping. Session intensity is moderate with focused edge control. A common error is letting bands get slightly uneven, which breaks the illusion. For social wear try a short-sleeve jersey top to keep the effect visible.
20. Blackwork Rose and Skull Composition
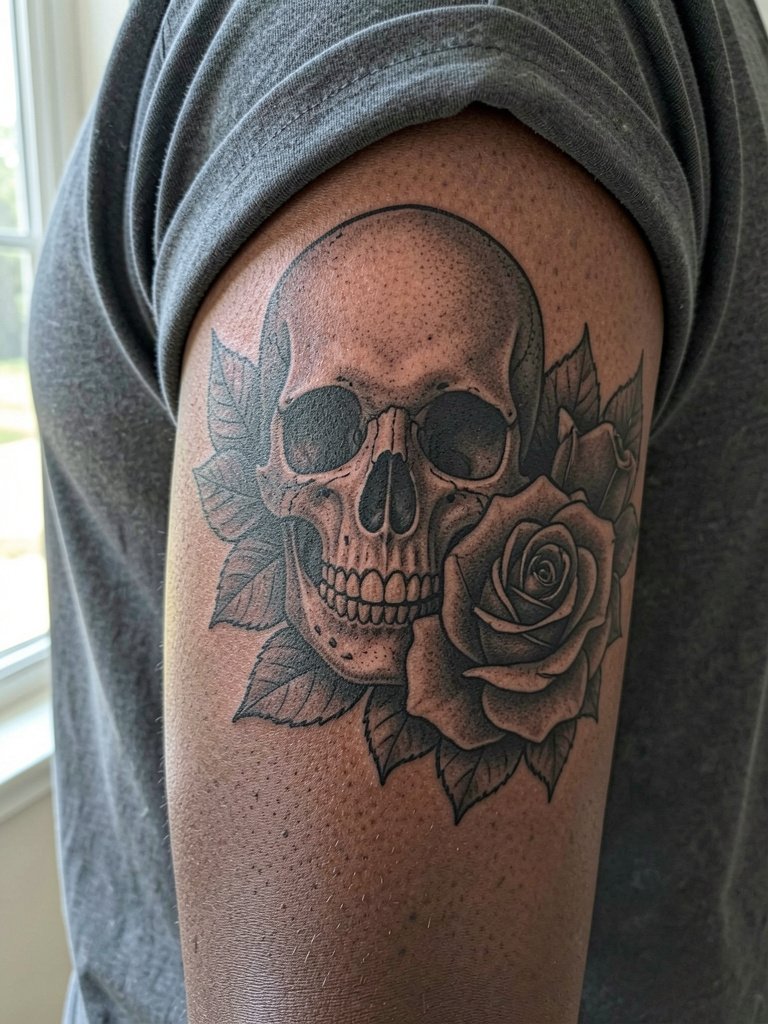
Skull-and-rose pairings balance hard and soft forms. Choose this when you want dramatic contrast without color commitment. Ask the artist to prioritize skull contour edges with heavy outlines so facial planes remain legible with time. The session often needs staged shading passes. Avoid asking for ultra-fine internal shading that will blur. For showing details, a fitted short-sleeve pullover keeps the motif in clear view.
21. Architectural Linework With Shadow Play
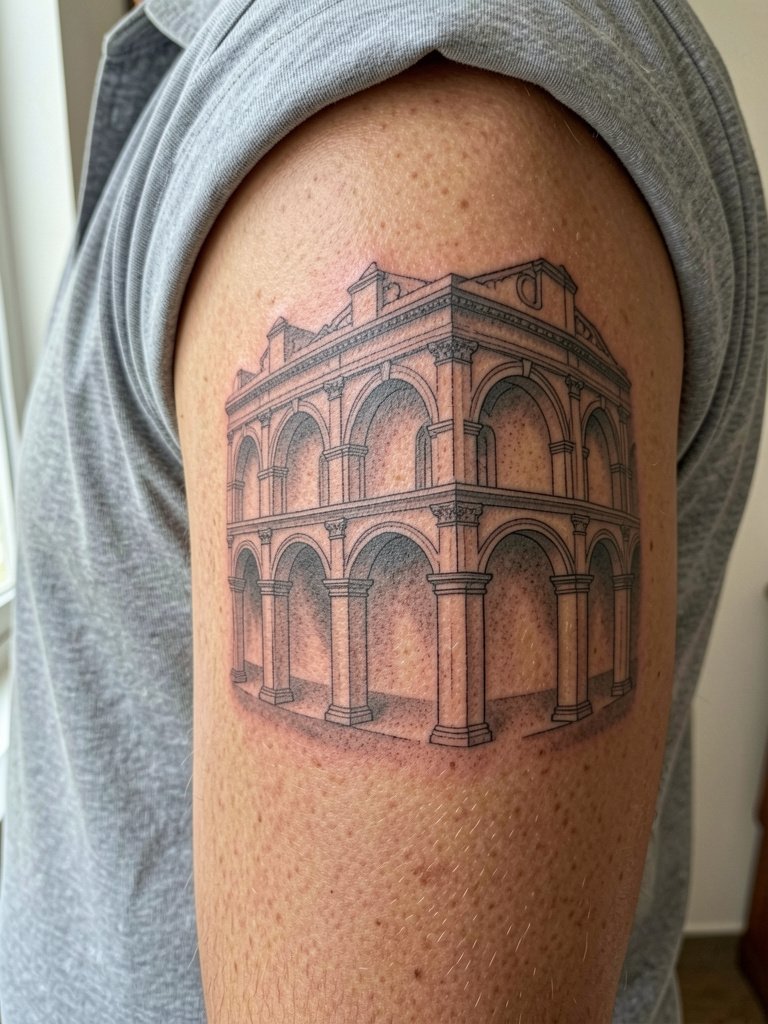
Architectural pieces use perspective and shadow to create form. This works for someone who wants structural motifs that age predictably. During the consult show the arm at rest and flexed so arches align visually. Sessions will alternate between crisp line passes and shaded fills. A frequent mistake is over-detailing small architectural textures. For a clean look, wear a short-sleeve polo that frames the arm lines.
22. Color-Blocked Abstract Sleeve
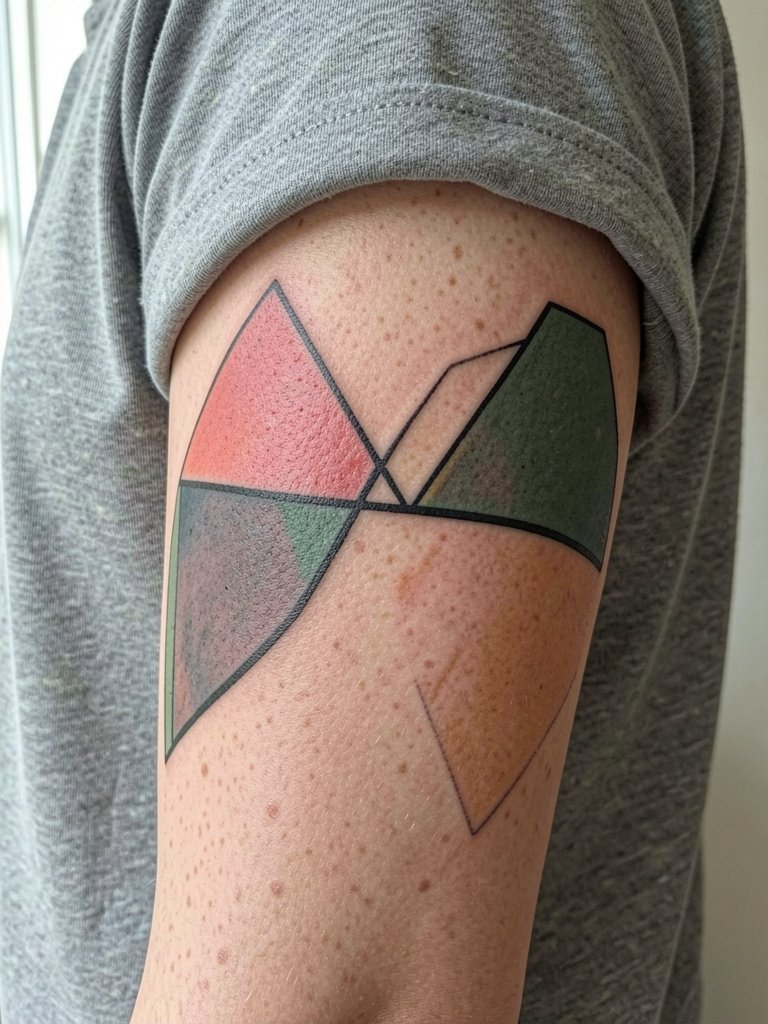
Abstract color blocking can be bold while remaining low-detail. Choose larger color patches that allow saturation to remain even during fading. During planning ask the artist which pigments hold longer on your skin tone and ask for slightly larger color fields than your inspiration. Sessions include color layering to build saturation. Avoid tiny color islands that require precision touch-ups. For evenings out, a short-sleeve blazer worn normally keeps the blocks visible.
23. Forearm-Curved Map With Compass and Coordinates
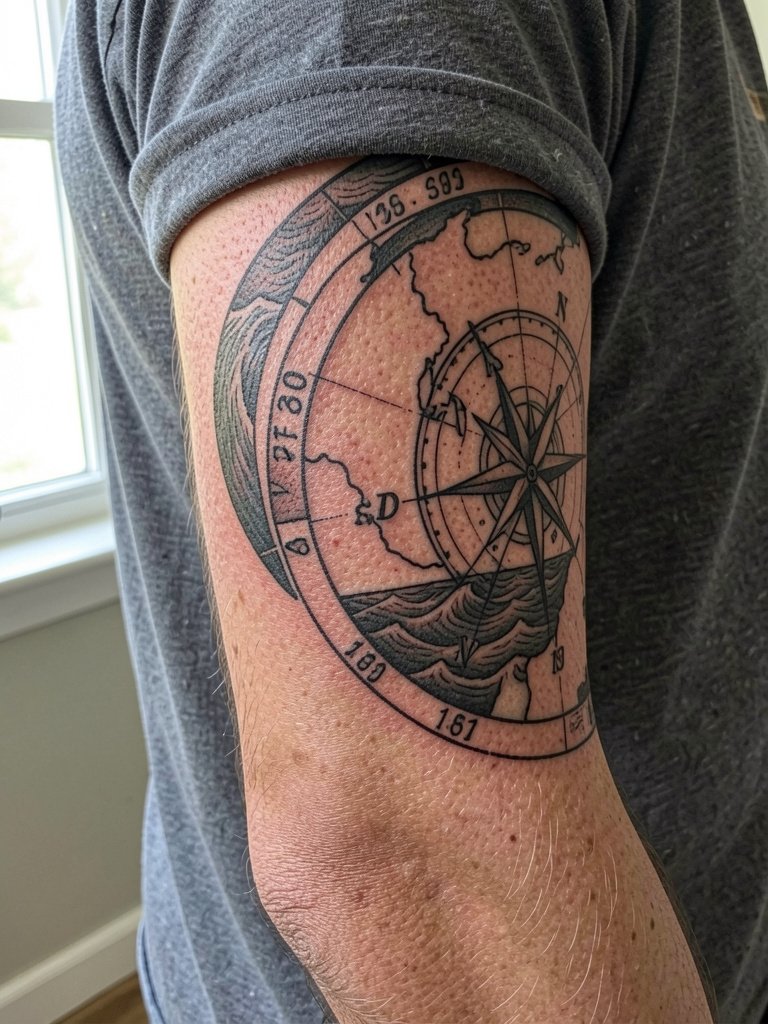
Maps that curve into the forearm need scale testing so the compass remains legible. Choose this if you want a navigation theme that flows into the arm. Provide coordinates in the consult and ask to preview the lettering at life size. Sessions are steady and line-focused. Common mistakes include scaling typography too small. Pair with a rolled-sleeve casual shirt to reveal the map line.
24. Neo-Tribal Band with Contemporary Twist
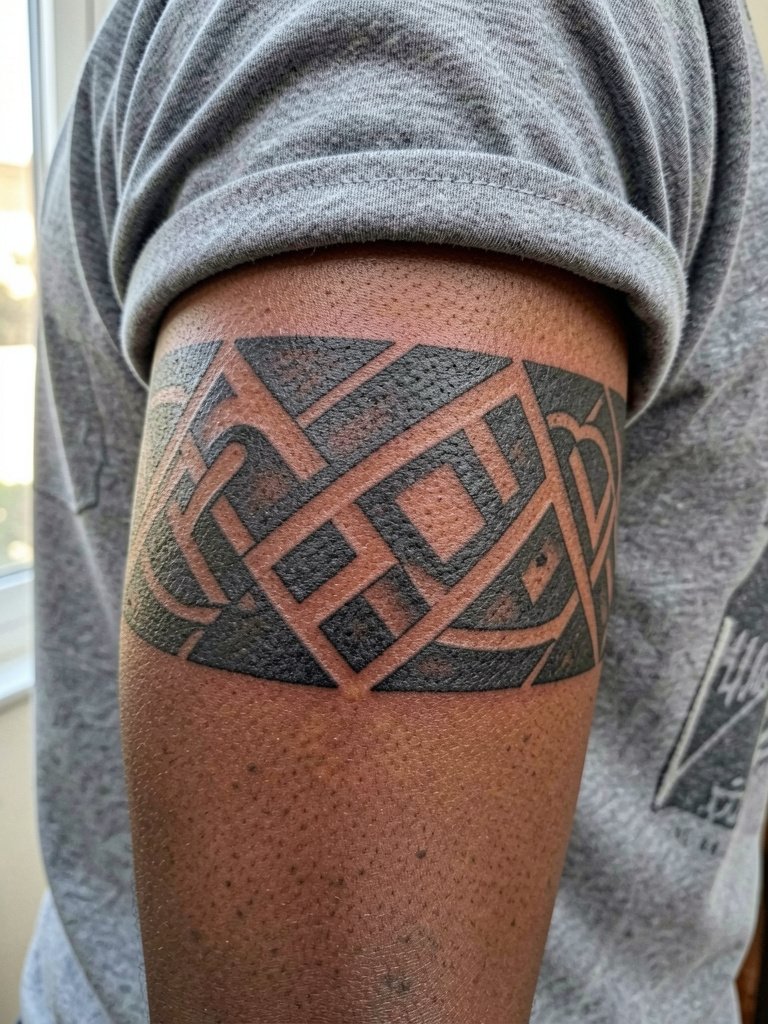
Neo-tribal adaptations require cultural sensitivity when motifs have ancestral meaning. One perspective insists on keeping traditional symbols intact out of respect. The opposing view supports modern reinterpretation if done thoughtfully and with acknowledgment. If you pursue this route, ask the artist about the symbol origins and choose designs that do not appropriate sacred patterns. For display, a short-sleeve utility shirt keeps the band visible.
25. Realistic Floral Wreath in Black and Gray
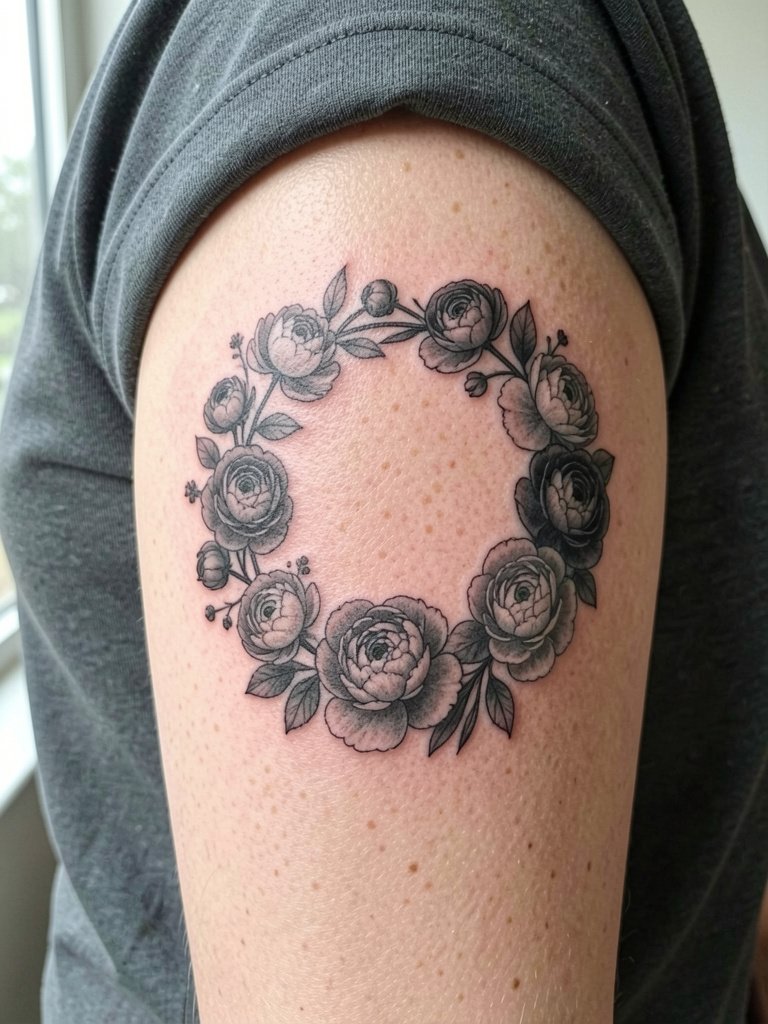
Black and gray florals hold because the shading is broad and contrasts are clear. Choose this if you like refined realism without color fades. During consult ask which petals should have crisp edges and which will be soft-washed. Sessions can be lengthy for layered gray washes. Mistakes include trying to render dozens of tiny stamens that vanish with time. Pair with a rolled-cuff tee to frame the wreath.
26. Compass Rose With Nautical Rope and Shading
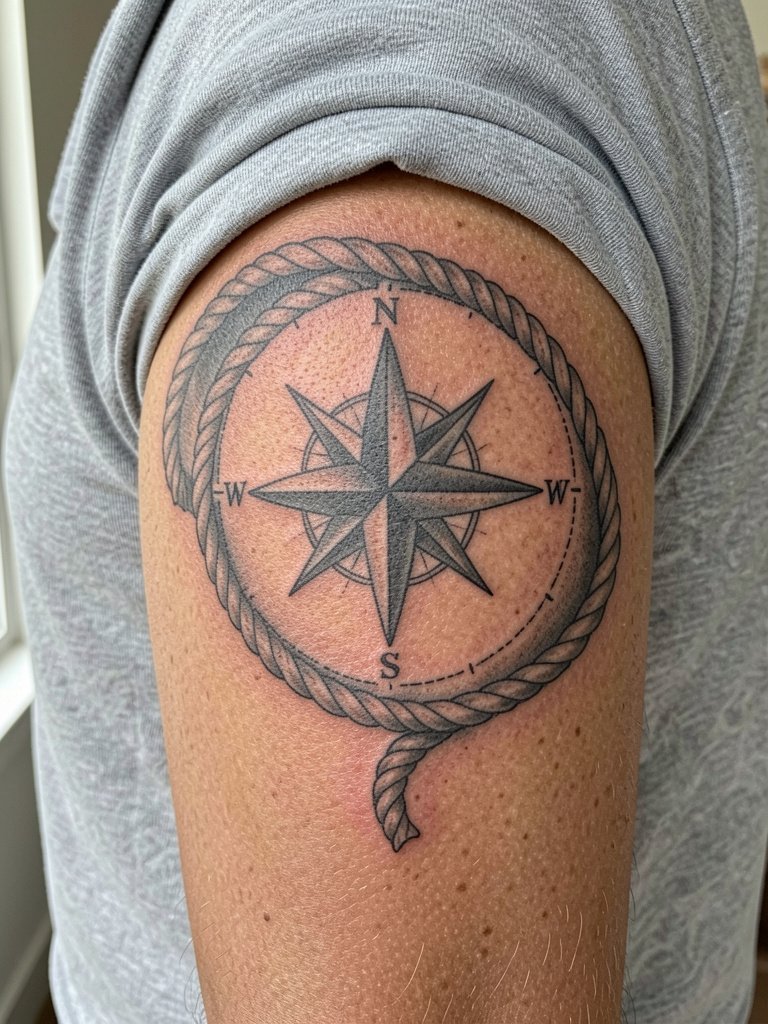
Compass pieces that use rope framing create a strong central marker for a half sleeve. Choose this for directional symbolism and clear geometry. Ask the artist to make the points slightly wider so they resist softening, and request the rope to have distinct highlights. Sessions vary by shading complexity. A common error is overfinishing the inner compass details. For travel days wear a short-sleeve utility tee to show the compass squarely.
27. Wraparound Mosaic Panel With Color Accents
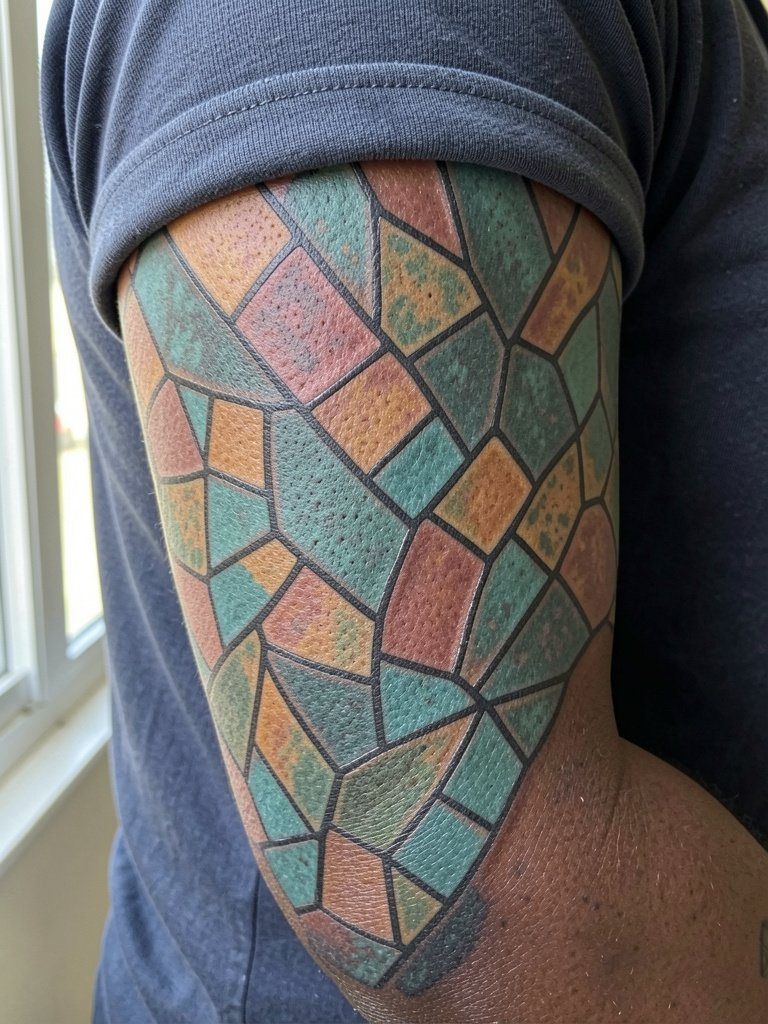
Mosaic panels work well when color fields are large enough to age evenly. Opt for fewer accent colors and larger tiles so saturation endures. In the consult ask to see a wrapped mock-up to ensure seams align at arm flexion points. Sessions involve color blocking and then glazes. Mistakes include shrinking tile sizes that cause visible mottling after healing. For showcasing the wrap, a short-sleeve camp shirt worn normally frames the mosaic.
Frequently Asked Questions
Q: How do I choose between fine line and bold blackwork for a half sleeve?
A: Fine line looks delicate but needs extra space and slightly thicker line weight to stay crisp. Bold blackwork keeps edges visible longer because saturation resists softening, and it usually requires fewer touch-ups for long-term legibility.
Q: Will a half sleeve on the upper arm hurt a lot and how long is the session?
A: Upper-arm half sleeves are mid-range for pain compared with ribs or hands. Most artists split a half sleeve into two to four sessions depending on saturation and color. Plan for multiple sittings of two to four hours and bring comfortable clothing that gives easy access to the upper arm.
Q: Where can I find healed portfolio examples and themed inspiration without naming specific artists?
A: Search platform hashtags and location filters on social apps, use portfolio aggregators that allow keyword searches, and browse community forums for healed photos in different skin tones. Try searching hashtags relevant to your theme and use city filters to find nearby studios with portfolios to compare healed work.
Q: How often will a half sleeve typically need a touch-up?
A: Touch-up frequency depends on style and saturation. Bold black and heavy-saturated pieces might go five to eight years before a refresh. Fine-line and micro-realism often need touch-ups earlier, sometimes within two to four years, especially if placed on high-friction areas.
Q: Are there special professional considerations for cultural or traditional designs?
A: Yes. Some people insist traditional symbols remain unchanged to preserve meaning. Others support contemporary reinterpretation when it is done with awareness and respect. If a design has cultural origin, discuss symbolism, provenance, and appropriate adaptations during your consult.
Q: What should I wear to the appointment for upper-arm work?
A: Wear easy-access tops like a loose tank or a fitted short-sleeve tee so the artist can work without fabric shifts. For travel home pick breathable cotton that will not rub heavily against the new tattoo while the initial barrier is in place.
